
The latest title from Kyle Thompson, developer of popular graveyard keeping, the Crypt Custodian and Islets, has arrived in the form of Well Dweller, a gorgeous looking Metroidvania.
Starring Glimmer, your feathered friend, armed with a matchstick, you’ll need to explore a massive world to find the seven golden feathers to rescue your flock and defeat the evil Queen.
It releases on 22 September 2026 for PC, PS5, Switch 2, and Xbox Series consoles. It’s also available day one on Xbox Game Pass. Why not check out our review?
Well Dweller: All Trinket Locations for the “Expert Collector” Achievement / Trophy Guide
There are 32 trinkets to collect in total. Some you’ll be able to buy from the Tent store, once occupied by Looter. These will cost in-game currency to buy. There are also some rewarded to you for returning the 20 Spirits (check out our Spirit Location guide).
The rest will be found around the map. They all have their own unique shape and design and they all do something different.
All trinkets take up a number of trinket slots (check out our guide for that here). The more slots you have, the more trinkets you can equip. You can equip and change your equipped trinkets at any tent location.
You can find them at any point during your play. There are none located in the Queen’s Castle location, where you fight the final boss. You can get all trinkets before you head there, or afterwards, in the endgame. There is no point of no return.
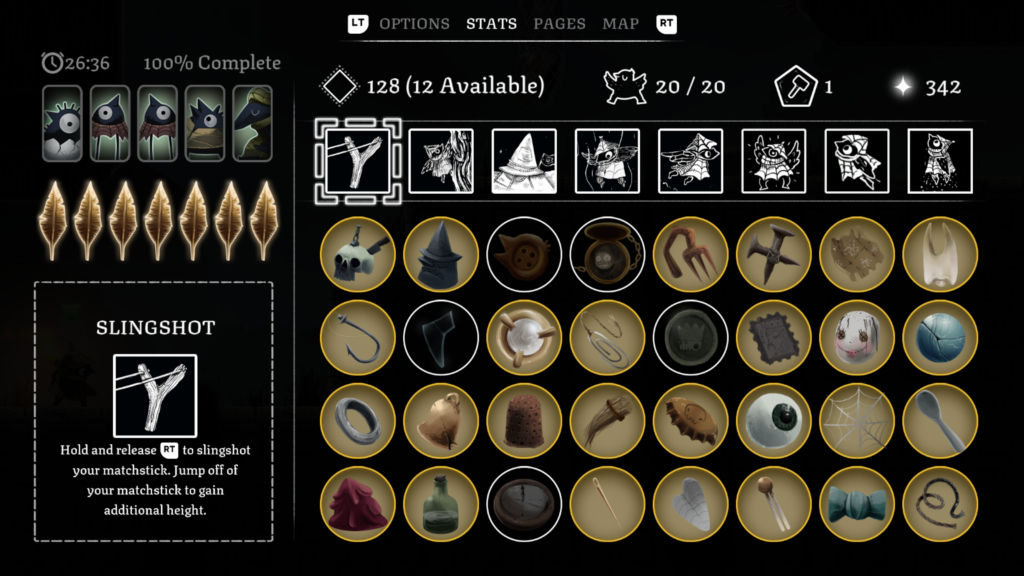
Abilities
I have listed collectibles in the order they were located, not necessarily the most efficient order. Thankfully, you can fast travel between tents once you have the ‘Tent Travel’ ability.
I have listed the different abilities below as each collectible will reference if an ability is needed. You may have to come back to once you have the ability mentioned. If the guide says “none” for abilities required, that means specifically to get the collectible. You’ll need an increasing number of the abilities to progress in the game.
There are eight abilities to get in the game.
- Slingshot – allows you to throw your matchstick. It can damage enemies when you throw it, and if it sticks into a wall you can bounce on it to gain additional height.
- Climb – holding A (Xbox) lets you climb up and down straight walls. You have certain amount of stamina before you let go.
- Tent Travel – let’s you fast travel between save tents. You can fast travel from the map screen, just find the icon on the map and press and hold A to fast travel.
- Wind Ride – lets you fly in wind tunnels, indicated by rushing wind animations.
- Hover – press A midair to hover. You can use this fly across gaps. You have a short amount of time to hover, this can be extended by finding additional feathers scattered around the The Lookout Tower area (pale blue area on the map).
- Endless Climb – lets you climb endlessly without falling from fatigue. Long walls are no longer an obstacle.
- Wall Sling – lets you plant your matchstick in the wall using RT while you’re climbing the wall. This means you can create a platform midway up a higher wall to jump across or get higher (especially if the wall isn’t straight).
- Soar – unlocked at the very end of the game, this lets you slam into the floor (Down + X) and on jumping (A) lets you take off to fly high to previously unreachable places.
You can watch a video guide below, or read on for an image and text guide.
All Trinket Locations
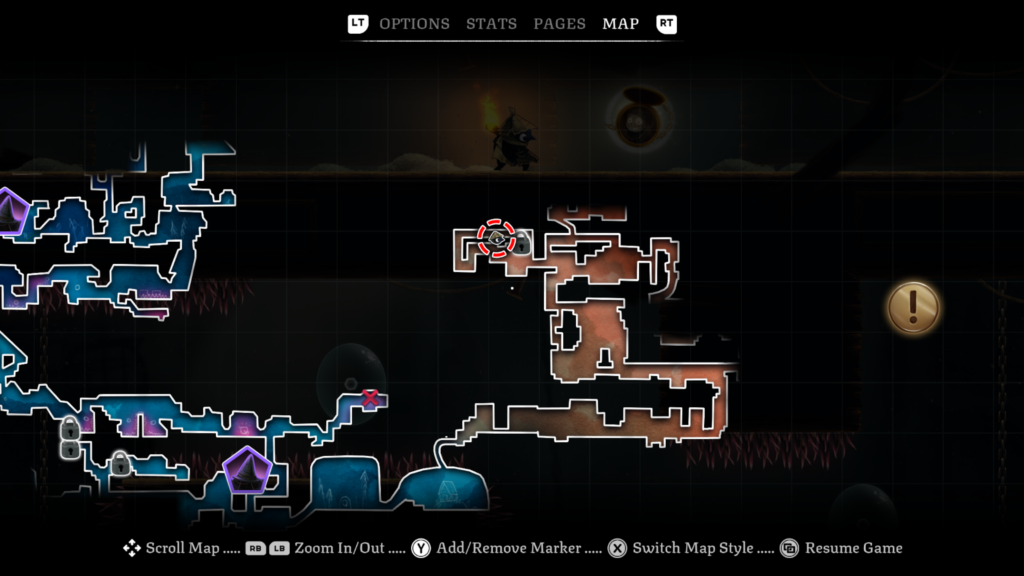
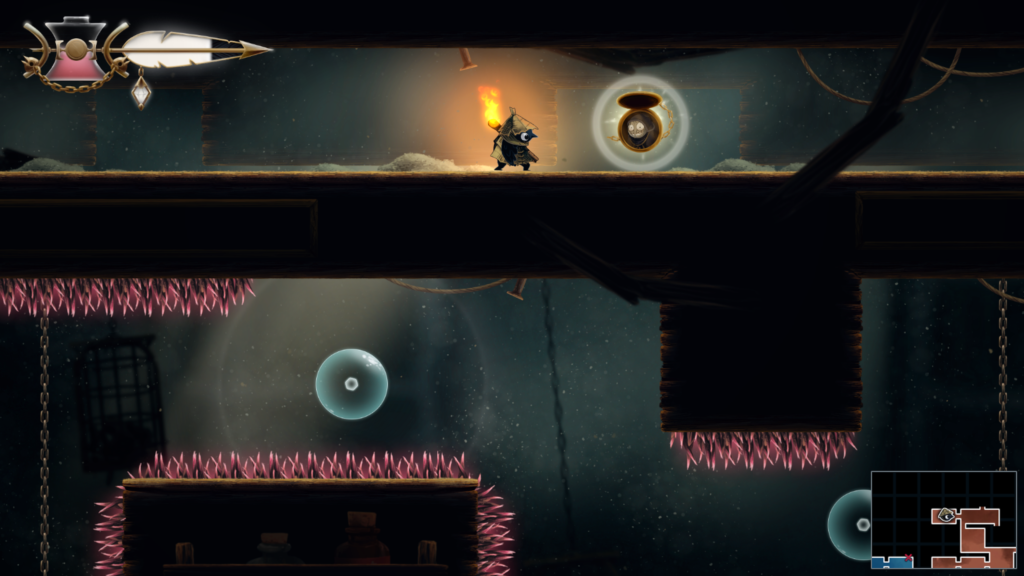
Trinket 1 / 32: Location – Hunter’s Cabin (pale orange colour on the map)
Trinket: Hunters Locket – gives a larger window for attempting to heal.
Abilities needed: None
You will unlock the “Hobby Collector” achievement for collecting your first trinket.
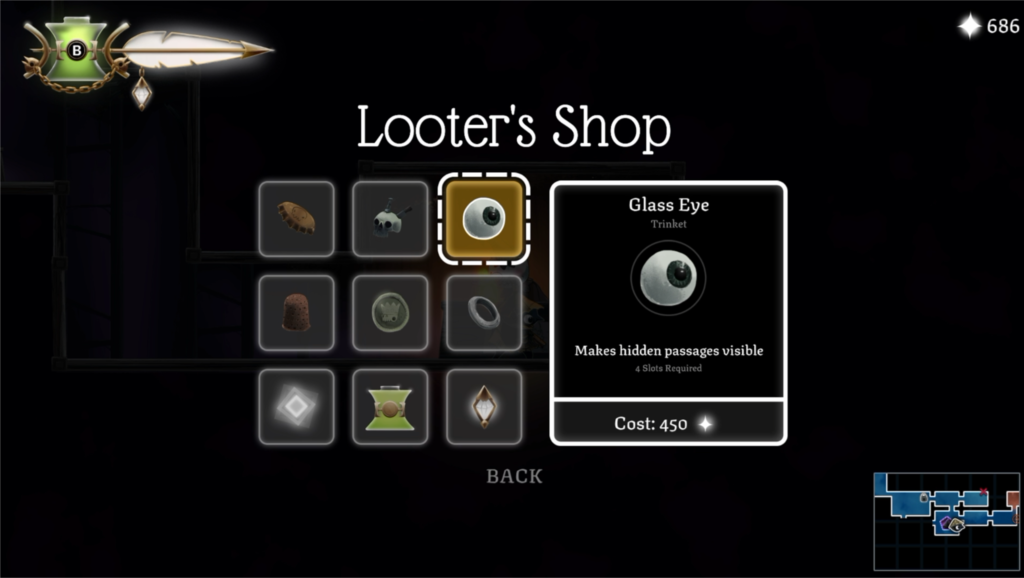
Trinket 2 / 32: Location – Looter’s Shop (Tent)
Trinket: Glass Eye – makes hidden passages visible.
Cost: 450
You will unlock the “First Purchase” achievement if this is your first purchase from Looter.
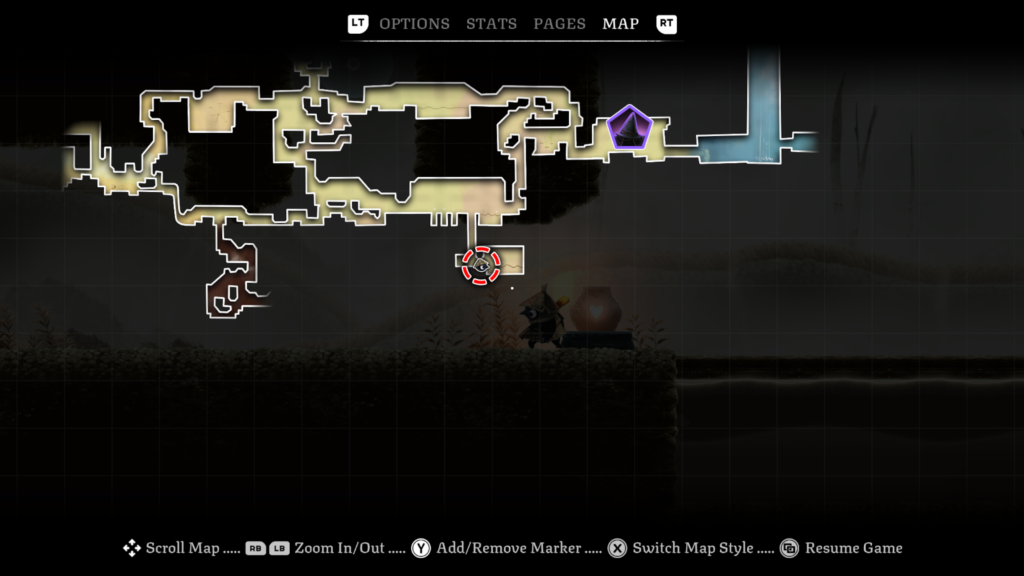
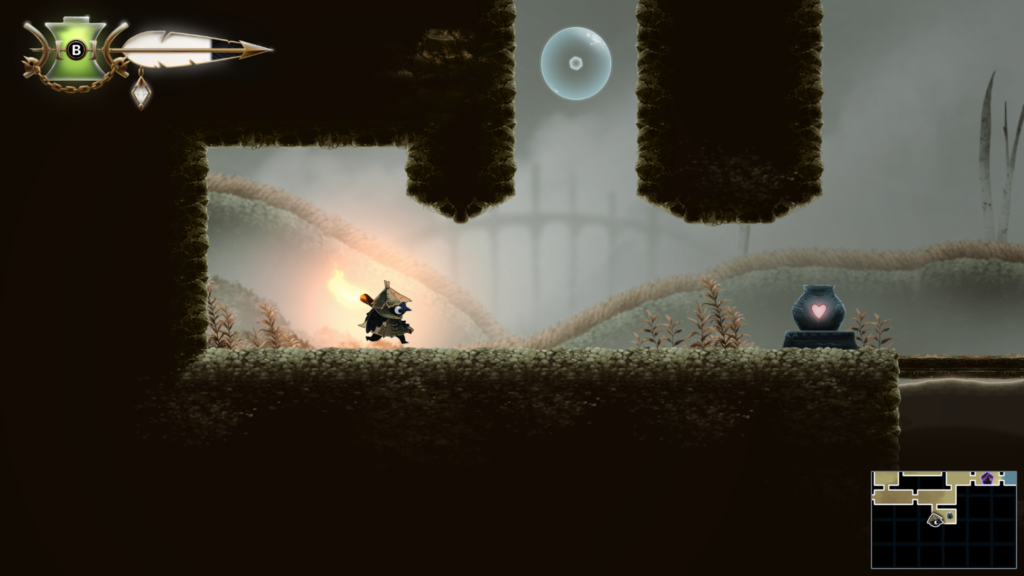
Trinket 3 / 32: Location – The Bog (yellow colour on the map)
Trinket: Hair Pin – if you do not attack for 8 seconds, your next attack is doubled
Abilities needed: None
Bounce on the bubbles in the order they appear to open the barrier.
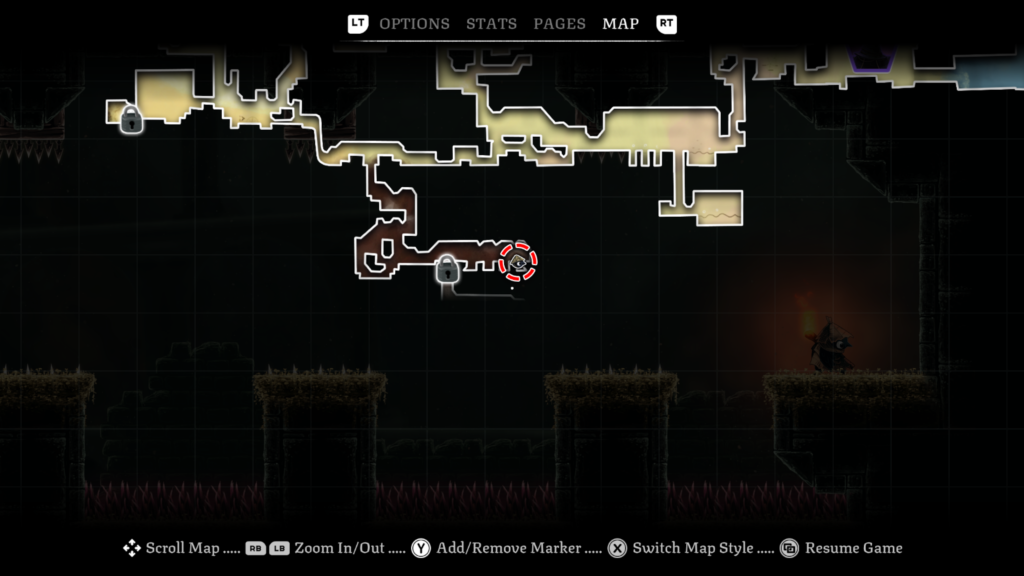
Trinket 4 / 32: Location – Burial Vault (dark brown colour on the map)
Trinket: Golden Needle – a constant circle of spikes surrounds you when you’re below 25% health
Abilities needed: None
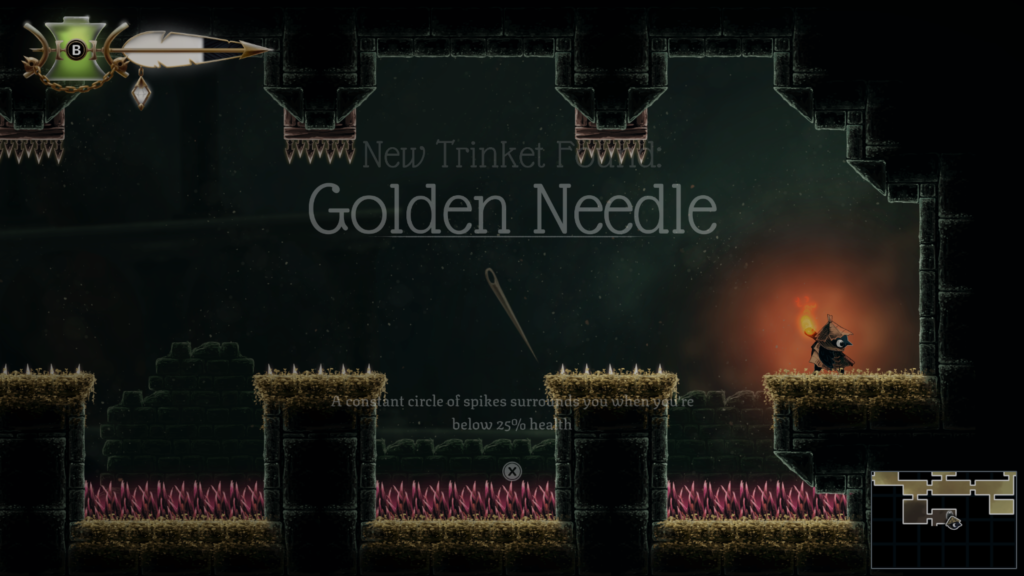
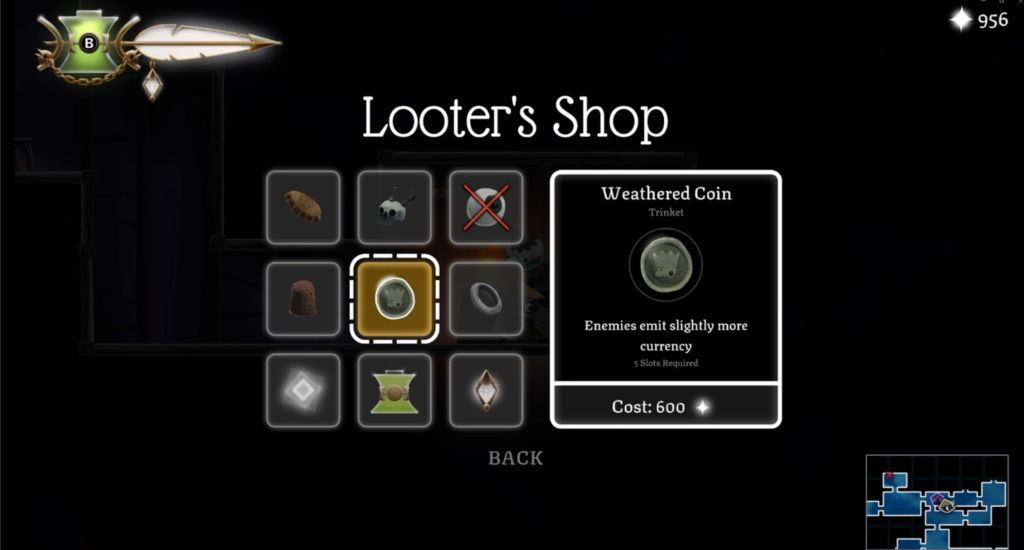
Trinket 5 / 32: Location – Looter’s Shop (Tent)
Trinket: Weathered Coin – enemies emit slightly more currency
Cost: 600
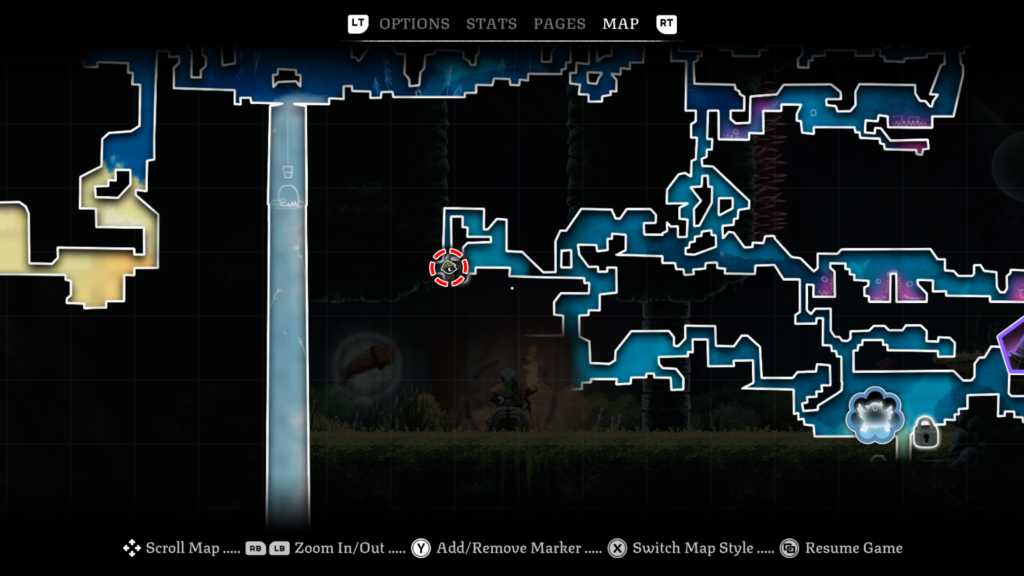
Trinket 6 / 32: Location – Night Garden (mixed blue colour on the map)
Trinket: Bundle of Hair – slamming the ground creates a blast of embers.
Abilities needed: None
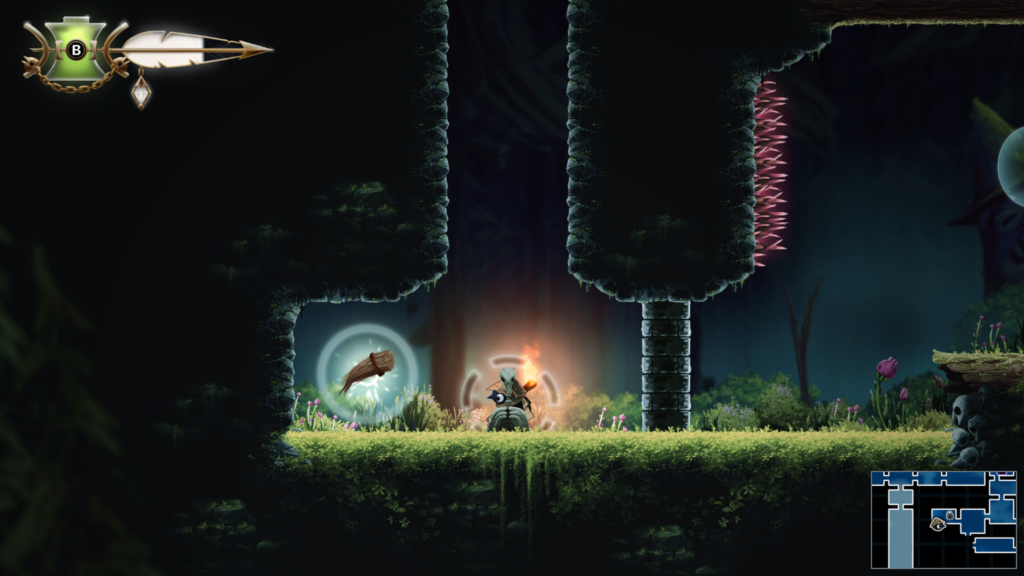
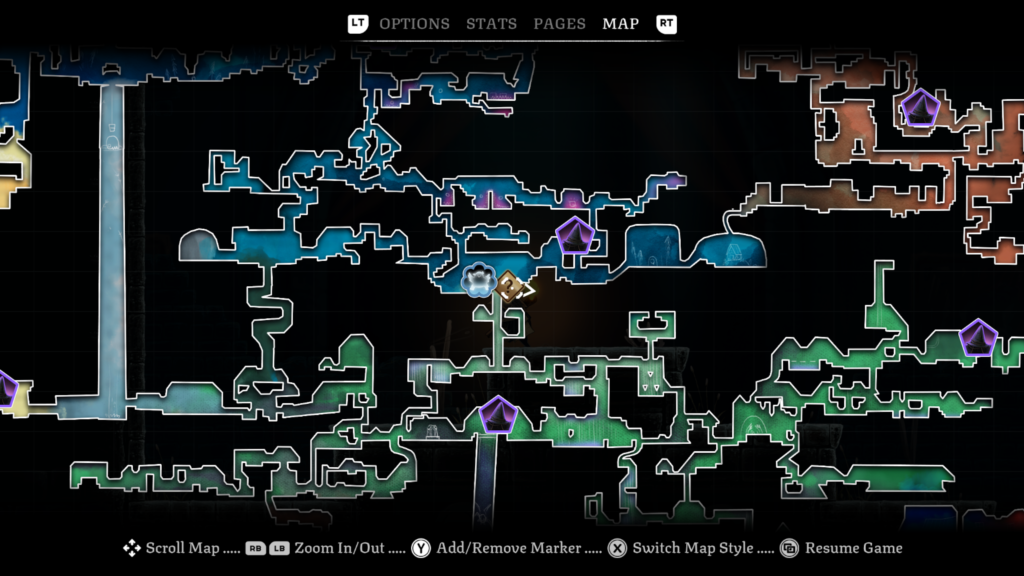
Trinket 7 / 32: Location – Night Garden (Spirit Return location)
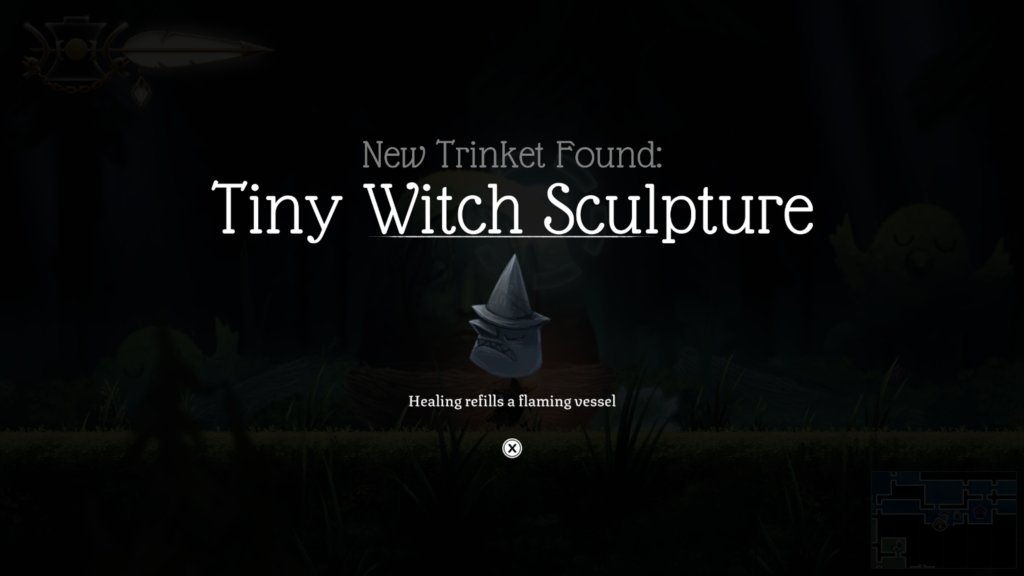
Trinket: Tiny Witch Sculpture – healing refills a flaming vessel
Cost: Return 2 of the 20 spirit collectibles.
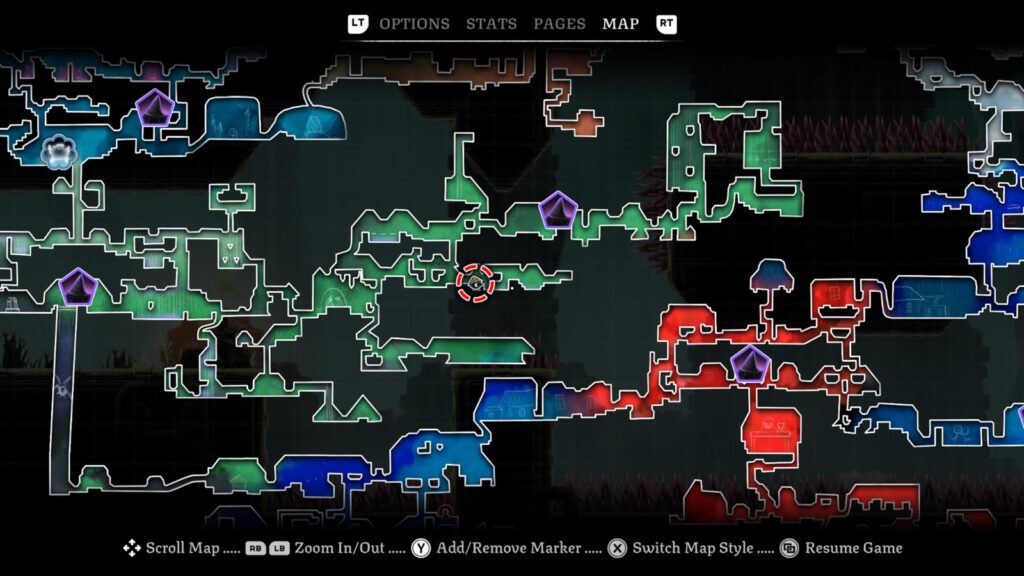
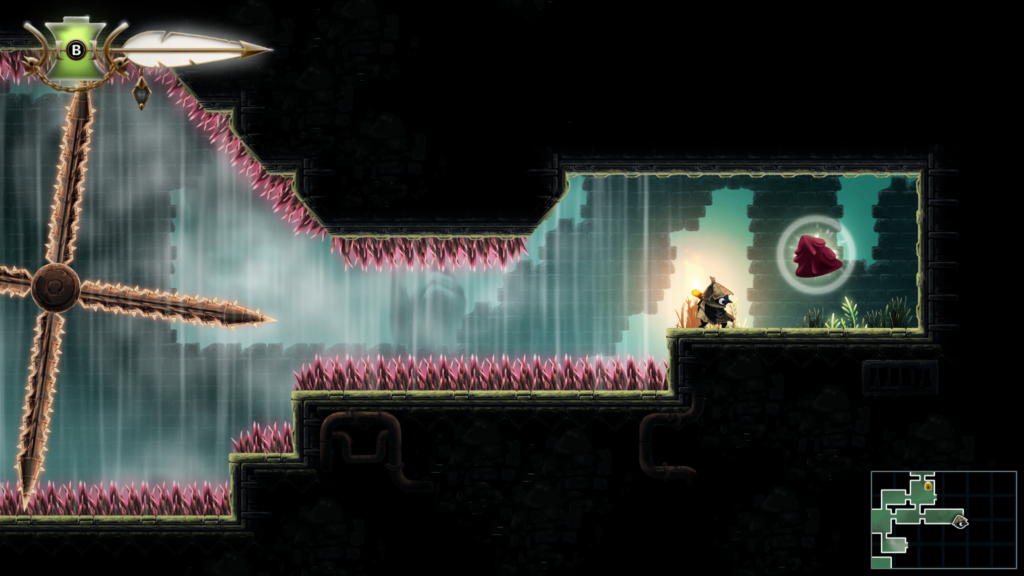
Trinket 8 / 32: Location – The Drains (green colour on the map)
Trinket: Melted Candle – makes you invincible for 2 seconds after you heal.
Abilities needed: Wind Ride
Trinket 9 / 32: Location – Graven Valley (grey colour on the map)
Trinket: Broken Bell – refills your vessel when a flaming vessel misses a target.
Abilities needed: None
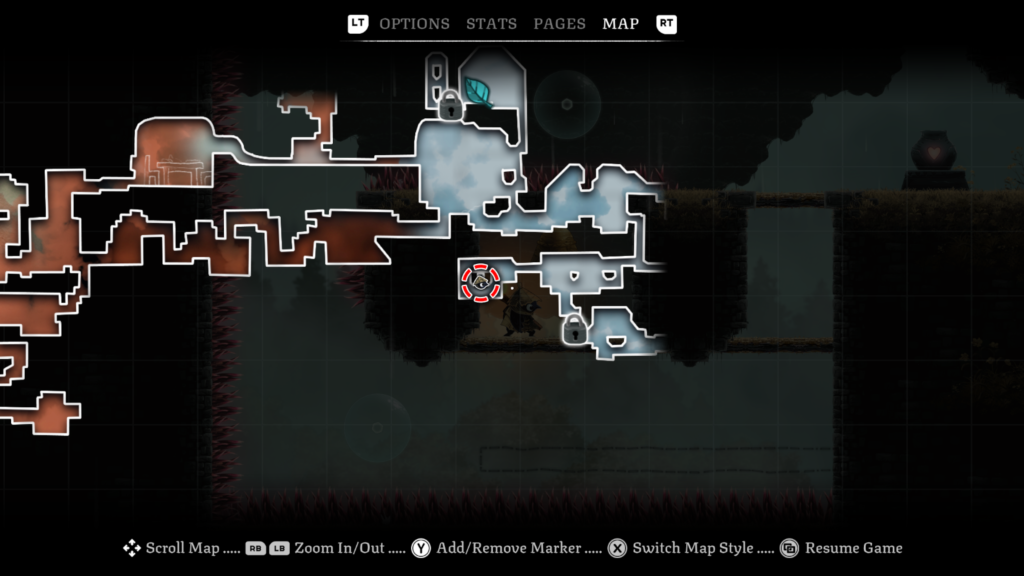
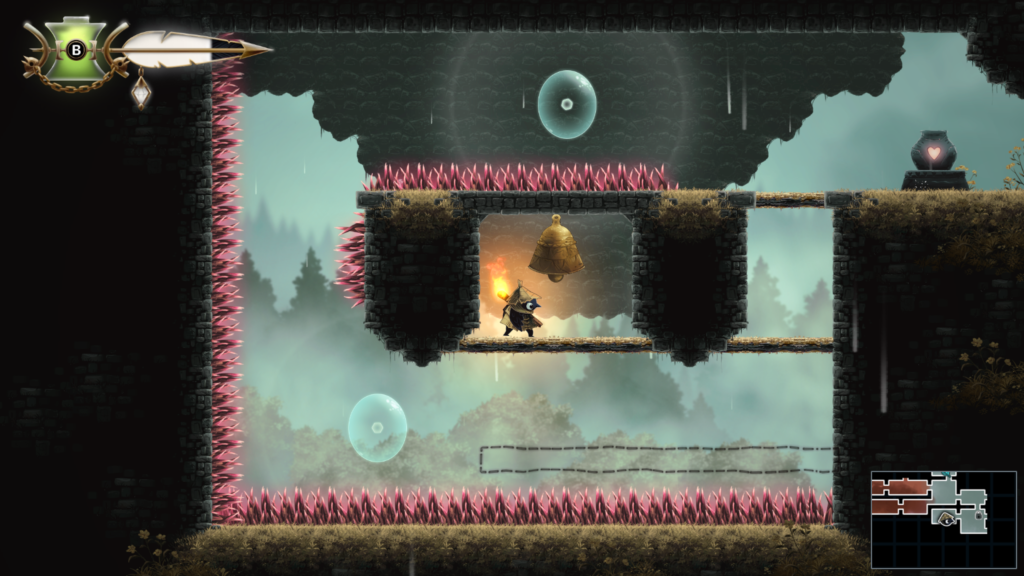
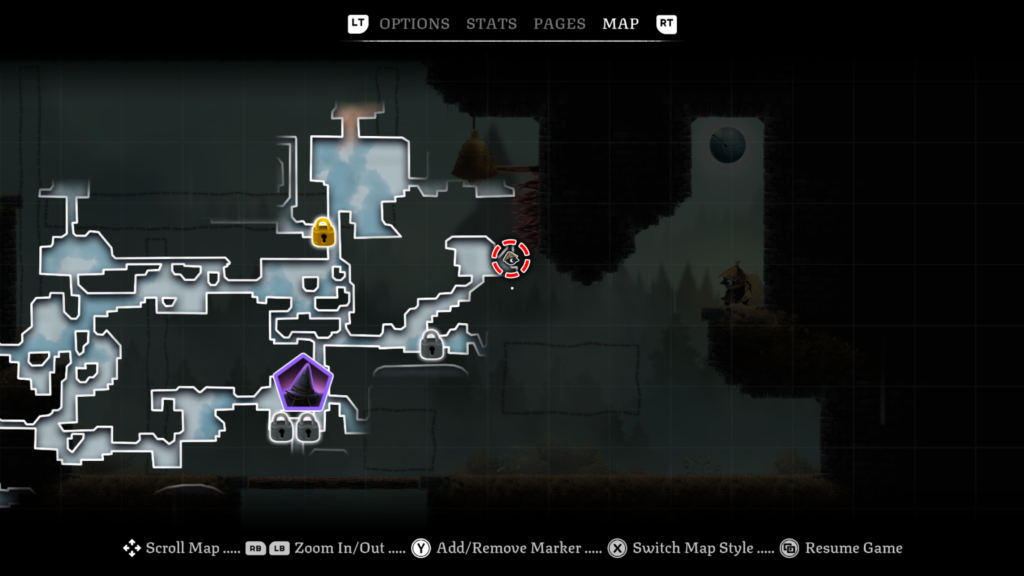
Trinket 10 / 32: Location – Graven Valley (grey colour on the map)
Trinket: Cracked Marble – slightly increases damage when at full health.
Abilities needed: Slingshot, Climb
You’ll earn the “Experienced Collector” achievement / trophy on collection of your 10th trinket.
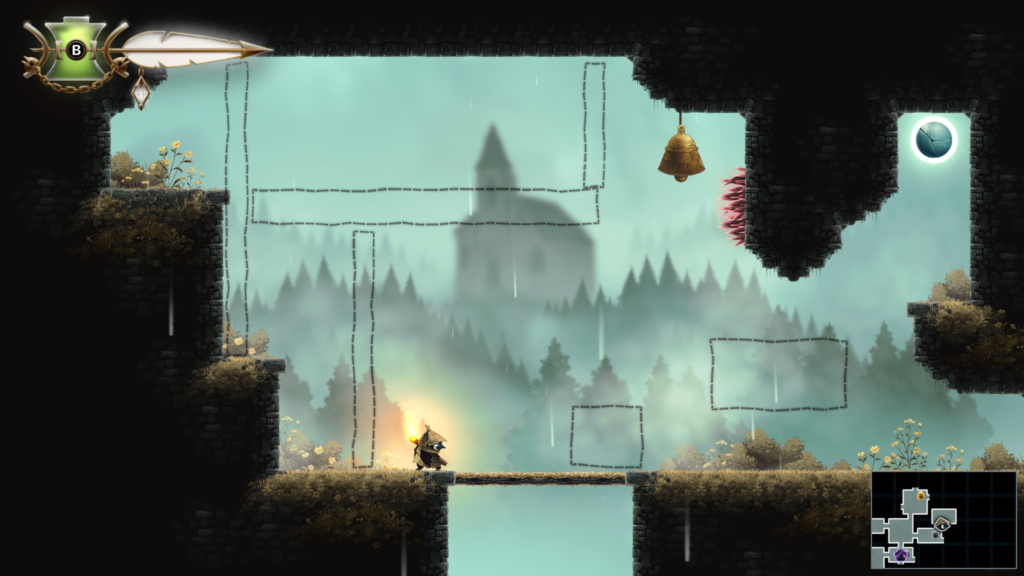
Trinket 11 / 32: Location – Looter’s Shop (Tent)
Trinket: Silver Ring – slightly increases damage dealt.
Cost: 800
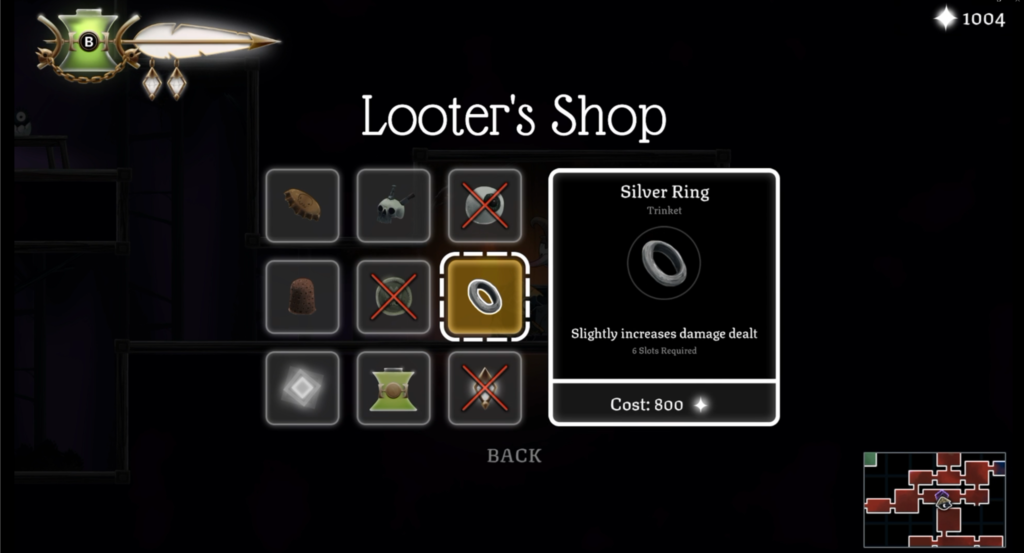
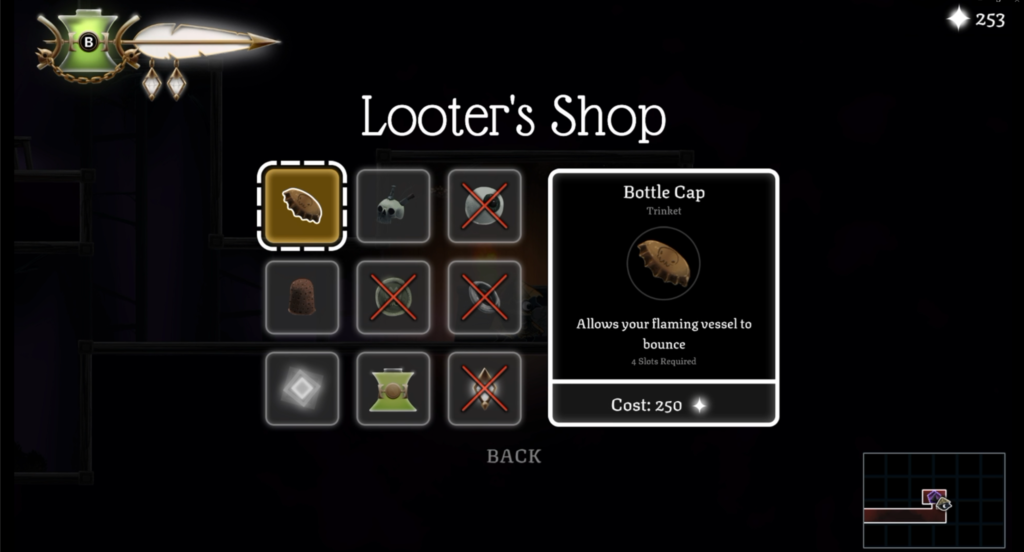
Trinket 12 / 32: Location – Looter’s Shop (Tent)
Trinket: Bottle Cap – allows your flaming vessel to bounce. You’ll need this for the “Bouncing Bottles” achievement / trophy.
Cost: 250
Trinket 13 / 32: Location – Dessicated Castle (red colour on the map)
Trinket: Silver Spoon – surrounds you in a brief protective barrier while you attempt to heal.
Abilities needed: Slingshot, Climb
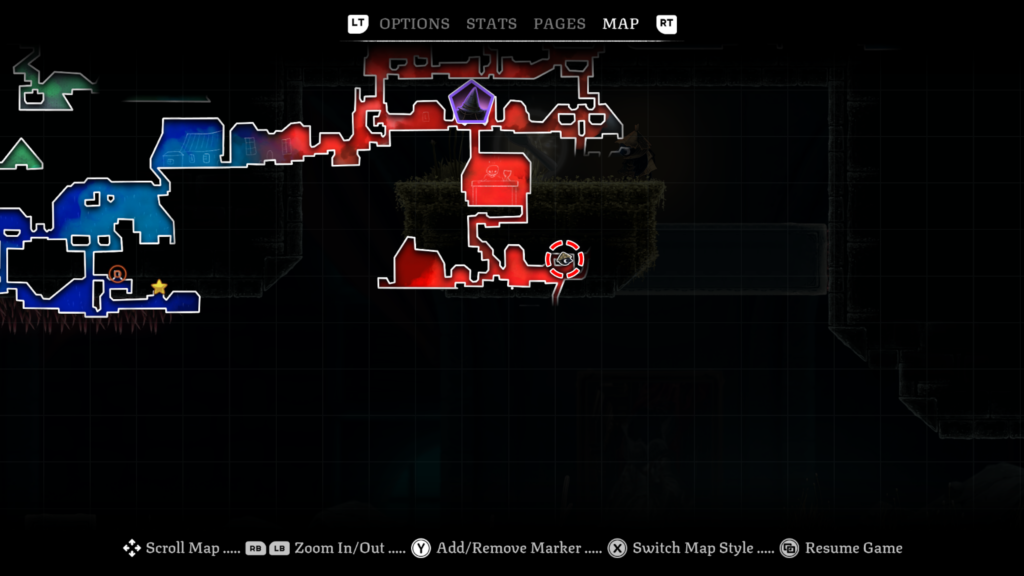
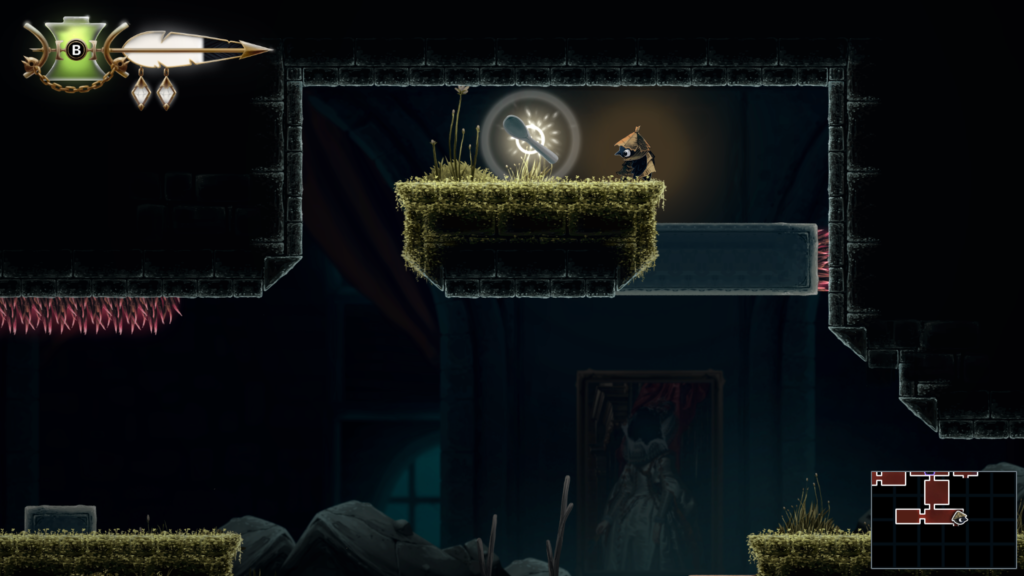
Trinket 14 / 32: Location – Dessicated Castle (red colour on the map)
Trinket: Burnt Shoelace – creates a trail of embers when you run at top speed.
Abilities needed: Climb
Trinket 15 / 32: Location – Night Garden (mixed blue colour on the map)
Trinket: Glass Shard – if you heal past your max health, the overflow will lengthen your
temporary damage boost.
Abilities needed: None
Trinket 16 / 32: Location – Looter’s Shop (Tent)
Trinket: Skull Keychain – emits a short barrage of burning embers when you take damage
Cost: 350
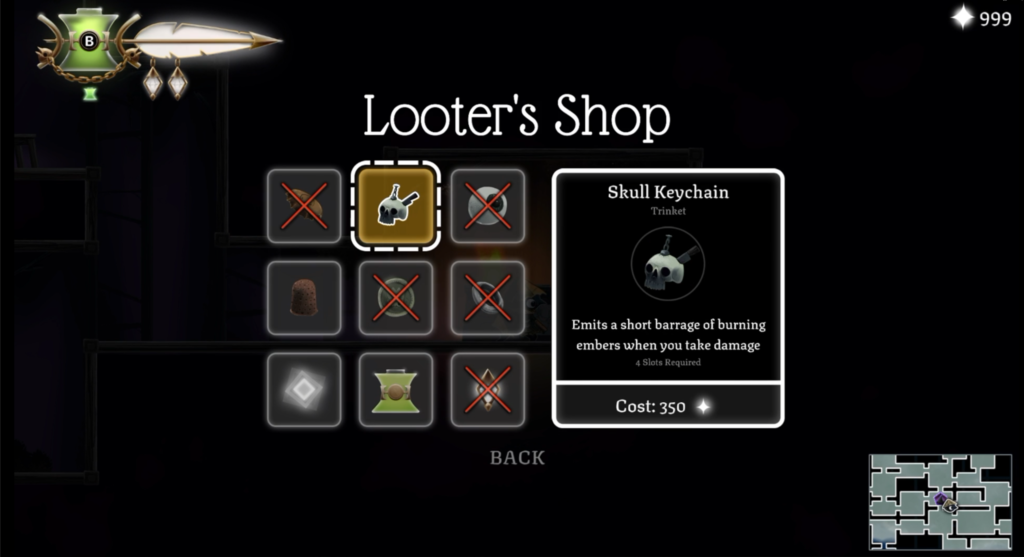
Trinket 17 / 32: Location – Looter’s Shop (Tent)
Trinket: Rusted Thimble – reduce damage from spikes
Cost: 550
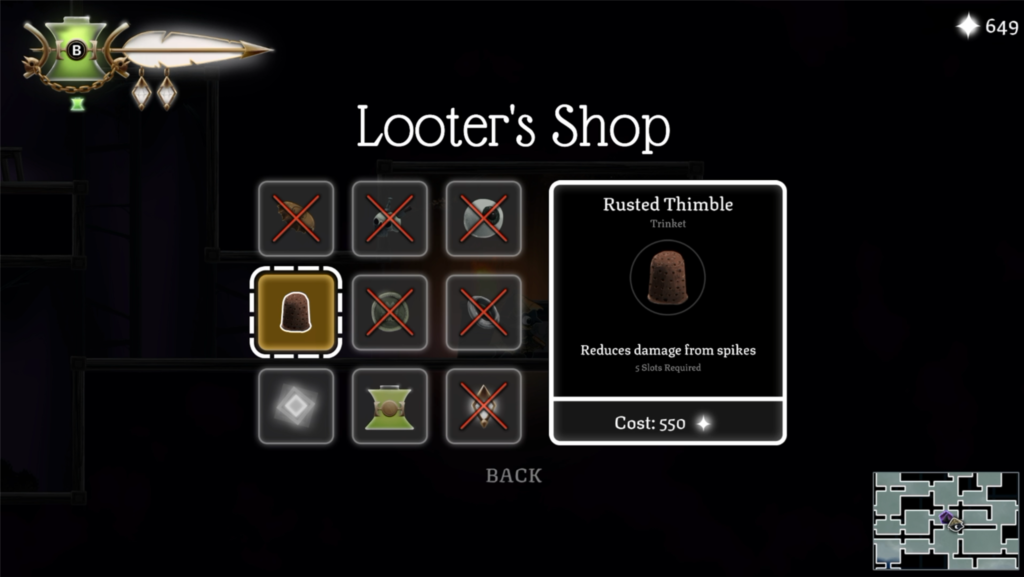
Trinket 18 / 32: Location – Midnight Drench (dark blue colour on the map)
Trinket: Spider’s Web – allows you to slingshot your flaming vessel.
Abilities needed: Slingshot, Climb
Trinket 19 / 32: Location – Autumn Forest (orange colour on the map, near the top)
Trinket: Blue Bow – automatically uses an oil vial to heal if you would otherwise die (legendary item!)
Abilities needed: Slingshot
You’ll need to play the game in the tent. Hit the narrow light blue target to win the trinket.
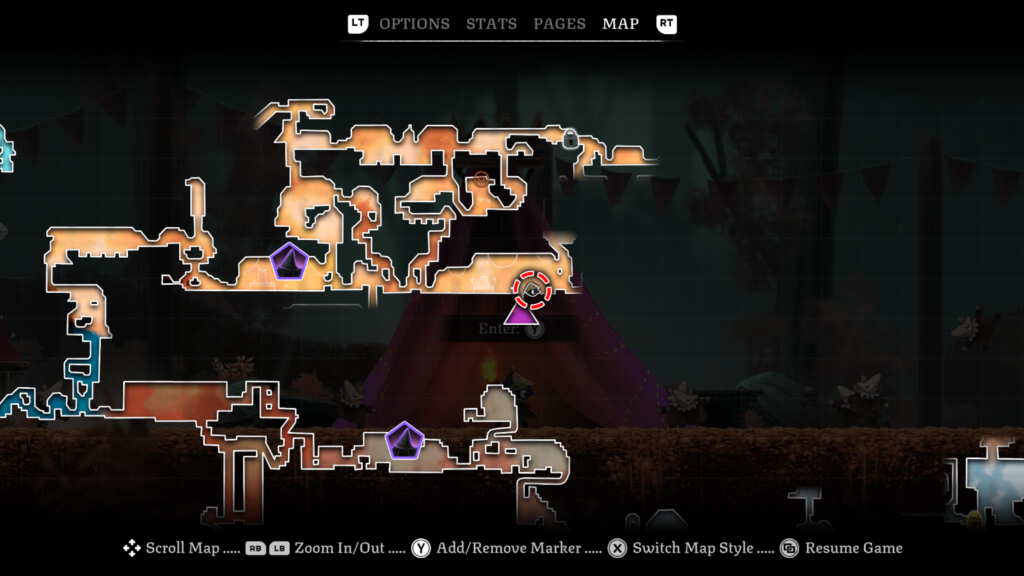
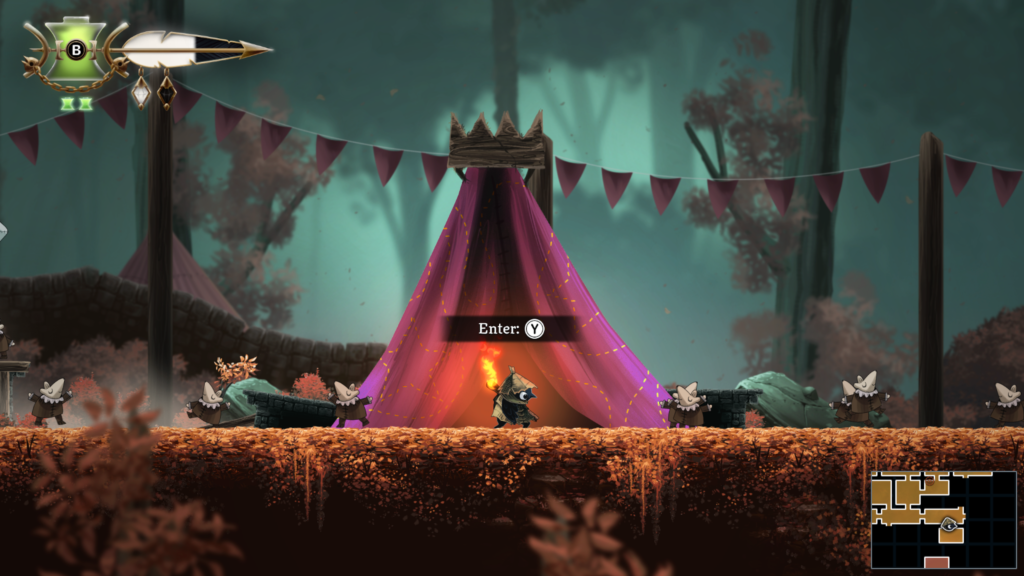
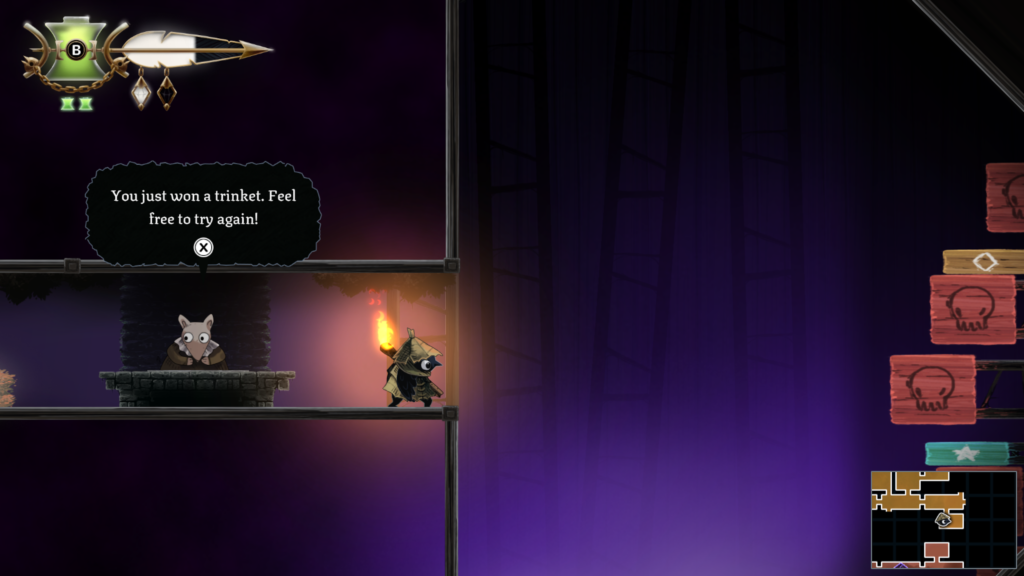
Trinket 20 / 32: Location – Autumn Forest (orange colour on the map, near the top)
Trinket: Doll’s Head- increases attack distance
Abilities needed: Climb
You’ll need to be quick to reach the top before the orb does, so you can smack it upwards into the pillar
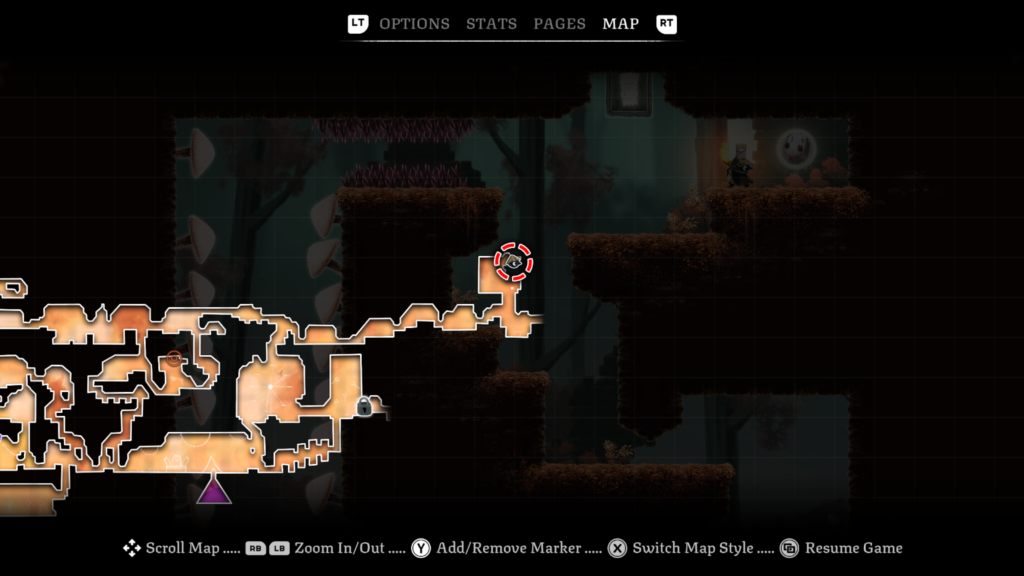
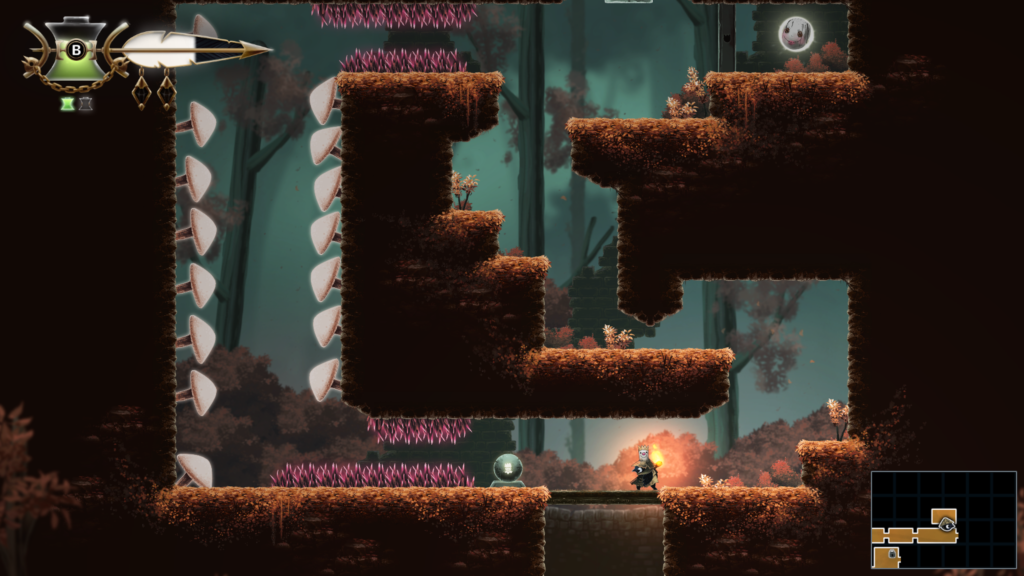
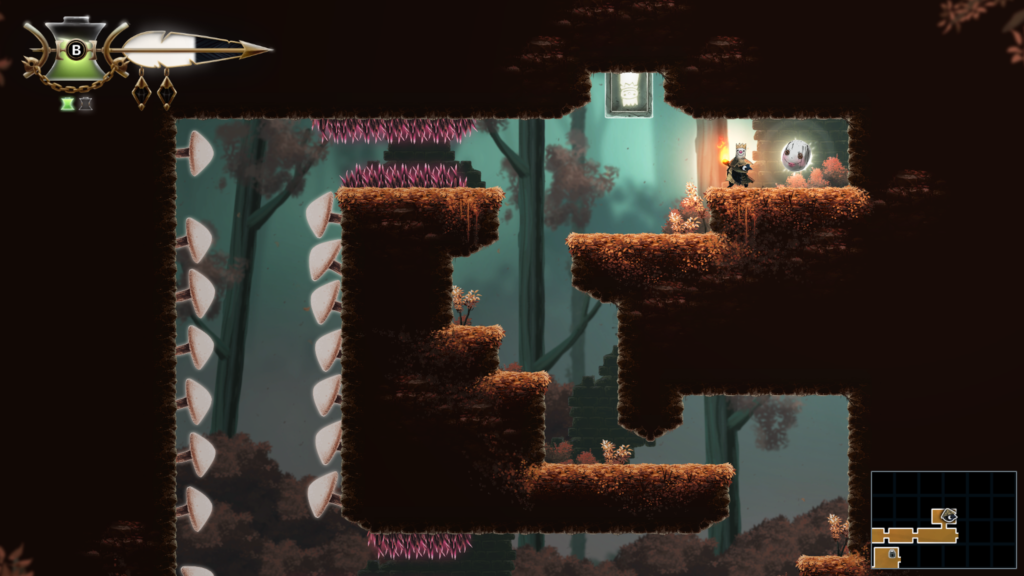
Trinket 21 / 32: Location – Graven Valley (grey colour on the map)
Trinket: Molar Tooth – emits burning embers while you slide.
Abilities needed: Climb
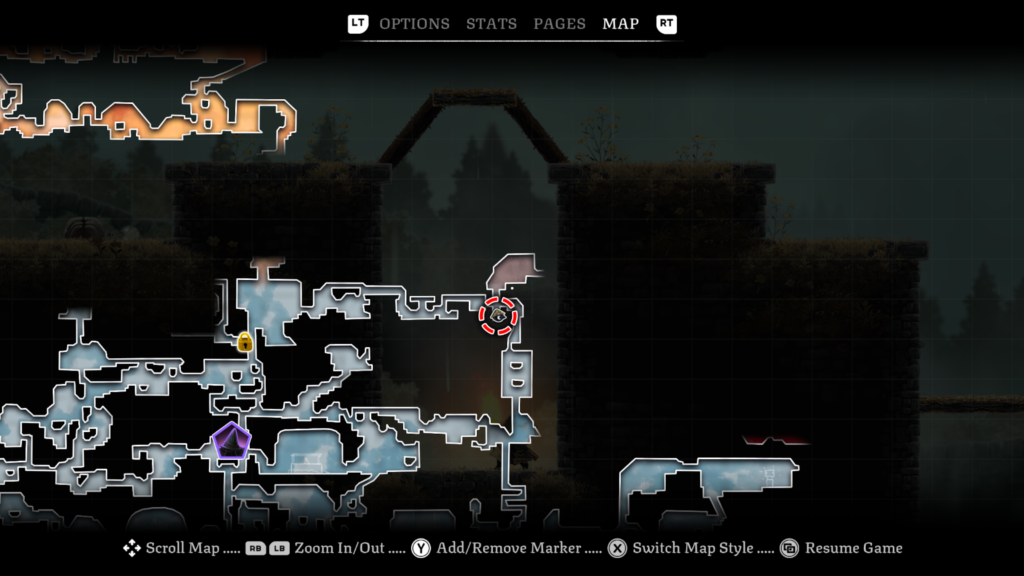
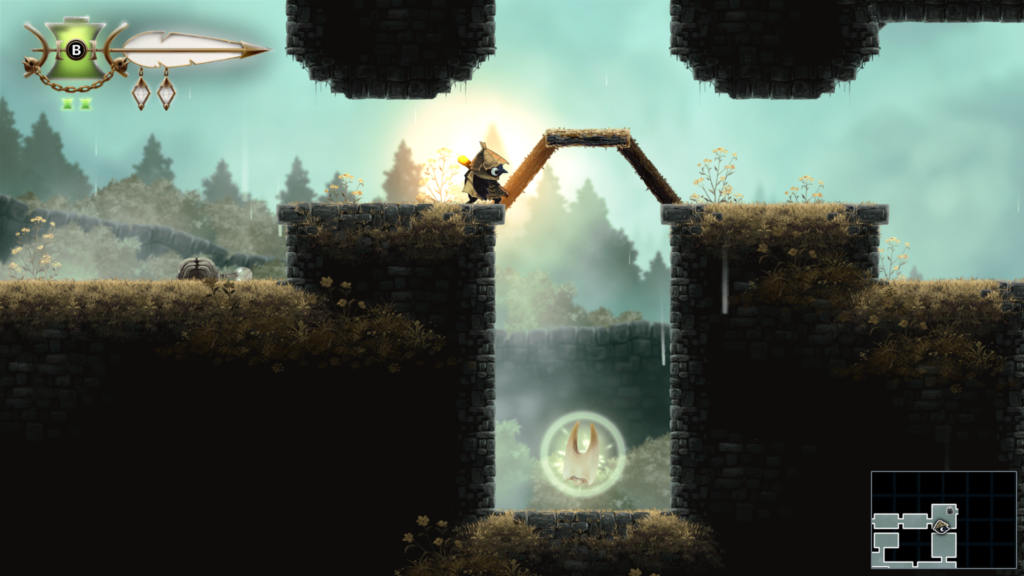
Trinket 22 / 32: Location – Night Garden (Spirit Return location)
Trinket: Tiny Witch Sculpture – healing refills a flaming vessel
Cost: Return 12 of the 20 spirit collectibles. You’ll get the Trinket awarded on the 12th return.
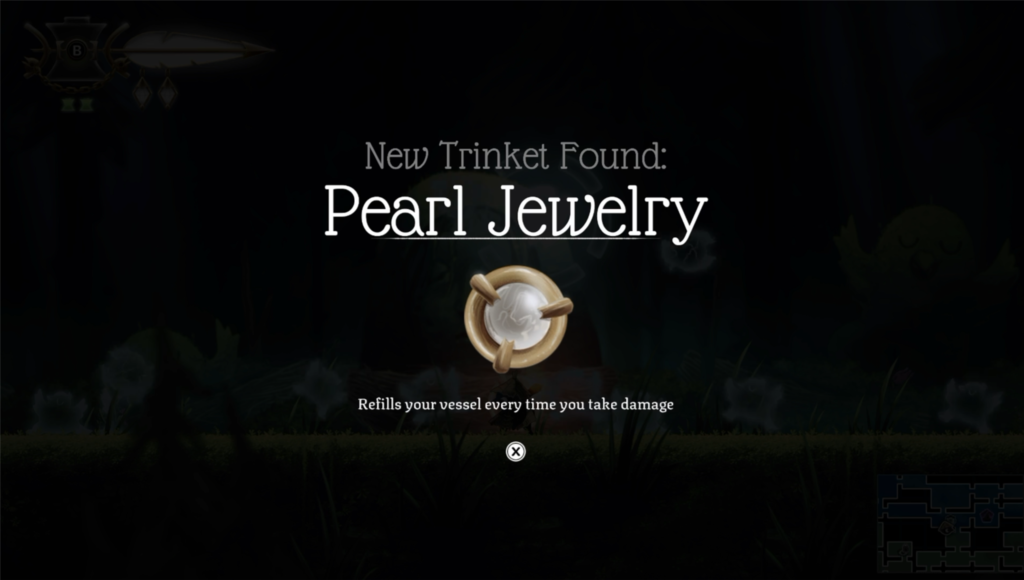
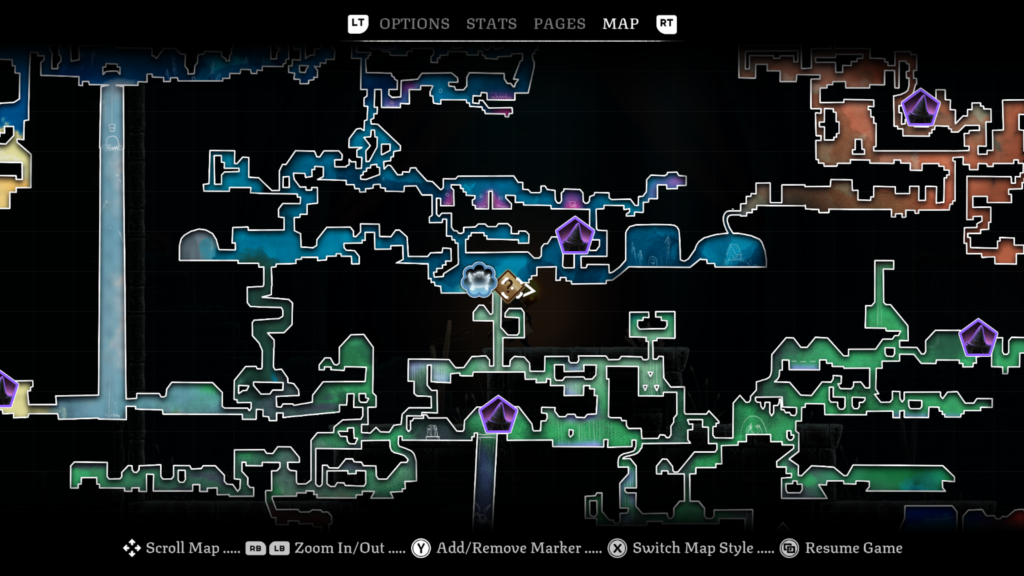
Trinket 23 / 32: Location – The Docks (brown colour on the map)
Trinket: Nails with Twine – enemies create a small blast upon death
Abilities needed: Climb, Hover
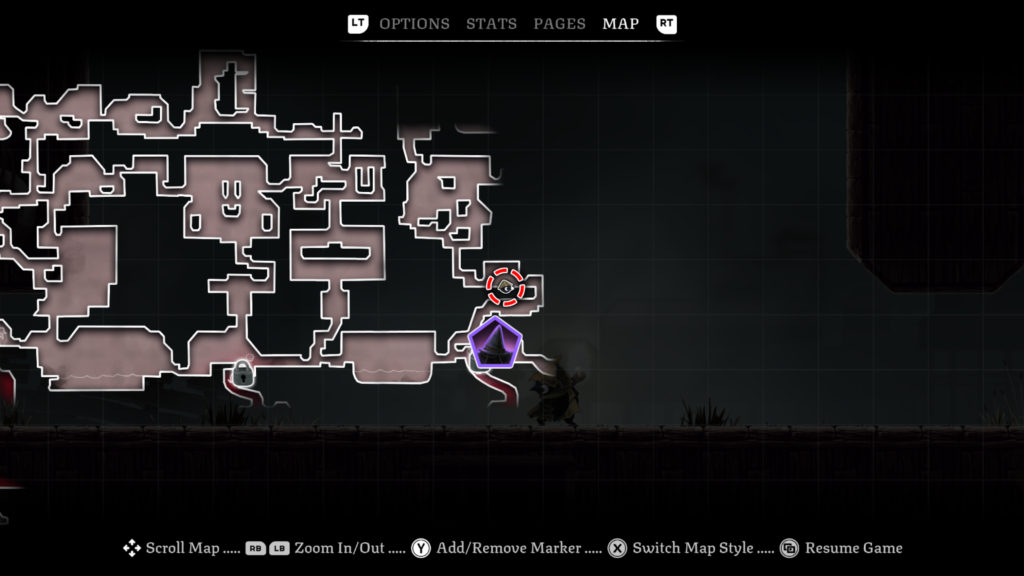
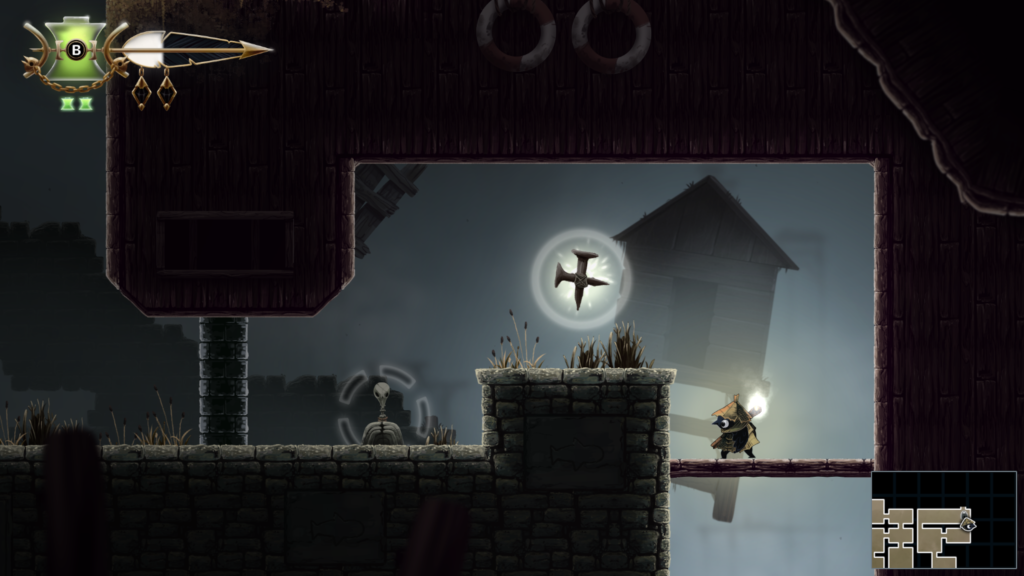
Trinket 24 / 32: Location – The Docks (brown colour on the map)
Trinket: Postage Stamp – currency increases for each enemy you kill in a row without taking damage
Abilities needed: Climb, Hover, Slingshot
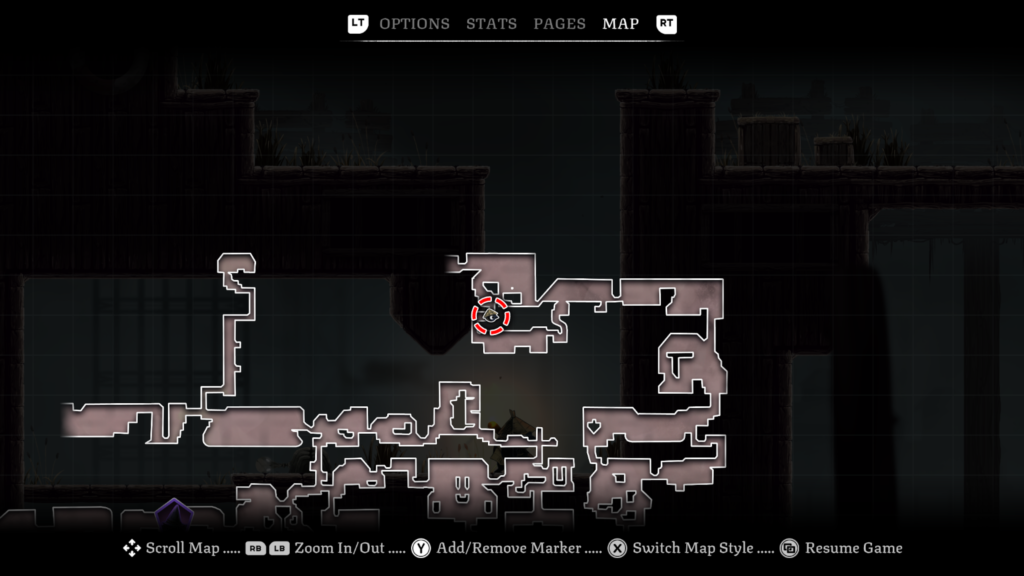
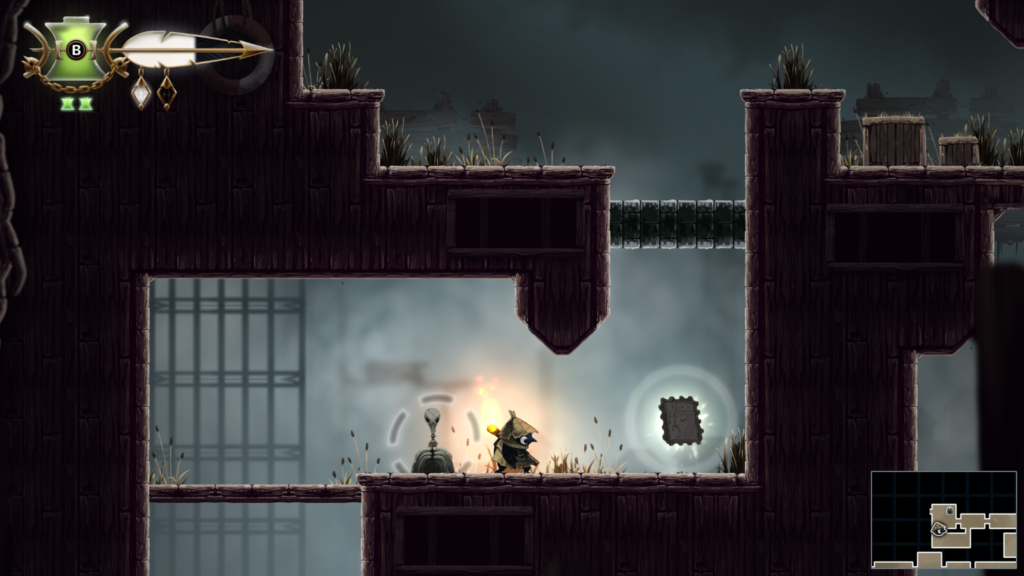
Trinket 25 / 32: Location – Dollmaker’s House (pinky-red colour on the map)
Trinket: Bird-Shaped Button – gain extra currency when you are at low health.
Abilities needed: Climb, Hover
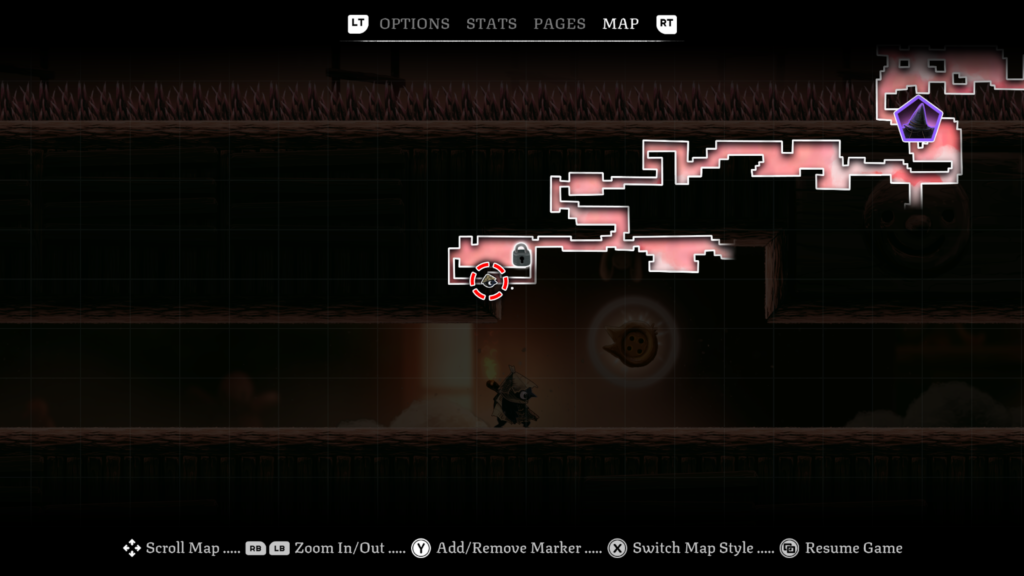
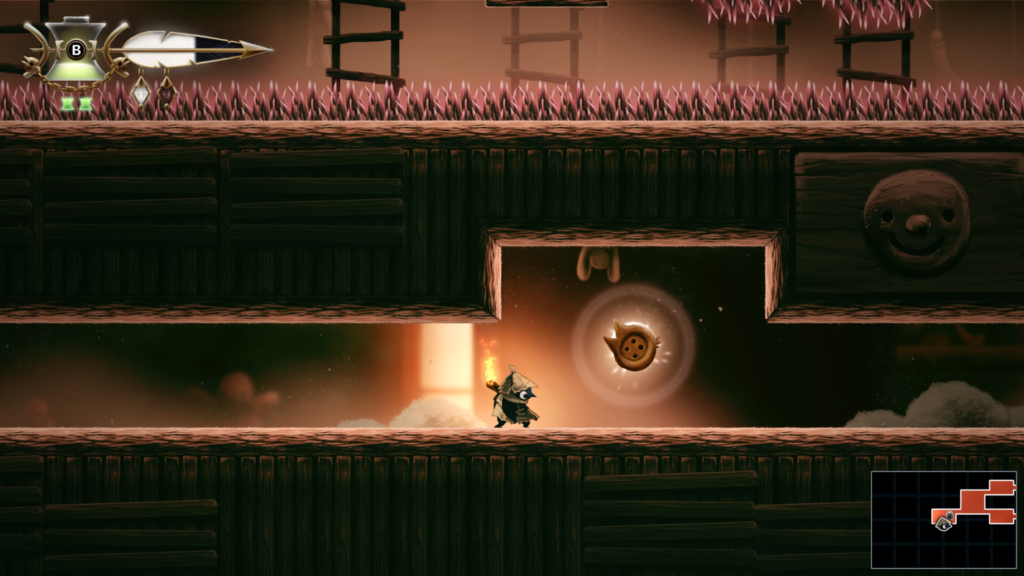
Trinket 26 / 32: Location – The Bog (yellow colour on the map)
Trinket: Scrap of Fabric – slightly increase attack damage while in the air.
Abilities needed: None
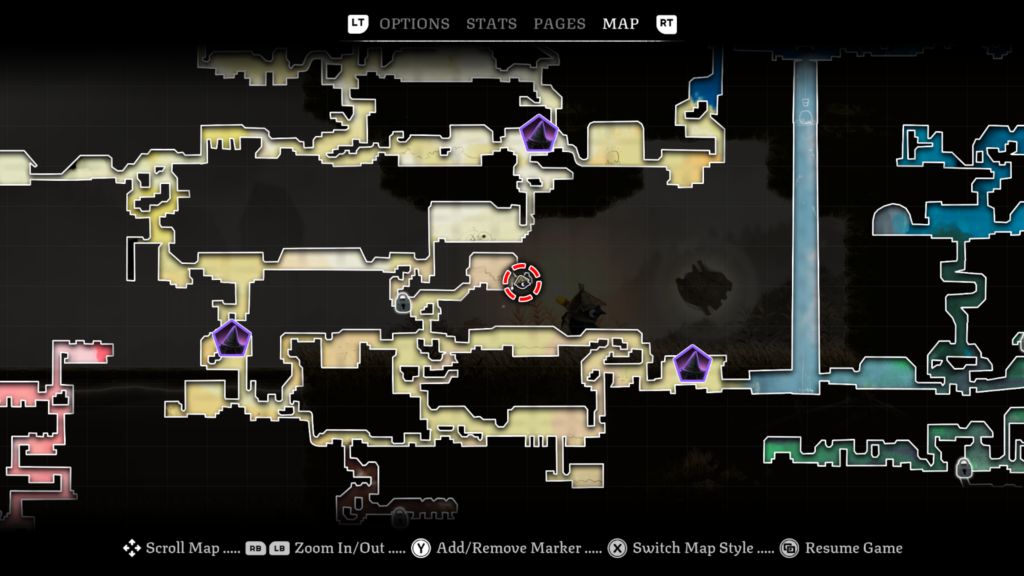
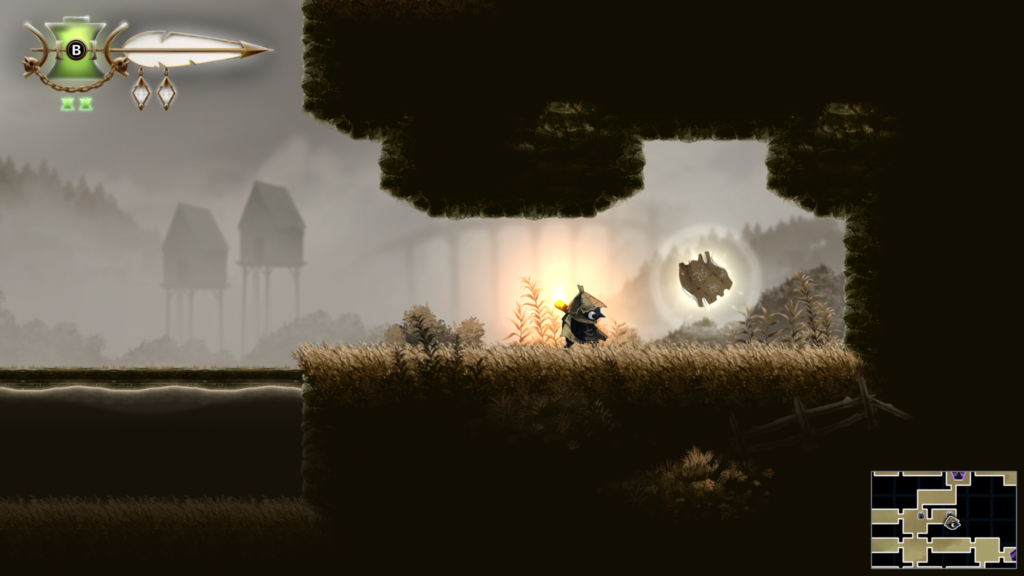
Trinket 27 / 32: Location – Webdrench Inn (purple colour on the map)
Trinket: Insect Wing – increases duration of hover
Abilities needed: Hover
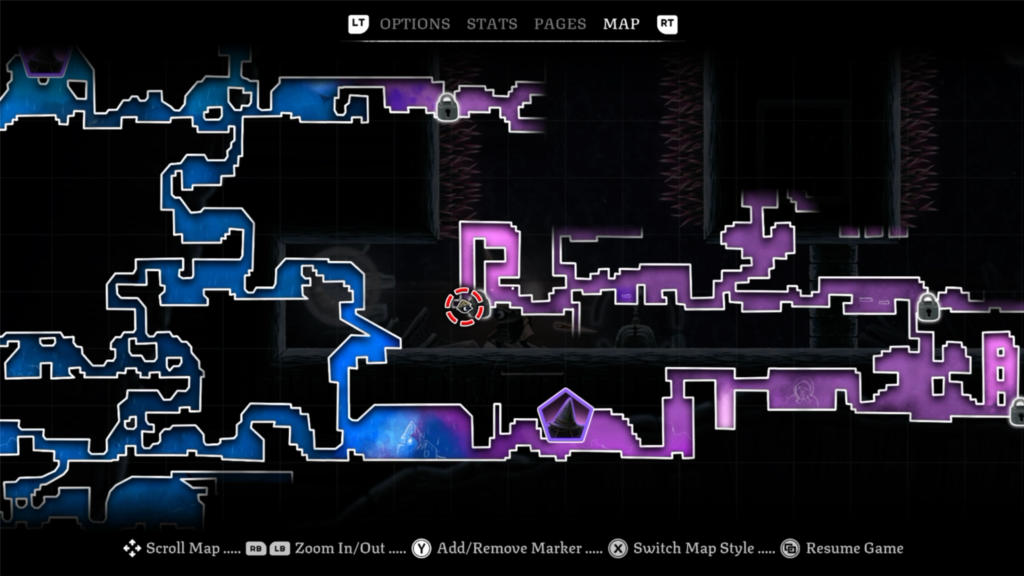
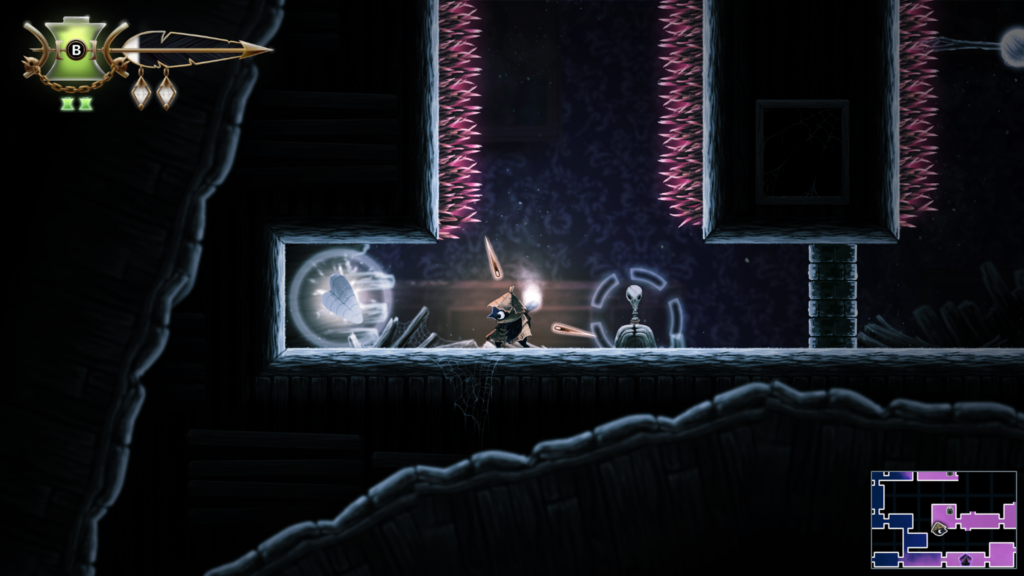
Trinket 28 / 32: Location – Webdrench Inn (purple colour on the map)
Trinket: Ember Vial – your flaming vessel will emit burning embers before it shatters.
Abilities needed: Hover, Climb
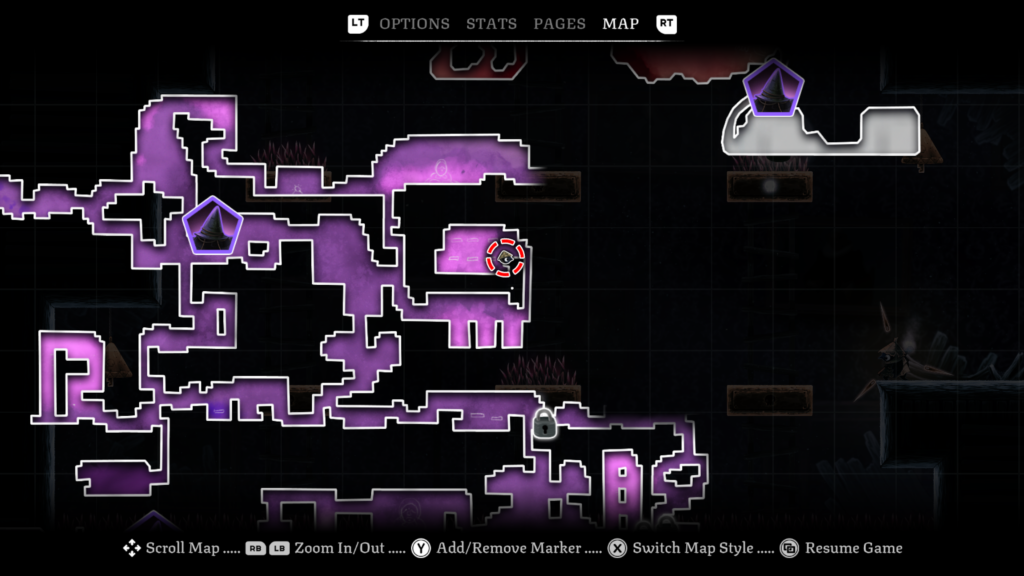
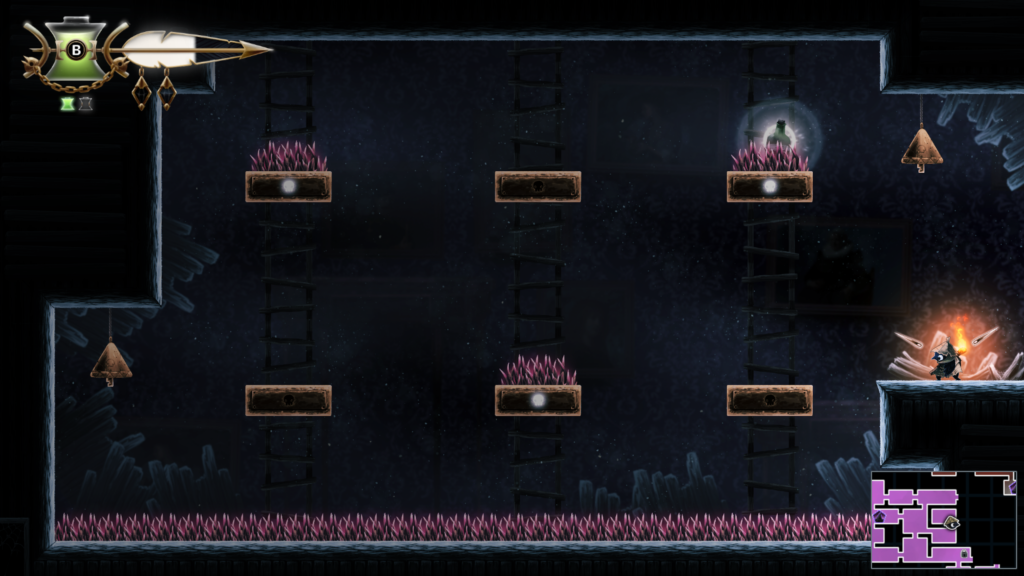
Trinket 29 / 32: Location – Burial Vault (dark brown colour on the map)
Trinket: Rusted Compass – creates a signal when a collectible is in the room
Abilities needed: Endless Climb
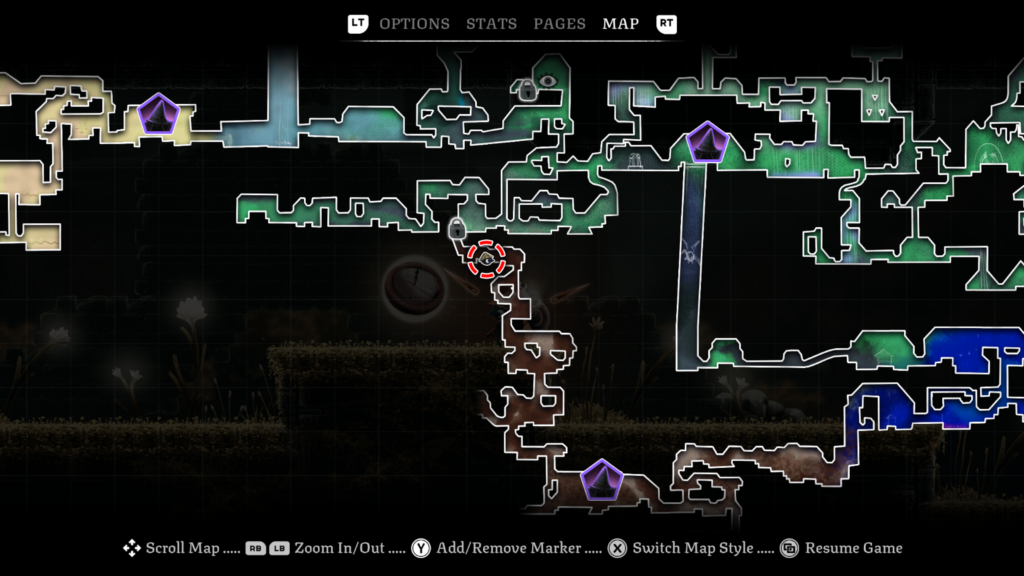
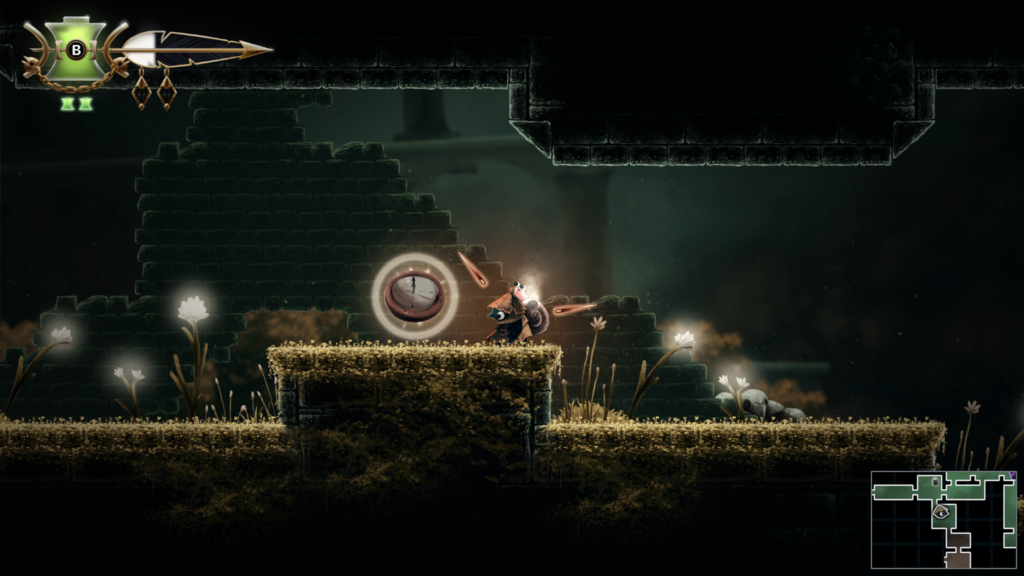
Trinket 30 / 32: Location – Night Garden (Spirit Return location)
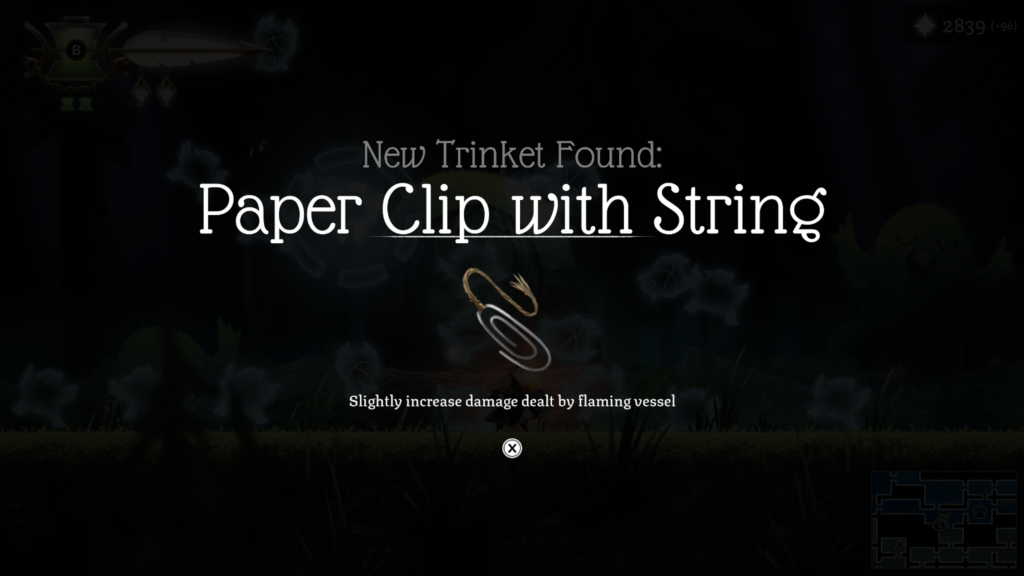
Trinket: Paper Clip with String – slightly increase damage dealt by flaming vessel
Cost: Return 20 of the 20 spirit collectibles.
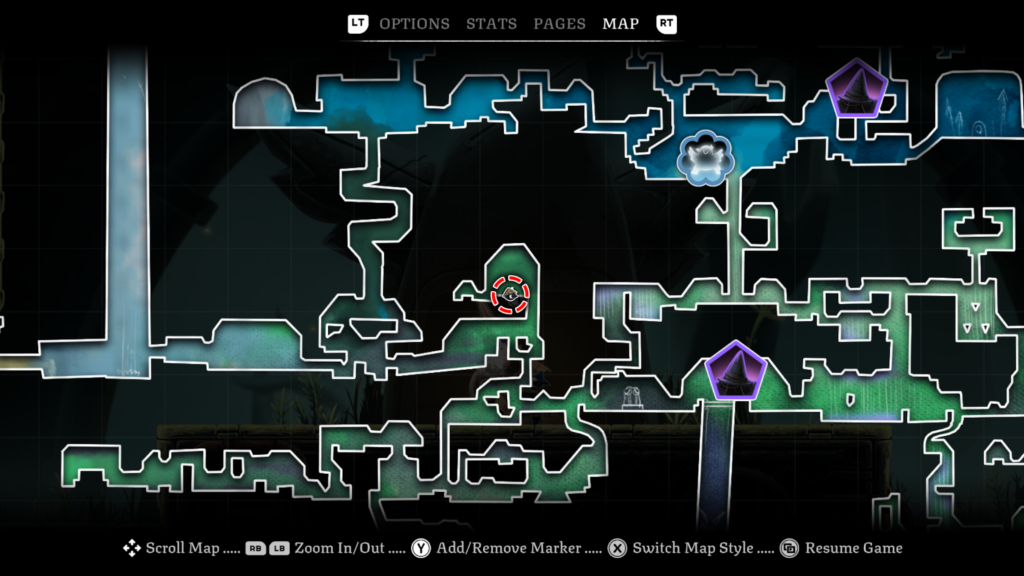
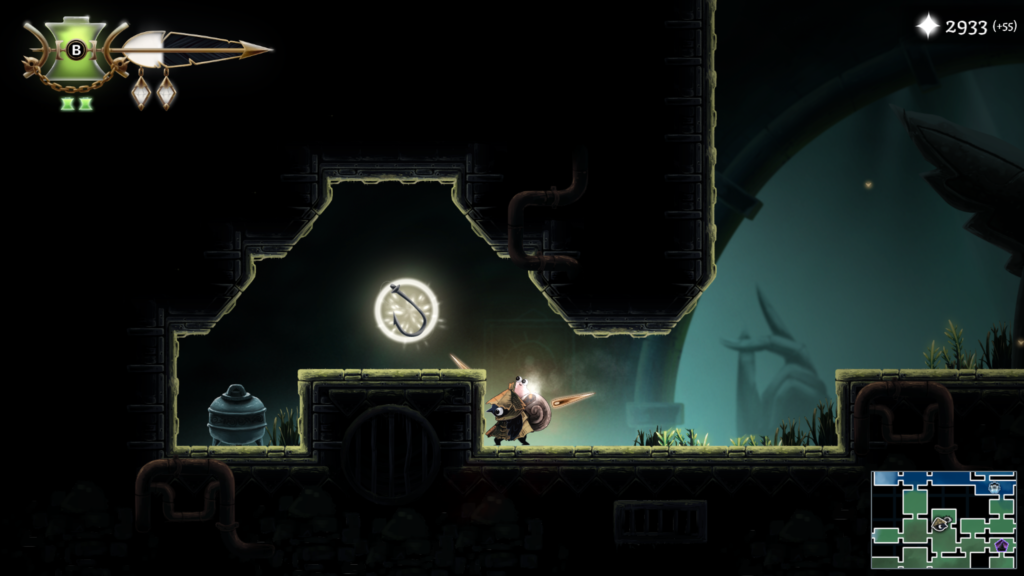
Trinket 31 / 32: Location – The Drain (green colour on the map)
Trinket: Fish Hook – greatly increases your vessel refill rate while at low health
Abilities needed: Endless Climb, Hover
You’ll need to complete the time trial to get this trinket
Trinket 32 / 32: Location – Hunter’s Cabin (orange colour on the map)
Trinket: Rusty Fork – increases damage death slightly when at low health.
Abilities needed: Wall Sling, Climb
You will unlock the “Experienced Collector” as soon as you grab the final trinket.
We hope you found this guide helpful. Check out more Well Dweller guides below:
Well Dweller Guides
- Well Dweller Achievement / Trophy List
- Beginner’s Guide
- All Time Trials Guide
- Find the Elevator Parts in The Drains
- Extend Your Flight Time in The Lookout Tower, Feather Locations
- Solve the Orb & Pillar Puzzles guide in the Autumn Forest
- Find the Gate Stones in The Docks
- Find Ilda’s Siblings in the Queen’s Castle
- Unlock the “Bouncing Bottles” achievement / trophy guide
- Unlock the “Snatched Up” achievement / trophy guide
- Unlock the “A Warm File” achievement / trophy guide
- Unlock the “Hide and Seek” achievement / trophy guide
- Unlock the “Taking a Break” achievement / trophy guide
- Unlock “The King’s Cap” achievement / trophy guide
- Unlock the Golden Gates and the “Stitched Up” achievement / trophy guide
- Unlock the “Late Night Guest” achievement / trophy guide
- Unlock the “Together at Last” achievement / trophy guide
Collectibles Guides
- 100% Collectibles and Achievement / Trophy Guide
- All Spirit Locations (Full Flock and “Halfway There” achievements / trophies)
- All Story Page Location (“The Tattered Doll”, “Above the Kingdom” and the “First-Born Daughter” achievements / trophies)
- All Workshop Trinket Locations (“In the Workshop” and “Fully Stocked” achievements /trophies)
- All Trinket Slot Locations (“10 Slots” and “Fifty Slots” achievements / trophies).
Boss Fights
- The Groundskeeper – Night Garden
- The Swarm – The Bog
- The Lady of the Drains – The Drains
- Lida the Terrible – Graven Valley
- Shrine of the Seven Sons – Midnight Drench
- Starsinger – The Lookout Tower
- Forest King – Autumn Forest
- Creature from the Deep – The Docks
- The Colony – The Depths
- Dollmaker’s Mirror – Dollmaker’s House
- Gravedigger – Burial Vault
- Silver Doll – Queen’s Castle
- The Queen – Queen’s Castle