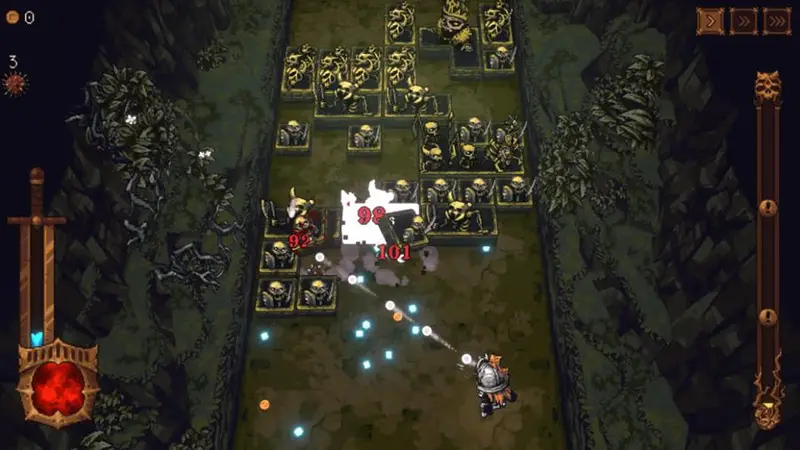
The latest title from Kyle Thompson, developer of popular graveyard keeping, the Crypt Custodian and Islets, has arrived in the form of Well Dweller, a gorgeous looking Metroidvania.
Starring Glimmer, your feathered friend, armed with a matchstick, you’ll need to explore a massive world to find the seven golden feathers to rescue your flock and defeat the evil Queen.
It releases on 22 September 2026 for PC, PS5, Switch 2, and Xbox Series consoles. It’s also available day one on Xbox Game Pass. Why not check out our review?
Well Dweller: 100% Collectibles & Achievement / Trophy Walkthrough
I will indicate in the headings if there is an achievement / trophy to nab, otherwise it will be the various collectibles:
- Trinkets (32 to find)
- Trinket Slots (over 100 to find, including 100 that can be bought from Looter’s store in the tent).
- Spirits (20 to find)
- Workshop Tokens (27 to find)
- Story Pages (23 to find)
There are occasionally additional area specific things to find. I have included a those below, in case they are needed.
Achievements like getting 100 or 500 kills will come naturally as you play the game.
Check out our Beginner’s Guide if you want to know more about each collectible.
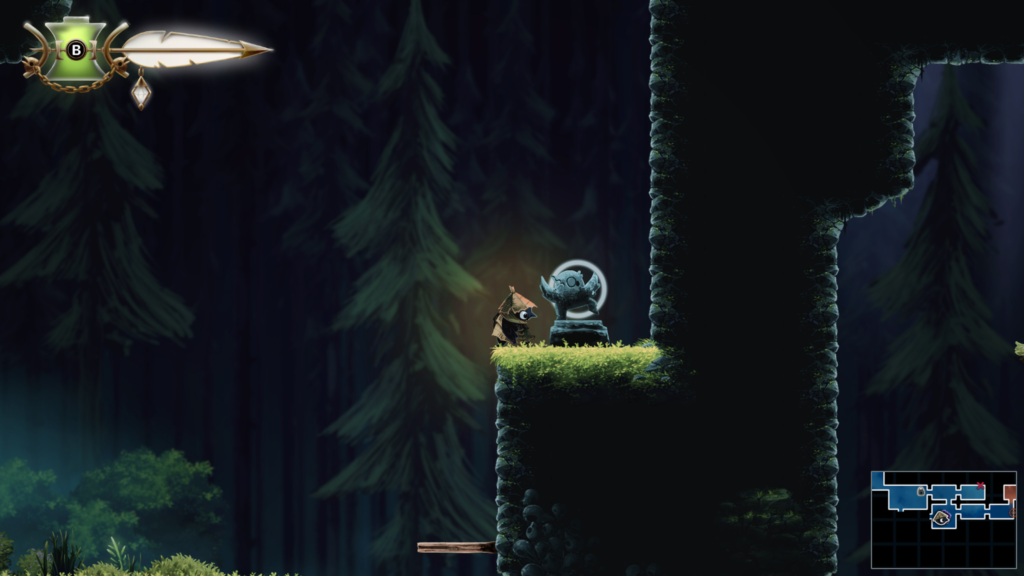
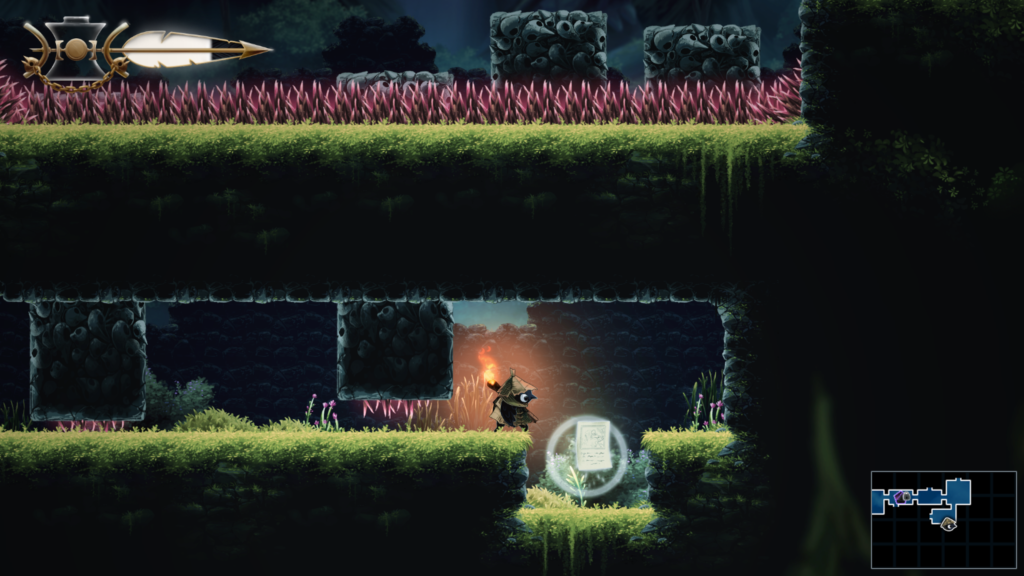
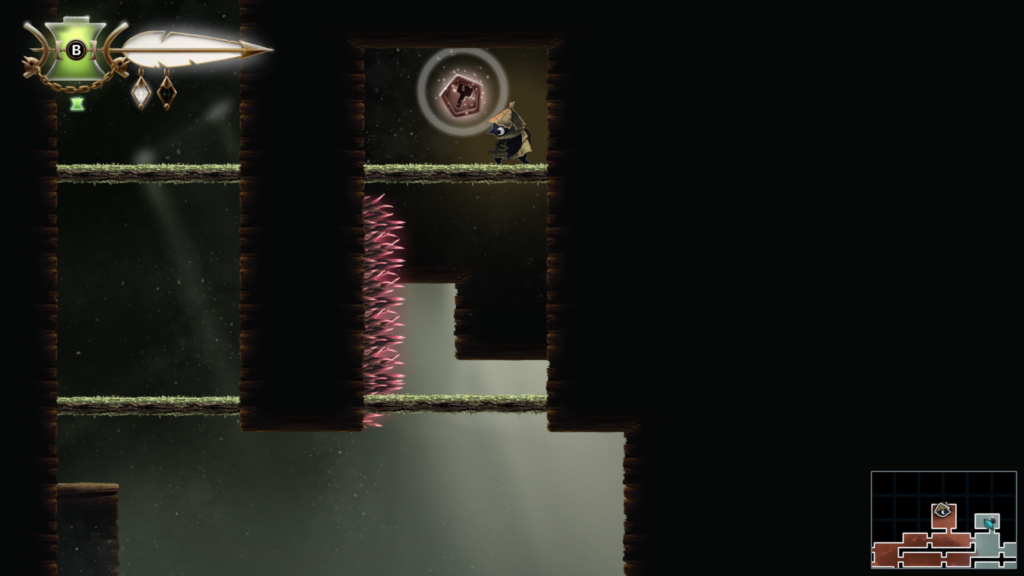
Abilities
I have listed collectibles in the order they were located, not necessarily the most efficient order. Thankfully, you can fast travel between tents once you have the ‘Tent Travel’ ability.
I have listed the different abilities below as each collectible will reference if an ability is needed. You may have to come back to once you have the ability mentioned. If the guide says “none” for abilities required, that means specifically to get the collectible. You’ll need an increasing number of the abilities to progress in the game.
There are eight abilities to get in the game.
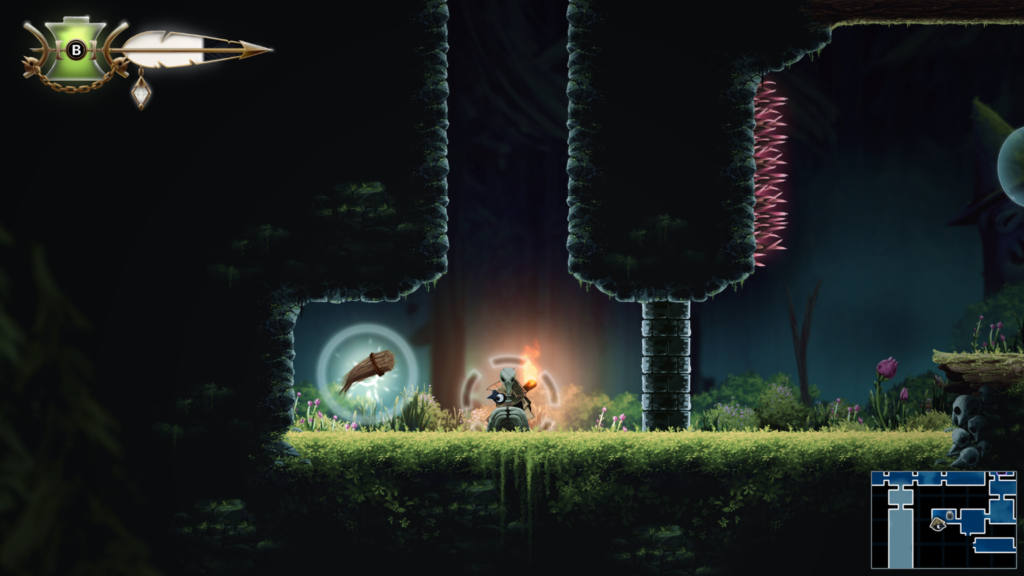
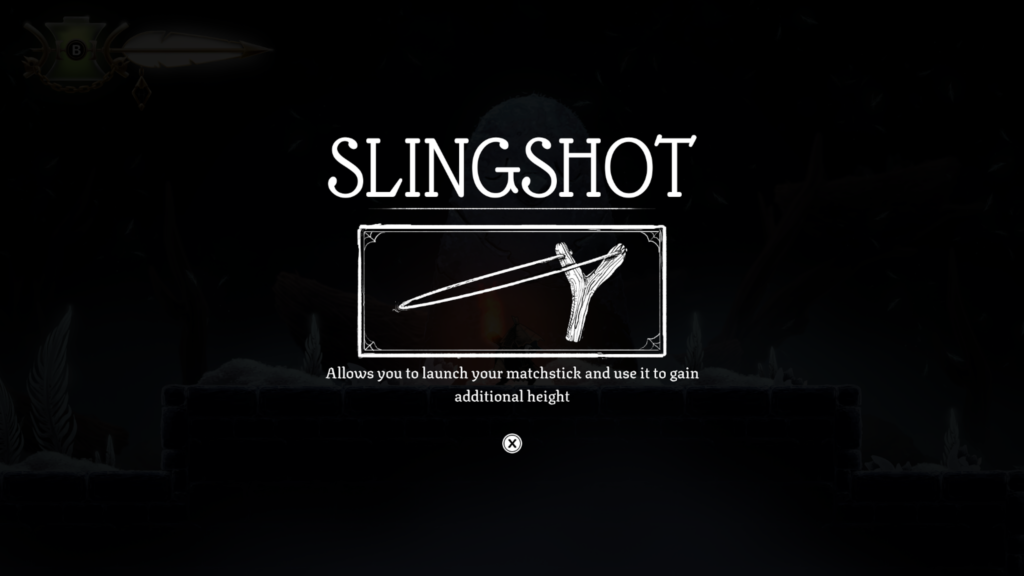
- Slingshot – allows you to throw your matchstick. It can damage enemies when you throw it, and if it sticks into a wall you can bounce on it to gain additional height.
- Climb – holding A (Xbox) lets you climb up and down straight walls. You have certain amount of stamina before you let go.
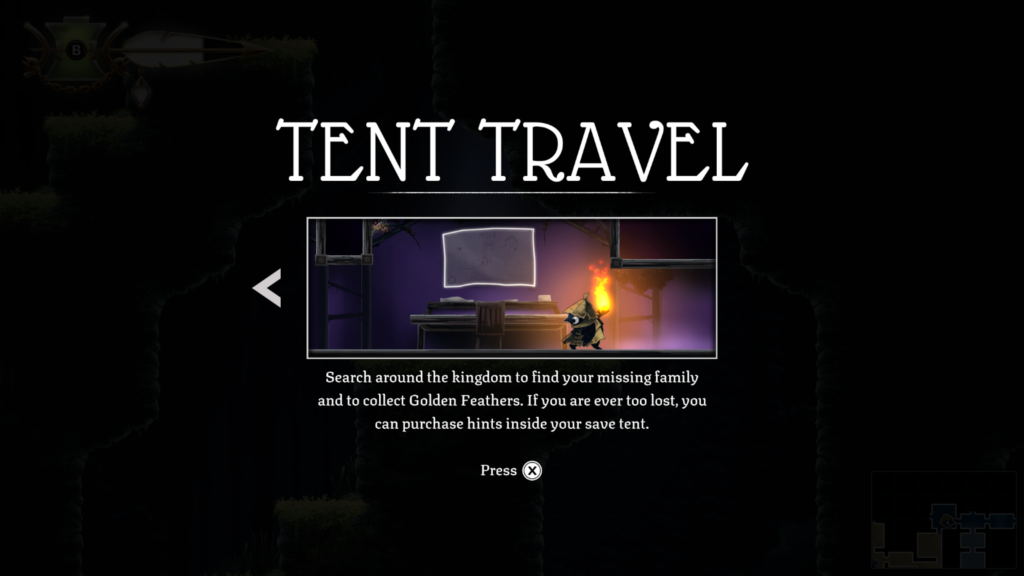
- Tent Travel – let’s you fast travel between save tents. You can fast travel from the map screen, just find the icon on the map and press and hold A to fast travel.
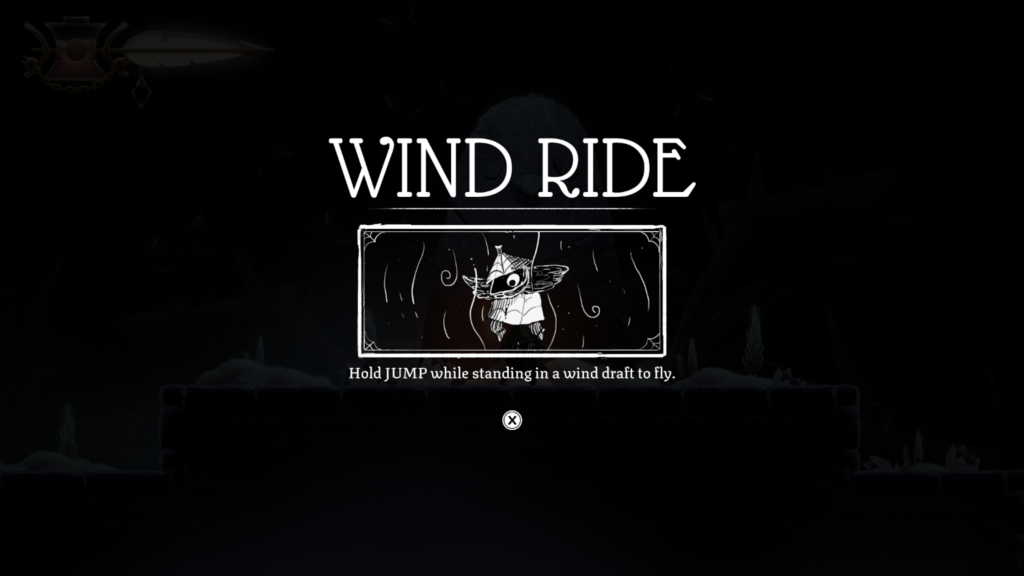
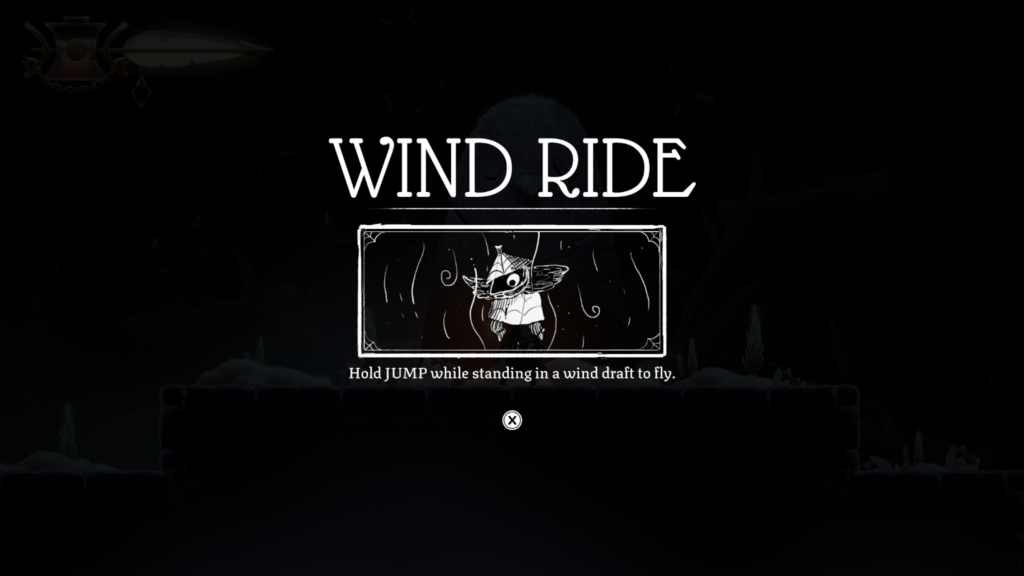
- Wind Ride – lets you fly in wind tunnels, indicated by rushing wind animations.
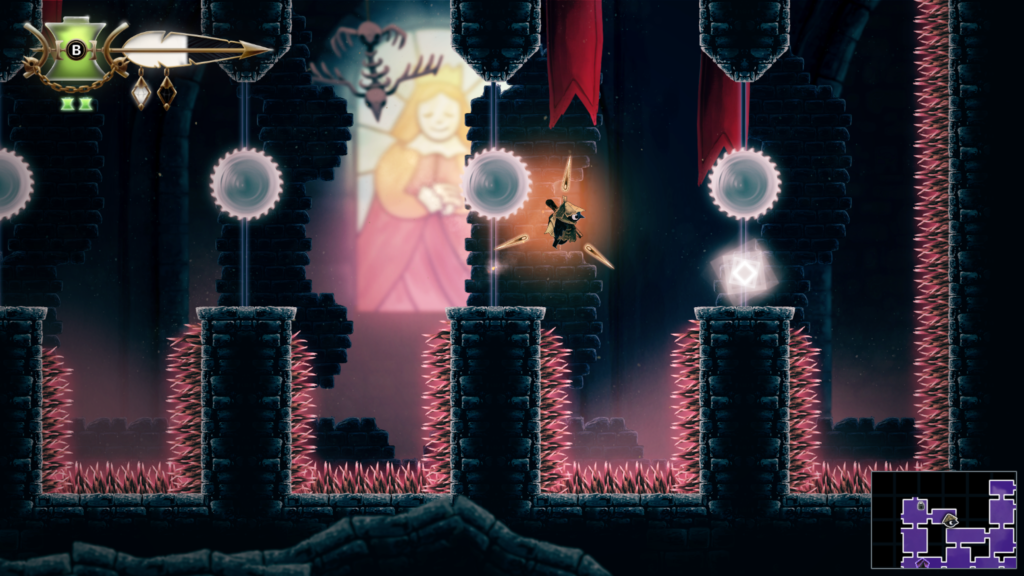
- Hover – press A midair to hover. You can use this fly across gaps. You have a short amount of time to hover, this can be extended by finding additional feathers scattered around the The Lookout Tower area (pale blue area on the map).
- Endless Climb – lets you climb endlessly without falling from fatigue. Long walls are no longer an obstacle.
- Wall Sling – lets you plant your matchstick in the wall using RT while you’re climbing the wall. This means you can create a platform midway up a higher wall to jump across or get higher (especially if the wall isn’t straight).
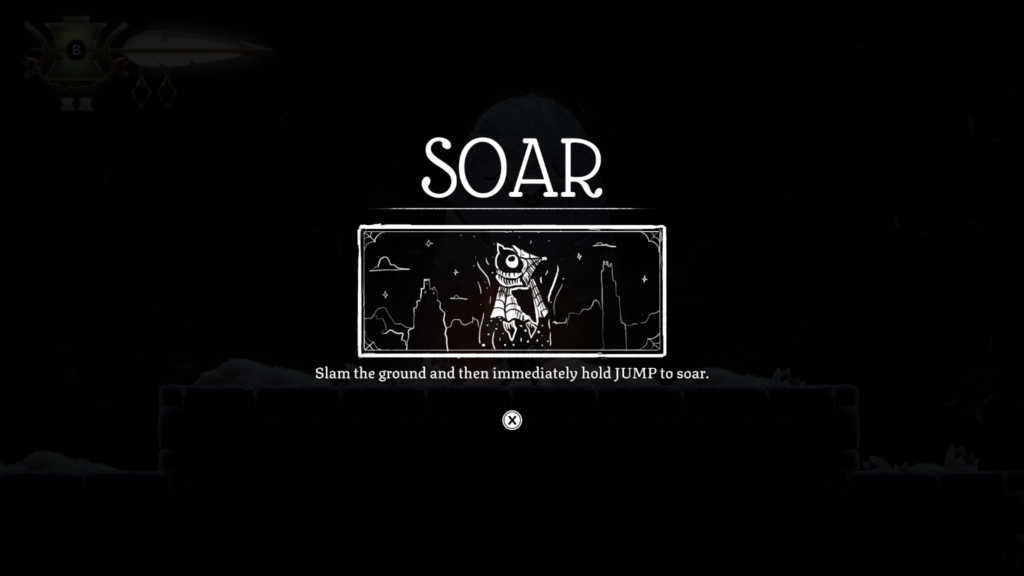
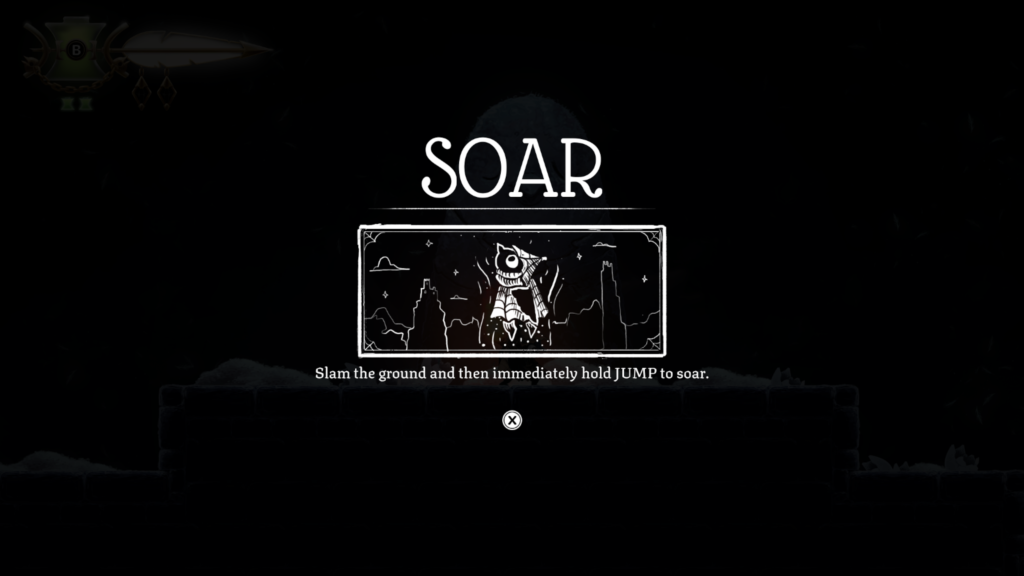
- Soar – unlocked at the very end of the game, this lets you slam into the floor (Down + X) and on jumping (A) lets you take off to fly high to previously unreachable places.
I will indicate below when a certain ability was found. Most are contained in eggs in giant nests that you’ll go through a short training section to learn the ability. Only one is found on the map as like a pick-up.
100% Collectibles and Achievement / Trophy Walkthrough
This is not a step-by-step guide, I have included all the collectibles, achievements / trophies and bosses. This allows you to enjoy the game whilst referring to this guide for help as needed.
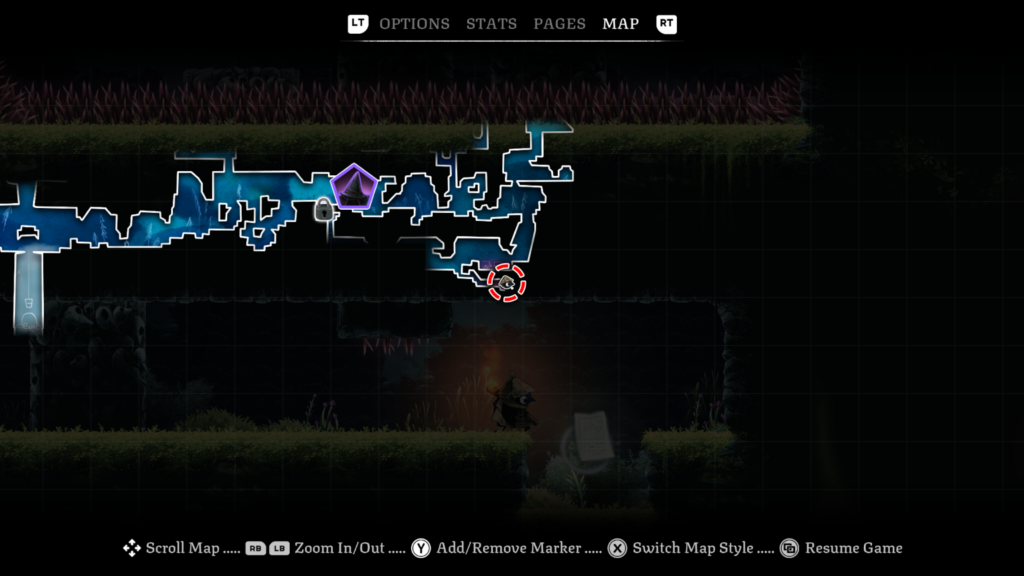
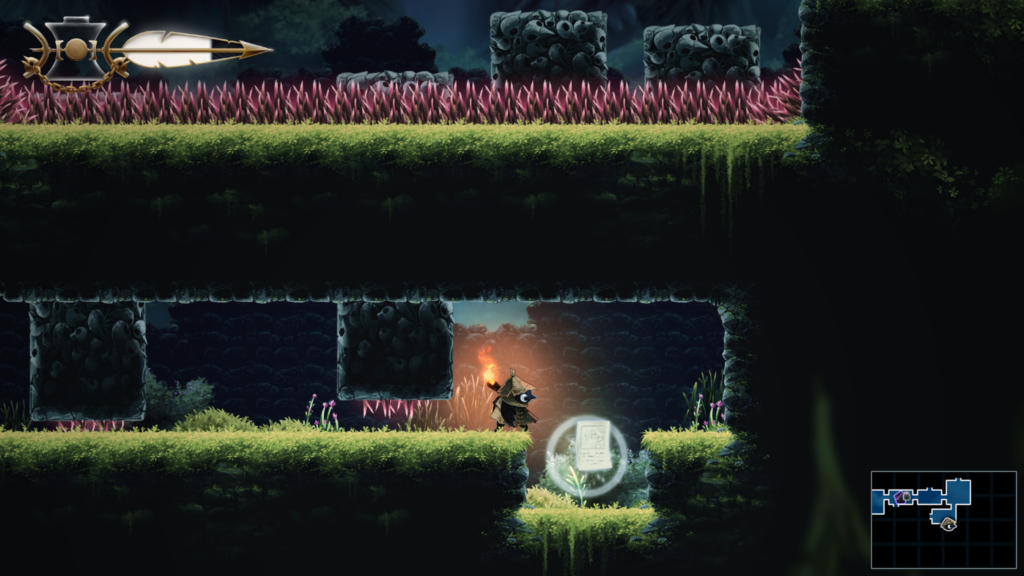
Story Page 1 / 23: Location – Night Garden (mixed blue colour on the map, the first area)
The Witch’s Bargain Story Page (1 / 9)
Abilities needed: None
You will unlock the “Once Upon a Time” achievement for collecting your first Story Page.
Well Dweller: The Groundskeeper Boss Guide
The Groundskeeper is the first boss you’ll fight. You’ll find him in the Night Garden, the first area you are in.
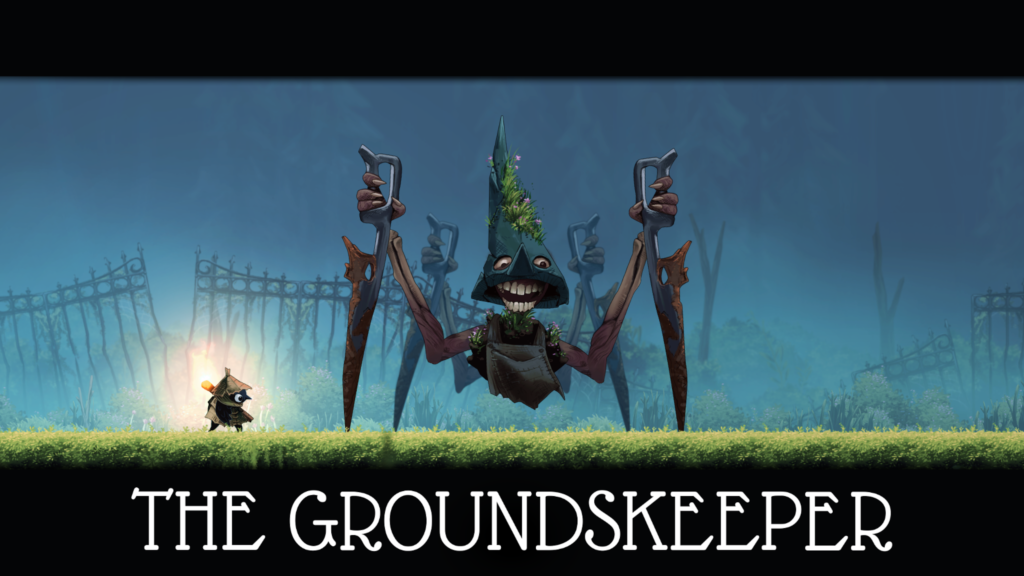
The Groundskeeper has a range of attacks to watch out for. You don’t get hurt walking in front of him, thankfully, Well Dweller doesn’t do that. The attacks are what do the damage.
Watch out for his projectile attacks; he’ll fire off a load of seeds that float down to the ground. He won’t wait till they’ve disappeared to start his next attack. He launch out rakes one at a time in quick succession, usually from the right, then the left and repeat. You can dodge the seeds easily enough, the rakes, you’ll need to do your slide dodge through them. They’re too tall to jump over.
He’ll also employ an area attack where leaves will appear and surround as he stomps from left to right and back again. I used slide through these, as it’s good practice for the second phase.
When half of the health bar is depleted, the music will switch up and the attacks get a bit more intense. More seeds / rakes get fired, and the leaves surrounding also double, making jumping through them impossible without taking damage (hence the slide preference).
The Groundskeeper will also do a smash attack that fires off a shock wave across the floor. You’ll need to slide through those too, but they’re quite lengthy, so try not to slide too early.
You can watch a video of the boss fight below:
Defeating The Groundskeeper will net you the “Dark Garden” achievement / trophy.
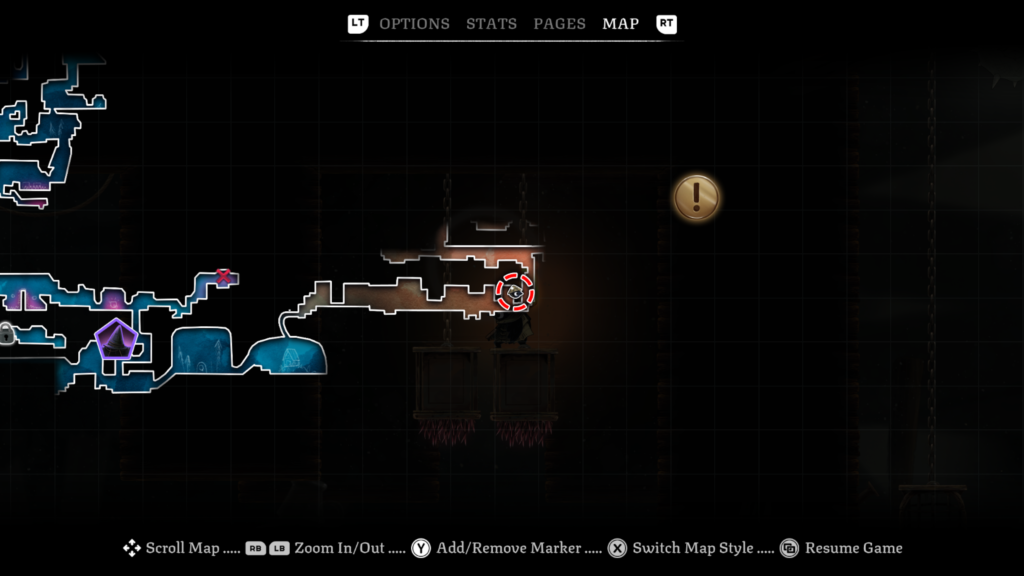
Story Page 2 / 23: Location – Hunter’s Cabin (orange colour on the map)
The Dollmaker Story Page (1 /8)
Abilities needed: None
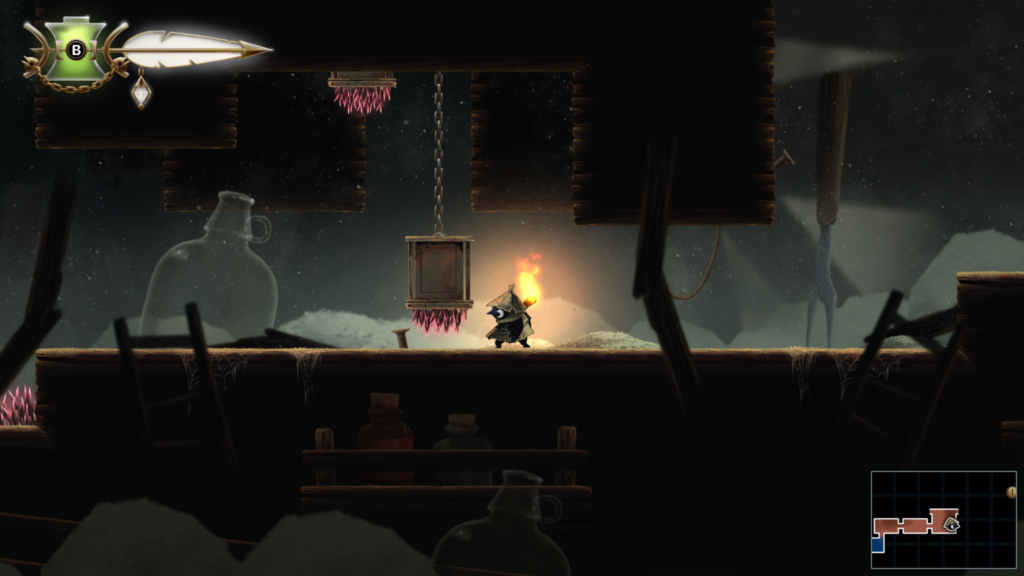
This Story Page is in a hidden passage, stand on the top of the spiky blocks and ride it upwards to the page.
Trinket 1 / 32: Location – Hunter’s Cabin (pale orange colour on the map)
Trinket: Hunters Locket – gives a larger window for attempting to heal.
Abilities needed: None
You will unlock the “Hobby Collector” achievement for collecting your first trinket.
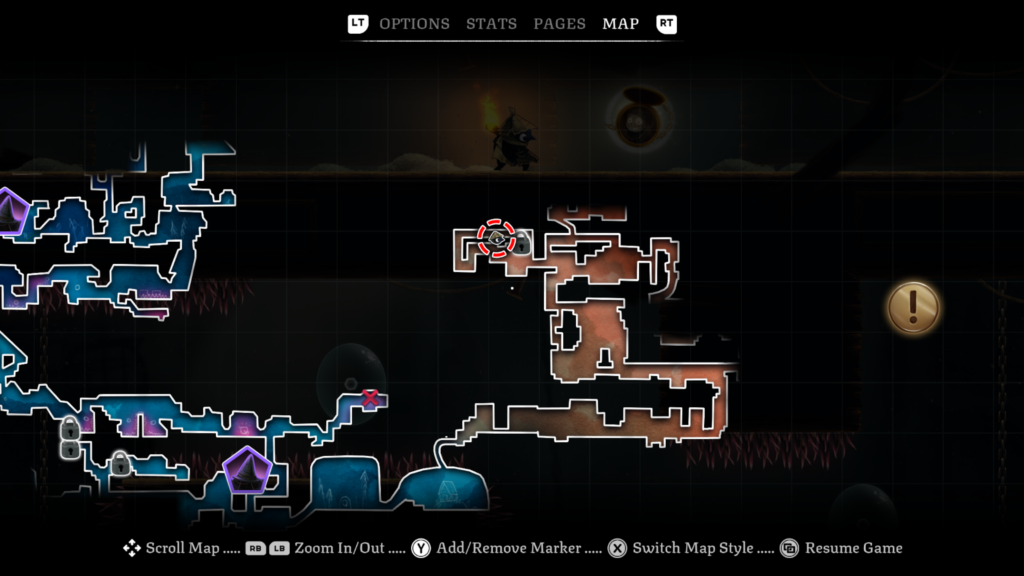
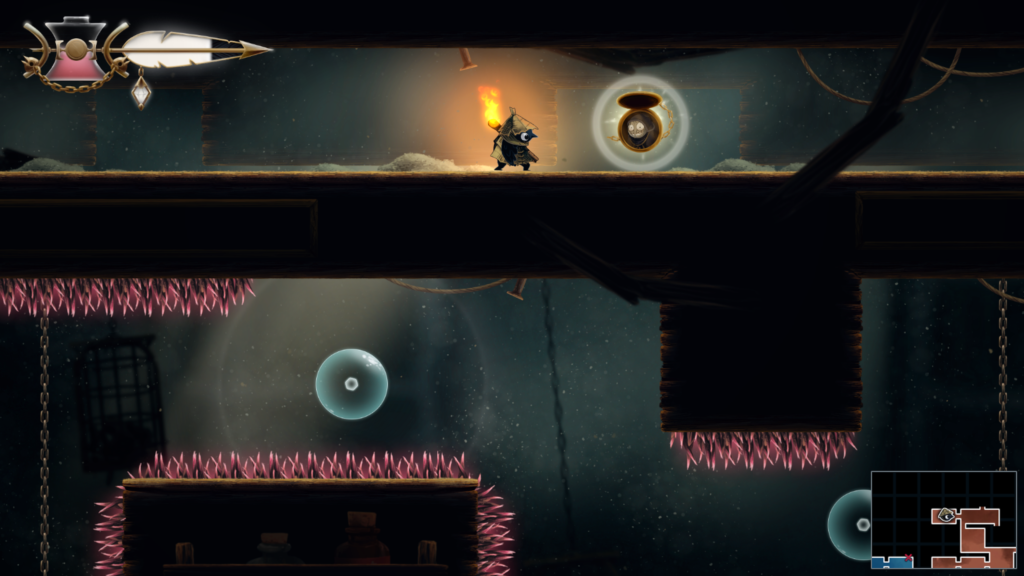
Ability: Slingshot – Location – Hunter’s Cabin (pale orange colour on the map)
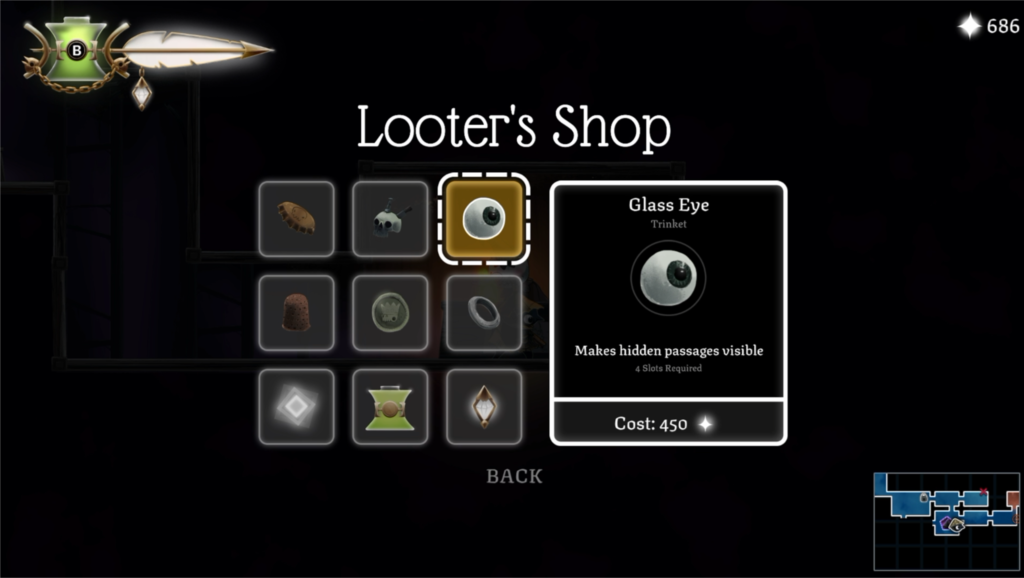
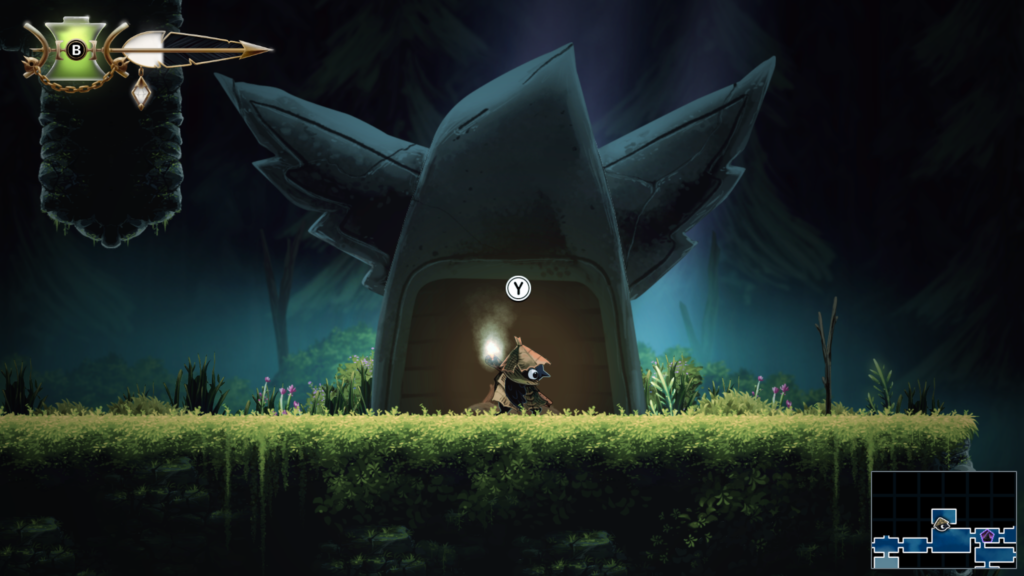
Trinket 2 / 32: Location – Looter’s Shop (Tent)
Trinket: Glass Eye – makes hidden passages visible.
Cost: 450
You will unlock the “First Purchase” achievement if this is your first purchase from Looter.
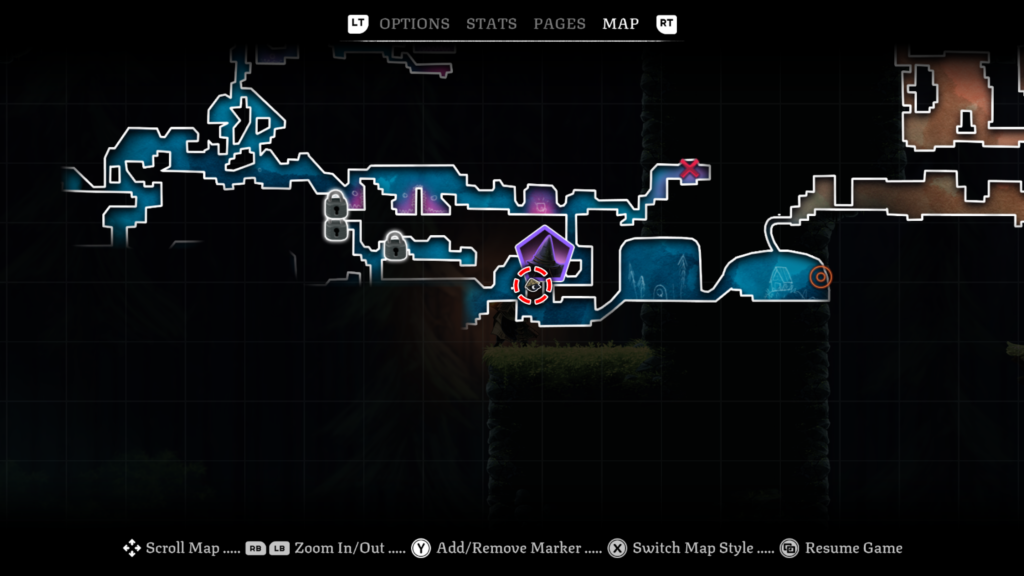
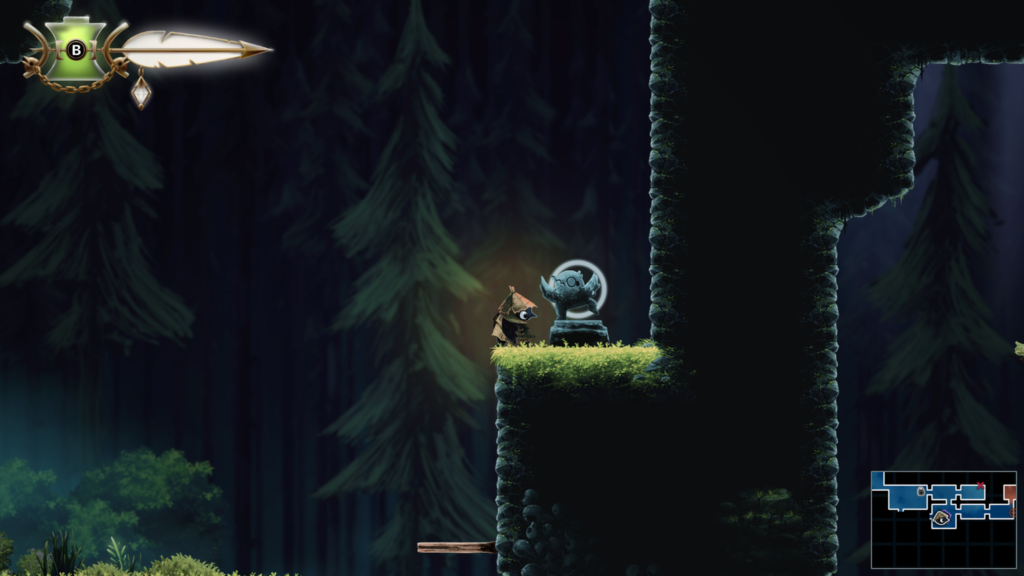
Spirit 1 / 20: Location – Night Garden (first area, mixed blue colour on the map)
Abilities needed: Slingshot
Throw your matchstick into the wall so you can jump off it to get high enough to reach the spirit.
You will unlock the “Solo Spirit” achievement once you return the first spirit.
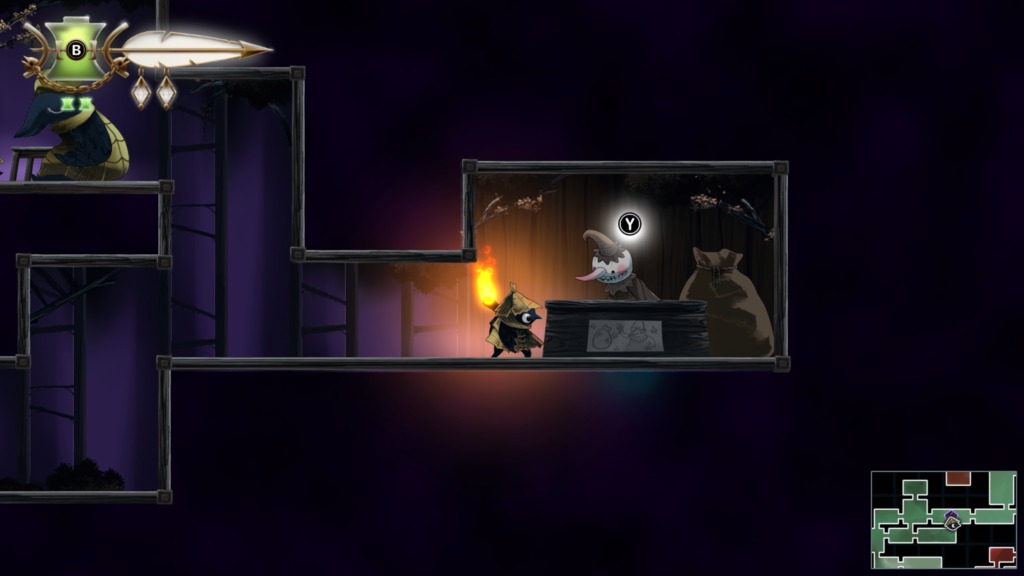
Trinket Slot 1 / 103: Location – Looter’s Shop (Tent)
Abilities needed: None
Bought from the shop
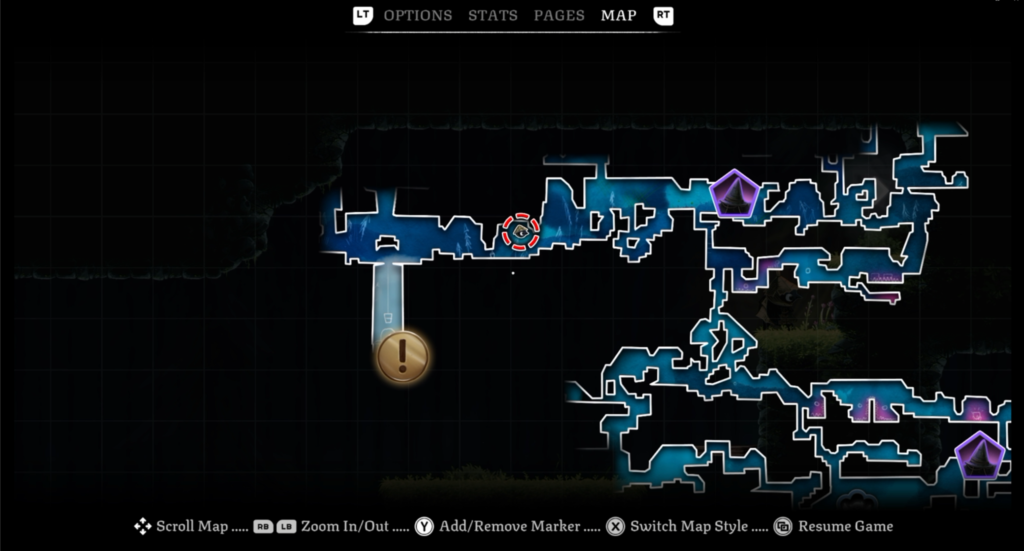
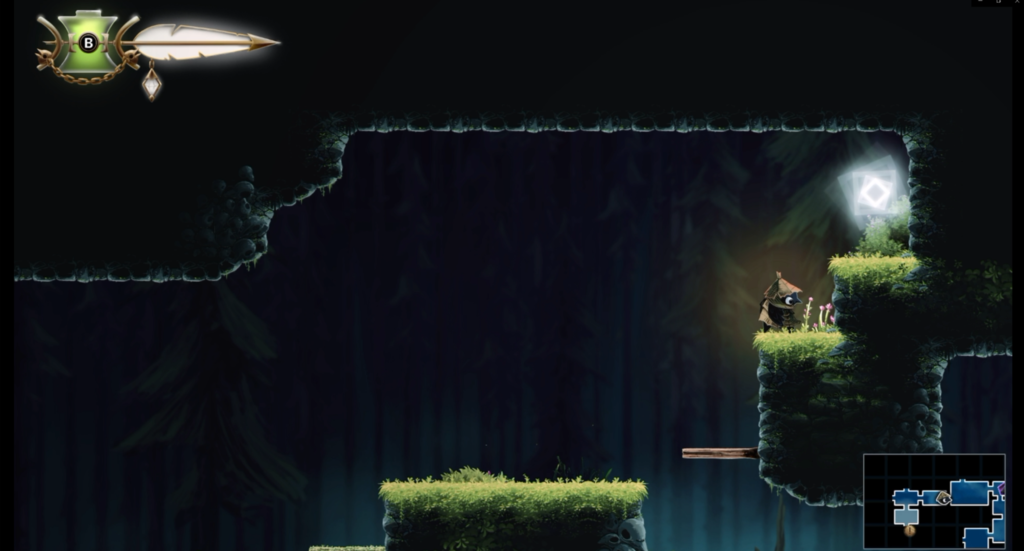
Trinket Slot 2 / 103: Location – Night Garden (mixed blue area on the map)
Abilities needed: Slingshot
Unlock the “Snatched Up” Achievement / Trophy Guide
You’ll unlock the “Snatched Up” achievement for successfully escape the Hunter’s grasp near the beginning of the game.
After you have grabbed the berries from the Hunter’s Cabin, you’ll return to your family at the bottom of the well. A cutscene will play where a noise is heard, and Mother asks Glimmer to go investigate. As Glimmer goes to see what’s going on, the long arm of the Hunter appears, triggering a chase sequence.
You’ve got to jump through the hole in the bottom of the well and stay out of reach of the Hunter. It’s a fairly easy chase sequence but there are couple of bits that can trip you up.
The main things you’ll need to do is attack the barriers, use your slam attack (Down + ATTACK whilst in mid-air), and slide.
You can watch a video of the sequence below:
Successfully getting to the bottom will unlock the “Snatched Up” achievement / trophy for meeting the Hunter for the first time!
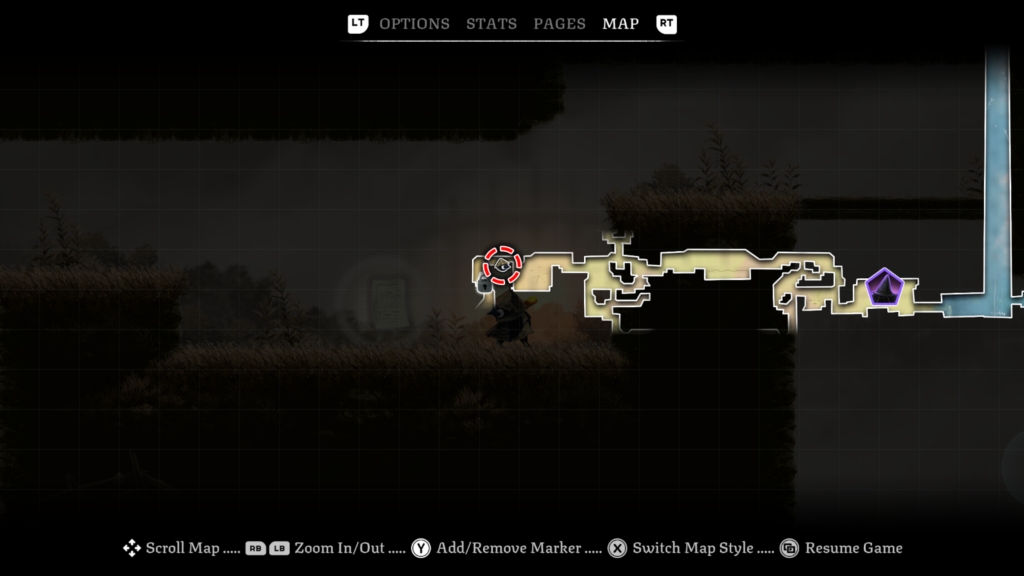
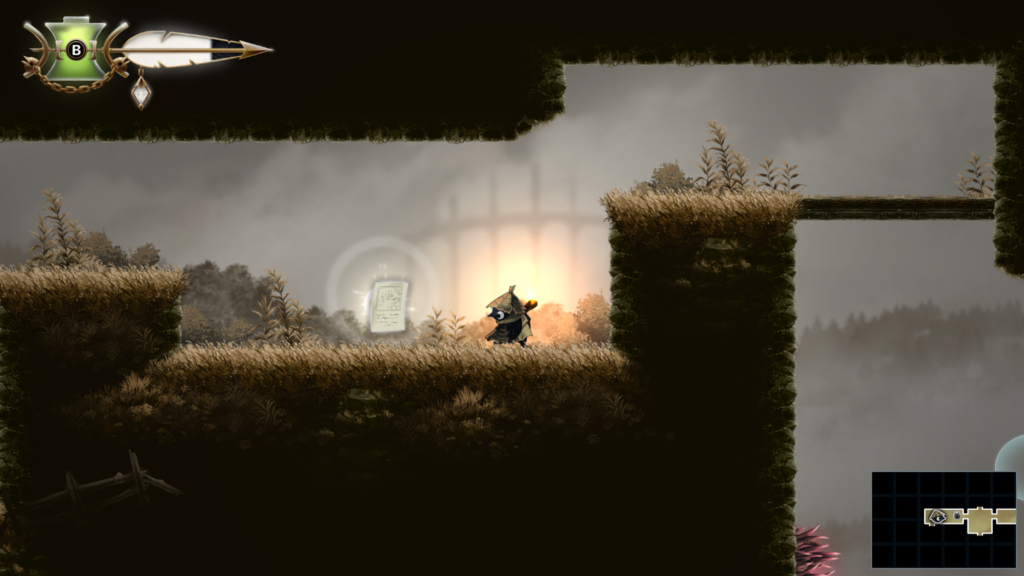
Story Page 3 / 23: Location – The Bog (yellow colour on the map)
The Dollmaker Story Page (2 / 8)
Abilities needed: None
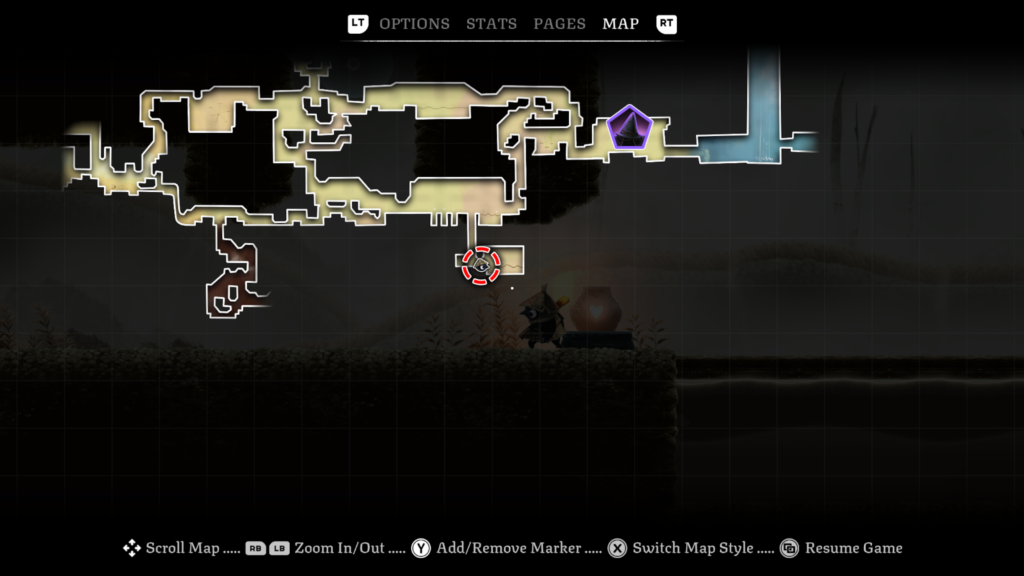
Trinket Slot 3 + 4 / 103: Location – Looter’s Shop (Tent)
Abilities needed: None
Bought from the shop.
Trinket 3 / 32: Location – The Bog (yellow colour on the map)
Trinket: Hair Pin – if you do not attack for 8 seconds, your next attack is doubled
Abilities needed: None
Bounce on the bubbles in the order they appear to open the barrier.
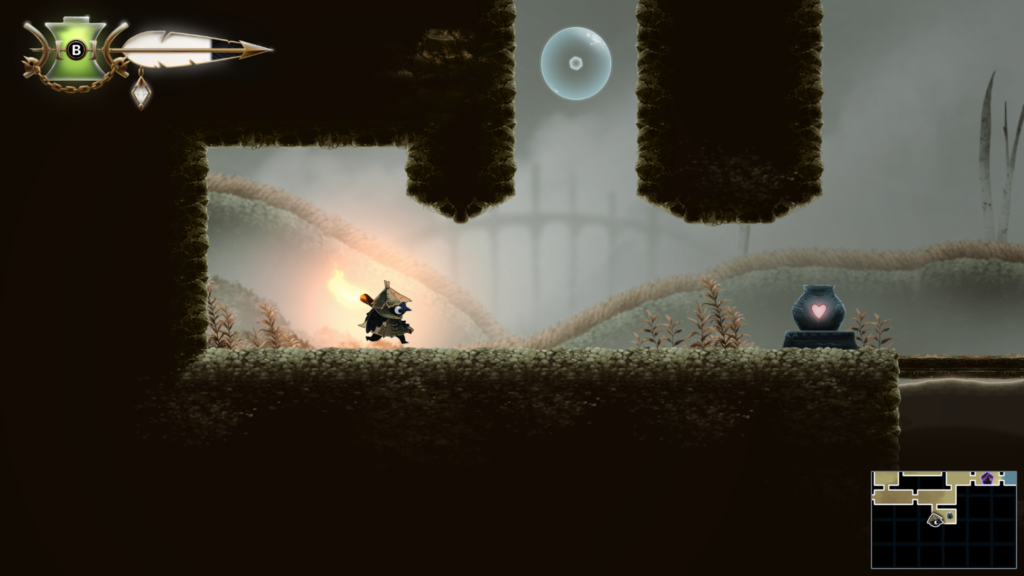
Well Dweller: Unlock the “A Warm File” Achievement / Trophy Guide
To unlock the “A Warm File” achievement / trophy, you will need to go camping with Ilda. This takes place in The Bog level of the game (yellow area on the map). It might be that this one is entirely unmissable, but I’ve created a guide for it, just in case.
You can watch a video guide below, or read on for a text and image guide.
You’ll start from the tent location in The Bog.
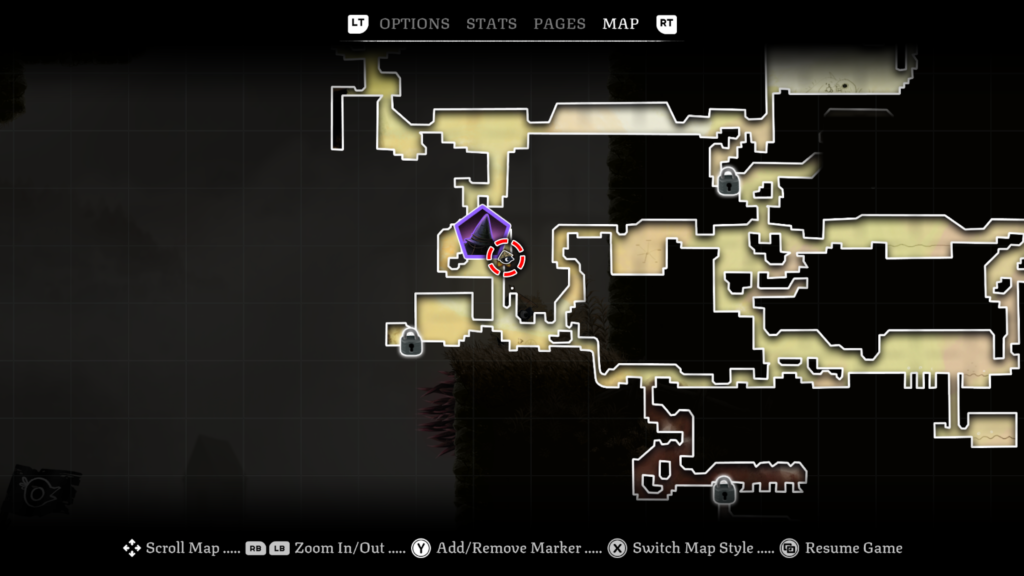
From the tent, head to the left and up into the next room. Bounce on the bubbles to continue going up, into the next room.
Defeat the enemies and then head to the right. In the next room, you’ll need to defeat a large flying insect, then continue right.
In the next room, head to the right and you’ll see a ppool of bubbly water and more bubbles. Throw your matchstick to the wall and use the bubble to bounce to the matchstick. Bounce on the matchstick to read the platform above and into the next room.
In the next room, you’ll meet Ilda who will take you to their campsite. Watch the cutscene and when you wake up in the morning you will unlock the “A Warm File” achievement / trophy.
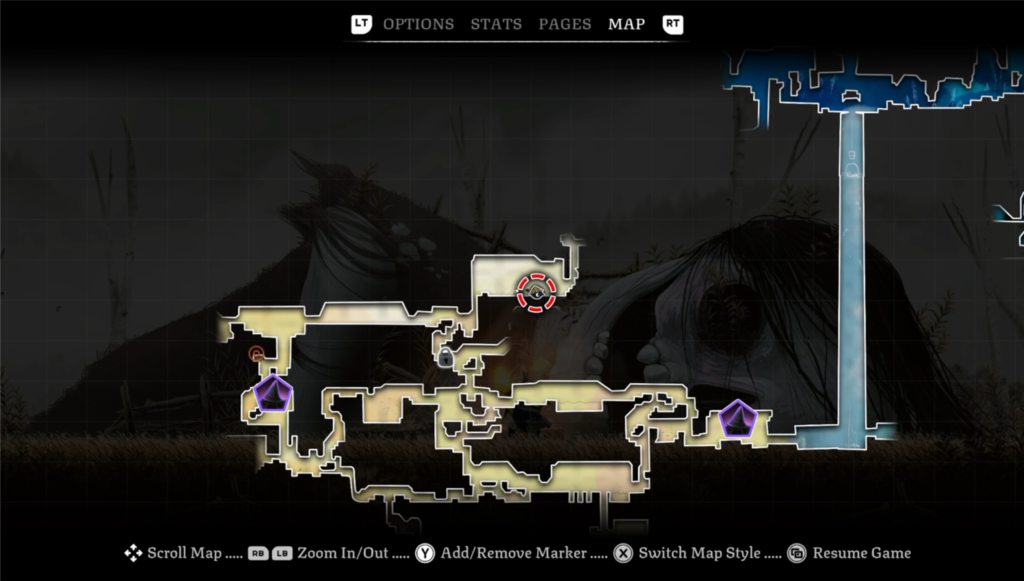
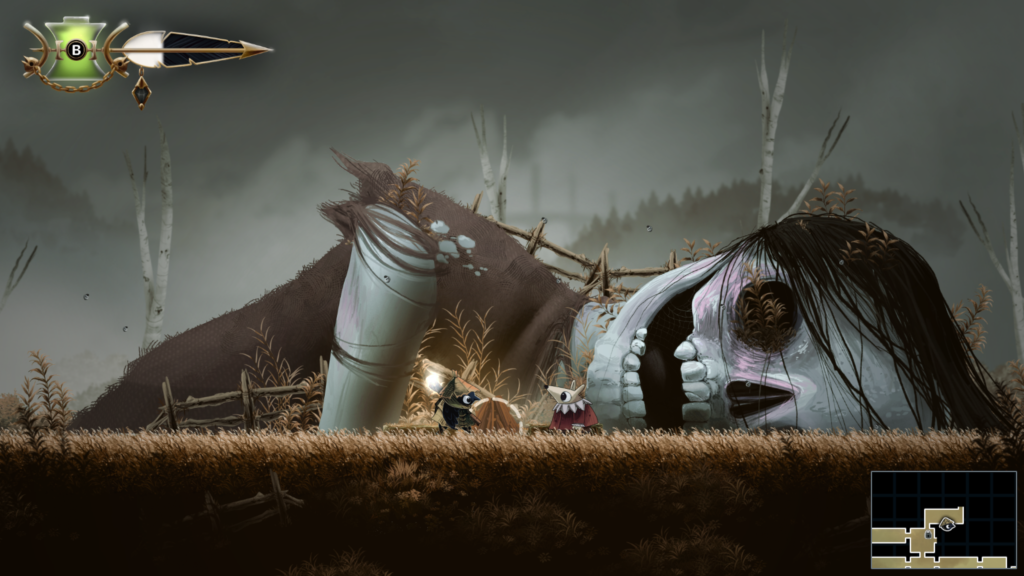
Trinket Slot 5 / 103: Location – The Bog (yellow area on the map)
Abilities needed: Slingshot
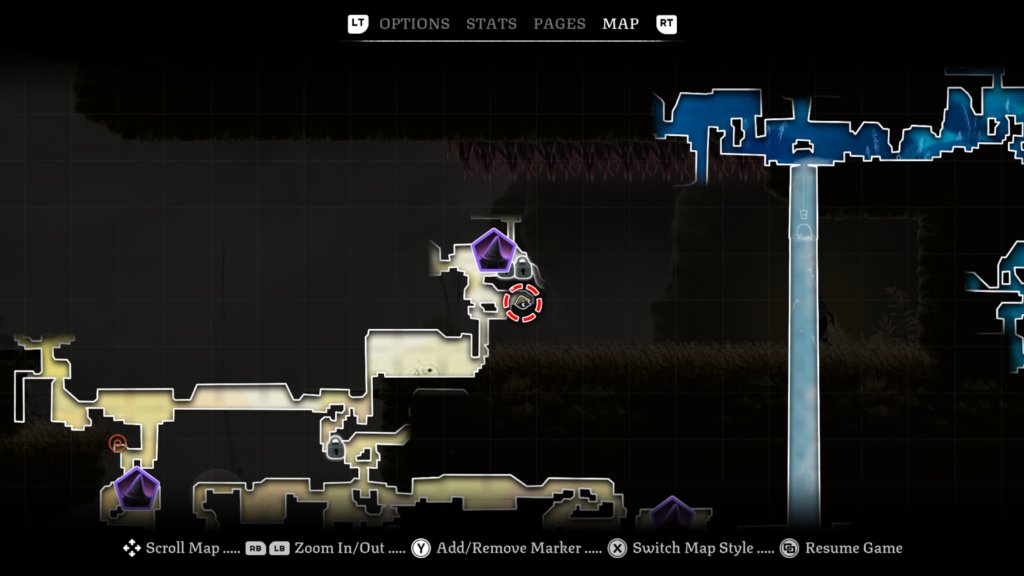
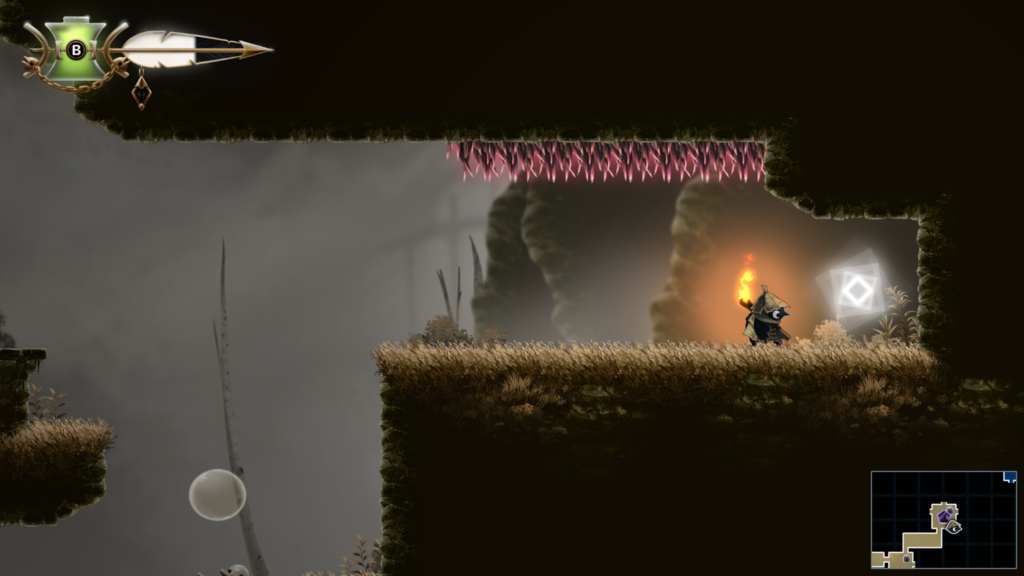
Trinket Slot 6 / 103: Location – Looter’s Shop (Tent)
Abilities needed: None
Bought from the shop.
Well Dweller: The Swarm Boss Guide
The Swarm boss fight takes place in The Bog area of the game. You’ll encounter it not long after visiting the ‘room’ where access to the Queen’s Castle is fenced off and you are instructed to come back after collecting the seven golden feathers.
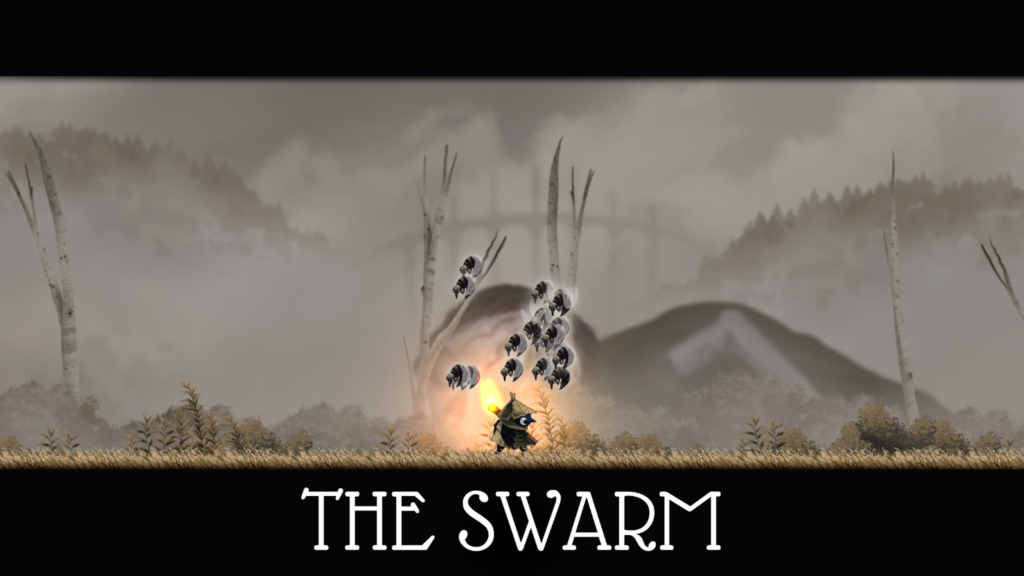
The Swarm, as the name implies, is a swarm of bug enemies that will fly above you a fair bit. This means you’ll need to attack upwards, or attack whilst jumping in mid-air.
It will throw projectiles at you that you’ll need to dodge in between of, and will surround itself with said projectiles, creating an attack barrier. Keep out of its way until it throws them.
At certain points, waves of bugs will fly towards you from the right side of the screen, creating barriers that you need to jump over. There will be bubbles that you can jump on to give you height to get over them.
Laying Eggs in the Brain
Just before half of the health is left, the bugs will fly to the background and retrieve a skull bringing it to the fight. They will start controlling it. This means you can attack the skull, rather than the bugs, which is an easier target to hit. The attacks are largely the same, but the skull adds a ground pound attack that creates a shockwave that you need to dodge.
At a quarter remaining health, the music will speed up and the attacks get a bit more intense. The attacks are largely the same, with the addition of single bugs appearing at ground level to the left and right and flying straight at you. You can slide dodge or jump over them, depending on what else is going on at that moment in time.
You can watch a video of the boss fight below:
Defeating The Swarm will award you the “Buggy Business” achievement / trophy.
Ability: Climb – Location – The Bog (yellow area on the map)
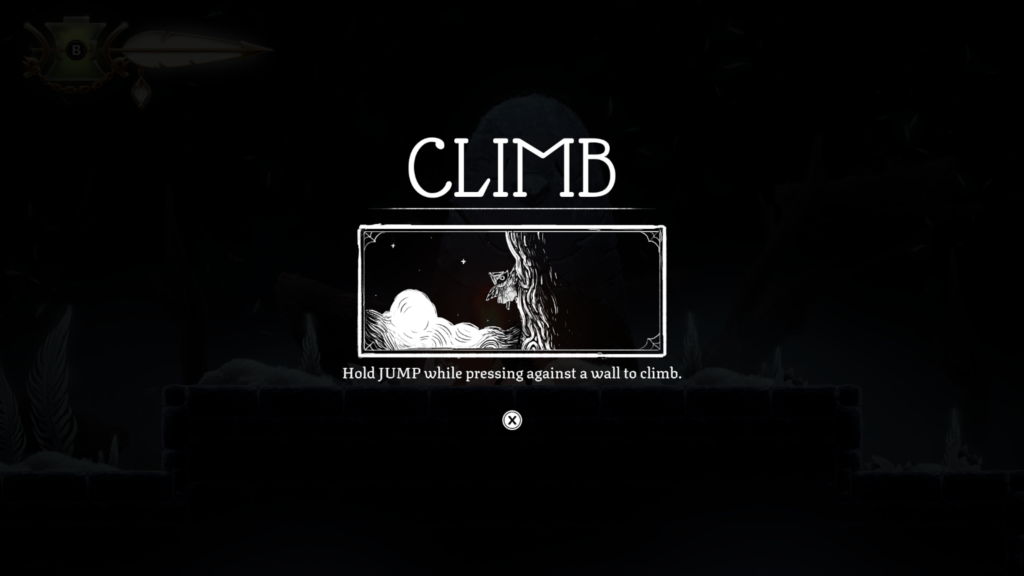
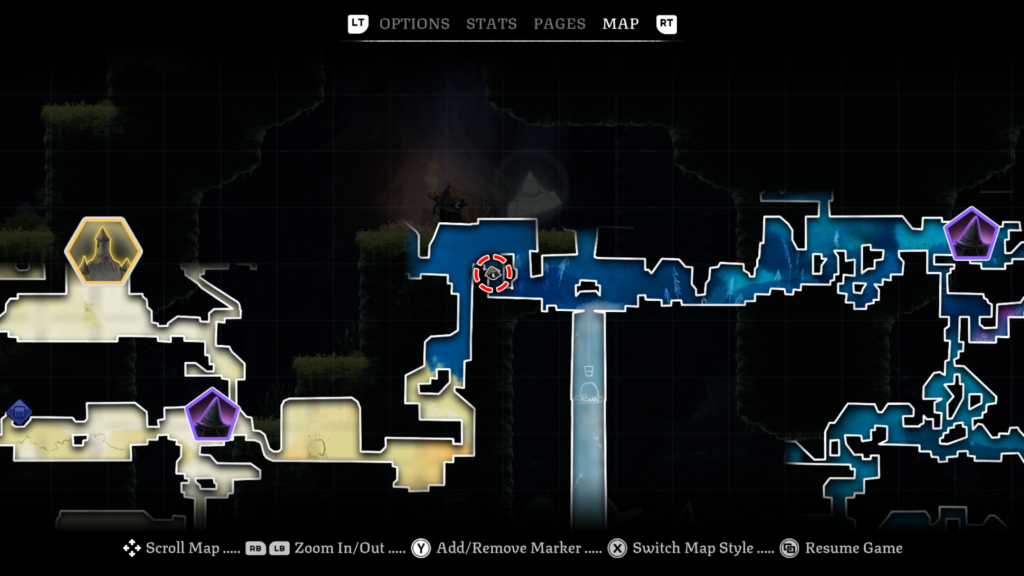
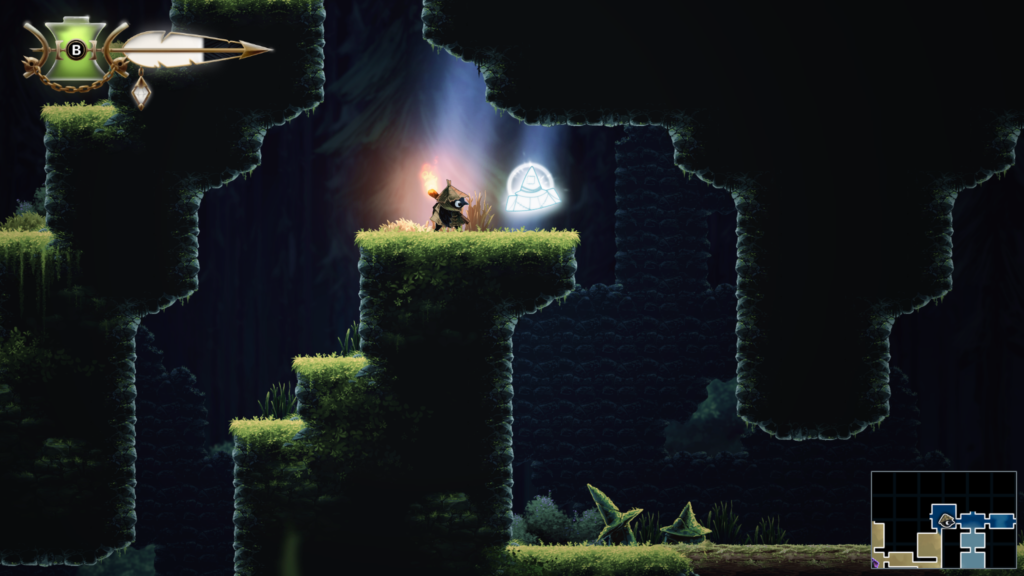
Ability: Tent Travel – Location – Night Garden (mixed blue area on the map)
Trinket Slot 7 / 103: Location – The Bog (yellow area on the map)
Abilities needed: Slingshot
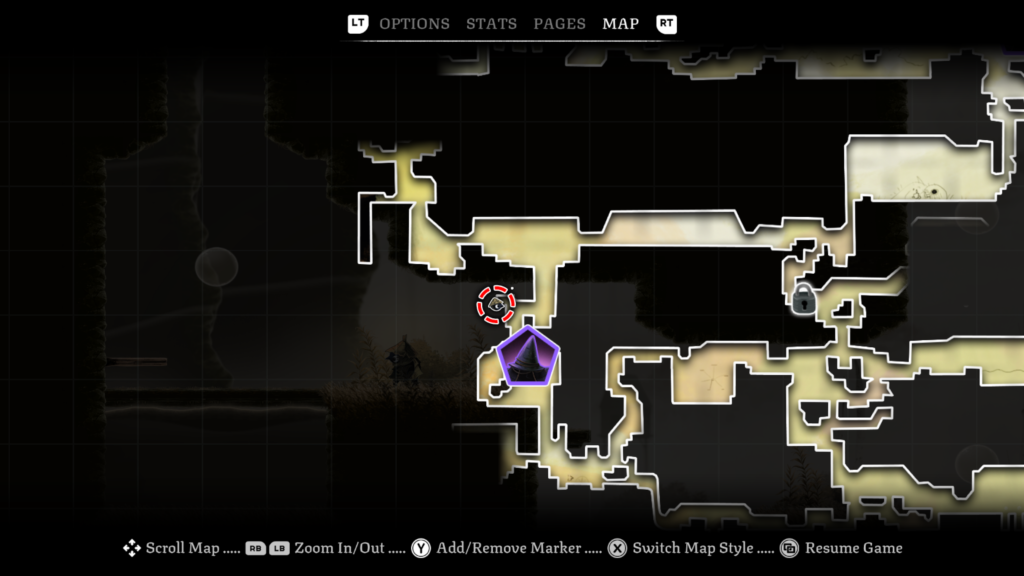
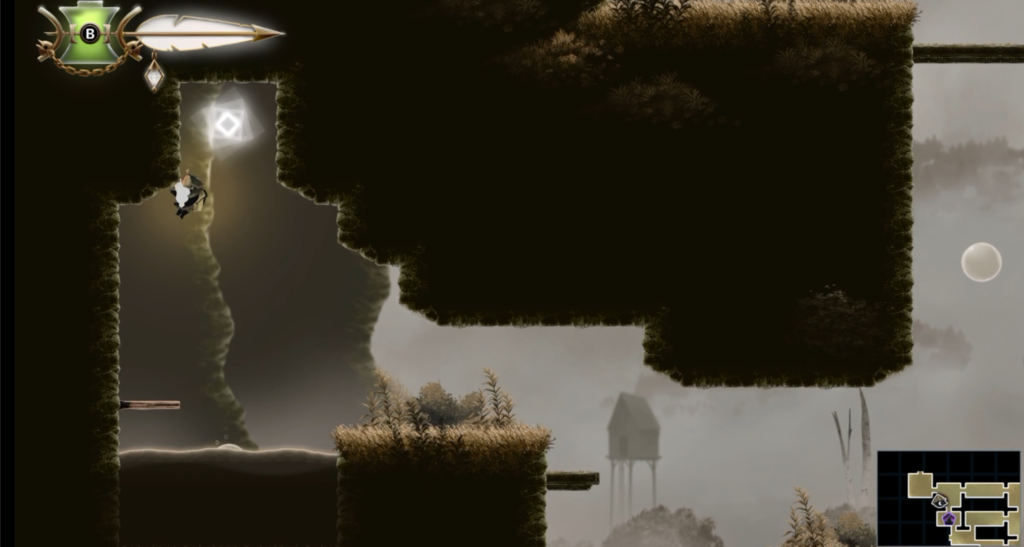
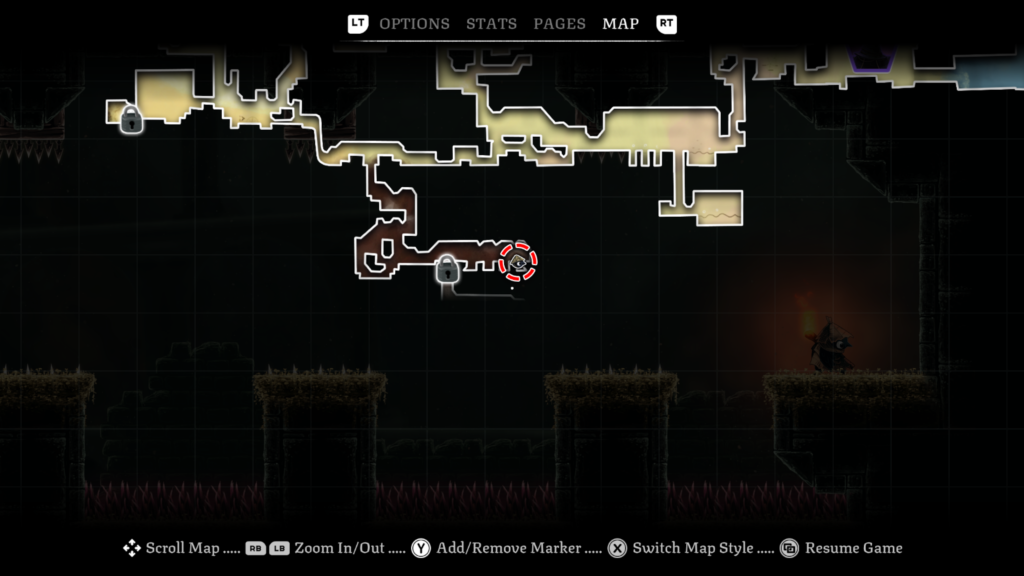
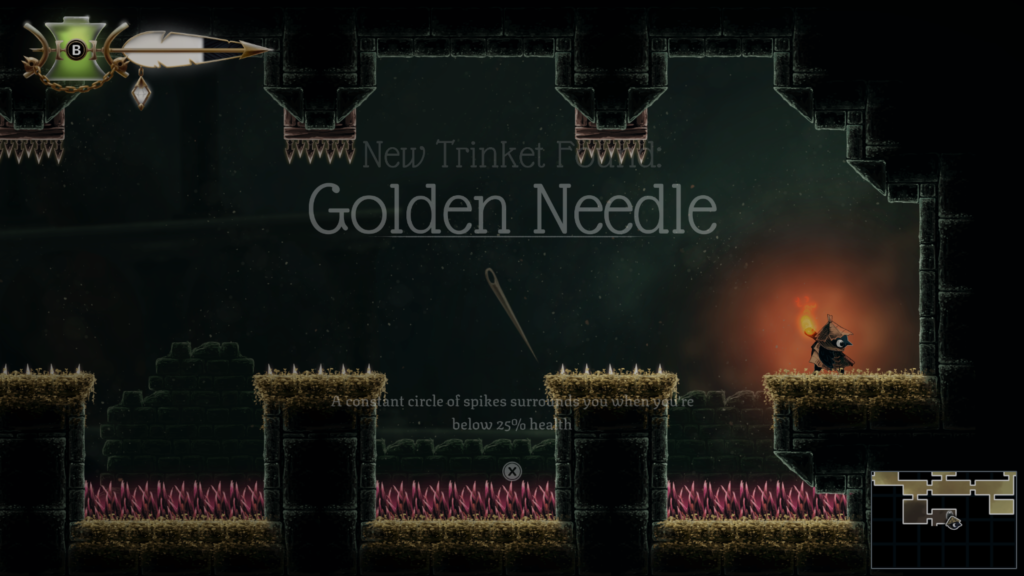
Trinket 4 / 32: Location – Burial Vault (dark brown colour on the map)
Trinket: Golden Needle – a constant circle of spikes surrounds you when you’re below 25% health
Abilities needed: None
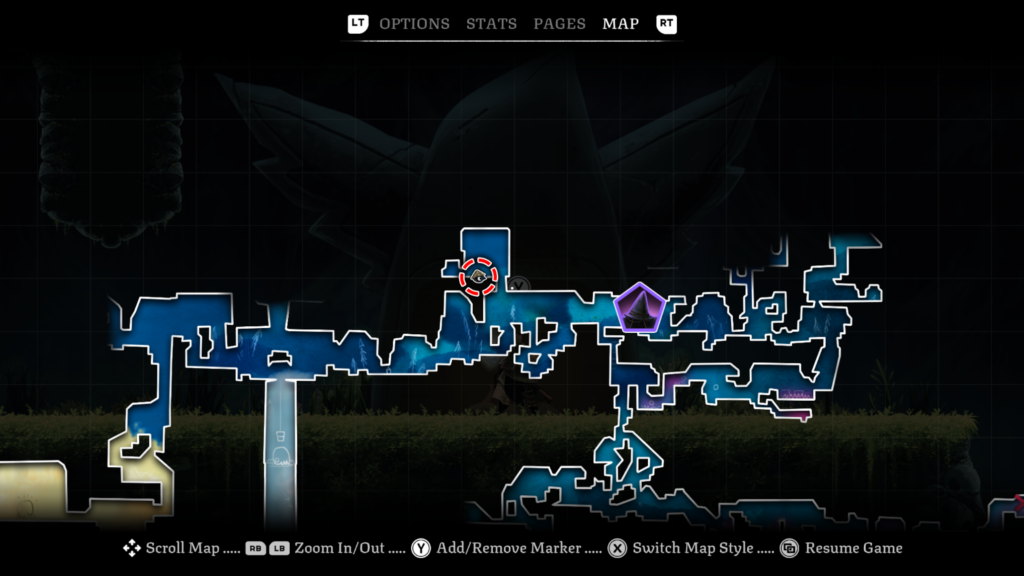
Trinket Slot 8 / 103: Location – Night Garden (mixed blue area on the map)
Abilities needed: Slingshot, Climb
You will need to use your matchstick to bounce over some obstacles. You’ll also need to dodge slide to get past some spiky hazards and maintain your speed.
You’ll be rewarded with a trinket slot for completing this time trial.
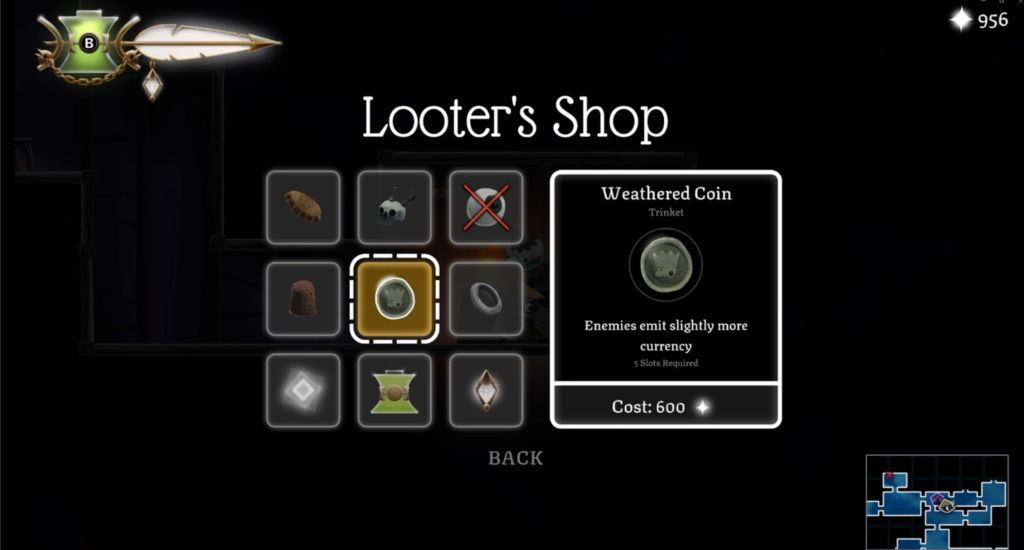
Trinket 5 / 32: Location – Looter’s Shop (Tent)
Trinket: Weathered Coin – enemies emit slightly more currency
Cost: 600
Trinket Slot 9 / 103: Location – Looter’s Shop (Tent)
Abilities needed: None
Bought from the shop.
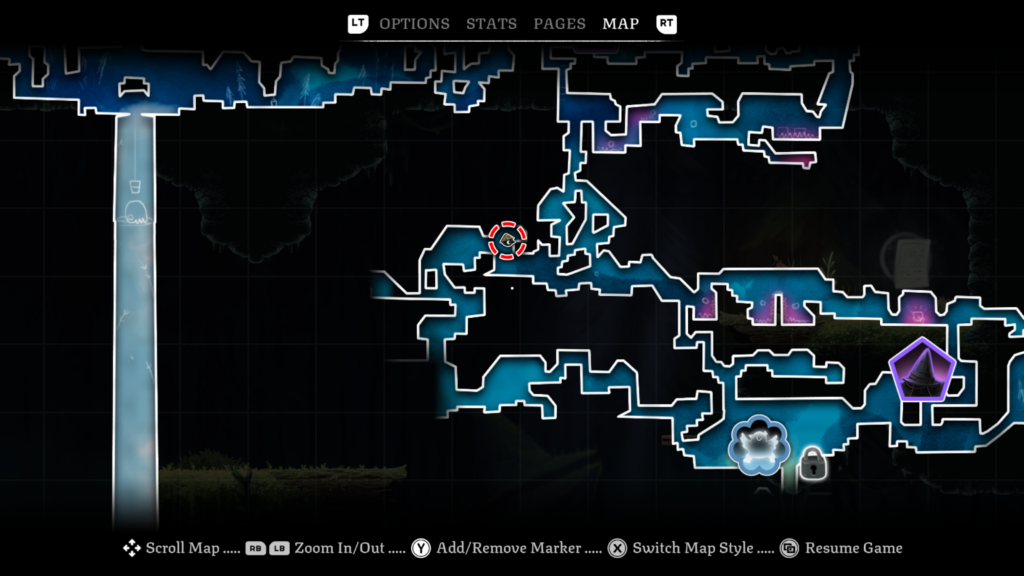
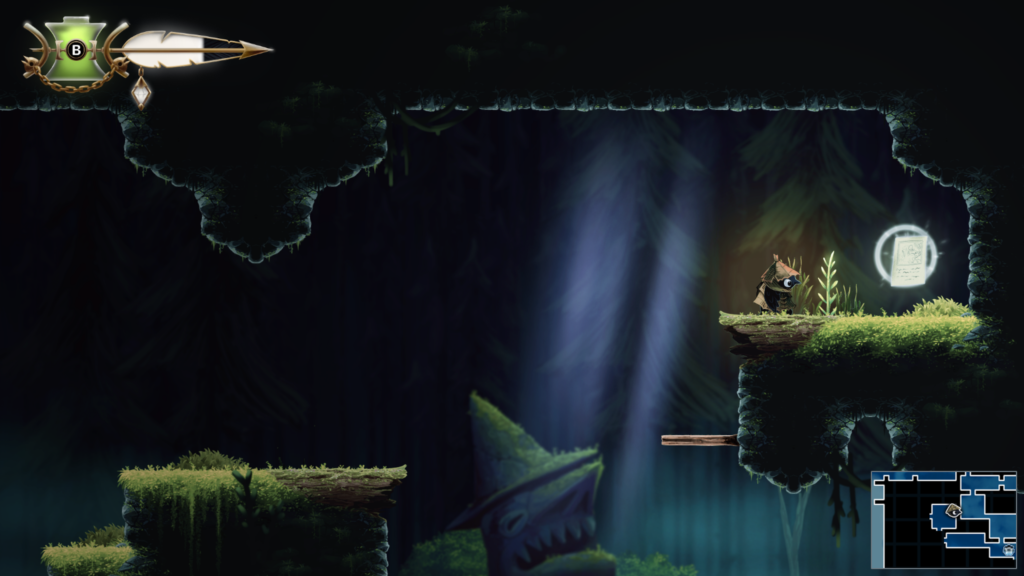
Story Page 4 / 23: Location – Night Garden (mixed blue colour on the map)
The Lookout Tower Story Page (1 / 6)
Abilities needed: Climb, Slingshot
Trinket 6 / 32: Location – Night Garden (mixed blue colour on the map)
Trinket: Bundle of Hair – slamming the ground creates a blast of embers.
Abilities needed: None
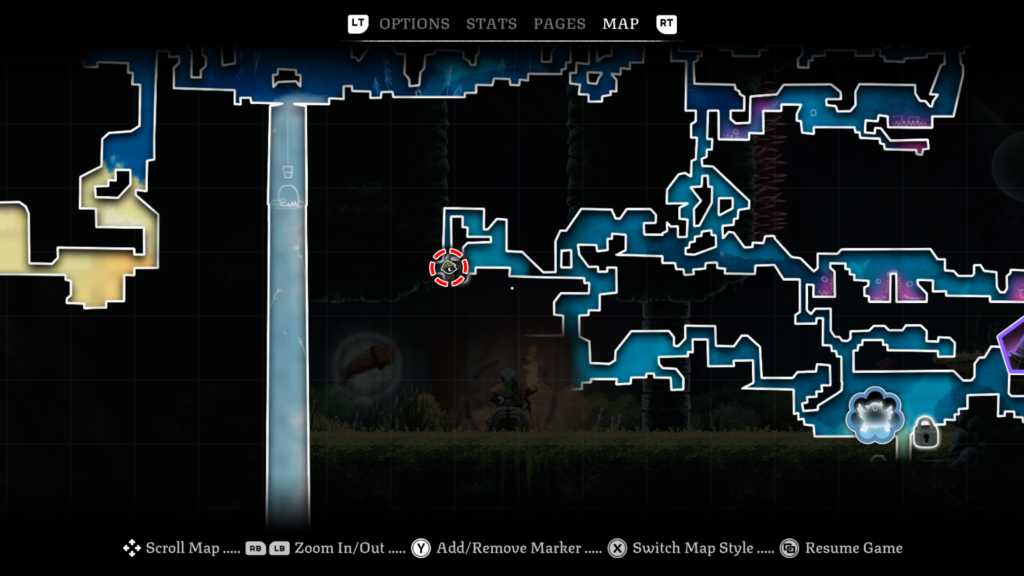
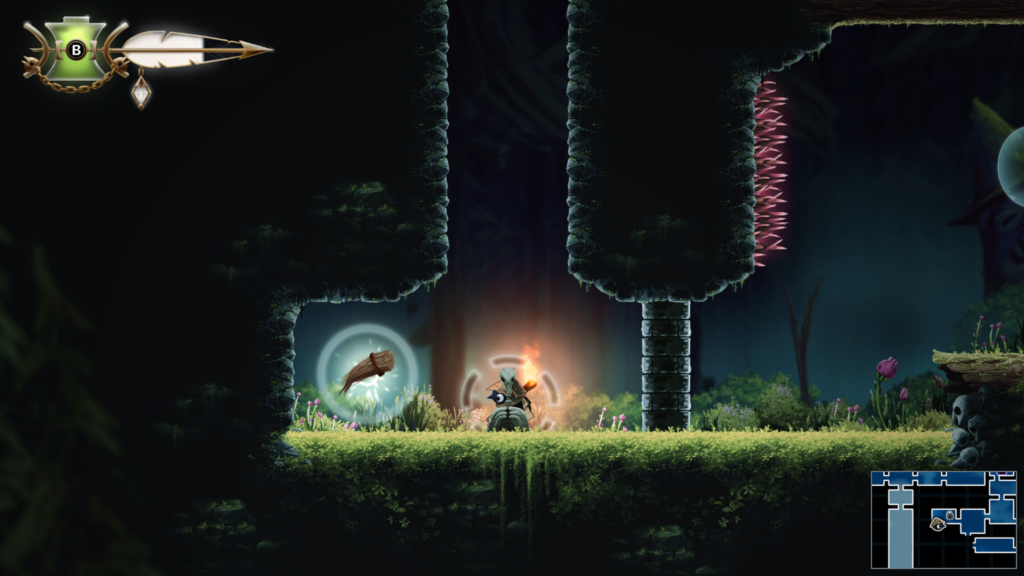
Spirit 2 / 20: Location – Night Garden (first area, mixed blue colour on the map)
Abilities needed: None
You will have to get through a combat challenge to reach the spirit.
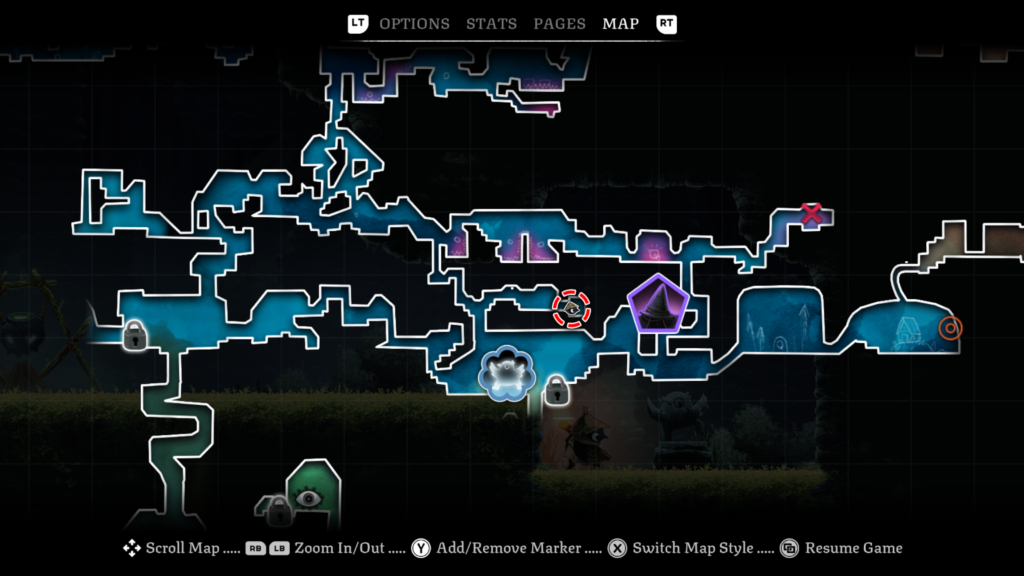
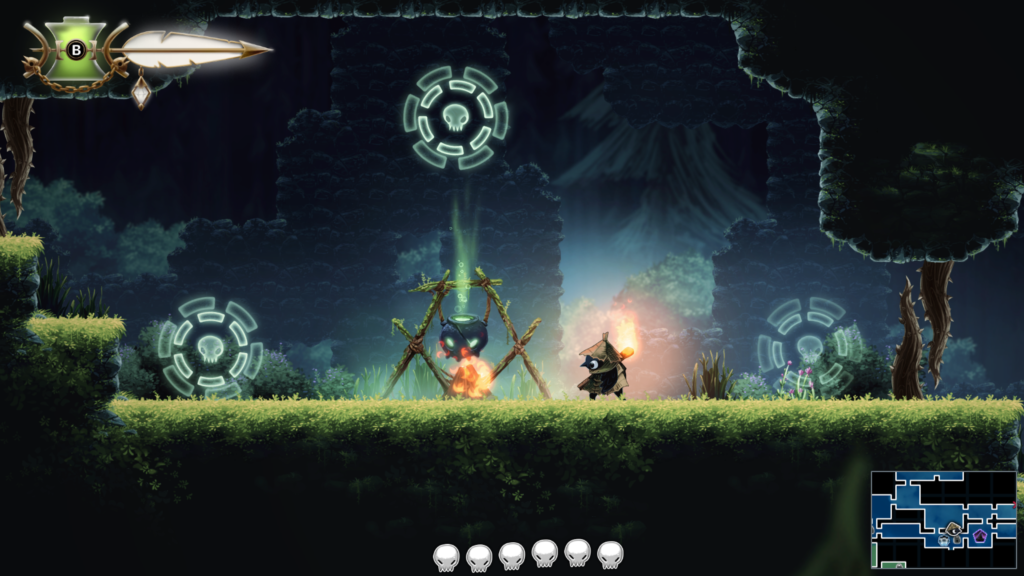
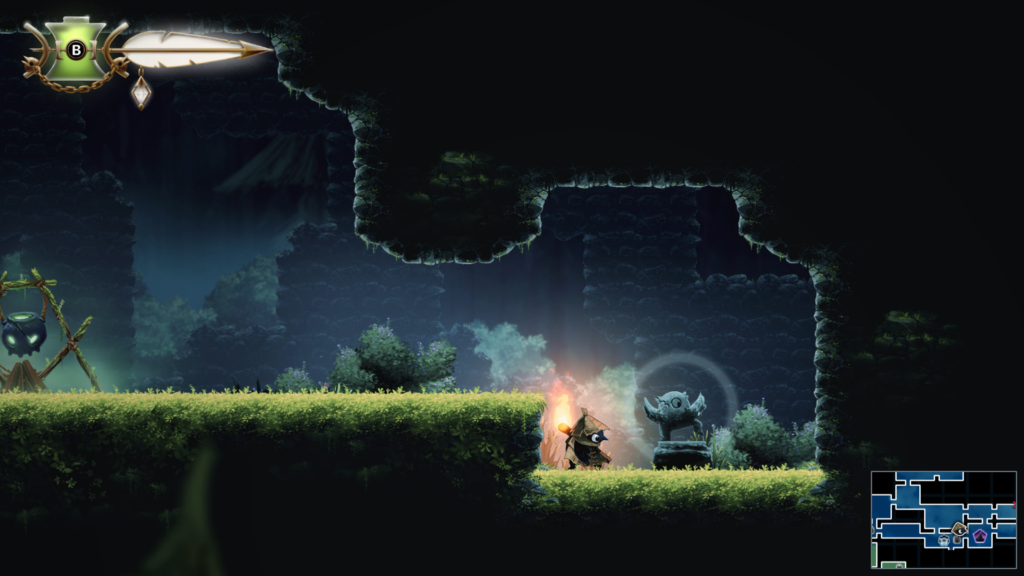
Trinket Slot 10 / 103: Location – Night Garden (mixed blue area on the map)
Abilities needed: None
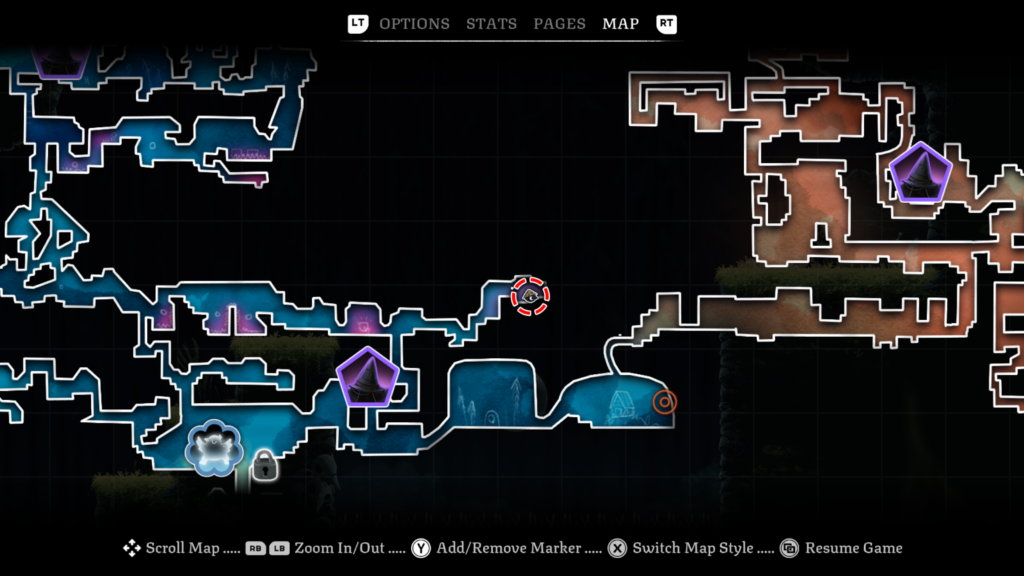
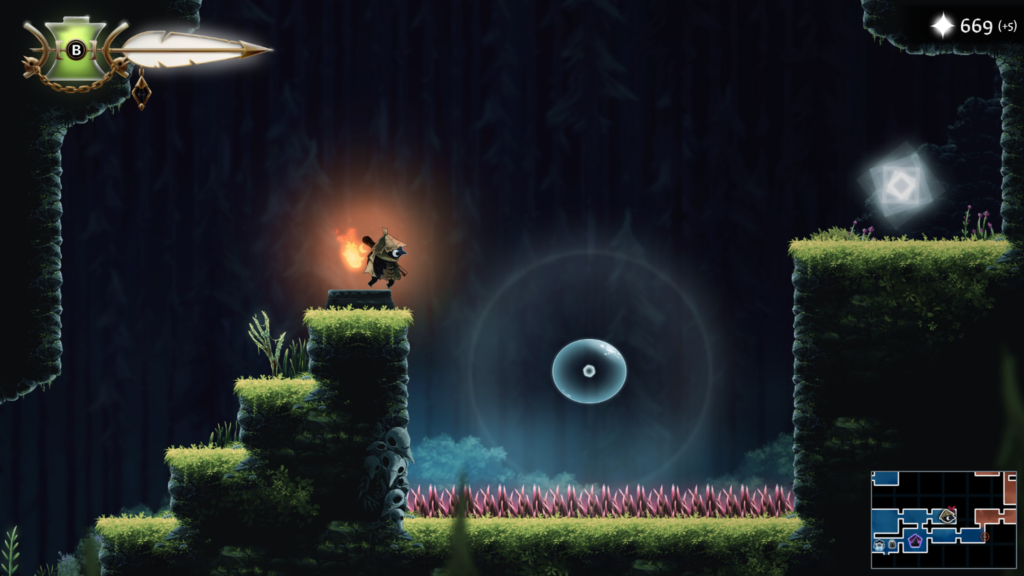
Trinket Slot 11 + 12 + 13 / 103: Location – Looter’s Shop (Tent)
Abilities needed: None
Bought from the shop.
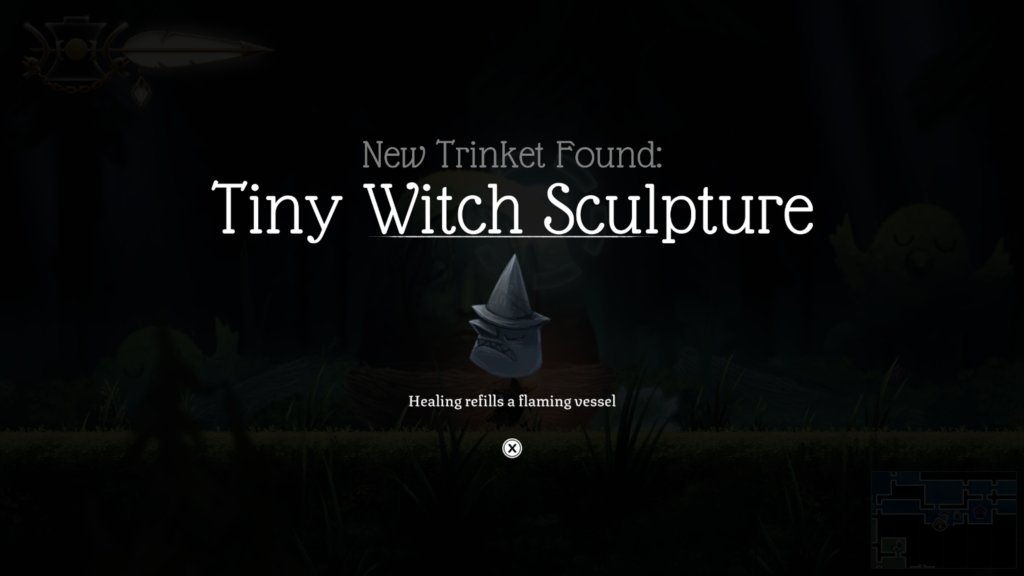
Trinket 7 / 32: Location – Night Garden (Spirit Return location)
Trinket: Tiny Witch Sculpture – healing refills a flaming vessel
Cost: Return 2 of the 20 spirit collectibles.
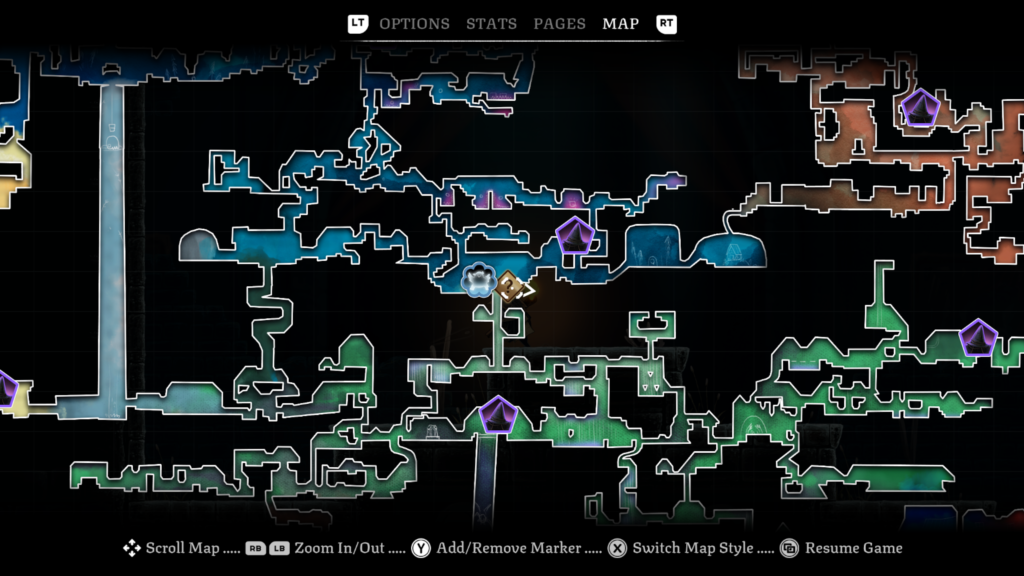
Trinket Slot 15 / 103: Location – Looter’s Shop (Tent)
Abilities needed: None
Bought from the shop.
Trinket Slot 16 / 103: Location – The Drains (green area on the map)
Abilities needed: Climb
The trinket is above in the gap in the picture.
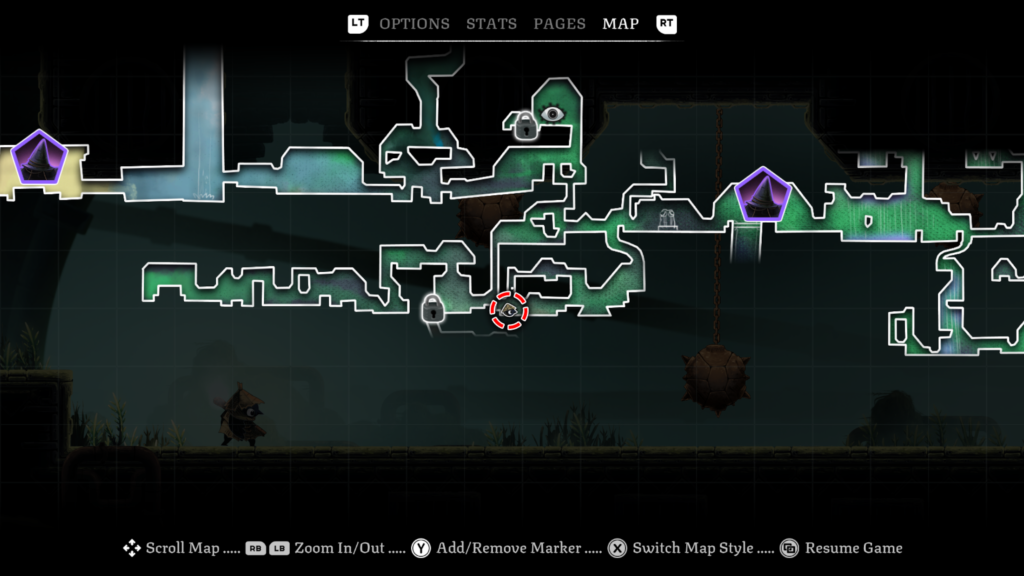
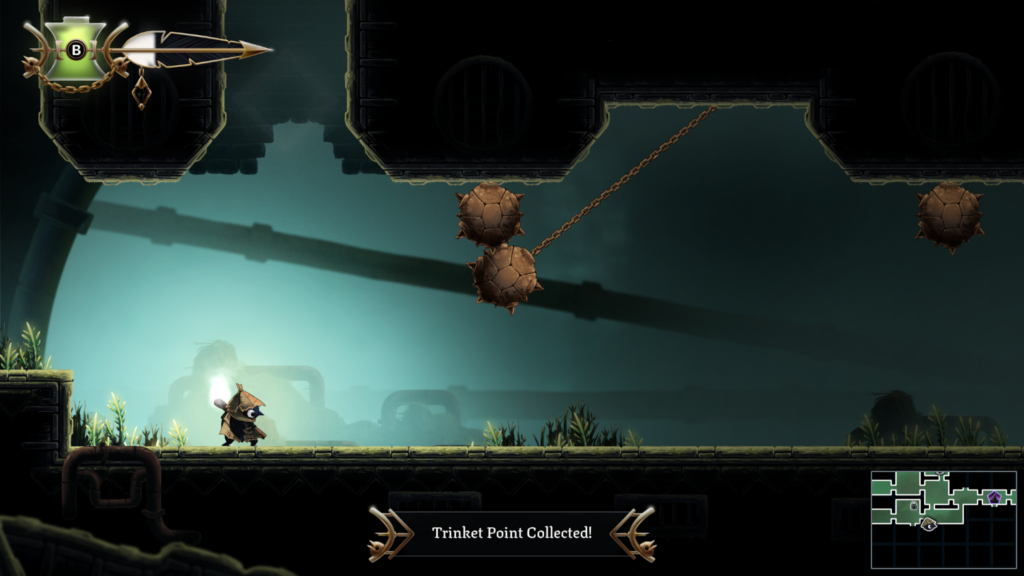
Ability: Wind Ride – Location – The Drains (green area on the map)
Unlock the “Taking a Break” Achievement / Trophy
To unlock the “Taking a Break” achievement / trophy, you will need to “Visit the Spa”.
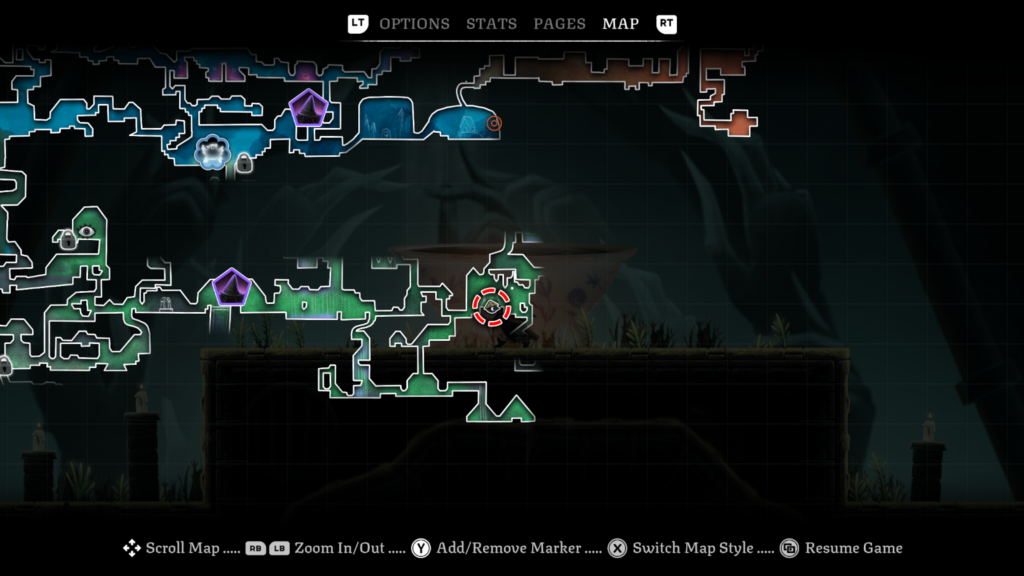
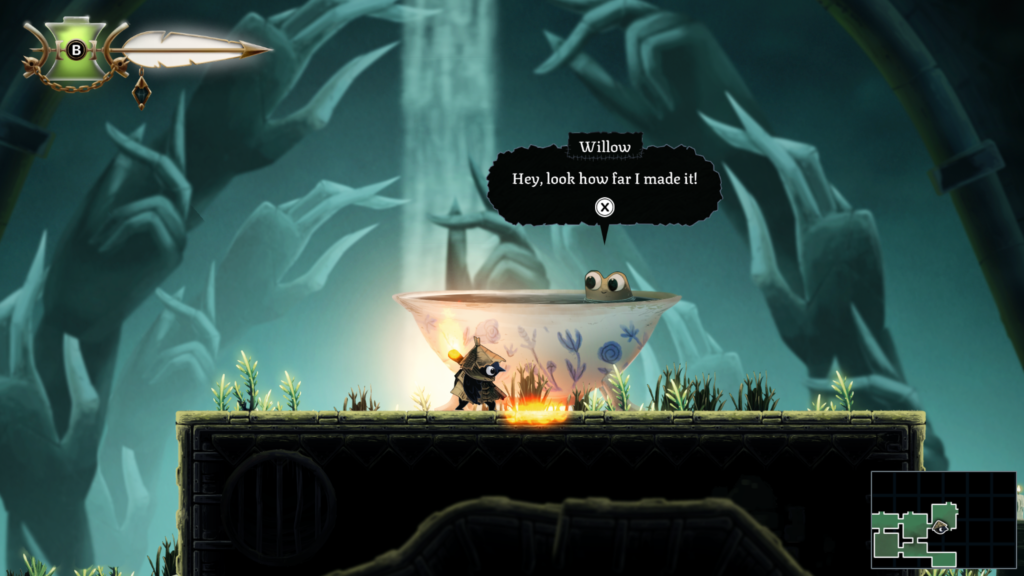
To do this, you will need to interact with the frog, Willow, several times which will lead you to the Spa.
You can watch a video guide below, or you can read on for a text and images guide.
Wind Ride Ability
To reach Willow, you’ll need to have the Wind Ride ability.
From the tent, next to the broken elevator, head to the right. Make your way across the windy spike area in the next room to the other side. You’ll see some platforms leading down before you exit the room on the right. Drop down those platforms into the room below.
Make your way down, avoiding the spikes, until you reach the bottom and head right. You’ll enter a battle area, where you need to defeat four enemies to progress. After defeating them, carry on right into the next room. You’ll need to drop down again and then head right to find the nest with the ability egg in it.
Complete the ability area, where you acquire the Wind Ride ability, then you can start exploring.
Take a Bath with Willow (The Drains)
Return back the way you came from getting the Wind Ride ability, until you’re on the same level as the tent. You’ll enter on the right side of the room with the wind and spikes by jumping up two platforms. Head right to the next room.
Wind ride up and to the right and then head down. Yoou can either go to the left and down, and to the right and up. Head to the right and up to enter the next room and find Willow bathing.
Elevator Part: 1 / 3 – The Drains (green colour on the map)
The order these elevator parts are not necessarily the most efficient order to find them, just the order I found them.
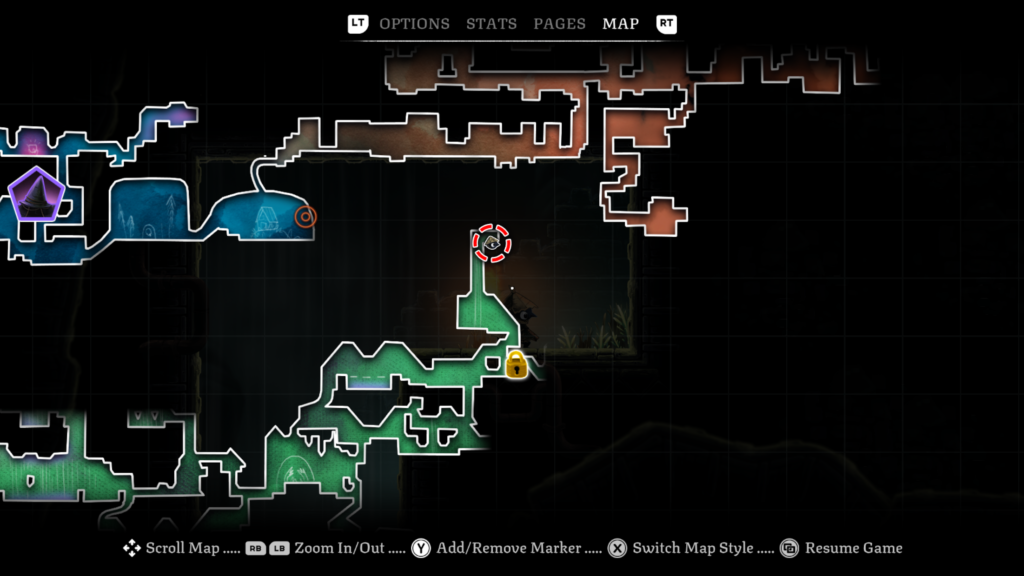
The first part is in the top right of the The Drains. Upwards from the room with the gold key gate. If you head up from the gate, you’ll spot a windy area that you can use your new ability on. It’ll take you into a new room above. Head to the top to find the first elevator part.
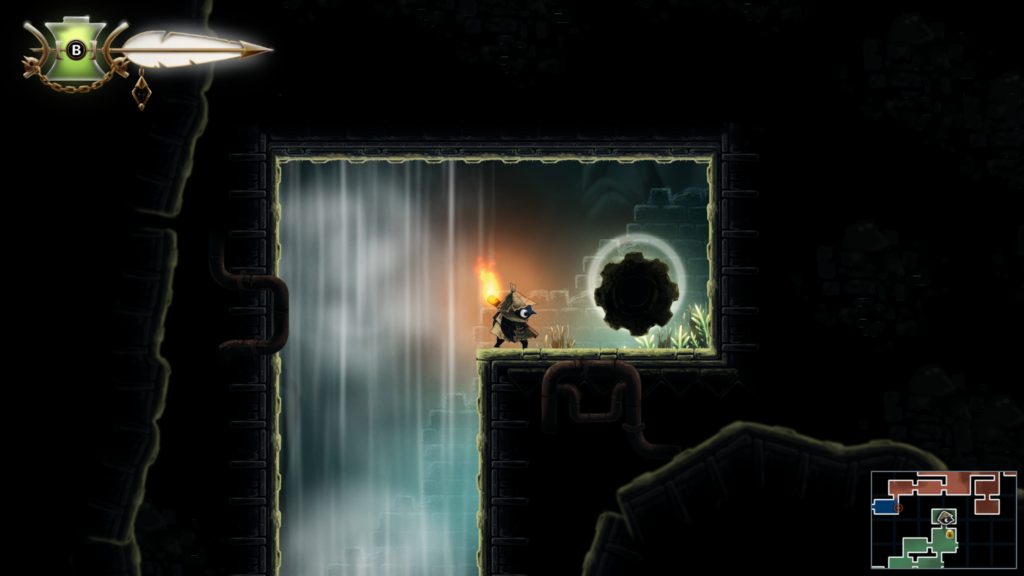
Trinket 8 / 32: Location – The Drains (green colour on the map)
Trinket: Melted Candle – makes you invincible for 2 seconds after you heal.
Abilities needed: Wind Ride
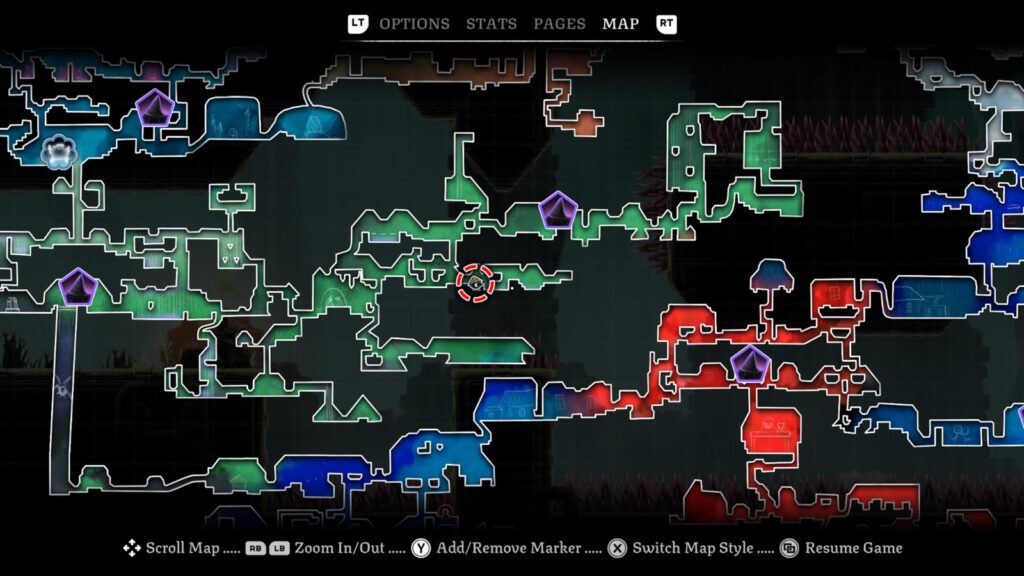
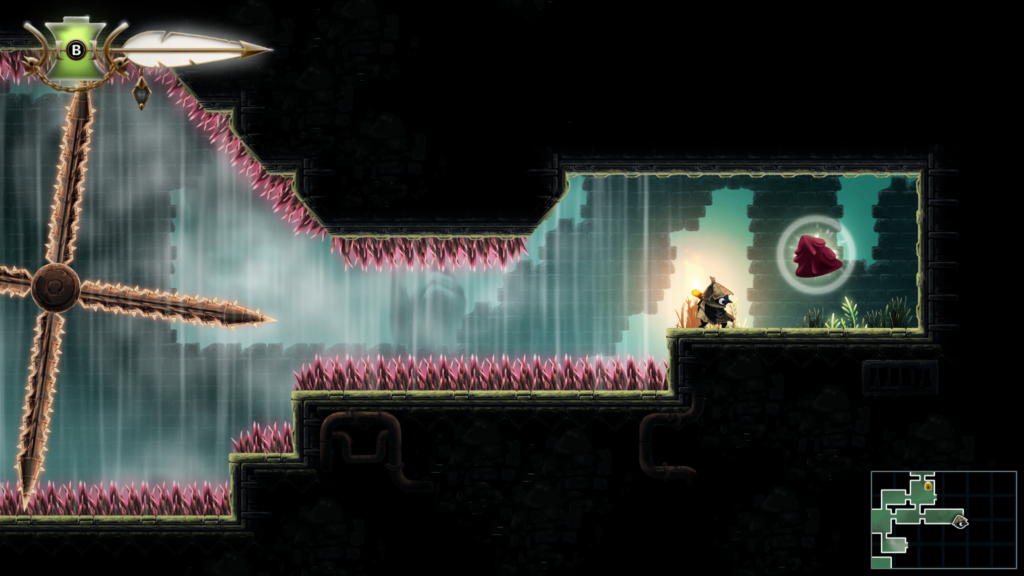
Elevator Part: 2 / 3 – The Drains (green colour on the map)
The second part is to the bottom left of The Drains area. The location is underneath The Bog area (pale yellow on the map), and the . You’ll enter a room where you need to head left over lots of windy zones and spikes. There is also a bubble that you use to propel yourself forward in a bubble.
Once you get to the left side, you’ll enter the next room where the elevator part is in. Throw your matchstick into the wall and use the jump to get to it.
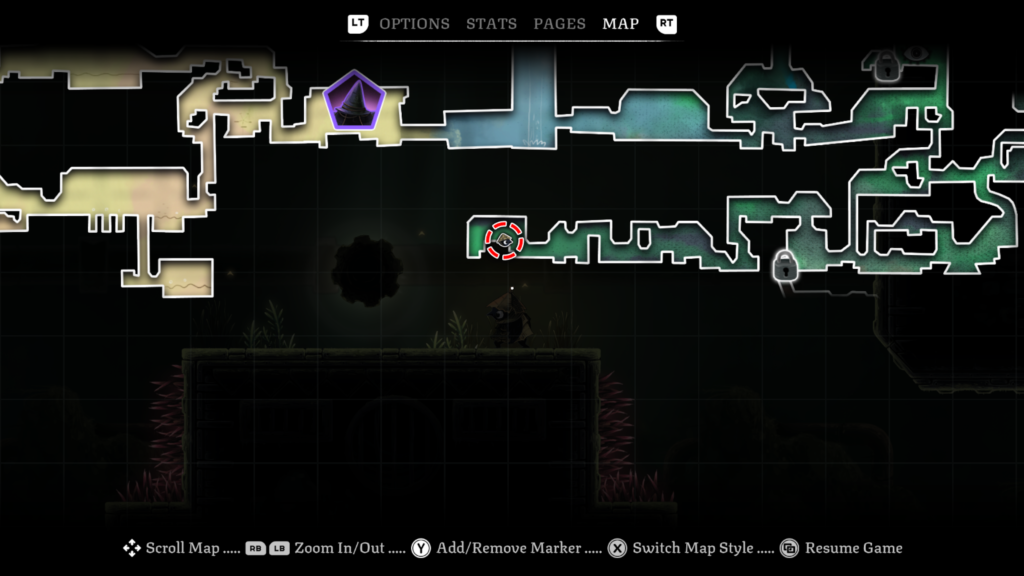
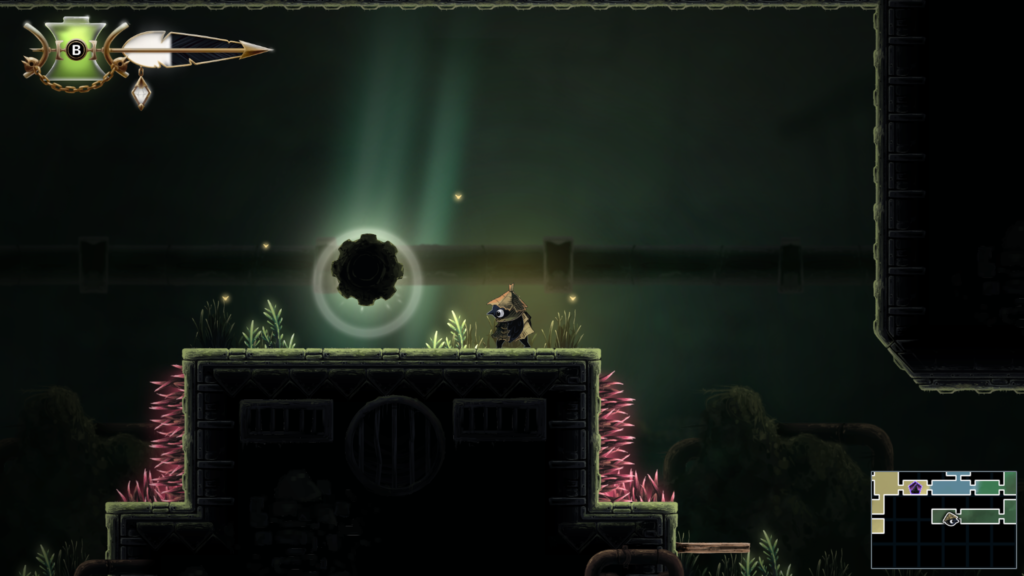
Trinket Slot 17 / 102: Location – The Drains (green area on the map)
Abilities needed: Wind Ride
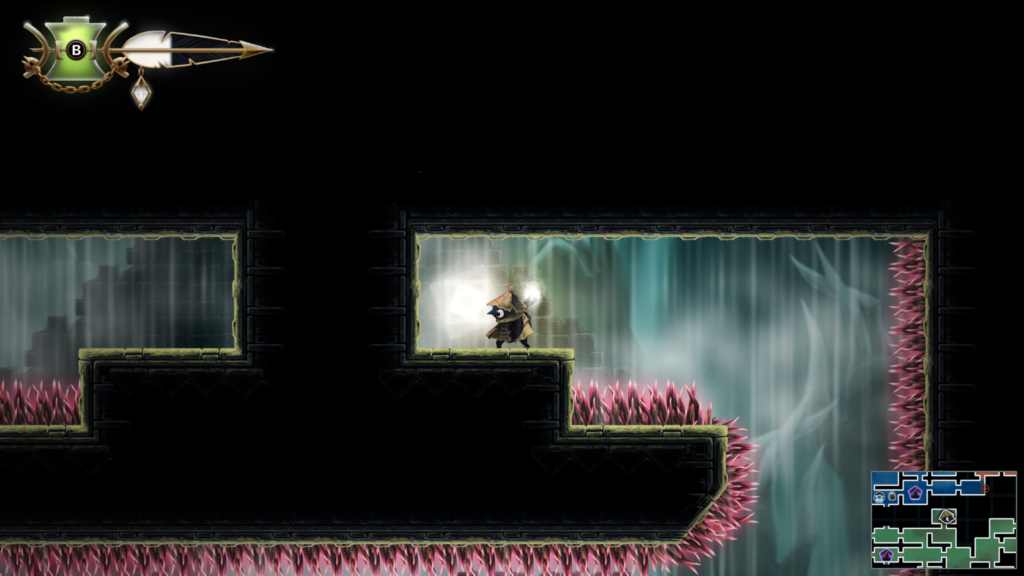
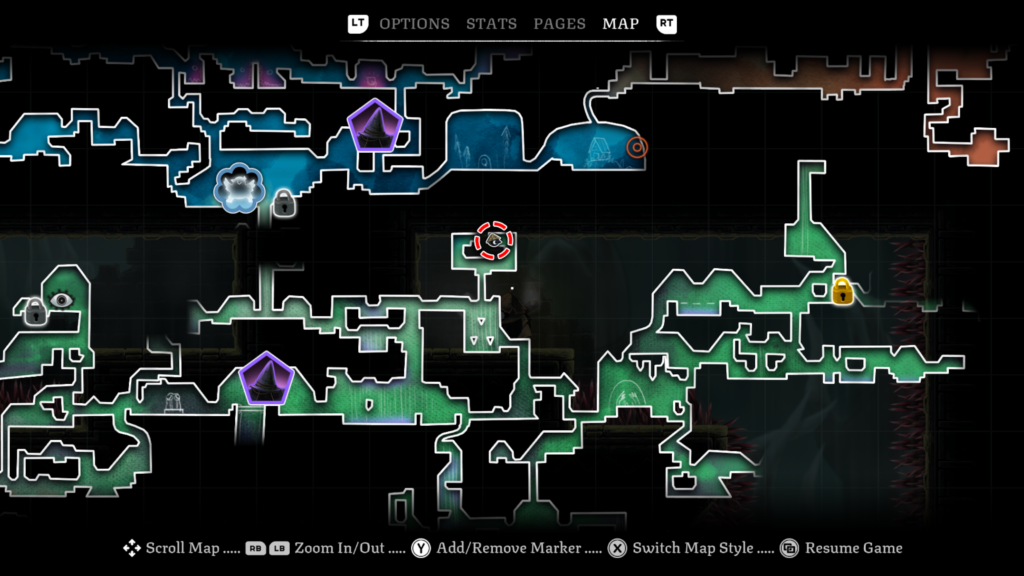
Spirit 3 / 20: Location – The Drains (green area on the map)
Abilities needed: Wind Ride
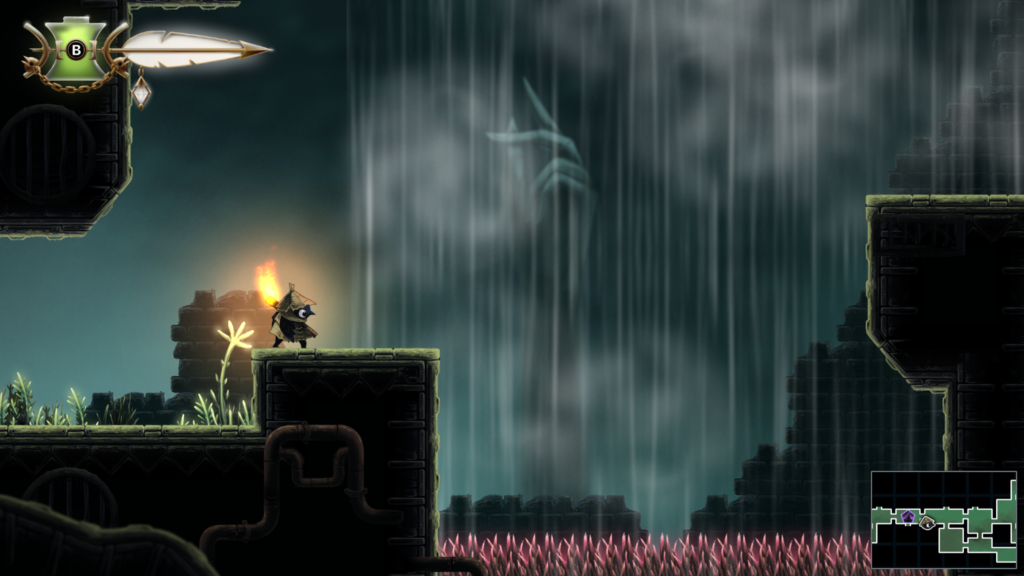
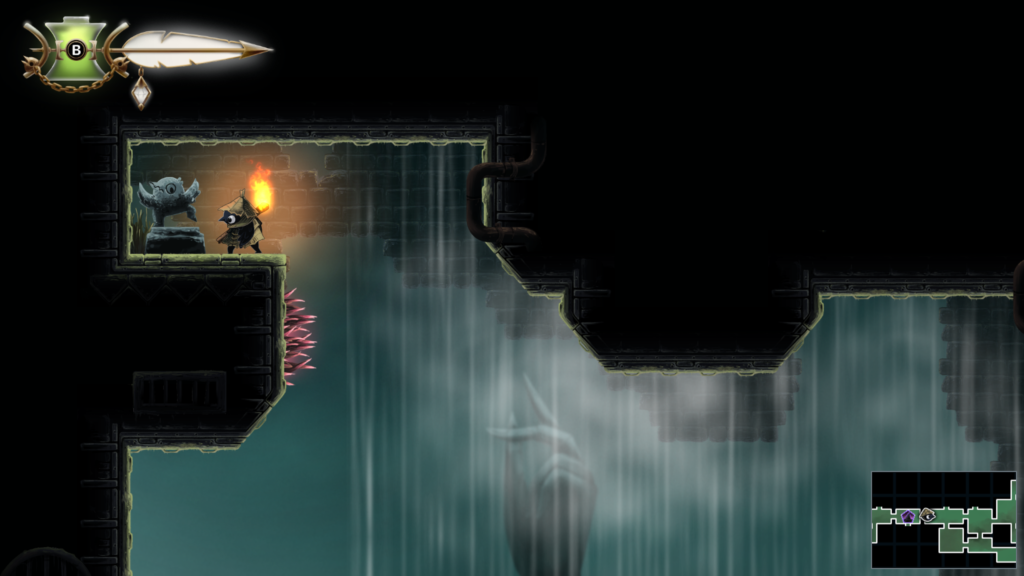
Right from the tent on the map. Wind Ride up and the spirit is on a ledge at the top of the room.
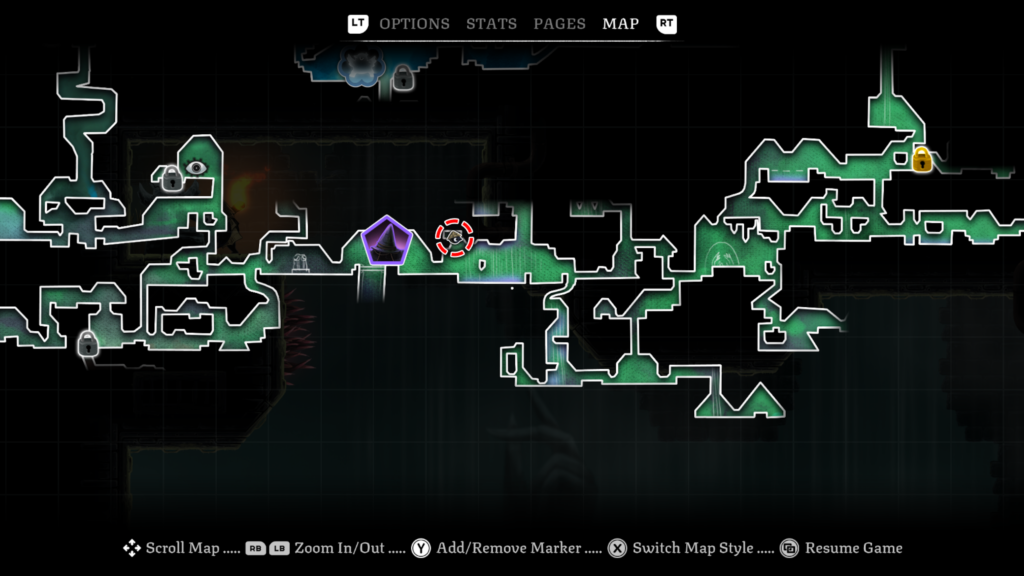
Trinket Slot 18 / 102: Location – Night Garden (mixed blue area on the map)
Abilities needed: None
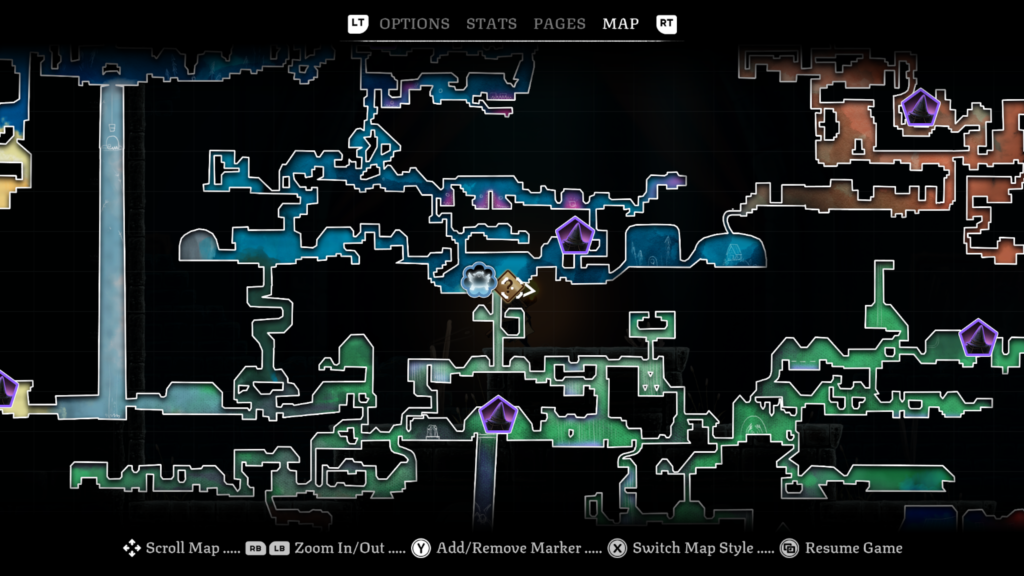
Awarded for returning a spirit. I’d collected three spirits by this point.
Elevator Part: 3 / 3 – The Drains (green colour on the map)
The final elevator part is located directly beneath the location where you return spirits in the Night Garden zone (blue area on the map – the first area you play). To access it you need to head to the room that is directly above the tent location that is next to the broken elevator.
You’ll enter the room and have to jump a pipe to access the next floor. There’s a wind tunnel that you can ride upwards that you need to go up. There are candles on either side of the wind tunnel. Head upwards and on your right as you go up (in the next room) is the final elevator part.
I would recommend going all the way up into the room above to unlock the switch to the above in the Night Garden.
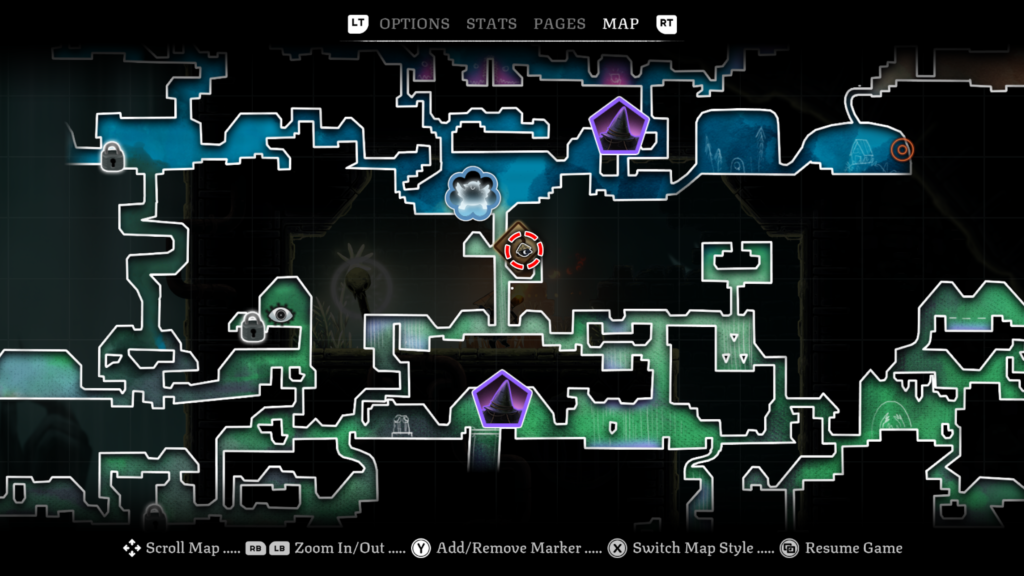
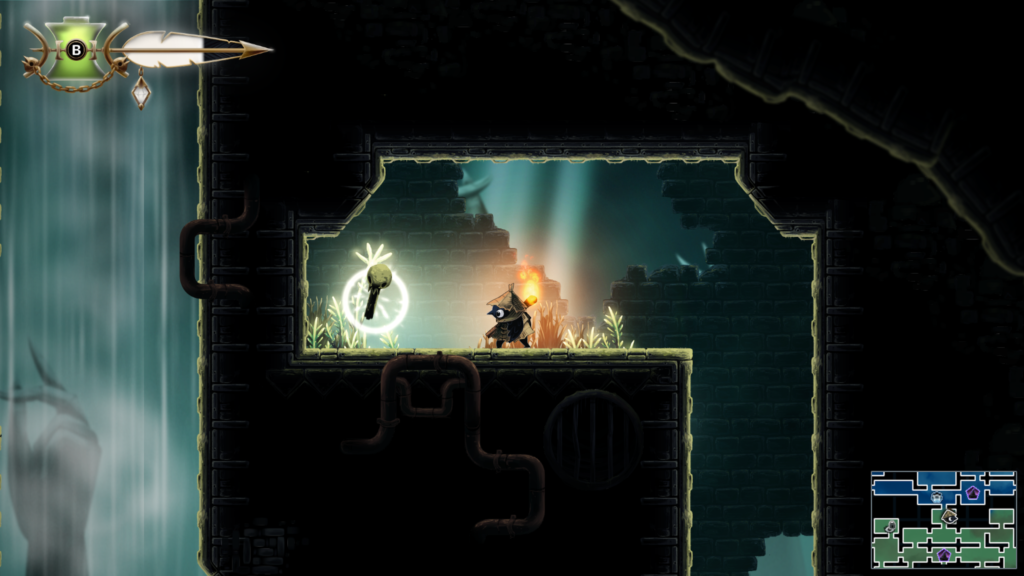
Once you have collected all three parts, the map will highlight the location of the elevator for you to progress. This is where you need to head, when you are ready, to take on the area’s boss!
The Lady of the Drains Boss Guide
The Lady of the Drains boss is located in The Drains area (green section on the map) and can be accessed after you have found the three elevator parts. The elevator to access the boss fight is directly to the left of the tent in the centre of the level.
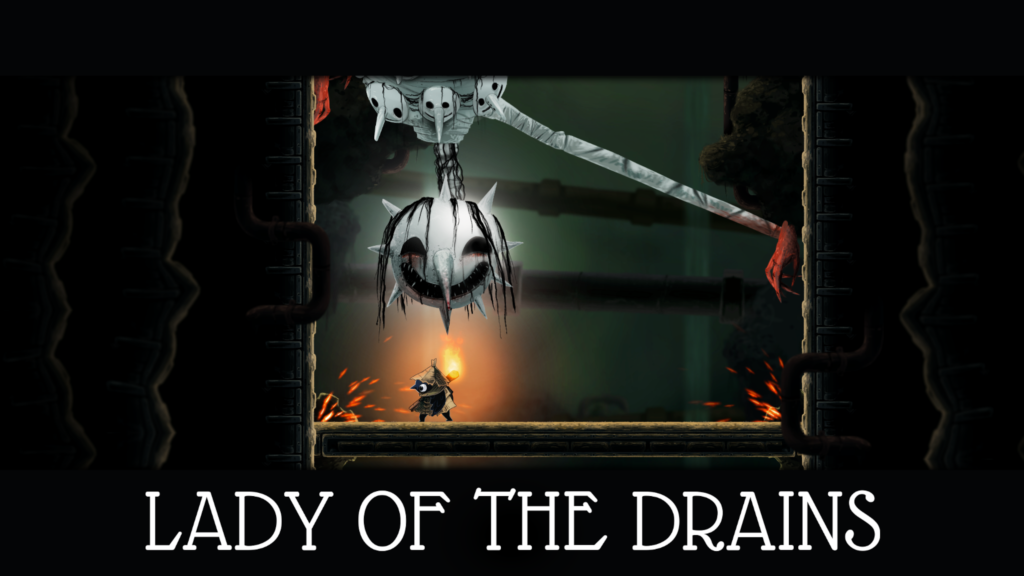
The Lady of the Drains boss fight takes place on the elevator as it continues to head down. She will appear above you and you will need to aim up or attack midair.
She has a number of attacks that will stop you being able to safely reach her, such as throwing spike balls at you, or surrounding herself with spinning spikes. Take your time and wait for an opening.
She will occasionally spawn an enemy, I recommend prioritising taking out said enemy when it appears, as it uses a ground-pound shockwave style attack that travels on the floor towards you. It’s just a bit distracting and inconvenient.
At certain points, the Lady of the Drains will disappear and the elevator platform will go up (or rather the screen will), as spike balls appear below that you have to dodge. use your dodge slide, and just remember it has a cool down. The boss will not appear during these sections, so just focus on dodging.
You can watch a video of the boss fight below:
Defeating the Lady of the Drains will net you the “Down the Drains” achievement / trophy.
Spirit 4 / 20: Location – Midnight Drench (dark blue area on the map)
Abilities needed: None
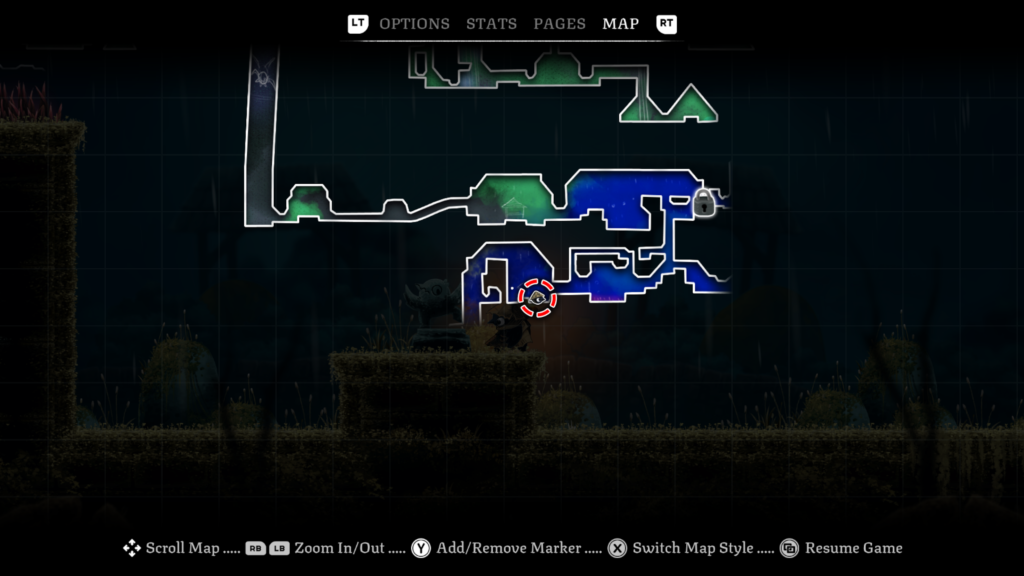
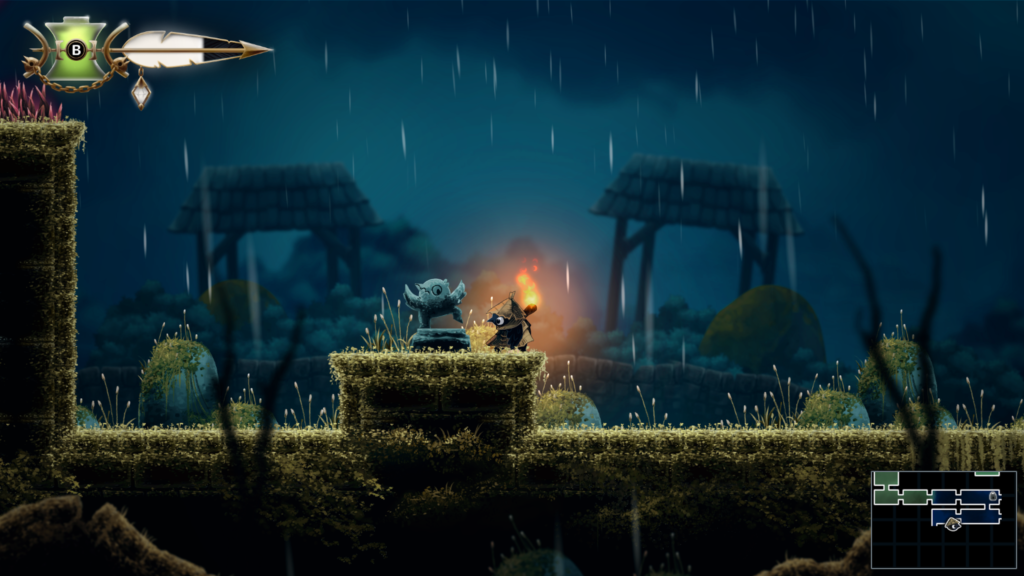
Trinket Slot 19 / 102: Location – Midnight Drench (dark blue area on the map)
Abilities needed: Slingshot
Bounce on the bubbles to get higher, they’ll guide you where to go.
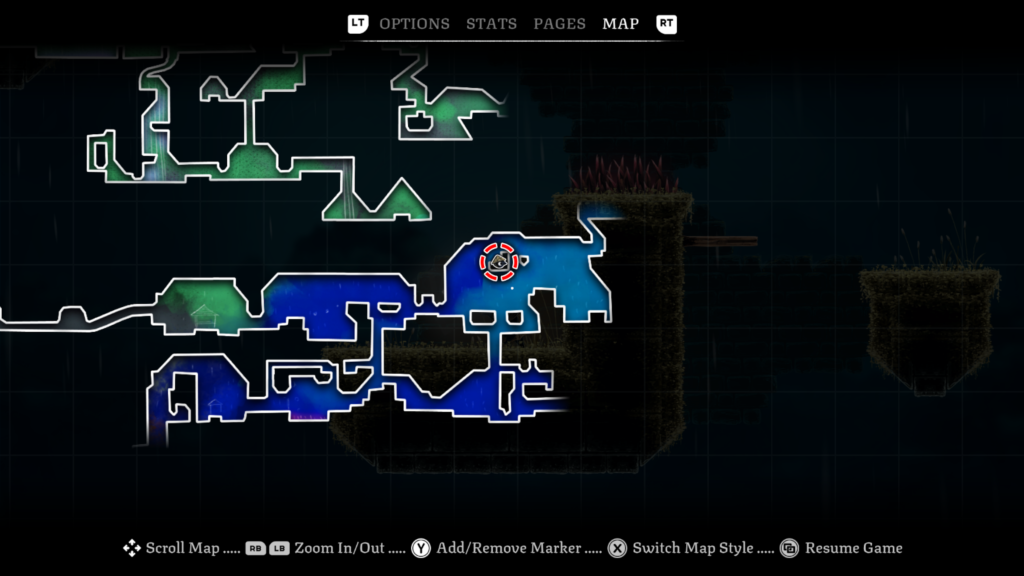
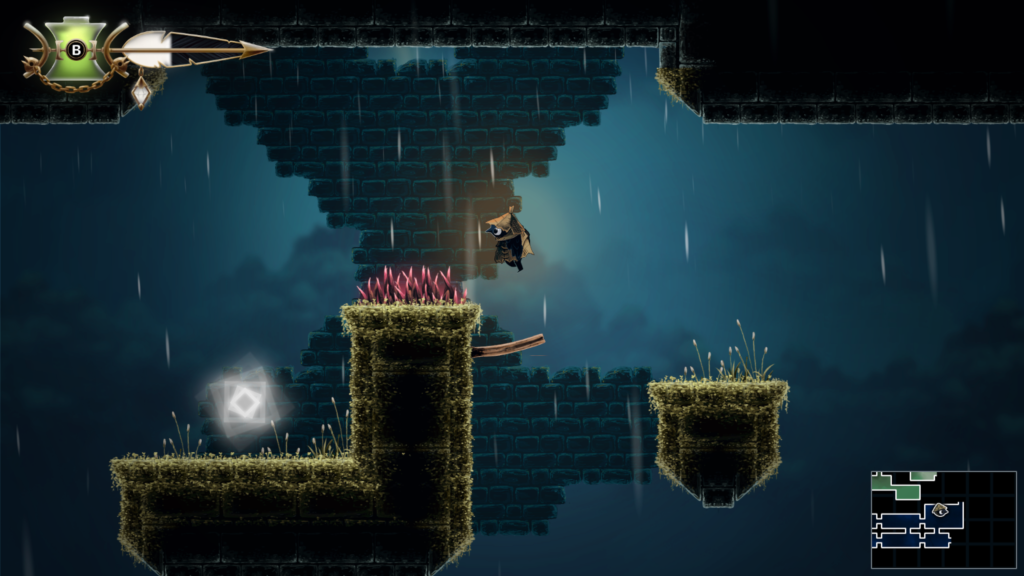
Workshop Token 1 / 27: Location – Tent (after defeating the Lady of the Drains boss)
Abilities needed: None
You will receive your first token from Willow who arrives in your tent (look for the red exclamation mark against the “Enter Tent” option.
You will unlock the “In the Workshop” achievement once you upgrade a trinket for the first time.
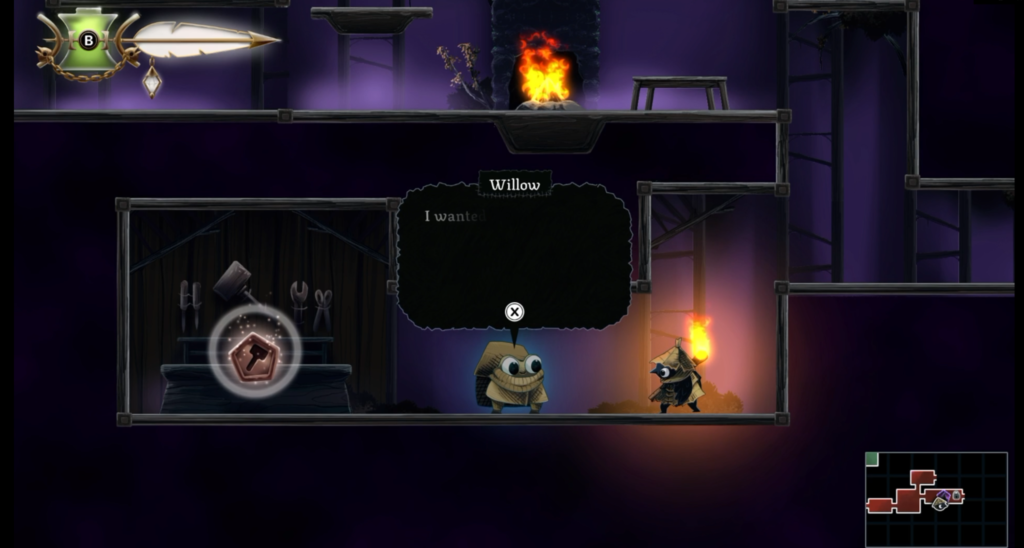
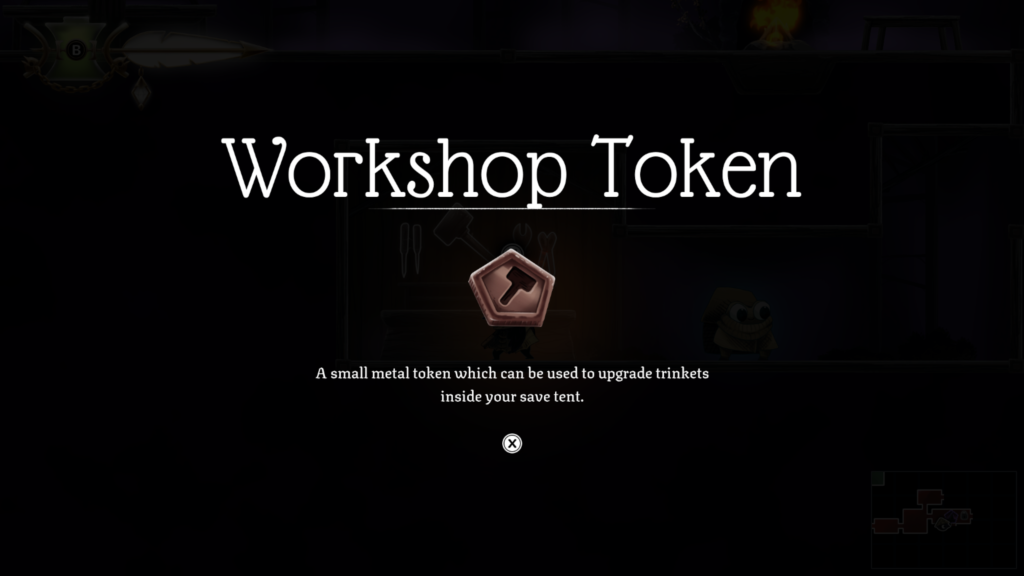
Story Page 5 / 23: Location – Dessicated Castle (red colour on the map)
The Witch’s Bargain Story Page (2 / 9)
Abilities needed: Climb, Slingshot
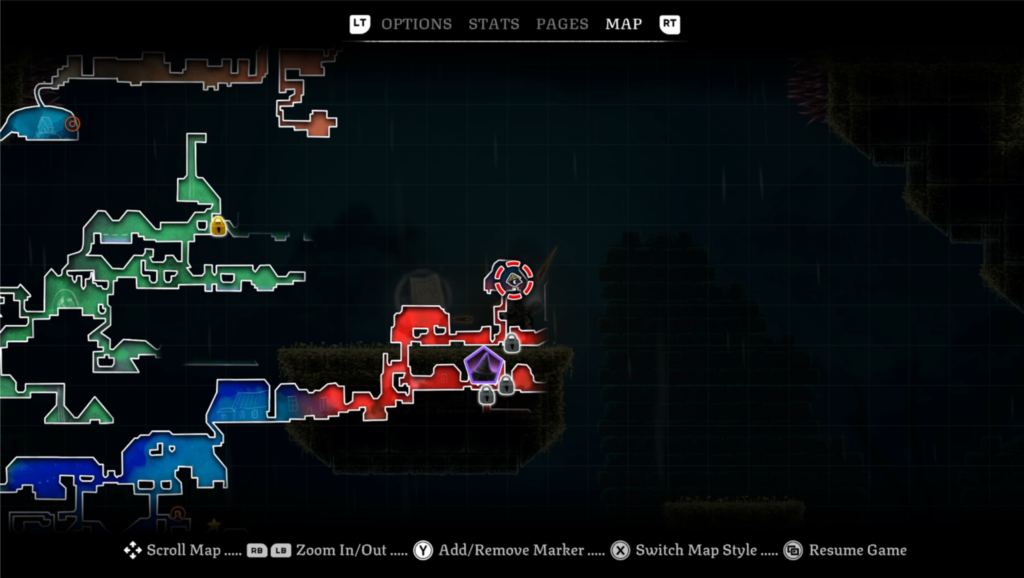
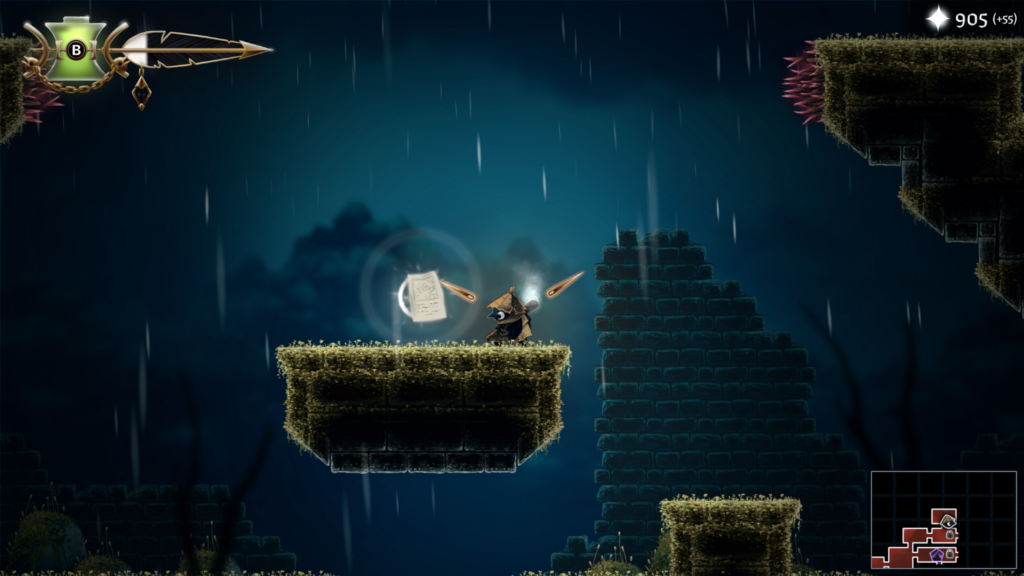
Workshop Token 2 / 27: Location – Hunter’s Cabin (orange colour on the map)
Abilities needed: Climb
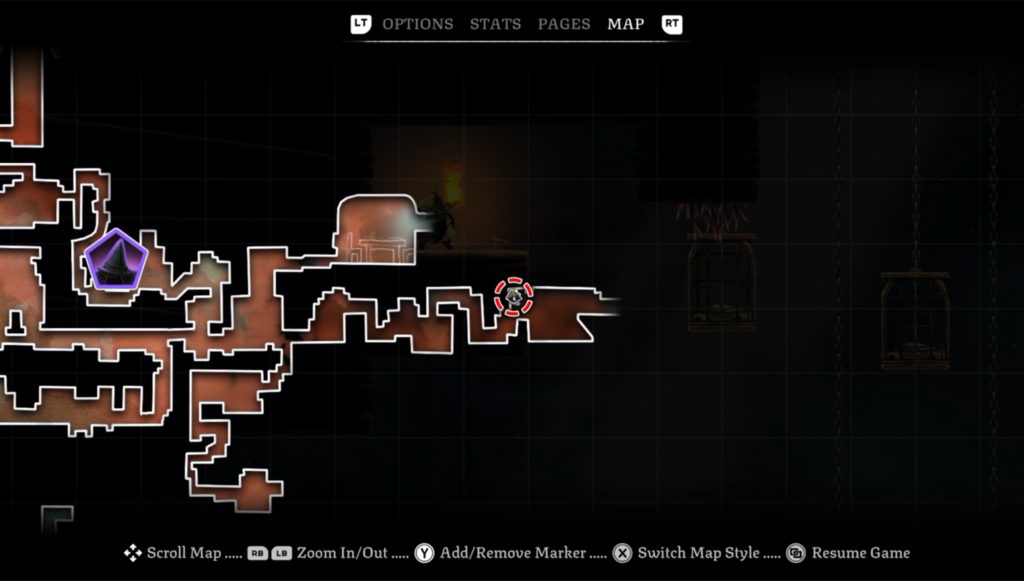
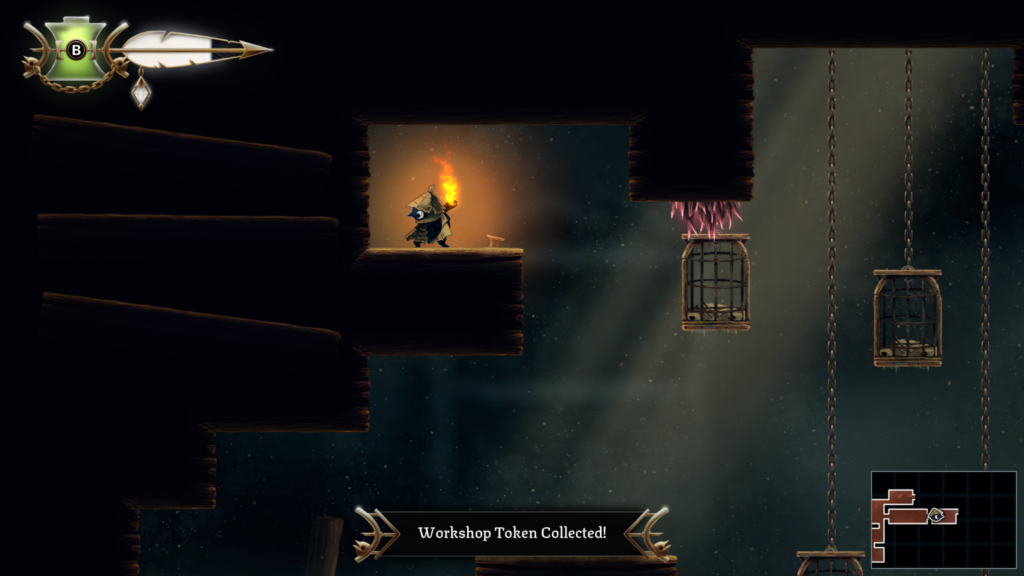
Trinket 9 / 32: Location – Graven Valley (grey colour on the map)
Trinket: Broken Bell – refills your vessel when a flaming vessel misses a target.
Abilities needed: None
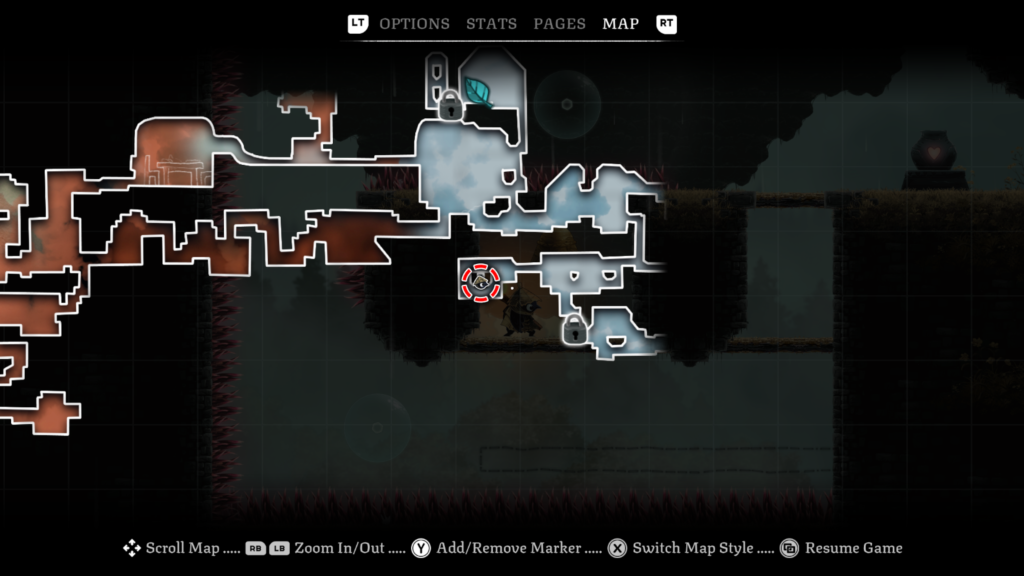
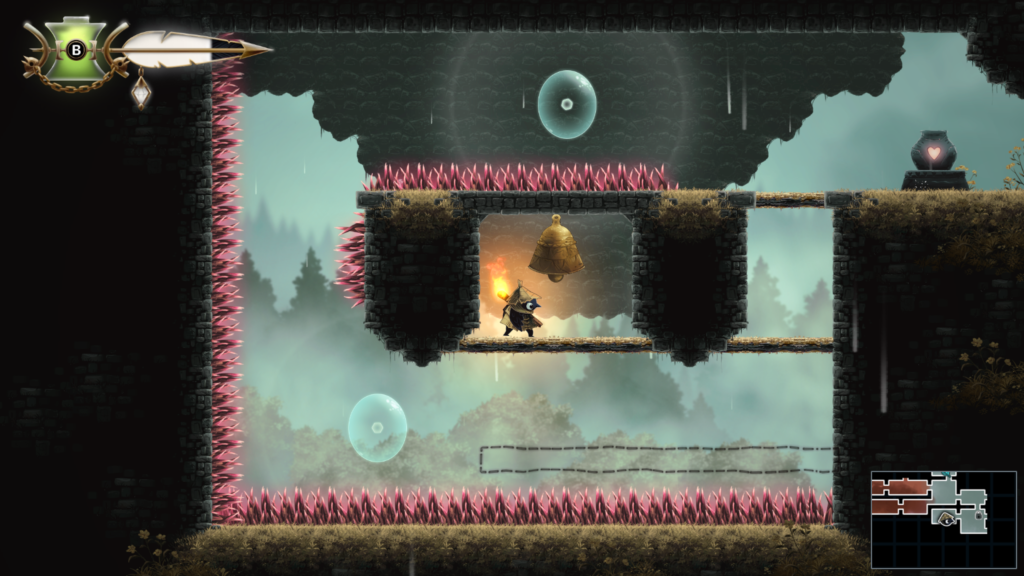
Trinket Slot 20 / 103: Location – Graven Valley (grey area on the map)
Abilities needed: Slingshot, Climb
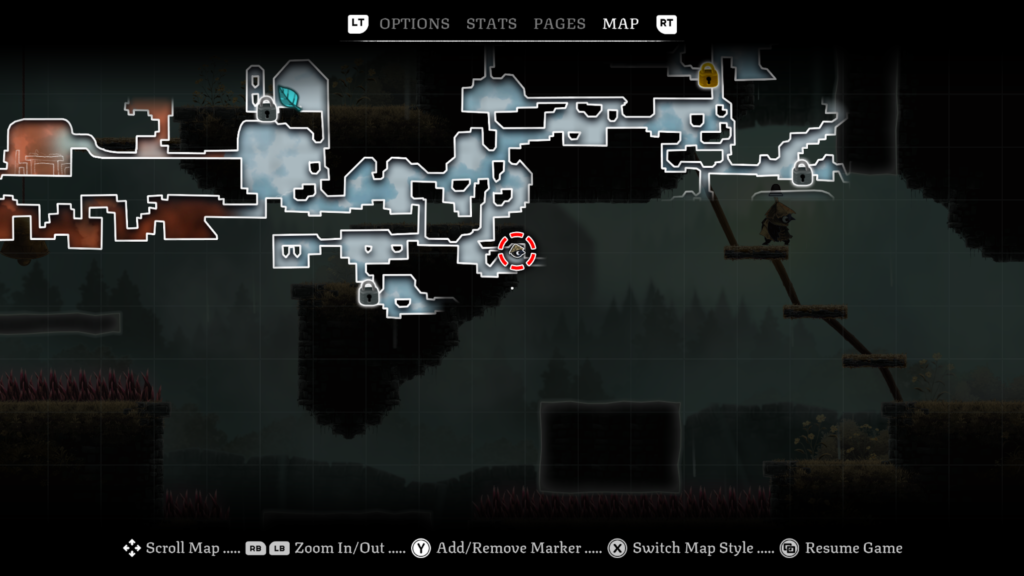
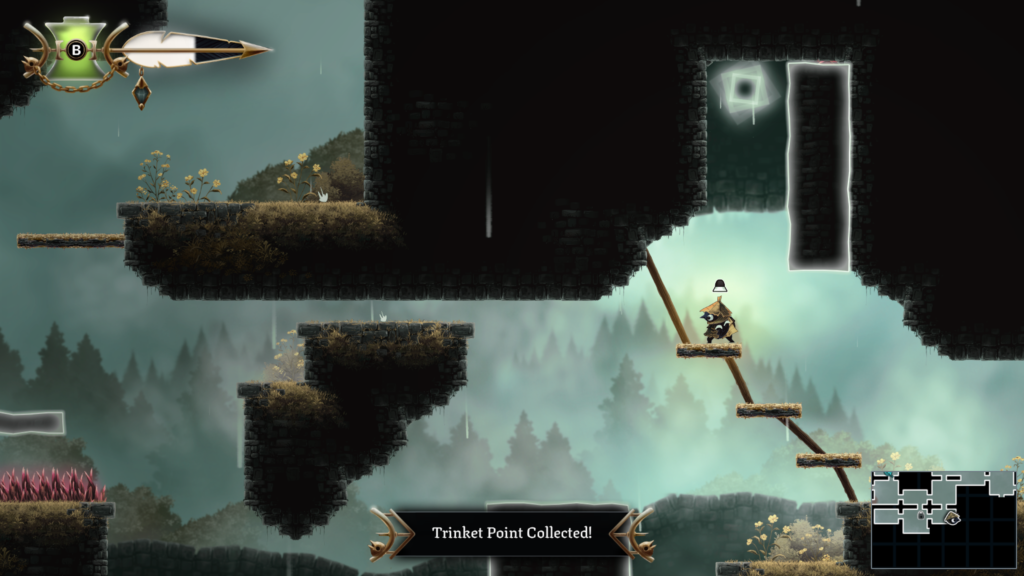
Trinket 10 / 32: Location – Graven Valley (grey colour on the map)
Trinket: Cracked Marble – slightly increases damage when at full health.
Abilities needed: Slingshot, Climb
You’ll earn the “Experienced Collector” achievement / trophy on collection of your 10th trinket.
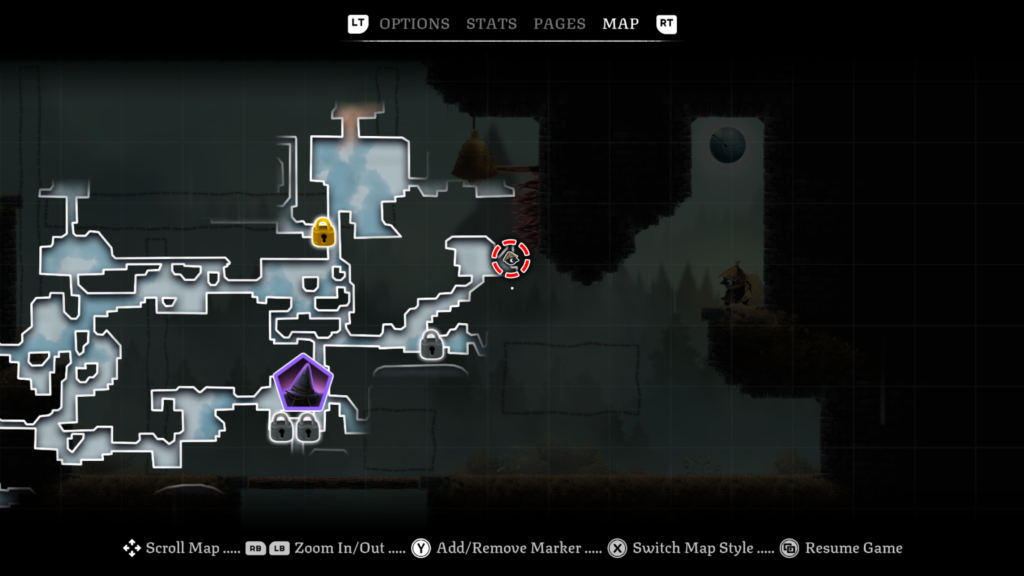
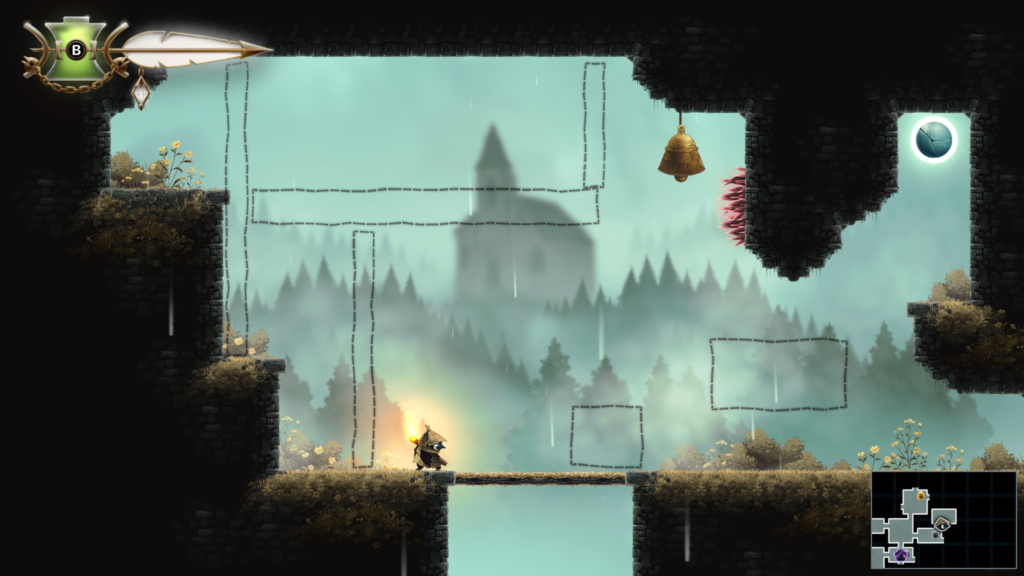
Story Page 6 / 23: Location – Graven Valley (grey colour on the map)
The Witch’s Bargain Story Page (3 / 9)
Abilities needed: Climb, Slingshot
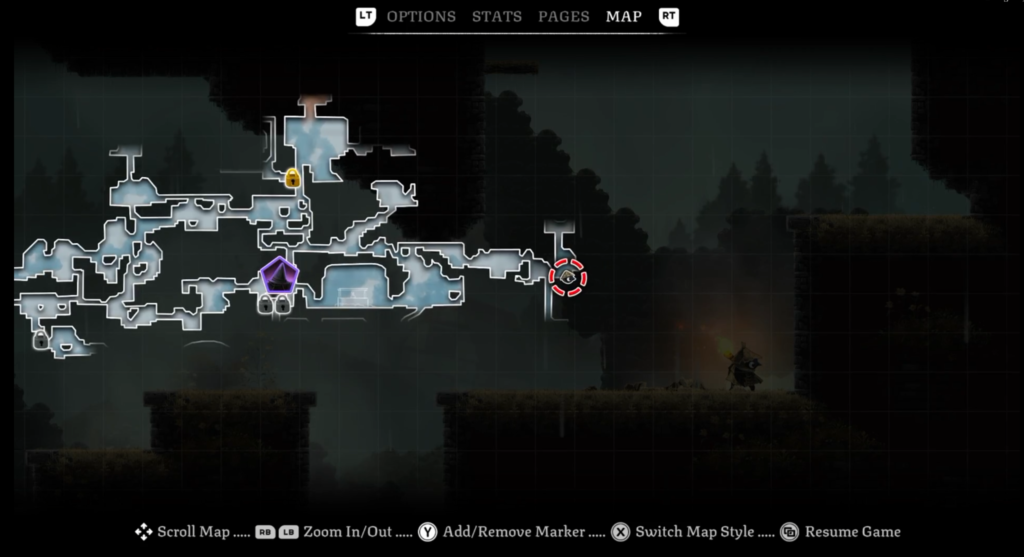
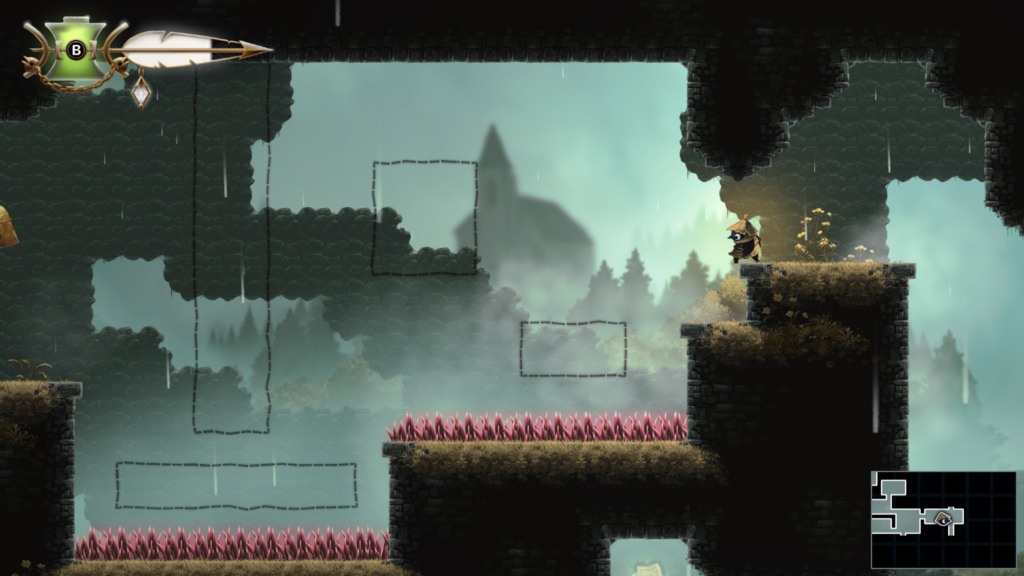
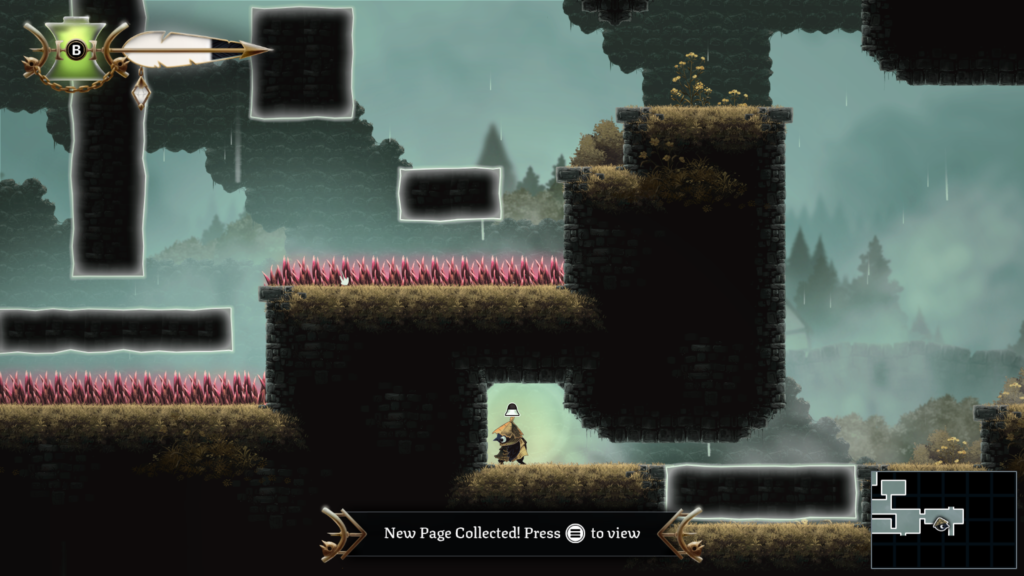
Spirit 5 / 20: Location – Graven Valley (grey area on the map)
Abilities needed: Climb
This one is hidden in a sneaky hidden passage in the top left of the room.
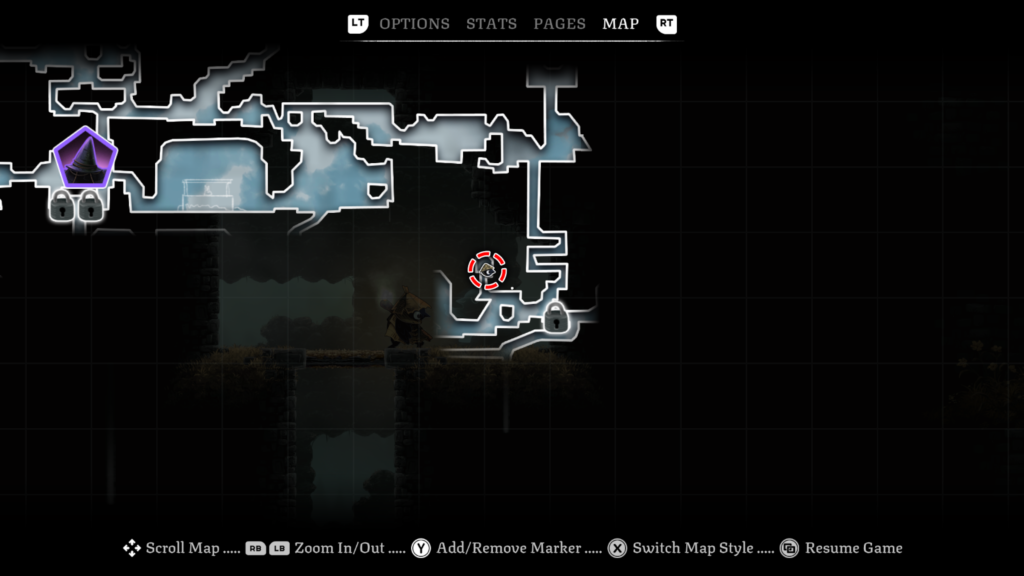
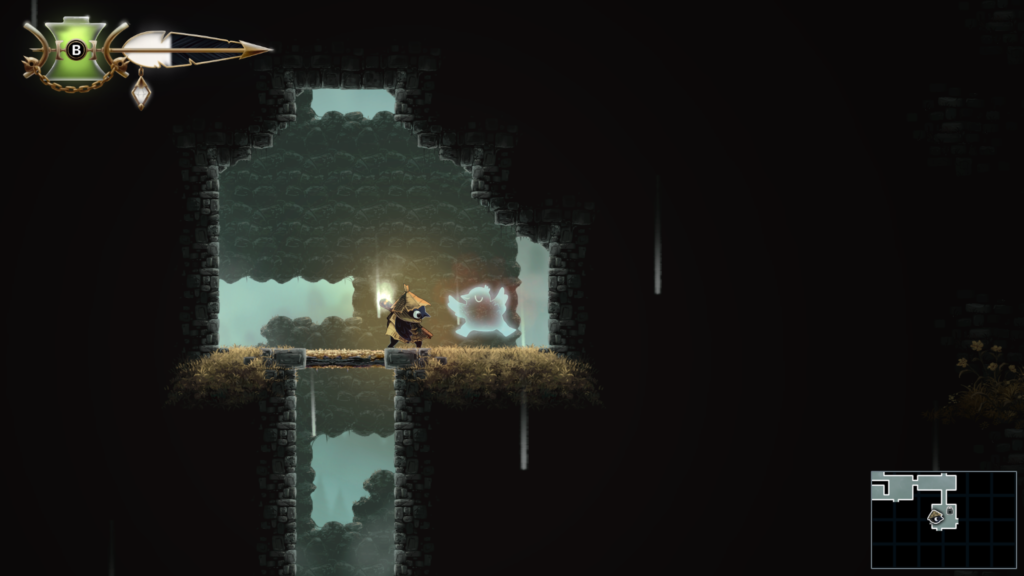
Trinket Slot 20 / 103: Location – Graven Valley (grey area on the map)
Abilities needed: Slingshot, Climb
Workshop Token 3 / 27: Location – Graven Valley (grey colour on the map)
Abilities needed: Climb, Slingshot
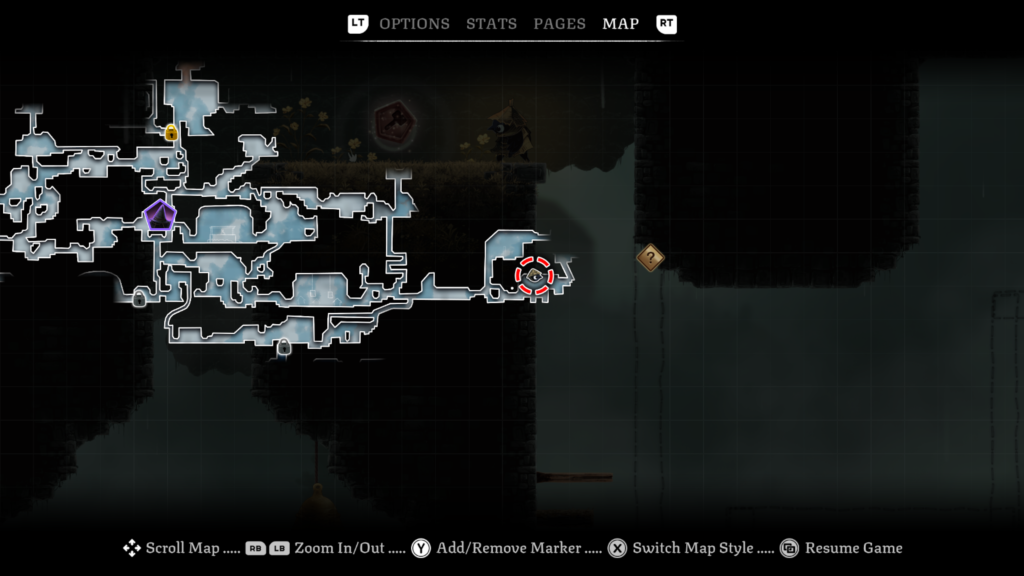
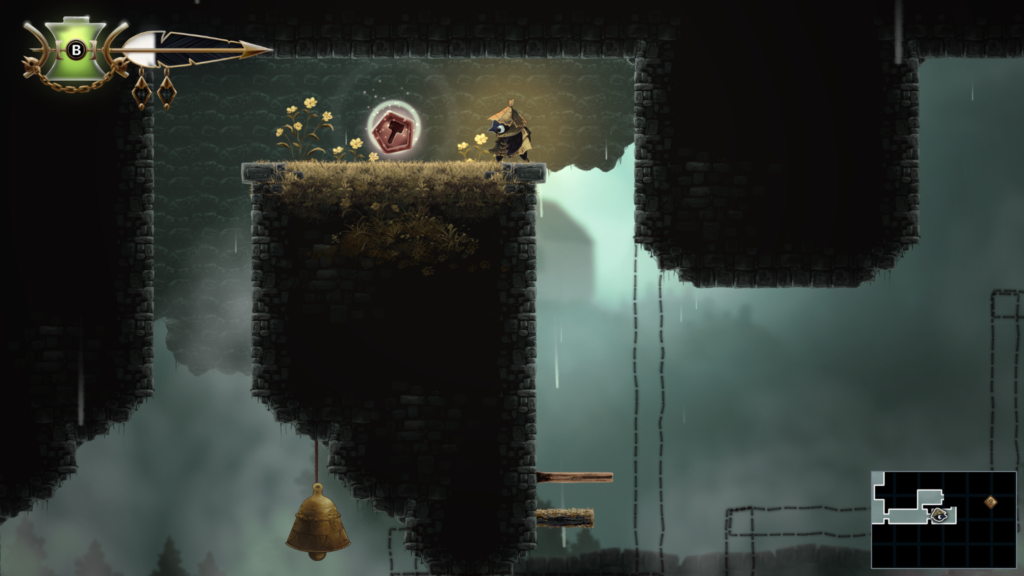
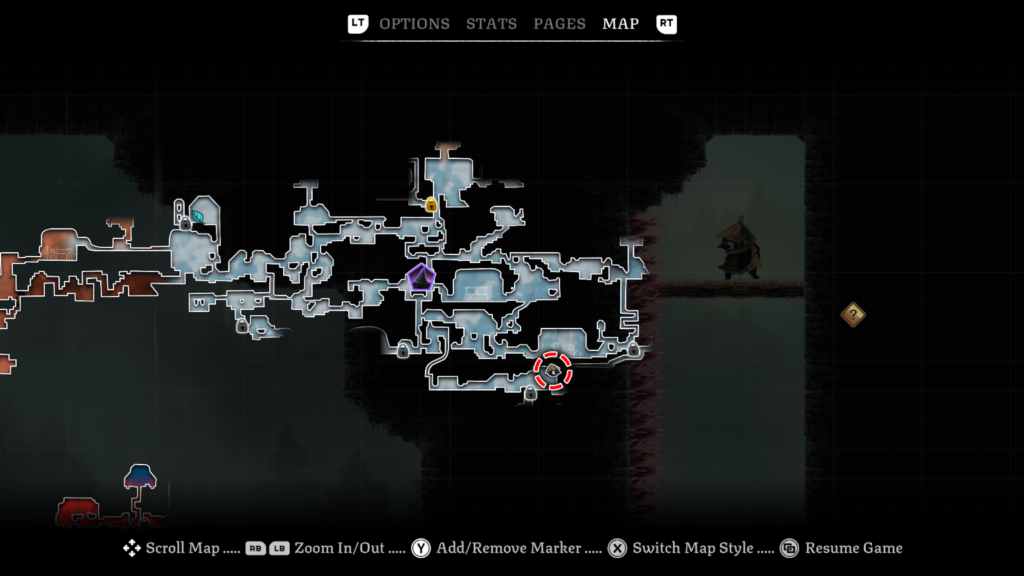
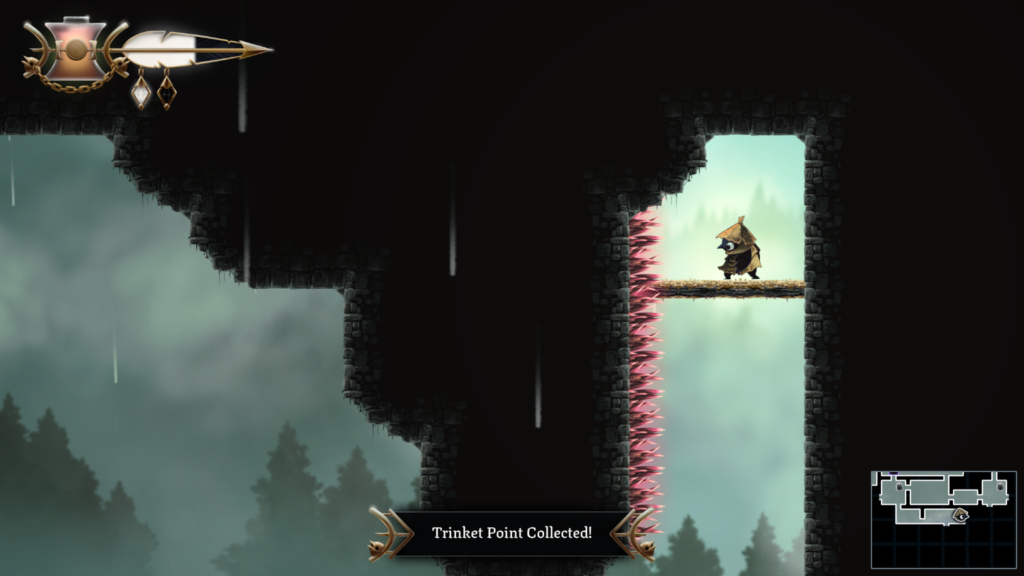
Story Page 7 / 23: Location – Graven Valley (grey colour on the map)
The Lookout Tower Story Page (2 / 6)
Abilities needed: Climb, Slingshot
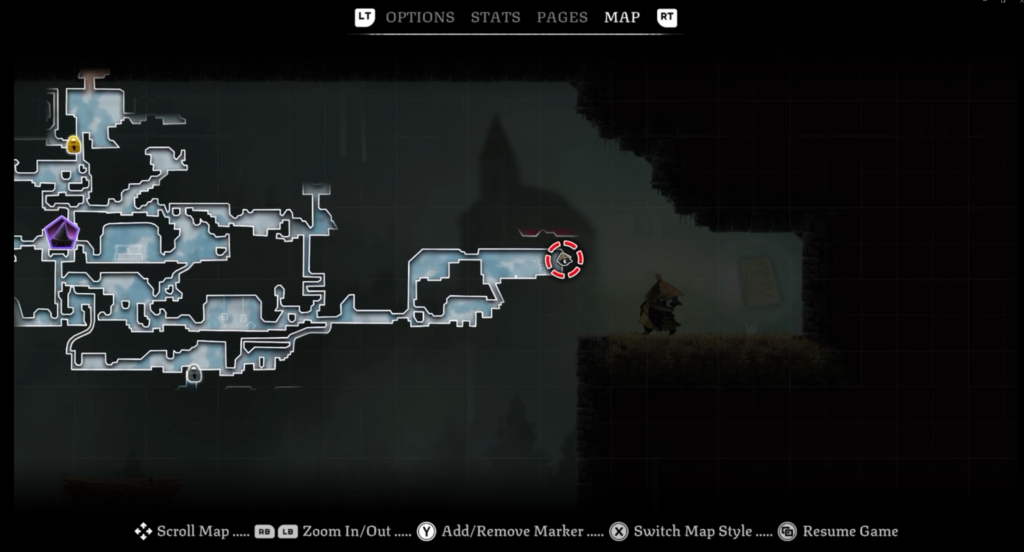
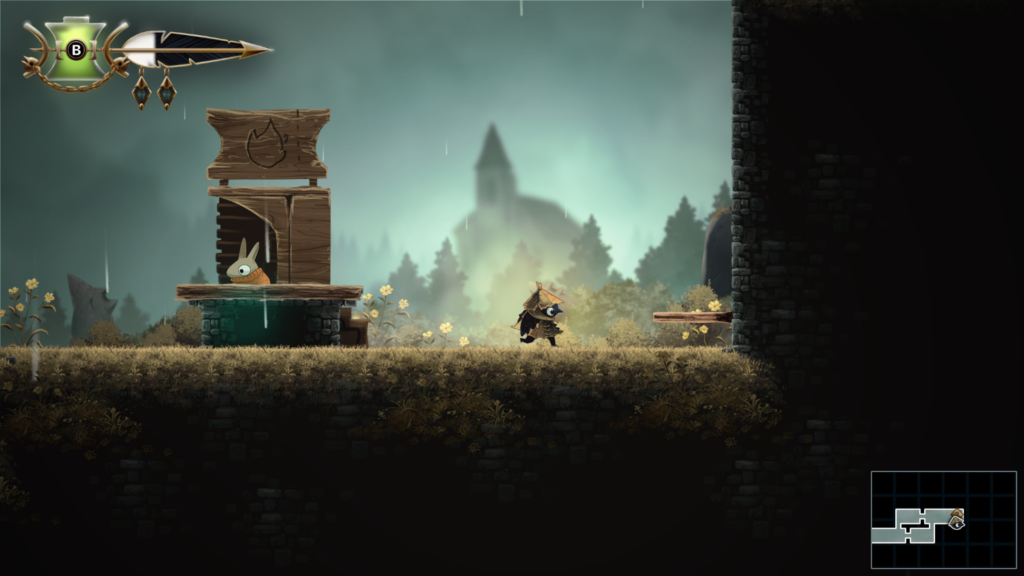
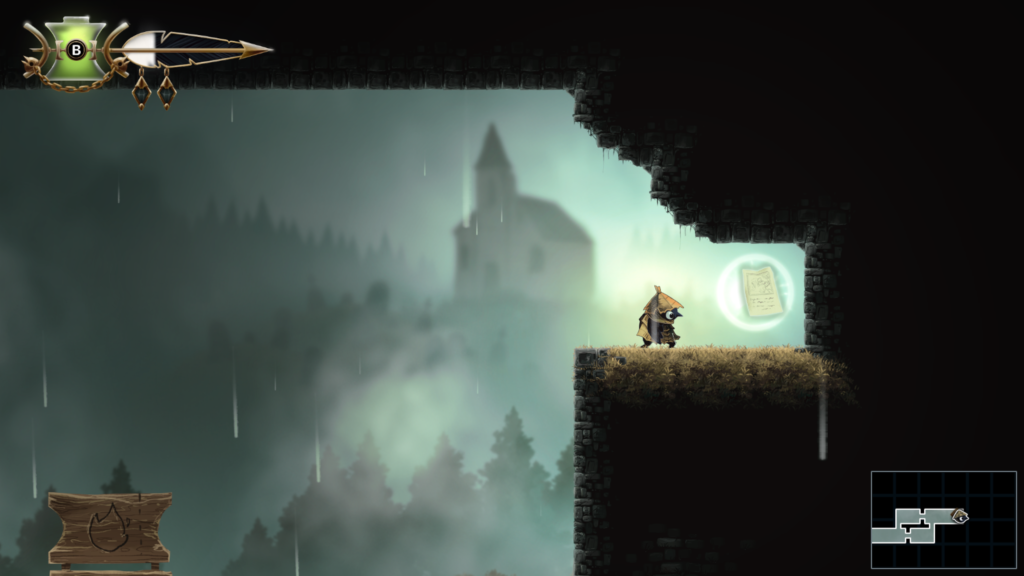
Trinket Slot 21 / 103: Location – Graven Valley (grey area on the map)
Abilities needed: Slingshot, Climb
Lida the Terrible Boss Guide
You’ll take on Lida the Terrible in the Graven Valley area of the game. It’s the grey area on the map.
You’ll be able to access the boss once you have got a ticket to the execution that is taking place as part of the story for that area.
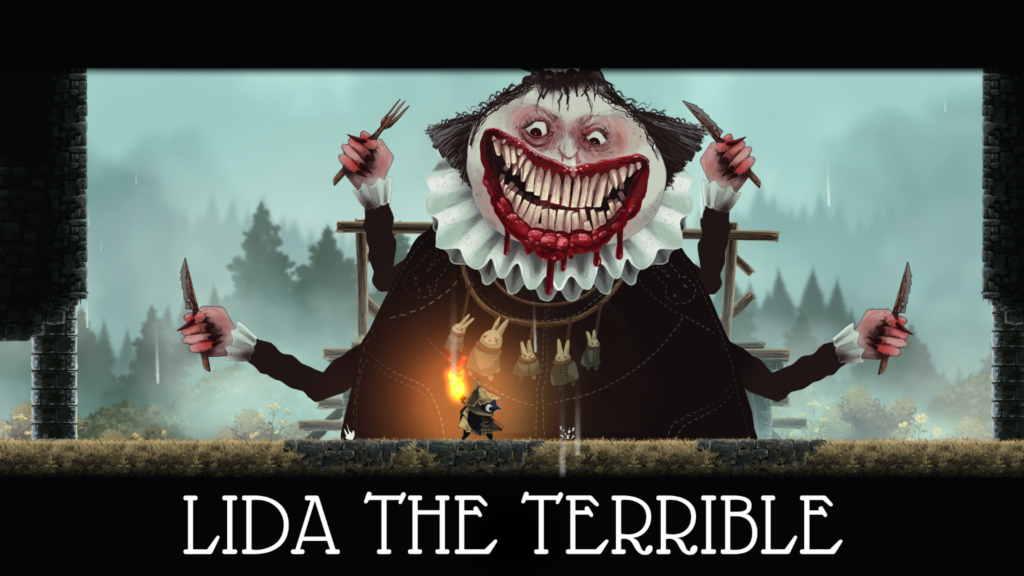
She’ll start off by throwing projectiles at you and then some homing knives. Be sure to keep an eye on them, they follow your location and are a bit of a pain until you work out their movement.
Bear in mind that your dodge slide has a cooldown that might impact how you need to dodge.
At about the halfway mark, she’ll raise a table in the centre and create spikes on either side, reducing the space you’ve got to fight in. The main thing to watch out for now are the cleavers that fall down in sets of three, there’s a gap in the middle, but they drop fast. There’s also some knives that fall in a cone shape, it’s tricky, but aim to dodge at the point of the cone.
You can watch a video of the boss fight below:
Once you’ve defeated Lida the Terrible, you’ll need to head to the room on the left from the boss area. Here you’ll find and ‘collect’ Egbert, unlocking the “Littlest Bird” achievement / trophy.
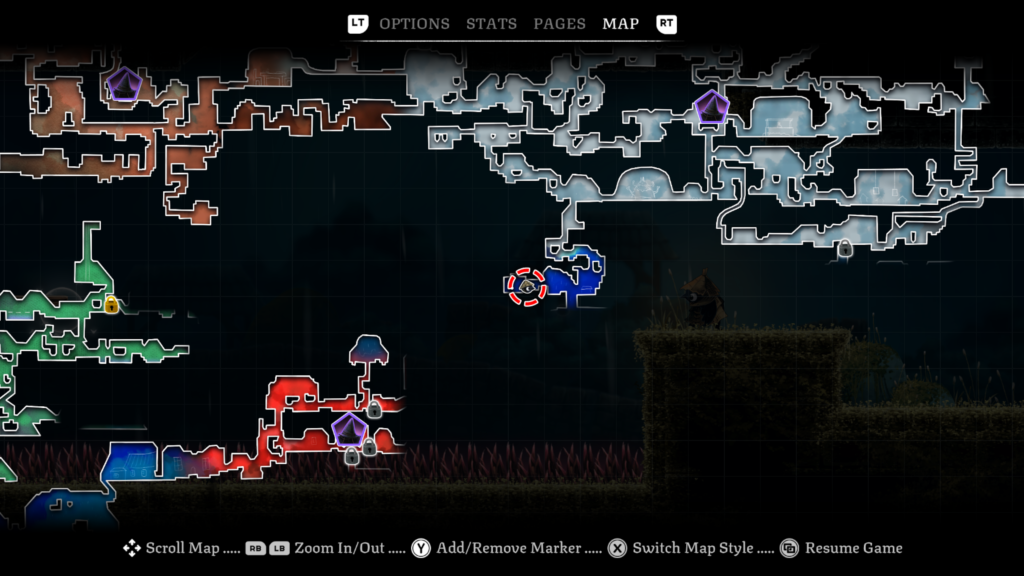
Trinket Slot 22 / 103: Location – Midnight Drench (dark blue area on the map)
Abilities needed: Slingshot
Throw your matchstick to the furthest away bubble then bounce on the remaining ones.
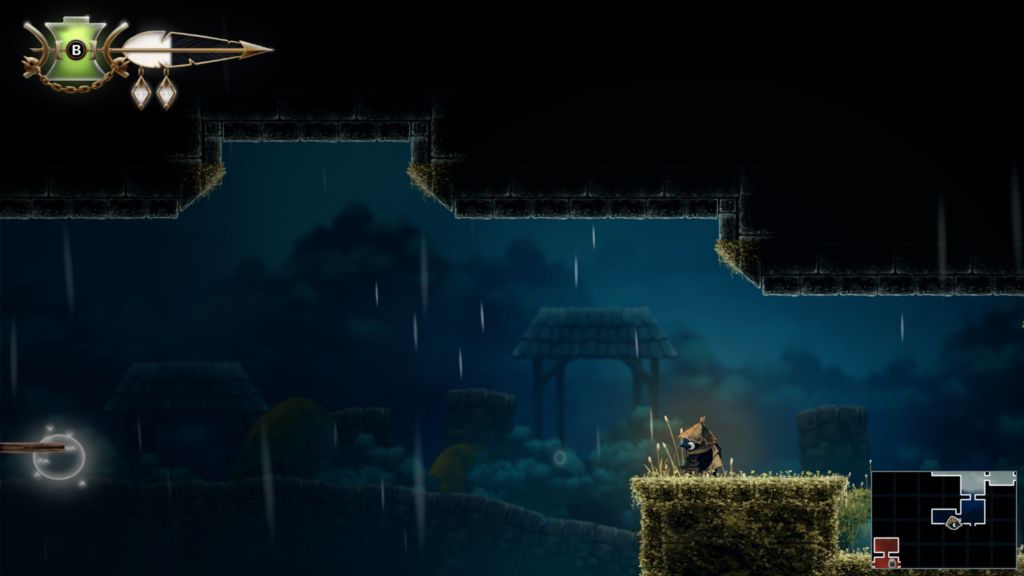
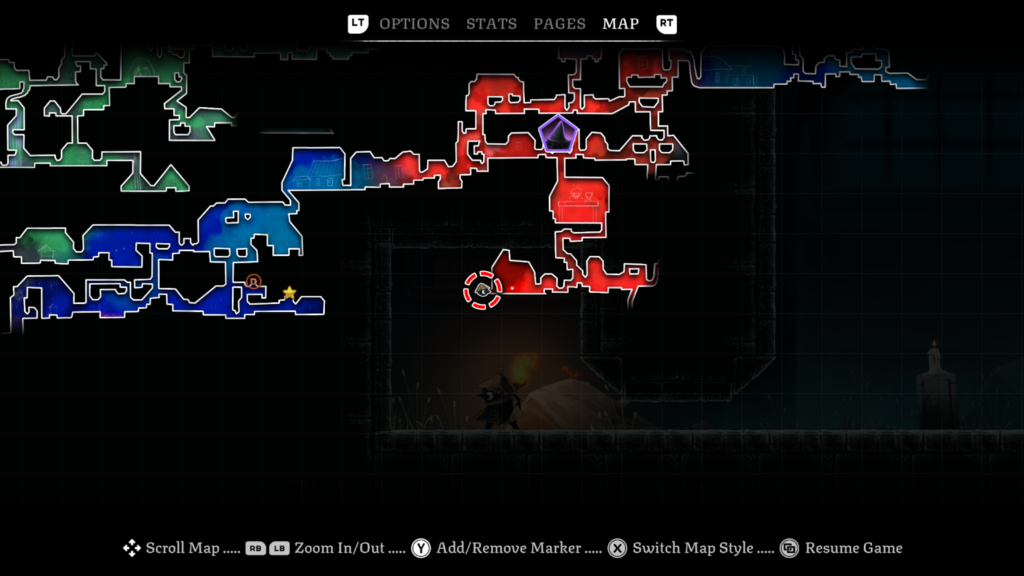
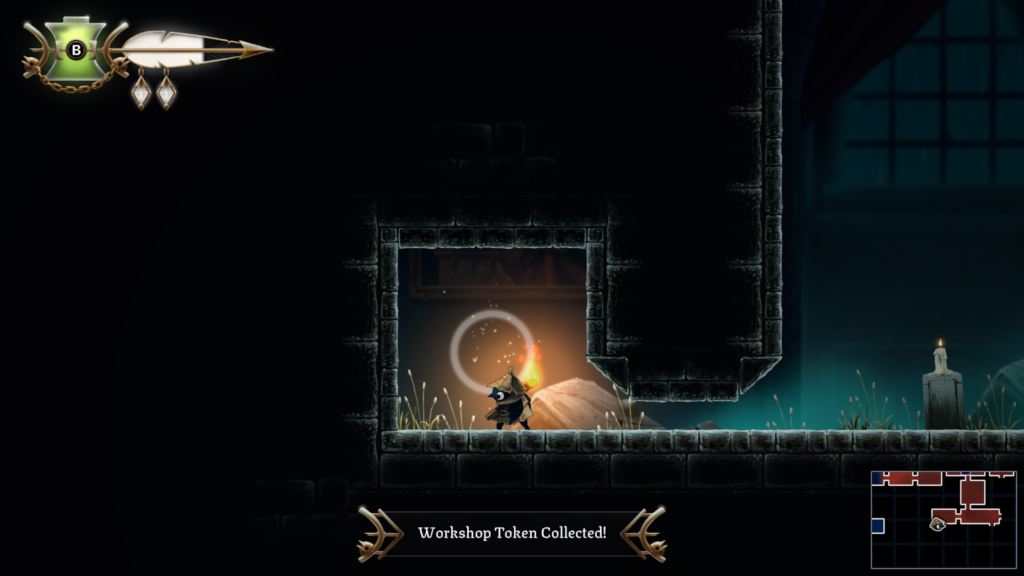
Workshop Token 4 / 27: Location – Dessicated Castle (red colour on the map)
Abilities needed: None
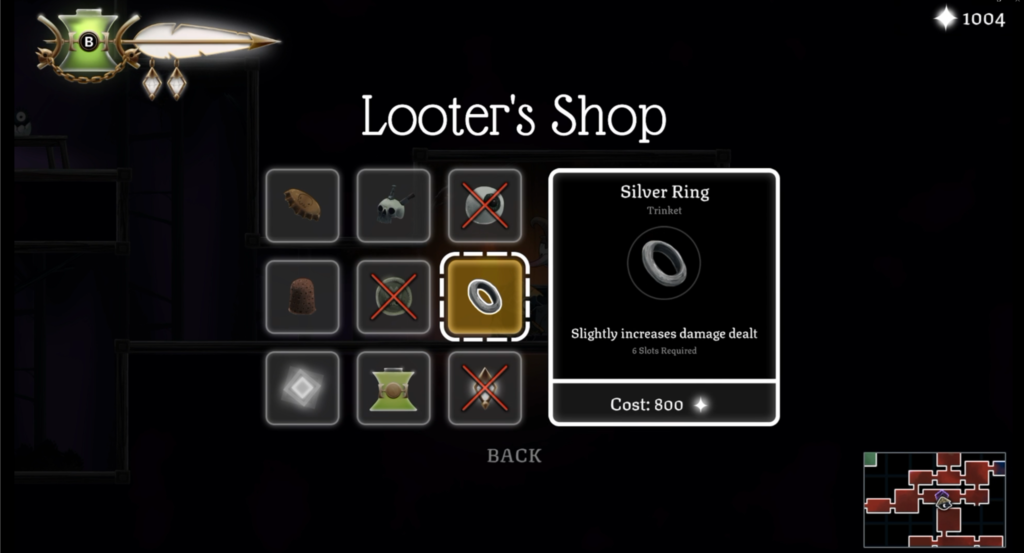
Trinket 11 / 32: Location – Looter’s Shop (Tent)
Trinket: Silver Ring – slightly increases damage dealt.
Cost: 800
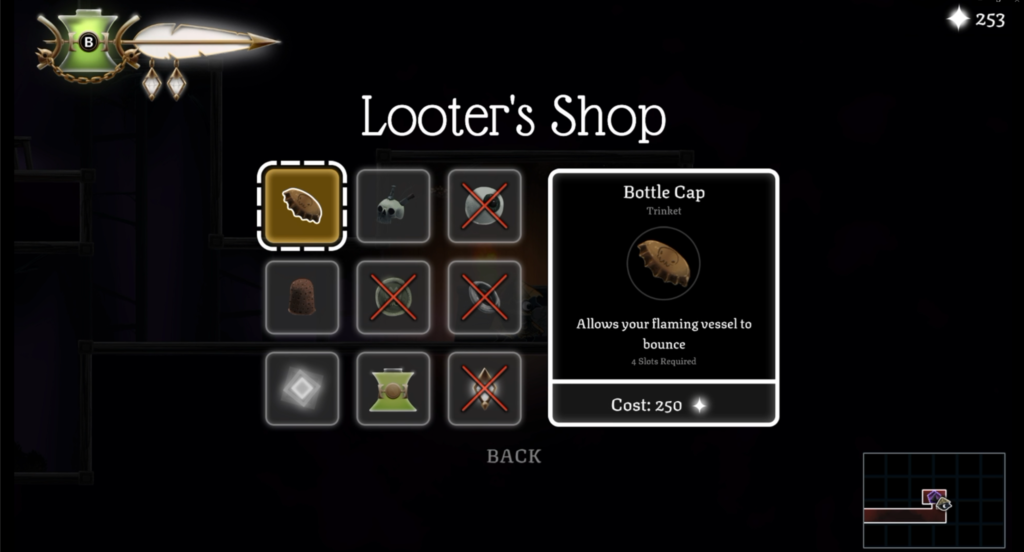
Trinket 12 / 32: Location – Looter’s Shop (Tent)
Trinket: Bottle Cap – allows your flaming vessel to bounce. You’ll need this for the “Bouncing Bottles” achievement / trophy.
Cost: 250
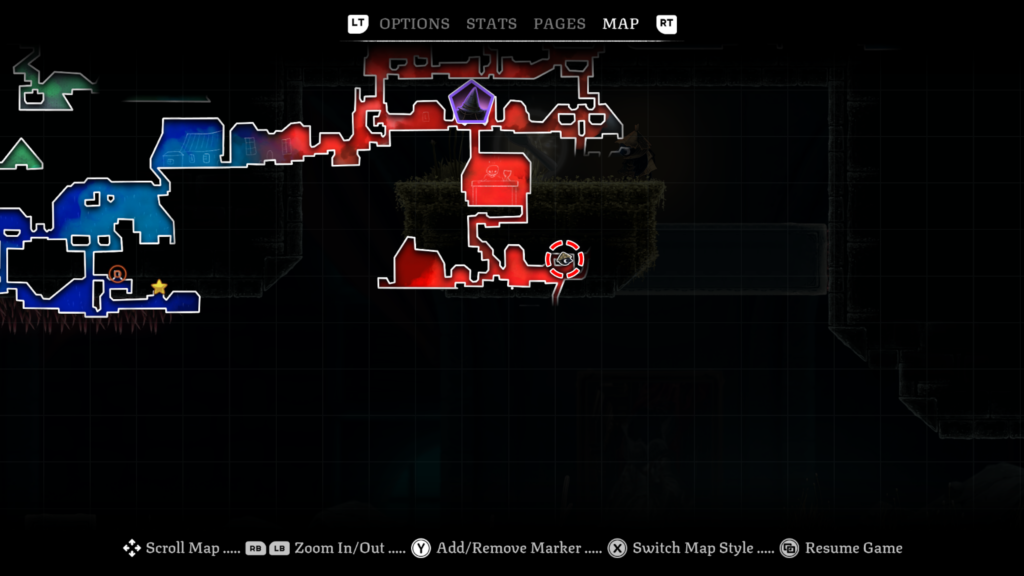
Trinket 13 / 32: Location – Dessicated Castle (red colour on the map)
Trinket: Silver Spoon – surrounds you in a brief protective barrier while you attempt to heal.
Abilities needed: Slingshot, Climb
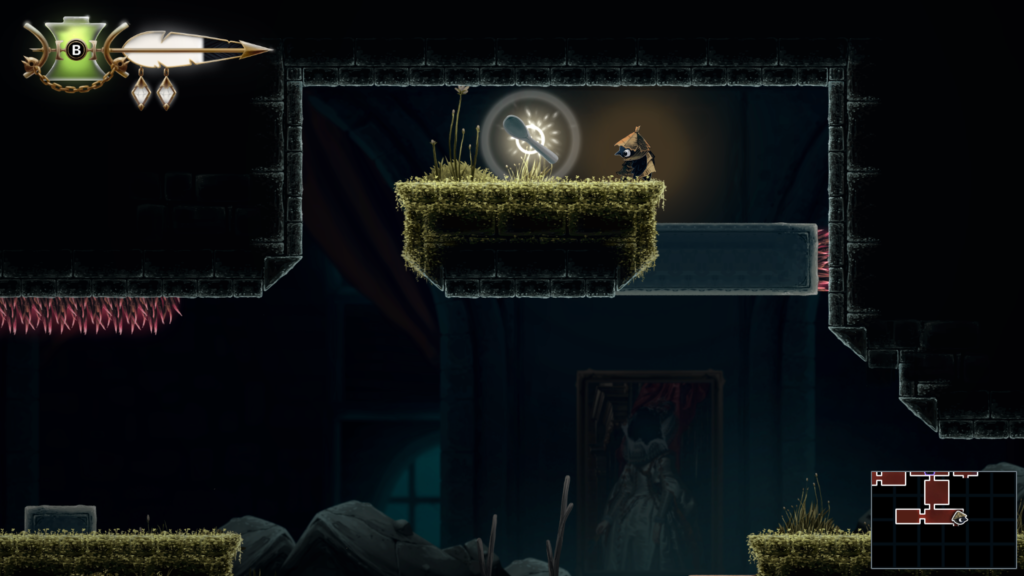
Trinket Slot 23 / 103: Location – Dessicated Castle (red area on the map)
Abilities needed: Climb
This is a vertical challenge, where you need to race upwards as quickly as you can. You’ll need to climb and wall jump to get to the top.
You’ll need to complete the time trial to get this trinket slot.
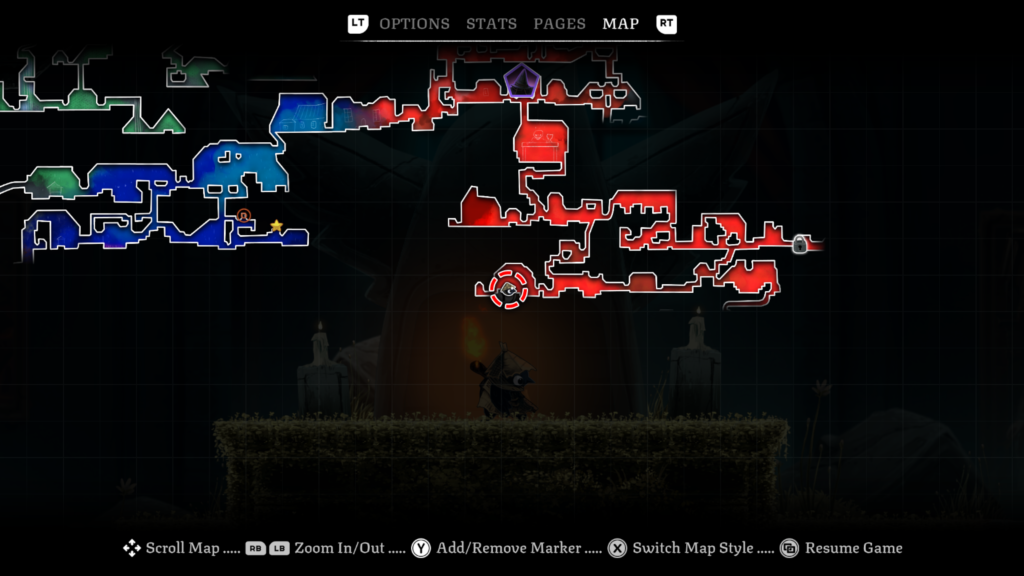
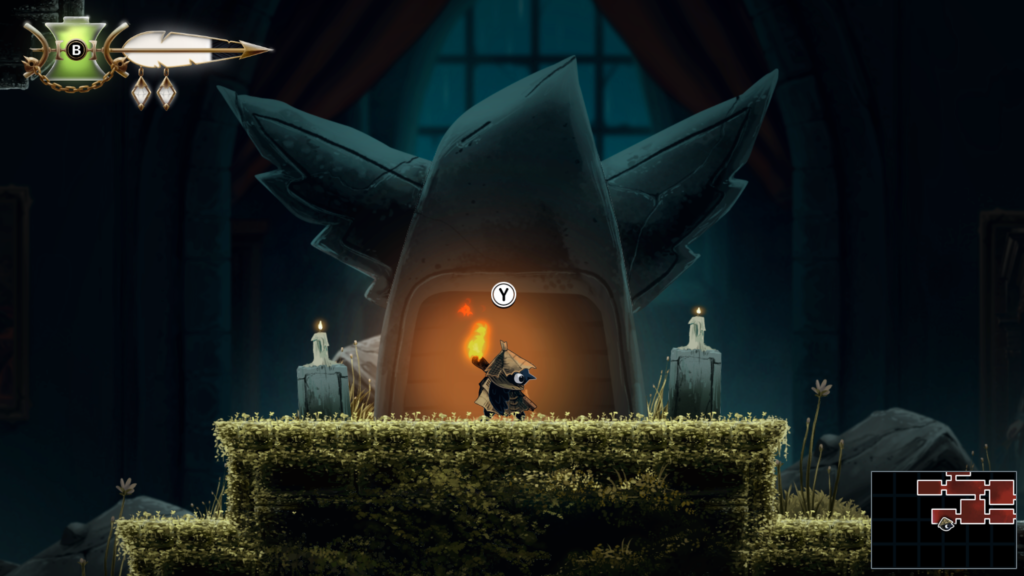
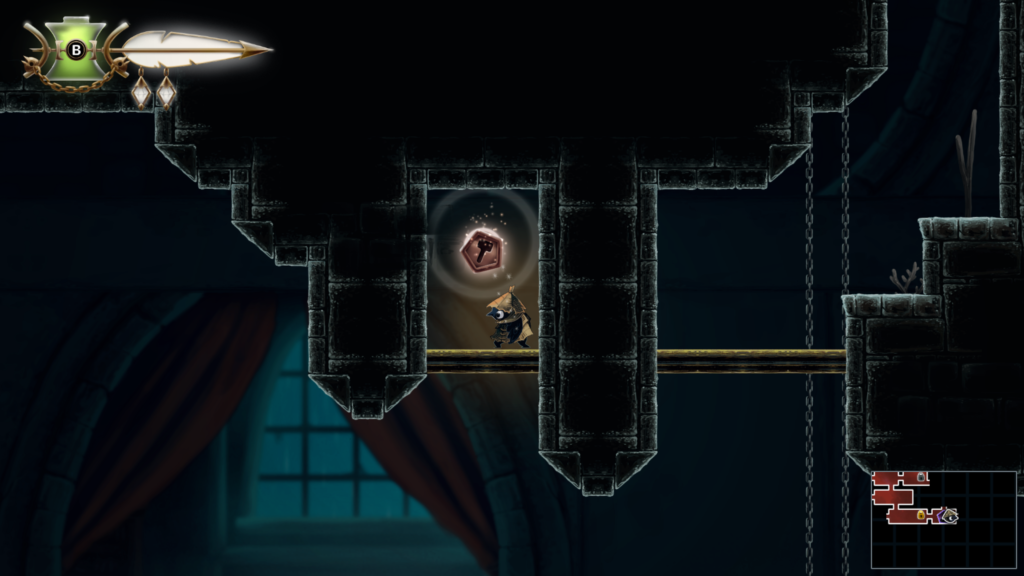
Workshop Token 5 / 27: Location – Dessicated Castle (red colour on the map)
Abilities needed: Slingshot, Climb
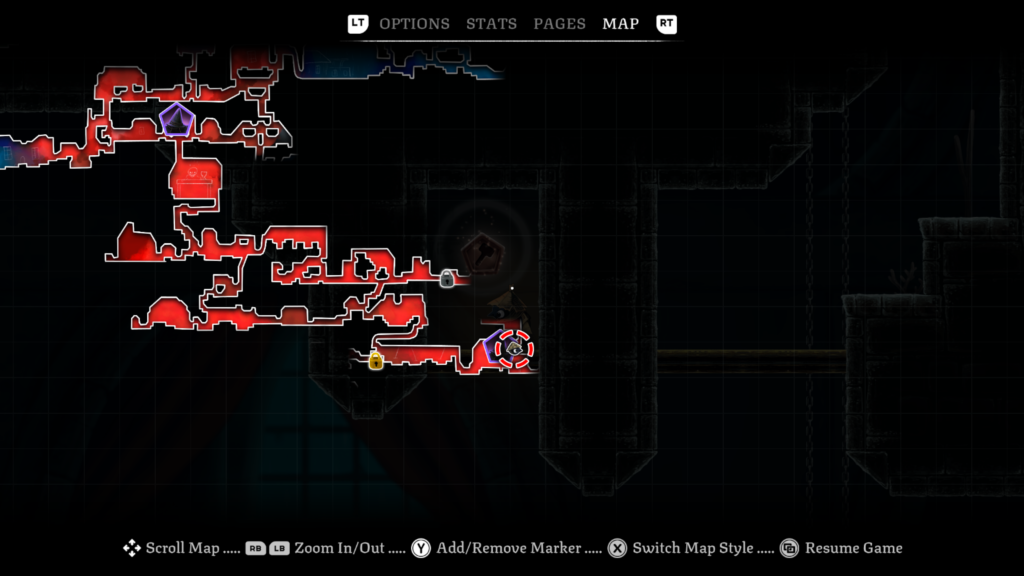
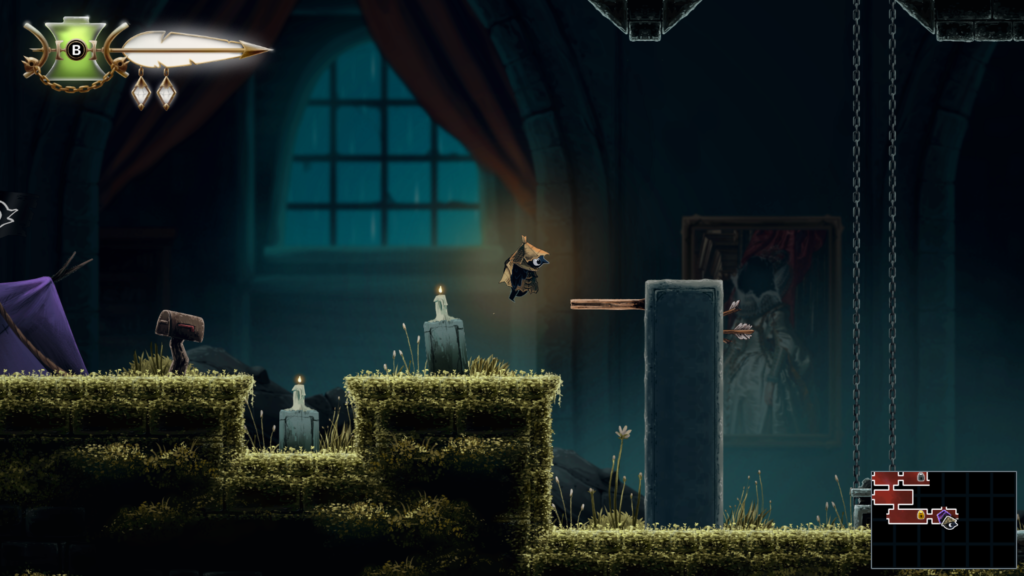
Trinket Slot 24 / 103: Location – Night Garden (mixed blue area on the map)
Abilities needed: None
Awarded for returning a spirit. I’d collected five spirits by this point.
Trinket Slot 25 / 103: Location – Dessicated Castle (red area on the map)
Abilities needed: None
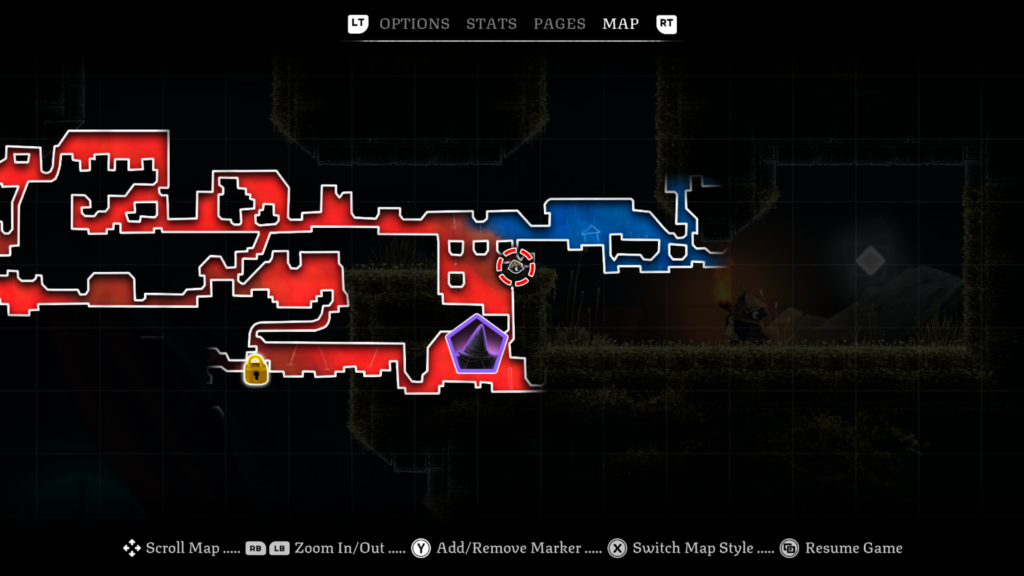
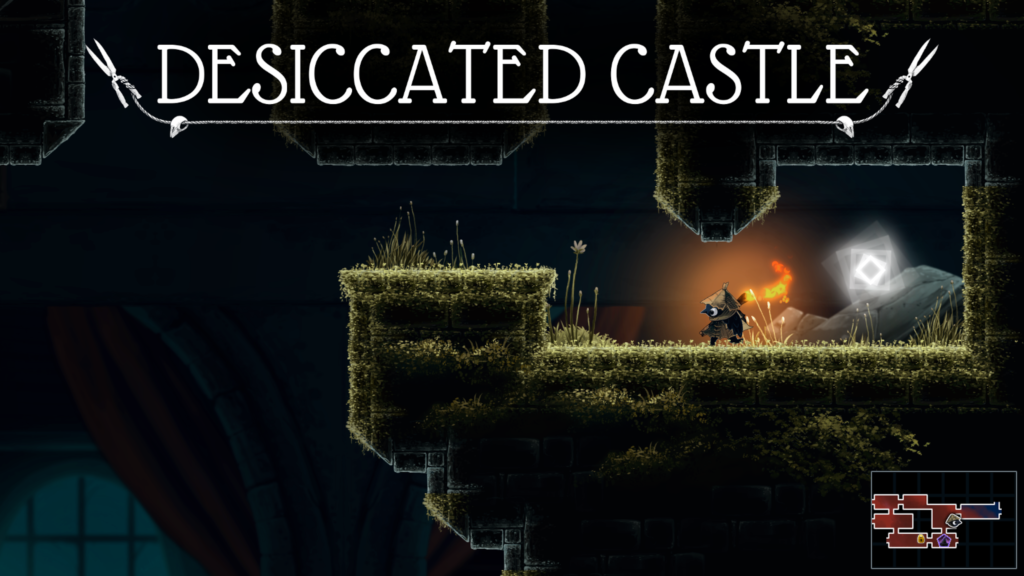
Trinket 14 / 32: Location – Dessicated Castle (red colour on the map)
Trinket: Burnt Shoelace – creates a trail of embers when you run at top speed.
Abilities needed: Climb
Unlock the “Hide and Seek” Achievement / Trophy
To unlock the “Hide and Seek” achievement / trophy, you will need to “Evade the Queen”.
This takes place during the Dessicated Castle section of the game. It’s the red location on the map.
You can watch a video guide below.
You’ll meet up with Looter who has found a golden earring. This belongs to the Queen and she’s returned to the Dessicated Castle to look for it.
What follows is an evasion section, where you must navigate a number of rooms without being spotted by the Queen. She uses a light to search the area. If the light lands on you, you’ve been caught and you’ll go back to the checkpoint. Thankfully, the checkpoints are fairly frequently so you shouldn’t go back too far.
You’ll need to use everything you’ve learned so far to escape her, and some of it will be trial and error. You’ll need to jump, use your matchstick, move quickly and hold your breath.
There’s nothing too overly complicated so you should get through it fairly easily.
Once you reach the end, Looter will get snatched, and you’ll unlock the “Hide and Seek” achievement.
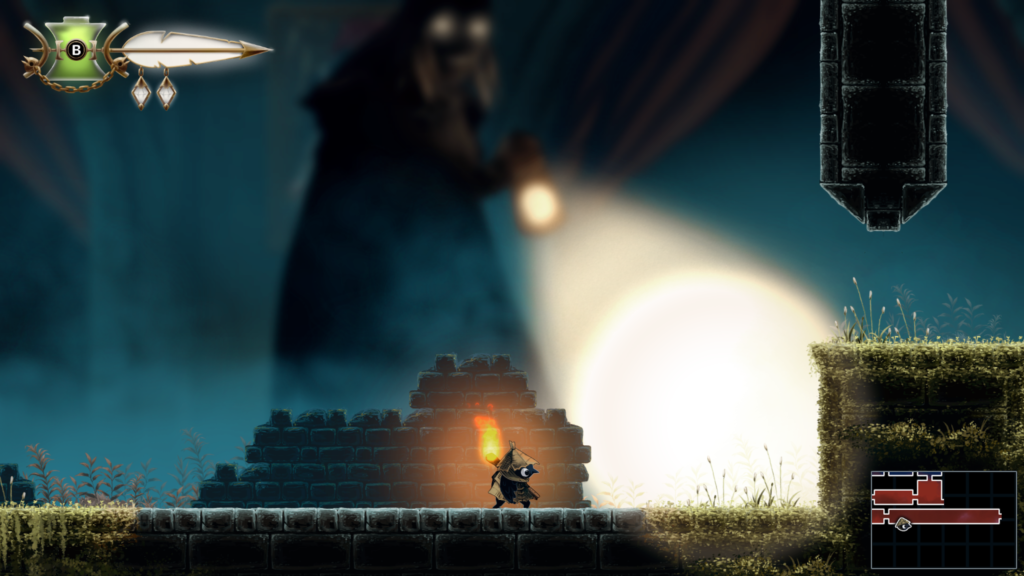
8 / 23: Location – Dessicated Castle (red colour on the map)
The Witch’s Bargain Story Page (4 / 9)
Abilities needed: Climb, Slingshot
You can grab this one after you’ve completed the ‘Evade the Queen’ section.
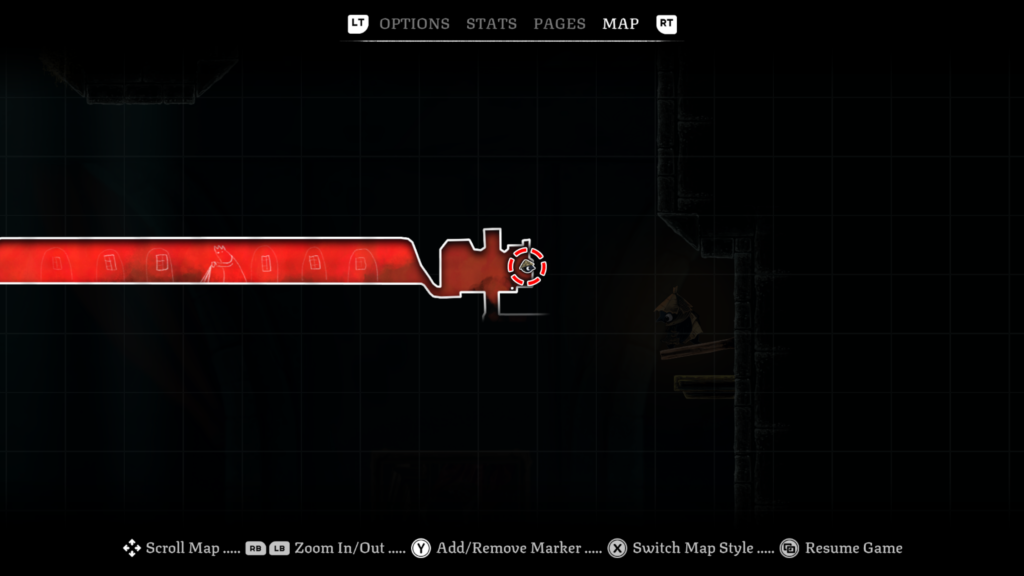
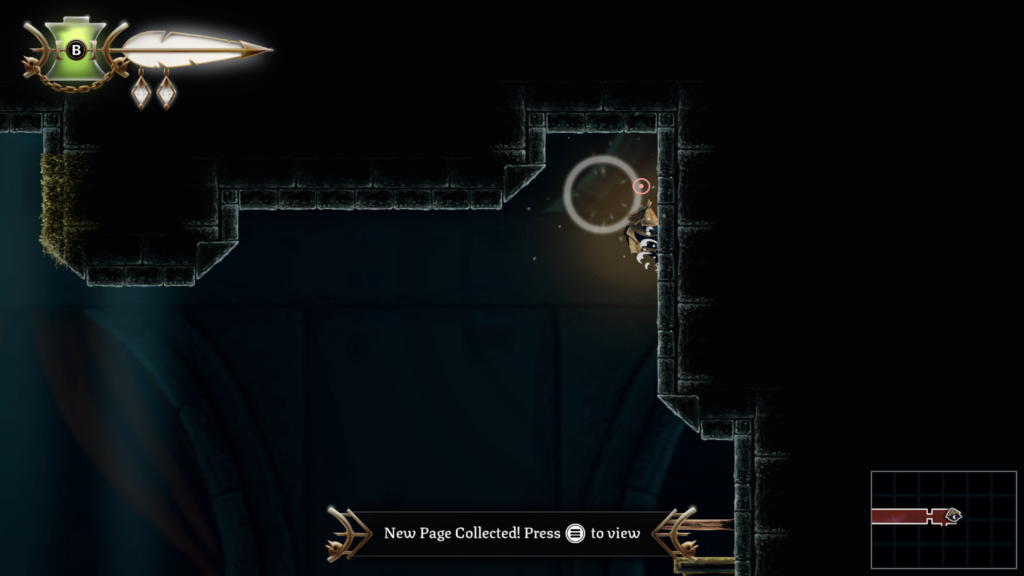
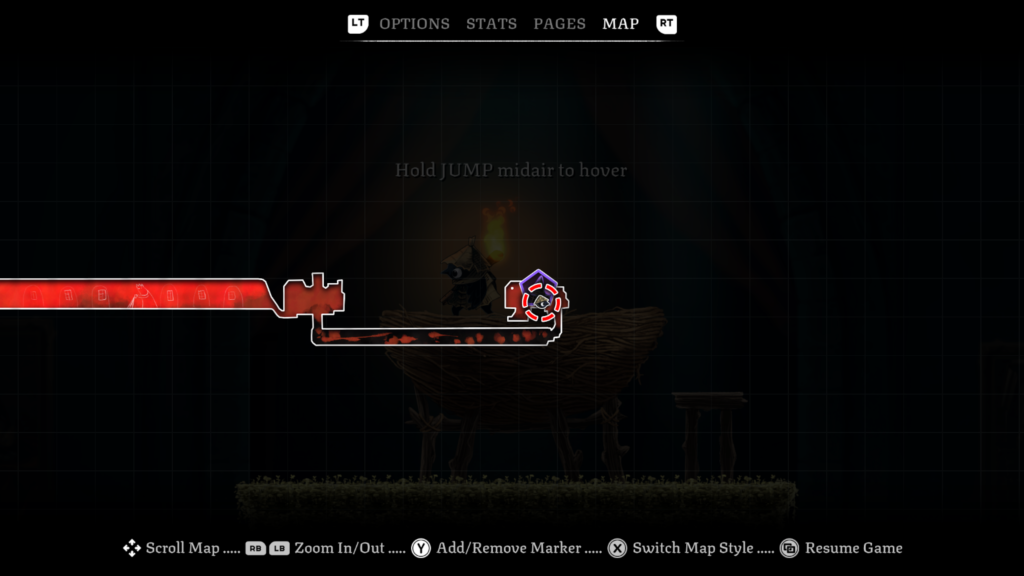
Ability: Hover – Location -Dessicated Castle (red colour on the map)
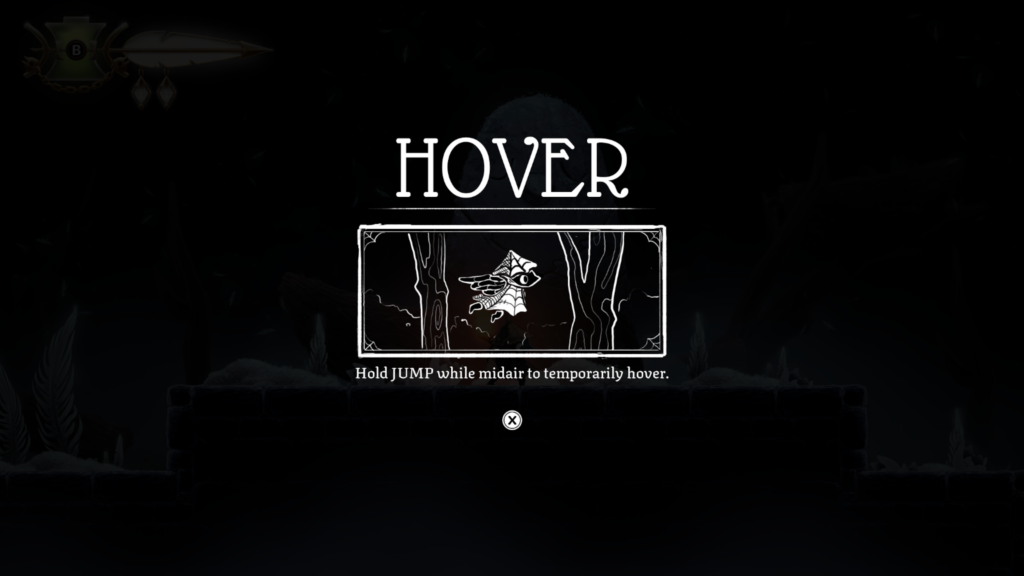
Willow Visits Your Tent
Later in the game, Willow will visit you in the tent so be sure to keep heading every so often (you should anyway for upgrades and such).
He will tell you that he has opened a Spa and encourages you to go visit it.
I spoke to him in the tent in the Dessicated Castle just after the “Evade the Queen” sequence.
Visit the Spa (Night Garden)
Once you’ve spoken to Willow in the tent, an objective marker will appear in the Night Garden (blue area on the map). Fast travel to the nearest tent, it’s the one next to where you return the spirits.
Head to the left and keep going until you reach the Spa.
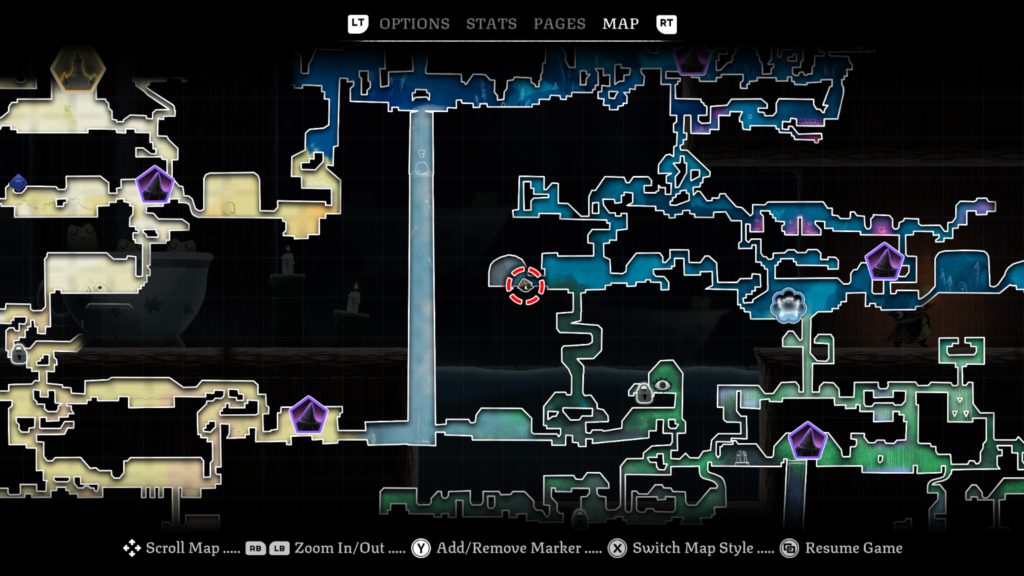
As soon as you enter the achievement / trophy should pop.
Workshop Token 6 / 27: Location – Night Garden (mixed blue colour on the map)
Abilities needed: Climb
This is in the Spa that Willow open. He’ll tell you about it, and an objective marker will appear on the map. The Workshop Token is above the bathing frogs.
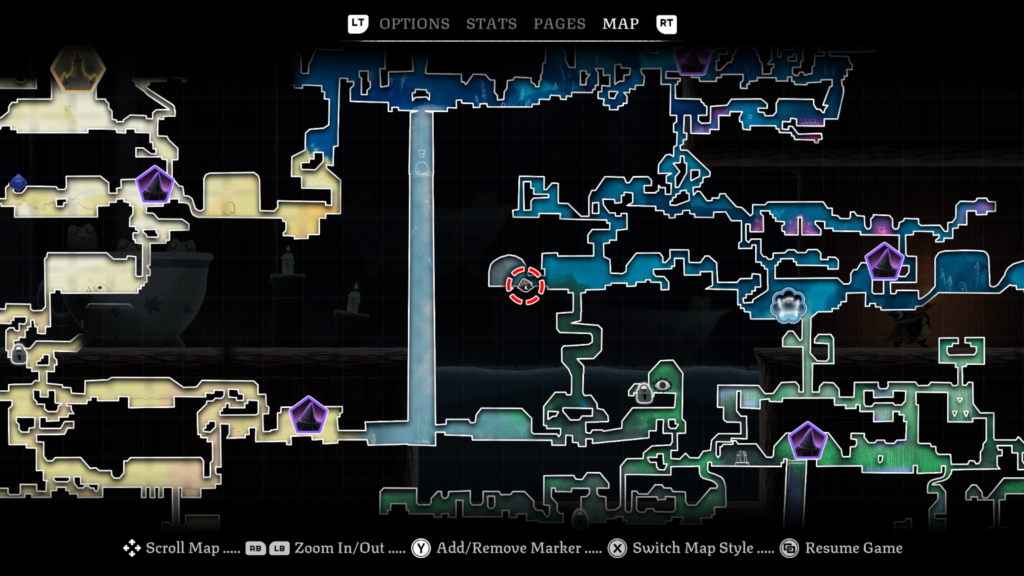
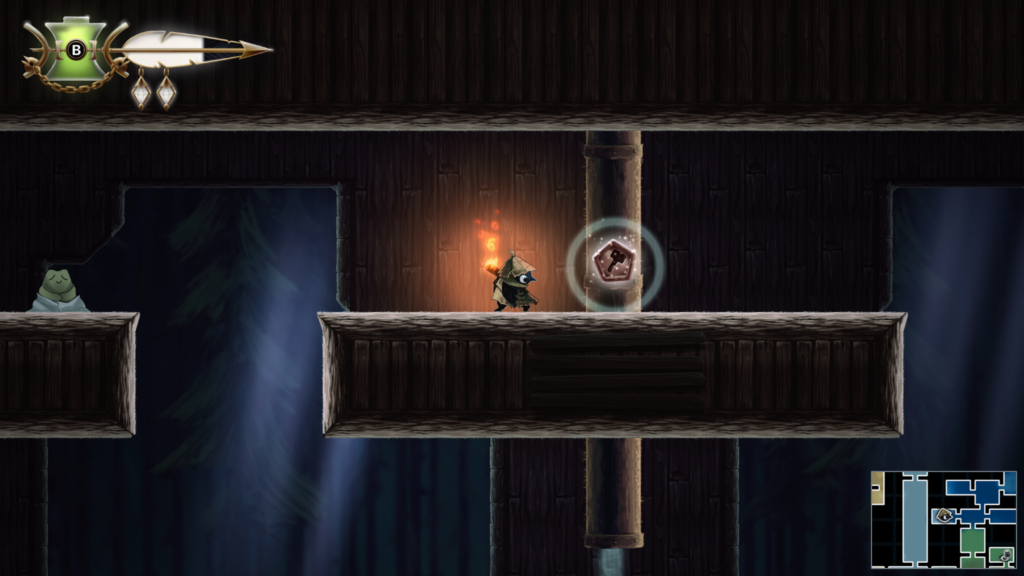
Workshop Token 7 / 27: Location – The Drains (green colour on the map)
Abilities needed: Hover, Wind Ride
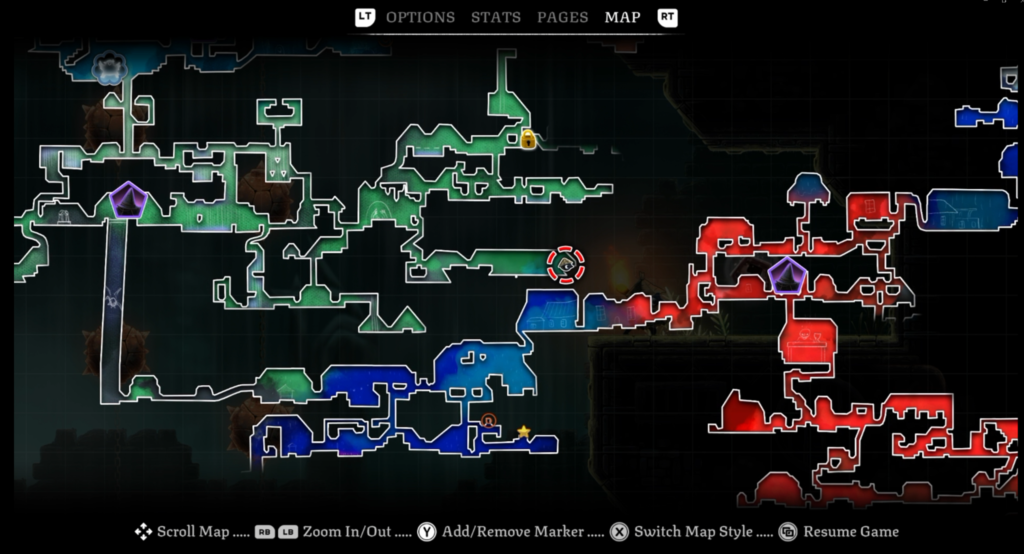
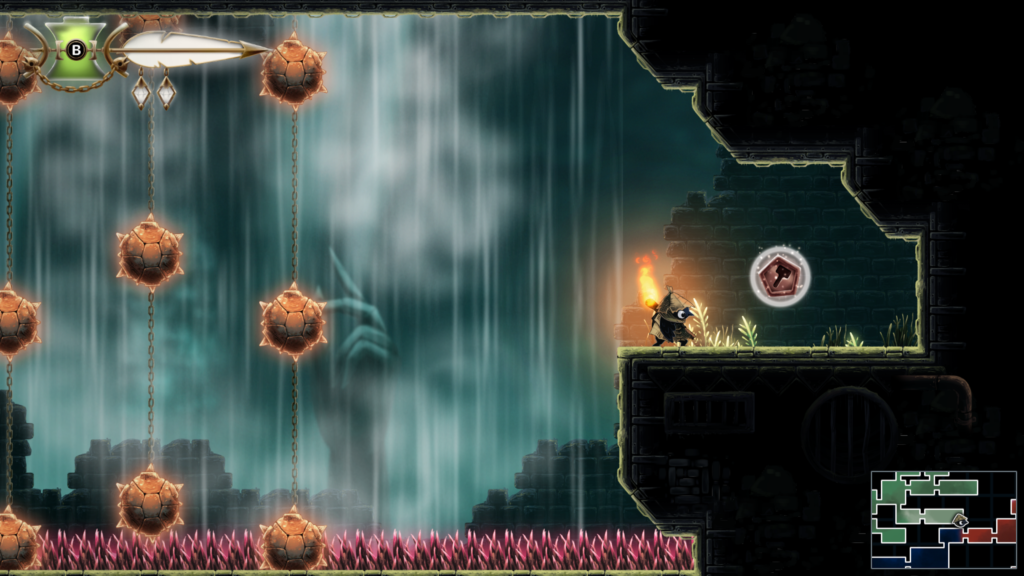
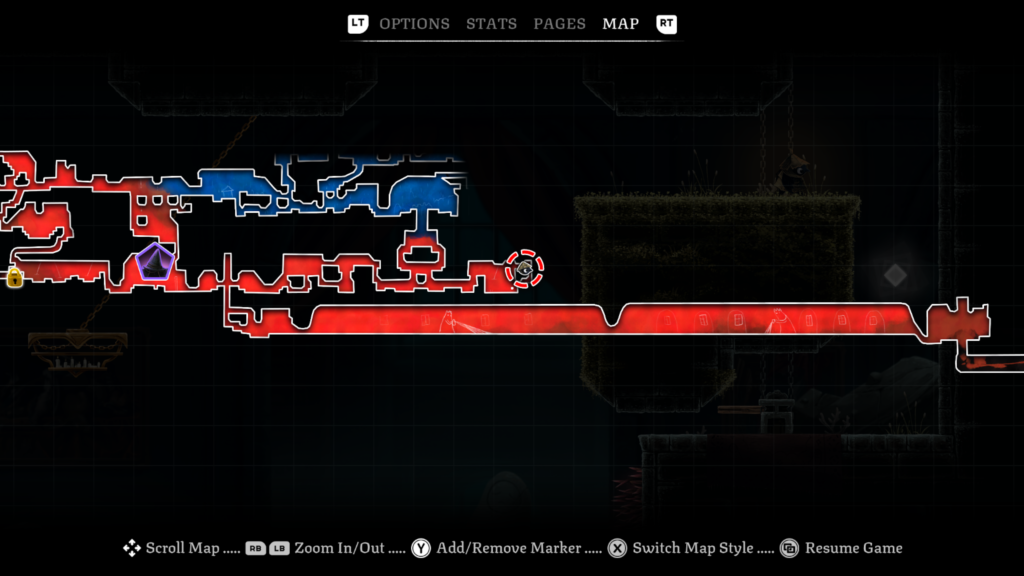
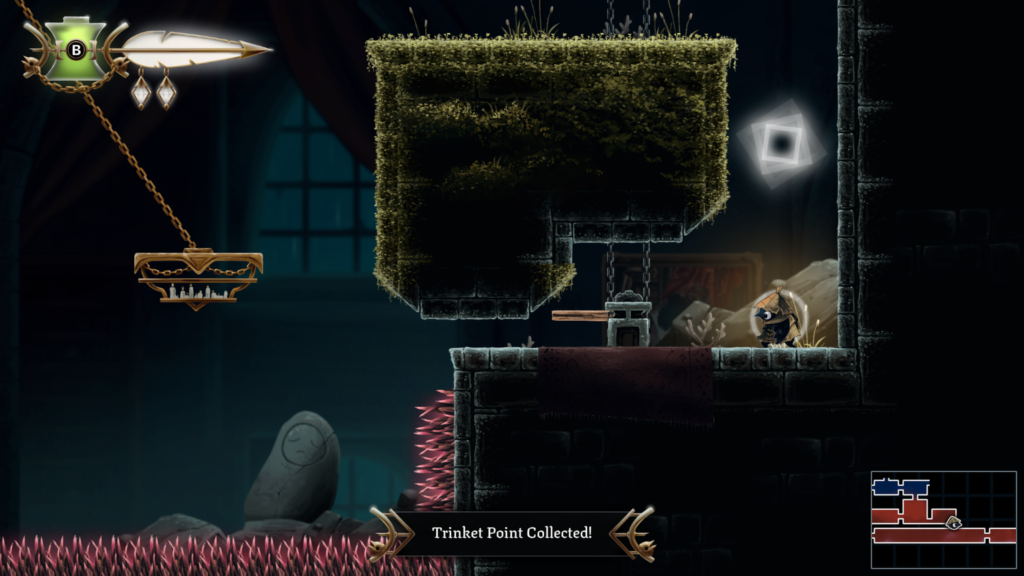
Trinket Slot 26 / 103: Location – Dessicated Castle (red area on the map)
Abilities needed: Slingshot, Climb
You have to throw your matchstick at the right time as the platform swings to get it through the narrow gap and hit the mechanism.
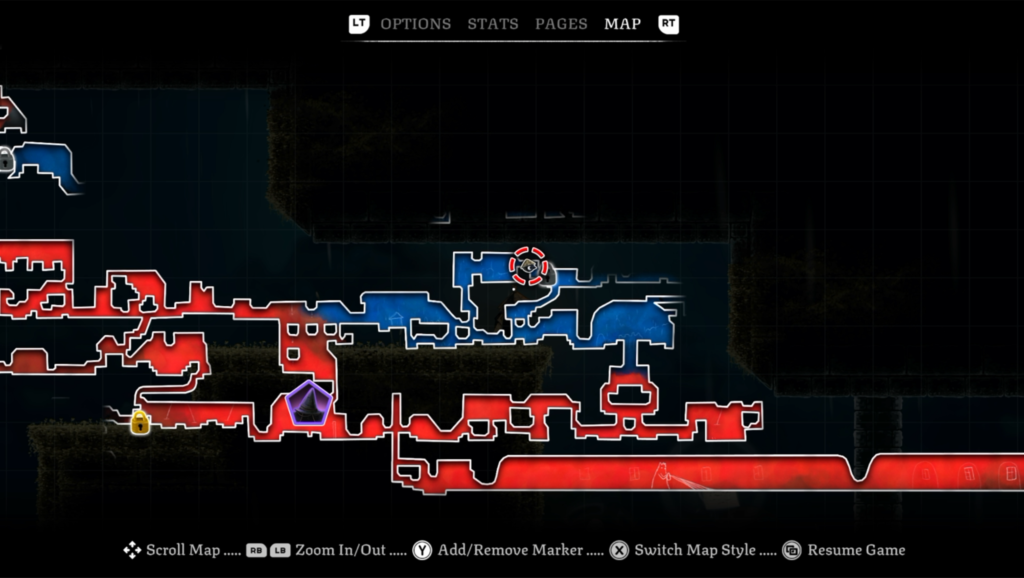
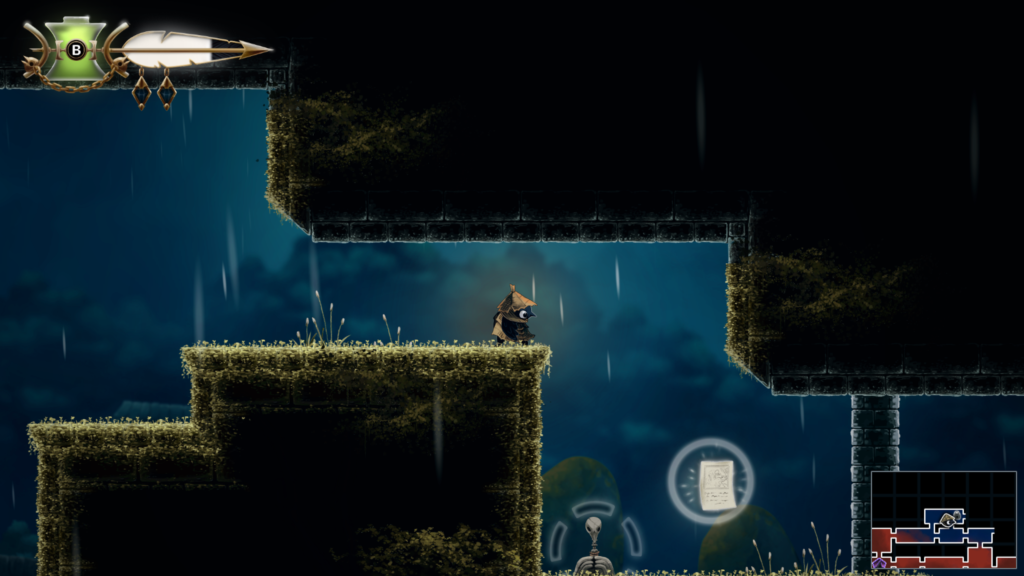
Story Page 9 / 23: Location – Midnight Drench (dark blue colour on the map)
The Witch’s Bargain Story Page (5 / 9)
Abilities needed: None (you’ll need Climb / Slingshot to get to the room, but none to get the collectible itself)
Spirit 6 / 20: Location – Dessicated Castle (red area on the map)
Abilities needed: Slingshot, Hover, Climb
This one is hidden in a sneaky hidden passage, you’ll have to slingshot and bounce upwards from below the spirit.
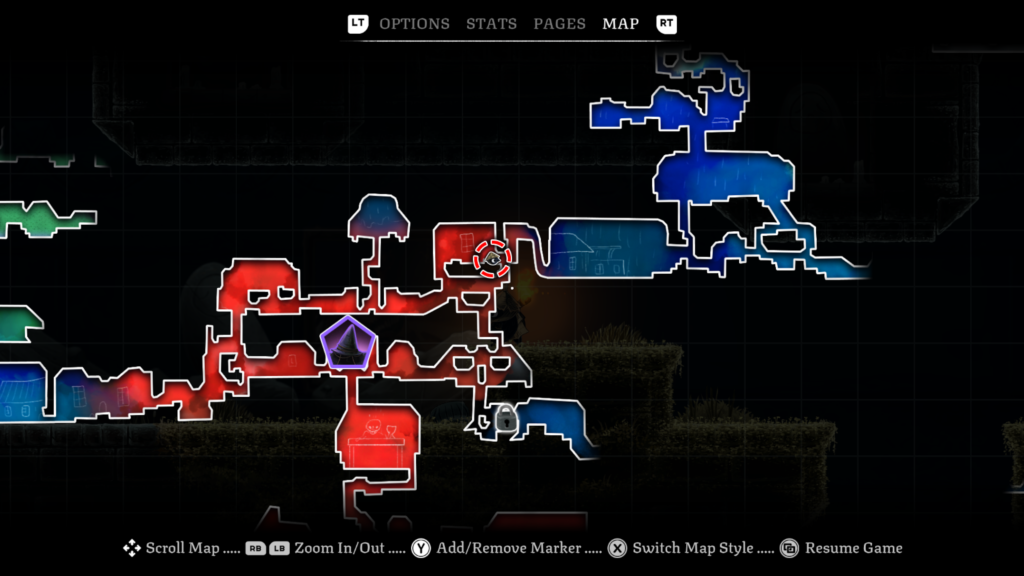
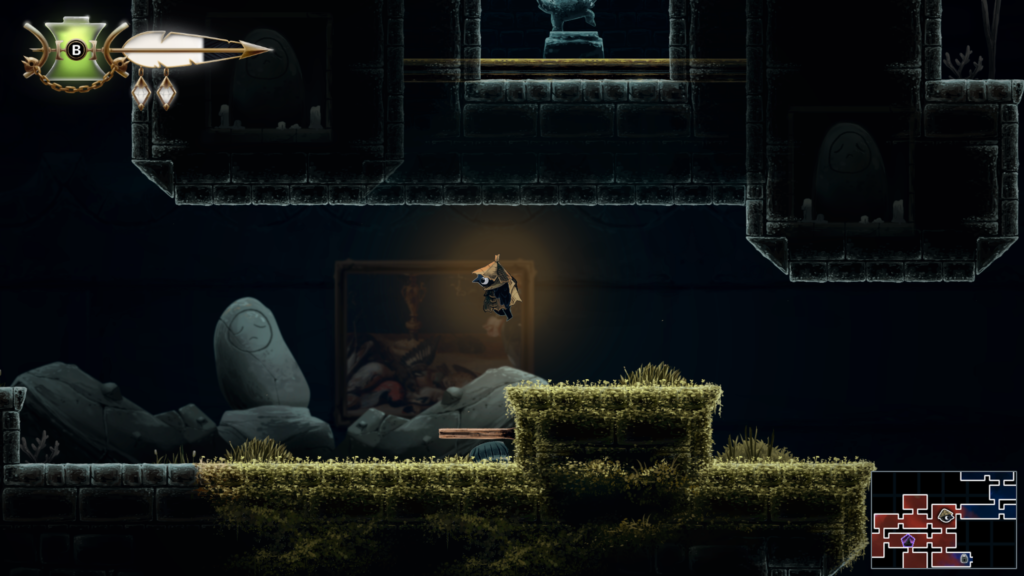
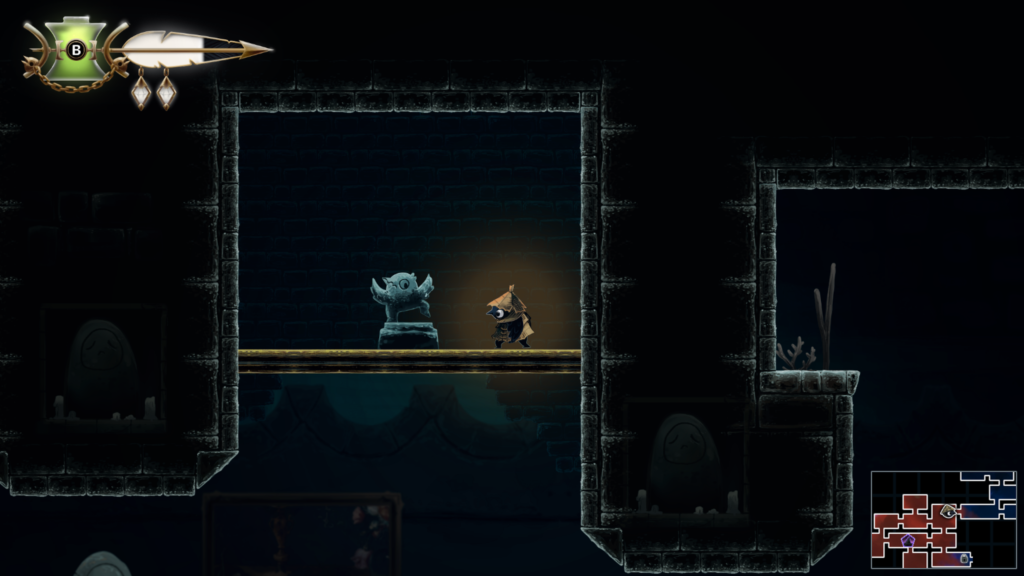
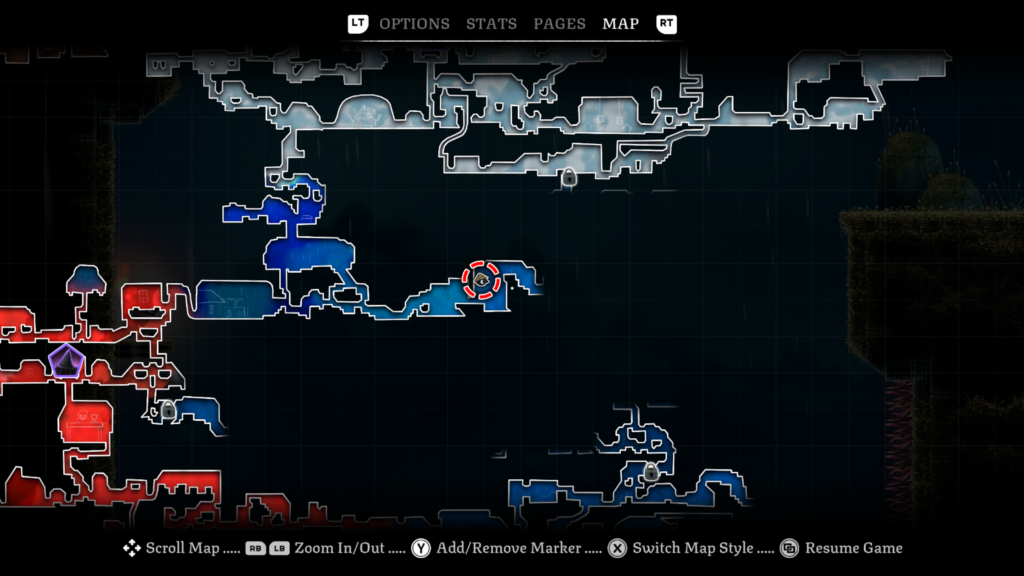
Trinket Slot 27 / 102: Location – Midnight Drench (dark blue area on the map)
Abilities needed: Hover
Bounce on the bubbles and hover in between them.
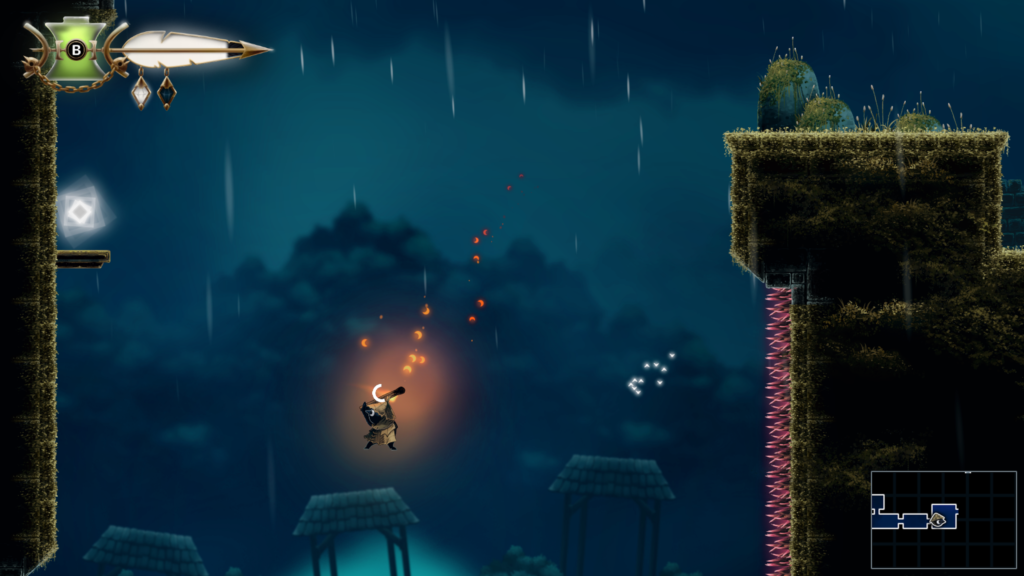
Unlock the “Bouncing Bottles” Achievement / Trophy
To unlock the “Bouncing Bottles” achievement / trophy, you will need to “Juggle a flaming vessel 10 times without it breaking”.
The thing you need for this is the Bottle Cap Trinket. You can purchase it from Looter’s shop in the tent at any point (providing you have enough currency).
I used a location in the Midnight Drench area of the game, near a tent. This meant that I could reload my vessels if they ran out easily.
Throw the bottle upwards and keep aiming upwards and hitting it with your matchstick, it shouldn’t go very far and give you enough time to stay underneath it.
You can let it hit a wall or the floor several times before it breaks, though it becomes slightly trickier to control when it does.
You can watch a video guide below.
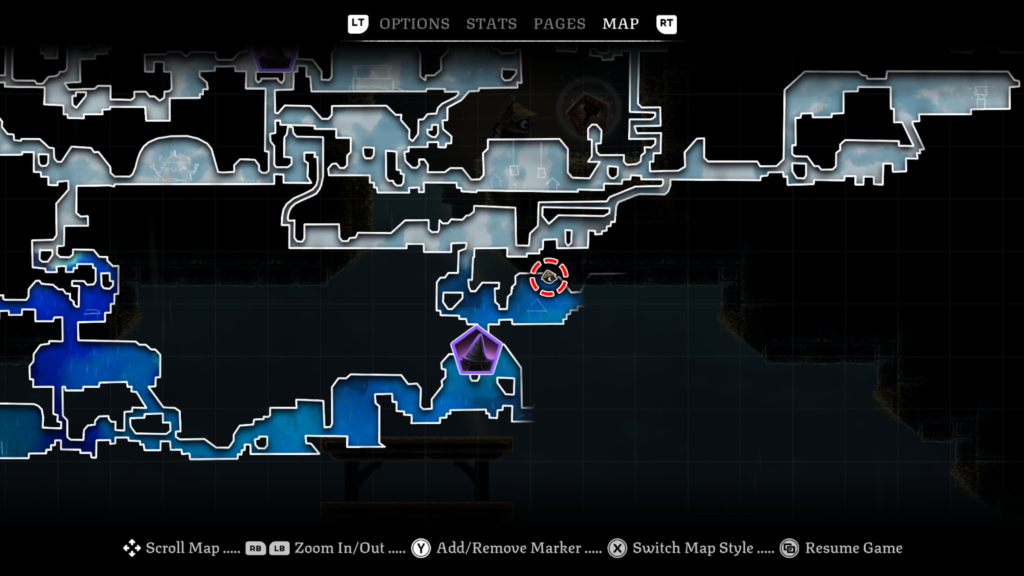
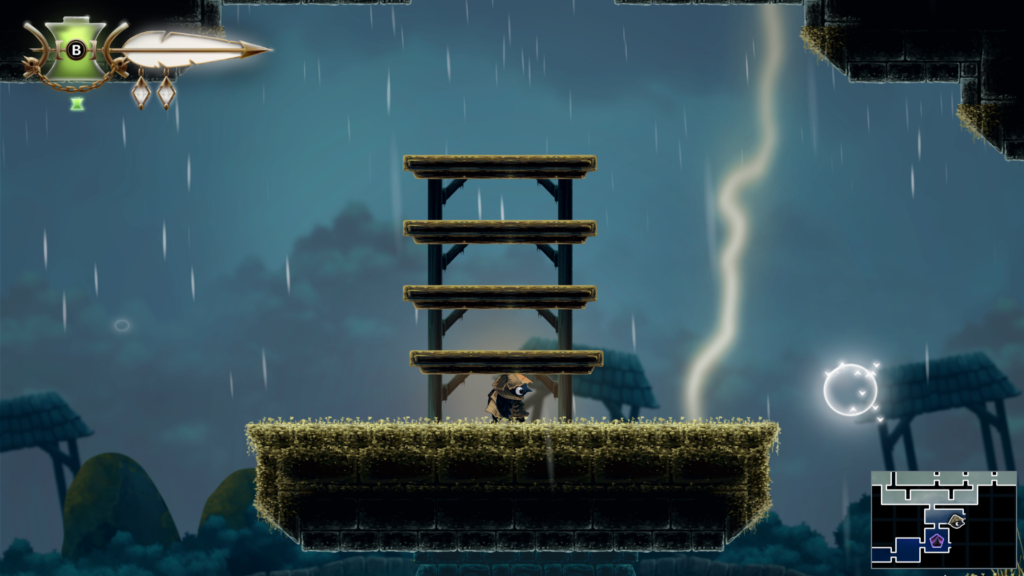
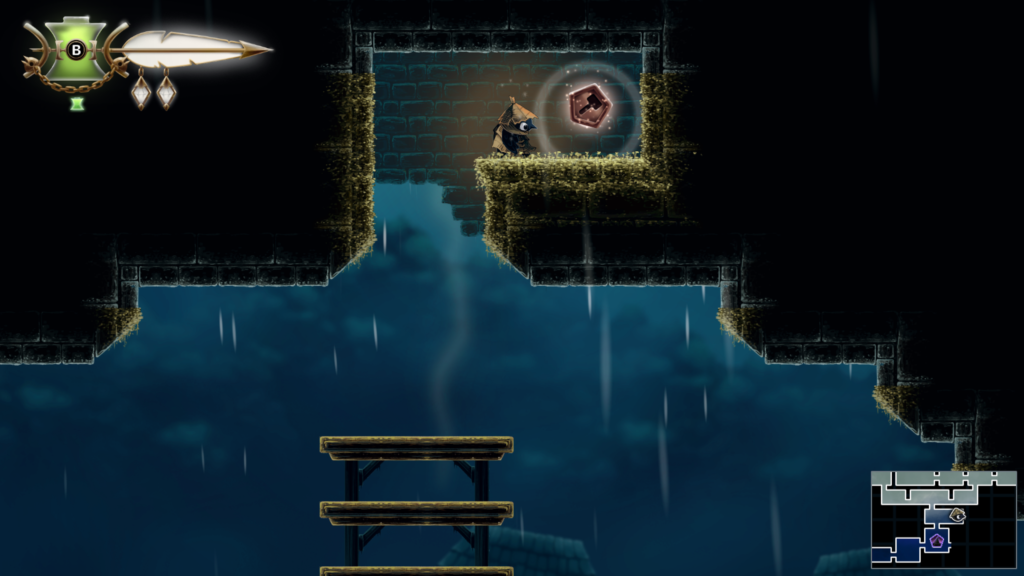
Workshop Token 8 / 27: Location – Midnight Drench (dark blue colour on the map)
Abilities needed: Slingshot, Climb
Stand in the centre of the wooden platforms and throw your matchstick to pop the bubbles at either side and keep jumping upwards.
Story Page 10 / 23: Location – Midnight Drench (dark blue colour on the map)
The Witch’s Bargain Story Page (6 / 9)
Abilities needed: Climb
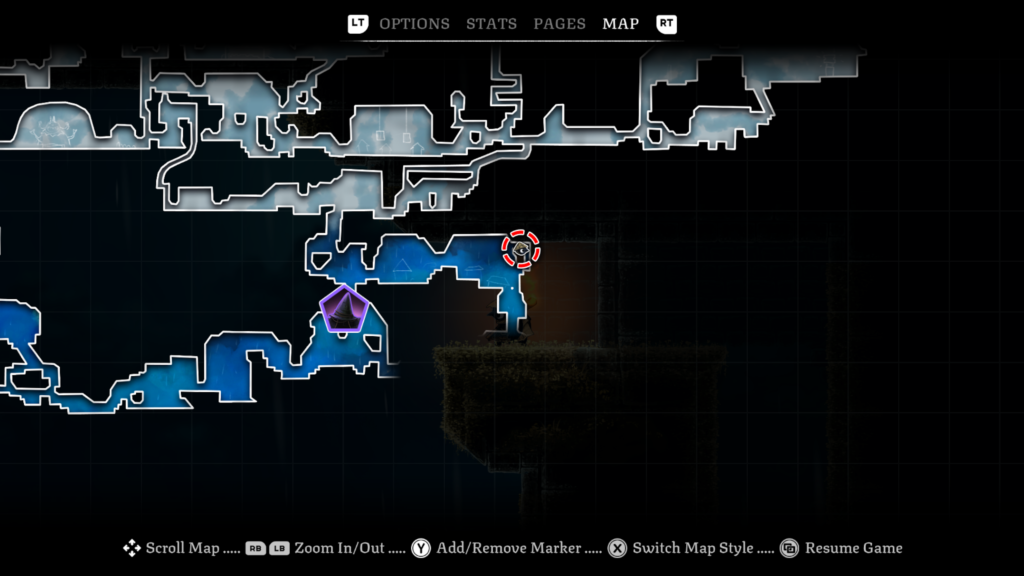
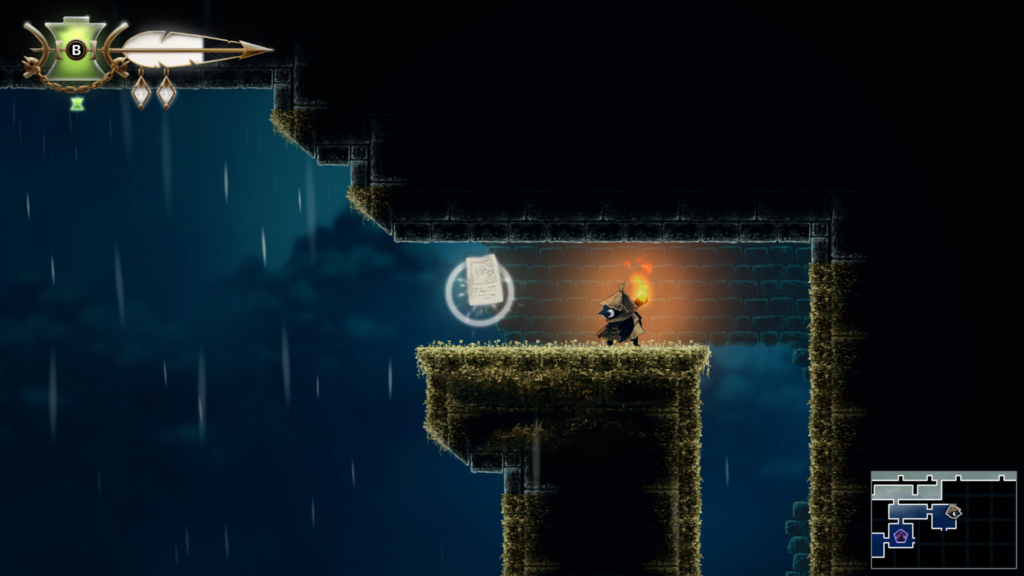
Spirit 7 / 20: Location – Midnight Drench (dark blue area on the map)
Abilities needed: Climb, Hover
This is a vertical challenge, where you need to race upwards as quickly as you can. You’ll need to climb, hover and wall jump to get to the top. There are bubbles to bounce off to get higher.
You’ll be rewarded with a spirit for completing this time trial.
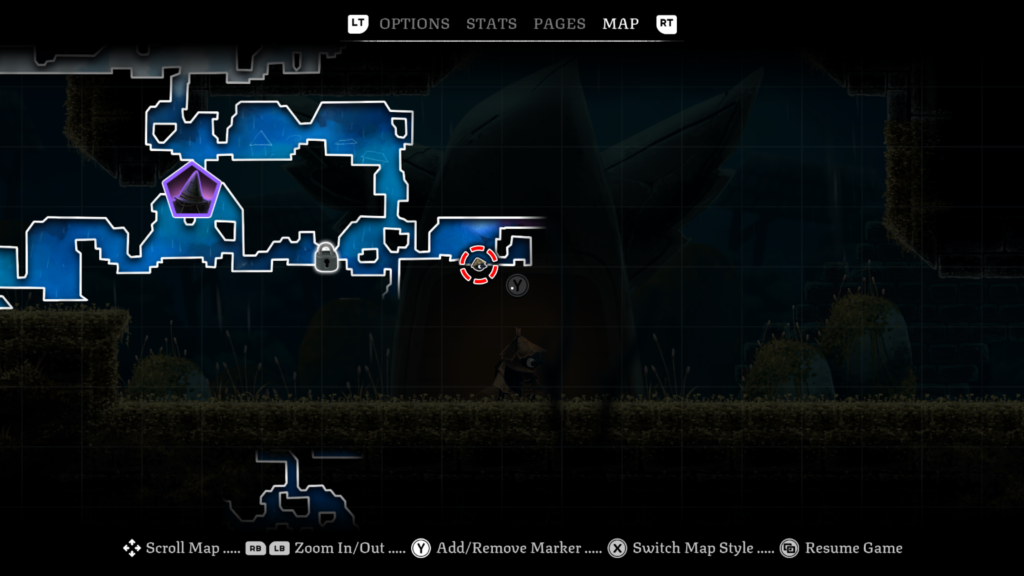
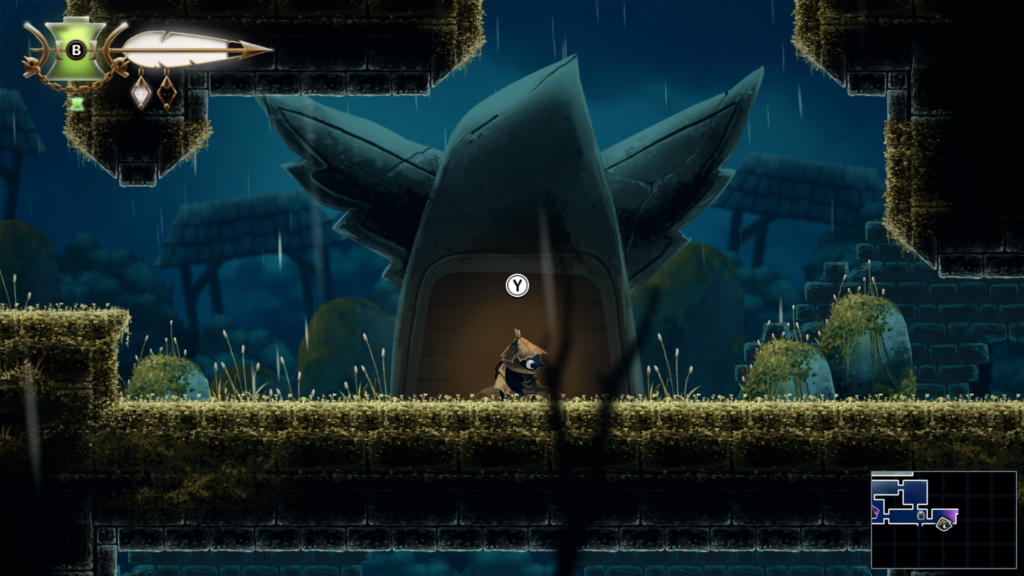
Trinket Slot 28 + 29 / 103: Location – Looter’s Shop (Tent)
Abilities needed: None
Bought from the shop.
Defeat Shrine of the Seven Sons Boss Guide
You’ll take on the Shrine of the Seven Sons boss in the Midnight Drench area of the game. It’s the dark blue area on the map.
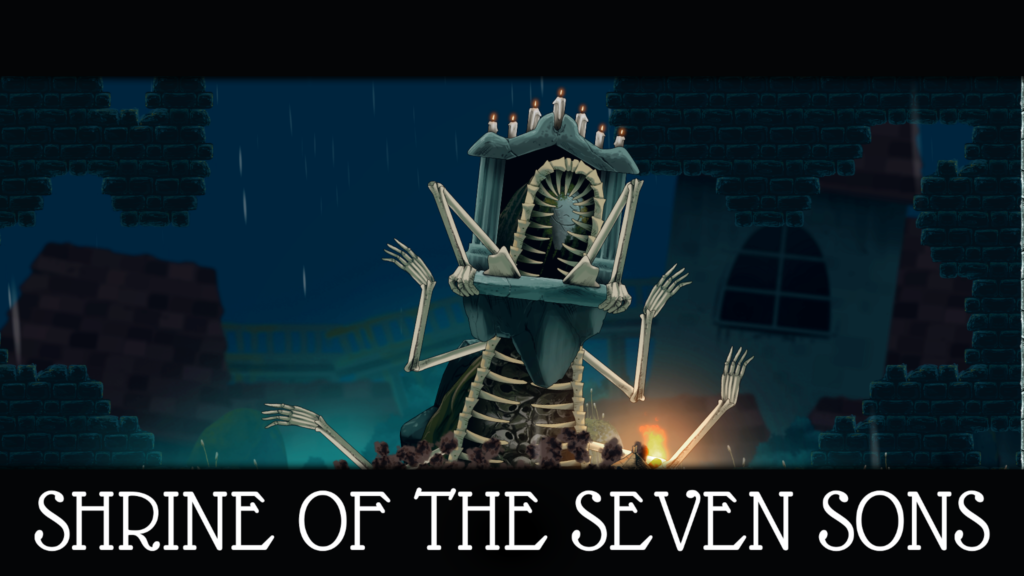
I found this boss to be one of the trickiest. There’s a lot going on, and it can feel a bit overwhelming. But, if you pay attention make use of all the skills and abilities you’ve learned to this point, you’ll eventually be triumphant.
It throws a lot of electric attacks at you that need to be dodged, slid past or evaded. Use the walls on the side to wall climb up and hover across to avoid some of the larger ones. In particular, it will fire a beam in the centre and electric will shoot out that goes across the floor and up the walls. Wall climb and hover is your go to for that.
It also fires a big, bouncing electric ball, when it hits the floor, it fires electric out on the floor. Use the walls to help dodge this. The ball does track your location and will aim for you, so keep moving.
It also fires boney arms out of the floor. A pink beam of light indicates that they are about to appear, from where the light appears. These appear fairly quickly so prioritise moving out of the way as soon as you’re able.
You can watch a video of the boss fight below:
Once beaten, you’ll unlock the “Stormy Night” achievement / trophy. Head to the left from the boss room and you’ll snatch up a golden feather.
Workshop Token 9 / 27: Location – Hunter’s Cabin (orange colour on the map)
Abilities needed: Slingshot, Hover, Climb
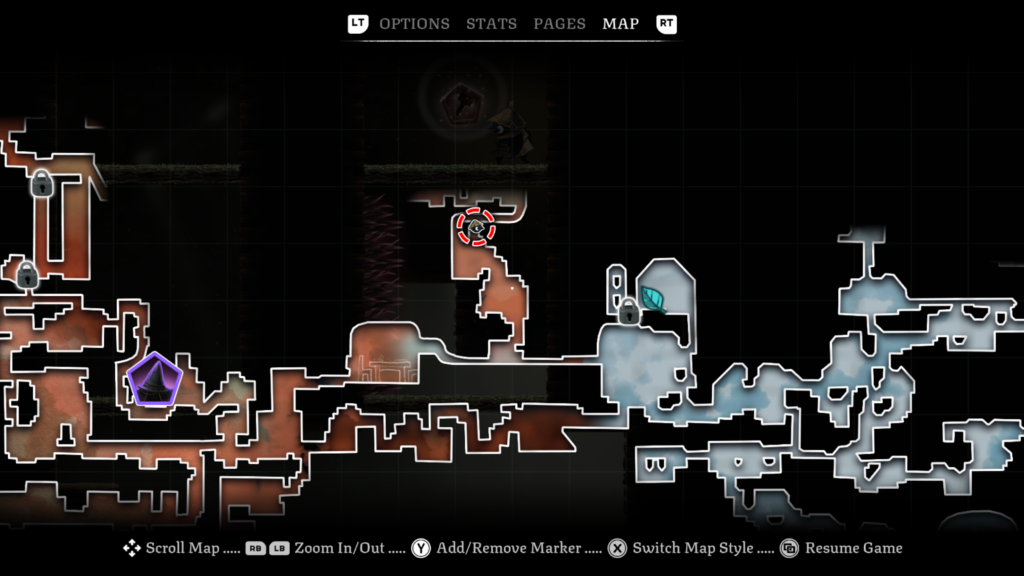
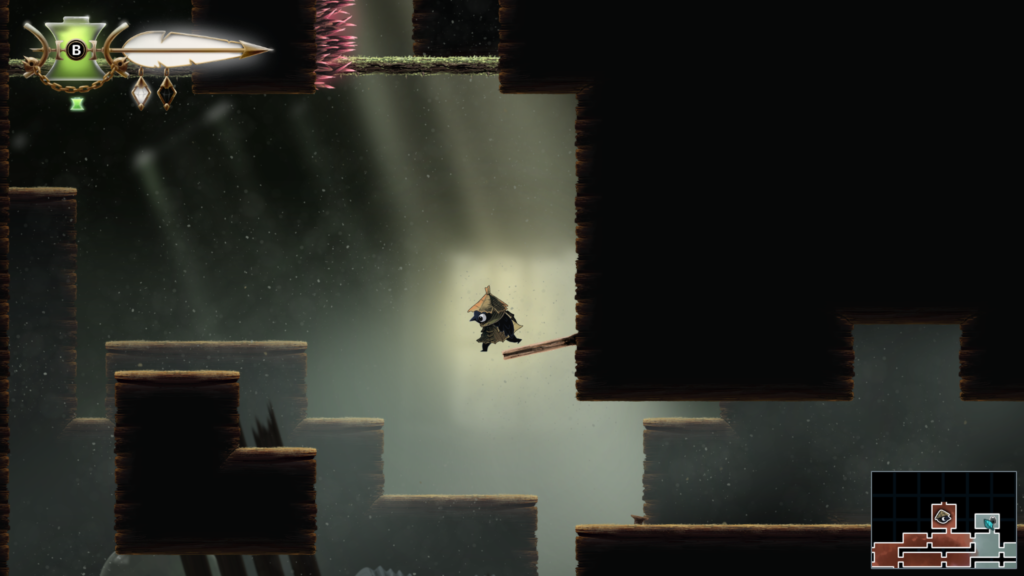
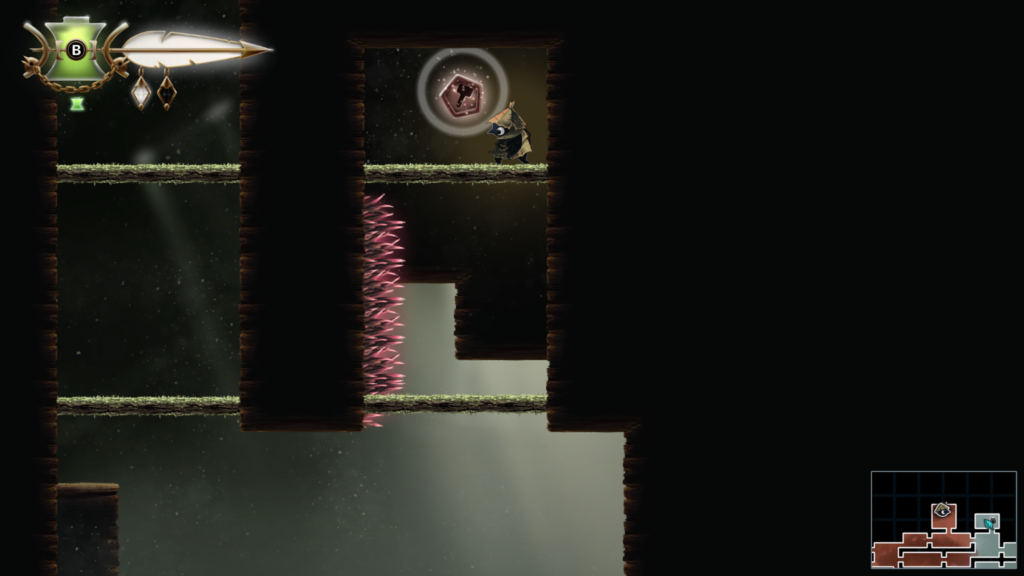
Spirit 8 / 20: Location – Hunter’s Cabin (pale orange area on the map)
Abilities needed: Climb, Hover, Slingshot
This one has you using all three mentioned abilities. You’ll have some left to right running and a bit of verticality too.
You’ll be rewarded with a spirit for completing this time trial.
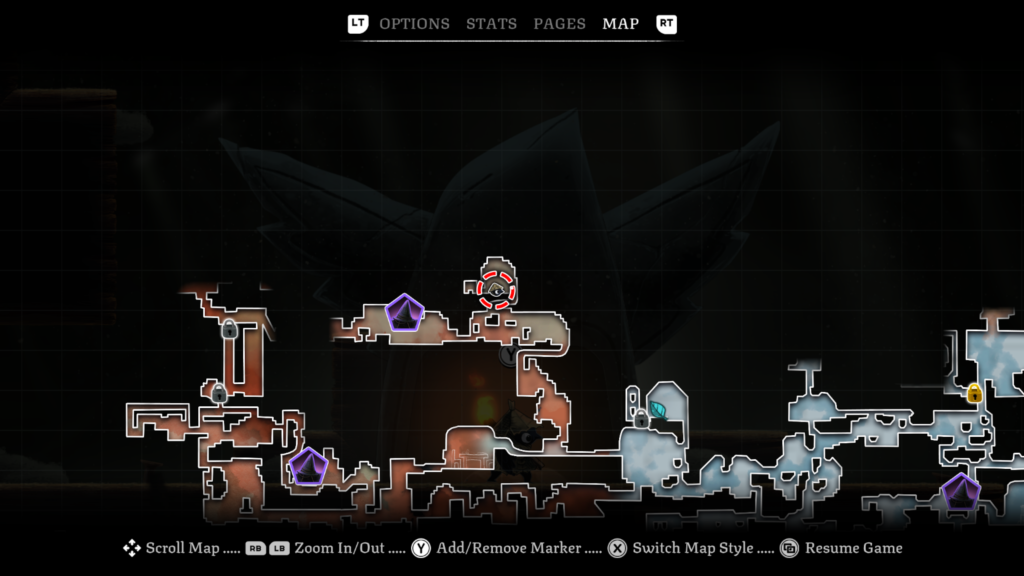
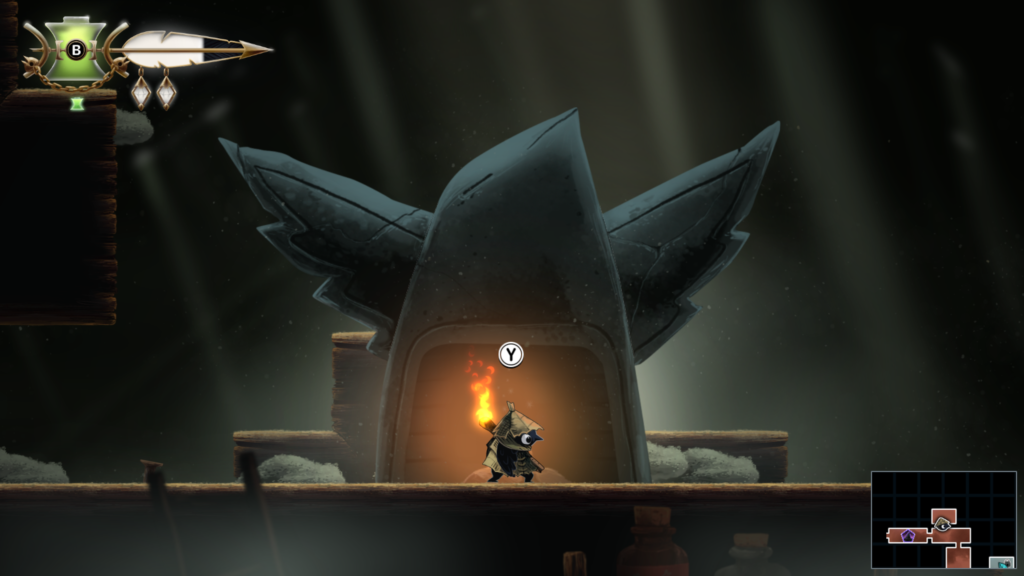
Trinket Slot 30 / 103: Location – Hunter’s Cabin (orange area on the map)
Abilities needed: Hover
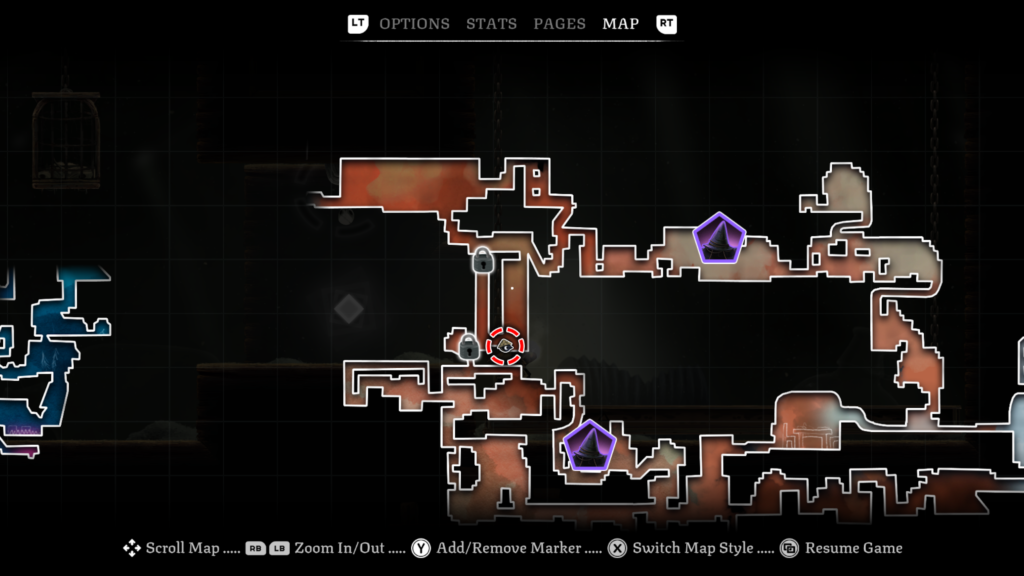
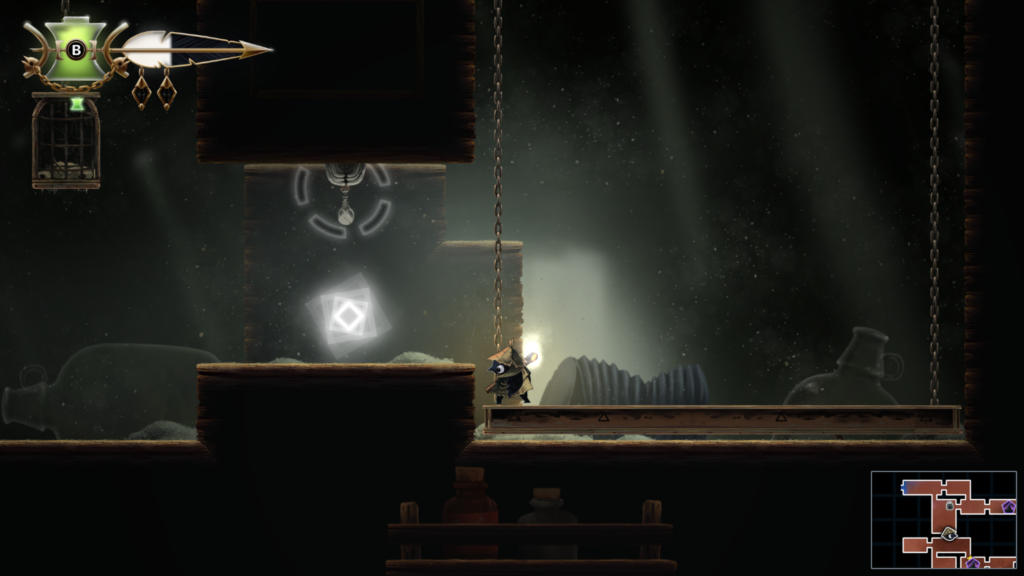
Trinket 15 / 32: Location – Night Garden (mixed blue colour on the map)
Trinket: Glass Shard – if you heal past your max health, the overflow will lengthen your
temporary damage boost.
Abilities needed: None
Trinket 16 / 32: Location – Looter’s Shop (Tent)
Trinket: Skull Keychain – emits a short barrage of burning embers when you take damage
Cost: 350
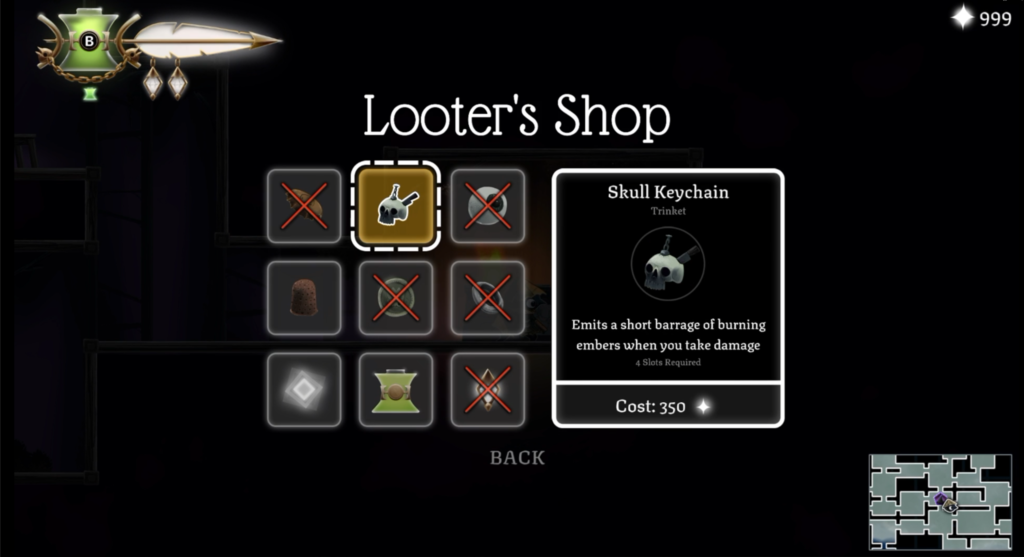
Trinket 17 / 32: Location – Looter’s Shop (Tent)
Trinket: Rusted Thimble – reduce damage from spikes
Cost: 550
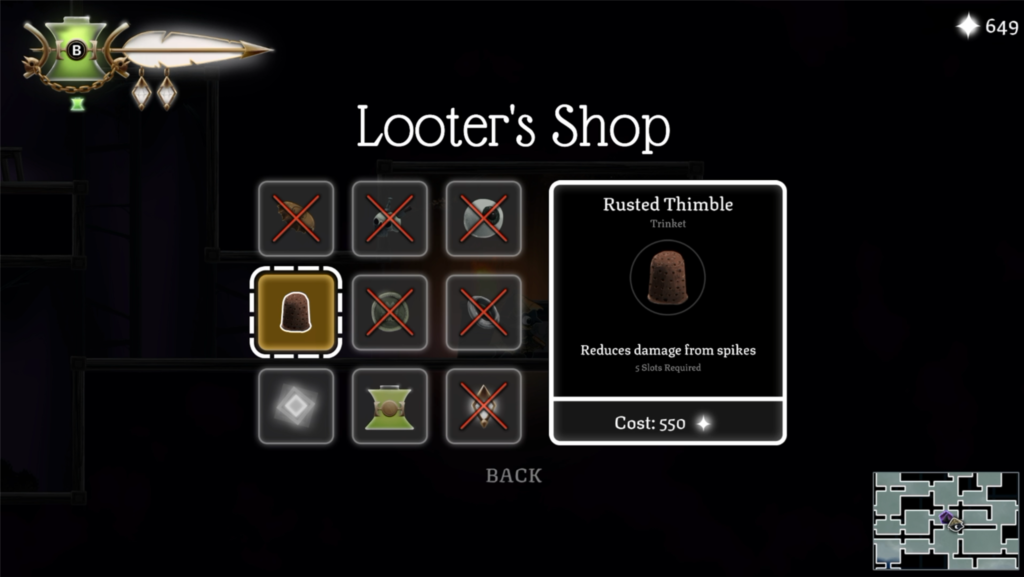
Trinket 18 / 32: Location – Midnight Drench (dark blue colour on the map)
Trinket: Spider’s Web – allows you to slingshot your flaming vessel.
Abilities needed: Slingshot, Climb
Trinket Slot 31 / 103: Location – Night Garden (mixed blue area on the map)
Abilities needed: Hover, Climb
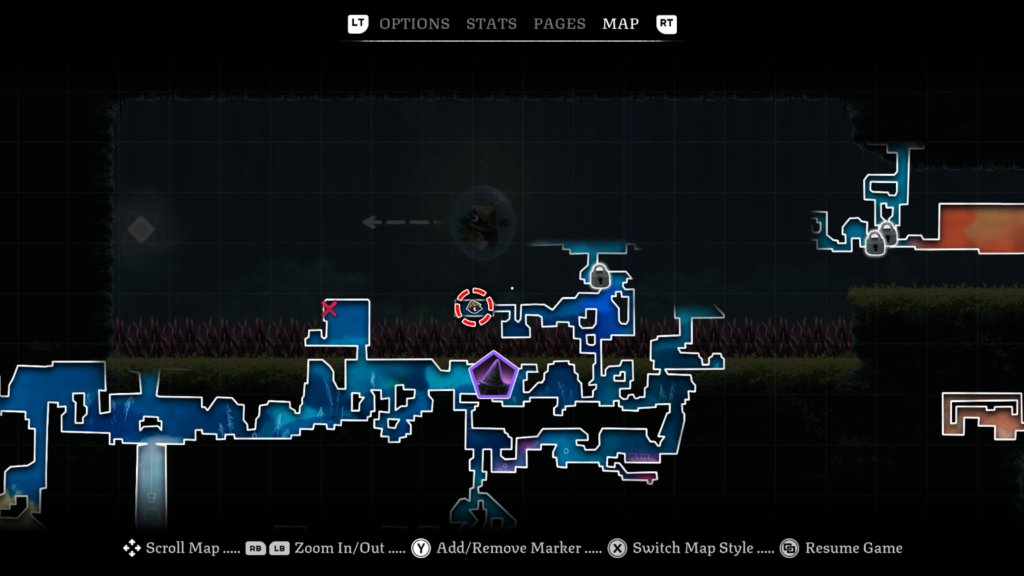
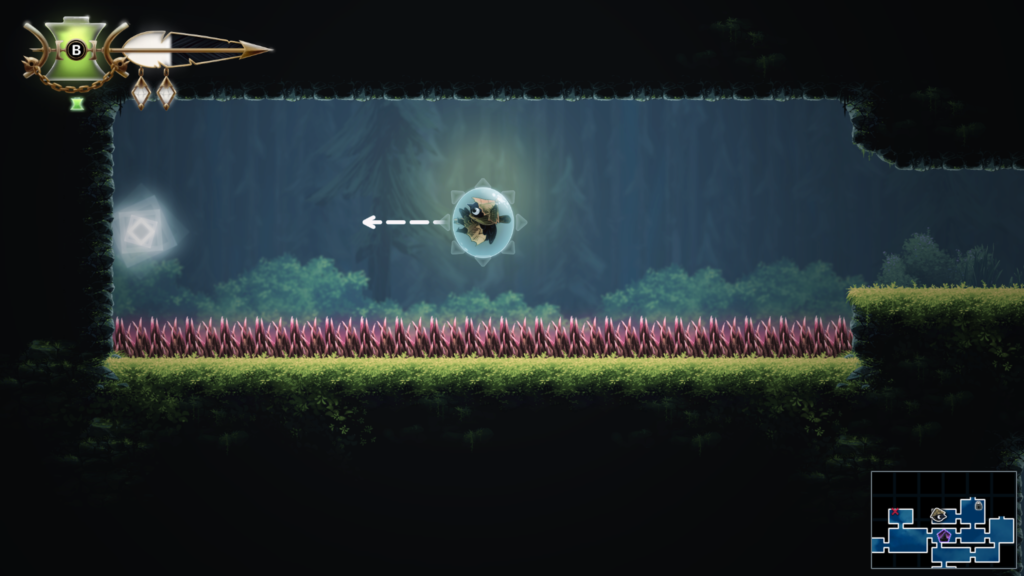
Trinket Slot 32 / 103: Location – Night Garden (mixed blue area on the map)
Abilities needed: Hover, Climb, Slingshot
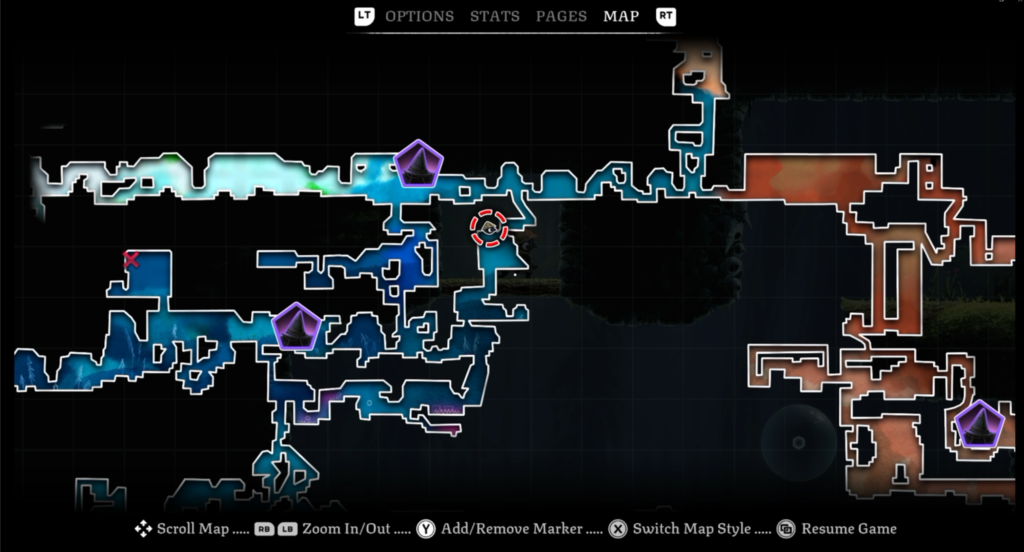
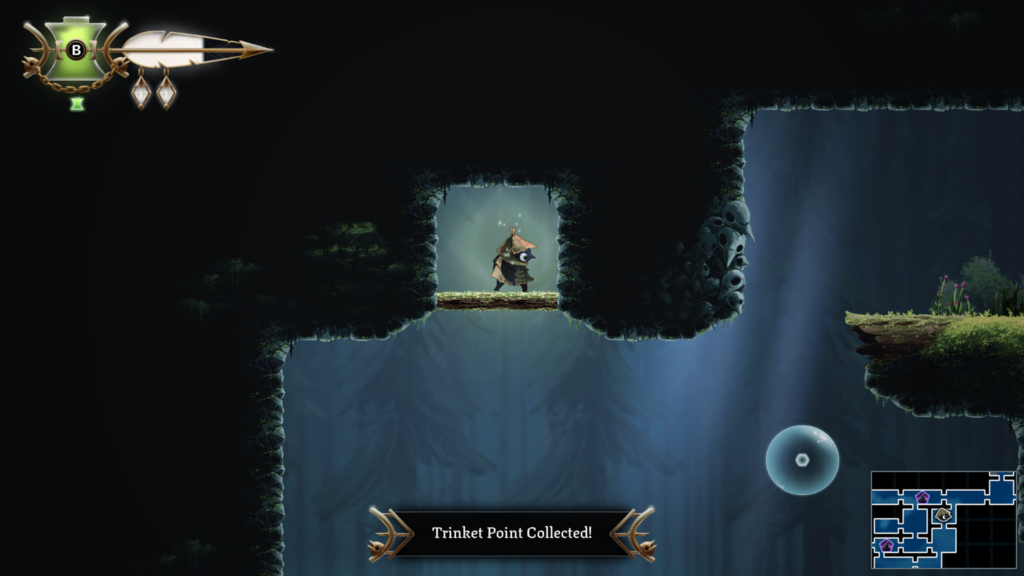
Spirit 9 / 20: Location – Night Garden (mixed blue colour on the map)
Abilities needed: Climb, Hover, Slingshot
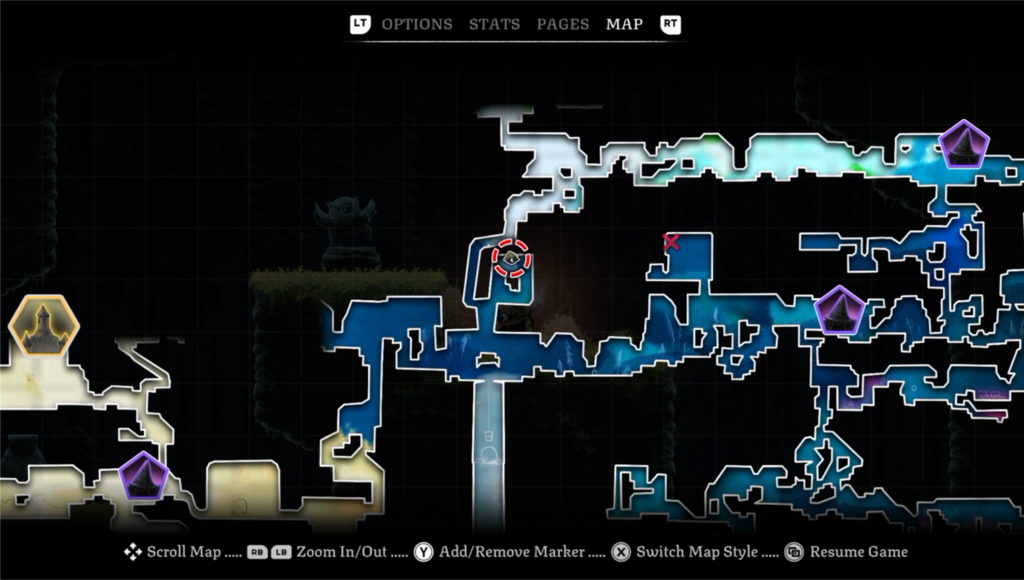
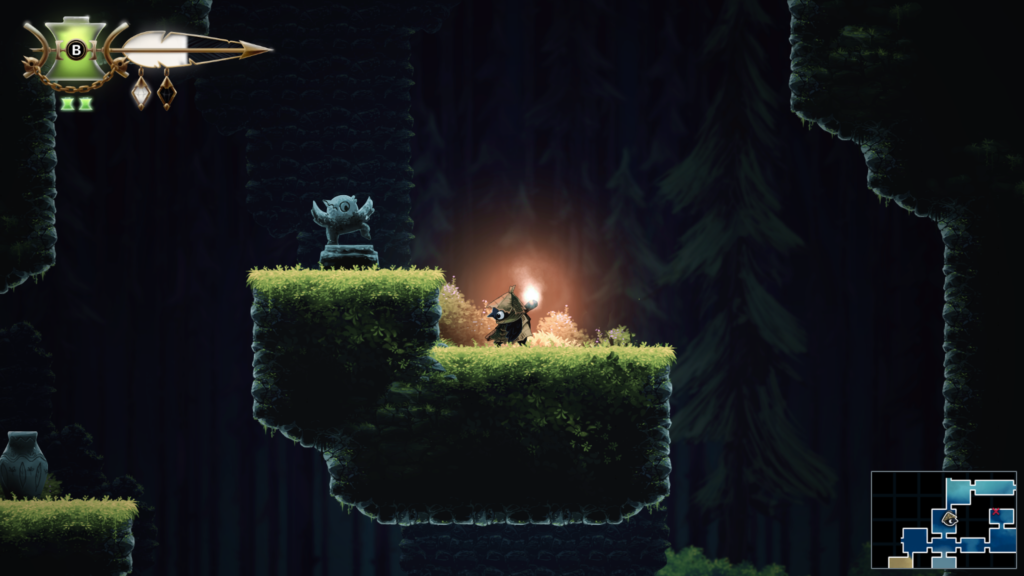
Spirit 10 / 20: Location – The Lookout Tower (light blue colour on the map)
Abilities needed: Hover
You’ll unlock the “Halfway There” achievement / trophy for returning your 10th spirit.
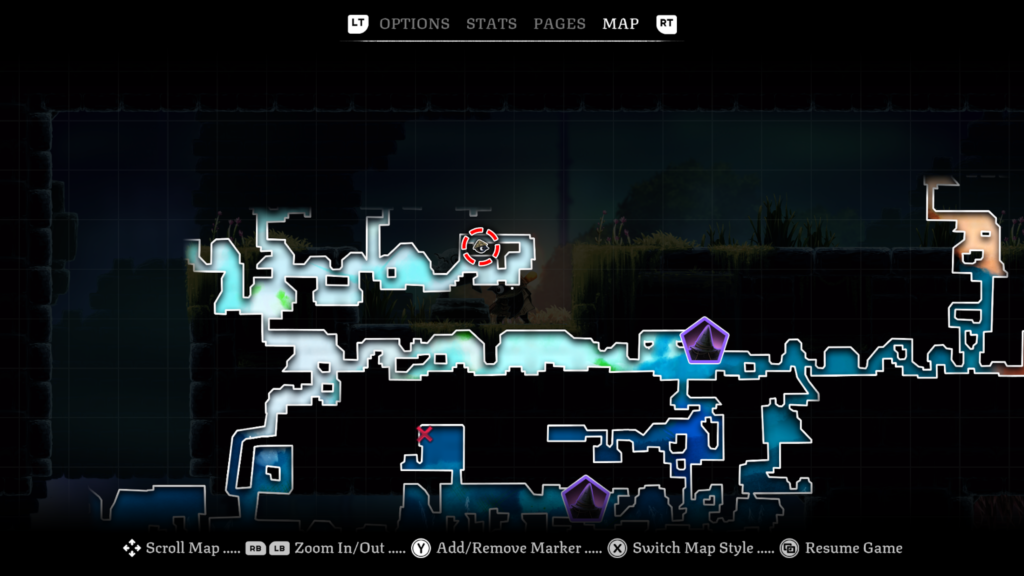
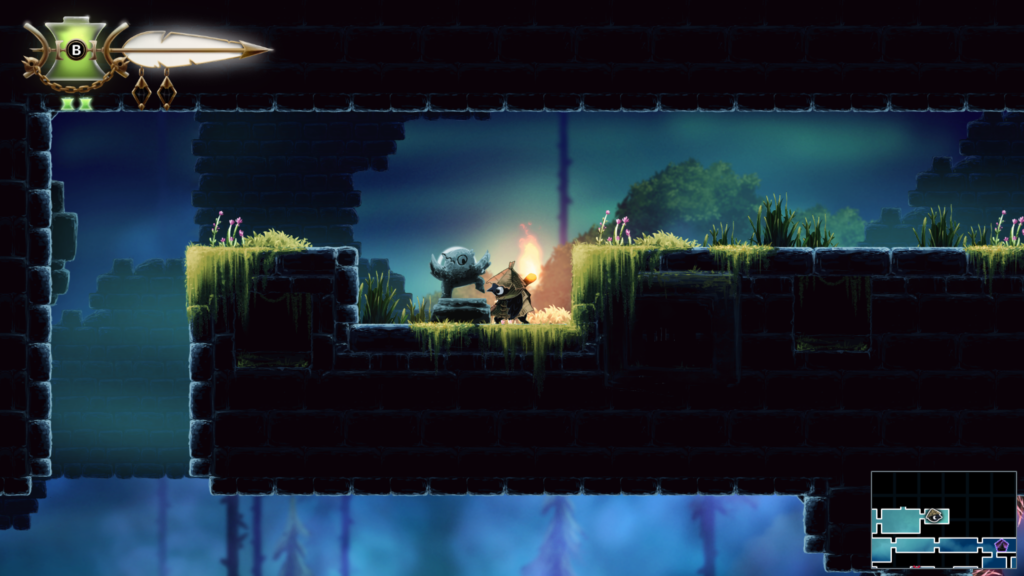
Trinket Slot 33 + 34 / 103: Location – Looter’s Shop (Tent)
Abilities needed: None
Bought from the shop.
Flying Ability
You get the ability to temporarily fly in the The Lookout Tower. This occurs when you jump onto a bubble that has a feather in it. Glimmer can fly for a short period, indicated by the little feather that appears above their head. There three feather pick ups in The Lookout Tower area that can extend that flight time.
You can use the tent in the centre of The Lookout Tower as a good reference point.
Please note that the order below isn’t necessarily the best order to find them, just the order I found them in.
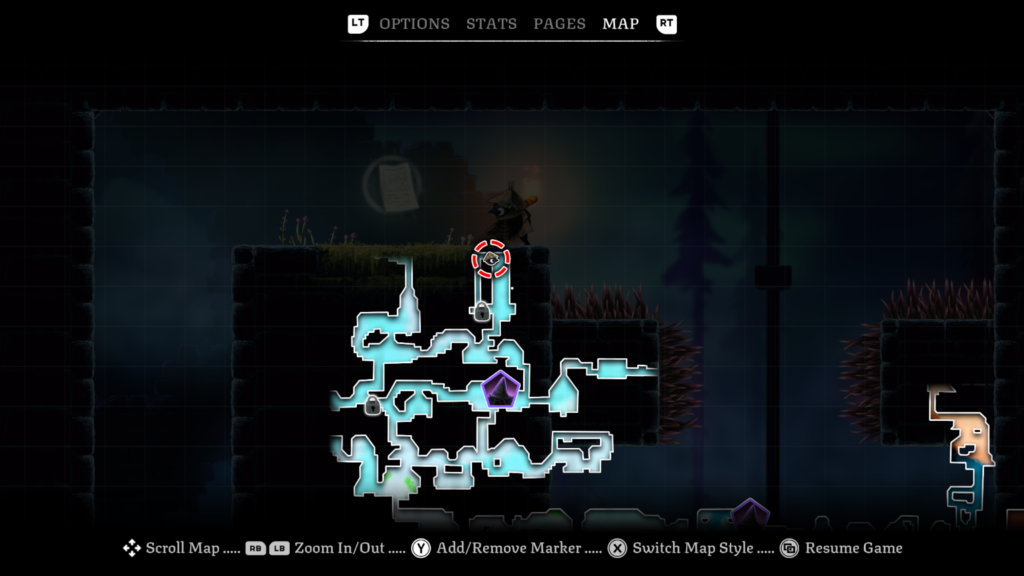
Feather: 1 / 3
The first feather is located above the tent and to the left in The Lookout Tower.
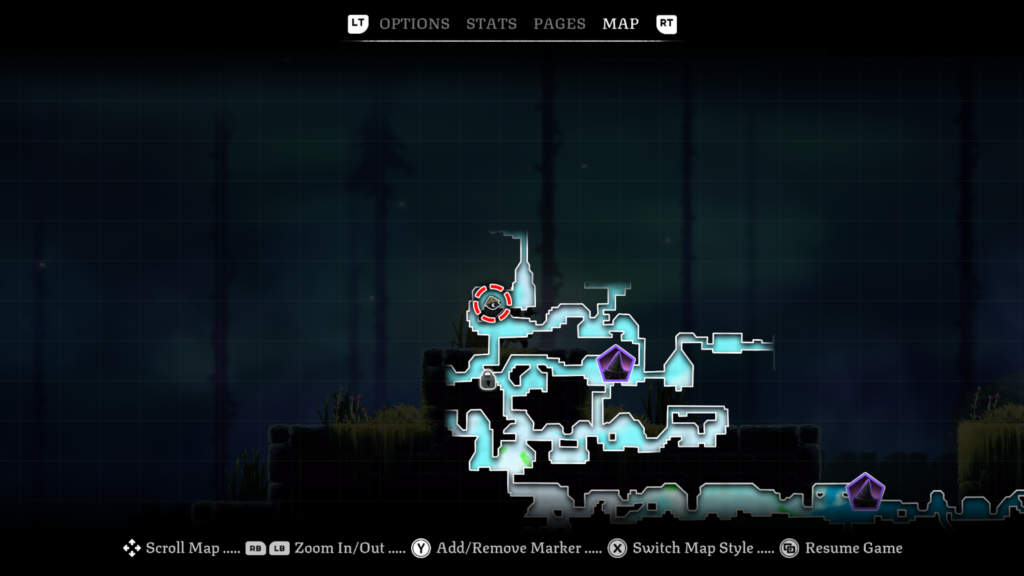
Story Page 11 / 23: Location – The Lookout Tower (light blue colour on the map)
The Lookout Tower Story Page (3 / 6)
Abilities needed: None
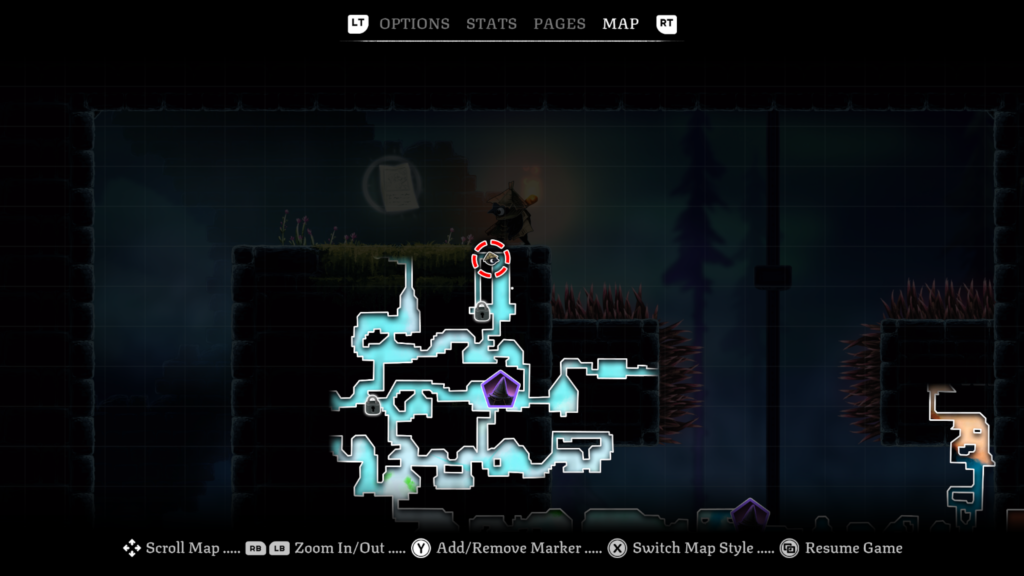
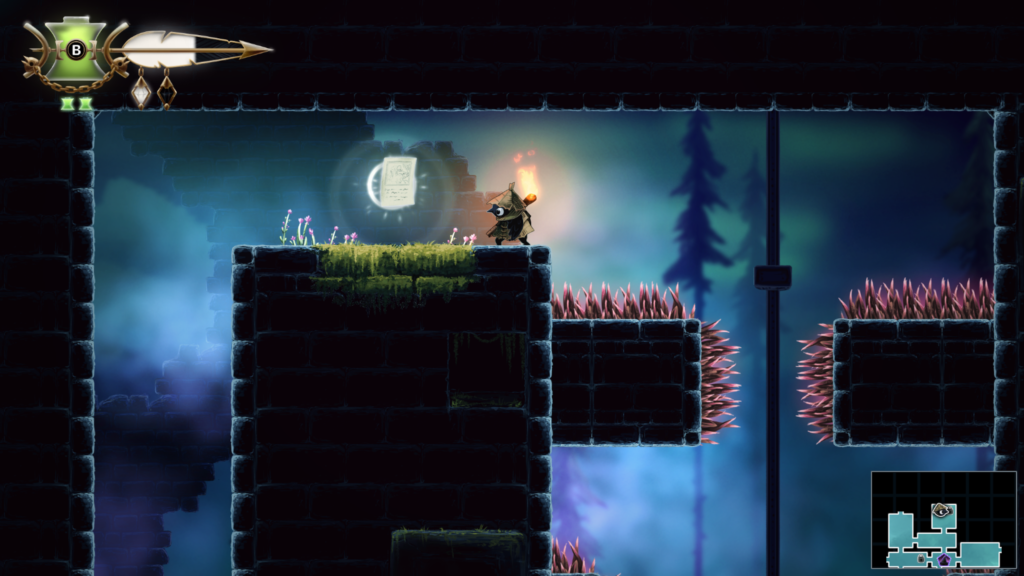
Story Page 12 / 23: Location – The Lookout Tower (light blue colour on the map)
The Lookout Tower Story Page (4 / 6)
Abilities needed: Slingshot, Climb, Hover
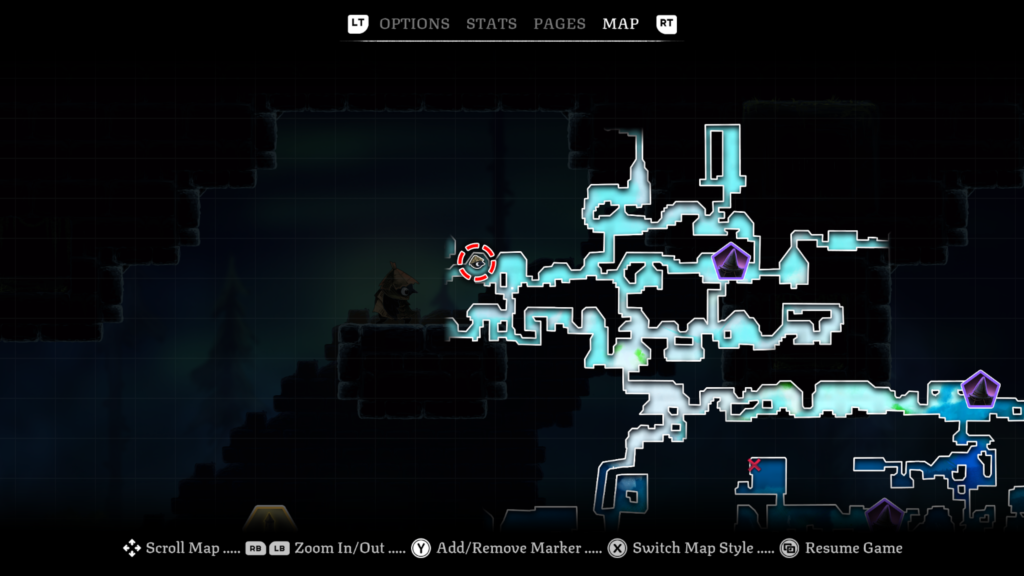
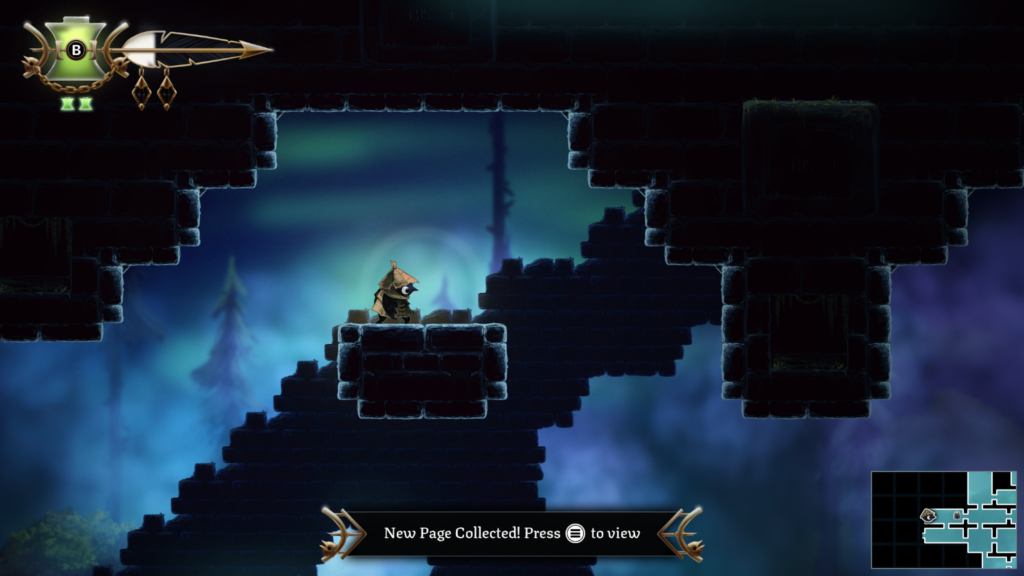
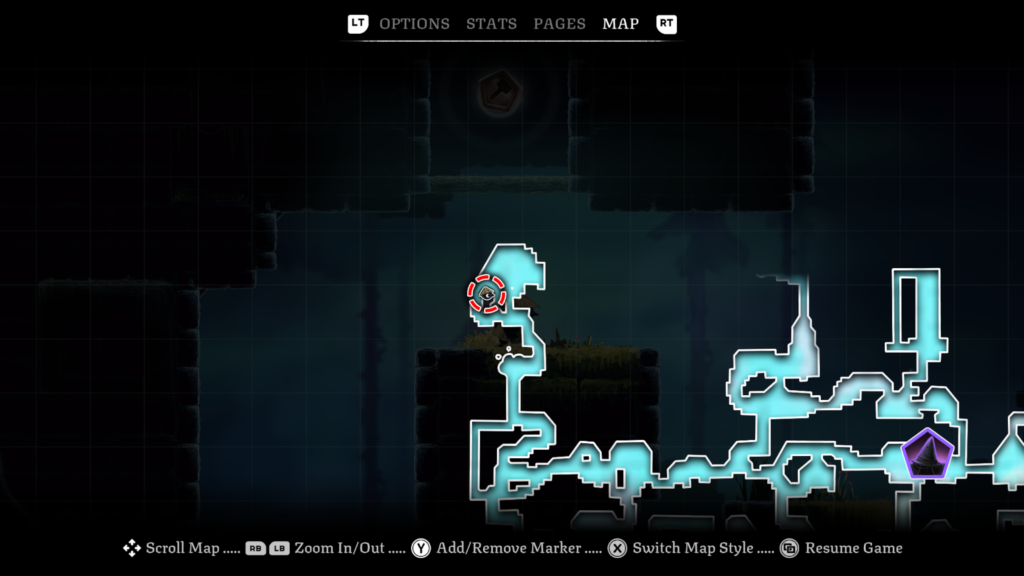
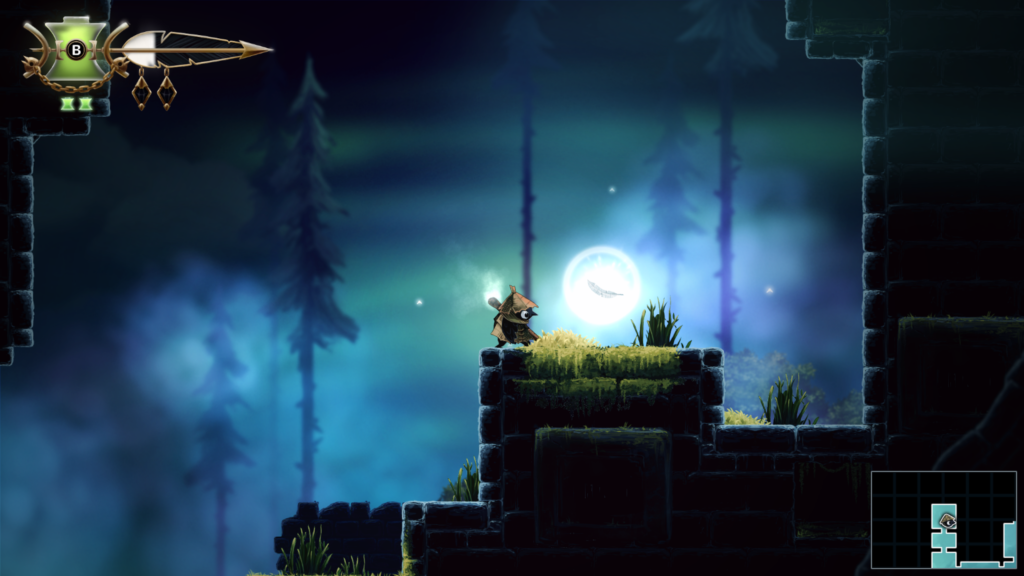
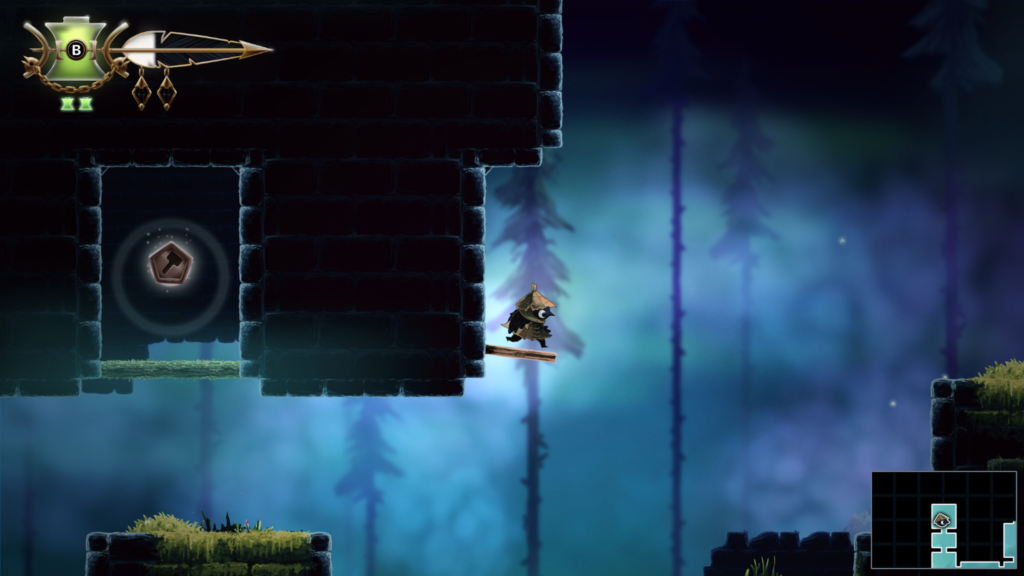
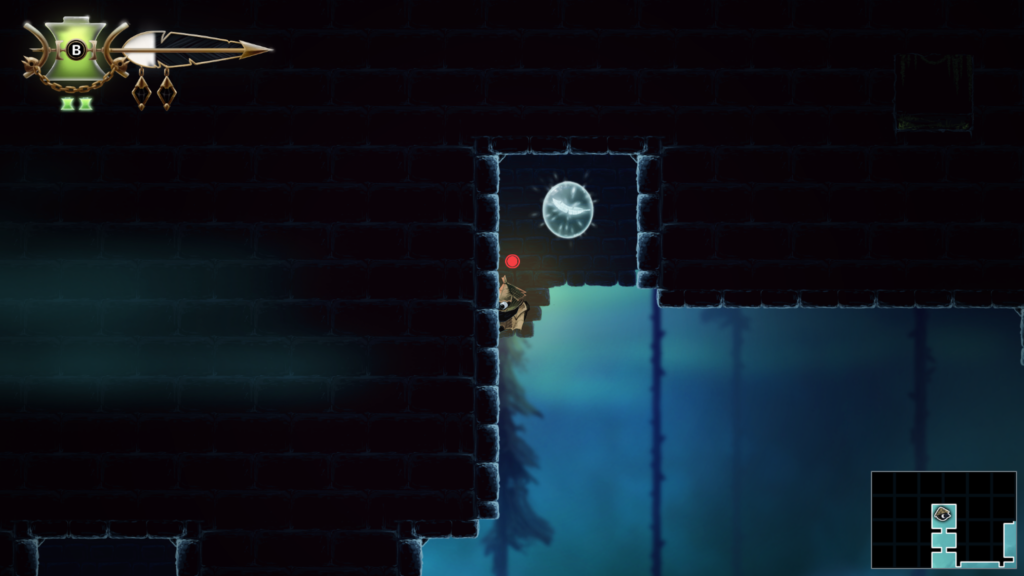
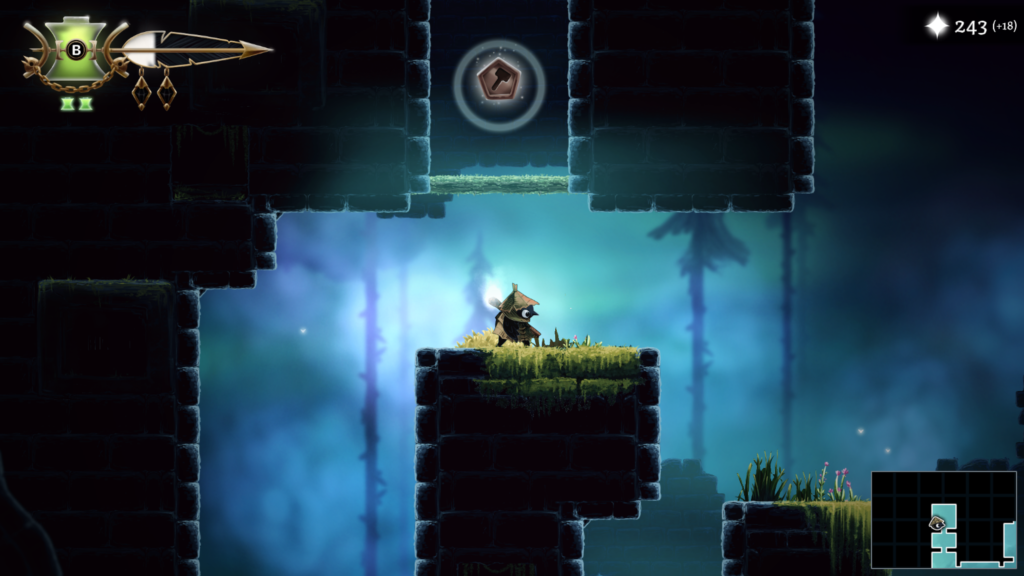
Workshop Token 10 / 27 + Feather 2 / 3: Location – The Lookout Tower (light blue colour on the map)
Abilities needed: Slingshot, Hover, Climb
You’ll need to go to the top of the room and grab the feather in a bubble that lets you fly briefly. Don’t flap and drop down to bring you under the Workshop Token. Then fly upwards to reach it. It might take you a couple of gos. Be sure to the grab the feather on the right to increase your flight time too.
Trinket Slot 35 / 103: Location – Lookout Tower (light blue area on the map)
Abilities needed: Hover, Climb, Slingshot
Throw your matchstick through the gap to the other side to create a platform you can reach and bounce up to the trinket slot.
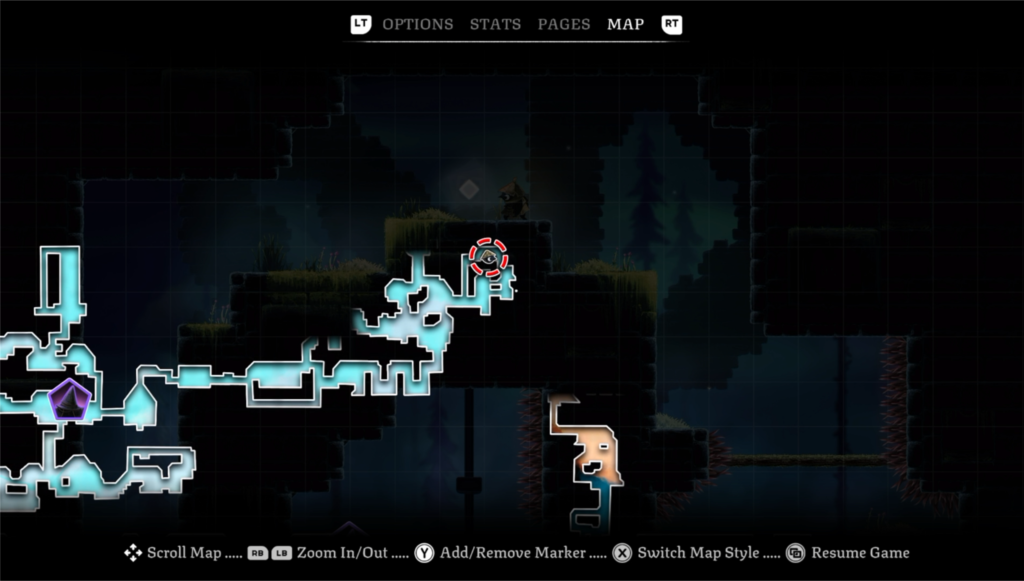
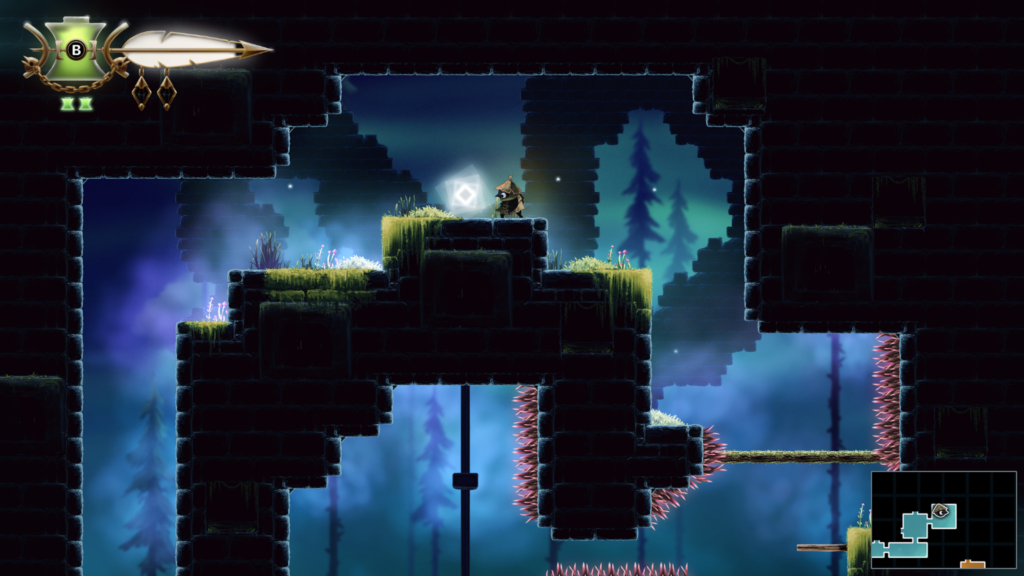
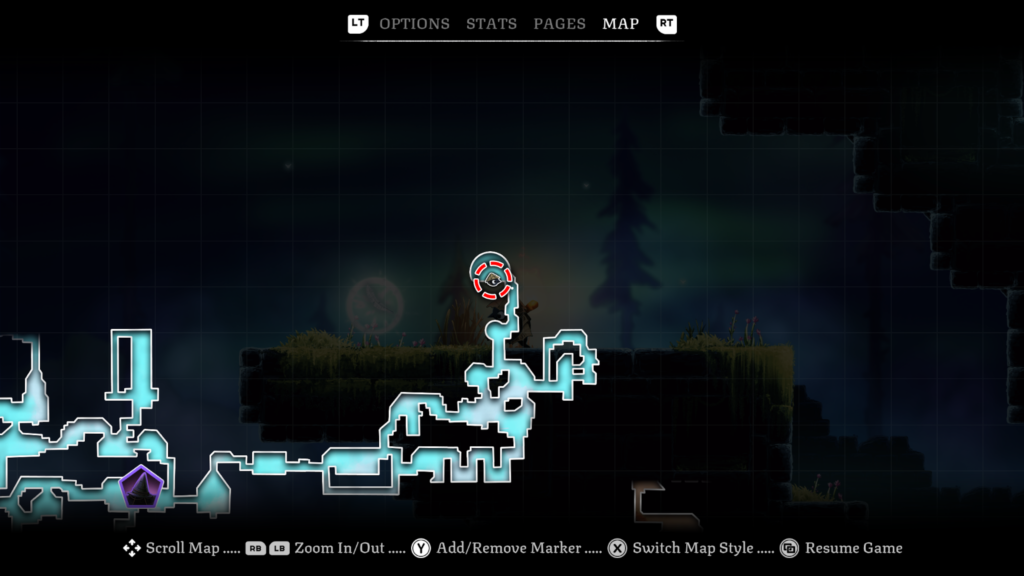
Feather: 3 / 3
The final feather is to the upper right area of The Lookout Tower.
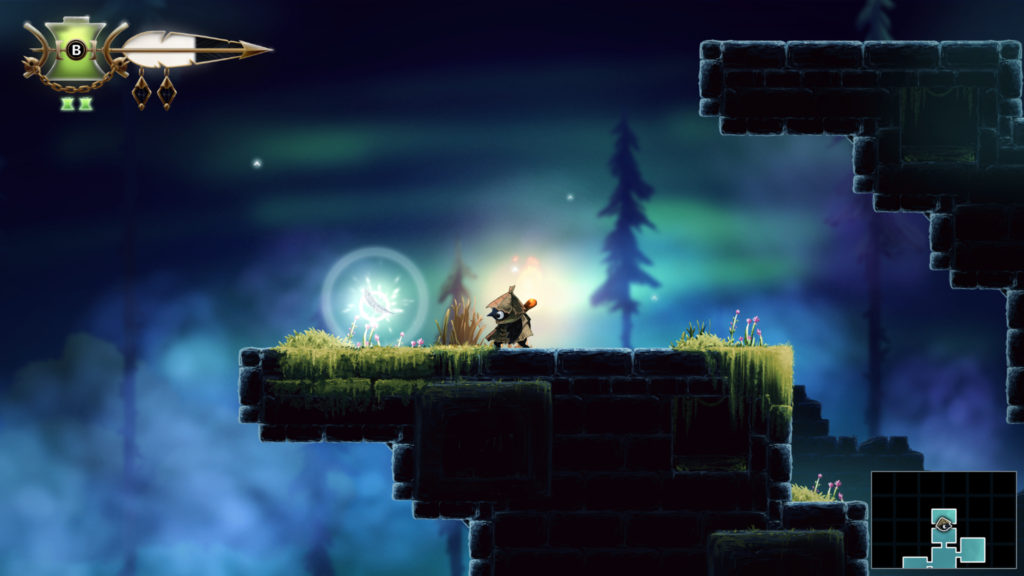
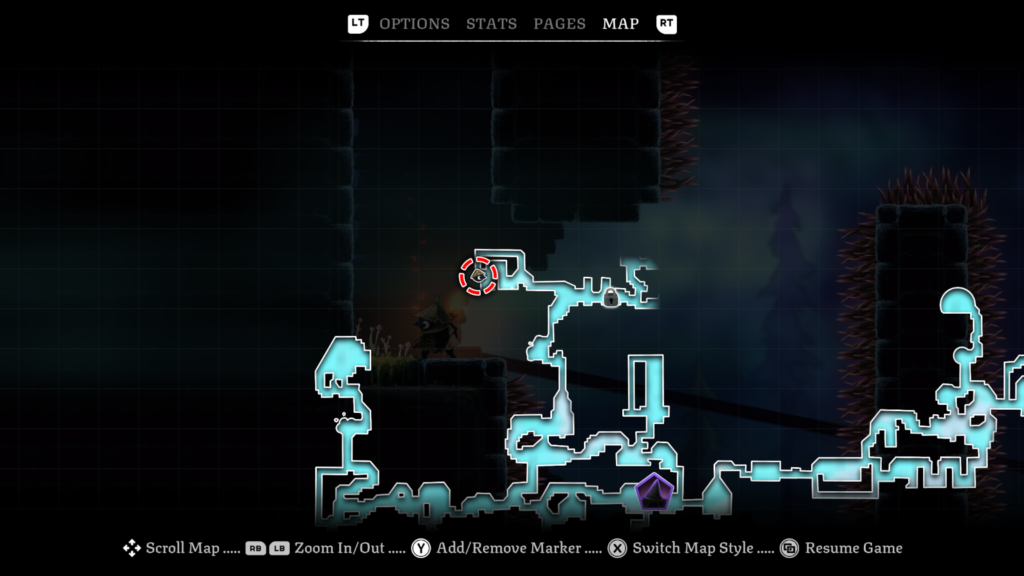
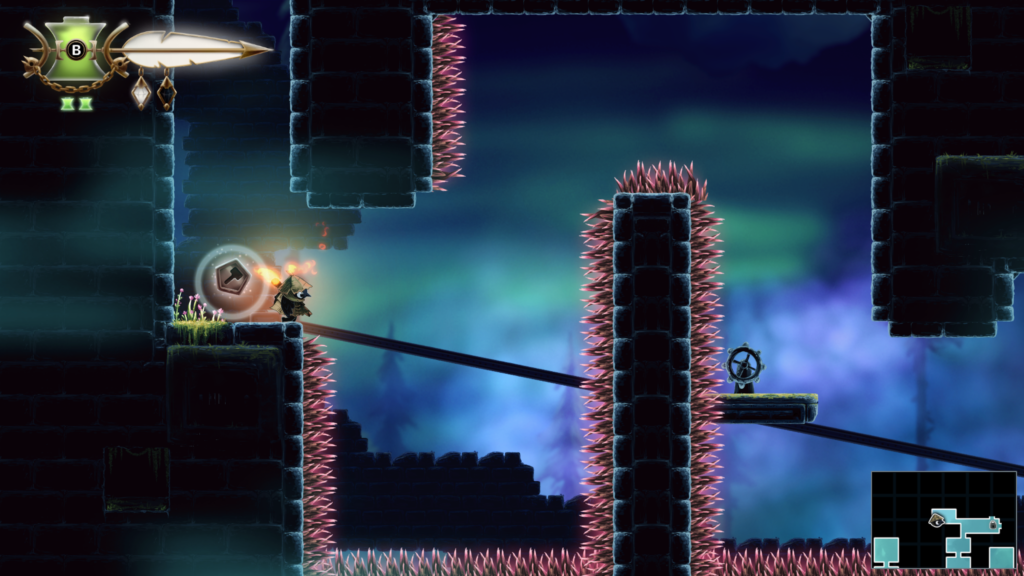
Workshop Token 11 / 27: Location – The Lookout Tower (light blue colour on the map)
Abilities needed: Hover, Climb
You’ll need to hit the wheel on the platform enough times to give it momentum to clear the spiky pillar in the middle, and enough time for you to jump to the wall on the right, climb up and hover across to the other side before the platforms returns back to where it started.
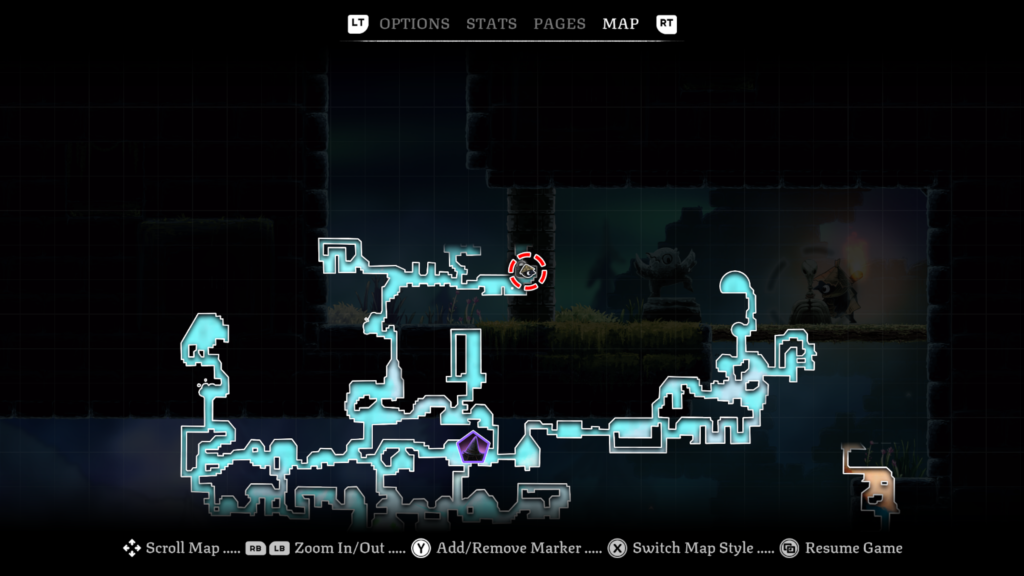
Spirit 11 / 20: Location – The Lookout Tower (light blue colour on the map)
Abilities needed: Hover
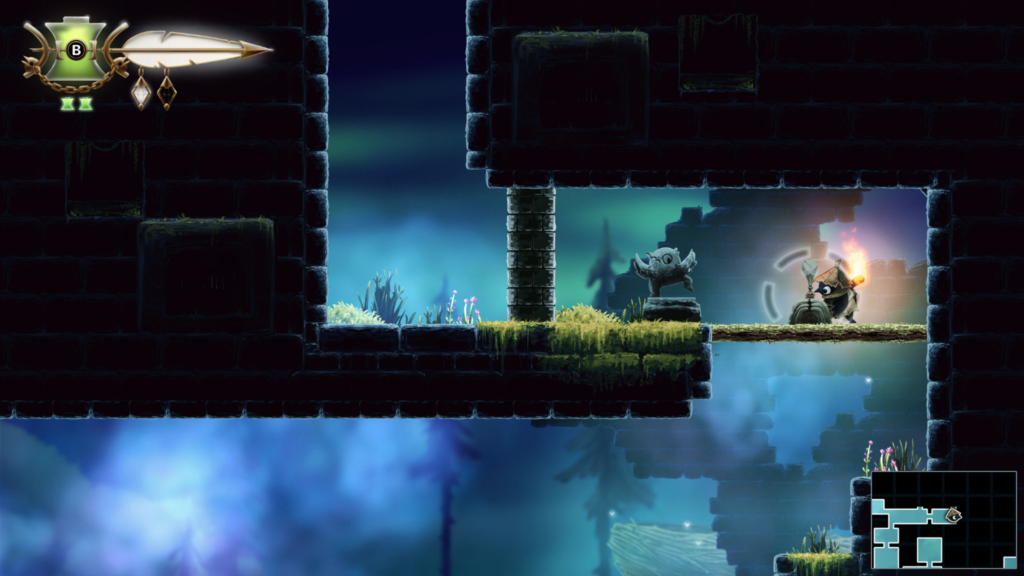
Trinket Slot 36 / 102: Location – Night Garden (mixed blue area on the map)
Starsinger Boss Guide
You’ll take on the Starsinger boss in The Lookout Tower area of the game (the teal coloured area on the map).
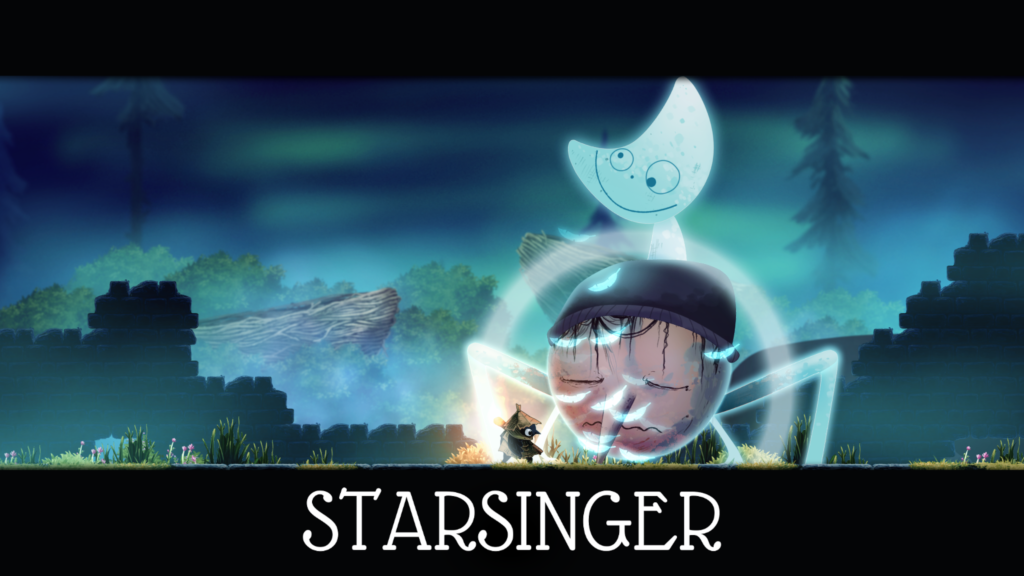
The Starsinger throws a lot of projectiles at you with different attack patterns. Some can be a bit tricksy, or the boss will do a ground pound while you’re focused on the projectiles, so keep your wits about you.
He will flow black feathers at you too, these don’t seem to target you, but you’ll need to keep moving to keep out of their range.
With a pink flash to indicate it, the boss will create a circle of the black feathers. These will move to the ground where you are and encircle you. Use your dodge slide to enter it, then use the dodge slide to move out of it on the other side.
As it takes more damage, it’ll get more red-faced and increase the intensity of its attacks. Keep moving, dodging, and using your flame vessel. If you’re struggling check your trinket loadout. The trinket that provides a brief period of invulnerability after using an oil flask is a life saver.
You can watch a video of the boss fight below:
Defeating the Starsinger boss will net you the “Song of the Stars” achievement / trophy.
Trinket Slot 37 / 102: Location – Autumn Forest (orange area at the top of the map)
Abilities needed: Hover, Climb
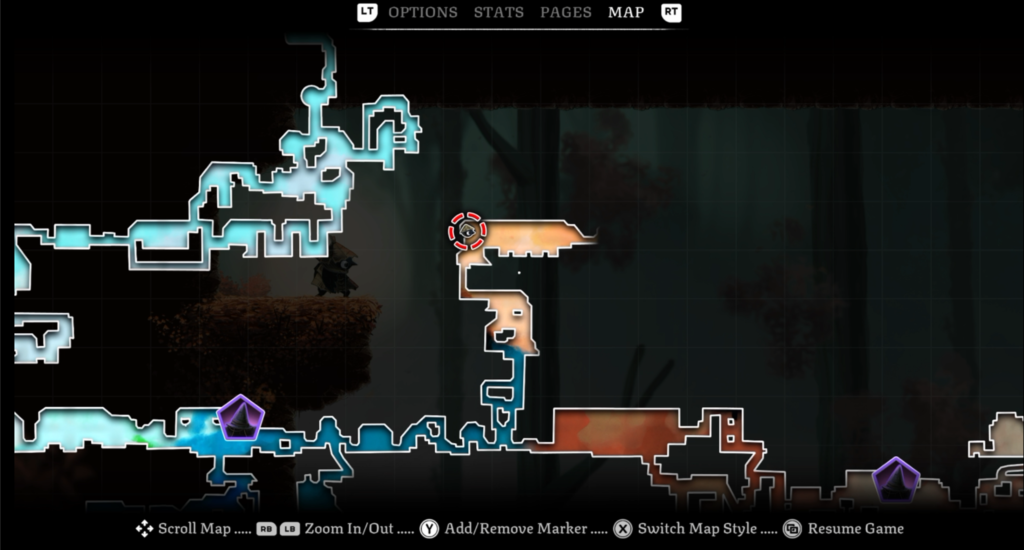
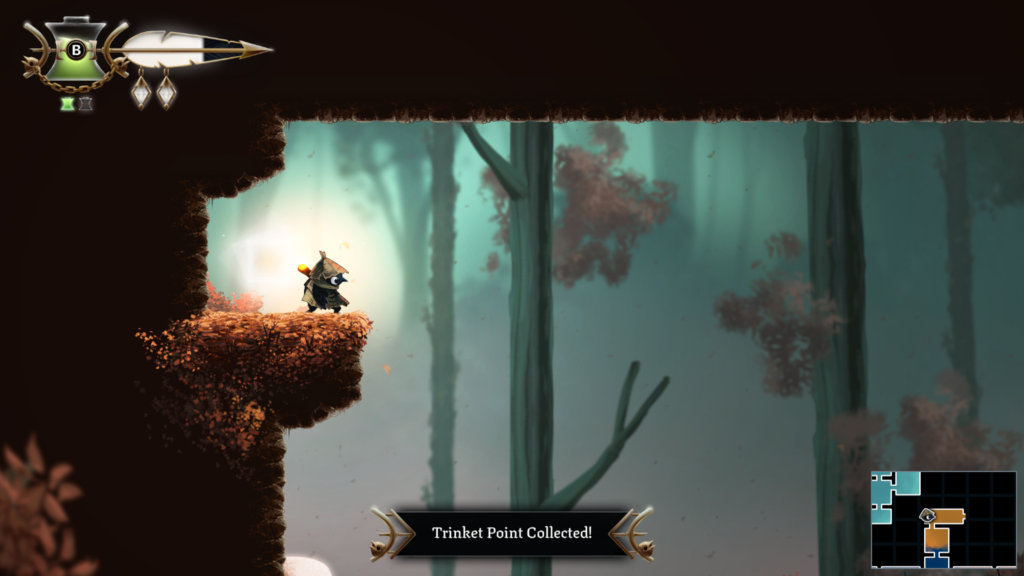
Trinket Slot 38 / 102: Location – Autumn Forest (orange area at the top of the map)
Abilities needed: Hover, Climb
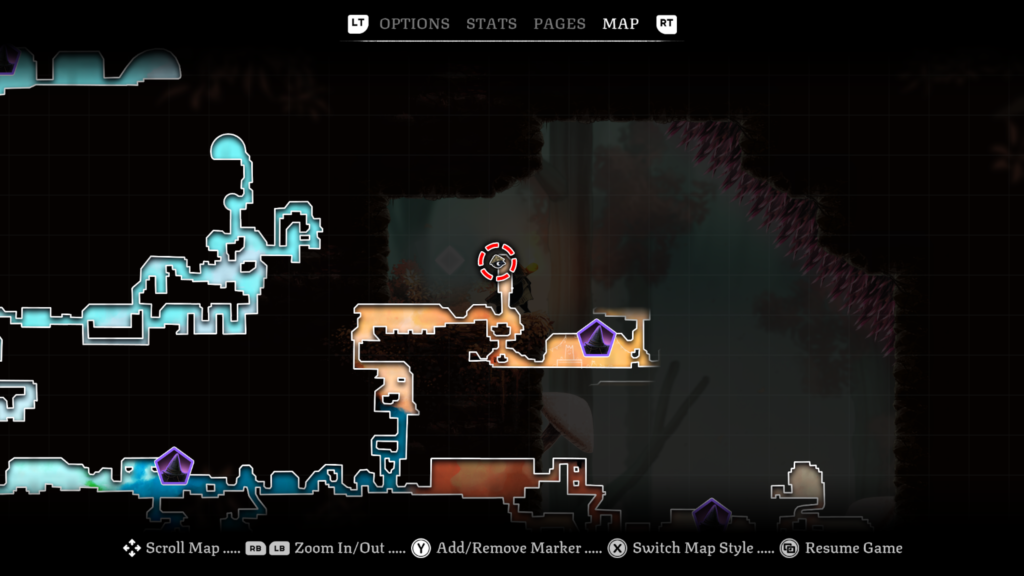
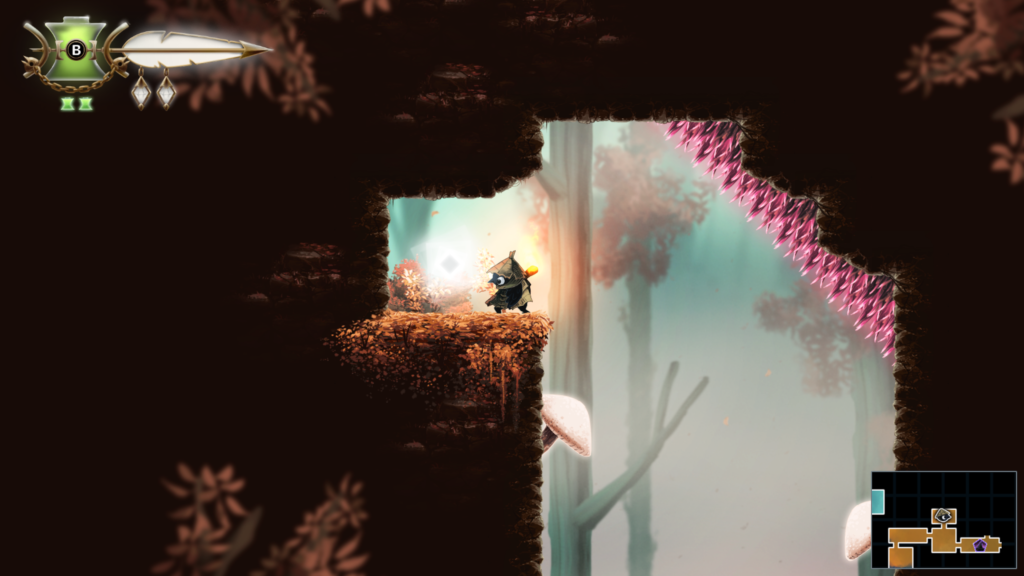
Spirit 12 / 20: Location – Autumn Forest (orange area near the top of the map)
Abilities needed: Hover, Climb
This one sees you dodging spinning spiky balls whilst navigating falling platforms. You have time to pause briefly so you can hover past the spinning spikes (not ages, there’s still a falling platform).
You’ll be rewarded with a spirit for completing this time trial.
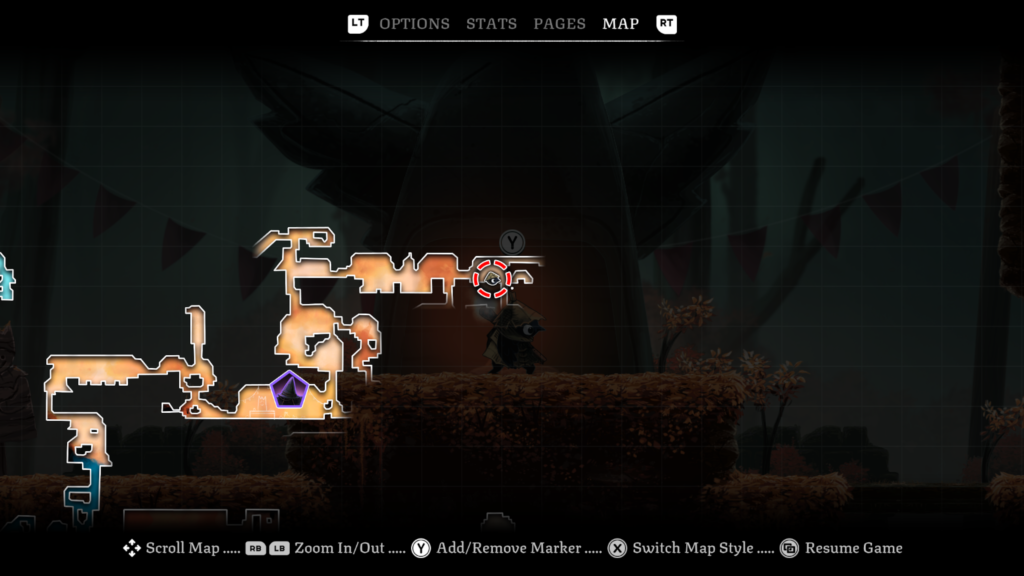
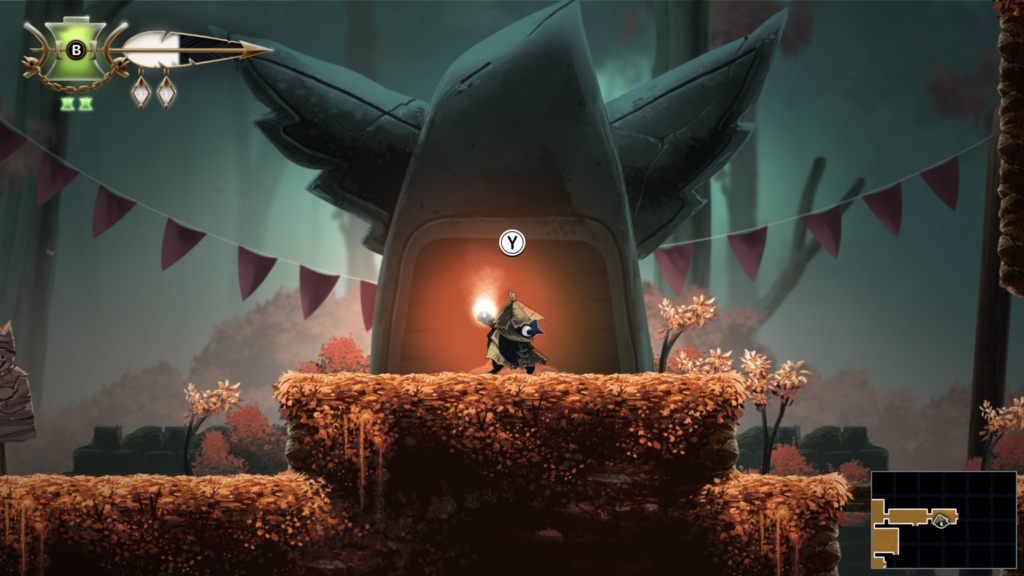
Well Dweller: Autumn Forest – All Orb & Pillar Puzzle Solutions
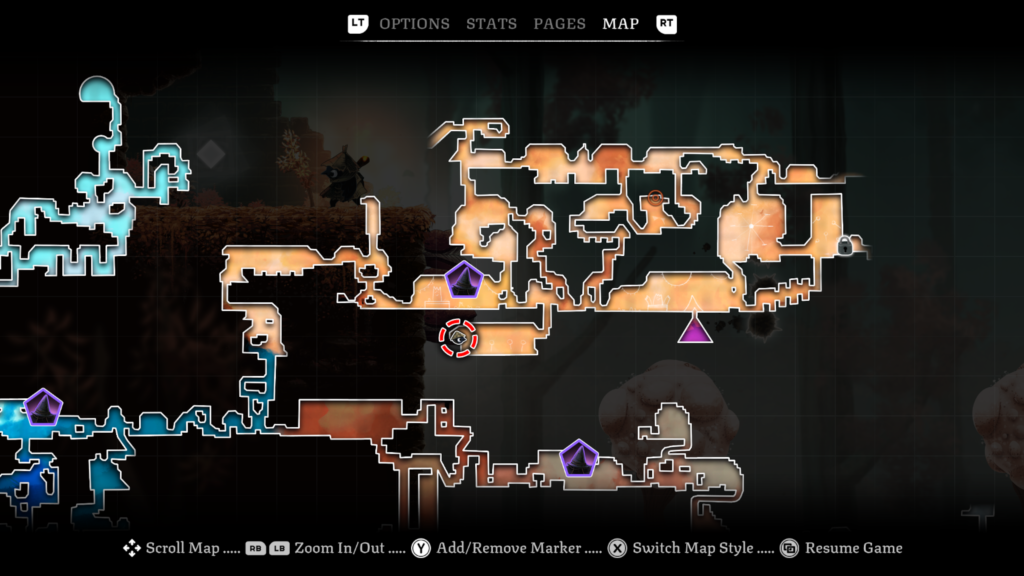
As you progress through the game, you’ll arrive in the Autumn Forest area, this autumnal looking area (proper reminded me of a section of Mushroom Hill Zone from Sonic & Knuckles). It’s the orange area on the map towards the top of the map.
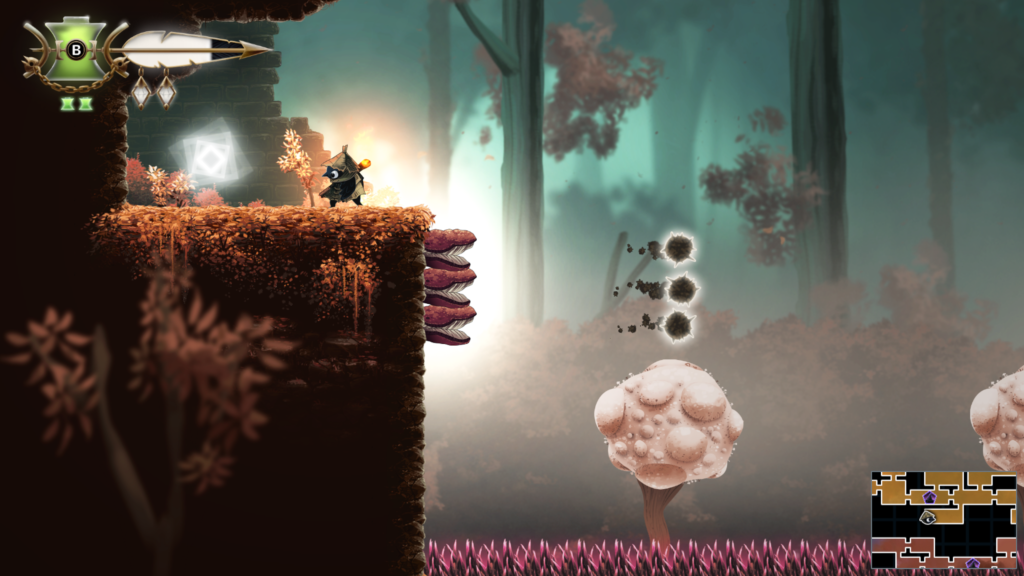
One of the areas puzzle mechanics is the orb & pillar puzzles. A stone orb will sit amongst some deactivated pillars, with a barricade blocking your path. To open the barricade you will need to bounce the ball between however many pillars there are in one go. That means from leaving its pedestal the orb must strike every pillar without hitting the wall or the floor, or leaving the screen.
This will usually require intervention from Glimmer to direct the orb in the direction needed. The guide will talk through each of the four main orb and pillar puzzles in the Autumn Forest as well as one that will give access to the Doll’s Head trinket.
Please note that these are the order I encountered the puzzles, you may discover them in different orders. Also, if you fail, the orb resets on the pedestal it started on.
You can watch a video guide below, or you can read on for a text and images guide.
- 0:00 – First Puzzle (example one to introduce the mechanic)
- 0:16 – Second Puzzle
- 0:34 – Third Puzzle
- 0:49 – Fourth Puzzle
- 1:12 – Doll’s Head Trinket Puzzle
Orb & Pillar Puzzle: 1 / 4
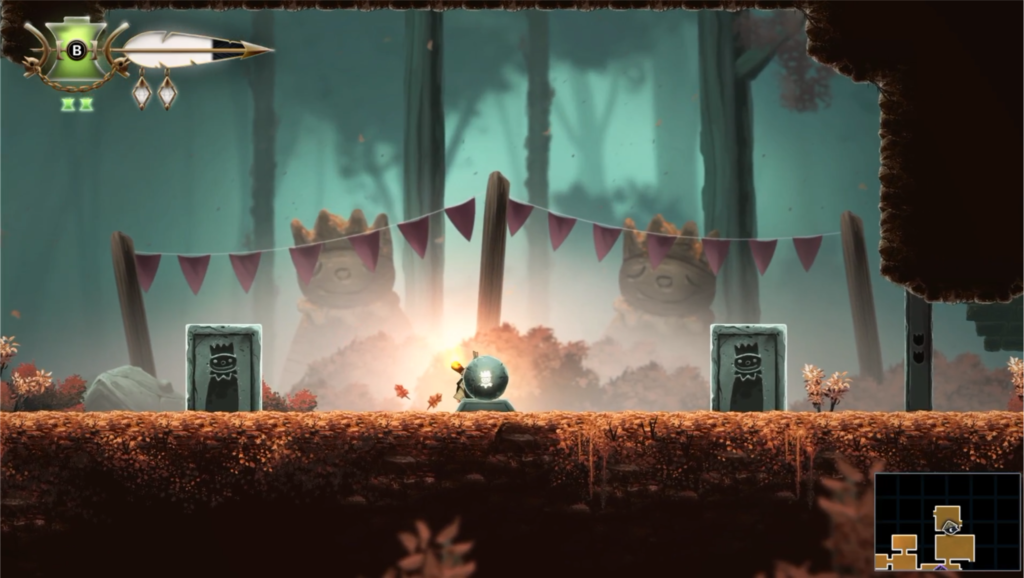
The first one is super easy and serves as a way to introduce the orb & puzzle mechanic. Smack the orb left or right and let it bounce from one pillar to the other.
Orb & Pillar Puzzle: 2 / 4
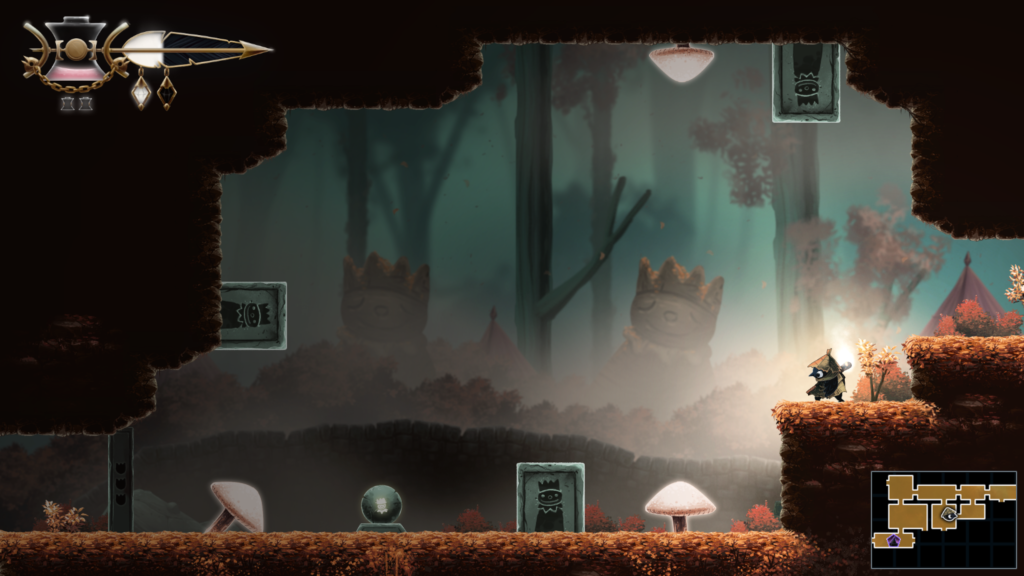
You will need to hit the orb towards the pillar on the floor (hit it to the right.
Then jump over the pillar on to the first ledge on the right as the orb flies through the air and then hit to the left as the orb bounces down. The orb should be aiming for the pillar on the far left that’s sticking out of the wall.
Staying where you are, wait for the orb to bounce off the pillar on the far left and come back towards you. As it lines up with the pillar on the roof, hit it upwards to hit the final pillar.
Trinket Slot 39 + 40 + 41/ 103: Location – Looter’s Shop (Tent)
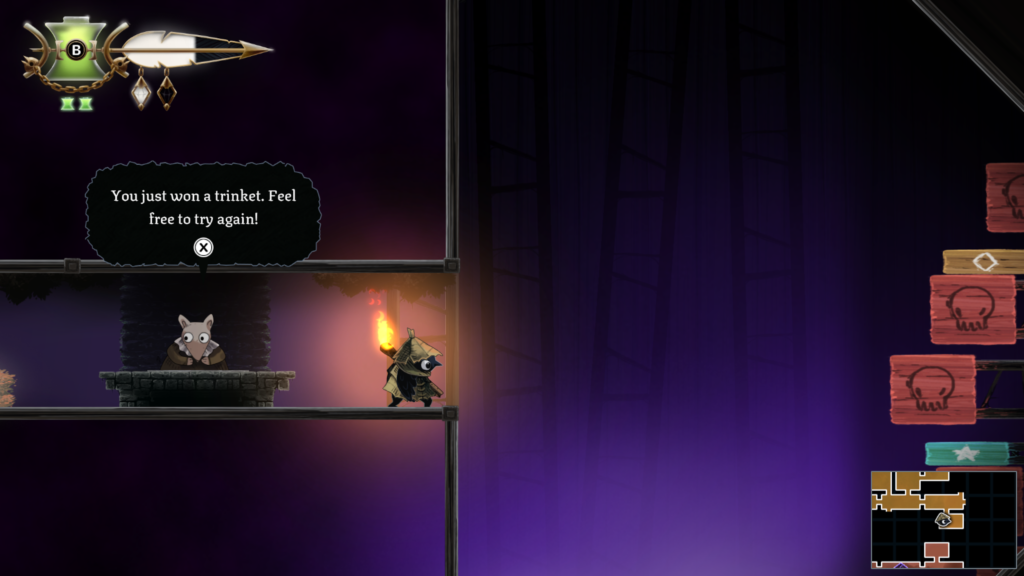
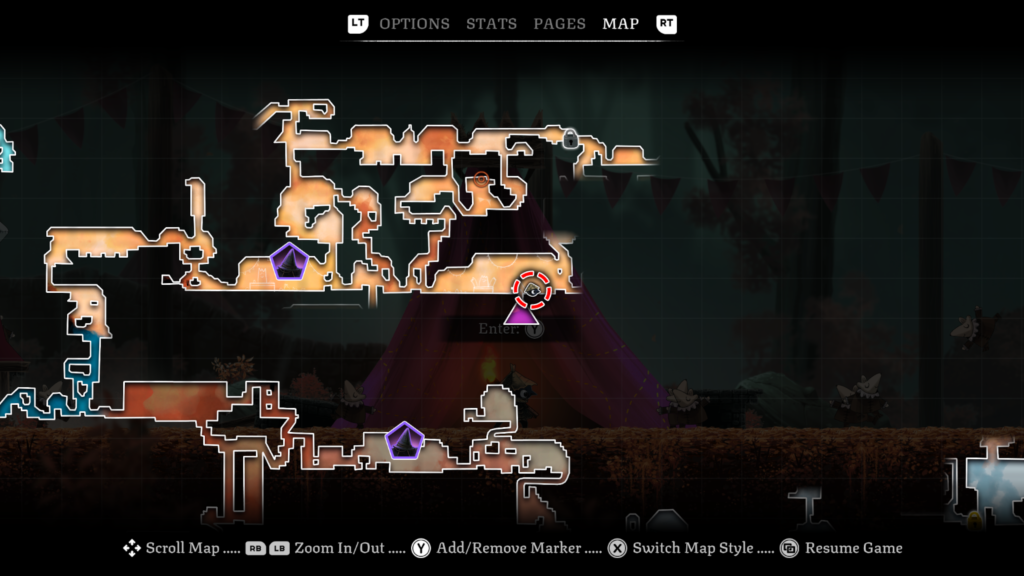
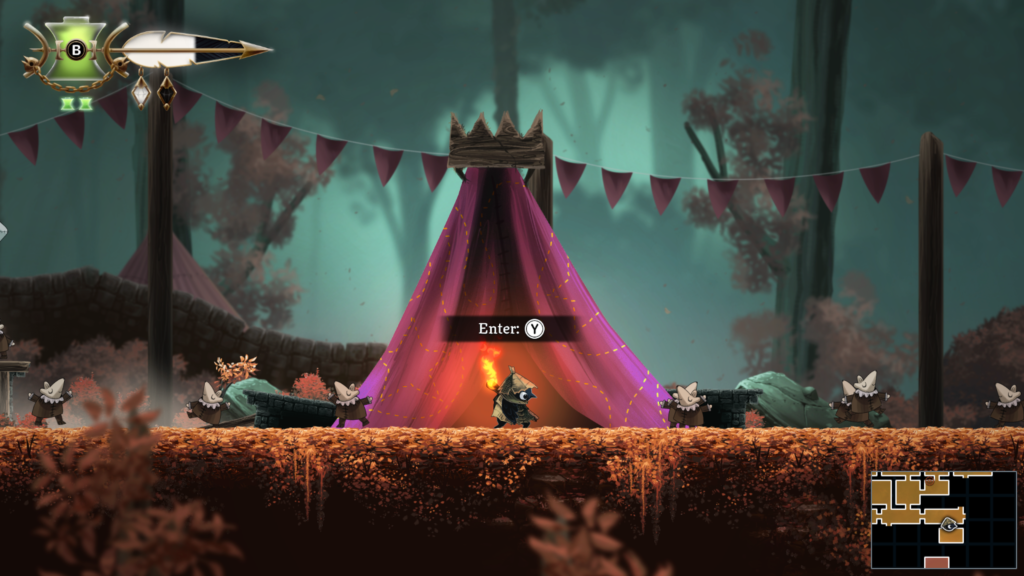
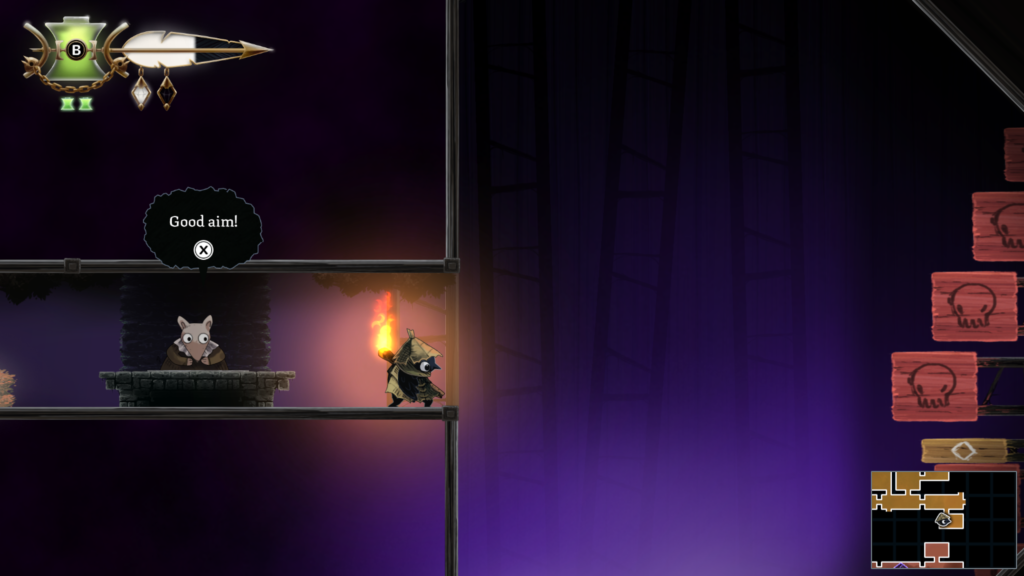
Trinket 19 / 32: Location – Autumn Forest (orange colour on the map, near the top)
Trinket: Blue Bow – automatically uses an oil vial to heal if you would otherwise die (legendary item!)
Abilities needed: Slingshot
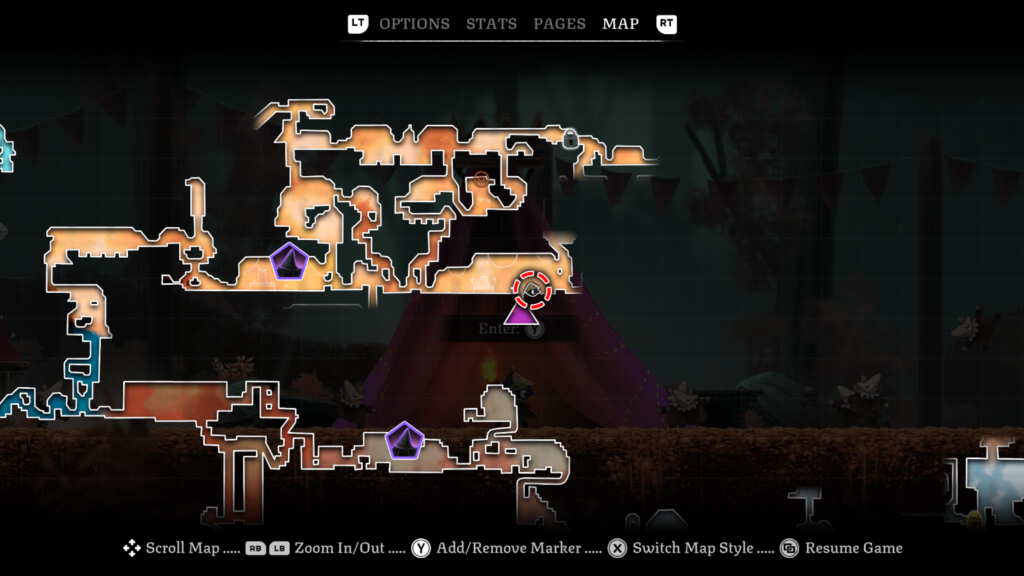
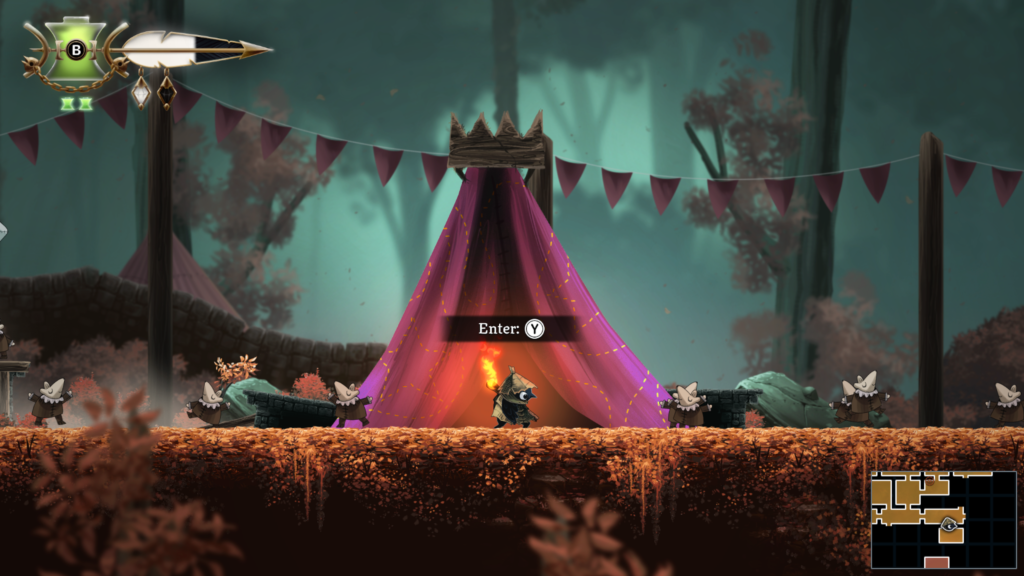
You’ll need to play the game in the tent. Hit the narrow light blue target to win the trinket.
Trinket Slot 42 / 103: Location – Autumn Forest (orange area at the top of the map)
Trinket Slot 43 / 103: Location – Autumn Forest (orange area at the top of the map)
Orb & Pillar Puzzle: 3 / 4
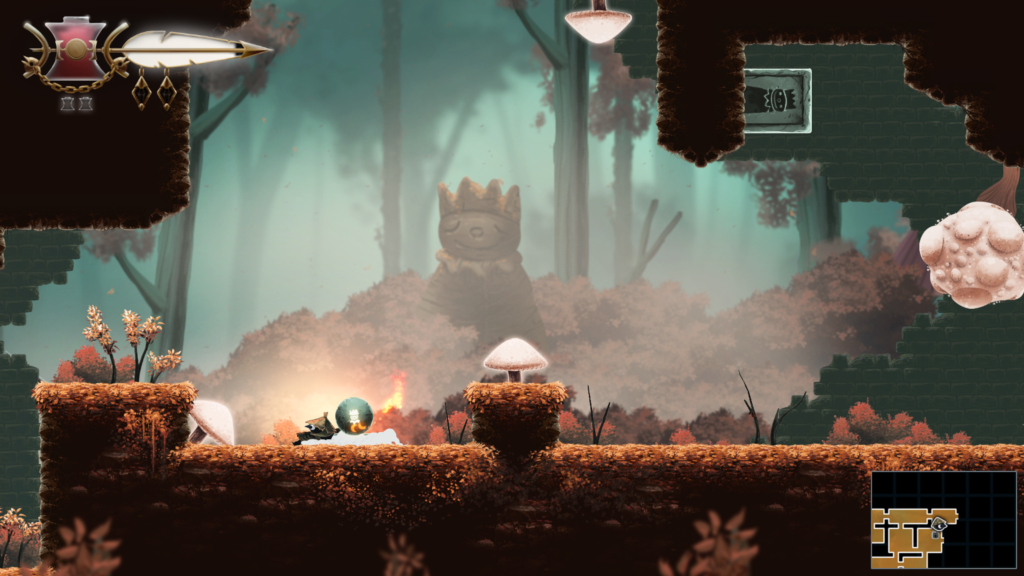
Stand to the right of the orb and hit it left, towards the diagonal facing mushroom.
As the orb bounces off the mushroom, down, you will need to bounce on the mushroom in middle and hit the orb to the right.
Ideally, it will hit the upper-left part of the big, bouncy thing on the right and hit the pillar. However, it might hit it dead centre, causing the orb to bounce back. You can try run underneath it and hit it upwards.
Well Dweller: Unlock the “The King’s Cap” Achievement / Trophy
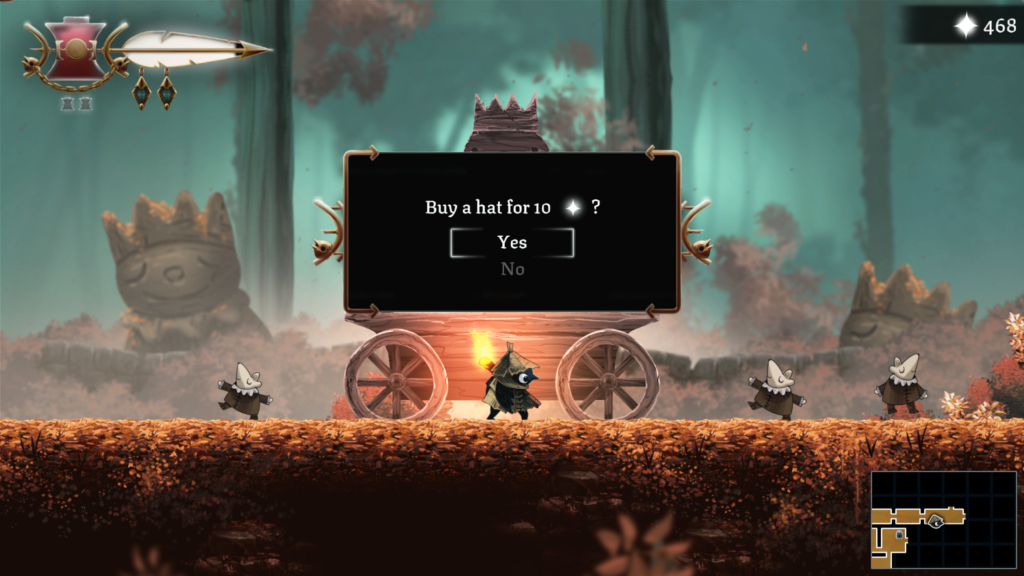
To unlock the “The King’s Cap” achievement / trophy, you will need to “Buy a festive hat”
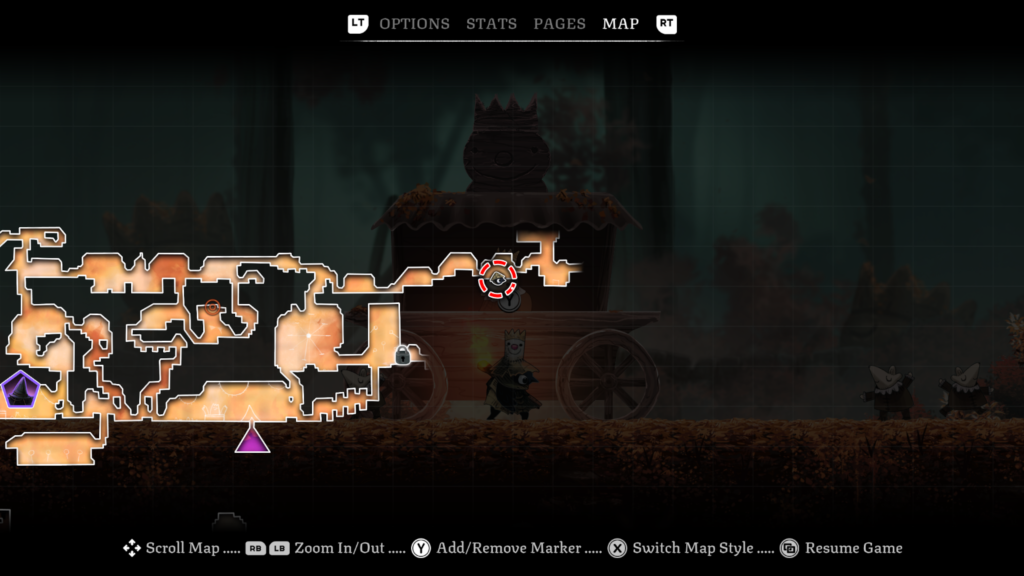
You will get the opportunity to buy this during the Autumn Forest area of the game (the orange area on the map, towards the top of the map).
You can watch a video guide below, or you can read on for a text and images guide.
A Festive Hat
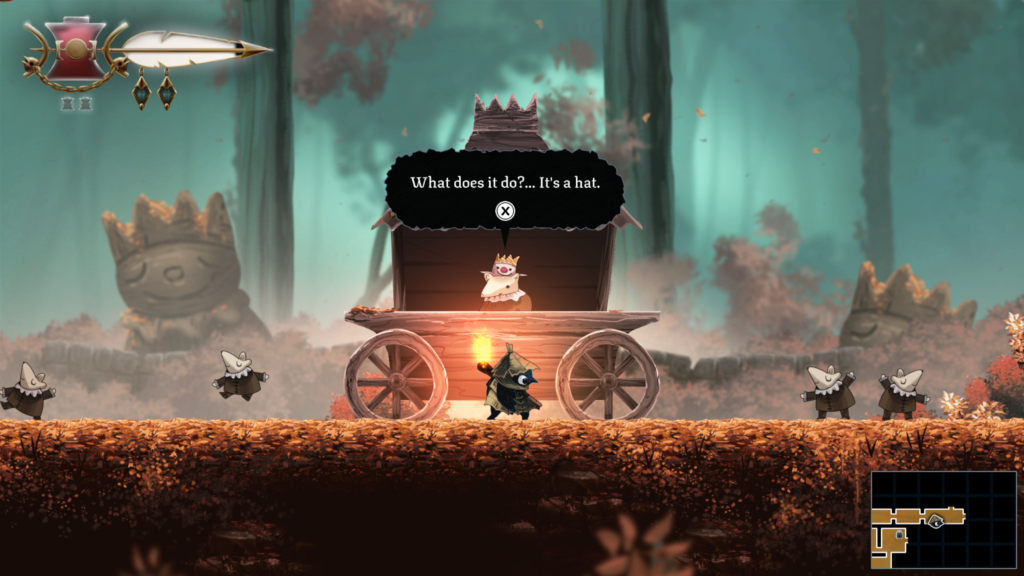
It’s pretty hard to miss this, but as you explore, preparing for the King’s arrival (*cough, boss battle, *cough). It’s the next room after you get passed one of the Orb & Pillar puzzles (see image below).
You’ll come across a mouse-y creature in a wooden cart selling festive hats for 10 in-game currency. He will ask you if you want to buy said hat, say yes to earn the achievement / trophy.
Don’t worry about your street cred, it’ll disappear the next time you die.
Trinket 20 / 32: Location – Autumn Forest (orange colour on the map, near the top)
Trinket: Doll’s Head- increases attack distance
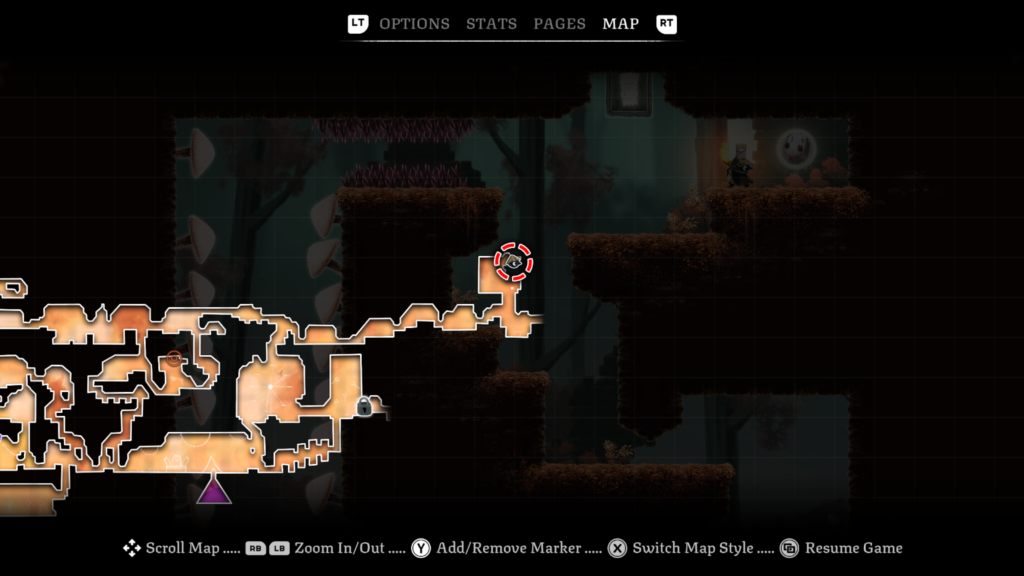
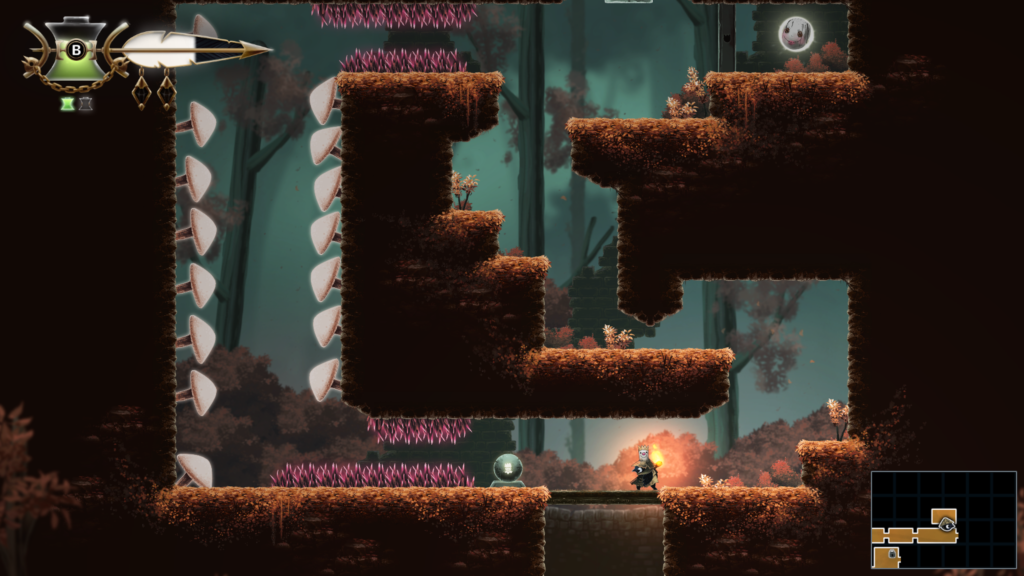
Abilities needed: Climb
You’ll need to be quick to reach the top before the orb does, so you can smack it upwards into the pillar
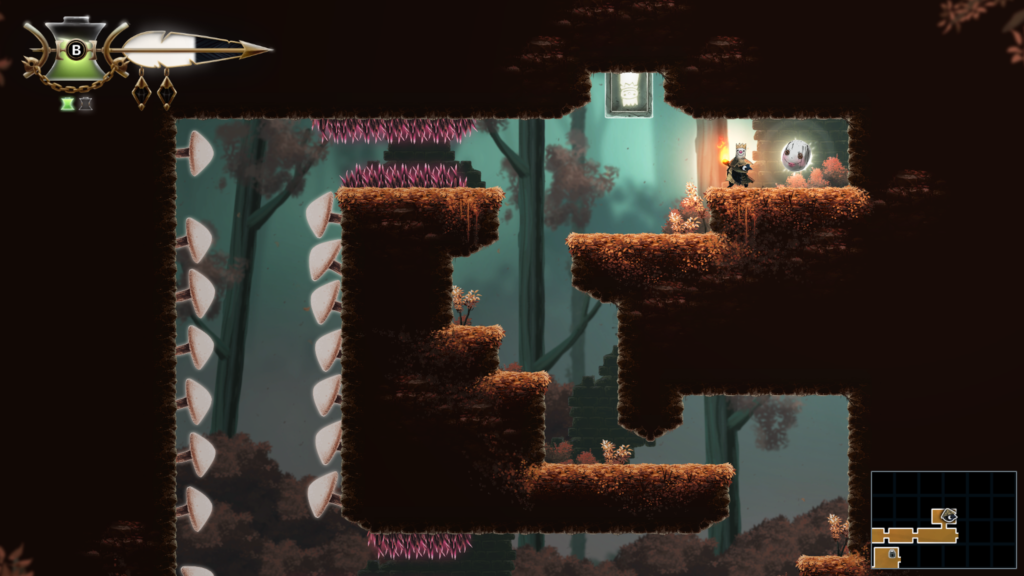
Trinket Slot 44 / 103: Location – Looter’s Shop (Tent)
Orb & Pillar Puzzle: 4 / 4
Hit the orb to the left. It will bounce off the diagonal mushroom and head for the mushroom on the roof, above where the starting point for the orb is.
In that time, you will need to climb the platform above in time to hit the orb to the left so it can bounce off the higher up diagonal mushroom on the left of the area.
As this is happening, run to the left of the pillar, so you’re to the left of the left mushroom on the roof, ready to the hit the orb into the pillar.
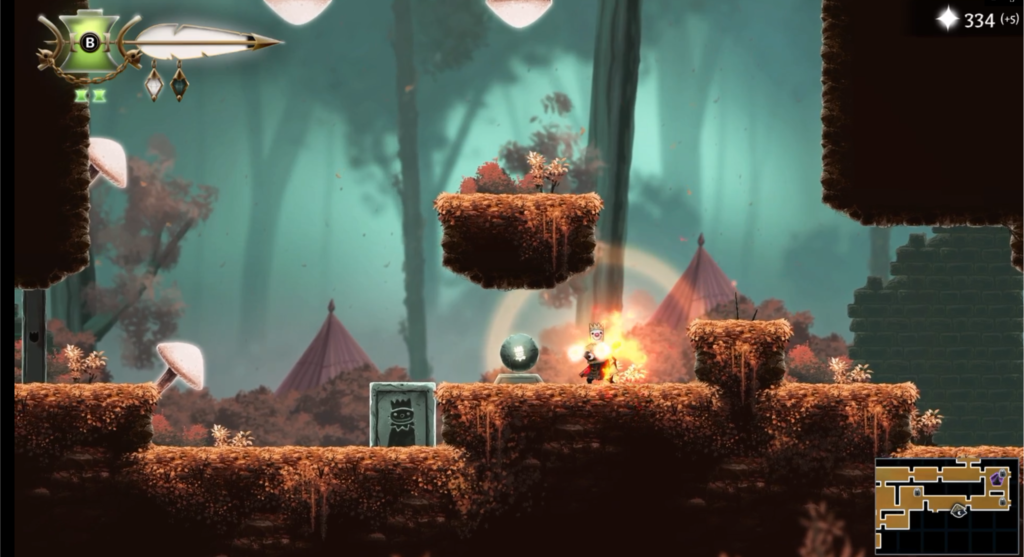
Spirit 13 / 20: Location – Autumn Forest (orange area near the top of the map)
Abilities needed: Slingshot, Hover, Climb
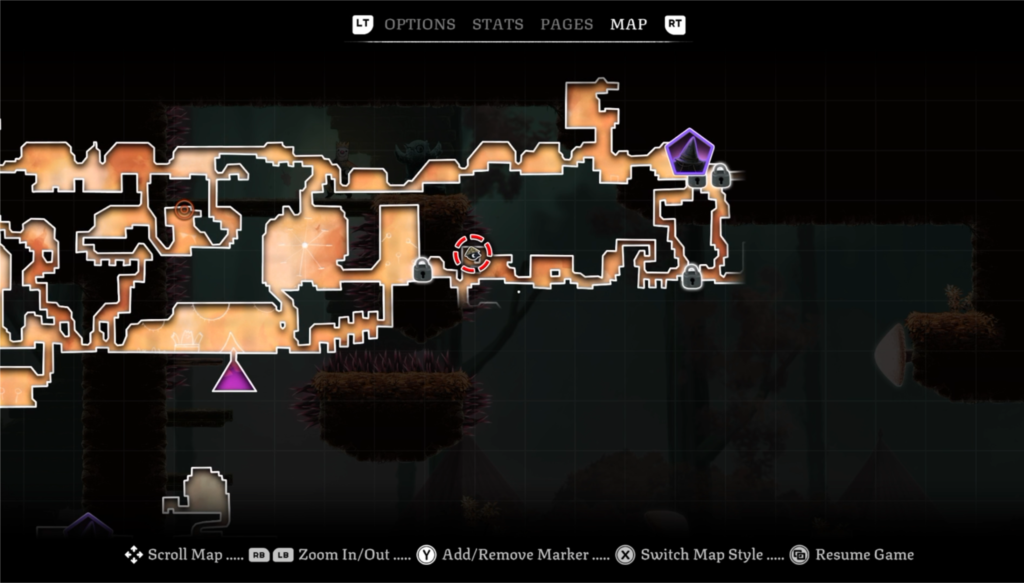
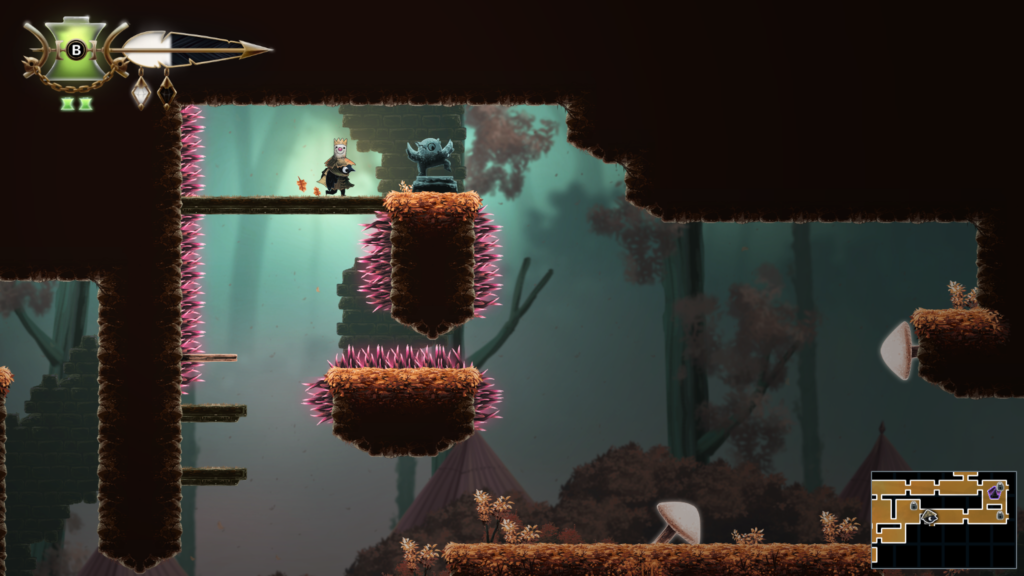
The Forest King Boss Guide
The Forest King is the boss of the Autumn Forest area, this is the orange area at the top of the map.
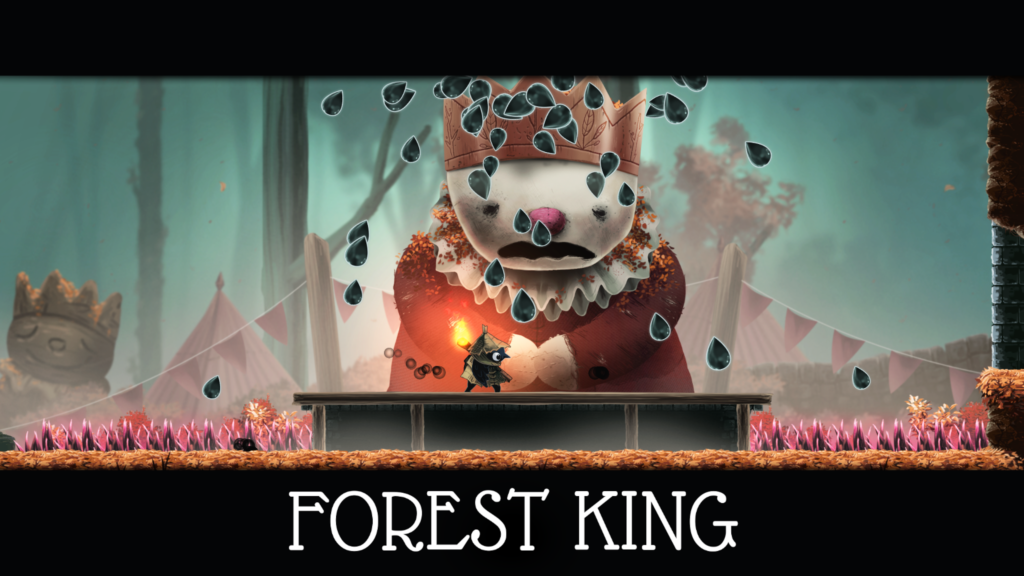
You will have quite a narrow platform to fight the Forest King, staying in the centre. Thankfully, he doesn’t move around, so you can smack him at every opportunity.
However, there is a lot of environmental hazards to dodge throughout this fight, so you’ll have to get your dodging on. Occasionally, walls will appear to either side of the platform that you will need to use to dodge spiky leaves (razor leaves, if you will) that rise from below. You’ll will need to hover across between the walls to dodge. Towards the end, this will happen again, but there will only be one wall to take refuge on.
In between the environmental threats, he will cry tears of pain, or drop rocks on you that fire out more spikes on the platform. You can stand on said rock to dodge the spikes.
You can watch a video of the boss fight below:
Defeating the Forest King will net you the “Fancy Feast” achievement / trophy. Hea
Story Page 13 / 23: Location – Autumn Forest (orange colour at the top of map)
The Dollmaker Story Page (3 / 8)
Abilities needed: Climb
Grab this after the Forest King boss fight. The Story Page is in the same room as the Golden Feather, in a hidden passage to the right of the character Ilda.
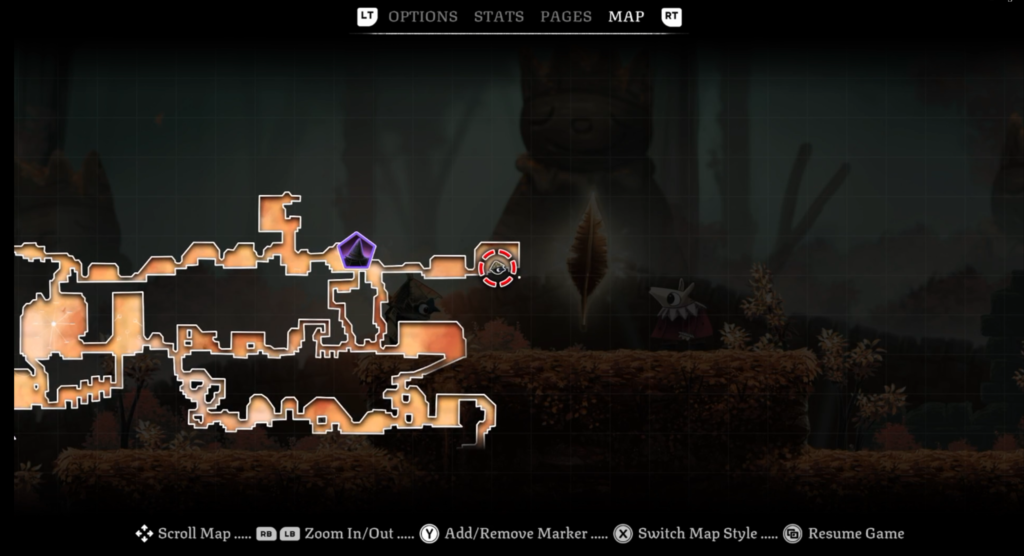
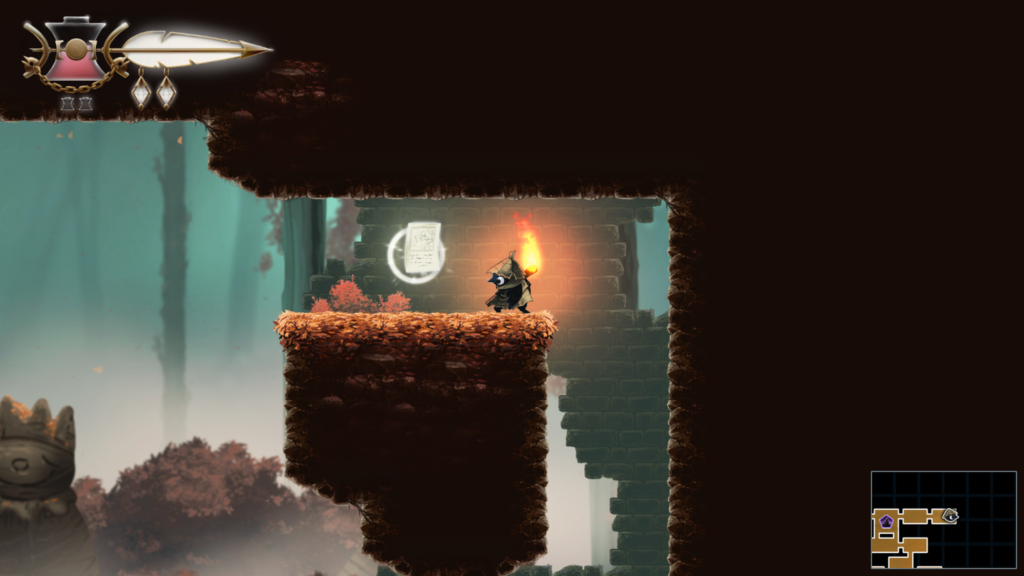
Trinket Slot Bonus (because I can’t ready my own writing): Location – Graven Valley (grey colour area on the map)
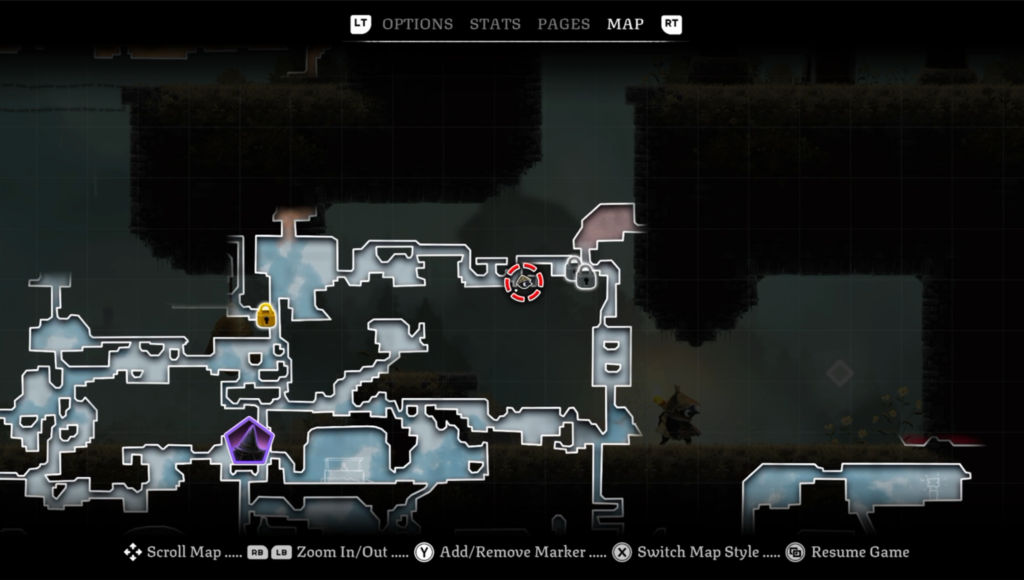
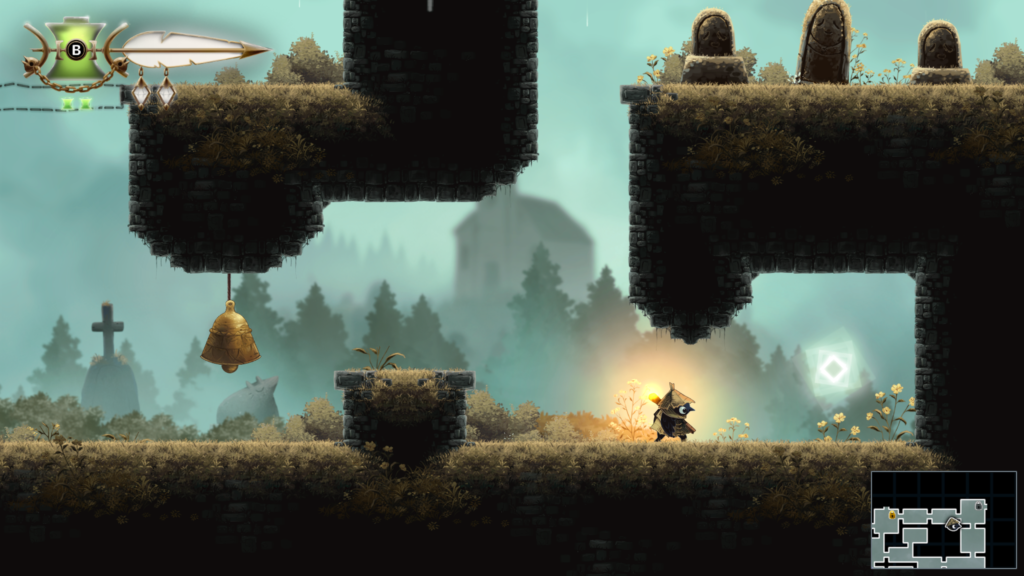
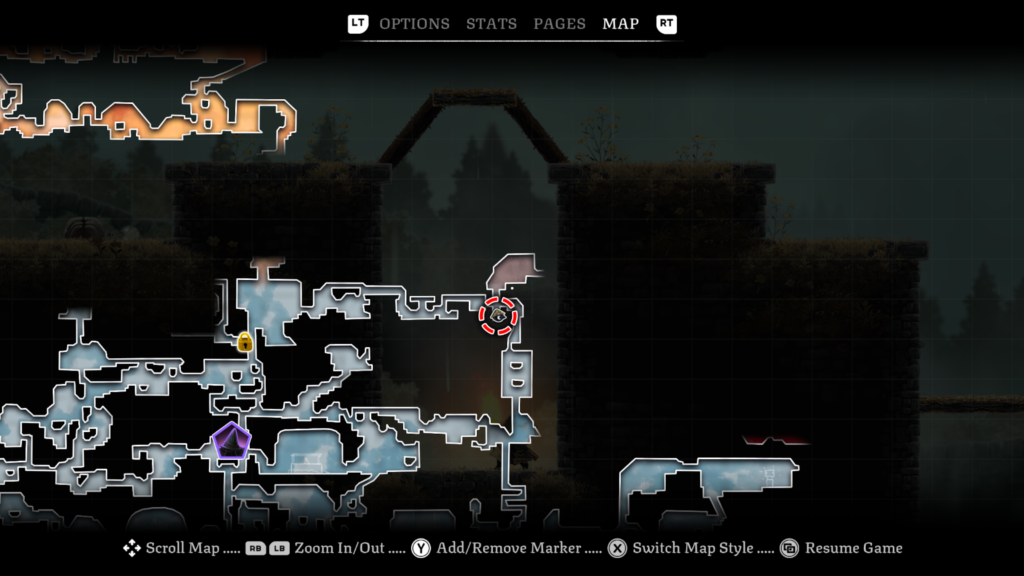
Trinket 21 / 32: Location – Graven Valley (grey colour on the map)
Trinket: Molar Tooth – emits burning embers while you slide.
Abilities needed: Climb
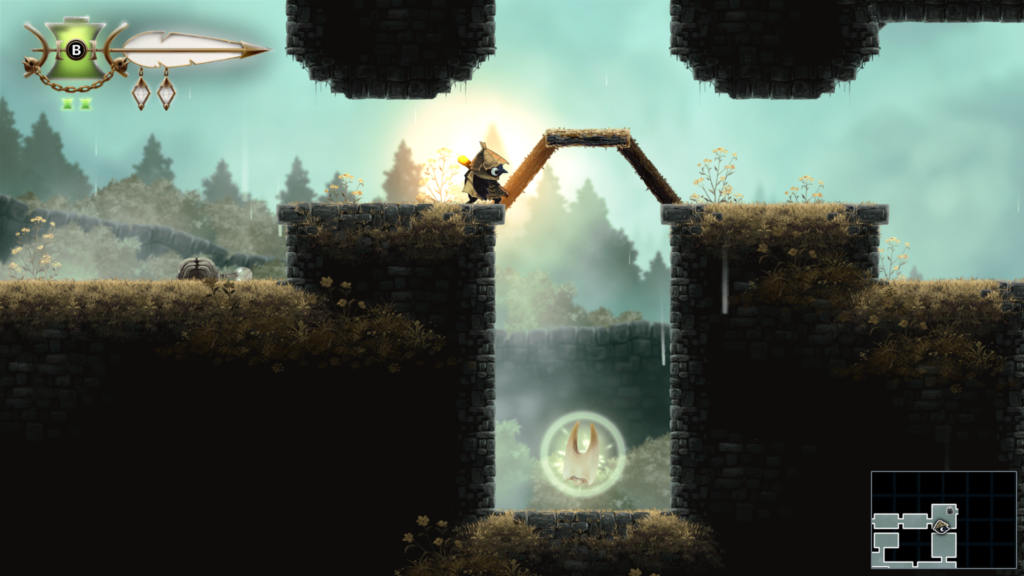
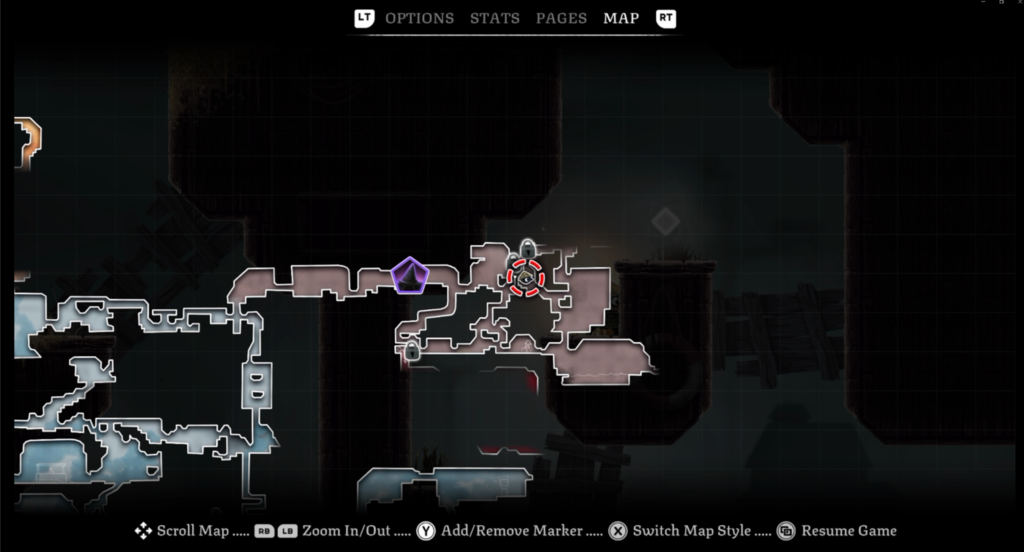
Trinket Slot 45 / 102: Location – The Docks (pale brown colour on the map)
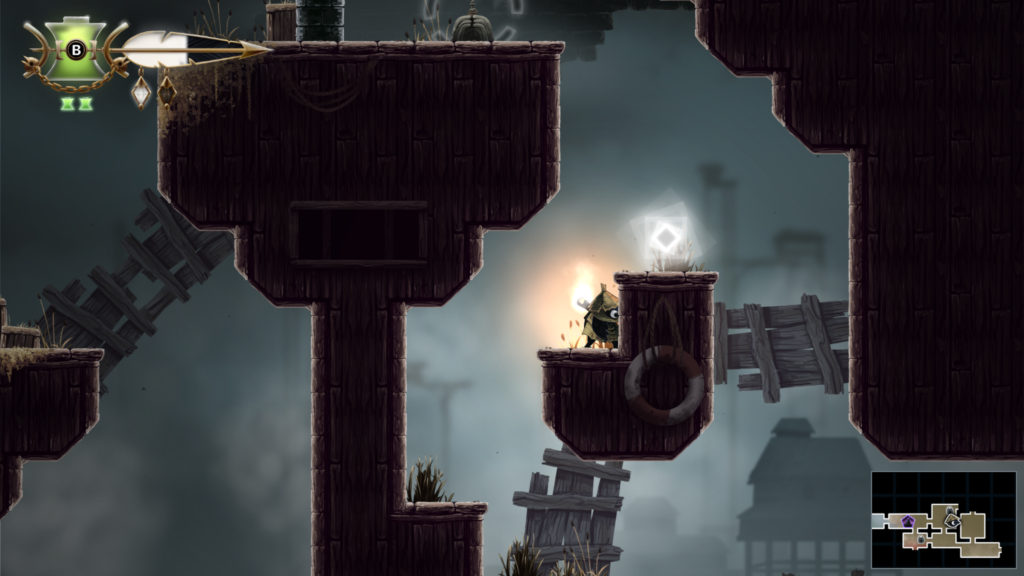
Workshop Token 12 / 27: Location – The Docks (pale brown colour on the map)
Abilities needed: Hover, Climb
I’d recommend landing on the platform on the left side before getting the Workshop Token. If you hit the spikes, you’ll respawn where you last walked on solid ground.
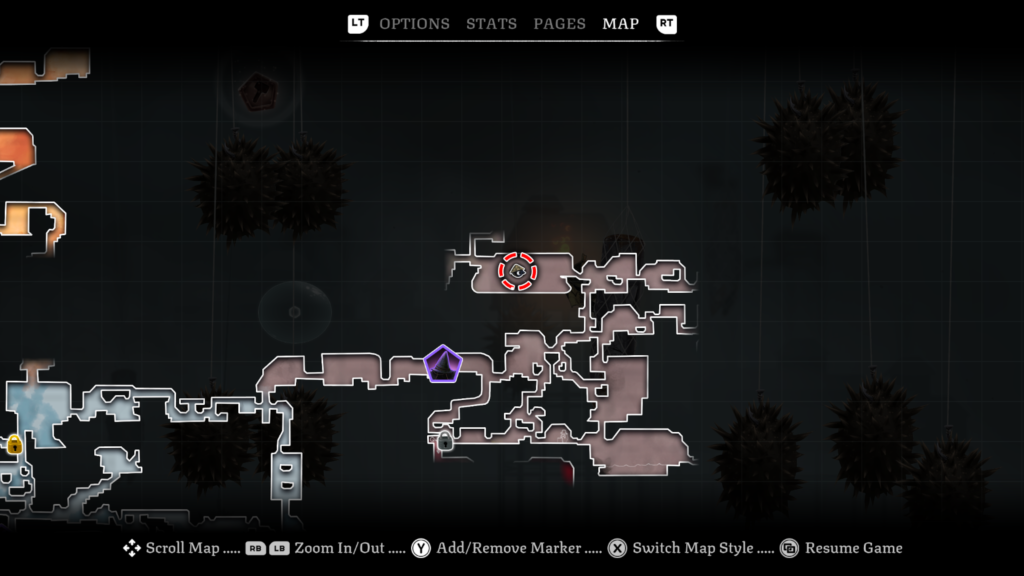
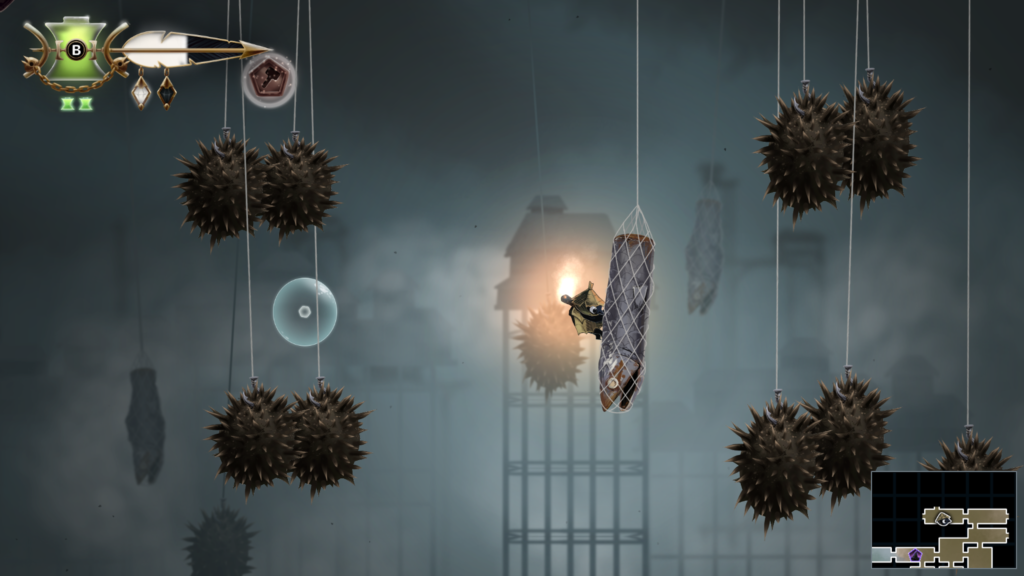
Well Dweller: Find the Gate Stones in The Docks
You’ll arrive at The Docks area as you progress through the game. It is the brown zone on the map screen. You’ll have to locate three white stones to progress. The gate is part of your main objective in the area.
Once you have claimed all three gate stones, the game will indicate the location of the gate on the map, so you know where to head.
You can watch a video guide below, or you can read on for a text and images guide.
Gate Stone: 1 / 3
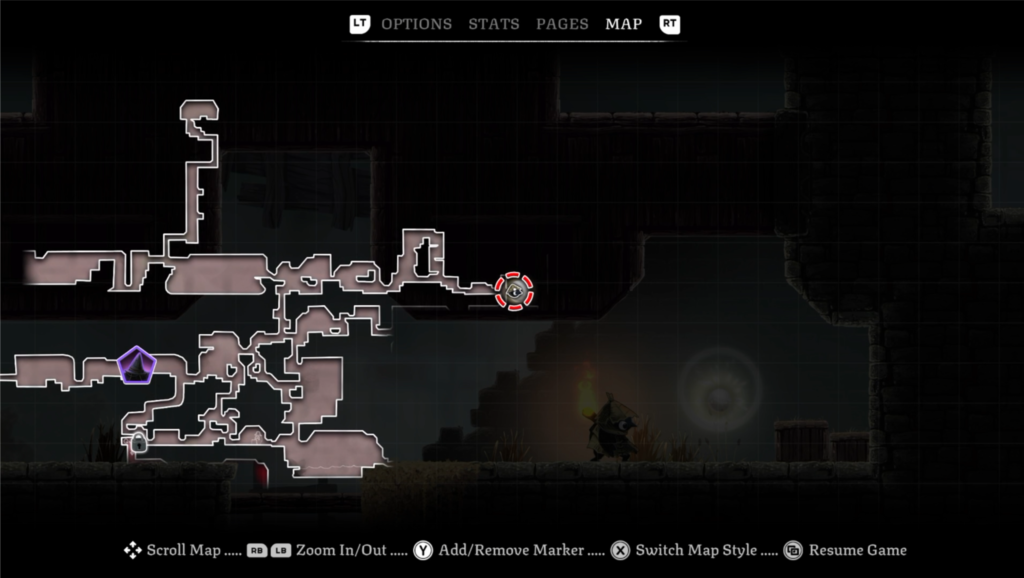
Head to the right from the tent and aim upwards.
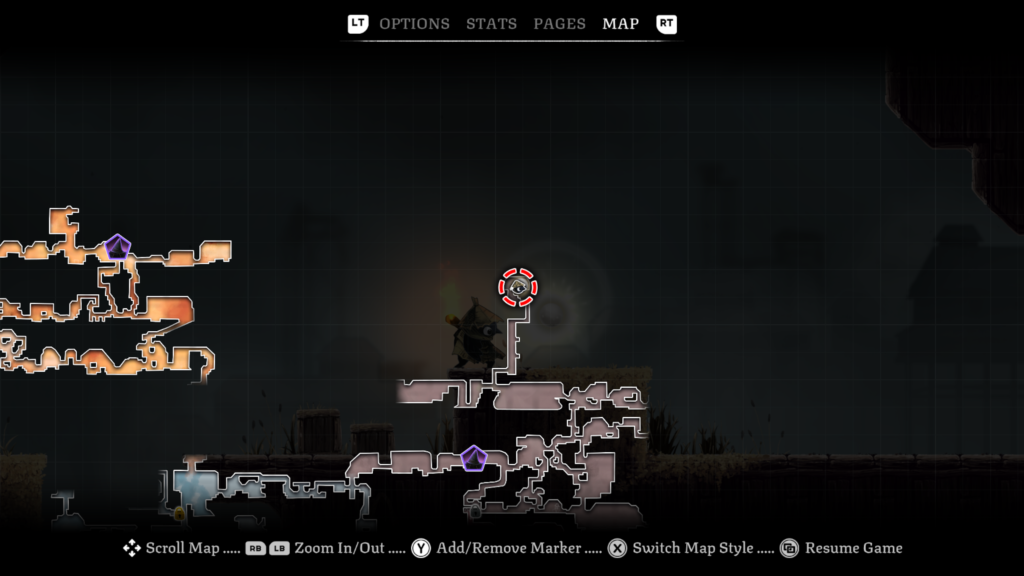
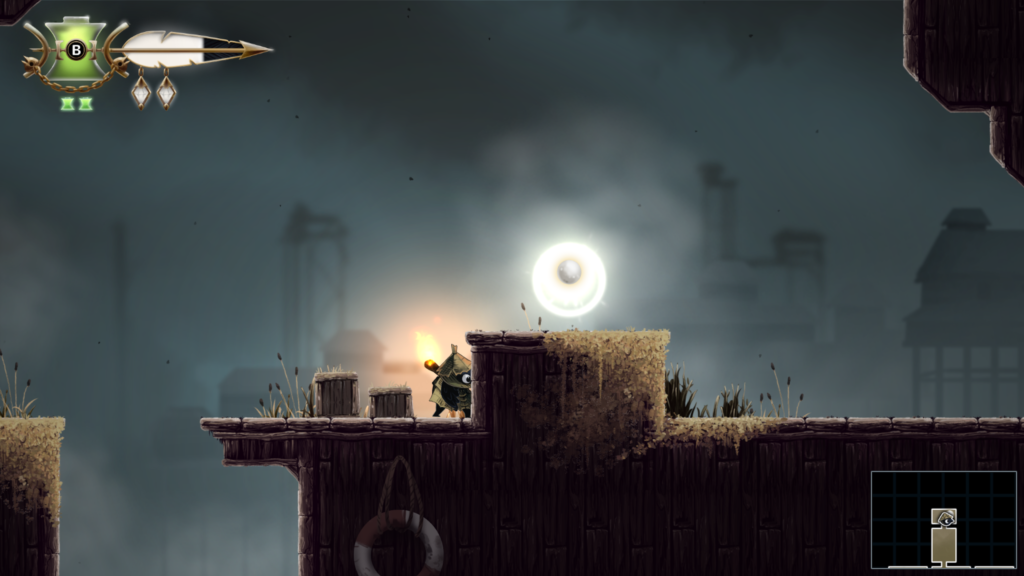
Gate Stone: 2 / 3
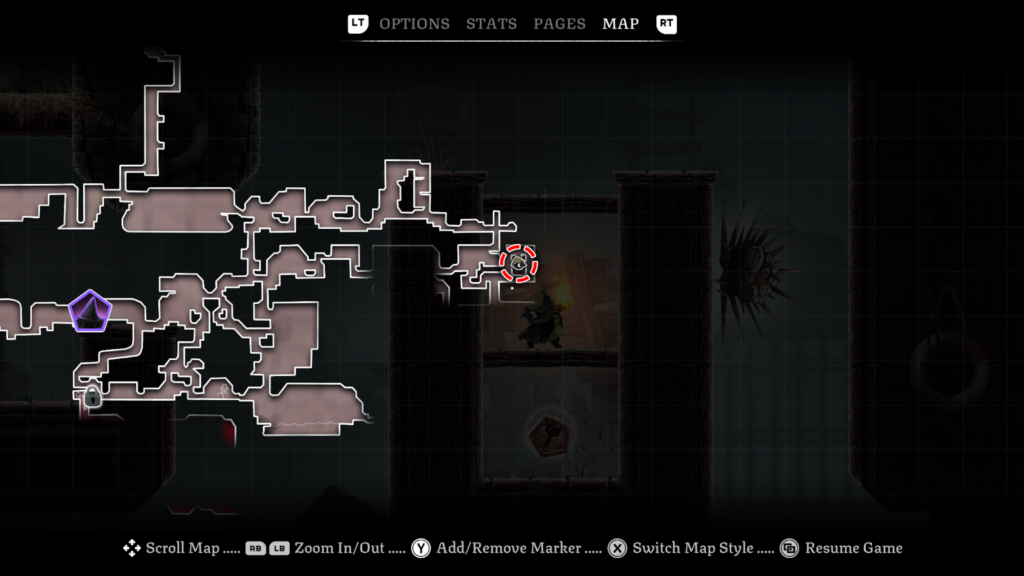
If you’re heading from the first gate stone (above), drop back down and head all the way right that you can to find the stone.
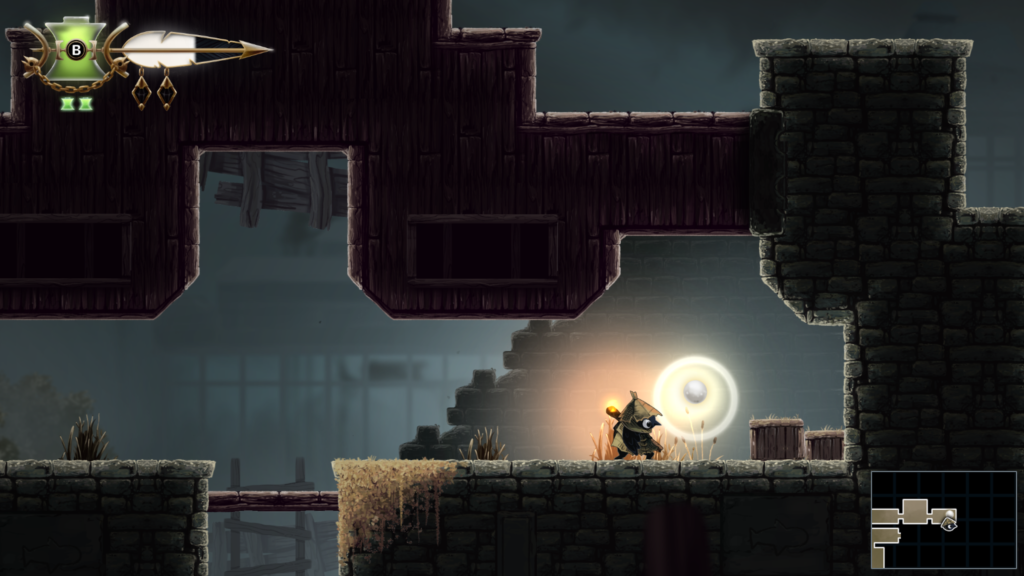
Workshop Token 13 / 27: Location – The Docks (pale brown colour on the map)
Abilities needed: Climb, Hover
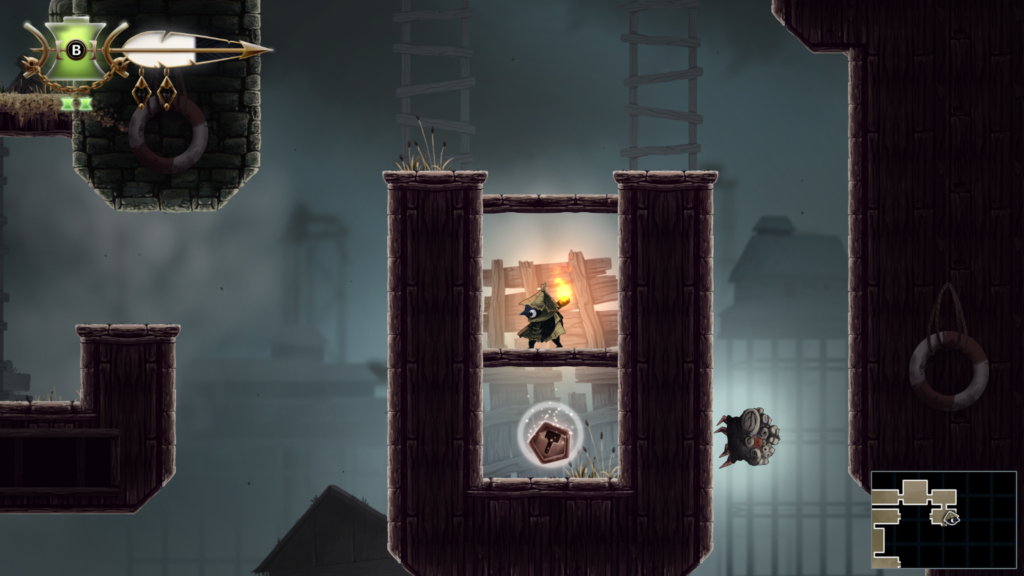
Spirit 14 / 20: Location – The Docks (pale brown colour on the map)
Abilities needed: Slingshot, Climb
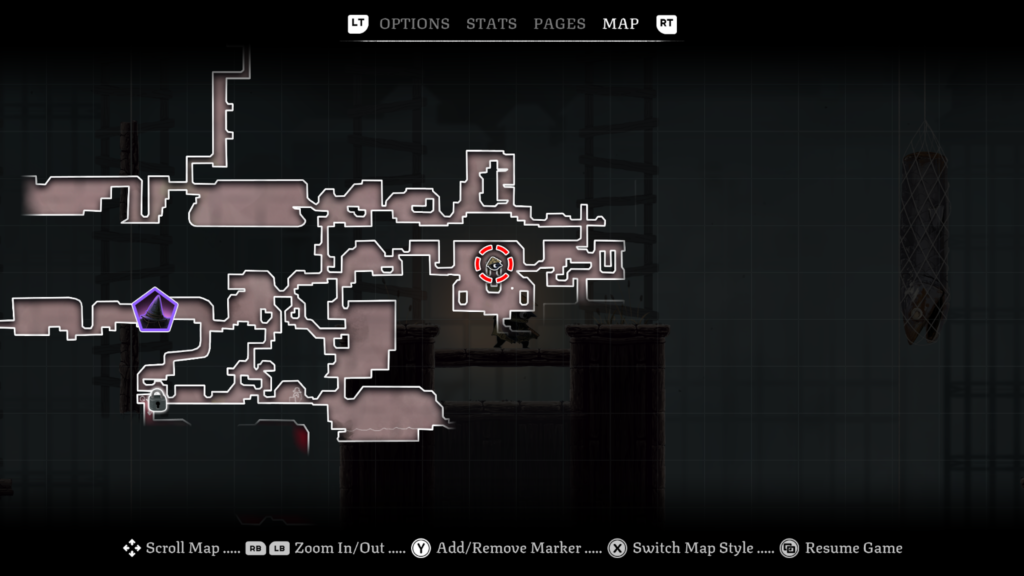
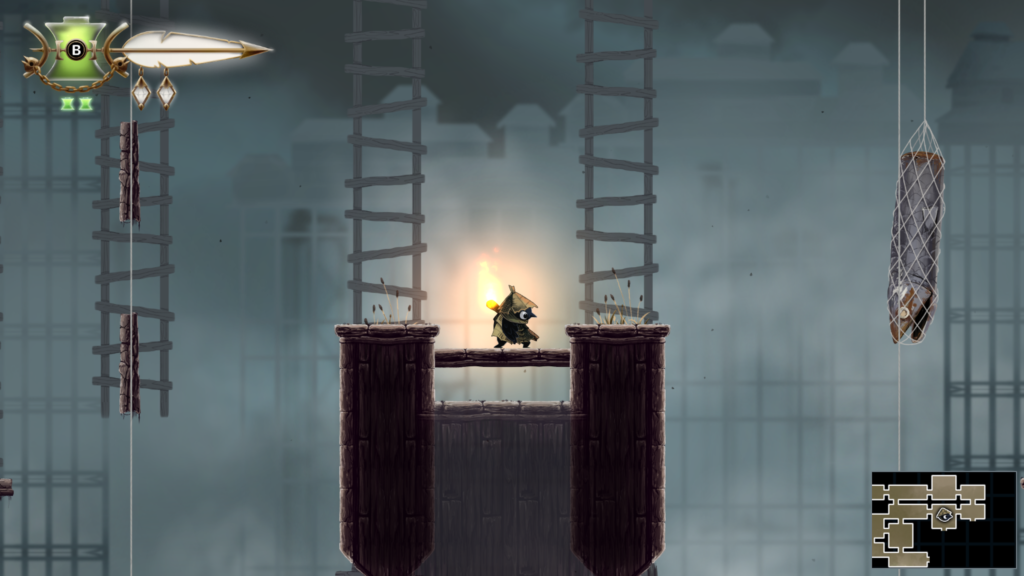
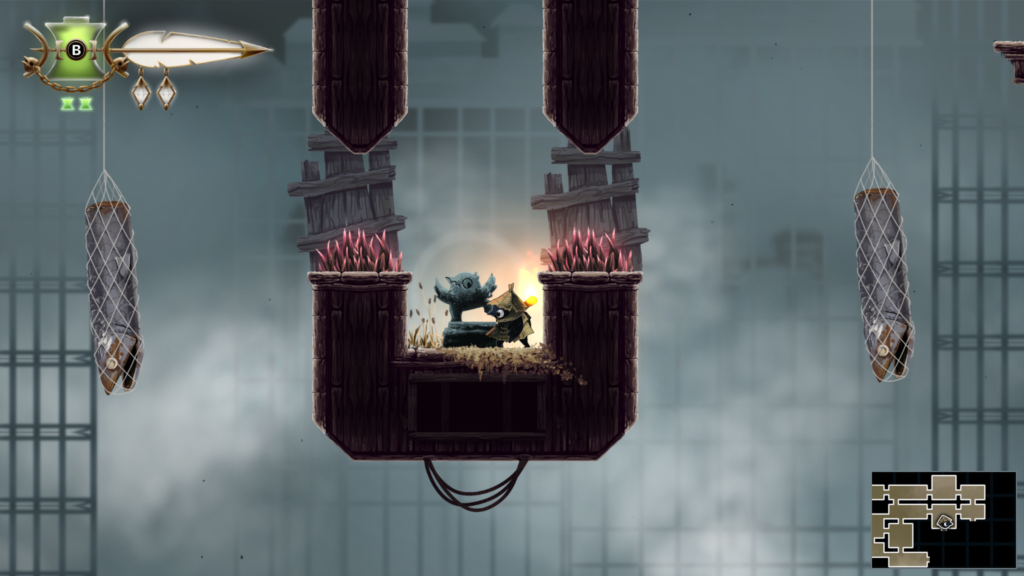
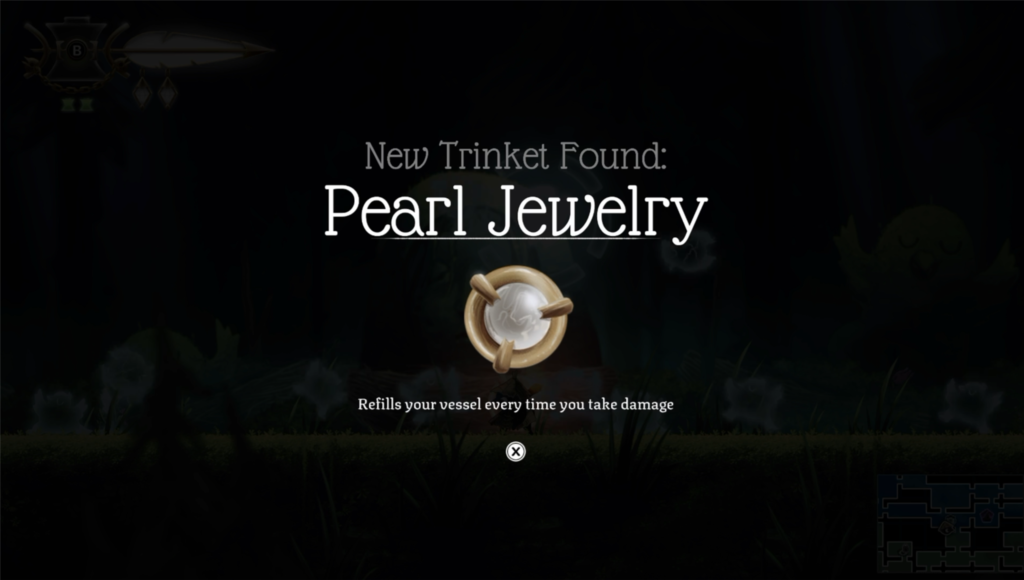
Trinket 22 / 32: Location – Night Garden (Spirit Return location)
Trinket: Tiny Witch Sculpture – healing refills a flaming vessel
Cost: Return 12 of the 20 spirit collectibles. You’ll get the Trinket awarded on the 12th return.
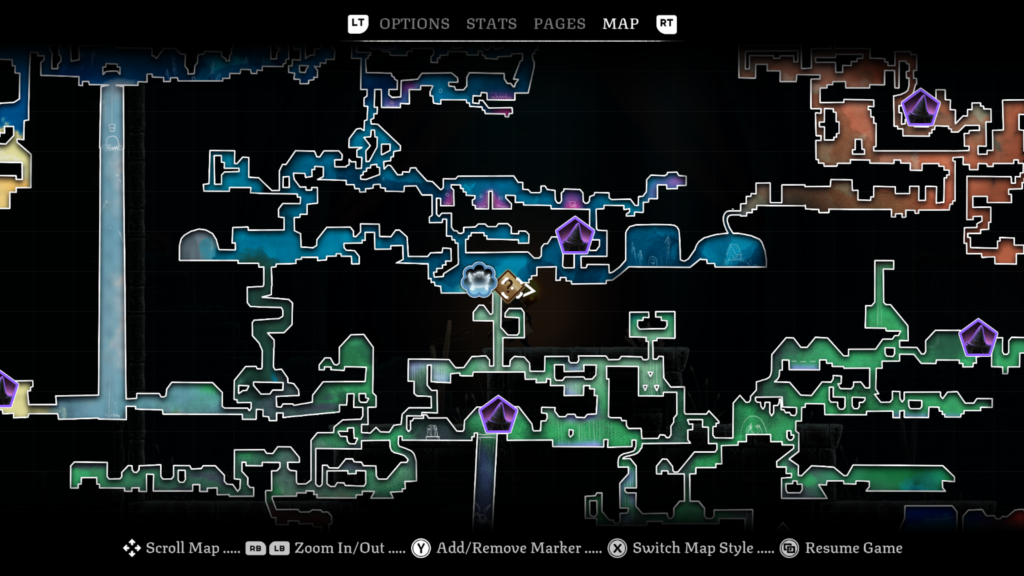
Trinket Slot 46 / 103: Location – Night Garden (mixed blue area on the map)
Trinket Slot 47 / 103: Location – Night Garden (mixed blue colour on the map)
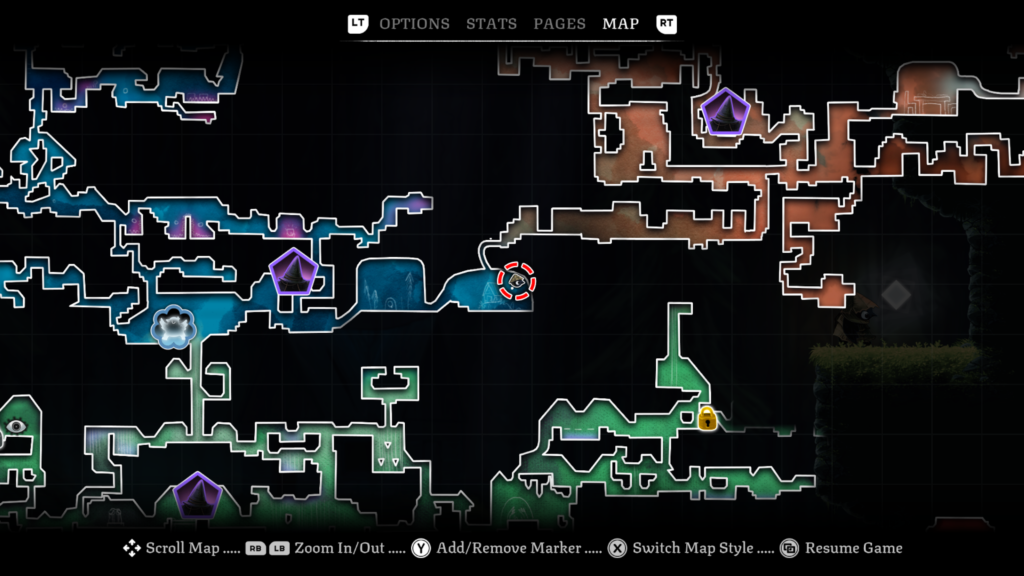
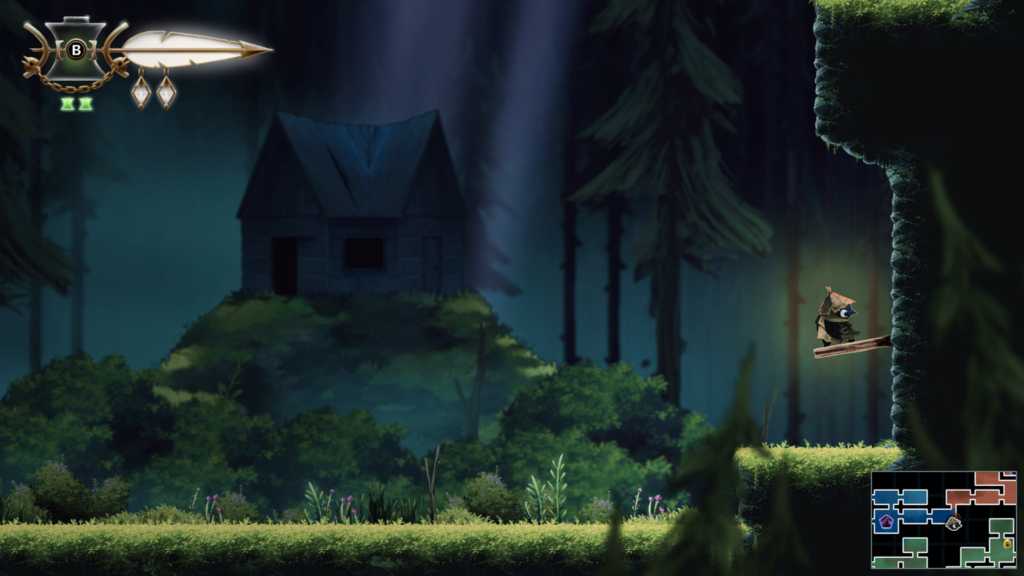
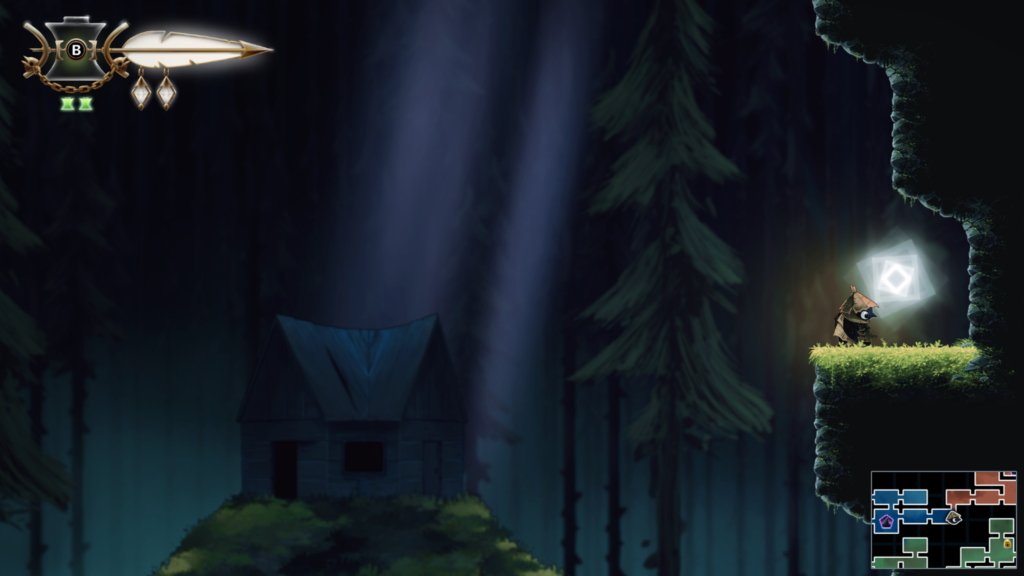
Trinket 23 / 32: Location – The Docks (brown colour on the map)
Trinket: Nails with Twine – enemies create a small blast upon death
Abilities needed: Climb, Hover
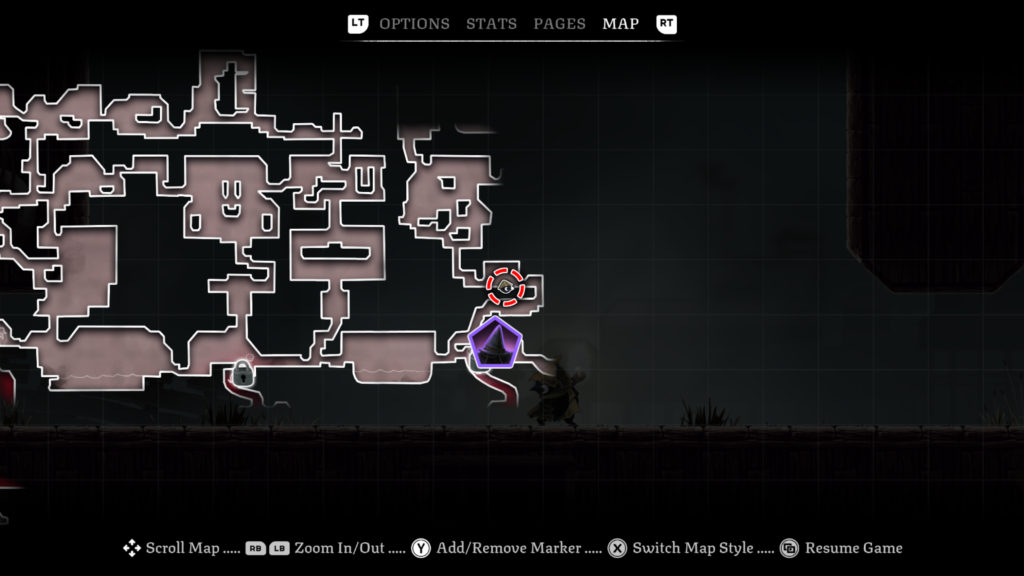
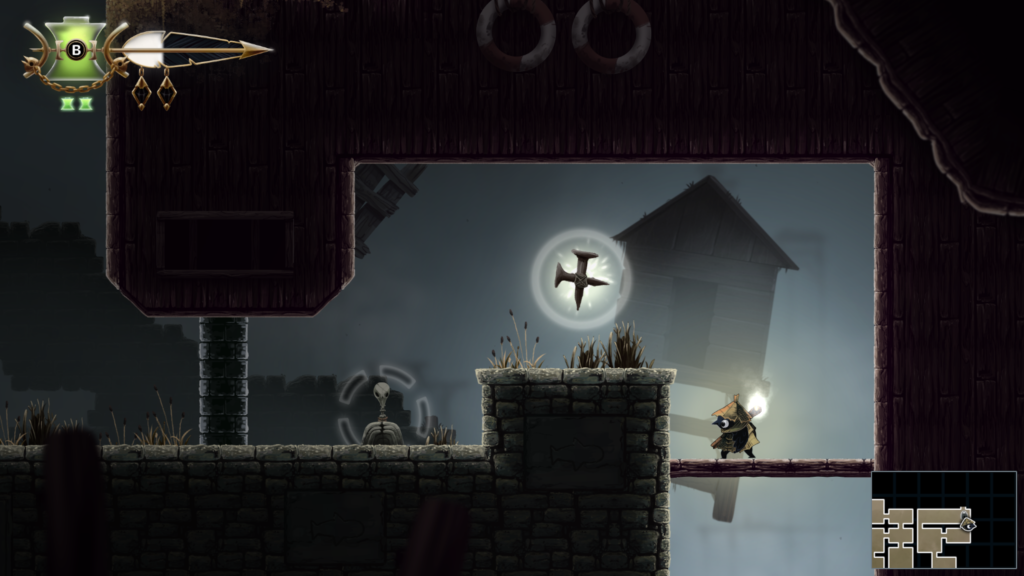
Spirit 15 / 20: Location – The Docks (pale brown colour on the map)
Abilities needed: Slingshot, Climb
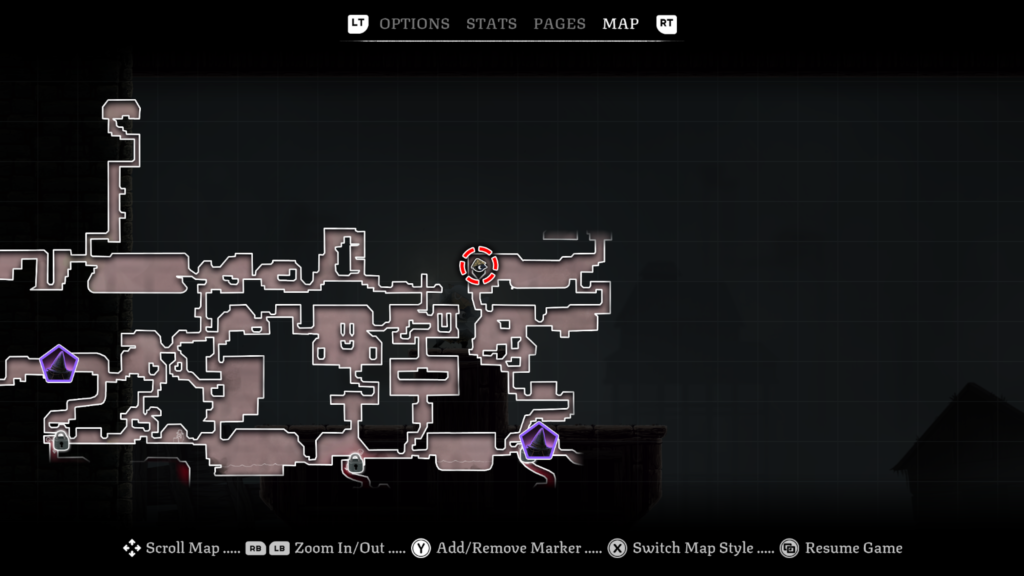
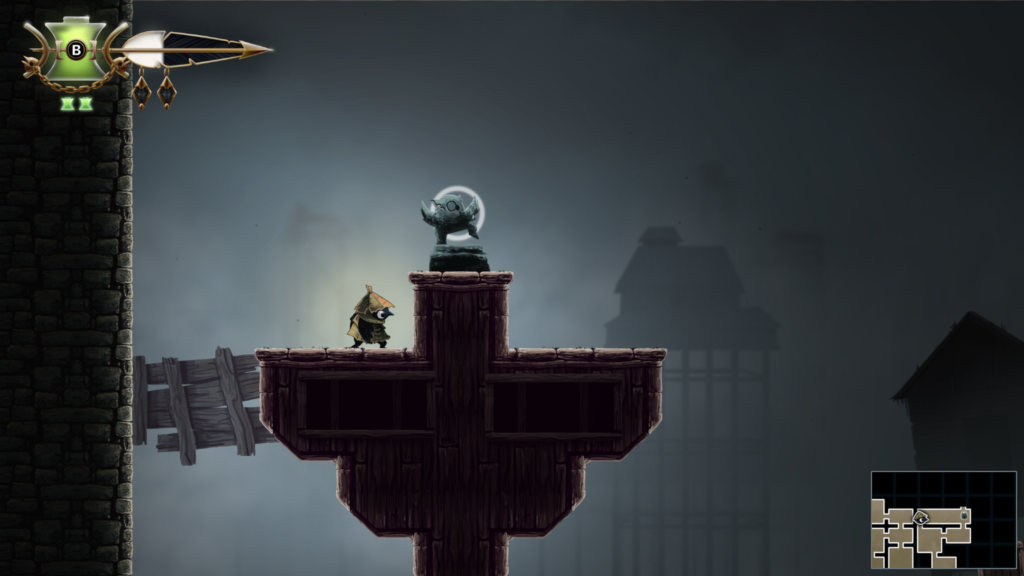
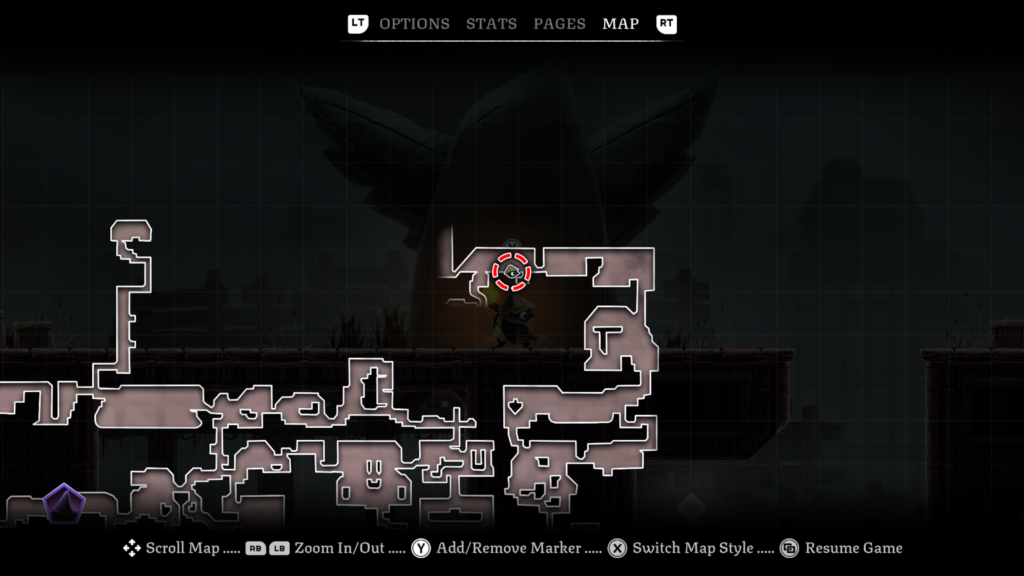
Trinket Slot 48 / 102: Location – The Docks (pale brown colour on the map)
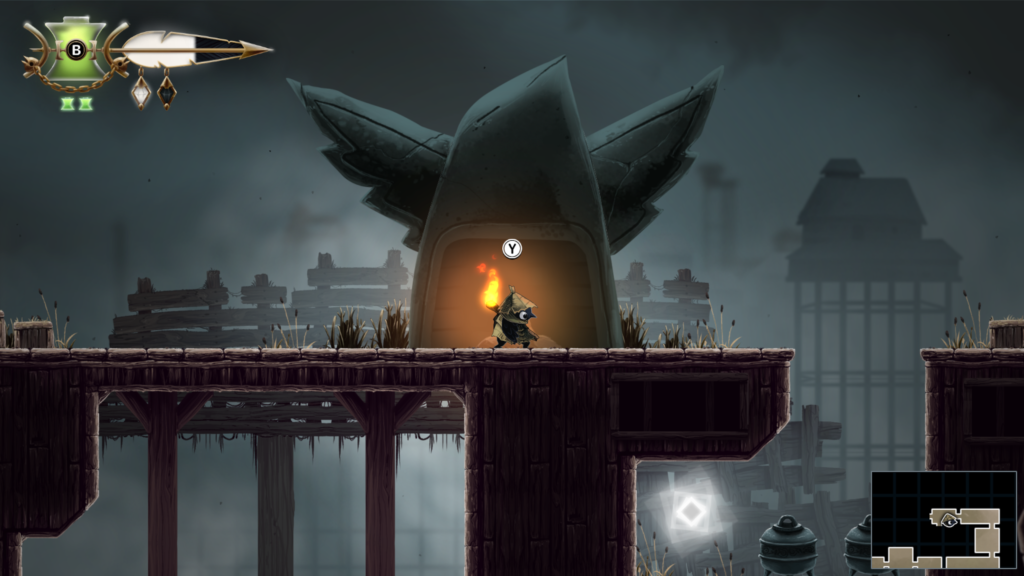
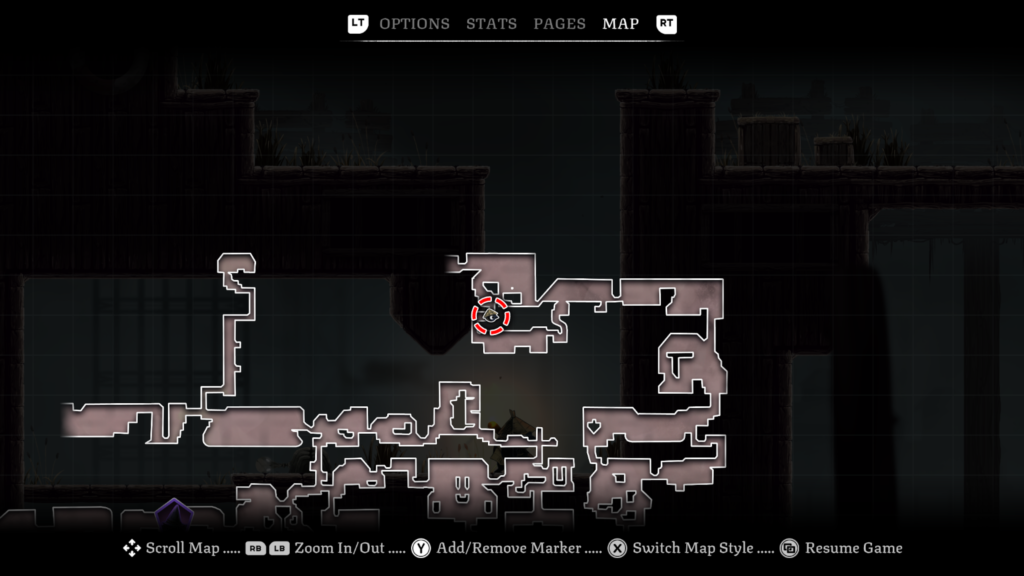
Trinket 24 / 32: Location – The Docks (brown colour on the map)
Trinket: Postage Stamp – currency increases for each enemy you kill in a row without taking damage
Abilities needed: Climb, Hover, Slingshot
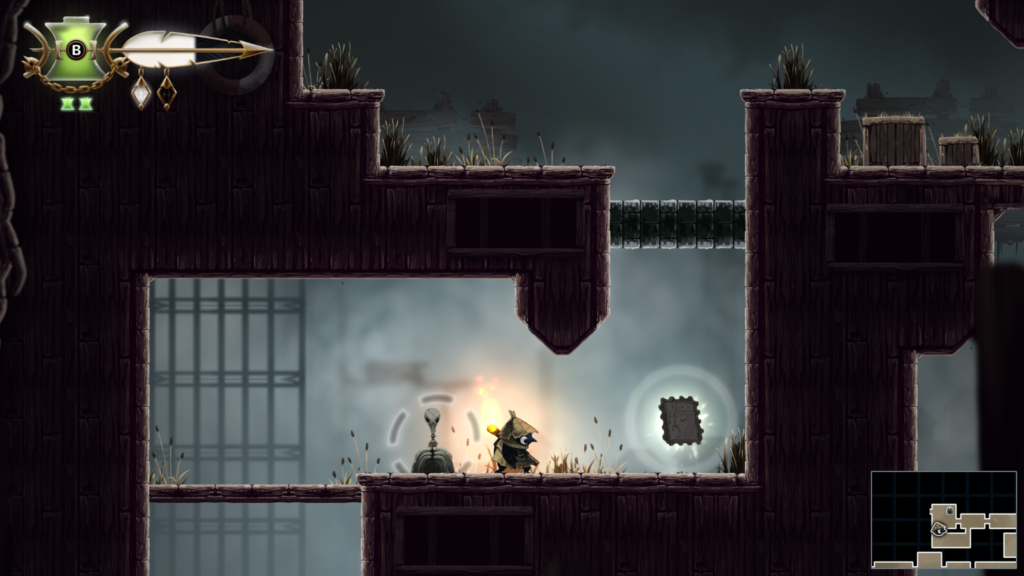
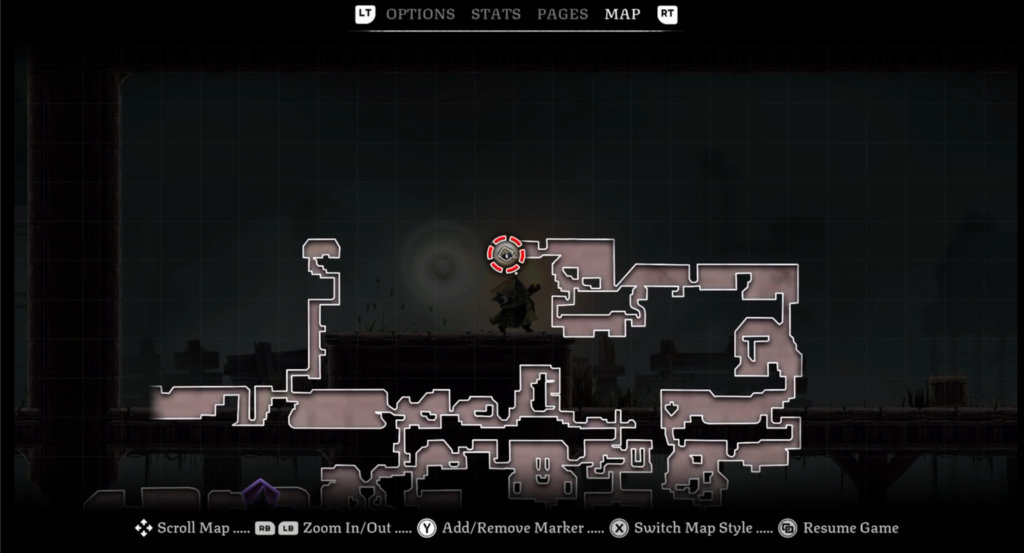
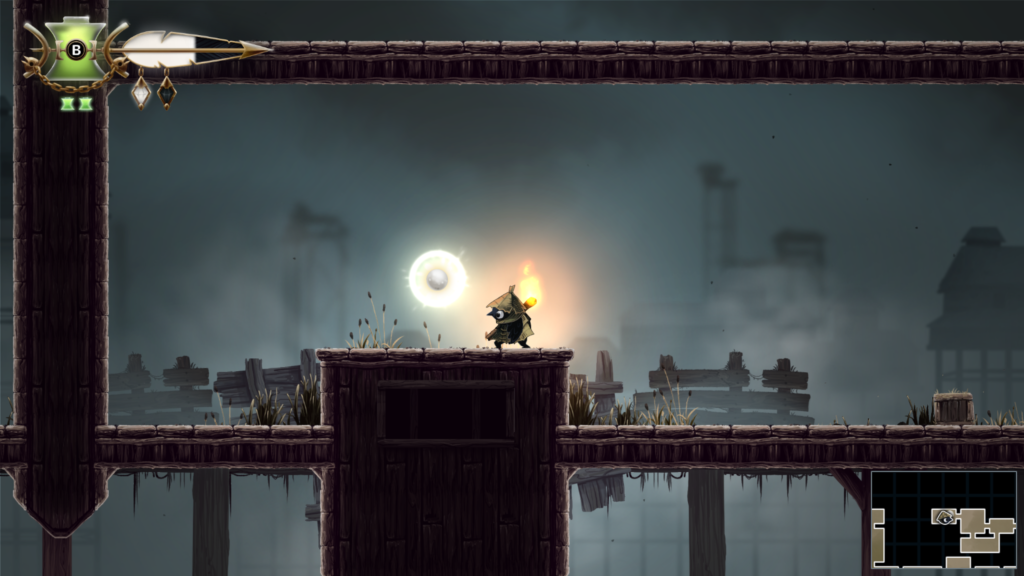
Gate Stone: 3 / 3
The final one requires you to go down from the second one, to towards the bottom of the area, head right and then start to ascend. The stone is at the very top of the area (check the map).
Once you have collected all three stones, the game will show you where the gate has opened on the map, giving you an objective marker to follow.
Defeat the Creature from the Deep Boss Guide
The Creature from the Deep is located in the The Docks area of the game, coloured brown on the map. You’ll have to fight it before you gain access to the submarine vehicle needed to access The Depths area.
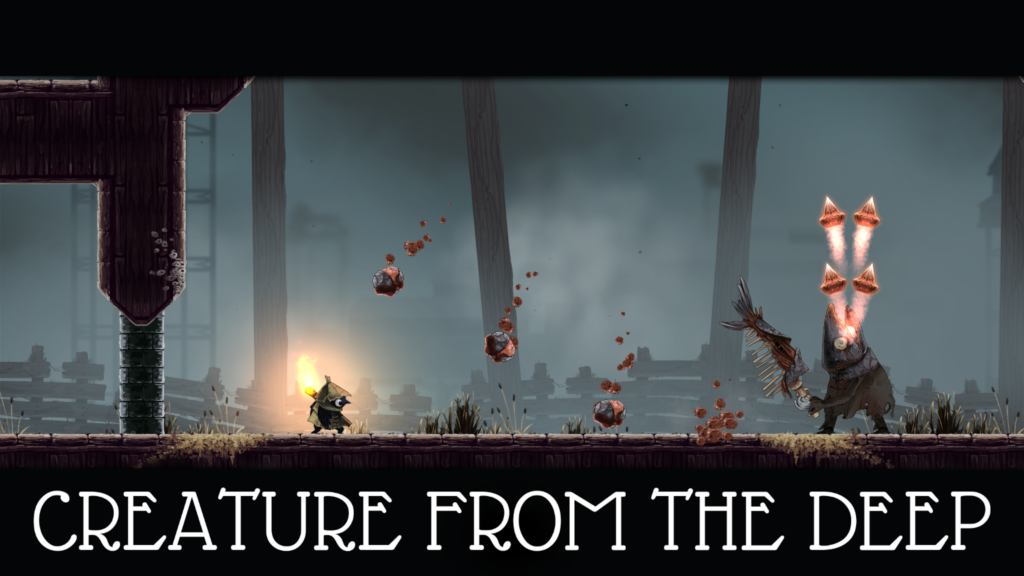
The Creature from the Deep shouldn’t give you too much trouble but it is quite aggressive, so you’ll want to keep an eye on it, and stay moving.
It has a range of attacks, usually created from its swordfish sword that it wields. As it uses it, it’ll likely create projectiles in the air, or shockwaves in the ground. It also charges across the screen from side to side.
Be sure to use all your dodging abilities; slide, hover, jump etc. You can easily hover over one of the shockwaves. Be sure to keep using your flaming vessels and check your trinket loadout if you’re struggling.
You can watch a video of the boss fight below:
Defeating the Creature from the Deep will net you the “Into the Deep” achievement / trophy.
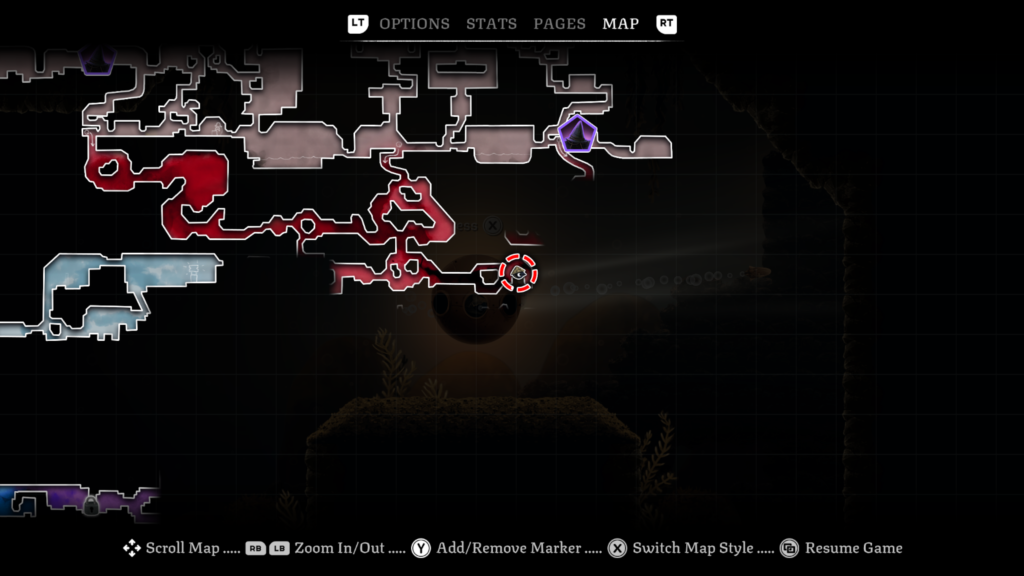
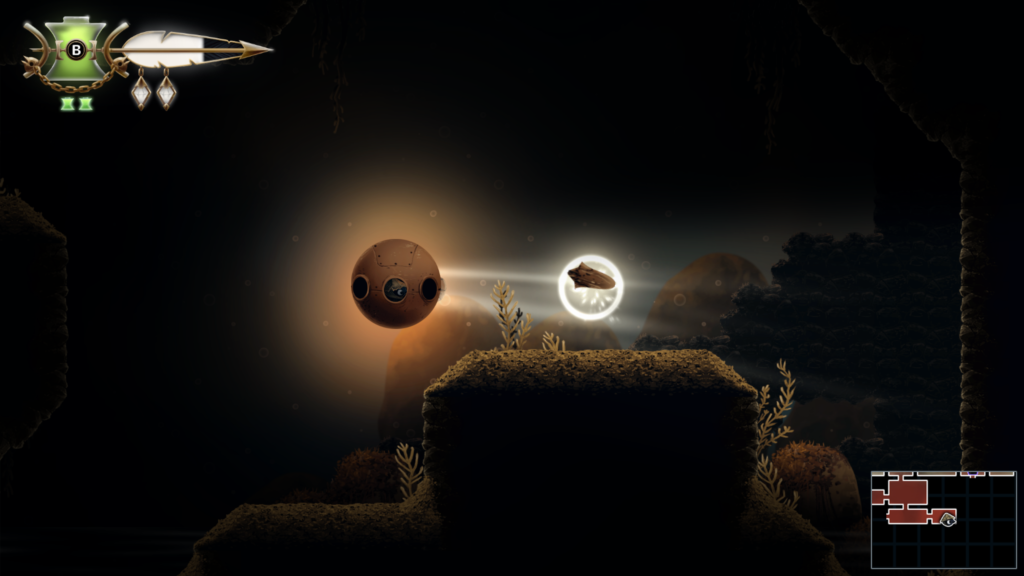
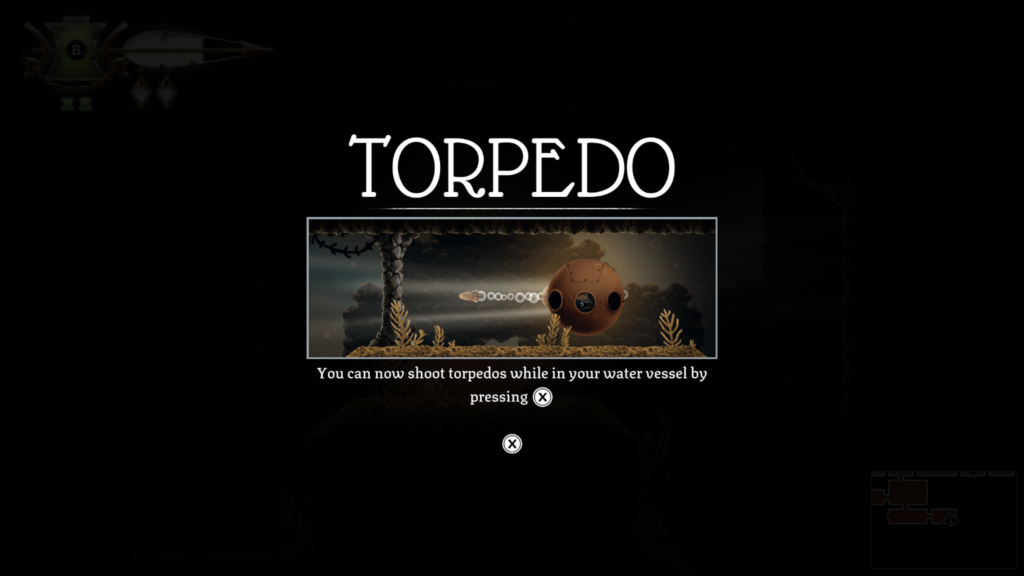
Ability: Torpedo – Location – The Deep (deep red colour on the map)
Trinket Slot 49 / 103: Location – The Deep (deep red colour on the map)
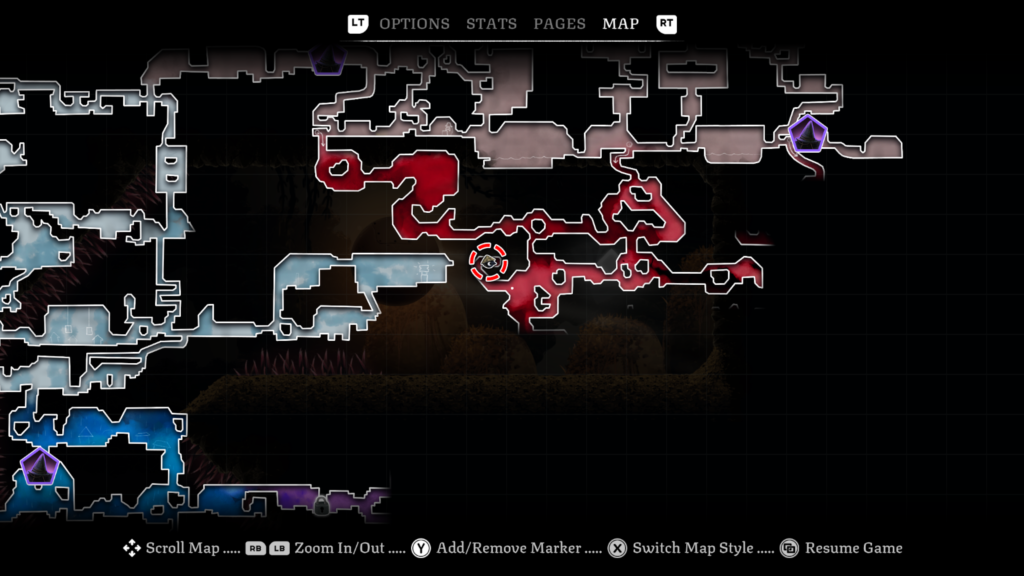
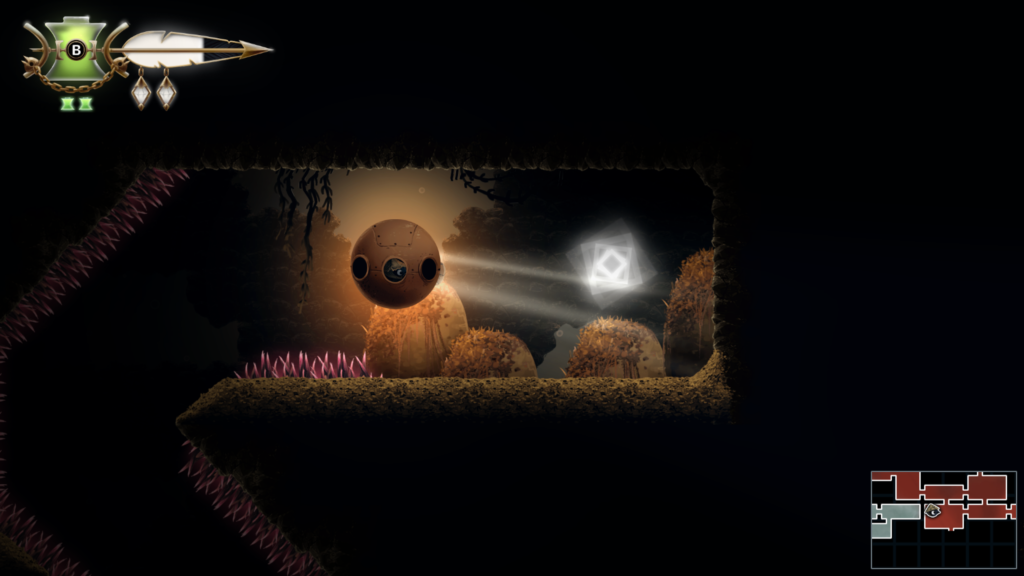
Trinket Slot 50 / 103: Location – The Deep (deep red colour on the map)
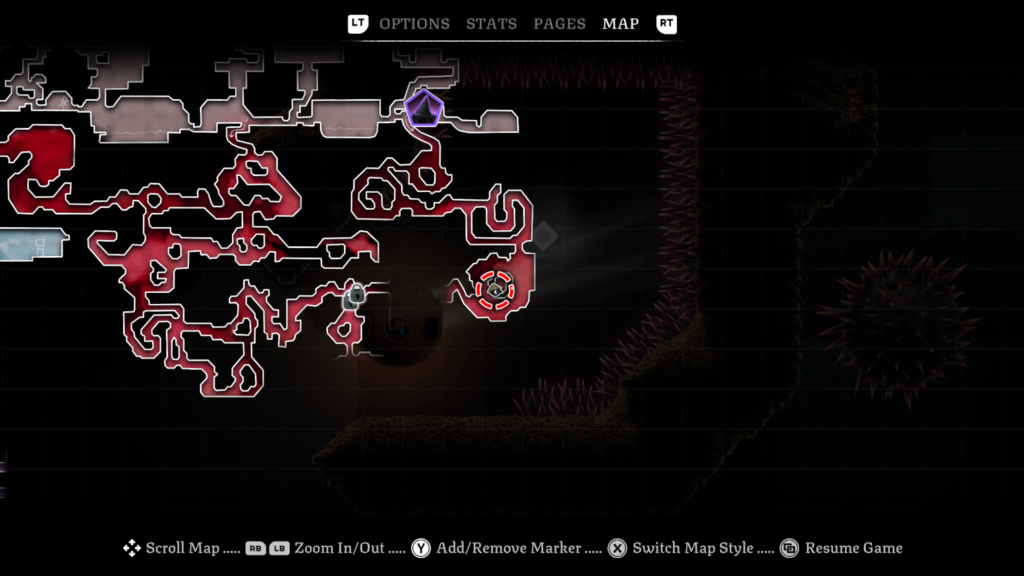
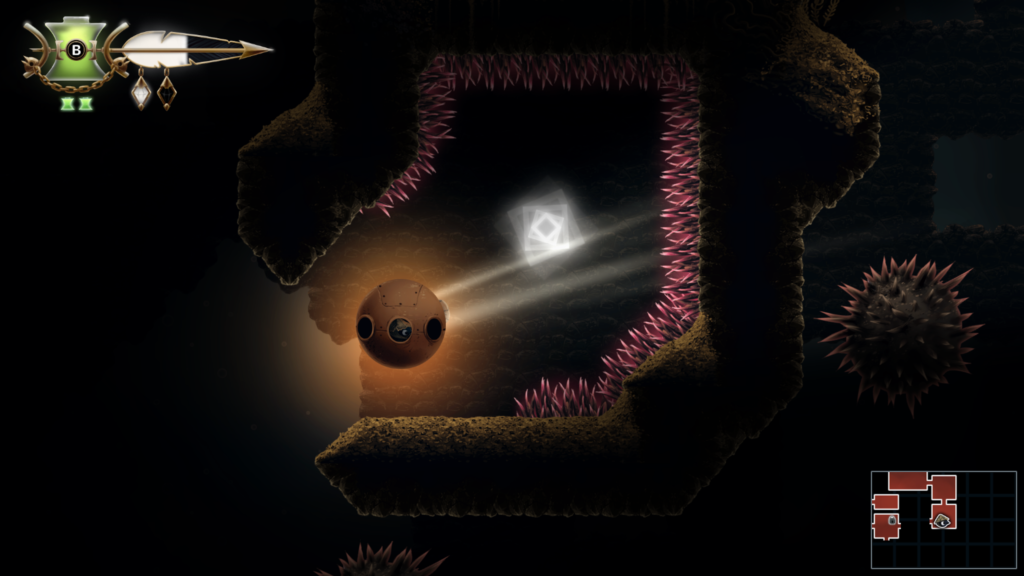
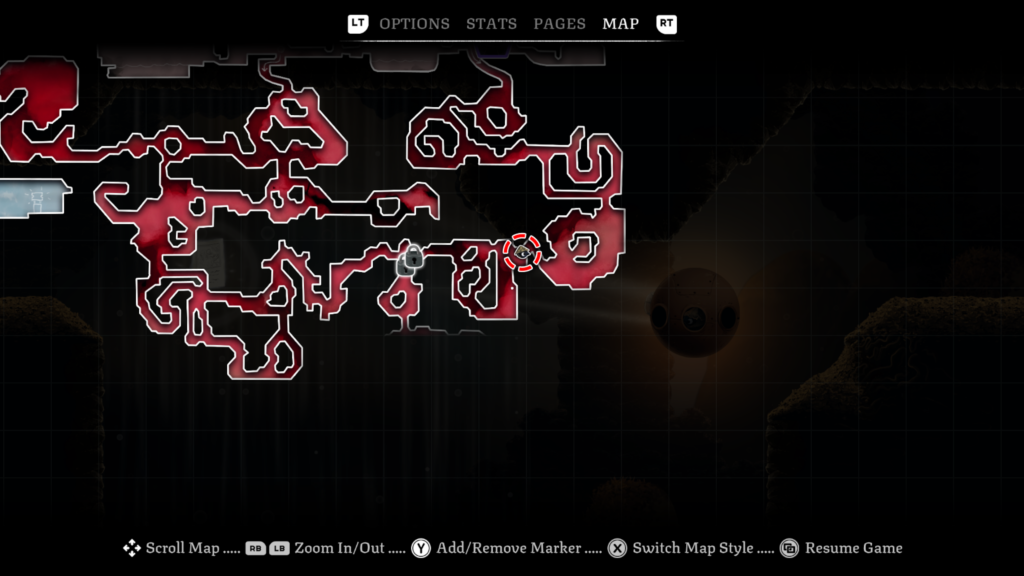
Story Page 14 / 23: Location – The Deep (dark red colour on the map)
The Lookout Tower Story Page (5 / 6)
Abilities needed: None
You can grab this once you’ve unlocked the submarine vessel and you can then go into The Deep area. Travel down the windy section and go up once at the bottom to the other side.
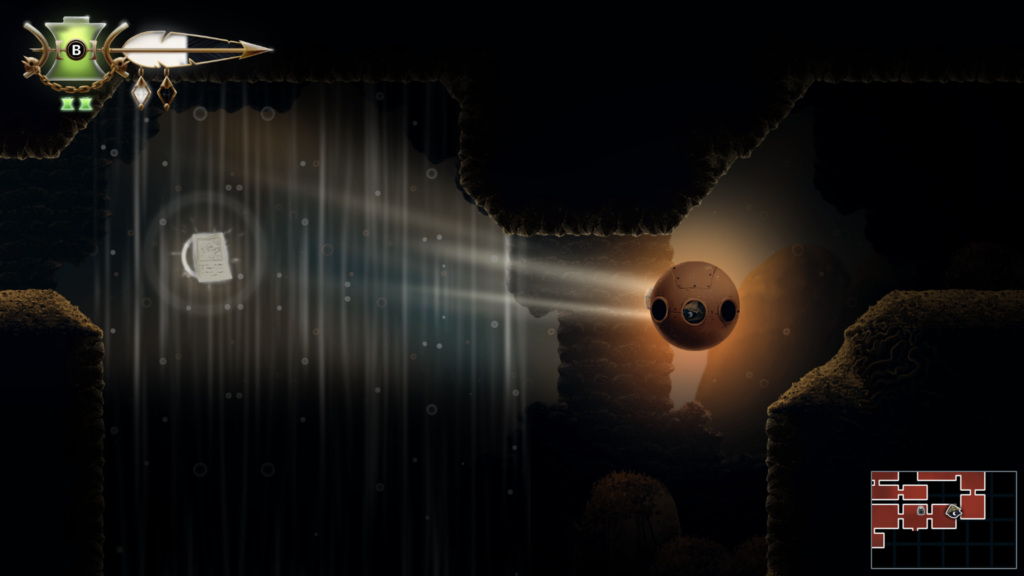
The Colony Boss Guide
This boss is in The Depths area which you access through The Docks using a submarine type vehicle. You enter the area through a giant skull.
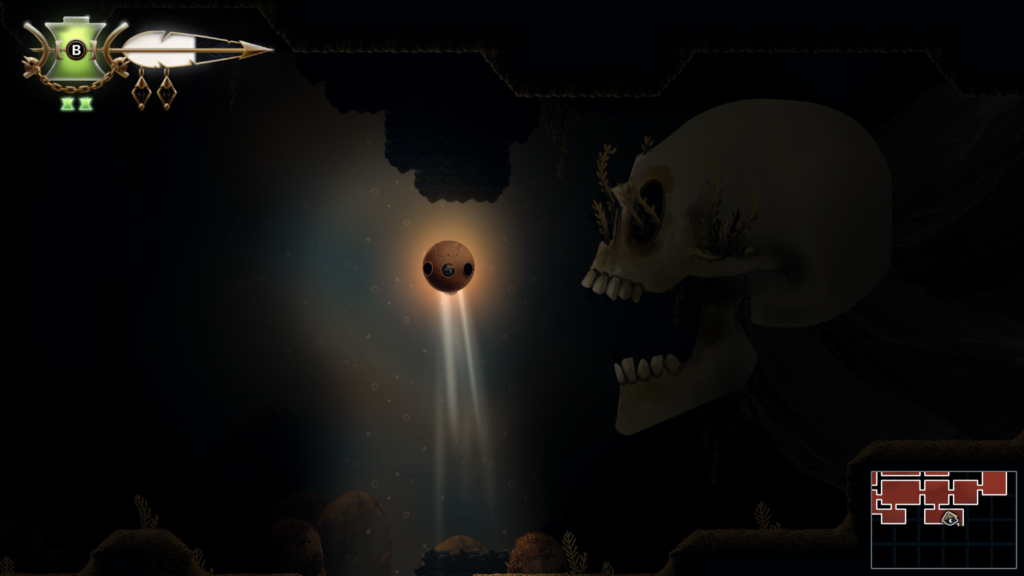
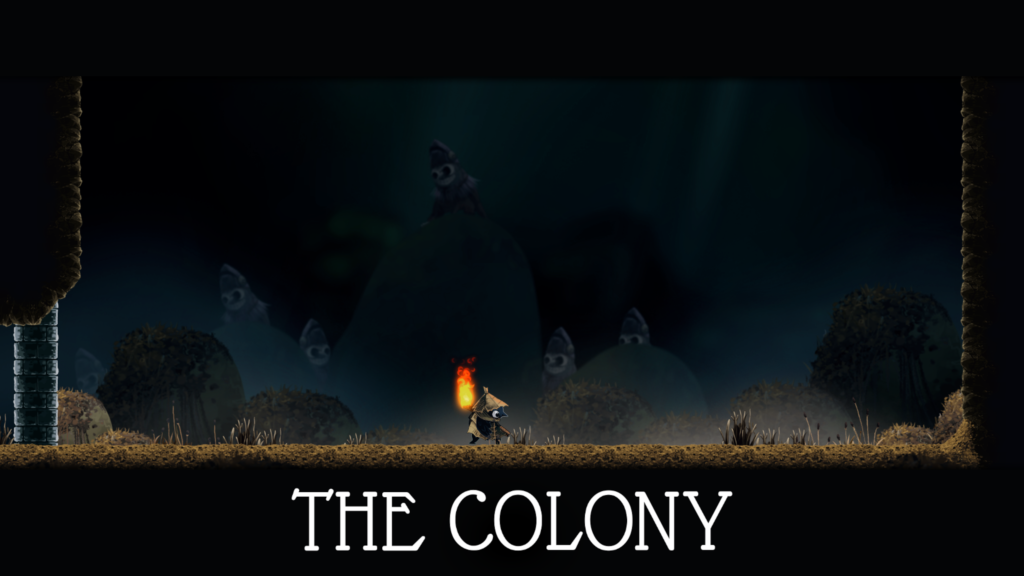
The Colony starts off with individual enemies carrying out various attacks. Involving projectiles from all manner of directions, as well as ground shockwaves. They attack fairly quickly so you’ll have to have your wits about you to dodge them.
About the halfway mark, a ‘final form’ drops in and this dude is obsessed with throwing homing spikes at you, so you need to keep moving, whilst this thing bounces all over the place.
I strongly recommend having the Bottle Cap trinket equipped (buy it from Looter’s shop in the tent for 250 in-game currency). This means your flaming vessel won’t break immediately if you miss. I also had the Blue Bow trinket equipped which meant my health refilled automatically if I ran out of health, so I didn’t need to worry about healing myself.
Of course, don’t forget your flaming vessels and play around with your trinket loadout if you’re struggling.
You can watch a video of the boss fight below:
Defeating The Colony will reward you with the “Double Trouble” achievement / trophy for rescuing the Twins, Thistle and Thimble.
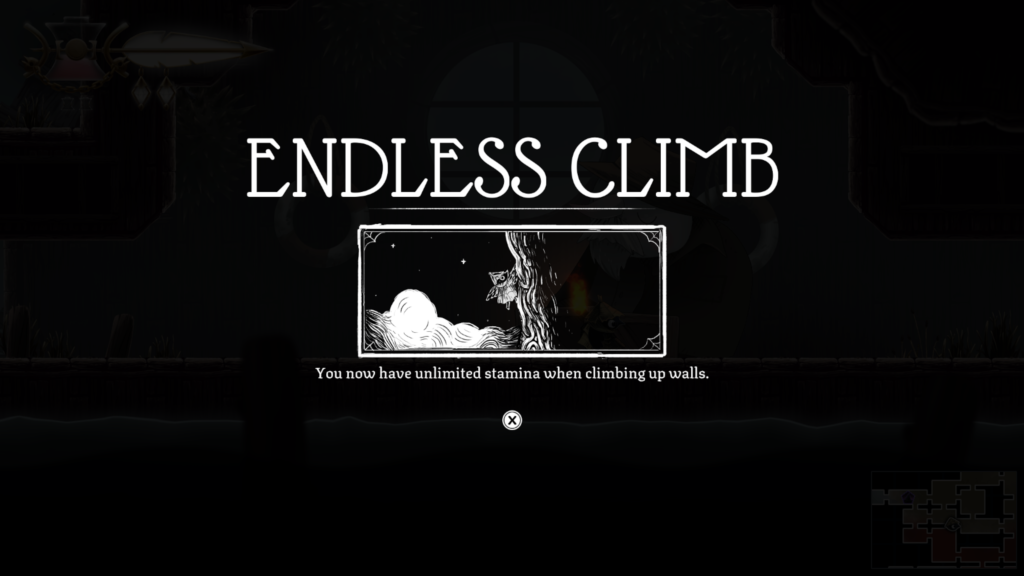
Ability: Endless Climb – Location – The Deep (dark red colour on the map)
The Golden Key and Unlocking the “Stitched Up” Achievement / Trophy
After you have defeated The Colony boss in The Drains, you’ll return to the character “Barge”, who will reward you with the Endless Climb ability. This will allow you to access an area of The Docks previously unaccessible, as you needed that ability. It’s the floor above the first tent you encounter in The Docks area.
Head there and you’ll find another tent, next to an old boot that you can enter. Here is where you’ll start the quest needed to unlock the “Stitched Up” achievement / trophy.
You can watch a video guide below, or you can read on for a text and images guide.
- 0:00 – Looter Quest begins and receiving the Golden Key
- 2:13 – Looter’s Legs in Graven Valley
- 3:09 – Looter’s Arms in Dessicated Castle
- 4:20 – Looter’s Torso in The Drains
- 5:00 – Looter’s Head in The Bog
- 6:16 – Putting Looter back together and receiving a Golden Feather
Unlock the Golden Gates with the Golden Key
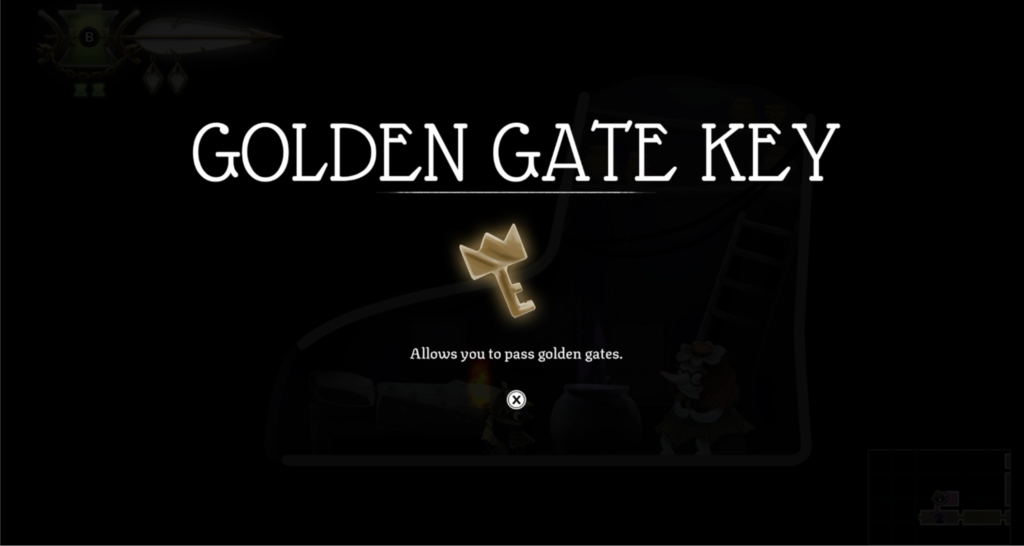
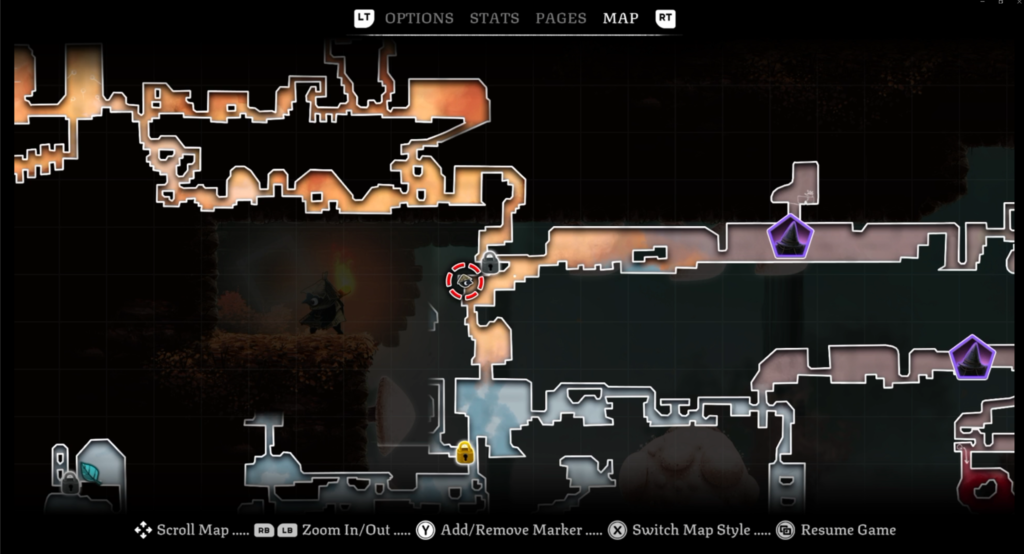
You’ll get the Golden Key as you speak to the character, Whisper, in the boot. She’ll help you find where Looter is, turns out he’s been split into four pieces across the game’s map. These won’t be indicated directly, but the golden key unlocks the golden gates. These are indicated by golden padlocks on the map. So you’ll need to aim for them.
Trinket Slot 51 / 103: Location – Autumn Forest (orange area at the top of the map)
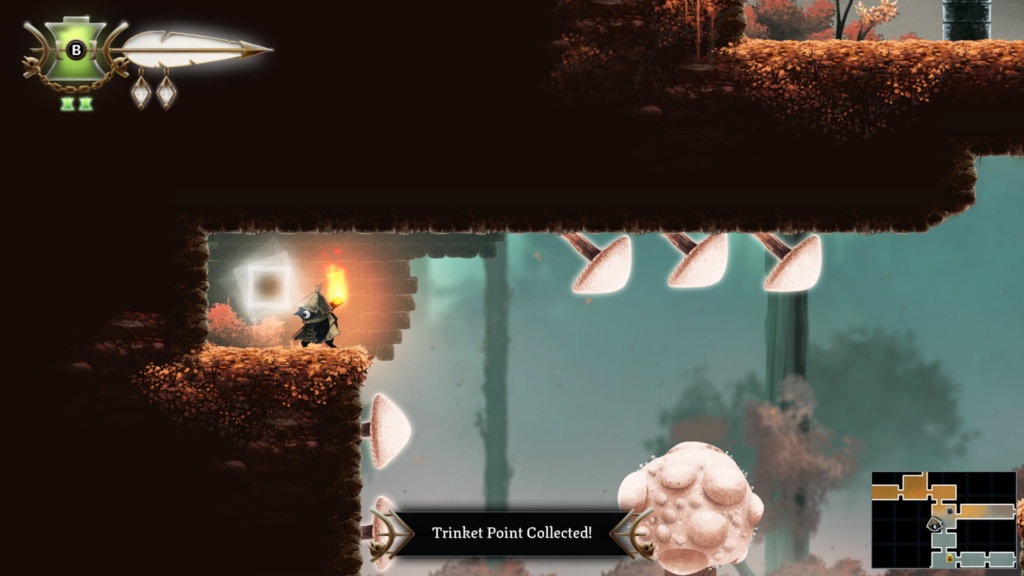
Trinket Slot 52 / 103: Location – Graven Valley (grey colour area on the map)
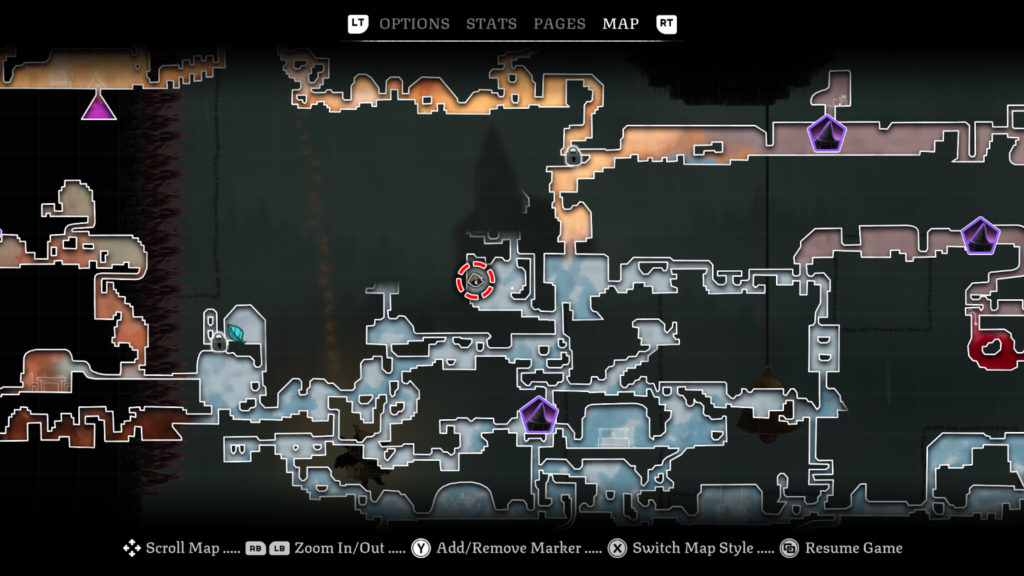
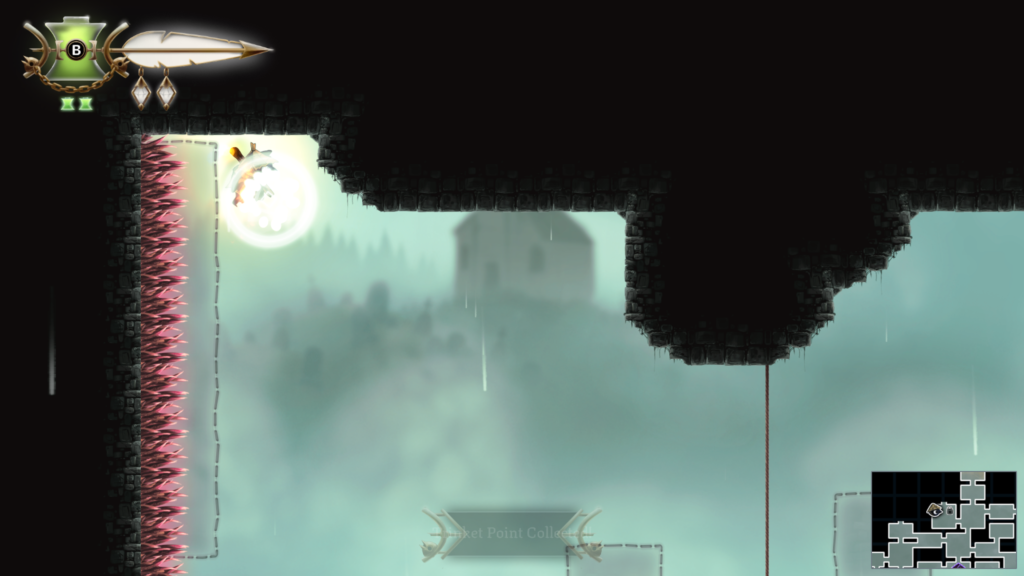
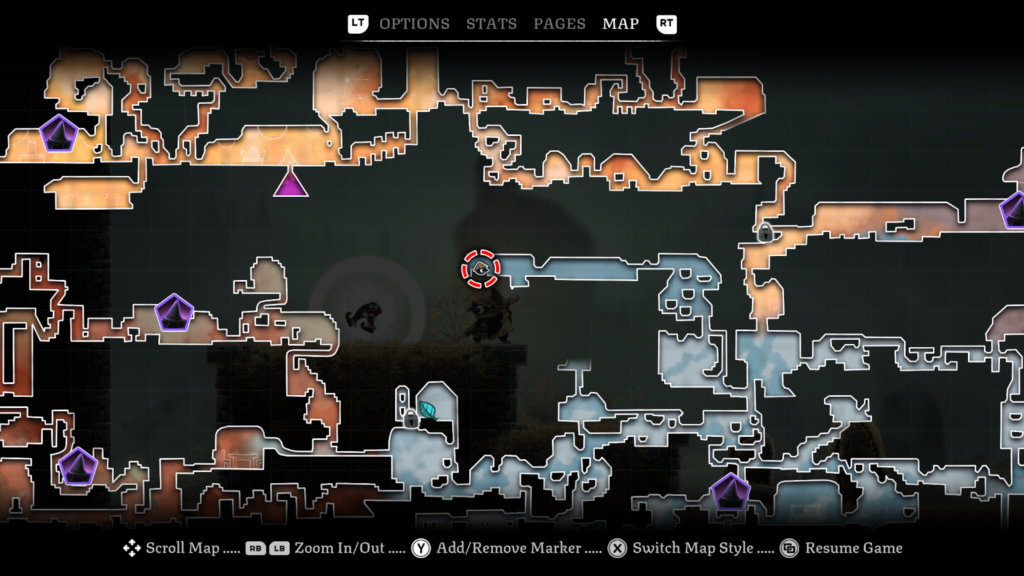
Looter’s Legs (1 / 4) – Graven Valley
Finding the different parts of Looter is pretty simple. Find the golden gate, go through and follow the route to the body part.
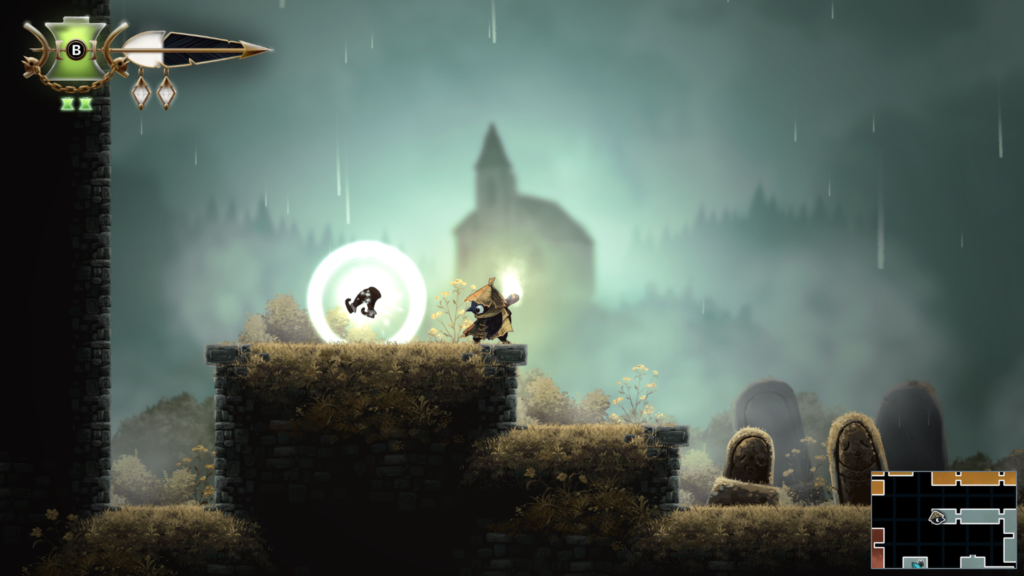
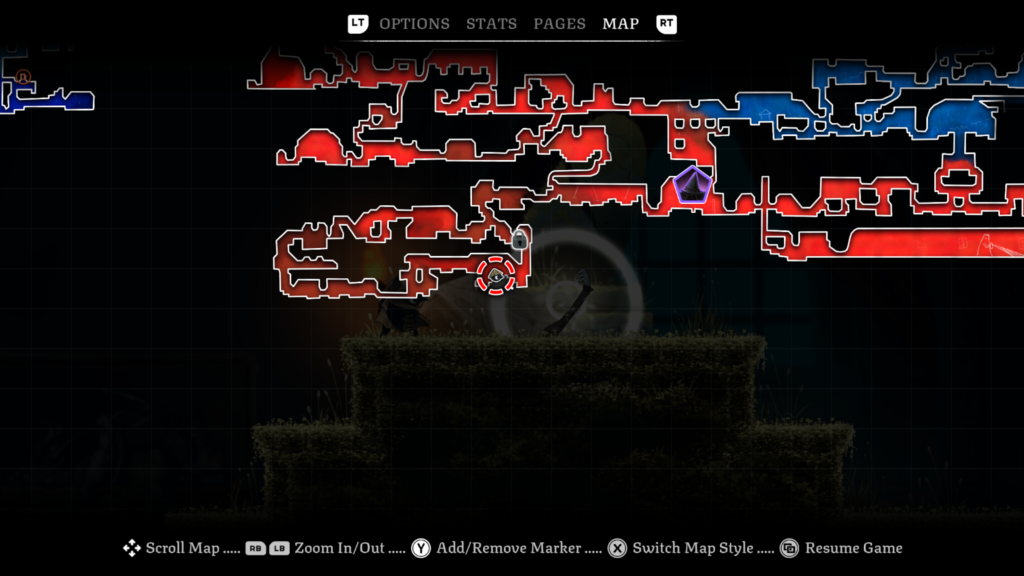
Looter’s Arms (2 / 4) – Dessicated Castle
Finding the different parts of Looter is pretty simple. Find the golden gate, go through and follow the route to the body part.
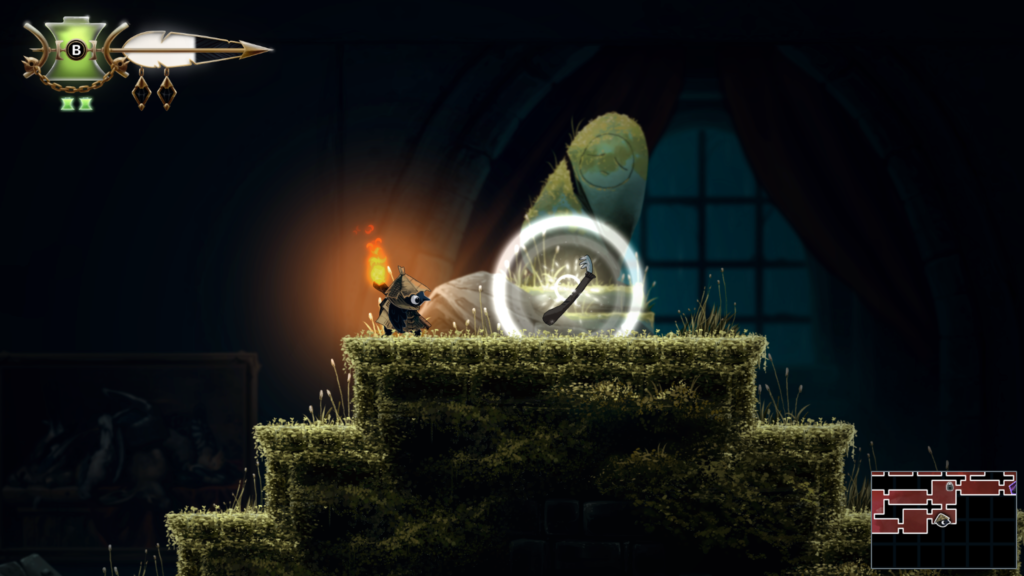
Trinket Slot 53 / 103: Location – The Drains (green colour area on the map)
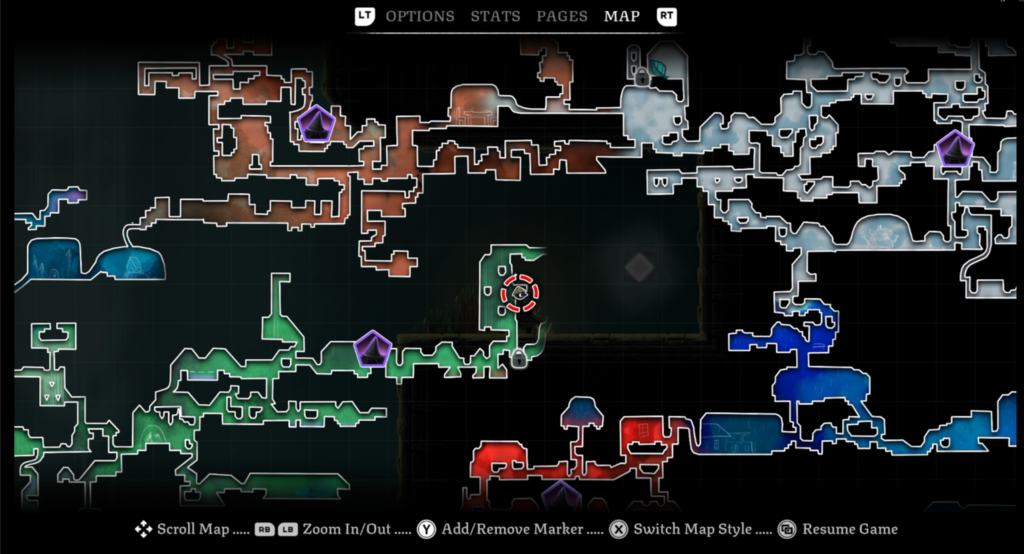
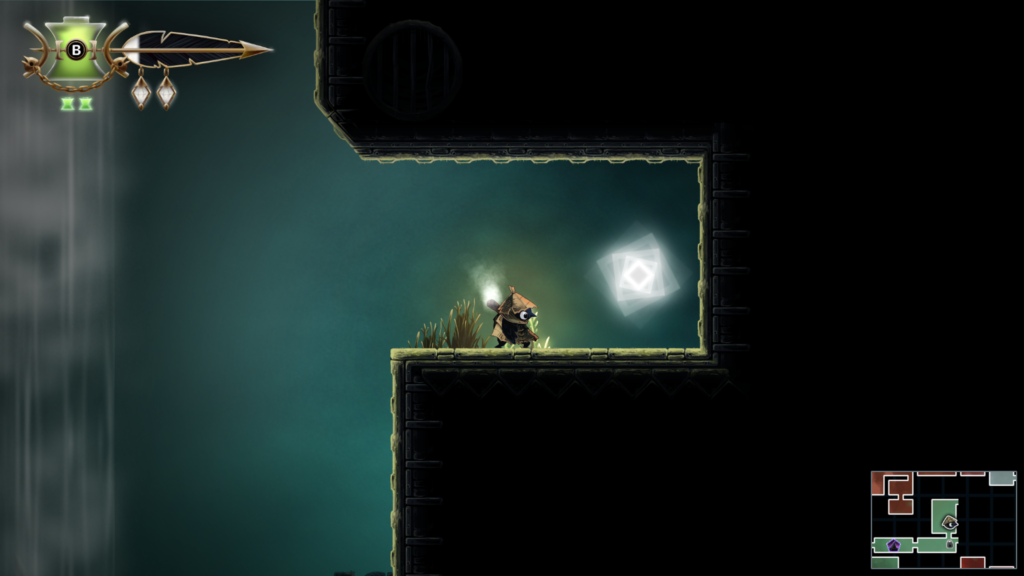
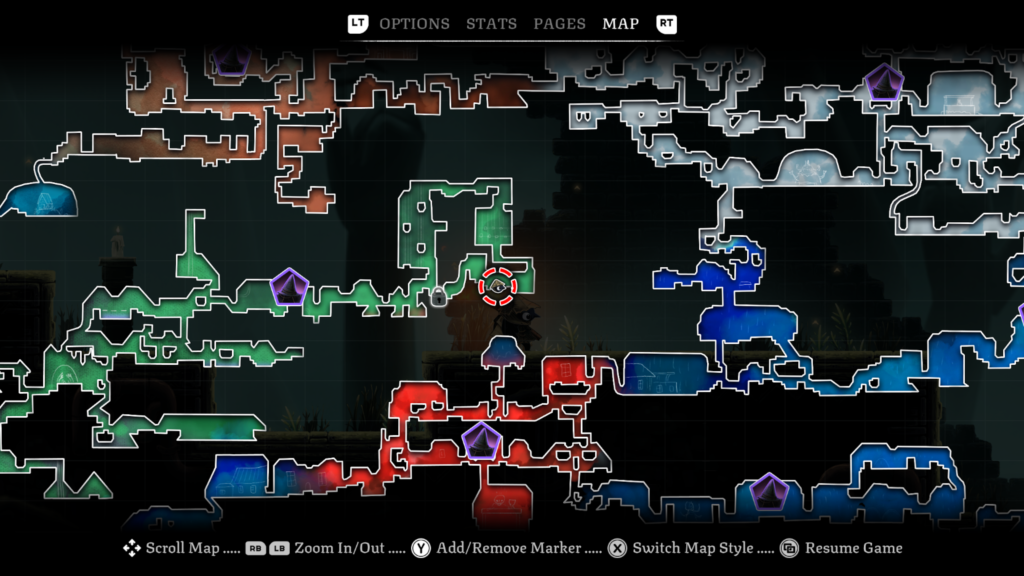
Looter’s Torso (3 / 4) – The Drains
Finding the different parts of Looter is pretty simple. Find the golden gate, go through and follow the route to the body part.
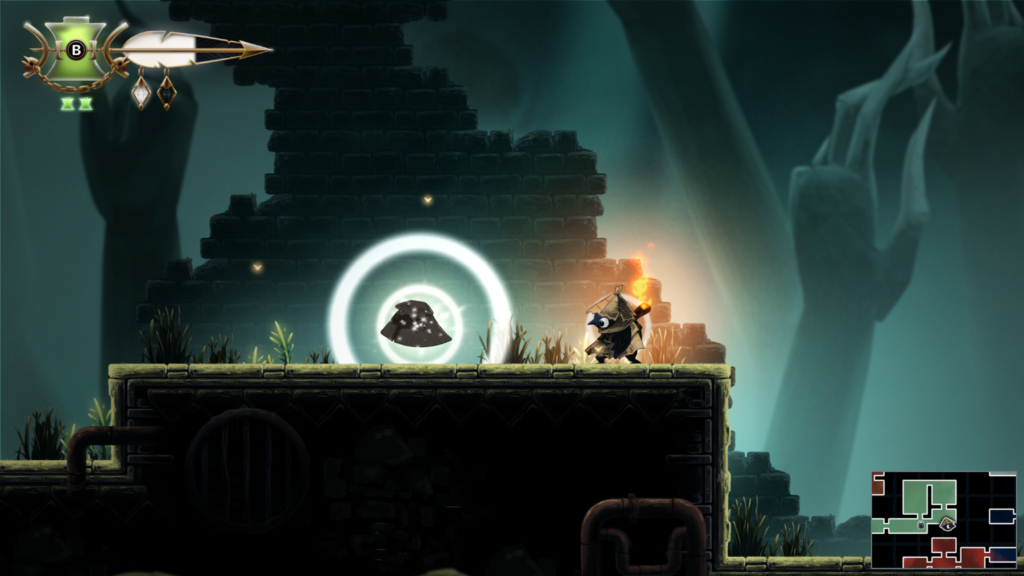
Story Page 15 / 23: Location – The Bog (yellow colour on the map)
The Dollmaker Story Page (4 / 9)
Abilities needed: Slingshot, Climb
Head to the left of the room, on the left of the tent, and stand on the upper-most step and throw your matchstick to the wall on the right (where the Story Page is).
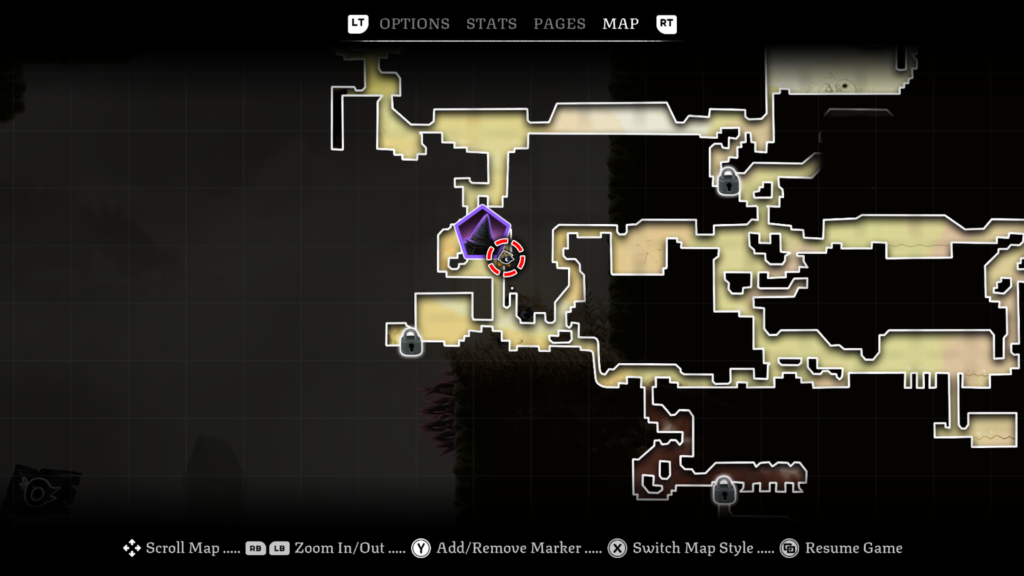
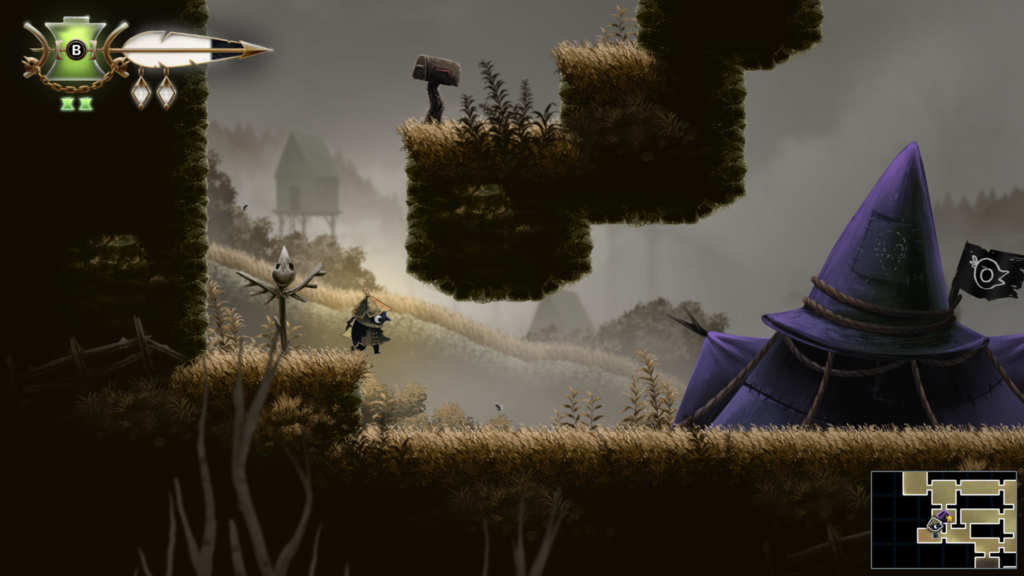
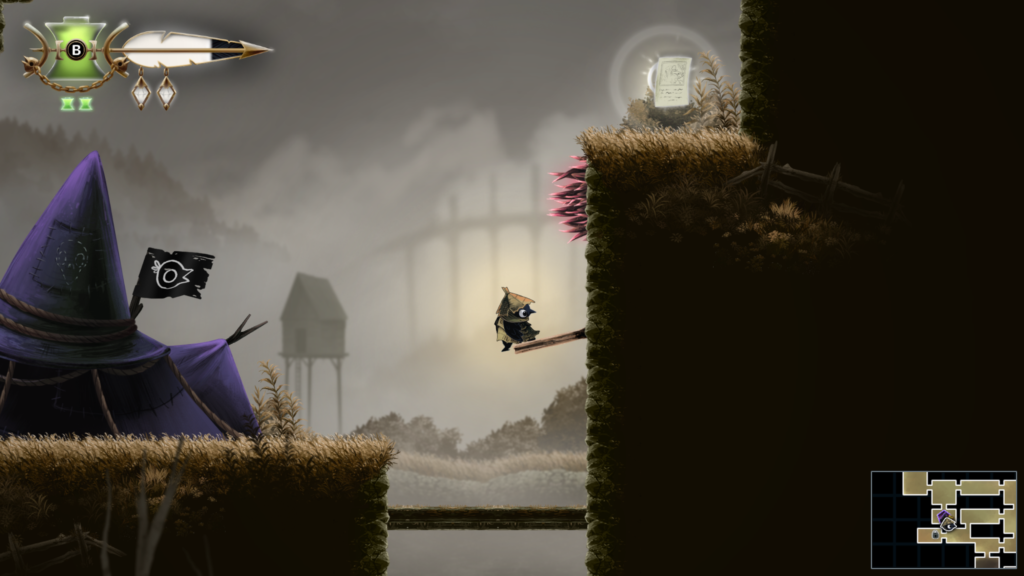
Trinket Slot 54 / 103: Location – The Bog (yellow colour area on the map)
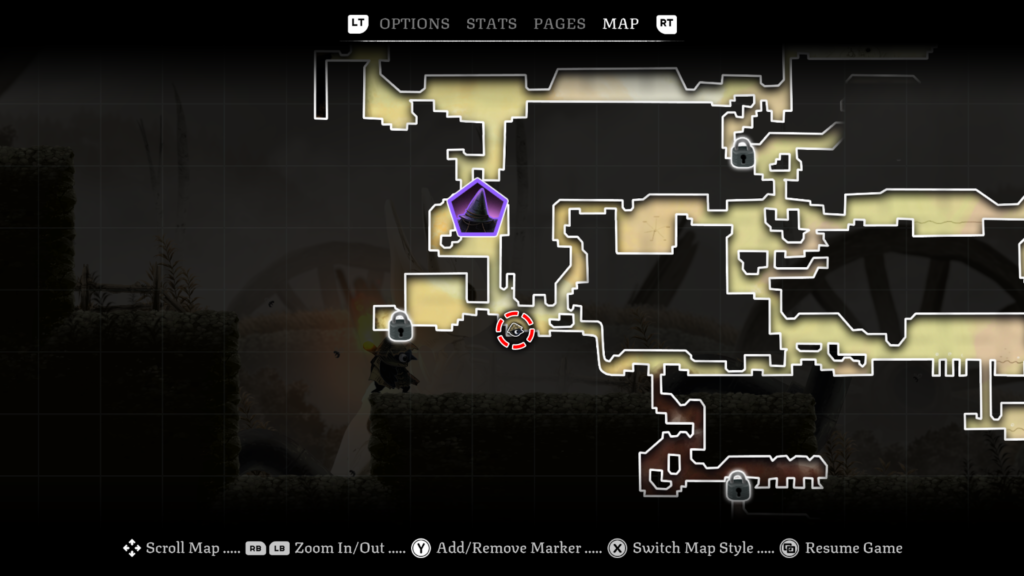
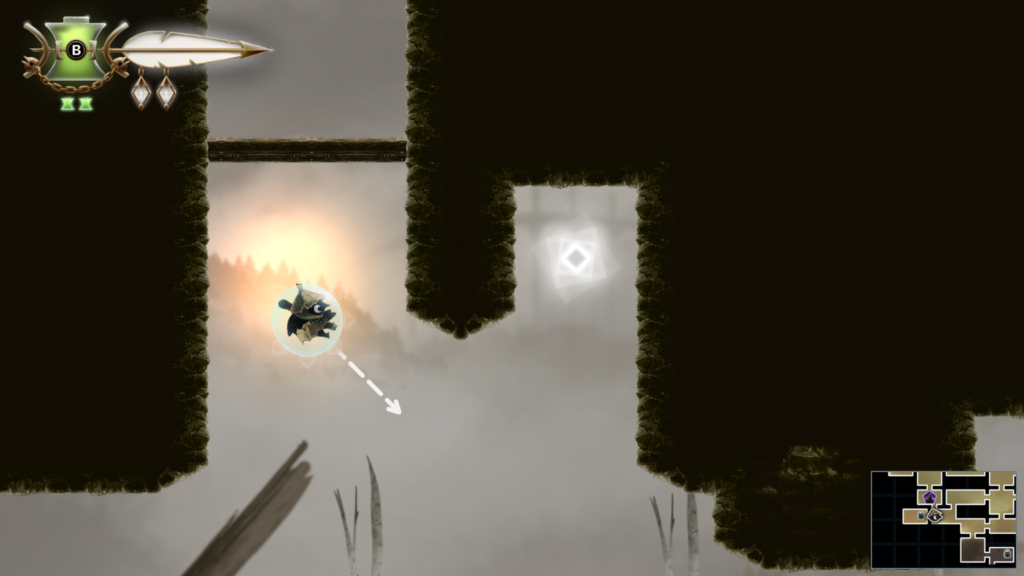
Spirit 16 / 20: Location – The Bog (yellow colour on the map)
Abilities needed: None (I think abilities would slow you down)
This one has little room for error. Run, jump and slide! Abilities would likely slow you down.
You’ll be rewarded with a spirit for completing this time trial.
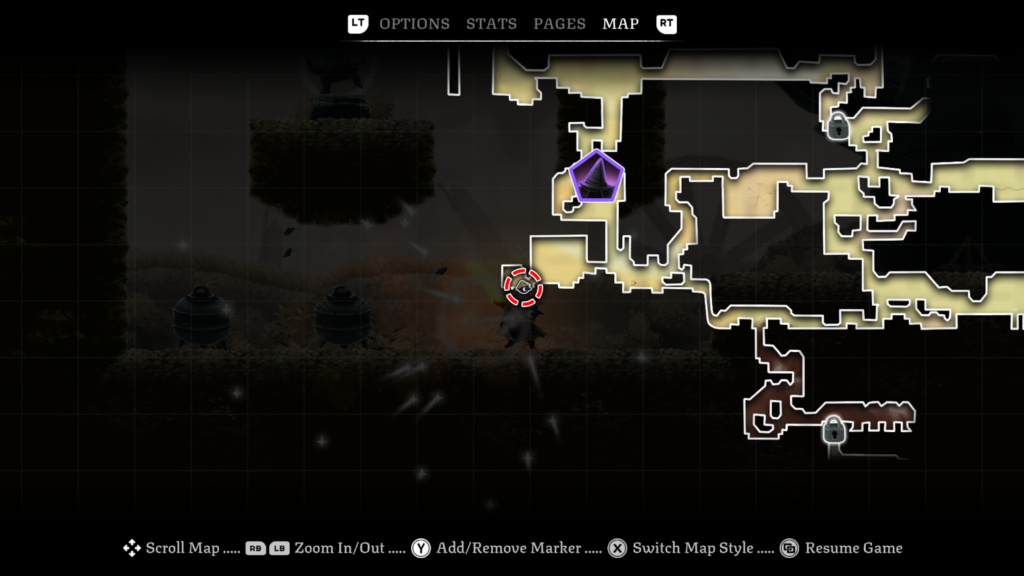
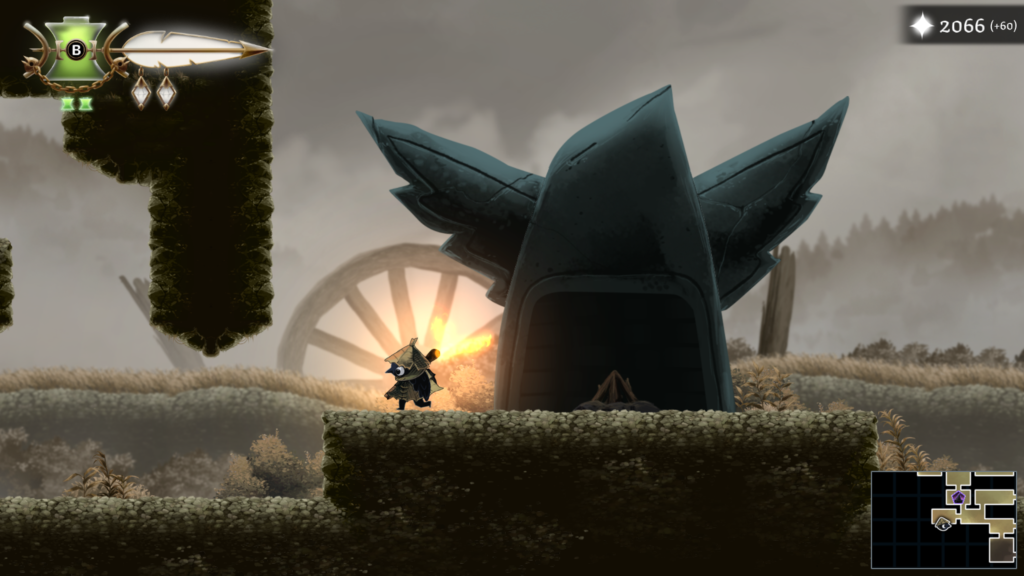
Workshop Token 14 / 27: Location – The Bog (yellow colour on the map)
Abilities needed: Endless Climb, Hover
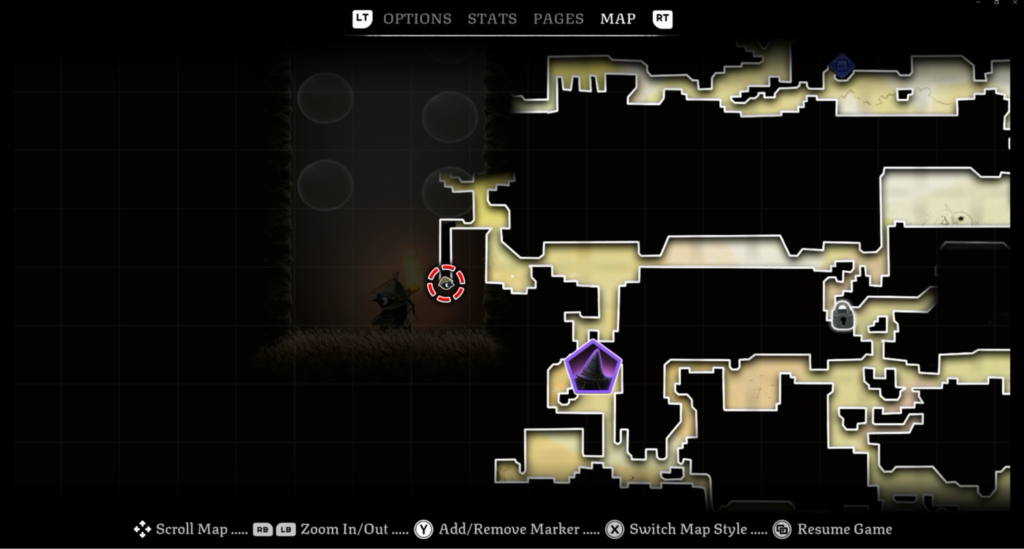
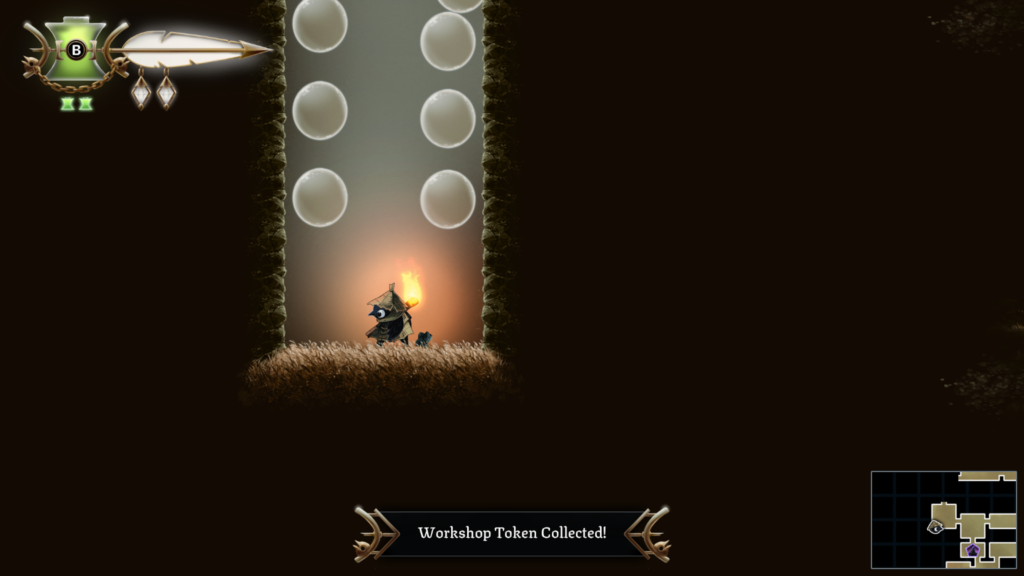
Trinket Slot 55 / 103: Location – The Dollmaker’s House (pinky-red colour area on the map)
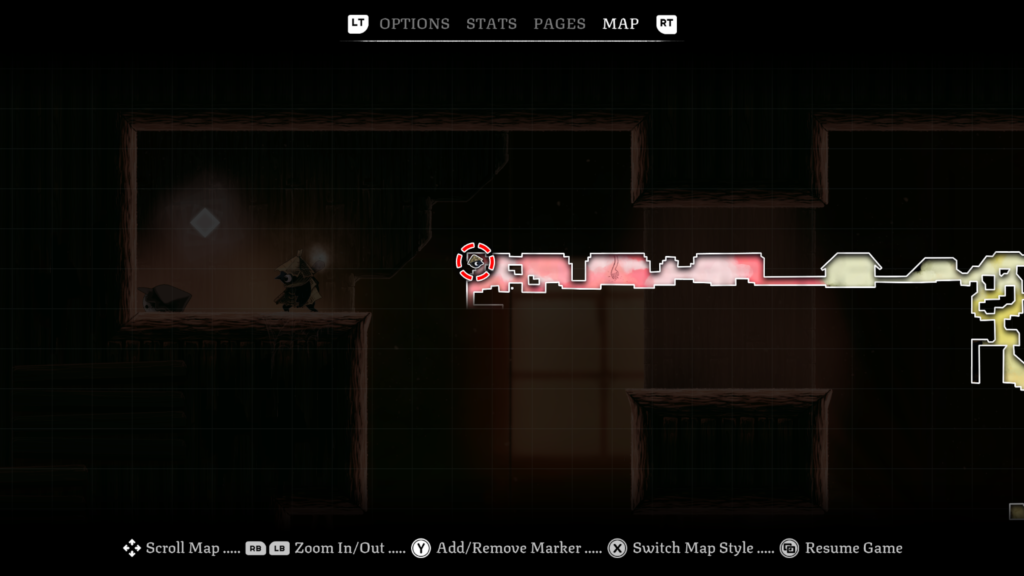
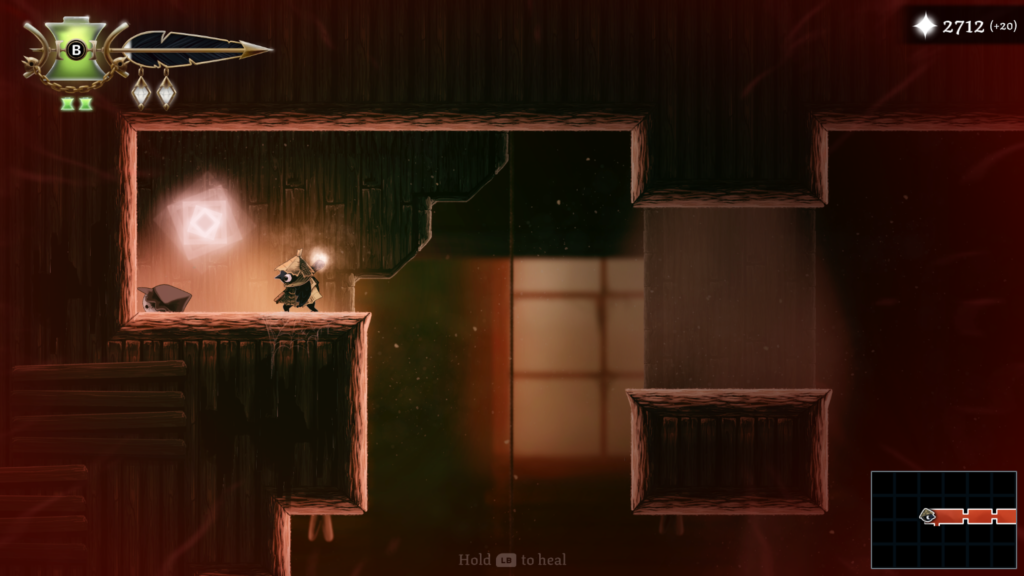
Spirit 17 / 20: Location – Dollmaker’s House (pinky-red area colour on the map, you get in via The Bog)
Abilities needed: Endless Climb, Hover
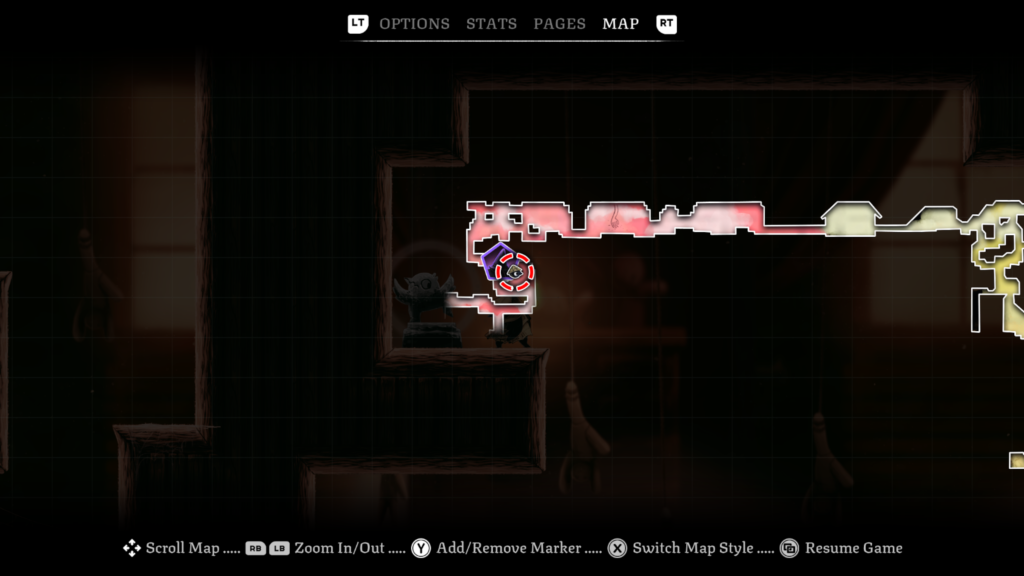
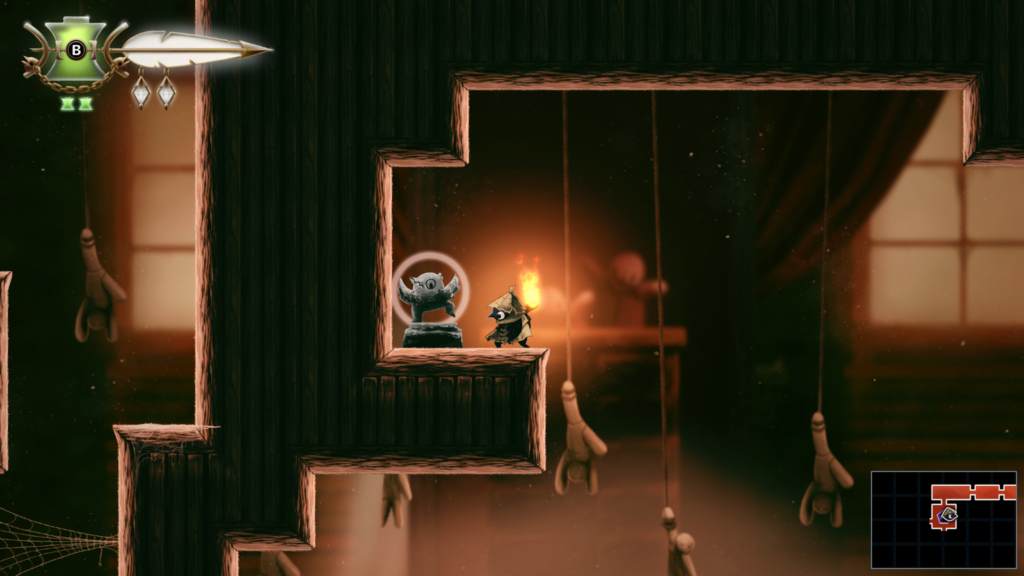
Trinket 25 / 32: Location – Dollmaker’s House (pinky-red colour on the map)
Trinket: Bird-Shaped Button – gain extra currency when you are at low health.
Abilities needed: Climb, Hover
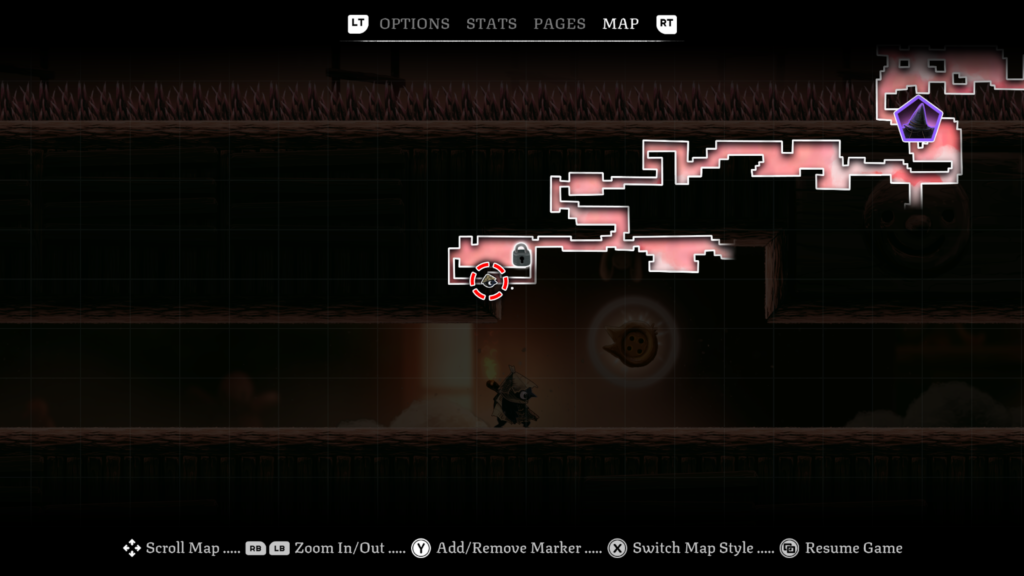
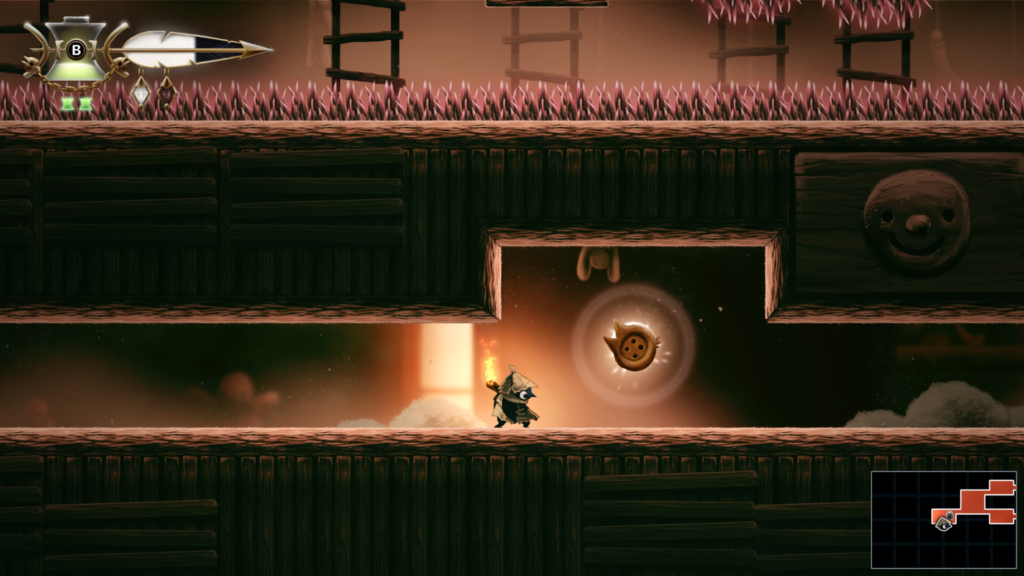
Workshop Token 15 / 27: Location – The Dollmaker’s House (pale pink colour on the map)
Abilities needed: None
This one is about up and over very quickly. There are a load of bubbles to help you get around quickly. You shouldn’t require any abilities.
You’ll be rewarded with a workshop token for completing this time trial.
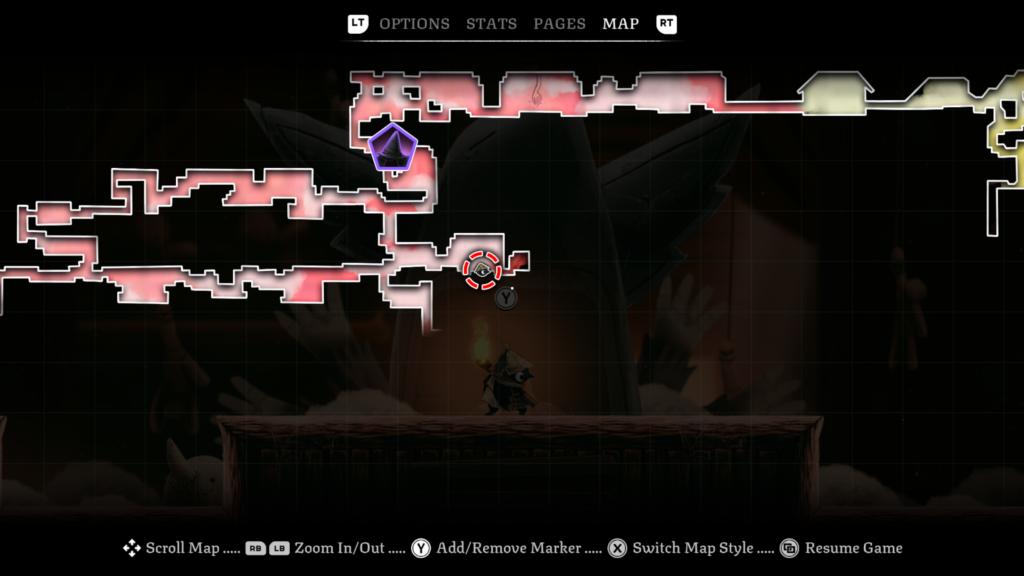
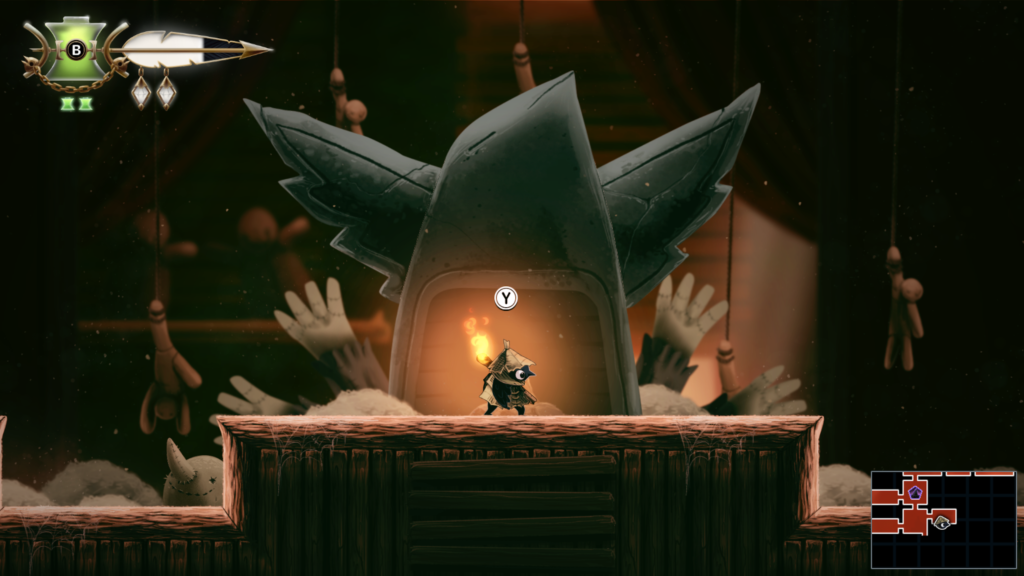
Trinket Slot 56 / 103: Location – The Dollmaker’s House (pinky-red colour area on the map)
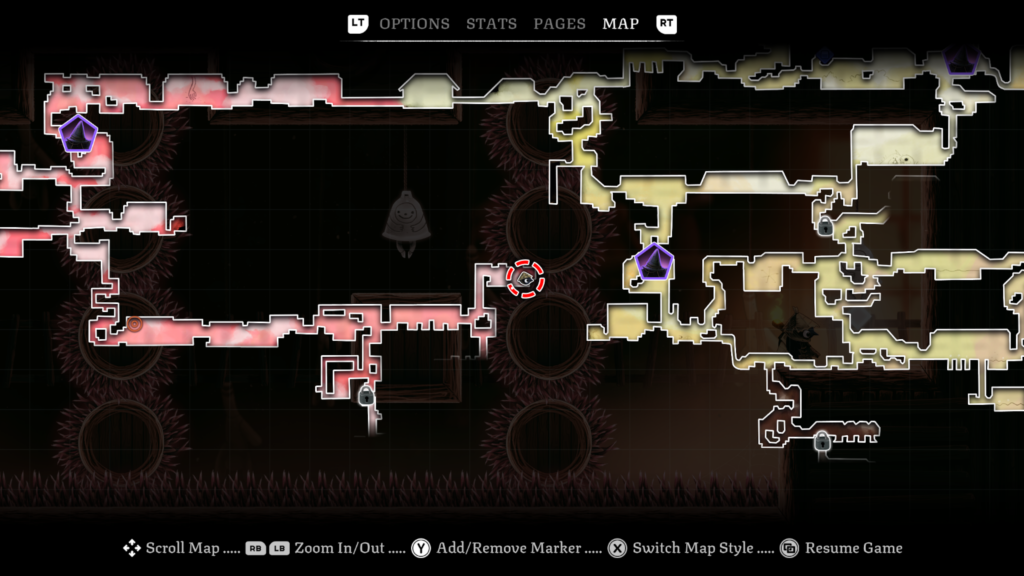
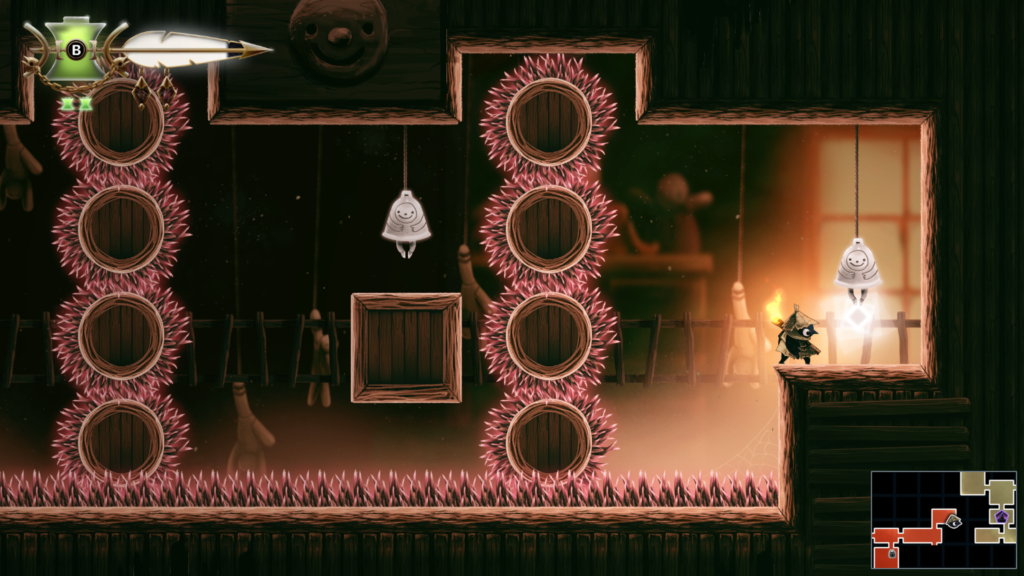
Trinket Slot 57 + 58 + 59 / 103: Location – Looter’s Shop (Tent)
Trinket Slot 60 / 103: Location – The Dollmaker’s House (pinky-red colour area on the map)
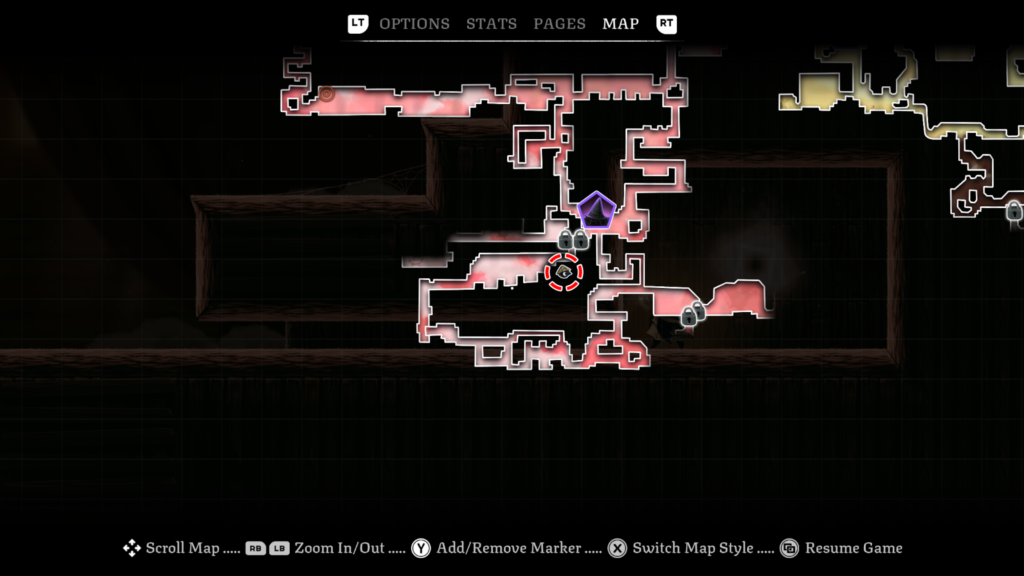
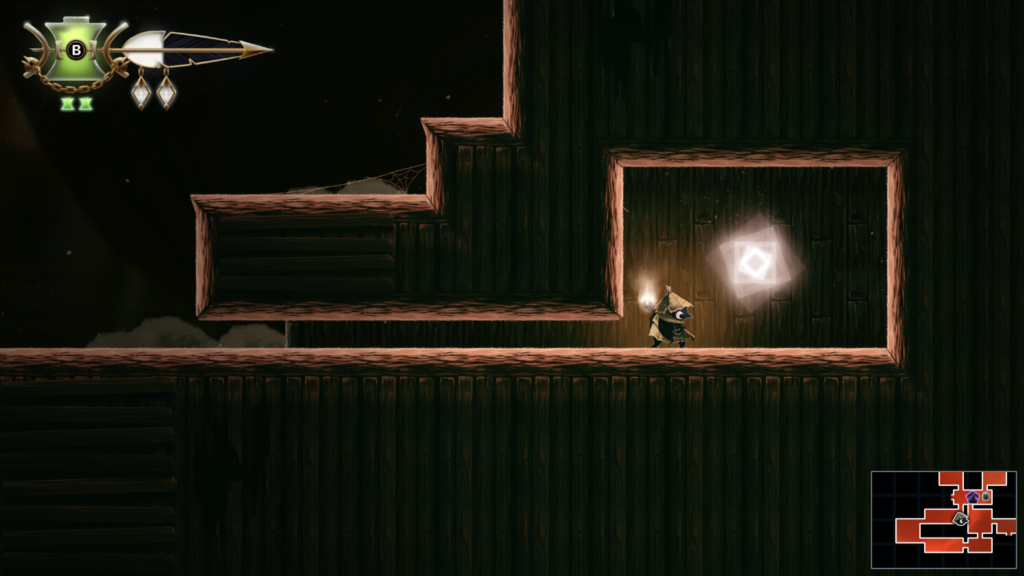
Story Page 16 / 23: Location – The Dollmaker’s House (pink colour on the map)
The Dollmaker Story Page (5 / 8)
Abilities needed: Hover, Climb
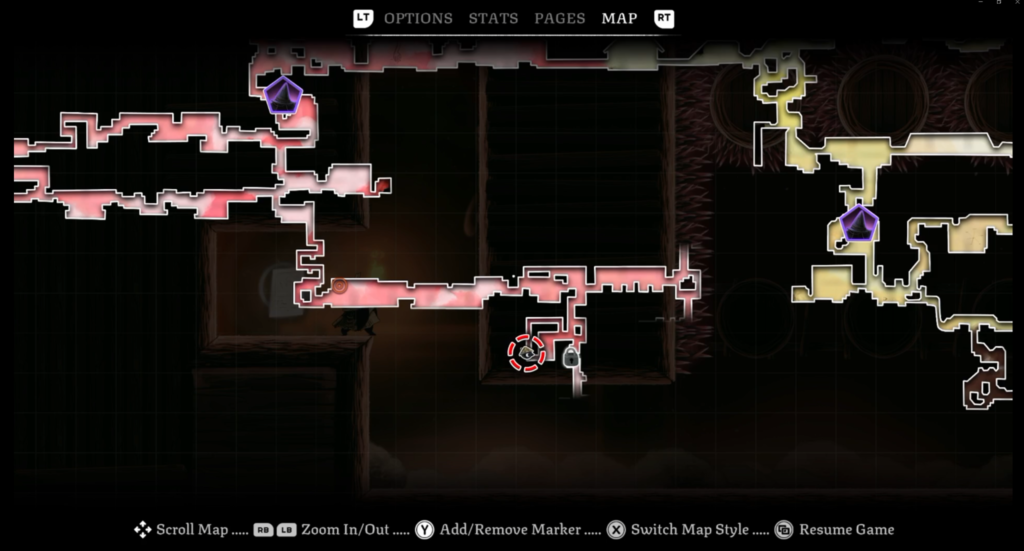
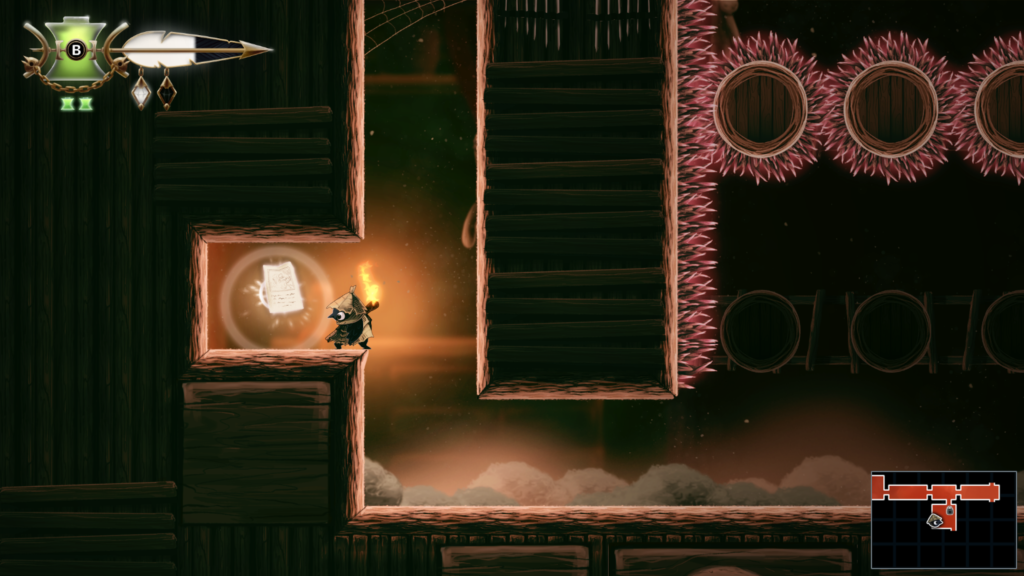
Defeat the Dollmaker’s Mirror Boss Guide
You’ll fight the Dollmaker’s Mirror in the Dollmaker’s House area of the game. It’s the pinky-red area on the map that you enter through The Bog level (yellow on the map).
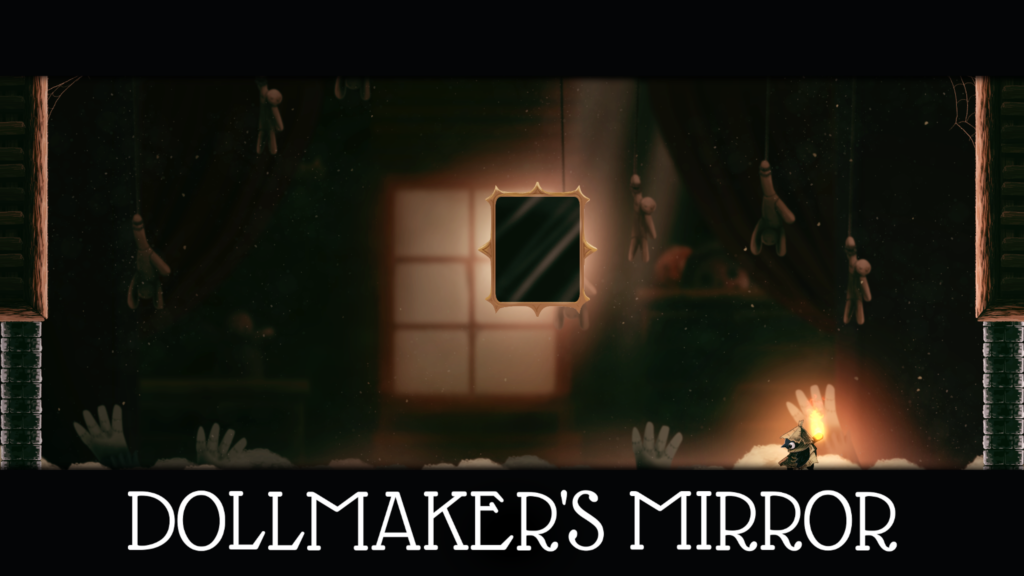
The Dollmaker’s Mirror is probably my favourite boss fight because of the different mechanics it uses. It’s pretty tricky too, but as is often the case, learning patterns and employing everything you know will help you succeed.
It’ll start off with several attacks, including one where multiple mirrors appear. They all have eyes and you’ll need to locate the one with the eye looking upwards, this is the one that is safe to stand under. The rest are all coming down. They drop quick so be sure to slide towards the upwards looking eye if needed.
The mirror also skims across the floor firing out glass shards. It goes from side to side several times. You can jump up the wall slightly, and since you’ll have Endless Climb (ability) you’ll be able to hold on as needed, without worrying about falling off. Just watch for shards as it bounces from side to side.
It also uses a move where glass shards circle the mirror and you’ll need to jump and dodge those.
Halfway Point
At around the halfway point, things get really interesting. The Dollmaker grabs Glimmer and separates them into two, one being Glimmer, the other being Glimmer’s reflection. The reflection lies on the left and Glimmer on the right. You’ll control both Glimmer’s at the same time, the one on the right moving normally, the one on the left moving in opposite directions, i.e. it’s a reflection.
The Dollmaker’s Mirror will then resume its attack. Thankfully it only appears on one half of the screen at a time, so you can focus on where it is. Either attacking the Mirror or dodging any hazards that will come your way. Energy balls will drop from above in various patterns, often on both sides. It is usually more intense on one side to the other, so focus your attention on the one that’s got more of them.
I would recommend focusing on Glimmer rather than thinking about which way you need to control Glimmer. I know that sounds a bit counterintuitive but it felt more natural. If Glimmer goes the wrong way go the other way.
You can watch a video of the boss fight below:
Defeating the Dollmaker’s Mirror will net you the “In the Dollmaker’s House” achievement / trophy.
Ability: Endless Climb – Location – The Dollmaker’s House (pink colour on the map)
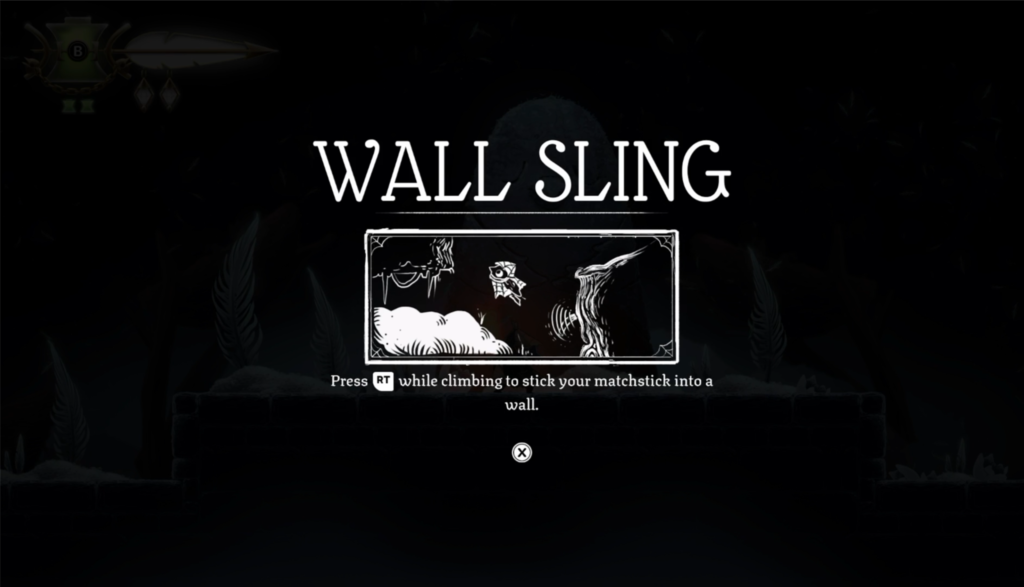
Workshop Token 16 / 27: Location – The Bog (yellow colour on the map)
Abilities needed: Hover, Climb, Wall Sling
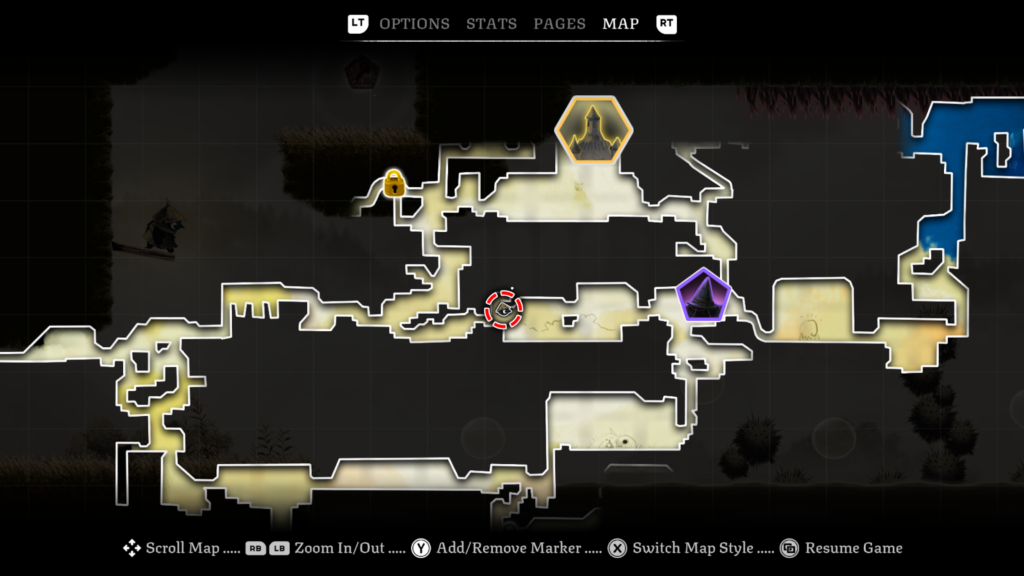
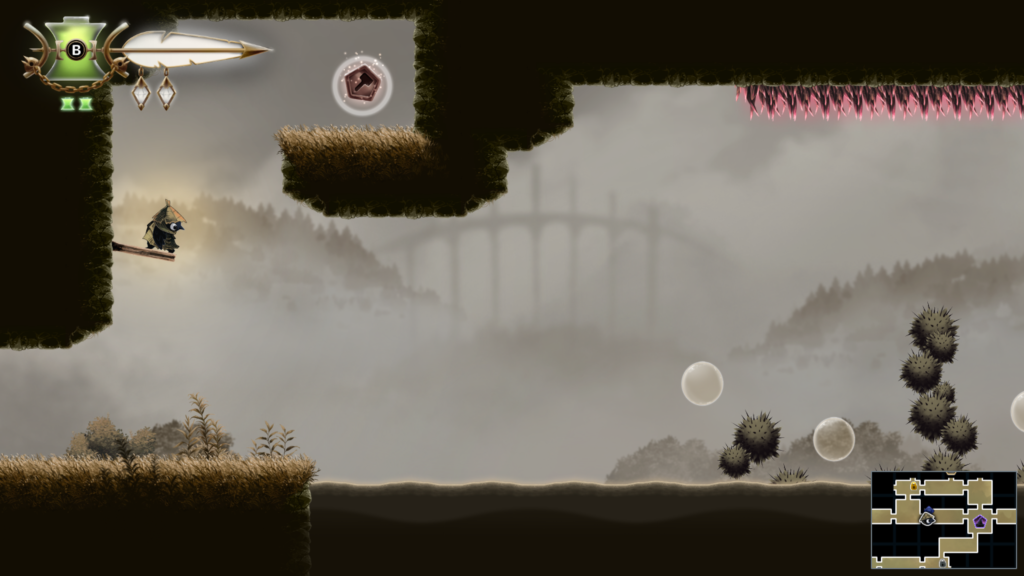
Looter’s Head (4 / 4) – The Bog
Finding the different parts of Looter is pretty simple. Find the golden gate, go through and follow the route to the body part. I suspect you need the Wall Sling ability, which you find in The Dollmaker’s House after finding Magda and defeating the Dollmaker’s Mirror boss.
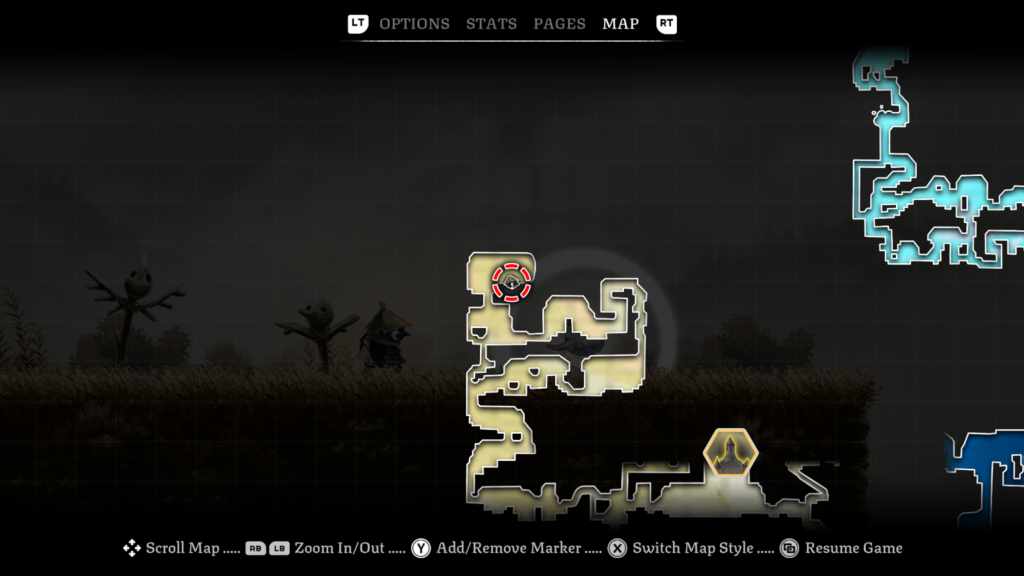
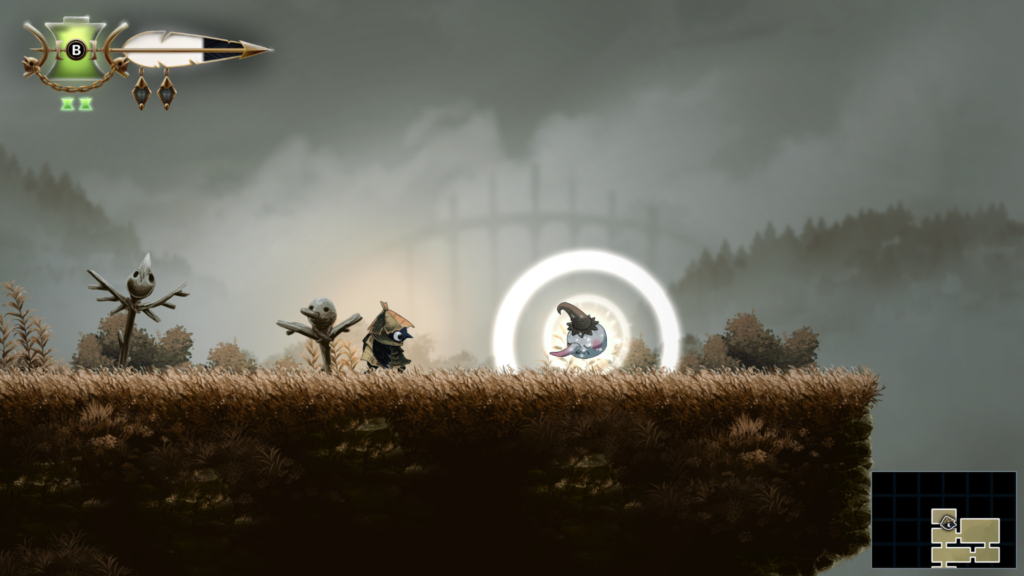
Finishing the Quest
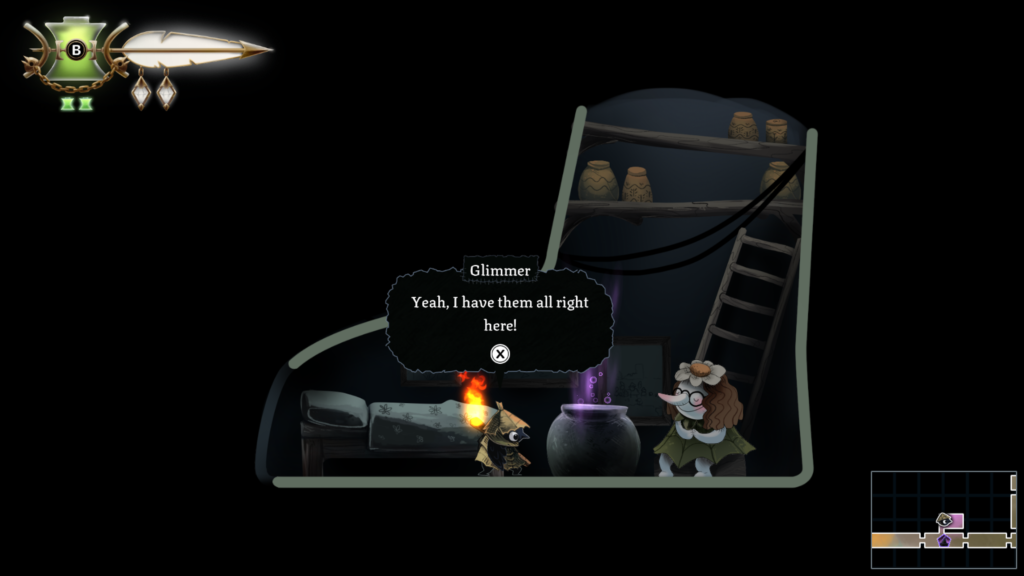
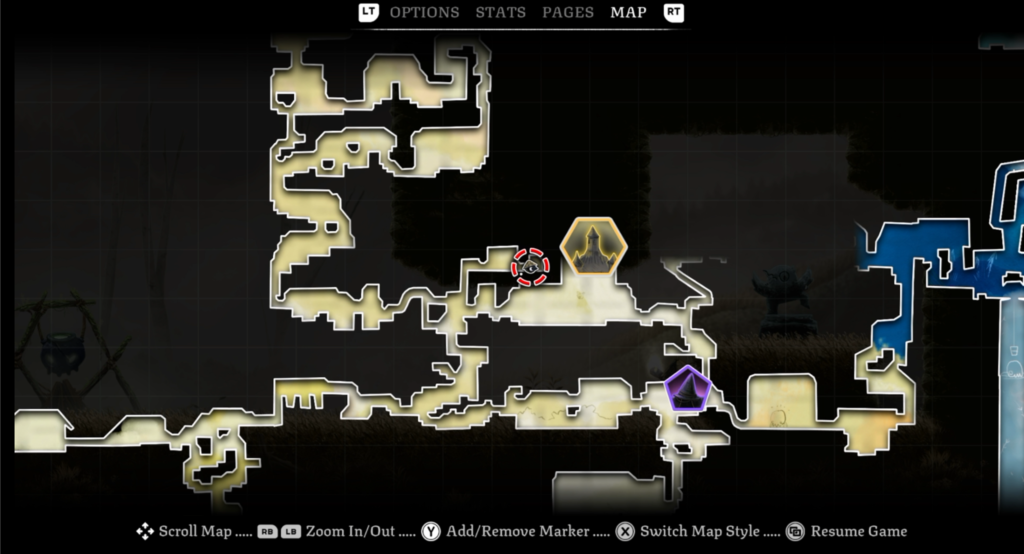
Once you have collected all four parts, the map will highlight the location where you first picked up the quest so you can return the parts and stitch Looter back together.
Doing so will net you the “Stitched Up” achievement / trophy alongside a golden feather to add to your collection.
Spirit 18 / 20: Location – The Bog (yellow colour area on the map)
Abilities needed: None
You will have to get through a combat challenge to reach the spirit.
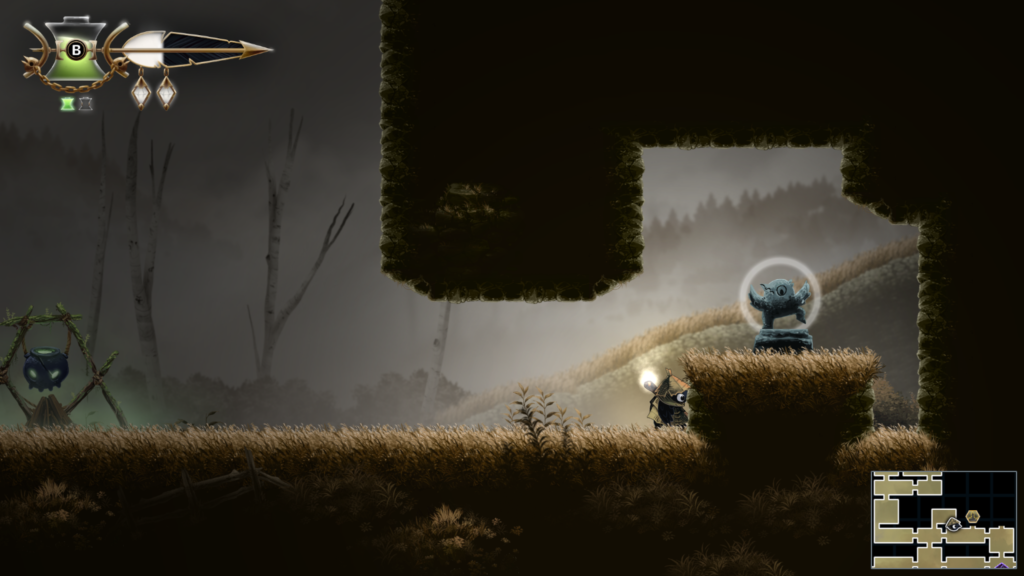
Trinket 26 / 32: Location – The Bog (yellow colour on the map)
Trinket: Scrap of Fabric – slightly increase attack damage while in the air.
Abilities needed: None
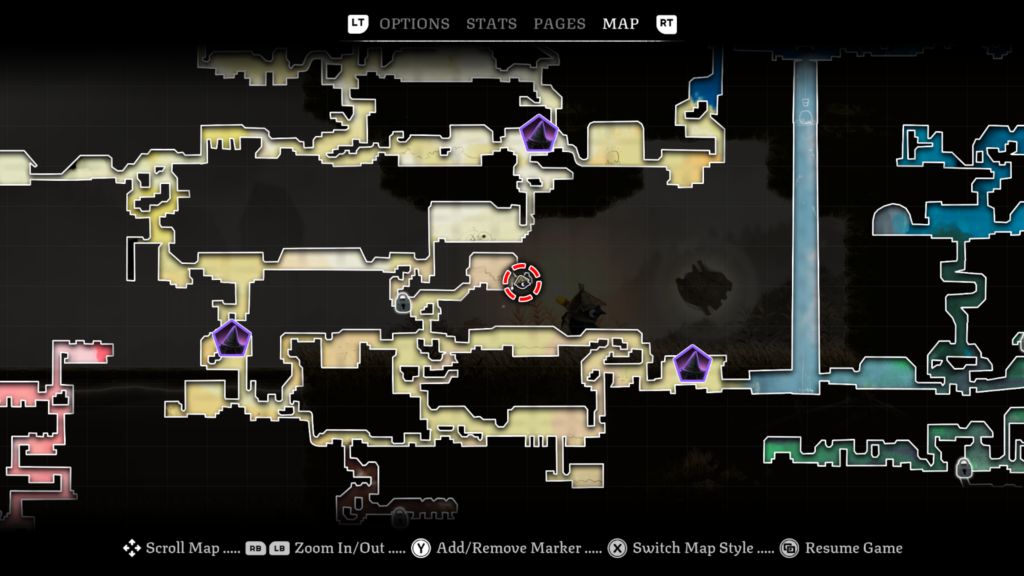
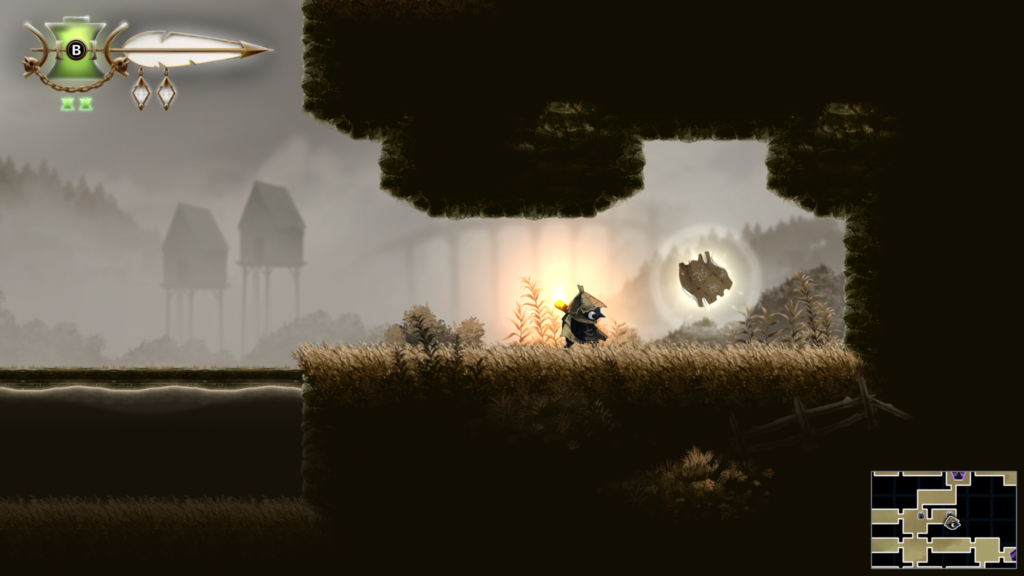
Trinket Slot 61 + 62 / 103: Location – Night Garden (mixed blue area on the map)
Trinket Slot 63 + 64 + 65 + 66 + 67 + 68 / 103: Location – Looter’s Shop (Tent)
Trinket Slot 69 / 103: Location – Webdrench Inn (purple colour area on the map)
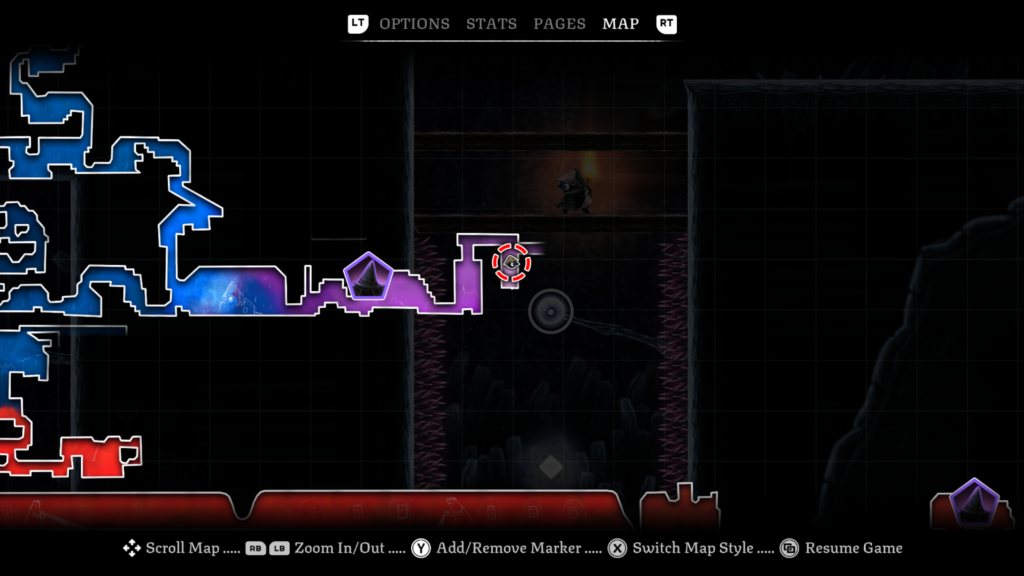
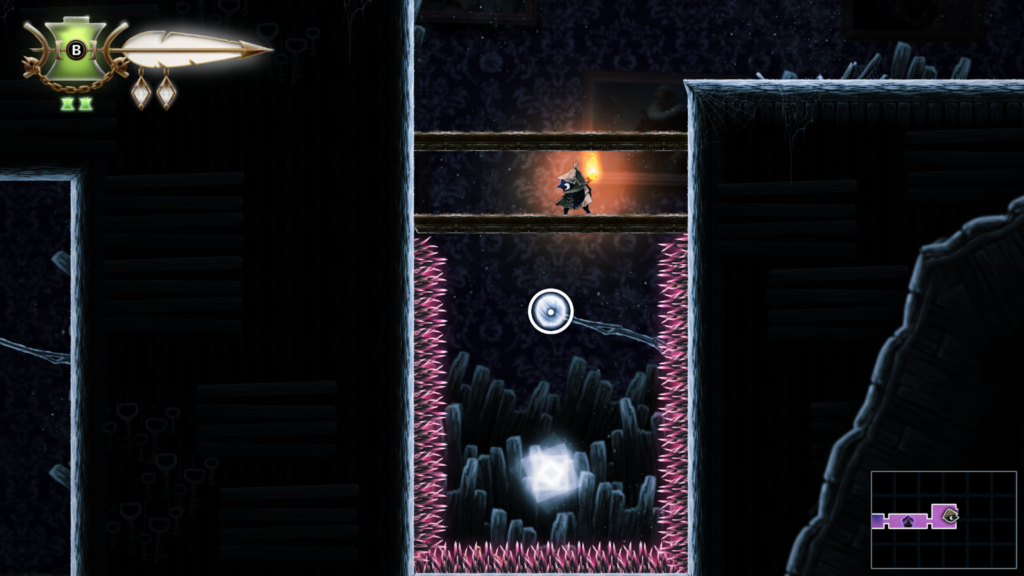
Trinket 27 / 32: Location – Webdrench Inn (purple colour on the map)
Trinket: Insect Wing – increases duration of hover
Abilities needed: Hover
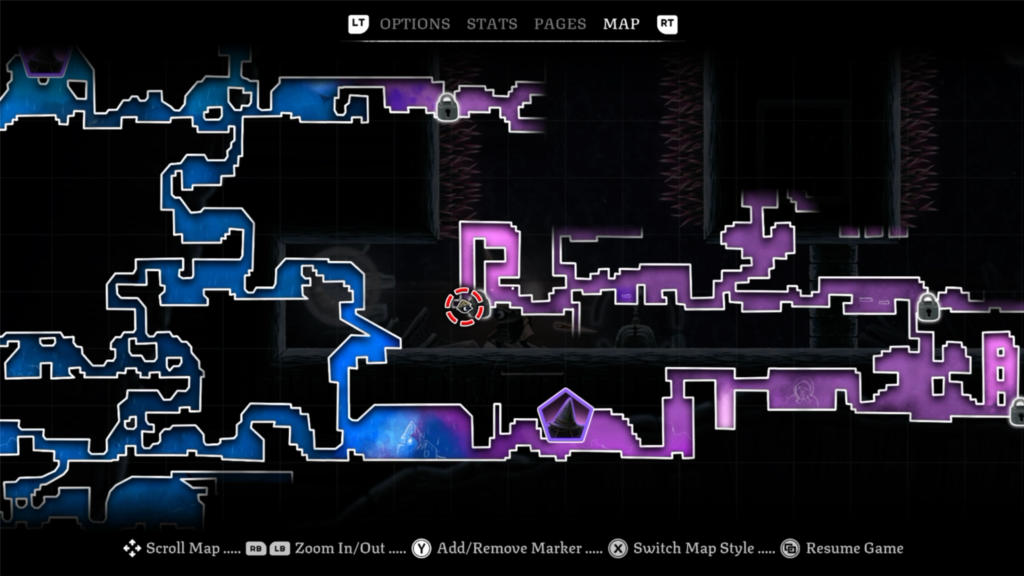
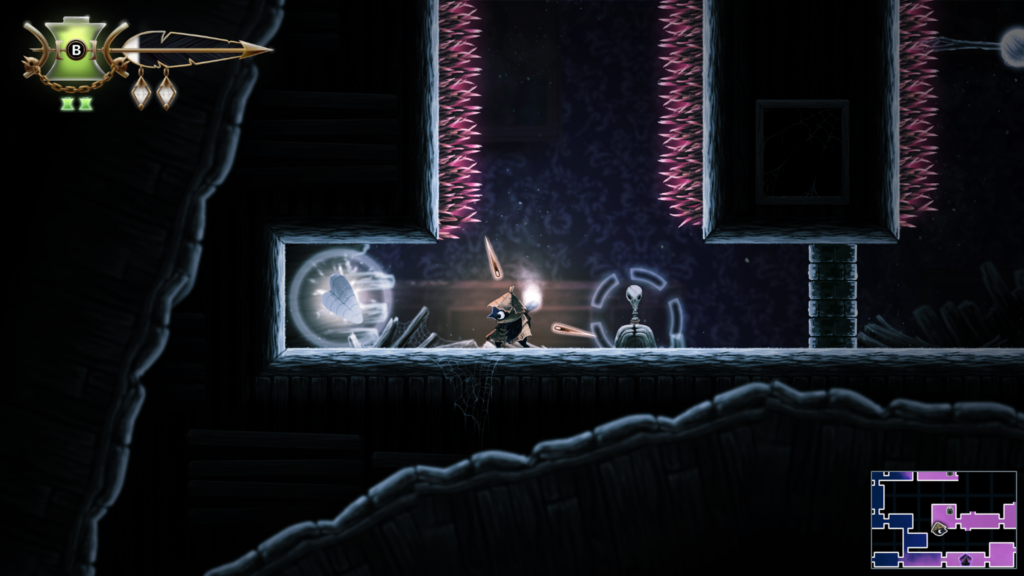
Workshop Token 17 / 27: Location – Webdrench Inn (pinky-purple colour on the map)
Abilities needed: Hover
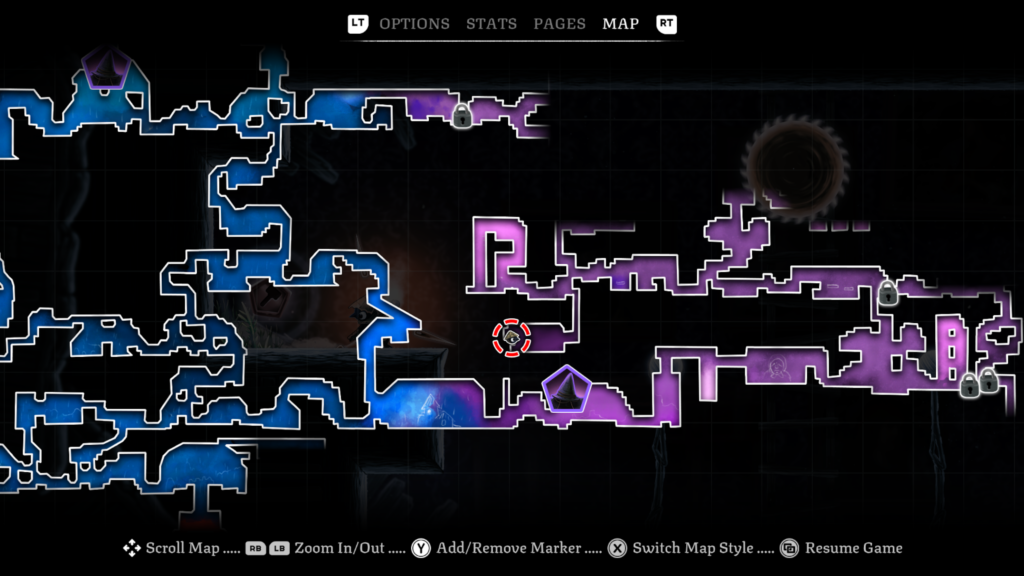
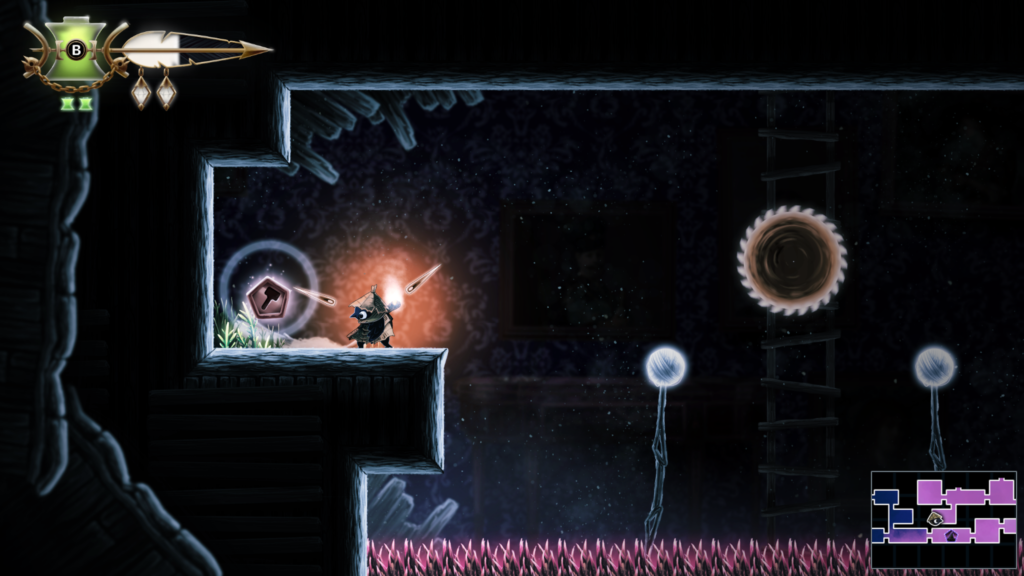
Trinket Slot 70 + 71 + 72 / 102: Location – Looter’s Shop (Tent)
Trinket 28 / 32: Location – Webdrench Inn (purple colour on the map)
Trinket: Ember Vial – your flaming vessel will emit burning embers before it shatters.
Abilities needed: Hover, Climb
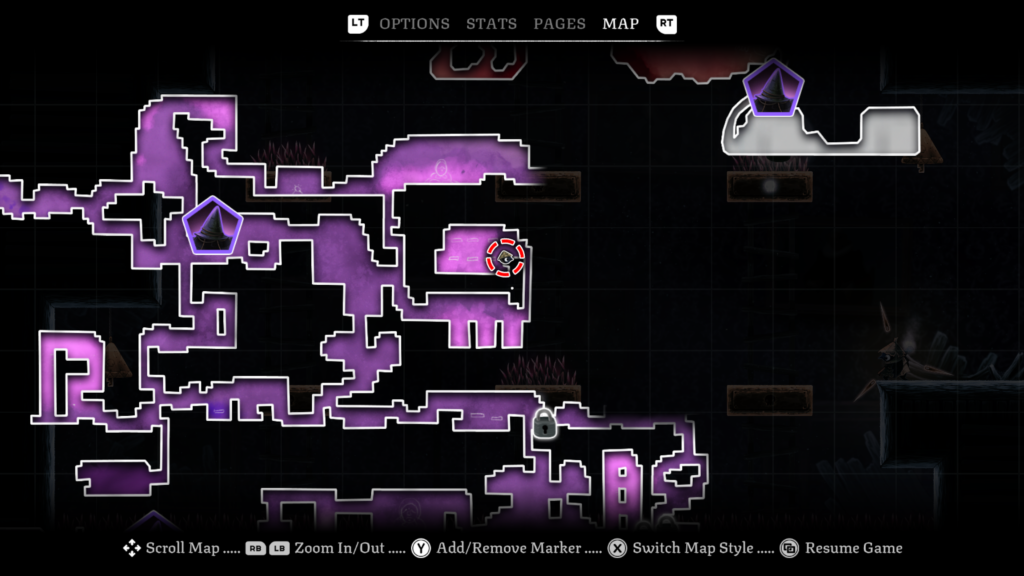
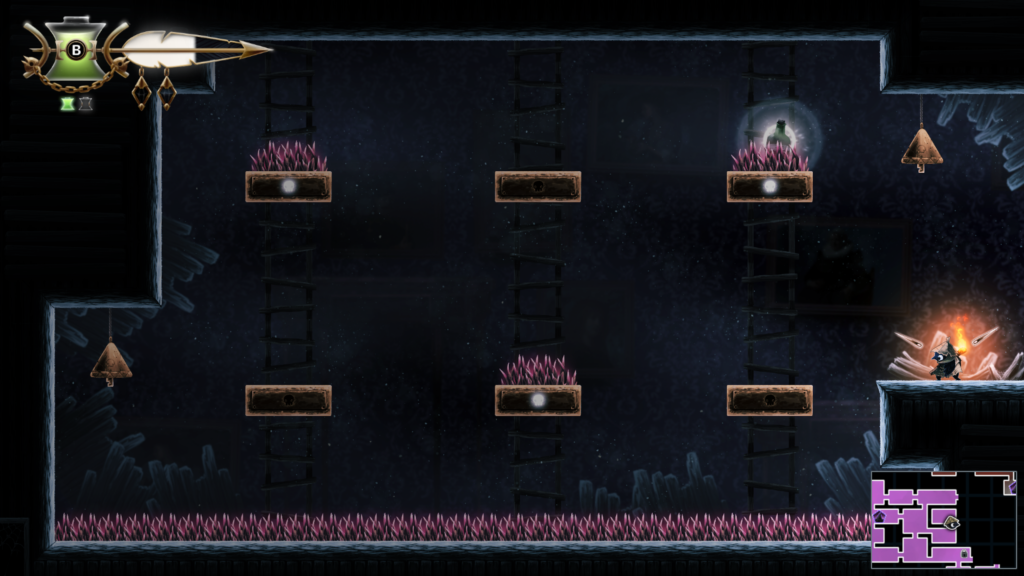
Workshop Token 18 / 27: Location – Webdrench Inn (pinky-purple colour on the map)
Abilities needed: Hover, Wall Sling
Hit the first bell, jump through and use the web ball to jump towards the second bell to drop the spiky wheels down again, making the token accessible. Then hover back in range of the web ball and use that catapult yourself upwards, over the lowered spiky wheels then hover to the wall. Wall Sling your matchstick in to the wall, or wall jump off to grab the token. Wall Sling felt less frantic.
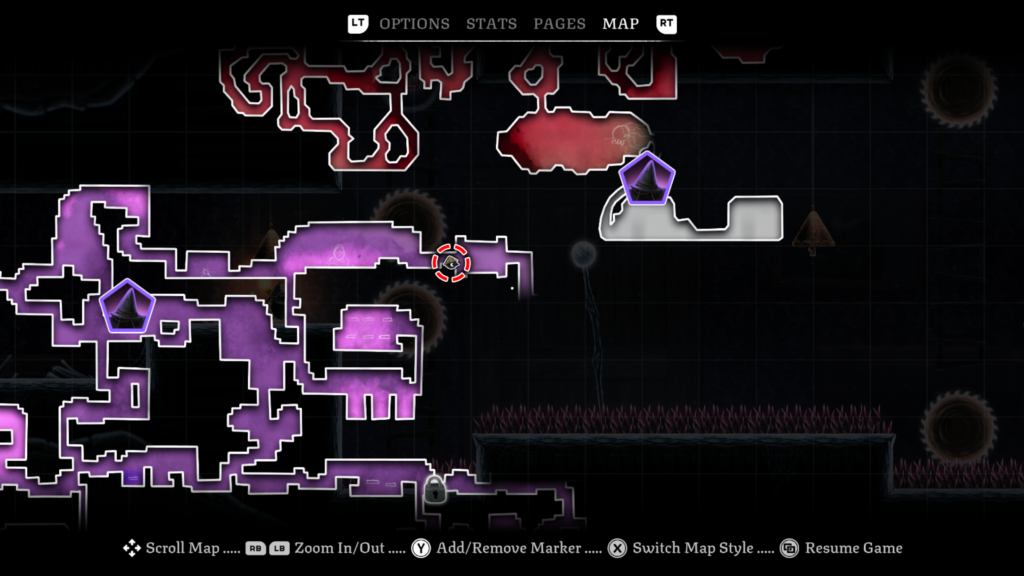
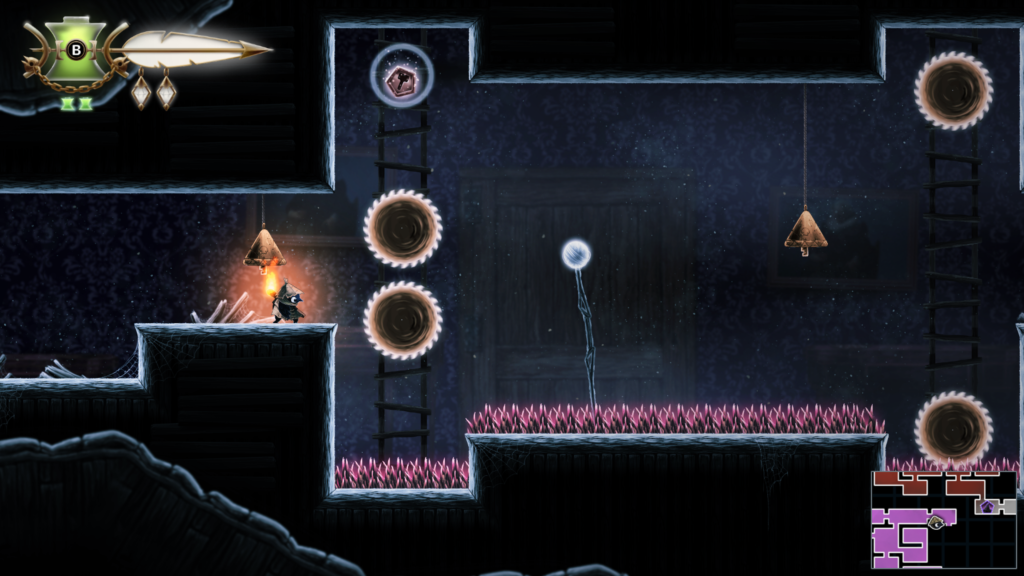
Unlock the “Late Night Guest” Achievement / Trophy Guide
You’ll unlock the “Late Night Guest” achievement for successfully escaping the Innkeeper in Webdrench Inn. This is the purple coloured area on the map.
This is a similar chase sequence to when the Hunter was trying to grab you. Instead of going down you’re running to the left, escaping the Innkeeper.
There’s a fair bit of platforming, as you’d expect and you’ll have to employ all your abilities to escape. This includes breaking barriers, doing ground smashes to break through floors, using wall jumping, climbing and hovering. There’s a few tricksy bits where you need to hit a bell to switch platforms to make them safe.
Also, keep an eye out for the small balls of webs, you’ll need to use RB (on Xbox) to use them to catapult you forward.
You can watch a video of the sequence below:
You’ll know you’ve escaped when you do a final long slide out, and you’re back in the Midnight Drench area. You’ll unlock the “Late Night Guest” achievement / trophy and gain a new golden feather.
Trinket Slot 73 / 103: Location – Webdrench Inn (purple colour area on the map)
Abilities needed: Hover, Climb
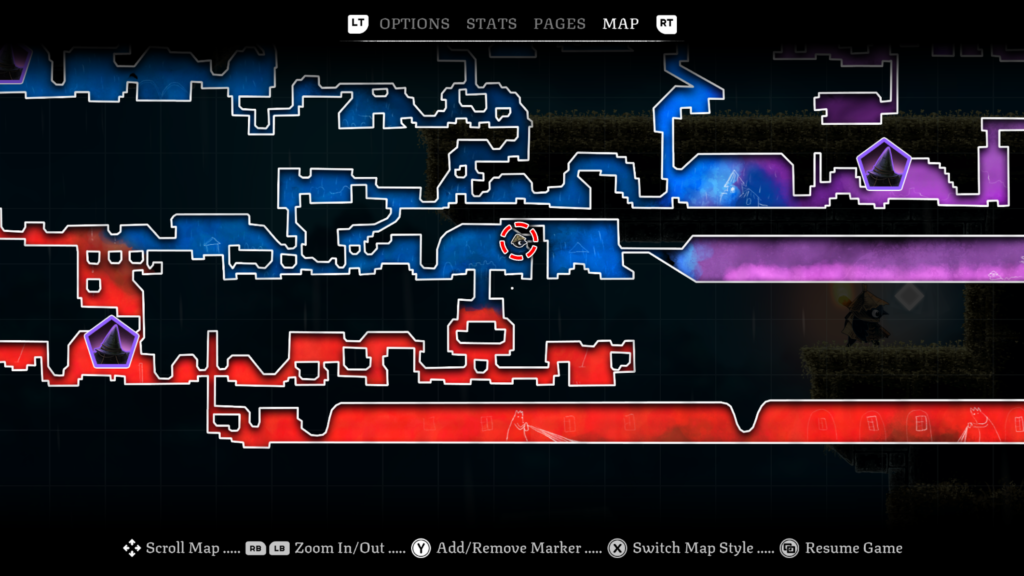
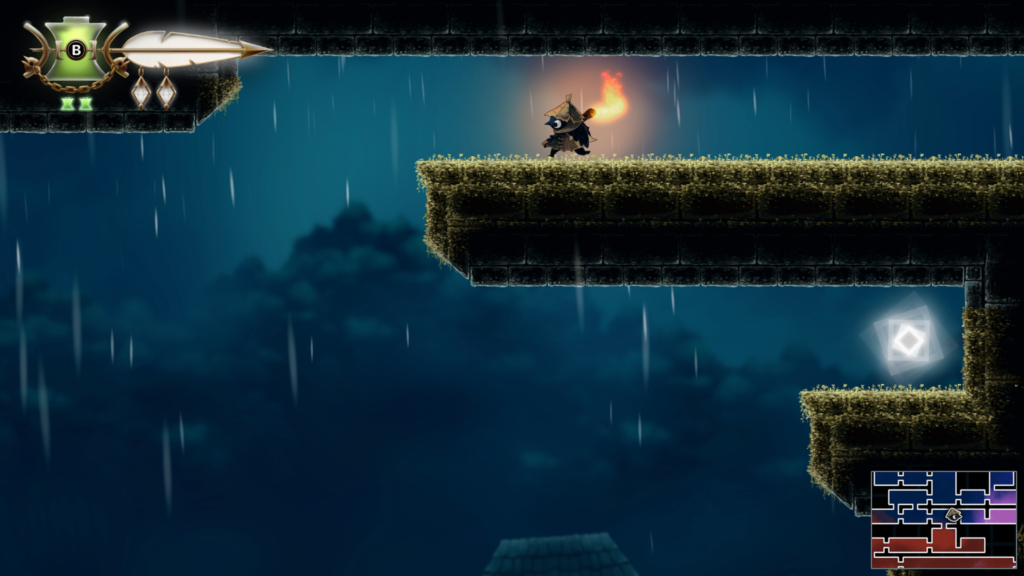
Workshop Token 19 / 27: Location – Graven Valley (grey colour on the map)
Abilities needed: Slingshot, Hover, Endless Climb, Wall Sling
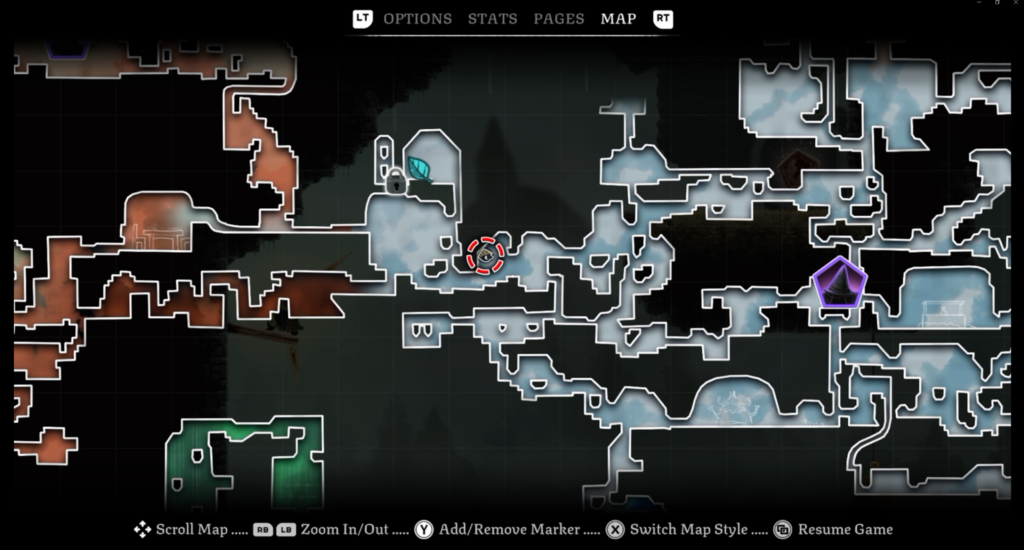
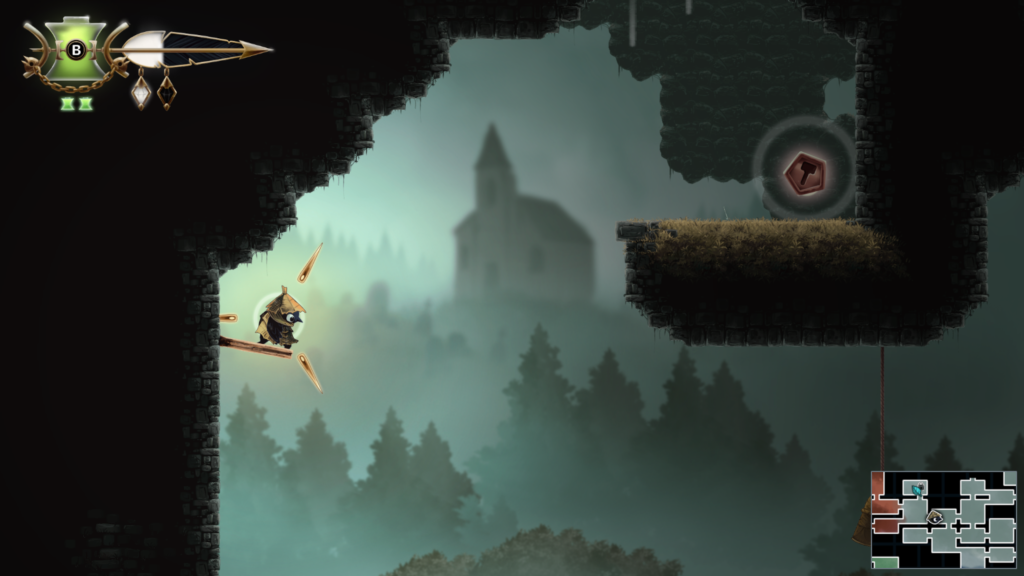
Trinket Slot 74 / 103: Location – Graven Valley (grey colour area on the map)
Abilities needed: Slingshot, Endless Climb (after the time trial)
At the beginning of the time trial, launch your matchstick and start running. You’ll jump over some platforms and then reach your bouncy matchstick to get up quickly. At the end you’ll need to evade spiky balls, you have a bit of leeway to pause for a gap.
You’ll be rewarded with a trinket slot for completing this time trial.
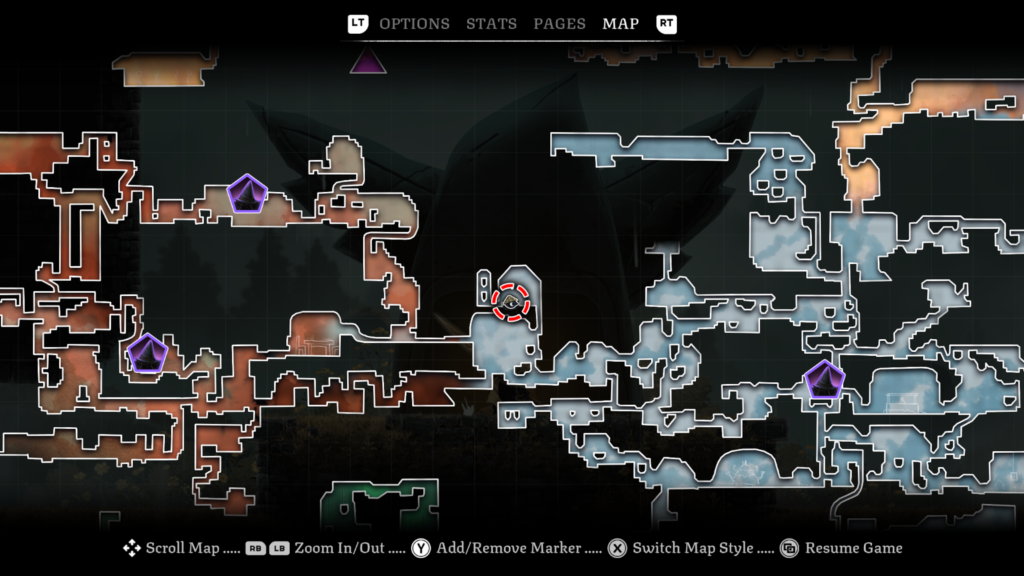
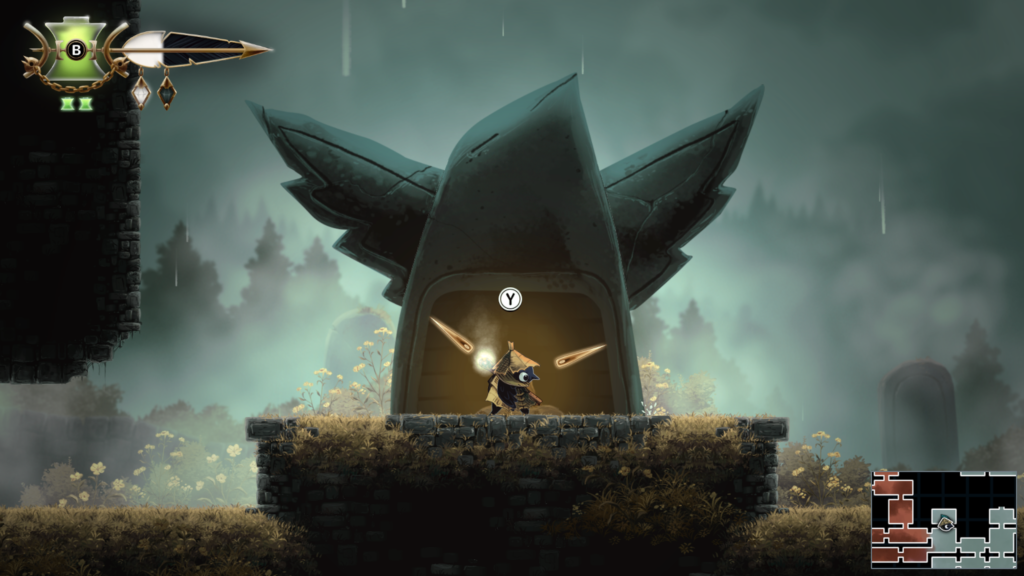
Workshop Token 20 / 27: Location – Graven Valley (grey colour on the map)
Abilities needed: Slingshot, Hover, Endless Climb, Wall Sling
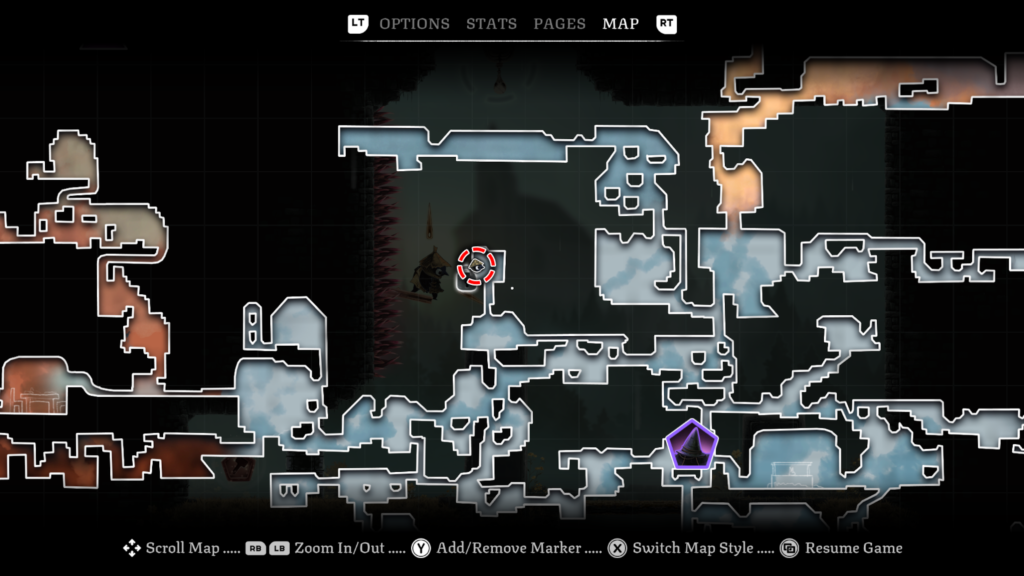
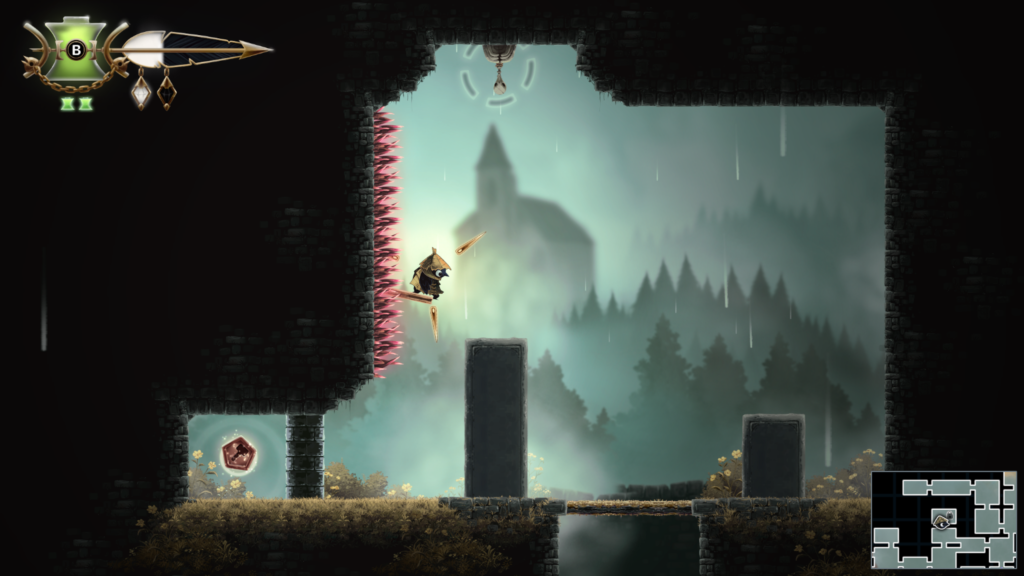
Workshop Token 21 / 27: Location – Autumn Forest (orange colour at the top of the map)
Abilities needed: Hover, Endless Climb, Wall Sling
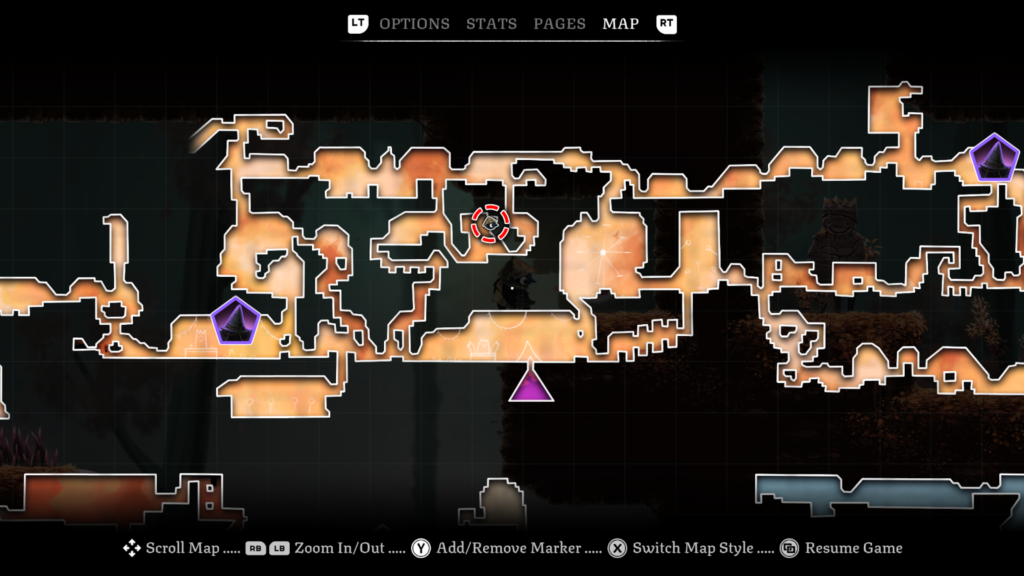
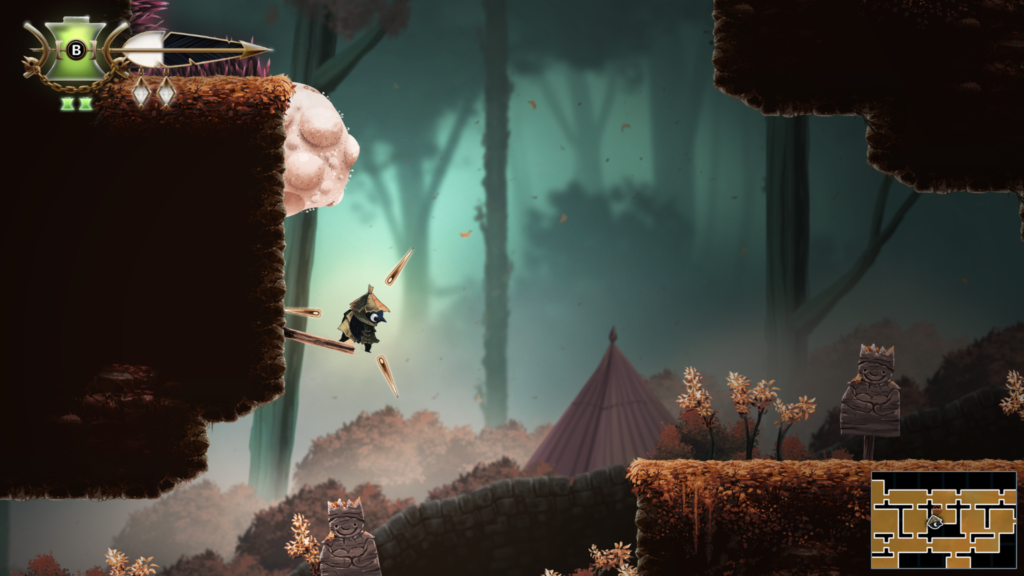
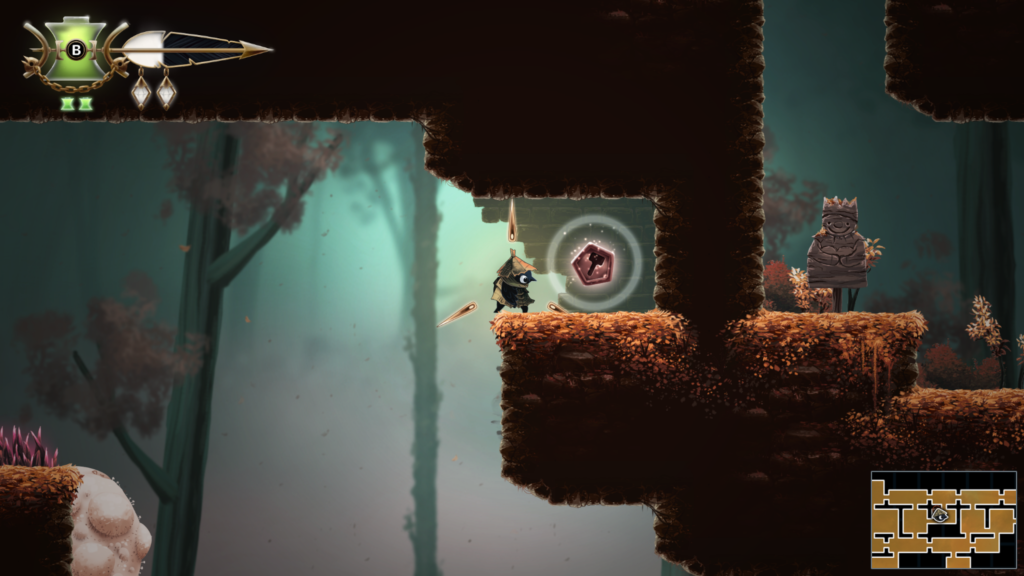
Workshop Token 22 / 27: Location – Autumn Forest (orange colour at the top of the map)
Abilities needed: Hover
Use Hover to fly over the last mushroom otherwise it’ll bounce you into the spikes up above.
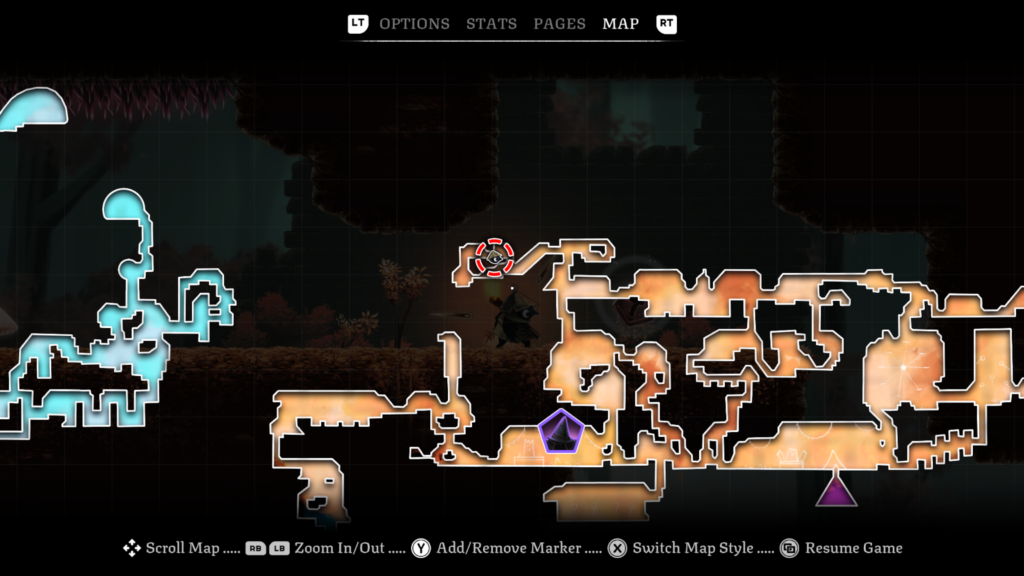
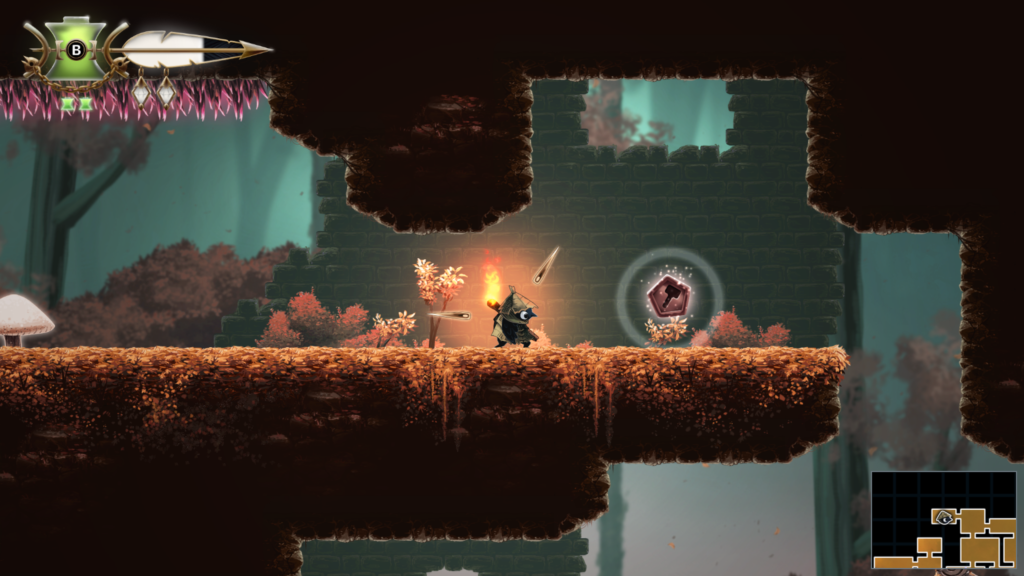
Trinket Slot 75 / 103: Location – Burial Vault (dark brown colour area on the map)
Abilities needed: None
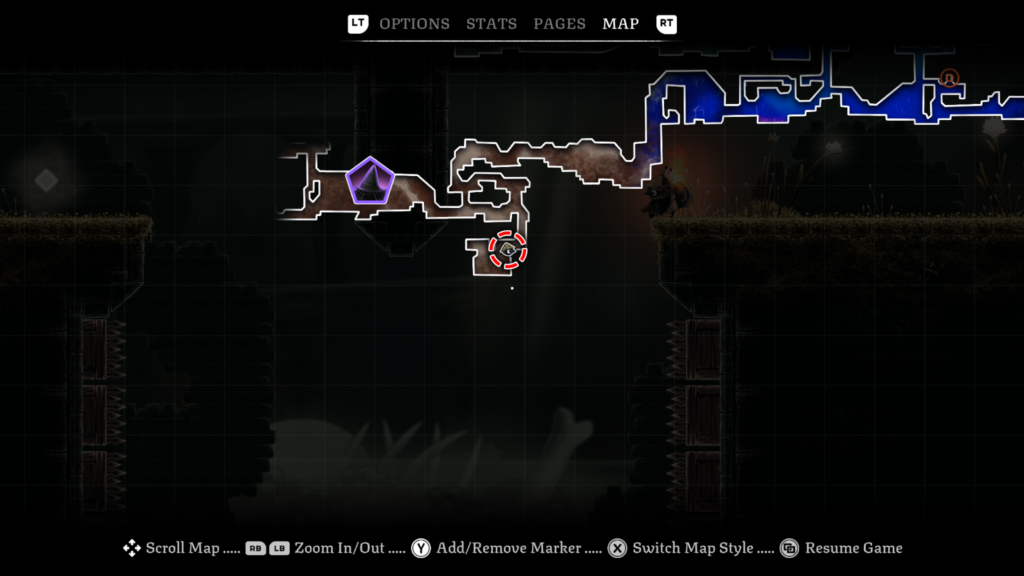
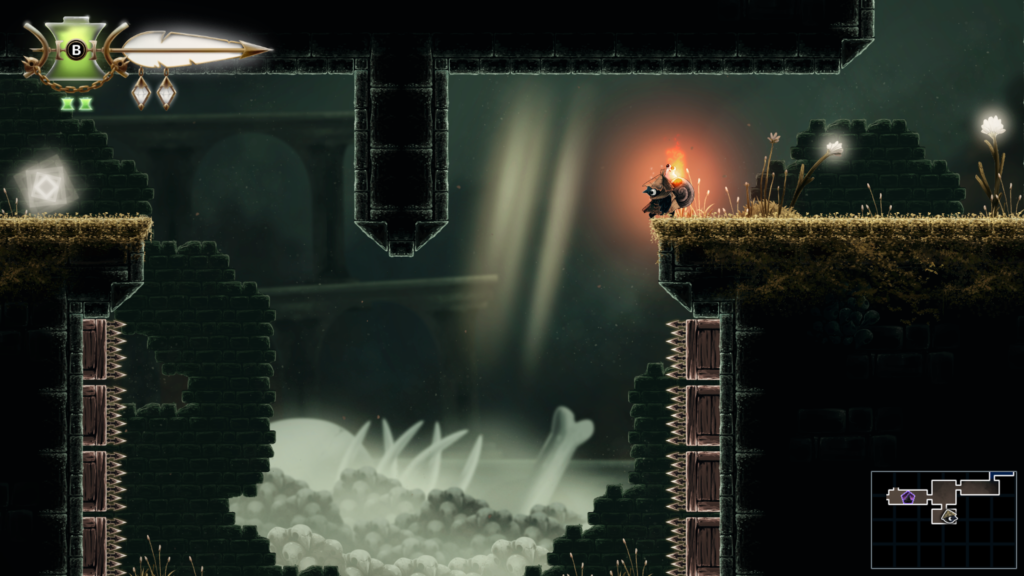
Trinket Slot 76 + 77 / 103: Location – Looter’s Shop (Tent)
Trinket Slot 78 / 103: Location – Burial Vault (dark brown colour area on the map)
Abilities needed: None
This trinket slot is in a hidden passage.
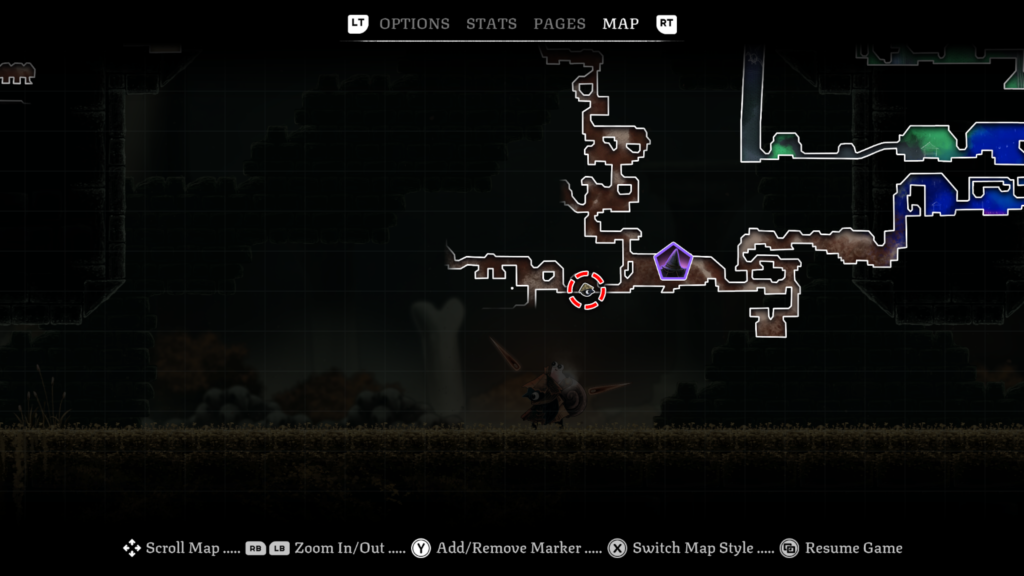
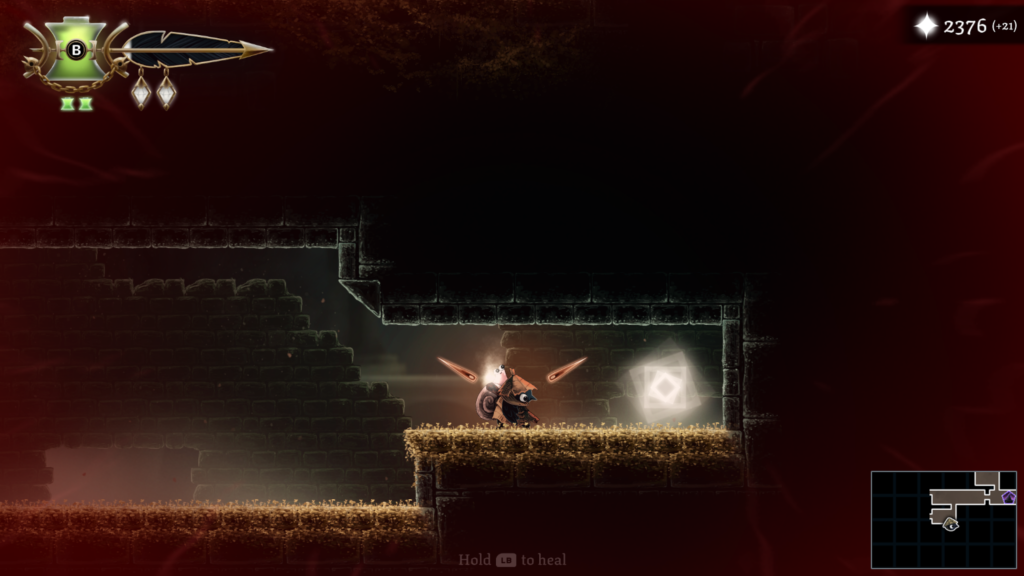
Trinket 29 / 32: Location – Burial Vault (dark brown colour on the map)
Trinket: Rusted Compass – creates a signal when a collectible is in the room
Abilities needed: Endless Climb
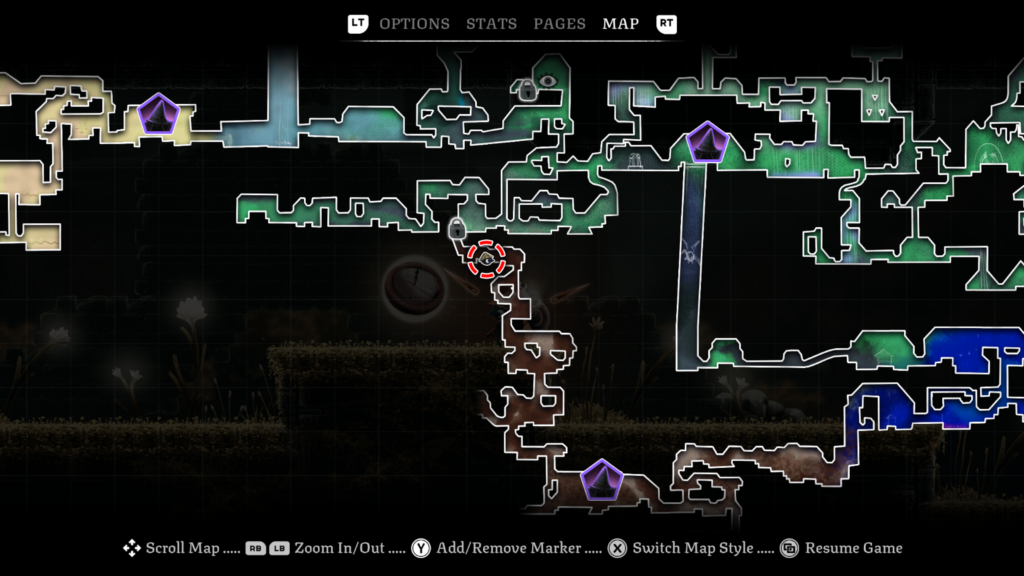
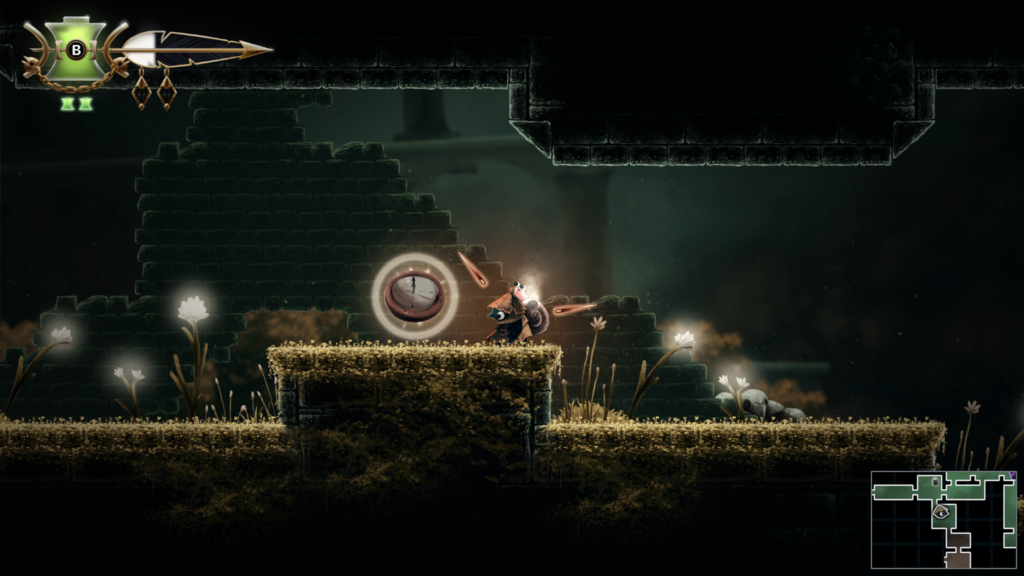
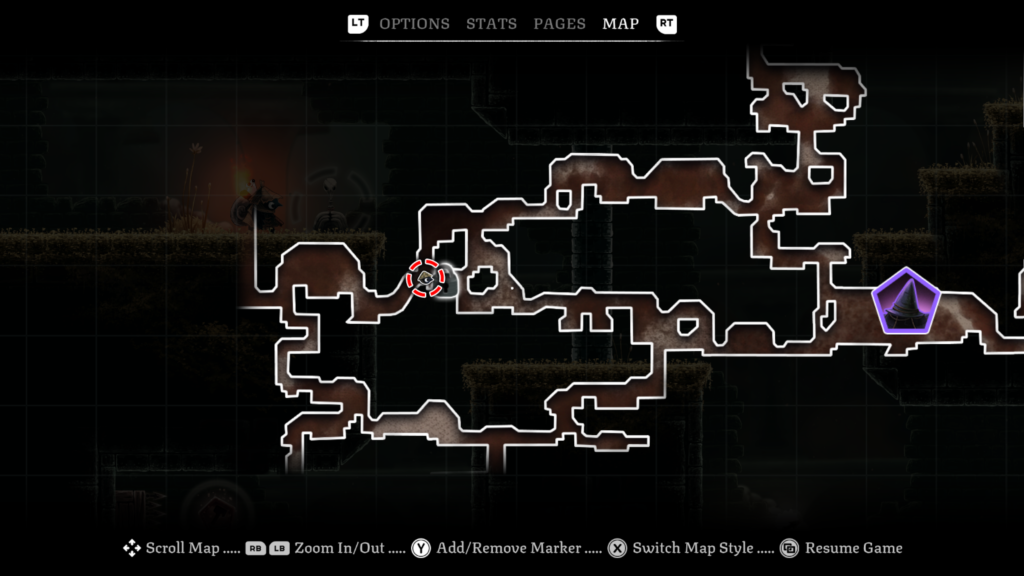
Spirit 19 / 20: Location – Burial Vault (darker brown colour area on the map)
Abilities needed: Slingshot, Endless Climb, Hover
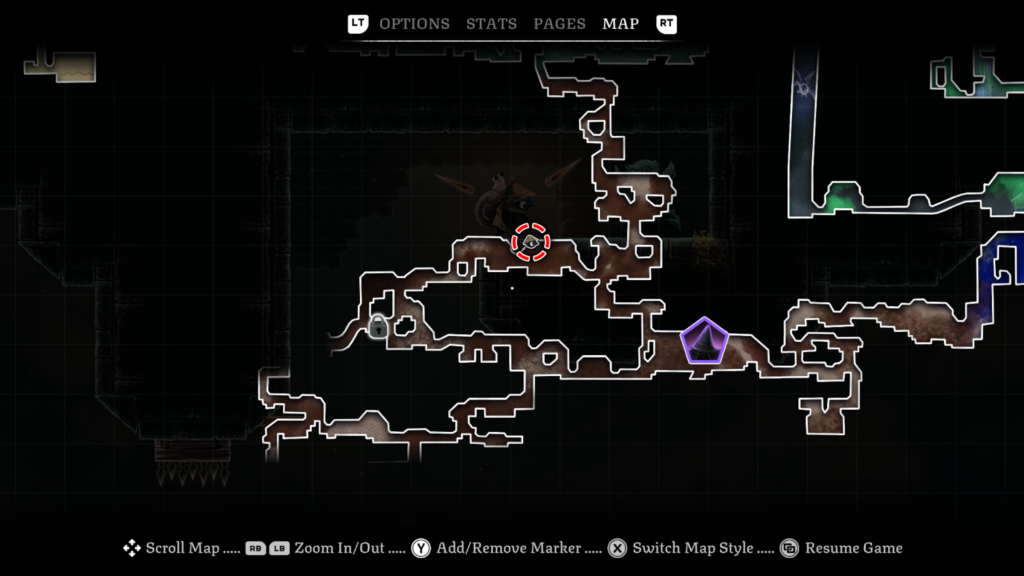
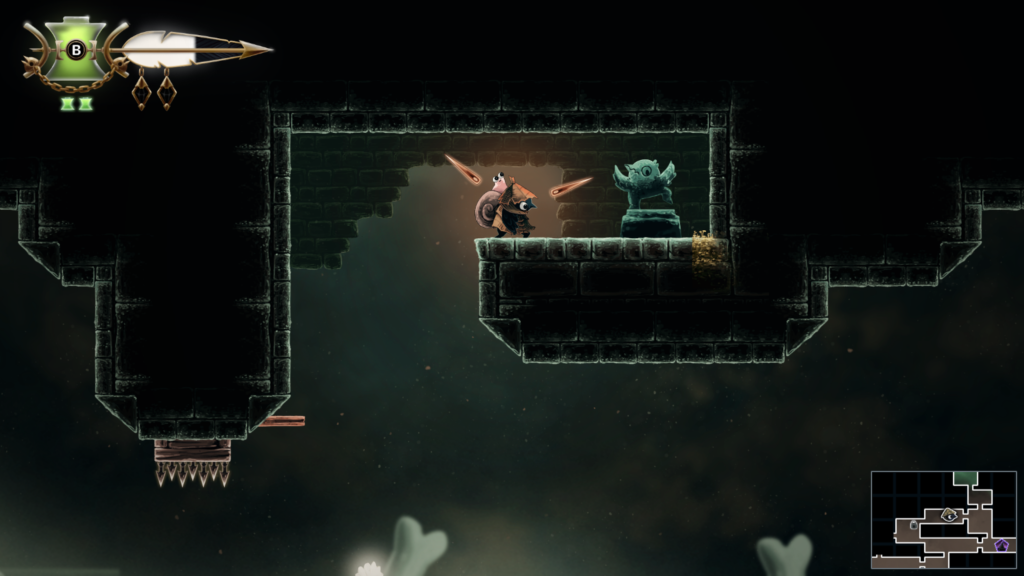
Trinket Slot 79 / 103: Location – Burial Vault (dark brown colour area on the map)
Abilities needed: None
This trinket is above you, run underneath the spike column from right to left. Get off the spiky floor, spin round and throw your matchstick into the retracting spike column. Use that to bounce upwards.
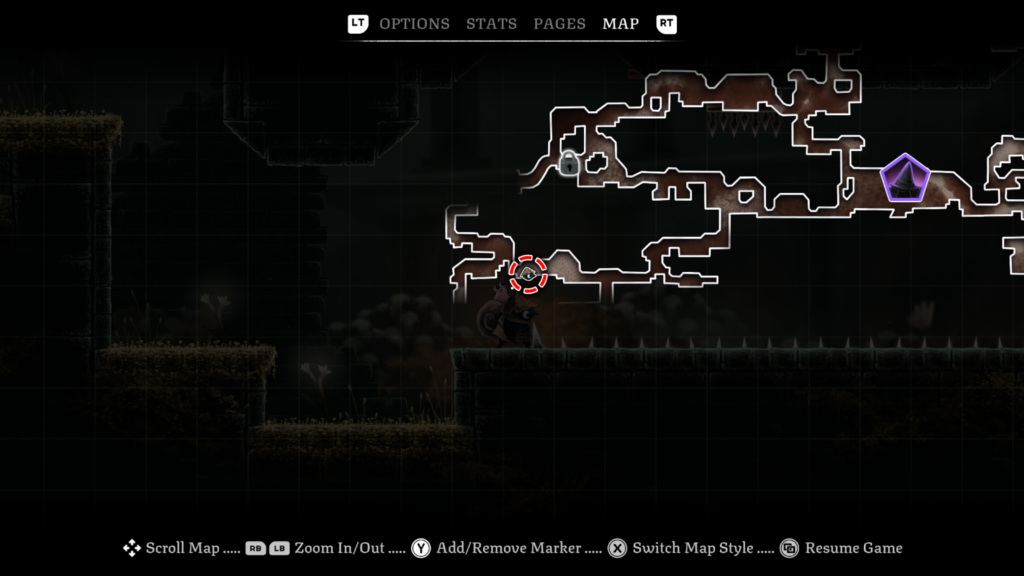
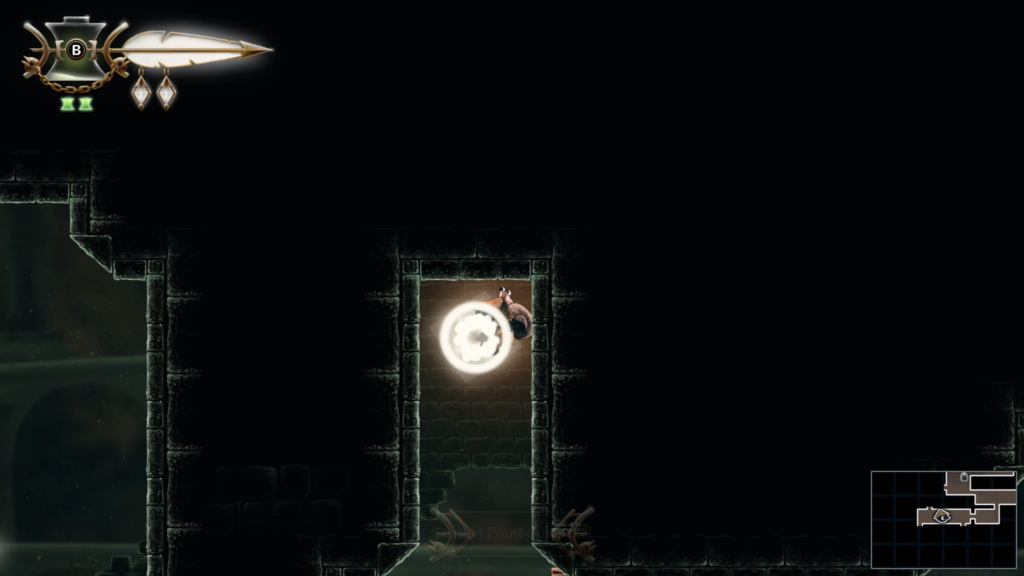
Spirit 20 / 20: Location – Burial Vault (darker brown colour area on the map)
Abilities needed: Slingshot, Endless Climb, Hover
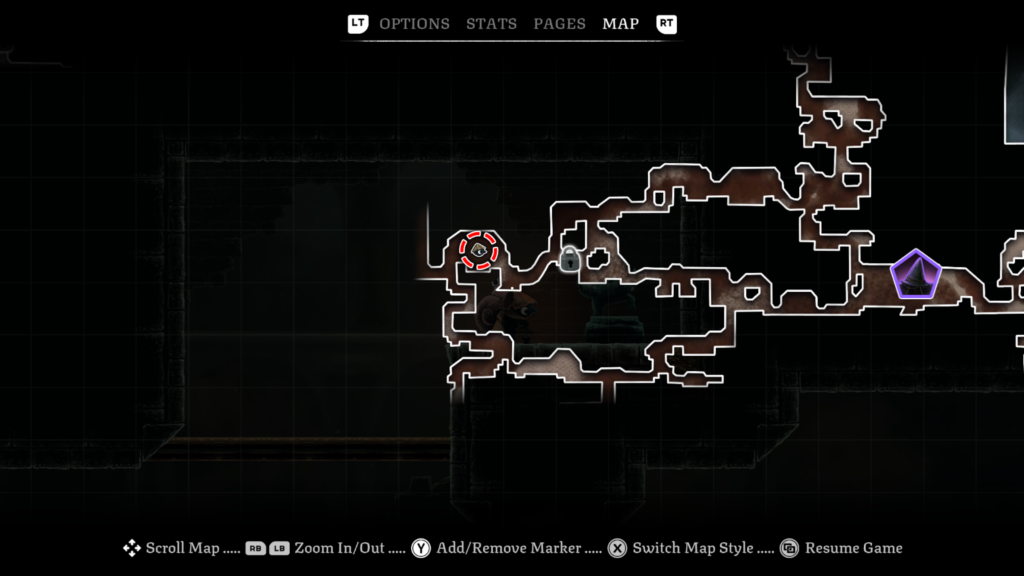
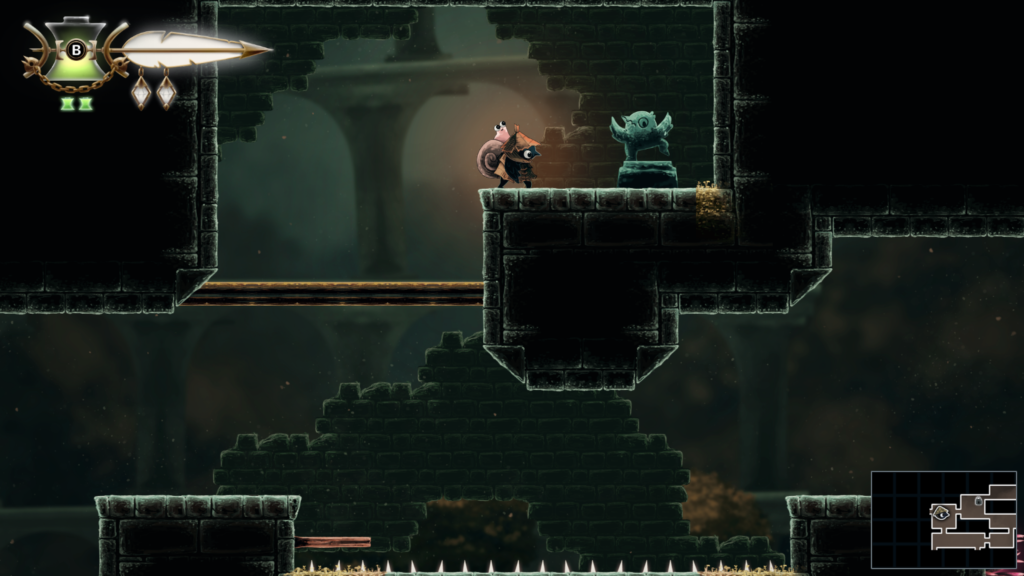
Once you have all 20 collected, head back to the Night Garden to earn the “Full Flock” achievement / trophy.
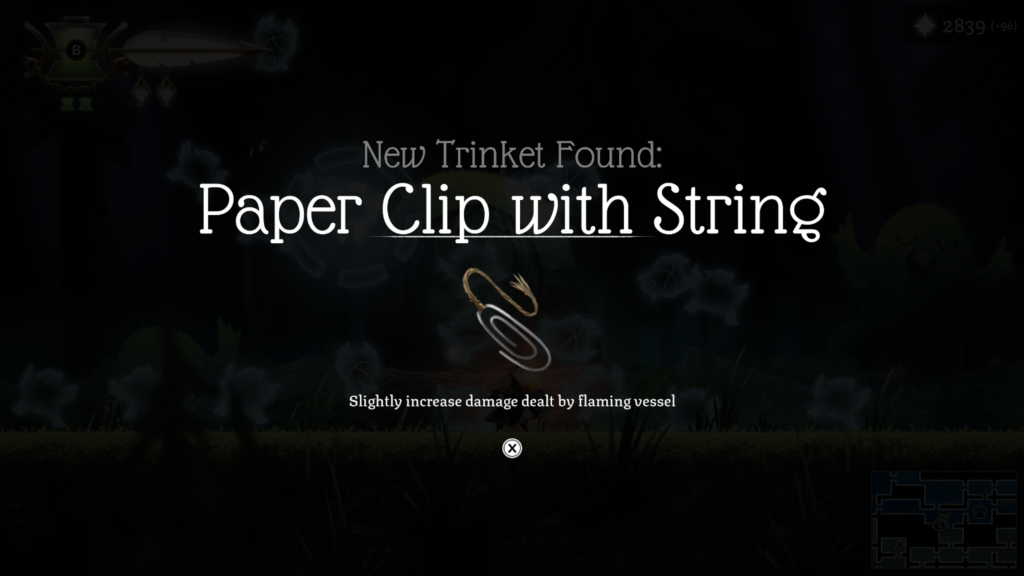
Trinket 30 / 32: Location – Night Garden (Spirit Return location)
Trinket: Paper Clip with String – slightly increase damage dealt by flaming vessel
Cost: Return 20 of the 20 spirit collectibles.
Workshop Token 23 / 27: Location – Burial Vault (dark brown colour on the map)
Abilities needed: Hover / Climb
Drop down in front of the spikes and then jump or climb out of its way. Once it starts retracting, you’ll have time to grab the token.
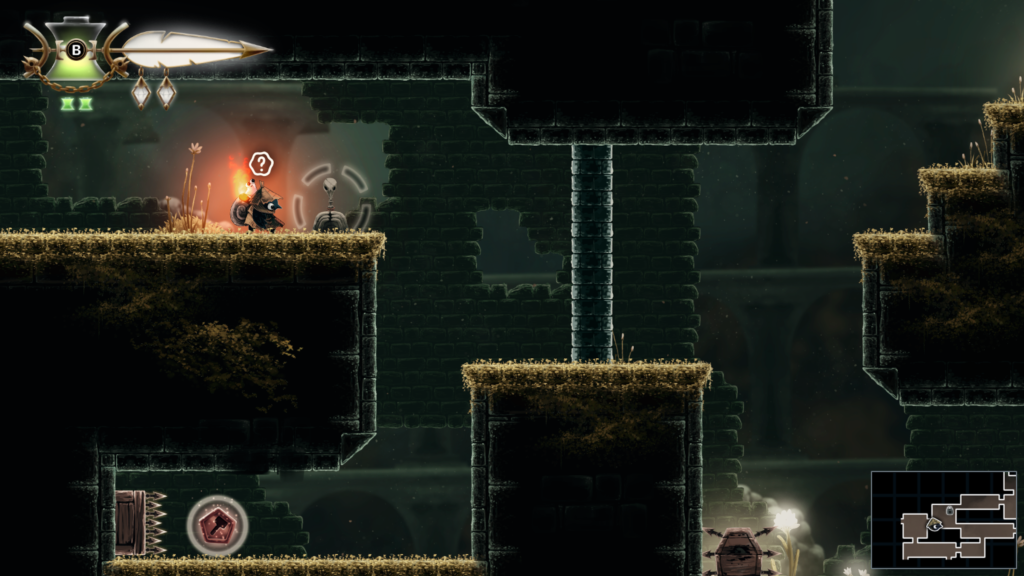
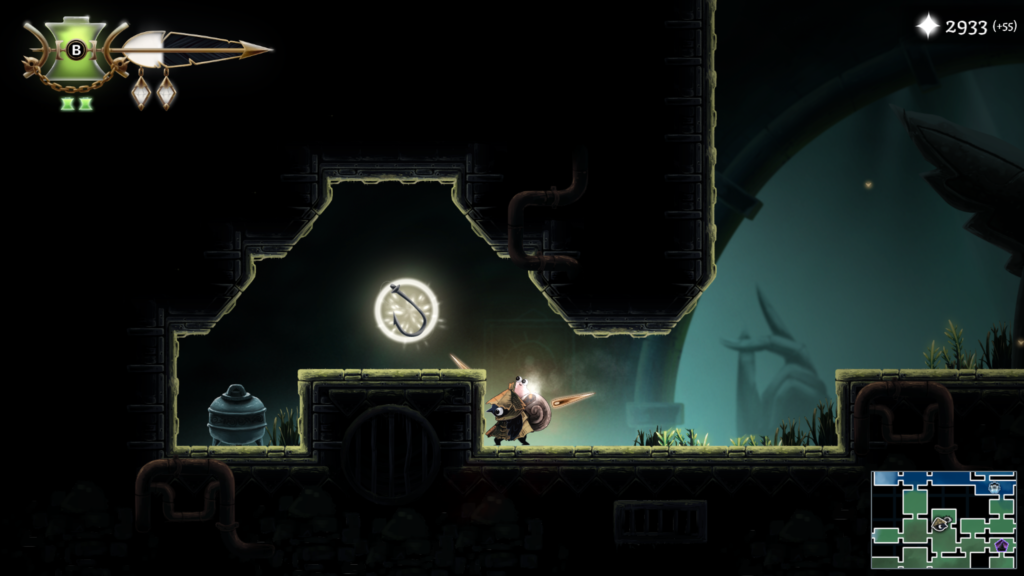
Trinket 31 / 32: Location – The Drain (green colour on the map)
Trinket: Fish Hook – greatly increases your vessel refill rate while at low health
Abilities needed: Endless Climb, Hover
This was pretty simple with the endless climb ability. Head up and jump between walls as needed.
You’ll be rewarded with the fish hook trinket for completing this time trial.
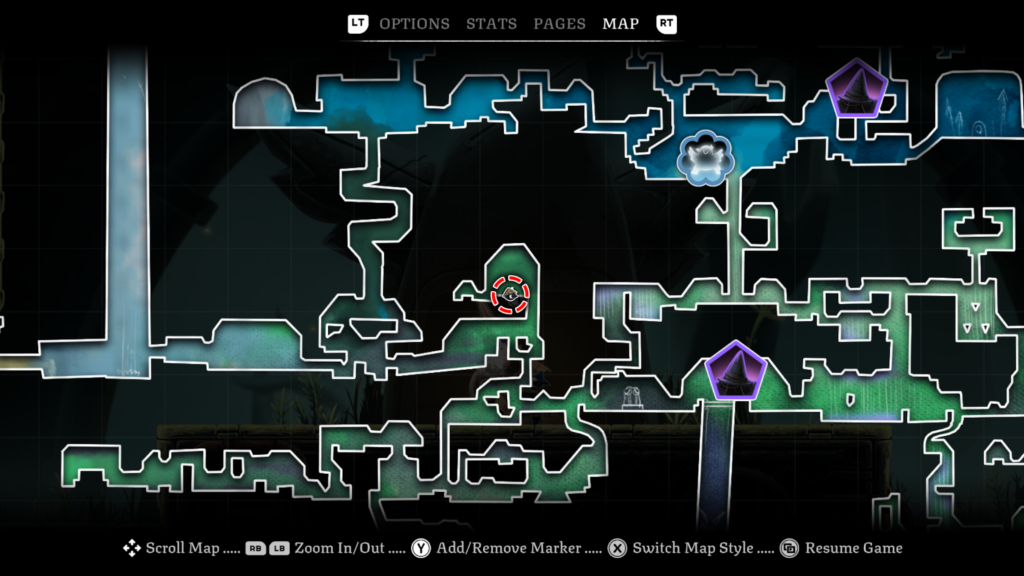
Workshop Token 24 / 27: Location – Burial Vault (dark brown colour on the map)
Abilities needed: Hover, Endless Climb
The token is behind a hidden passage.
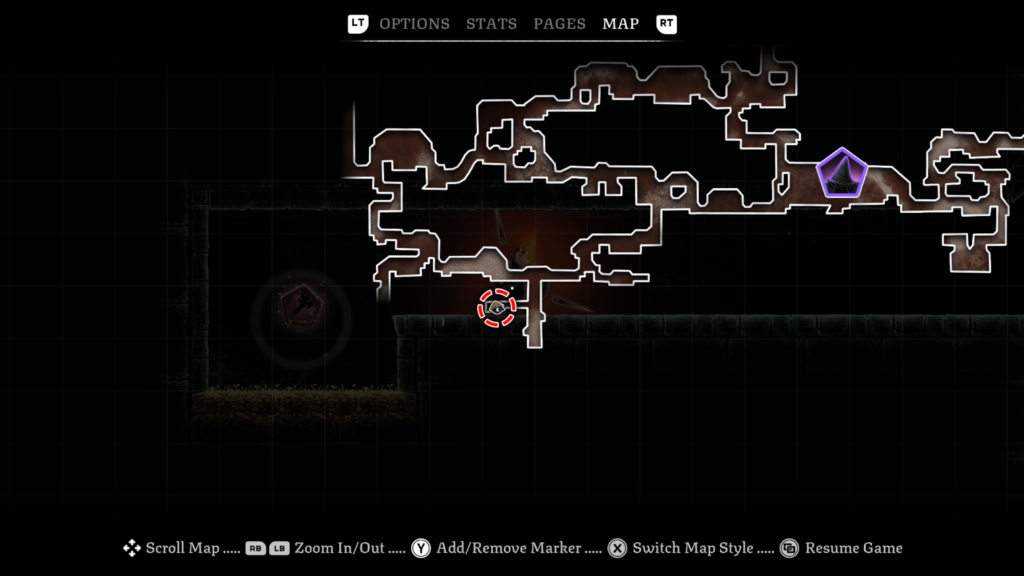
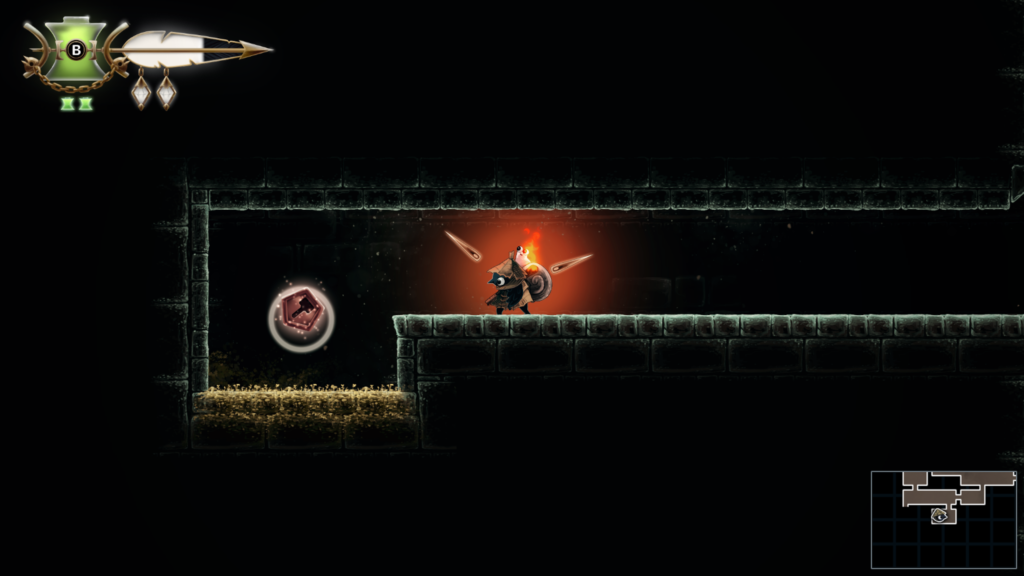
Trinket Slot 80 / 103: Location – Burial Vault (dark brown colour area on the map)
Abilities needed: Endless Climb, Hover
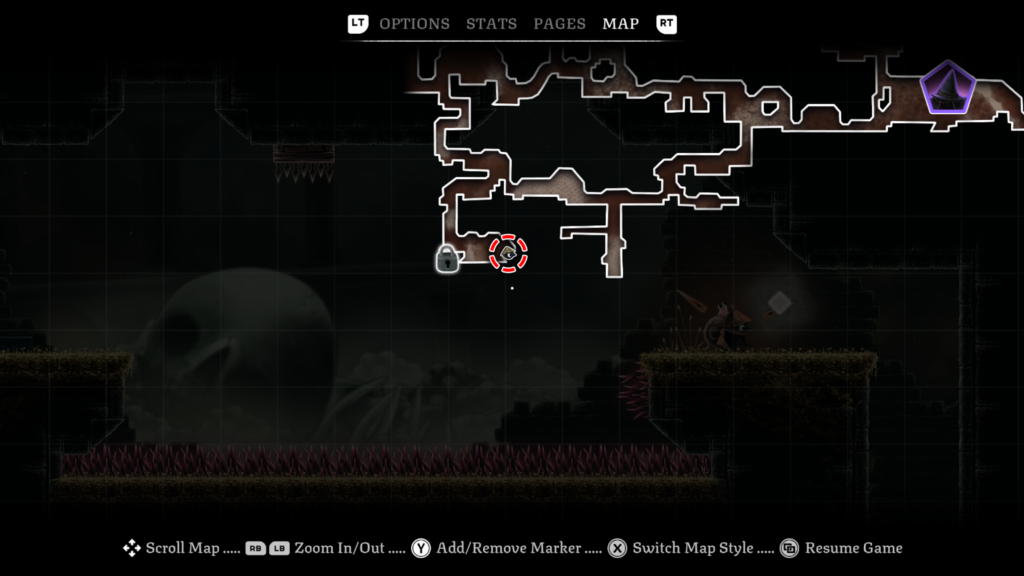
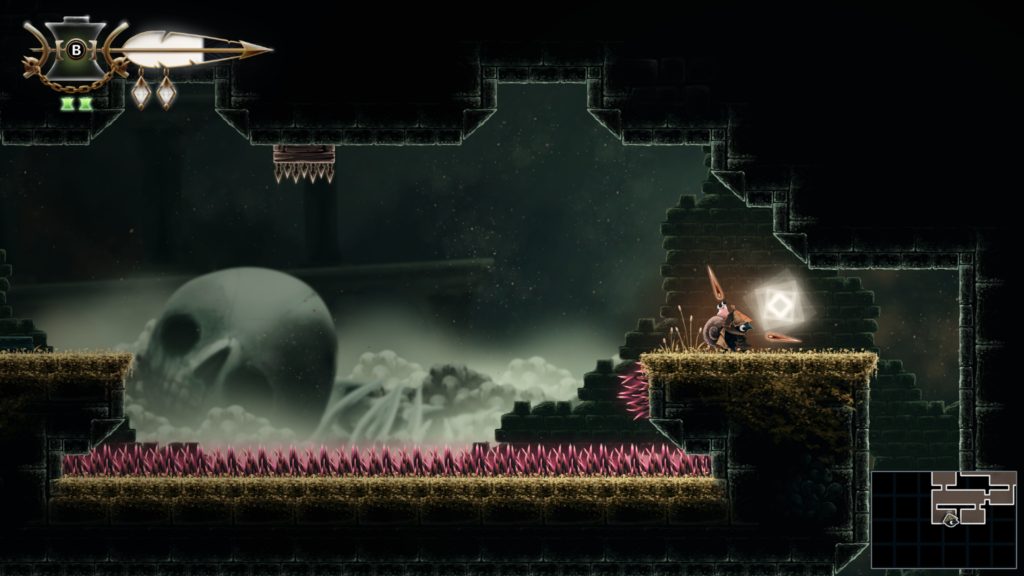
Story Page 17 / 23: Location – The Dollmaker’s House (pink colour on the map)
The Dollmaker Story Page (6 / 8)
Abilities needed: Hover, Endless Climb, Slingshot
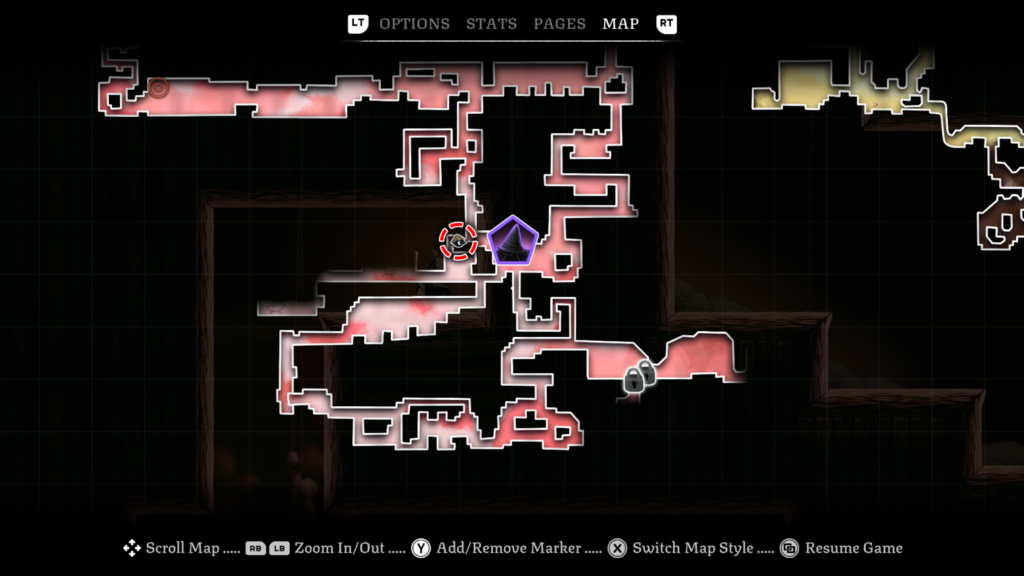
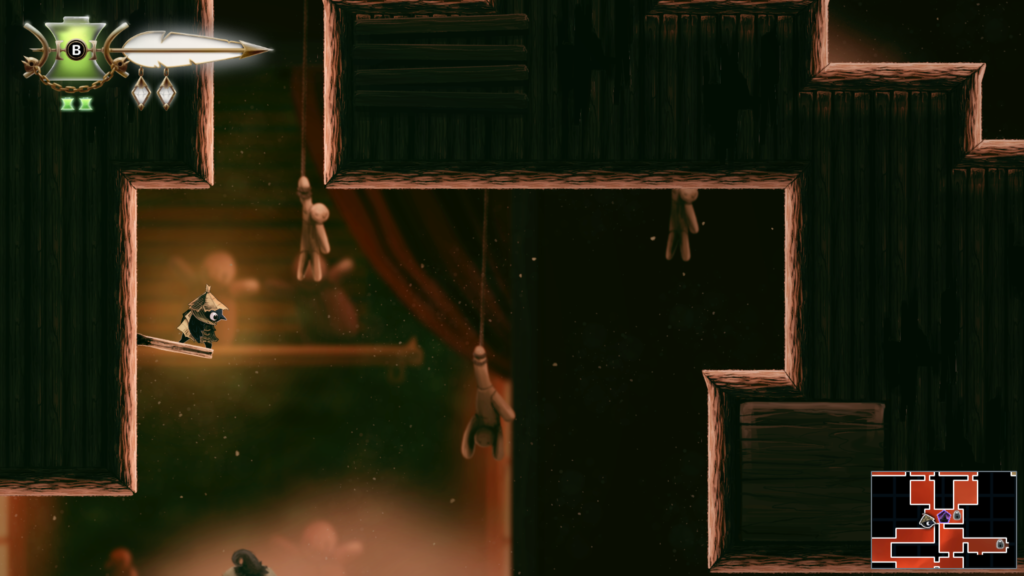
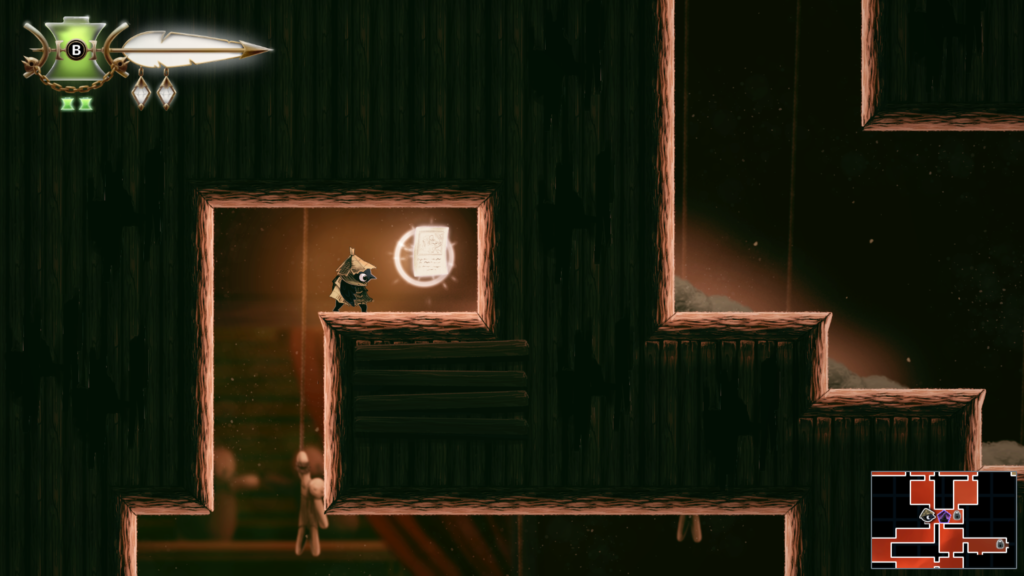
Story Page 18 / 23: Location – Burial Vault (dark brown colour on the map)
The Dollmaker Story Page (7 / 8)
Abilities needed: None
The Story Page is in a hidden passage.
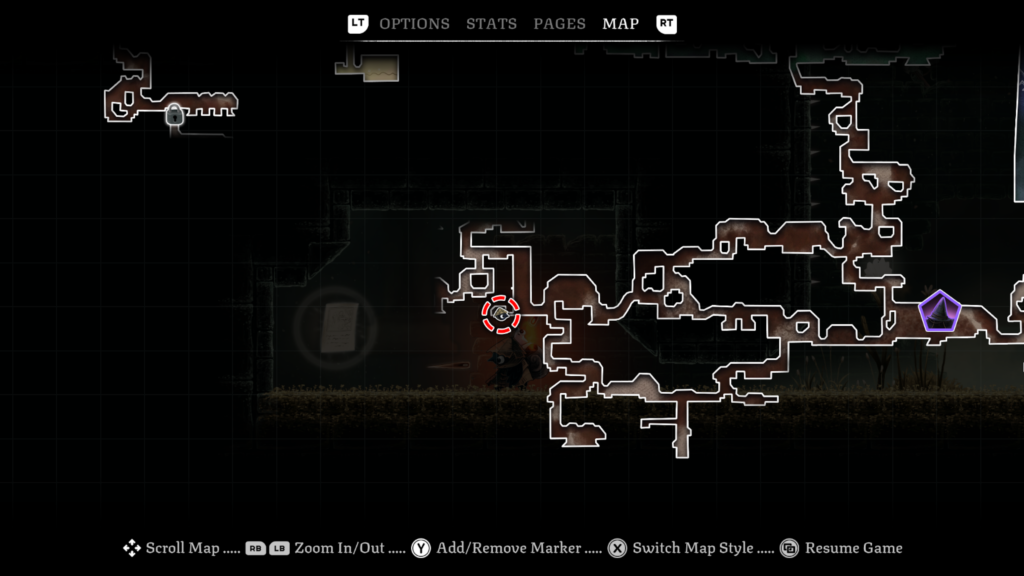
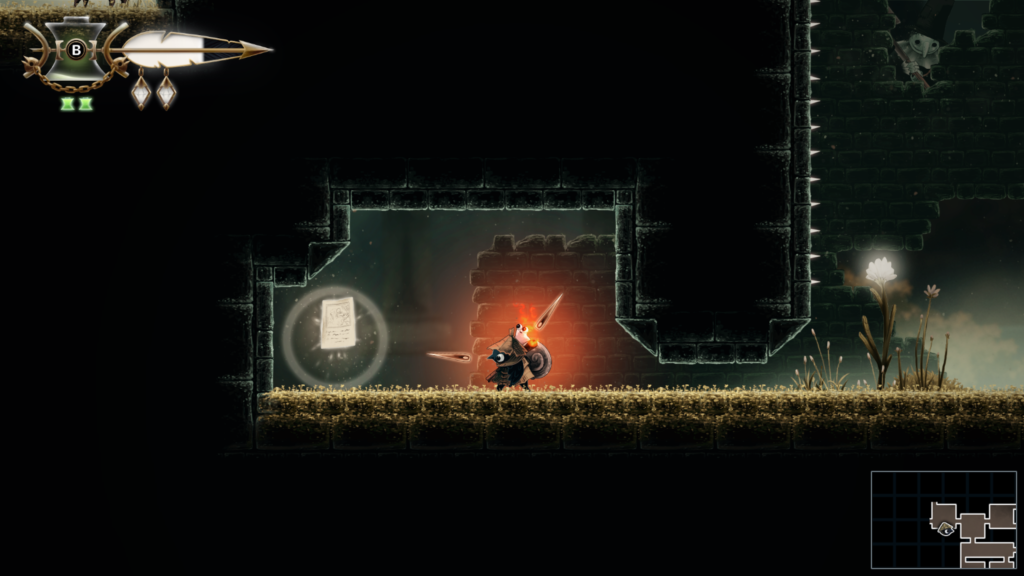
Workshop Token 25 / 27: Location – Burial Vault (dark brown colour on the map)
Abilities needed: Hover, Endless Climb, Wall Sling
The token is behind a hidden passage and a barrier that needs breaking down with your weapon.
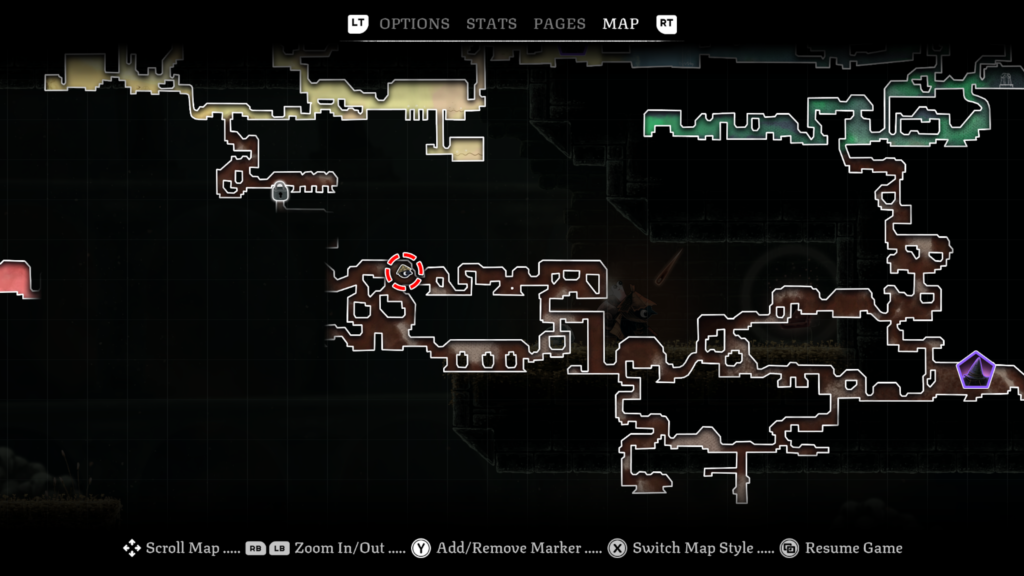
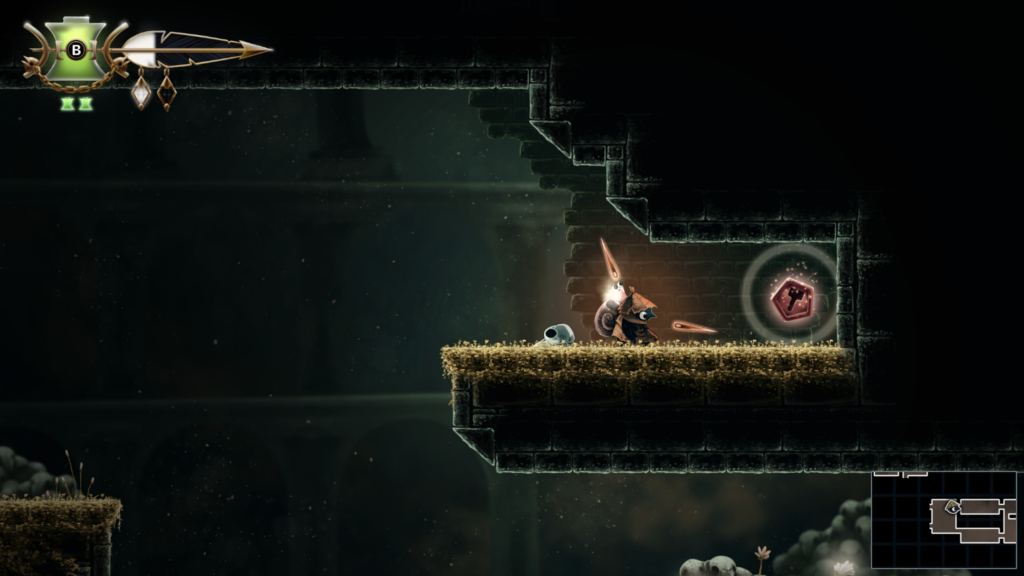
Trinket Slot 81 / 103: Location – Burial Vault (dark brown colour area on the map)
Abilities needed: None
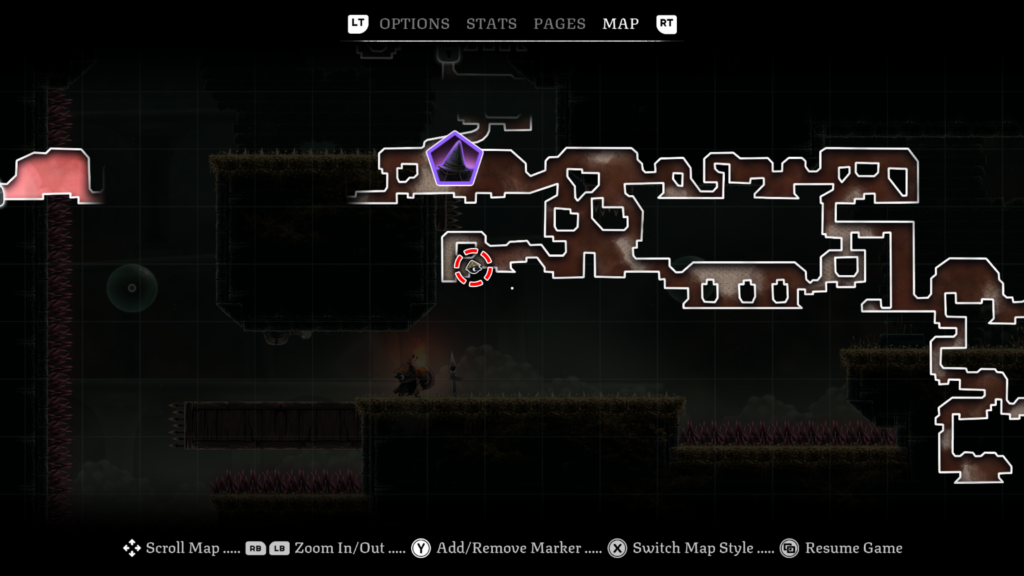
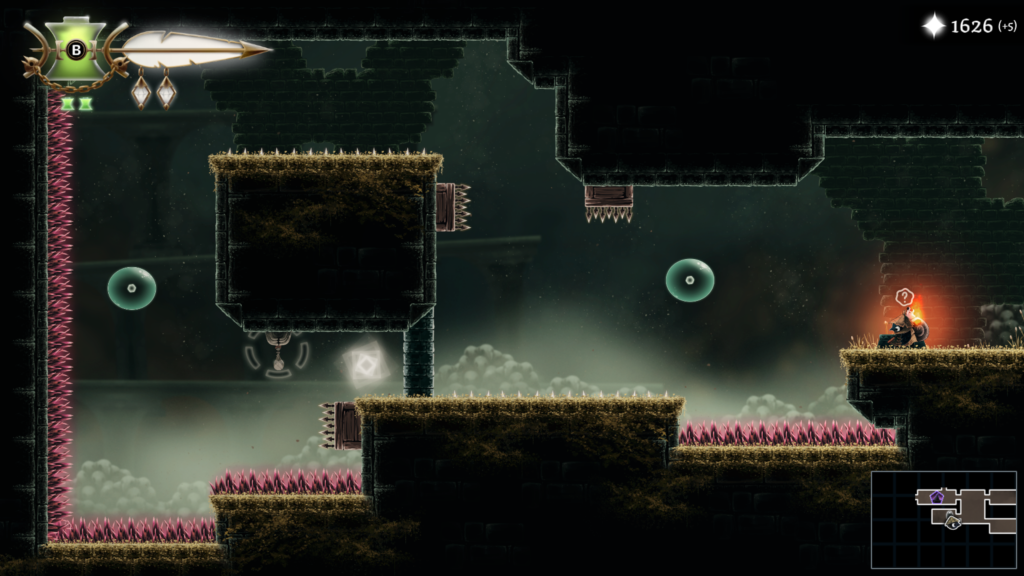
The Gravedigger Boss Guide
You’ll face the Gravedigger in the Burial Vaults area of the game, it’s the dark brown coloured area on the map.
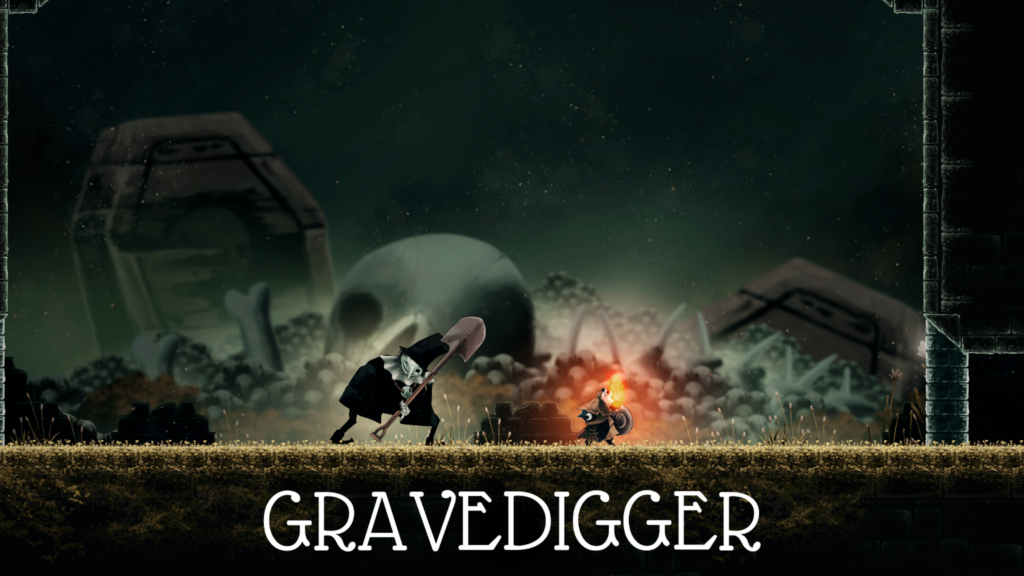
The Gravedigger keeps moving and does a lot of downward attacks, smashing his shovel into the the ground. This often creates bones that fly up that can damage you, or creates shockwaves of bones that spike out of the ground. These spikes last for a little too long to slide safely, unless you’re close to the Gravedigger himself to slide past him. A hover should protect you.
He also throws out balls of bones in a five-point direction, you can jump / hover over these, but beware that they fly out and then come back in, so give yourself enough space to jump / slide over them again.
By this point in the game, I had a lot of trinkets and trinket slots so I could equip a lot of helpful items. Blue Bow, that refills your health with an oil flask if you should have died is very useful, as is the Bottle Cap trinket that lets your flaming vessels bounce. This helps you out if you miss. Be sure to upgrade your favourite trinkets at the workshop in the tent too.
Of course, don’t forget about using your flaming vessels as much as you can for good damage.
You can watch a video of the boss fight below:
Defeating the Gravedigger will net you the “Dig Deep” achievement / trophy. Head left out of the boss arena to deliver the snail and grab a golden feather.
Trinket Slot 82 + 83 + 84 + 85 + 86 / 103: Location – Looter’s Shop (Tent)
19 / 23: Location – The Dollmaker’s House (pink colour on the map)
The Dollmaker Story Page (8 / 8)
Abilities needed: None
If you have been following this guide, you will unlock “The Tattered Doll” achievement for finding all ‘The Dollmaker’ story pages.
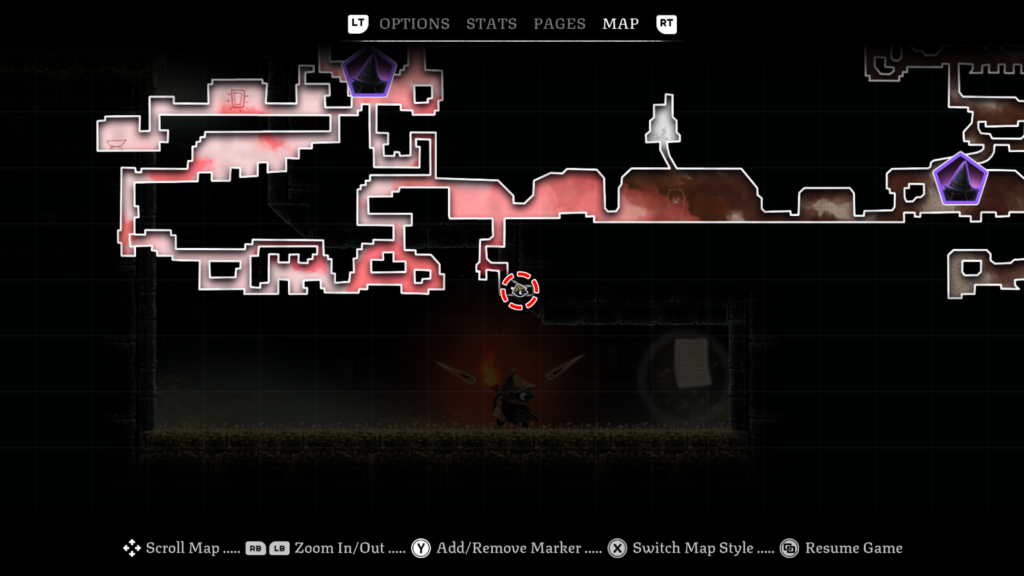
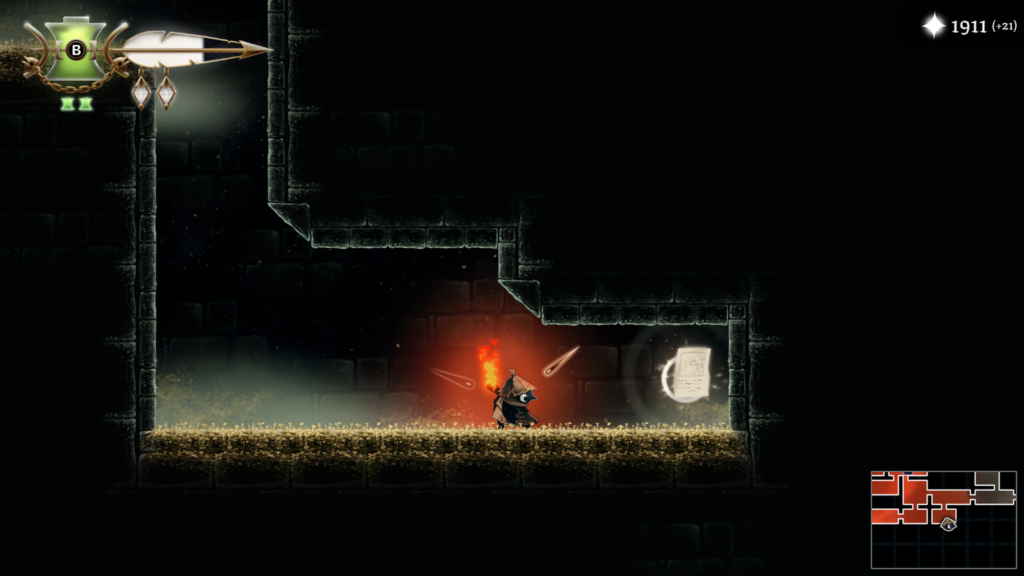
Trinket 32 / 32: Location – Hunter’s Cabin (orange colour on the map)
Trinket: Rusty Fork – increases damage death slightly when at low health.
Abilities needed: Wall Sling, Climb
You will unlock the “Experienced Collector” as soon as you grab the final trinket.
Story Page 20 / 23: Location – Hunter’s Cabin (orange colour on the map)
The Witch’s Bargain Story Page (7 / 9)
Abilities needed: Climb
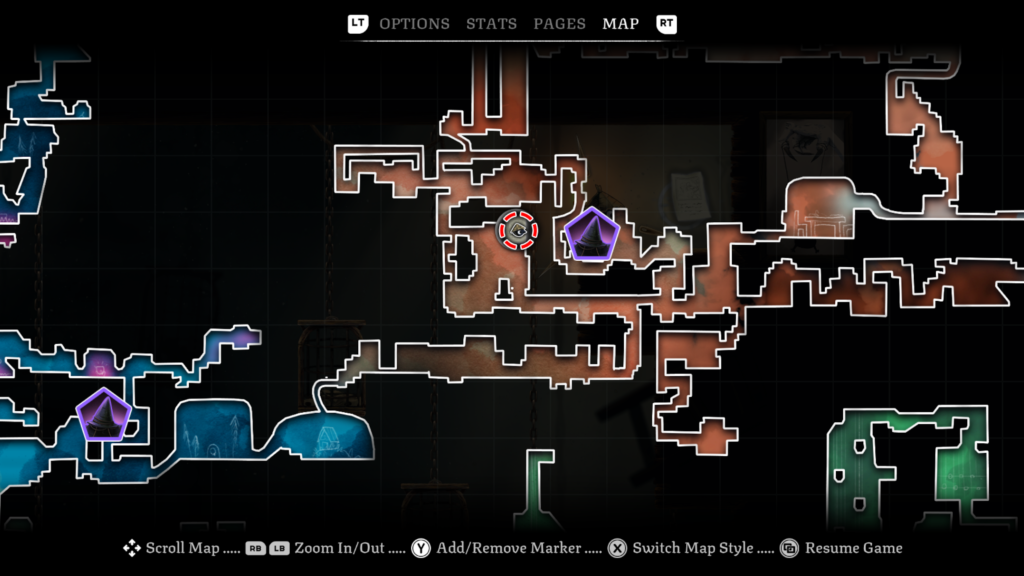
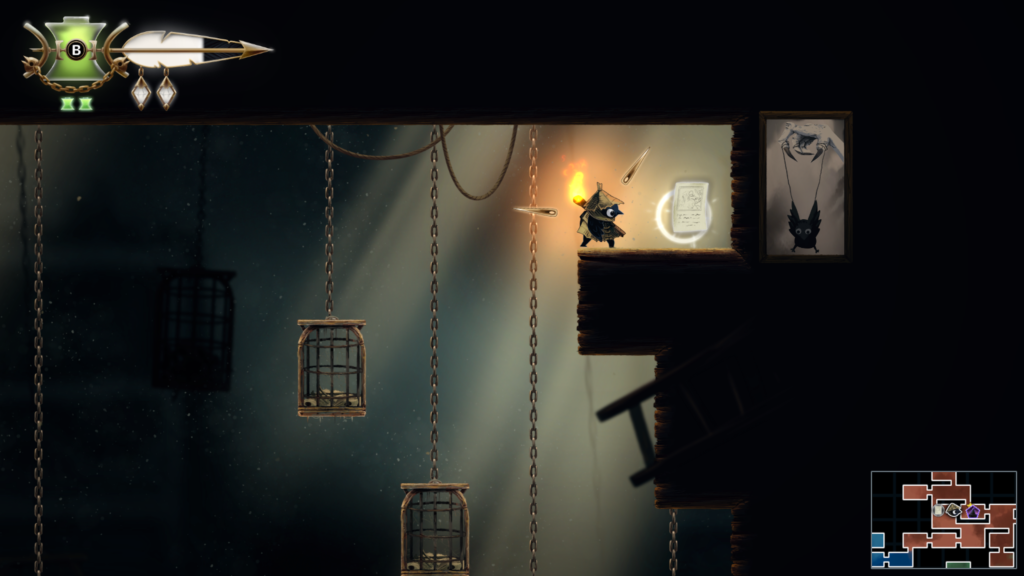
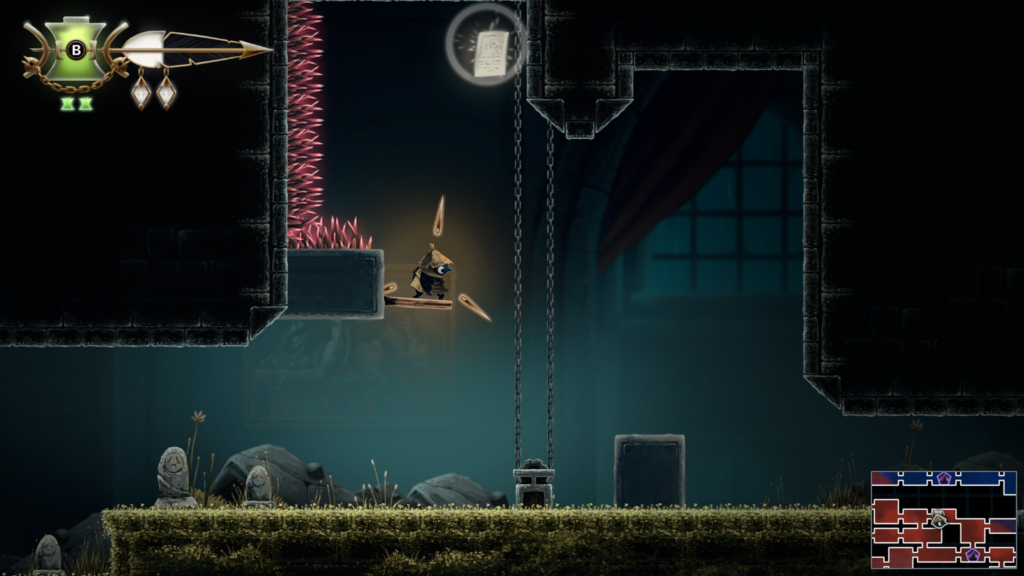
Story Page 21 / 23: Location – Dessicated Castle (red colour on the map)
The Witch’s Bargain Story Page (8 / 9)
Abilities needed: Slingshot, Climb
Use your slingshot on the mechanism on the floor, ride / climb up the raising pillar on the right. Then, when level with the extending spiky, horizontal pillar on the left, throw your slingshot to create a platform and jump across.
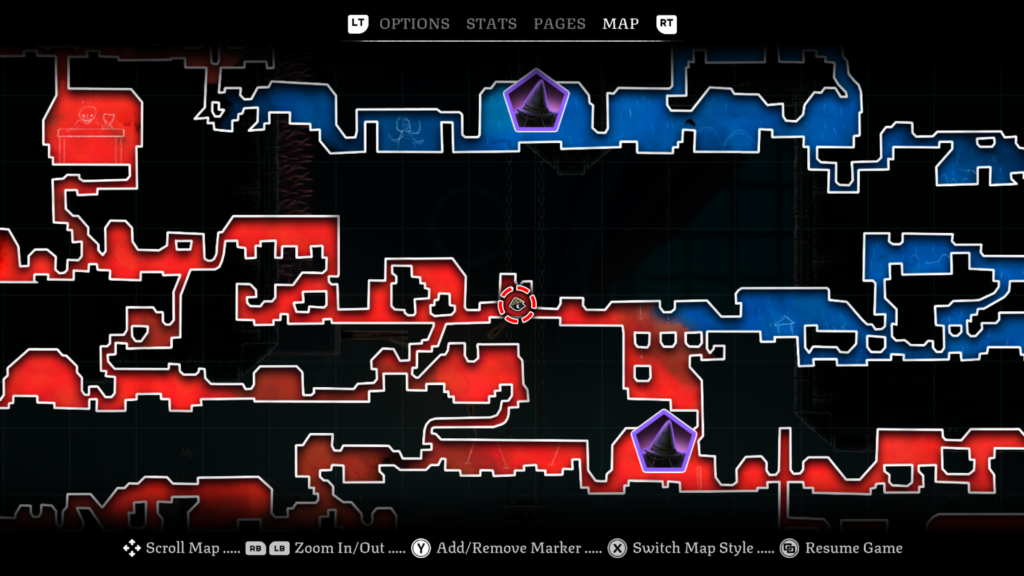
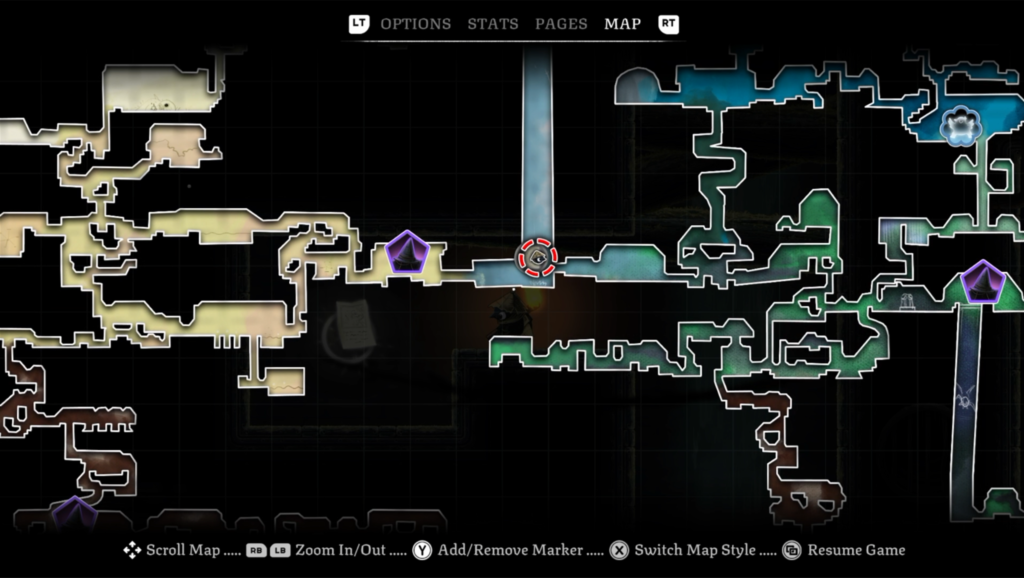
Story Page 22 / 23: Location – The Bog (yellow colour on the map)
The Lookout Tower Story Page (6 / 6)
Abilities needed: Endless Climb
This story page is to the right of the first tent in the bog. In the long tunnel between The Bog and The Drains.
If you have been following this guide, you will unlock “Above the Kingdom” achievement for finding all ‘The Lookout Tower’ story pages.
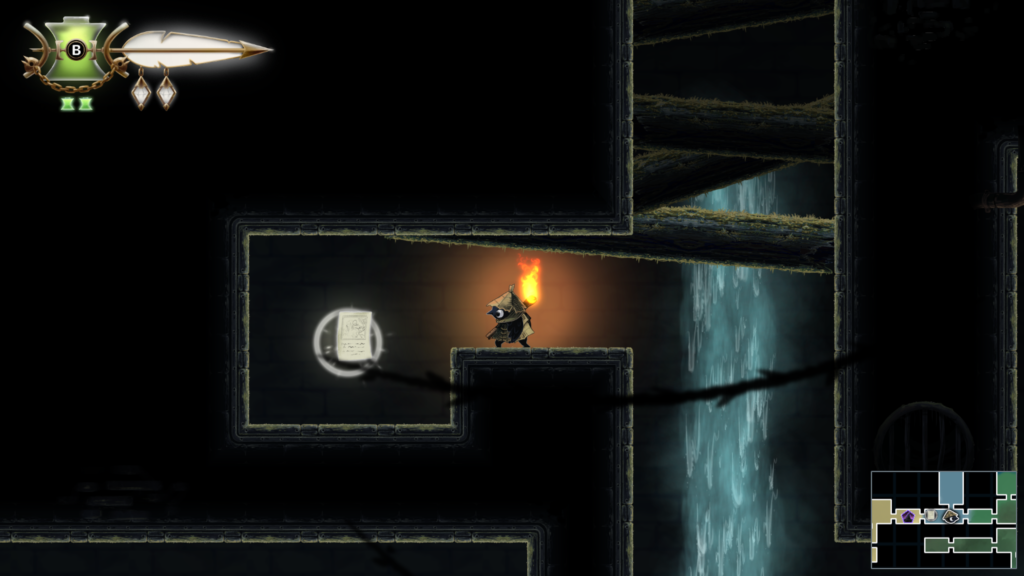
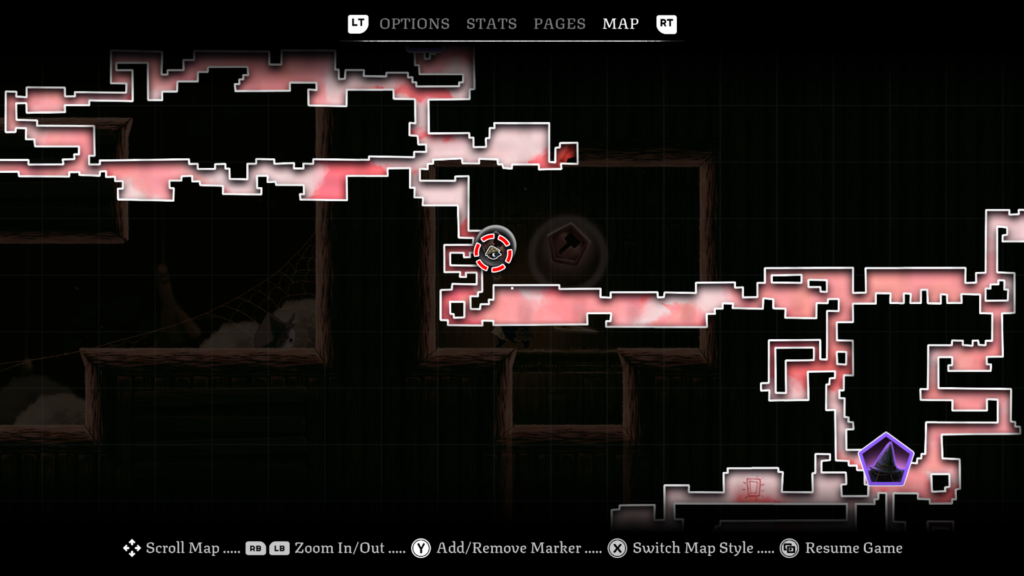
Workshop Token 26 / 27: Location – The Dollmaker’s House (pale pink colour on the map)
Abilities needed: Slingshot, Endless Climb
The token is behind a hidden passage that you climb through.
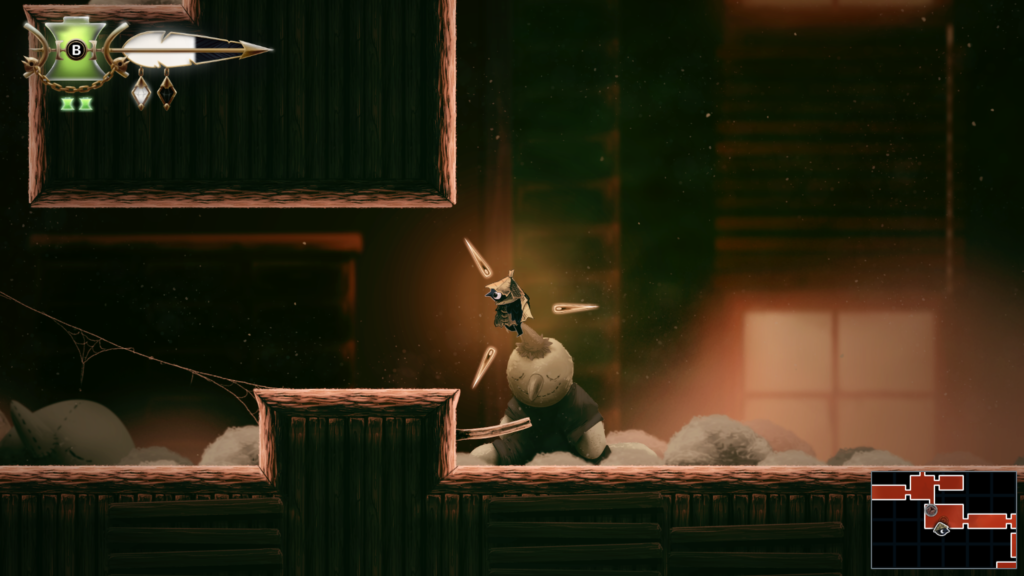
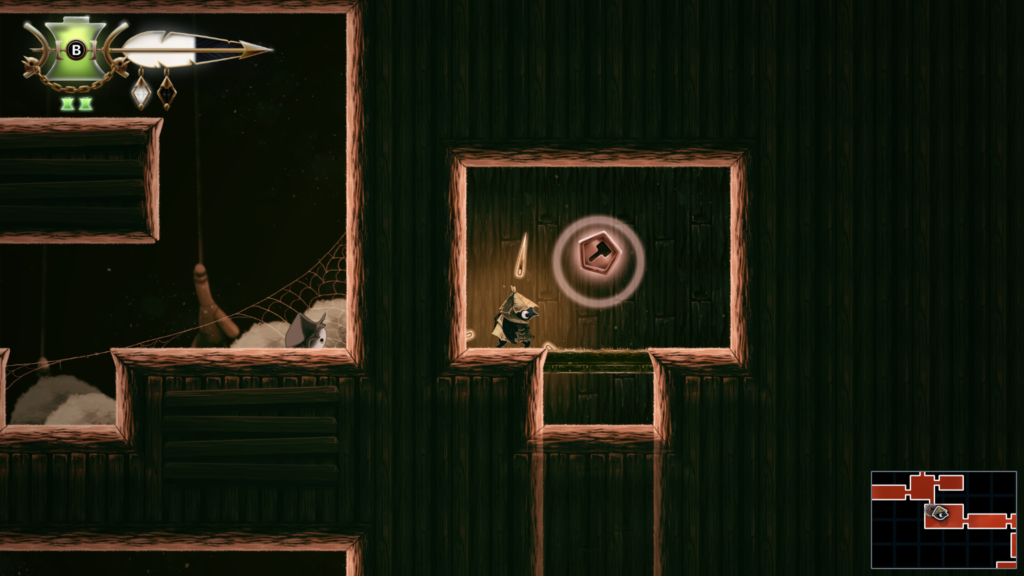
Find Ilda’s Siblings in the Queen’s Castle
The final area you’ll arrive at is the Queen’s Castle, this is the royal purple coloured area on the map. It’s the one you have to enter when you’ve collected all seven golden feathers. As you explore, you’ll come across Ilda who wants to help you reach the Queen, but can’t without the help of their siblings, who are in cages across the Queen’s Castle.
You’ll need to find the three pairs of siblings to progress onto the Queen. Their locations aren’t marked on the map until you enter the room near where they are, an objective marker will then appear.
The order they found below isn’t necessarily the most efficient way to find them, just the order that I found them in.
You can watch a video guide below, or you can read on for a text and images guide.
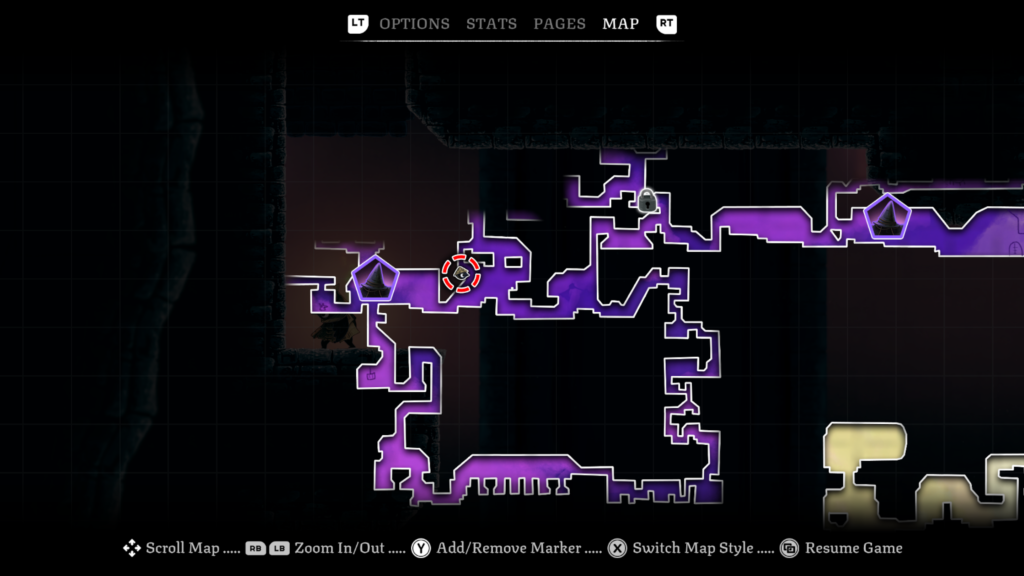
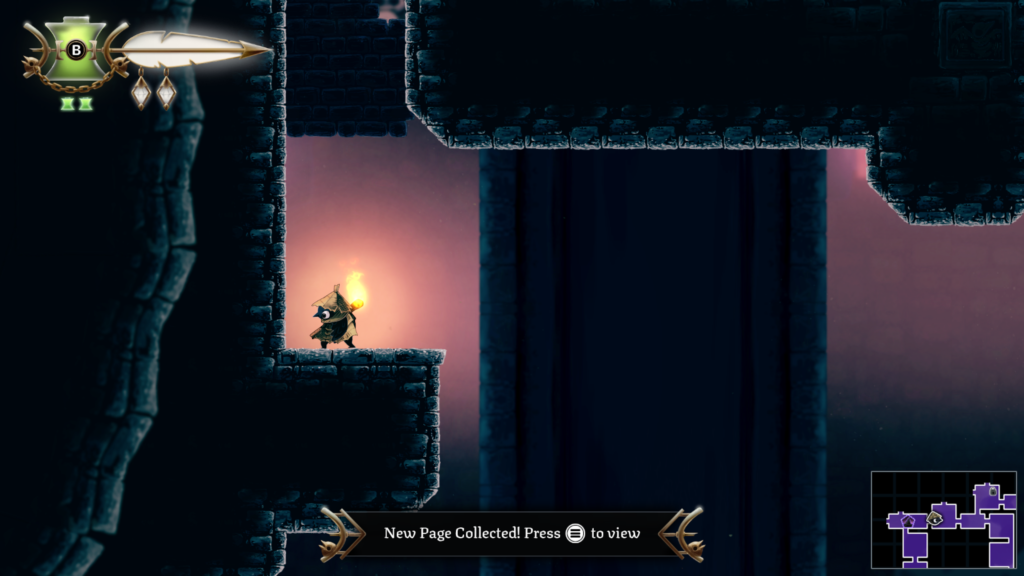
Sibling Pair: 1 / 3
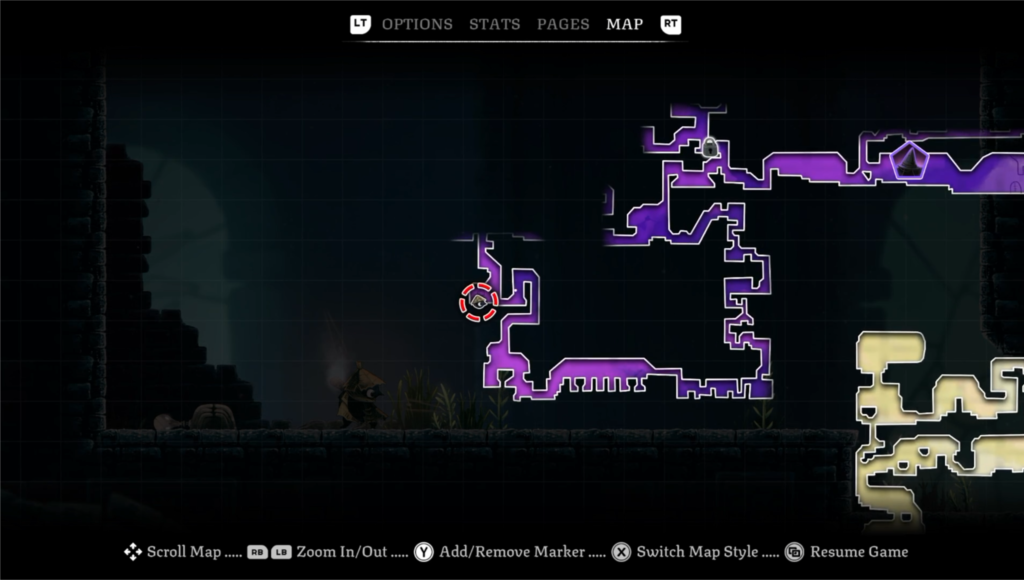
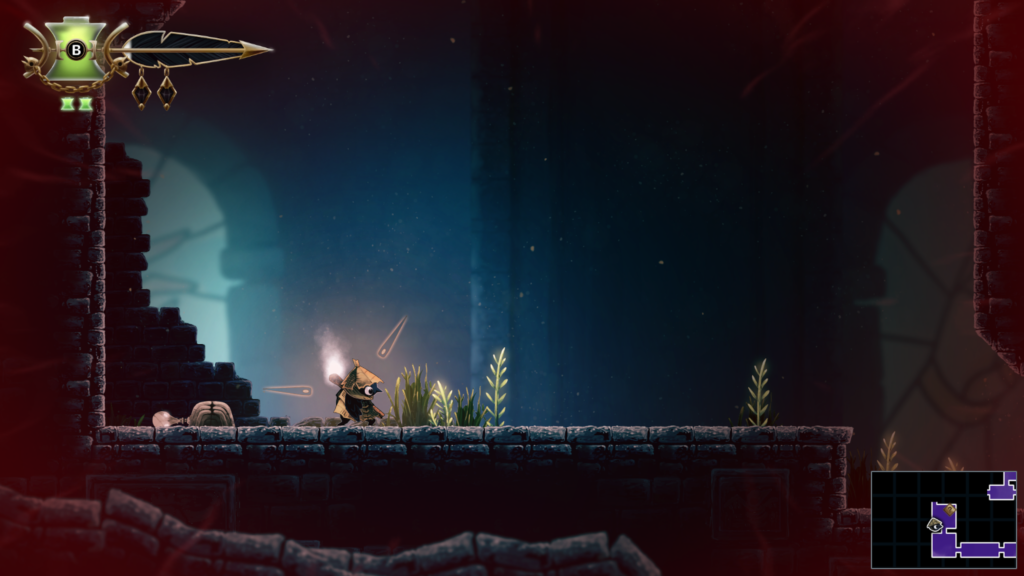
Story Page 23 / 23: Location – The Queen’s Castle (royal purple colour on the map)
The Witch’s Bargain Story Page (9 / 9)
Abilities needed: Endless Climb, Hover
If you have been following this guide, you will unlock “The First-Born Daughter” achievement for finding all ‘The Witch’s Bargain’ story pages.
Silver Doll Boss Guide
You’ll take on the Silver Doll in the Queen’s Castle, the royal purple coloured area on the map. You can’t get here until you’ve located all seven golden feathers. You will encounter the Silver Doll as you seek out the three pairs of siblings that will help you access the Queen. The Silver Doll is guarding one of them.
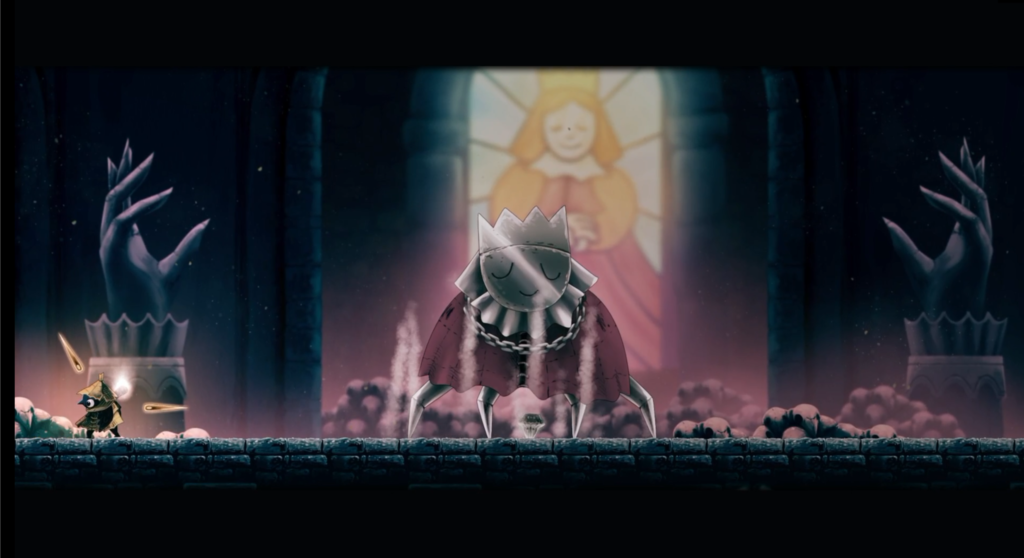
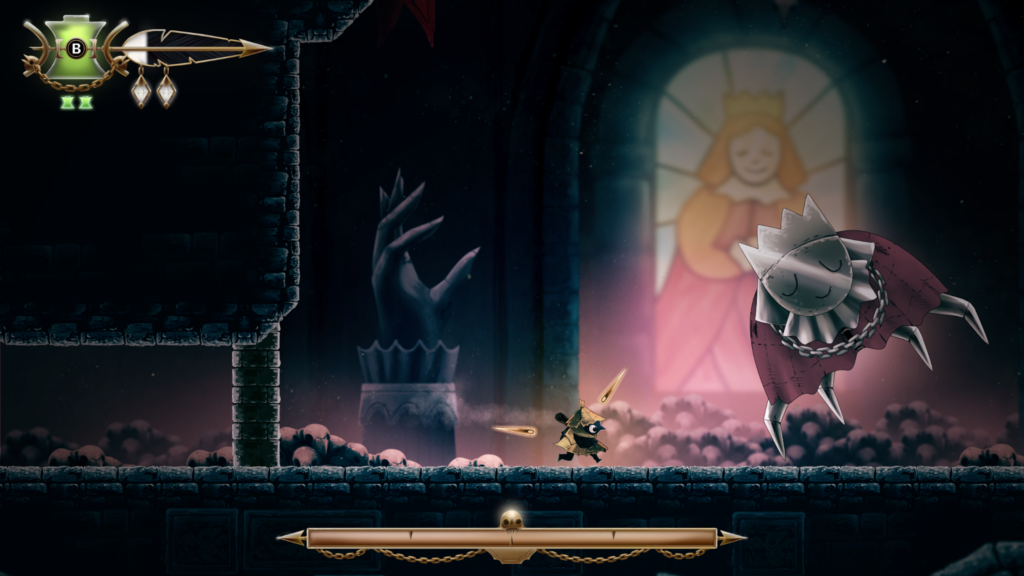
The Silver Doll is something of a mini-boss, as the main boss for the Queen’s Castle is the Queen herself. That being said, you’ll have to keep your wits about you as the Silver Doll isn’t to be underestimated given it loves to through a whole load of projectiles at you.
It bounces around and creates spikes out of the ground when it lands, or damaging shards. It also throws balls of fire at you (goodness, gracious) as well spiky wheels. The wheels fire out to the sides of the arena and then roll towards you in the centre.
You will need to use combos of your evasive manoeuvrers as a number of the attacks last longer than one type of dodge. The wheels for example will likely be a combo of hover and dodge slide. If you can reach a wall you can grab onto it until that attack stops.
You can watch a video of the boss fight below:
Defeating the Starsinger boss will net you the “Sharp and Shiny” achievement / trophy and then you can rescue one pair of Ilda’s siblings to help you reach the Queen.
Sibling Pair: 2 / 3
You’ll have to fight the Silver Doll boss to get to the second pair. They are to the right of the boss arena, after you have defeated the Silver Doll.
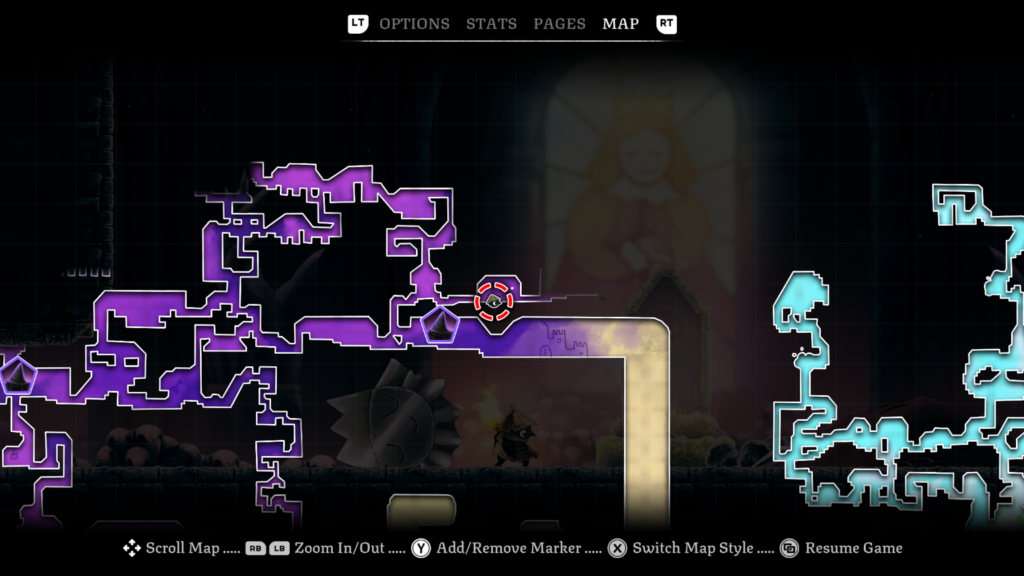
Trinket Slot 87 / 103: Location – Queen’s Castle (royal purple colour area on the map)
Abilities needed: Hover
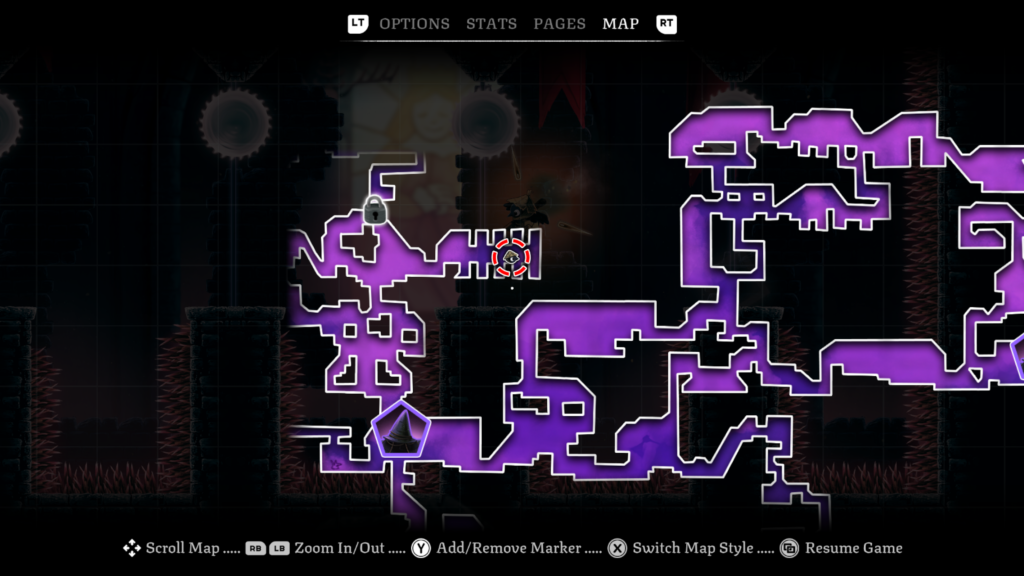
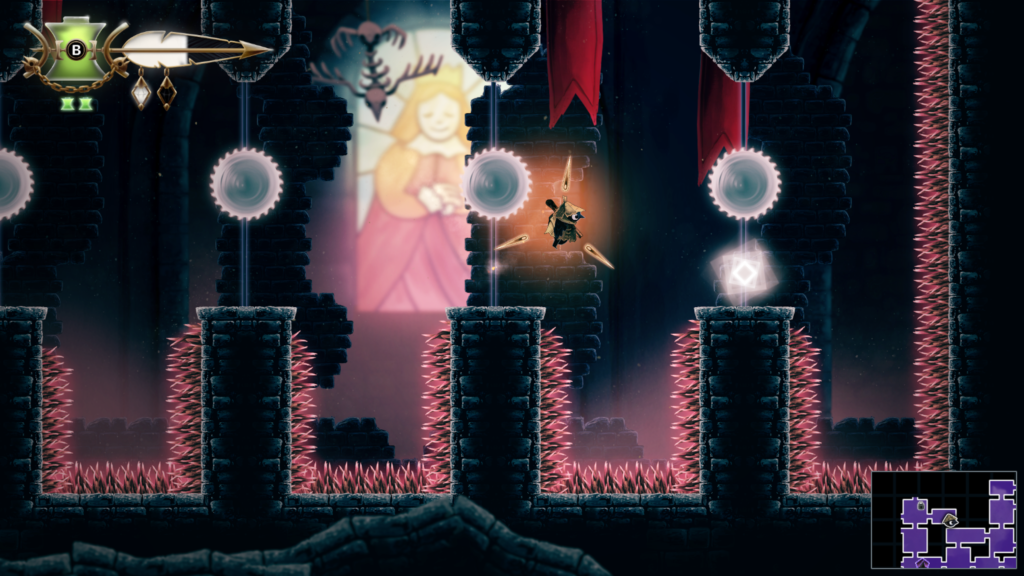
Workshop Token 27 / 27: Location – Queens’ Castle (royal purple colour on the map)
Abilities needed: Endless Climb, Hover
Get above it and drop down.
Once you have upgraded all upgradeable trinkets, you will unlock the “Fully Stocked” achievement / trophy.
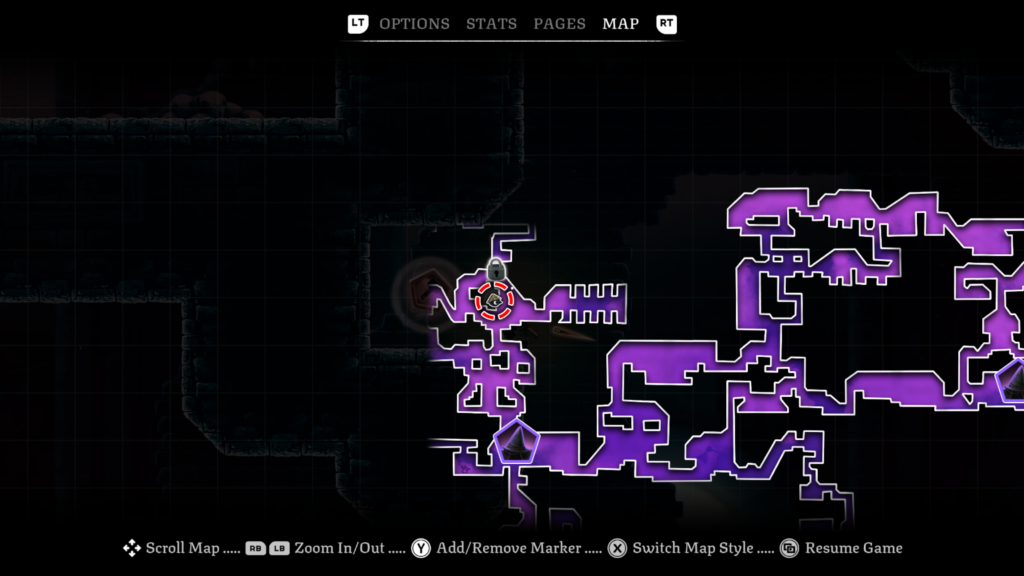
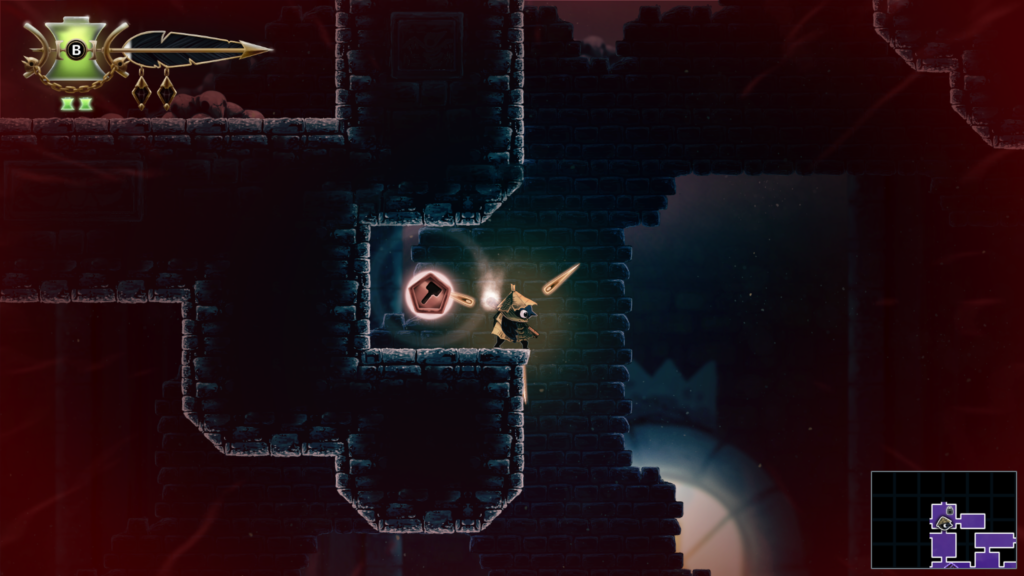
Sibling Pair: 3 / 3
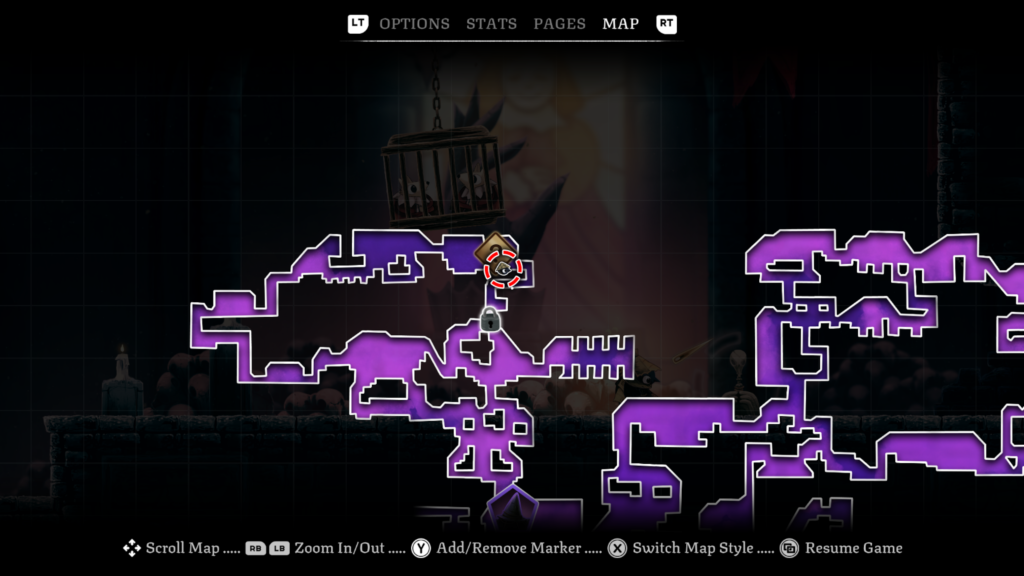
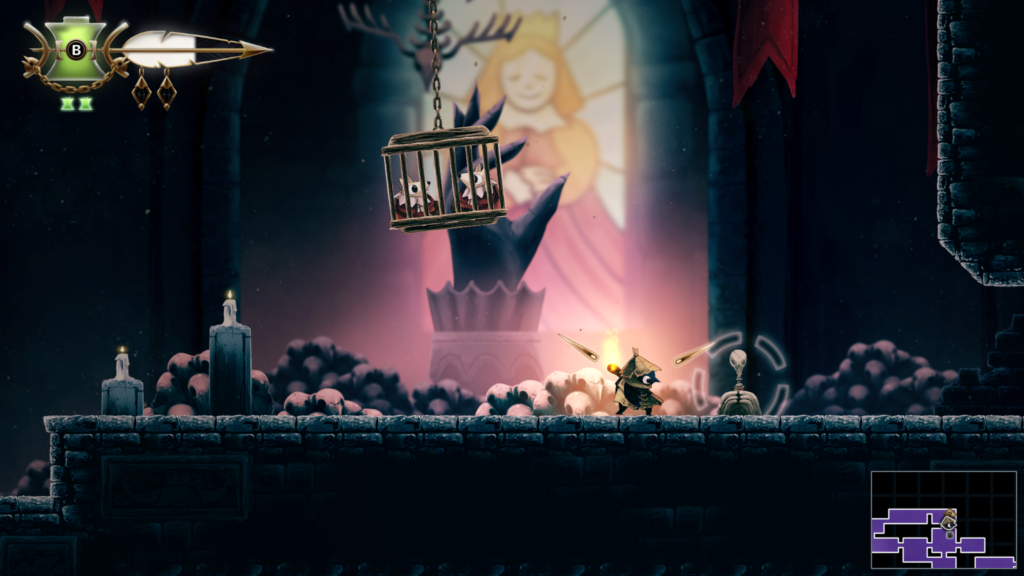
Once you have collected all three parts, the map will highlight the location of where you need to return so you can progress and take on the Queen. There isn’t a point of no return, so you can take on the Queen and then mop up anything you’ve missed if you want to.
Trinket Slot 88 + 89 + 90 + 91 + 92 / 103: Location – Looter’s Shop (Tent)
The Queen Boss Guide
The final battle with The Queen takes place in the Queen’s Castle area of the game. You can only access the Queen’s Castle after you have collected the seven golden feathers. Once inside, you will need to take on the Silver Doll boss and find Ilda’s siblings in order to reach the final battle.
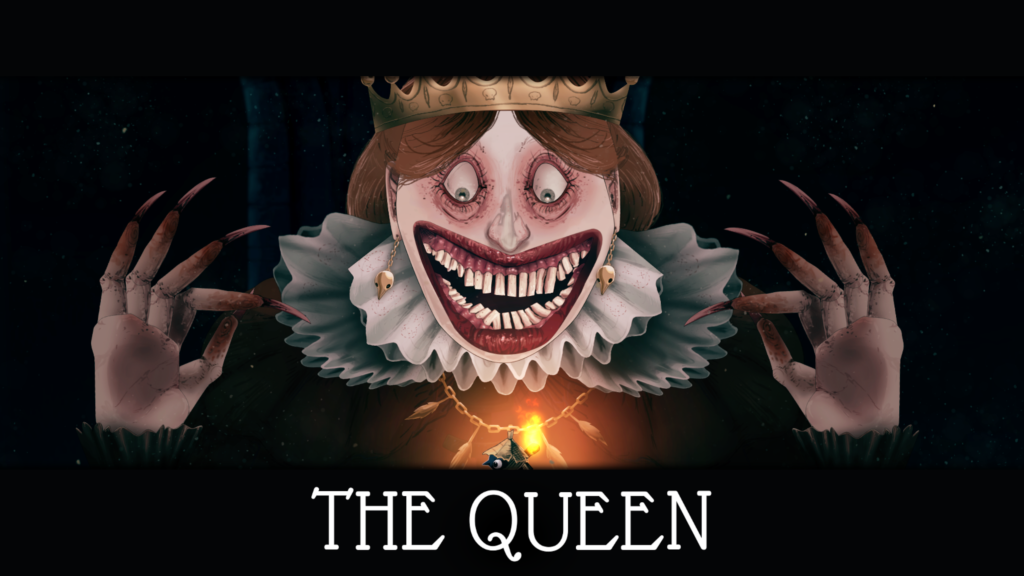
The Queen, as you might expect isn’t an easy boss. The first half of the fight consists of a lot of projectiles and attacks thrown at you, where you’ll have to employ all the evasion techniques you know to survive.
Spikes that protrude out of the ground can be dodged with a hover, the golden swords and giant spike rectangles will need a combo of slide dodge and jumping, but you’ll have to be quick. She drops a bowling pin shaped doll to the floor that fires out of balls of fire. There’s also some large circling fire balls that you’ll have to slide dodge through, just remember it has a cool down.
Woah-Oh, We’re Halfway There
At the halfway mark, spike walls will close in, and the floor will become spiky. You’ve got to use the newly raised platforms to stay alive, whilst dodging falling swords, circular saws and other environmental hazards. This will likely need you to use the hover ability to stay off the platforms when needed. You’ll also need to bounce off your matchstick to get across some of the hazards, keep an eye out for the platform with the splintered arrow marker (that’s where you need to throw your matchstick).
As always, check your trinket loadout if you’re struggling, and make good use of your flame vessels to do additional damage.
You can watch a video of the boss fight below:
Defeating The Queen will net you the “The End” achievement / trophy. You can then access the game and clean up any missing collectibles as well as doing the “Reunite the Flock” achievement / trophy objective.
Ability: Soar – Location – Queen’s Castle (royal purple colour area on the map)
Unlock the “Together at Last” Achievement / Trophy
You will not be able to go for this achievement / trophy until after you have defeated The Queen final boss. To unlock the “Together at Last” achievement / trophy, you must “reunite the flock”. This is a new objective that appears in the endgame of Well Dweller.
It should be noted that to complete this objective you will need to have found and returned all 20 spirits that are scattered across the map. Be sure to check out our guide for any you might be missing.
You can watch a video guide below, or you can read on for a text and images guide.
Soar Ability
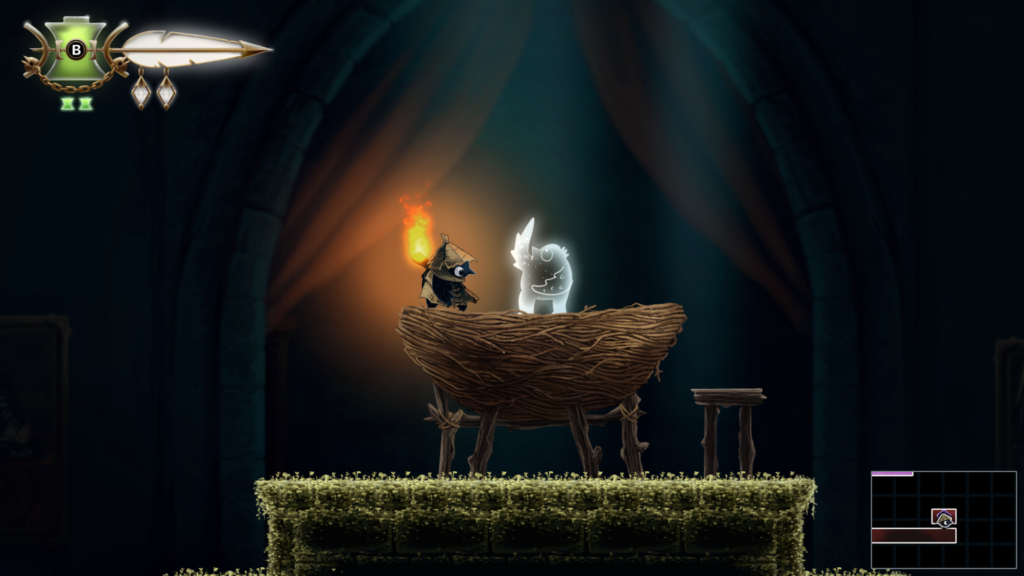
Before you can start this quest, you will need to unlock the Soar ability which you can grab in the Queen’s Castle, not far from where you fought her.
This will unlock the “Flying High” achievement / trophy, as well as give you the ability to fly directly upwards over large distances.
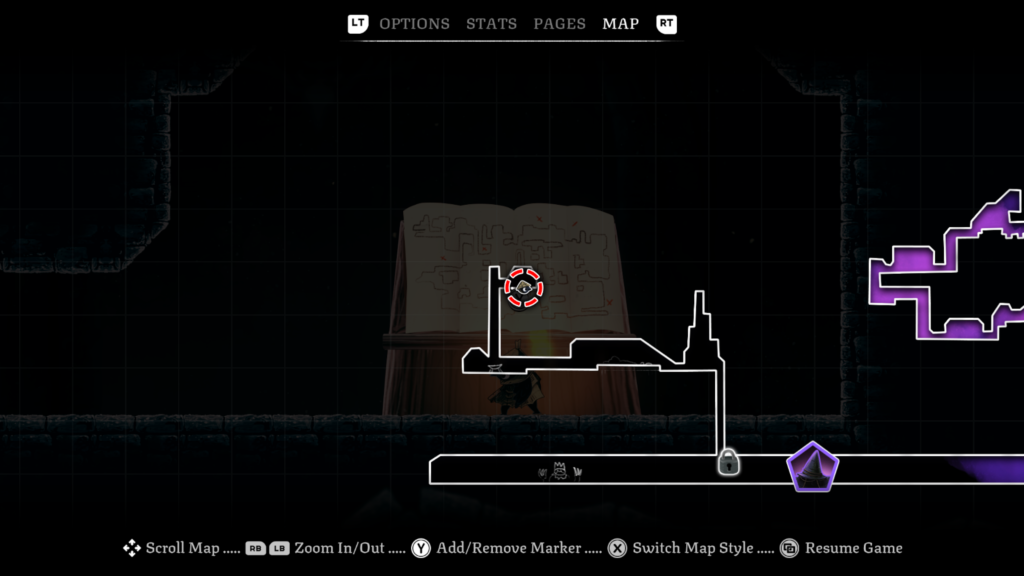
Map Markings
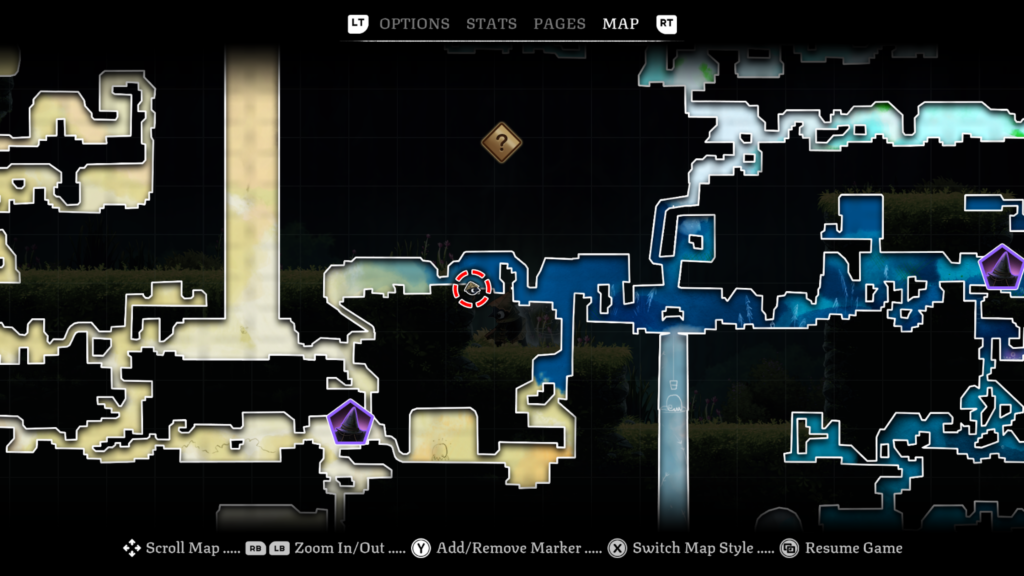
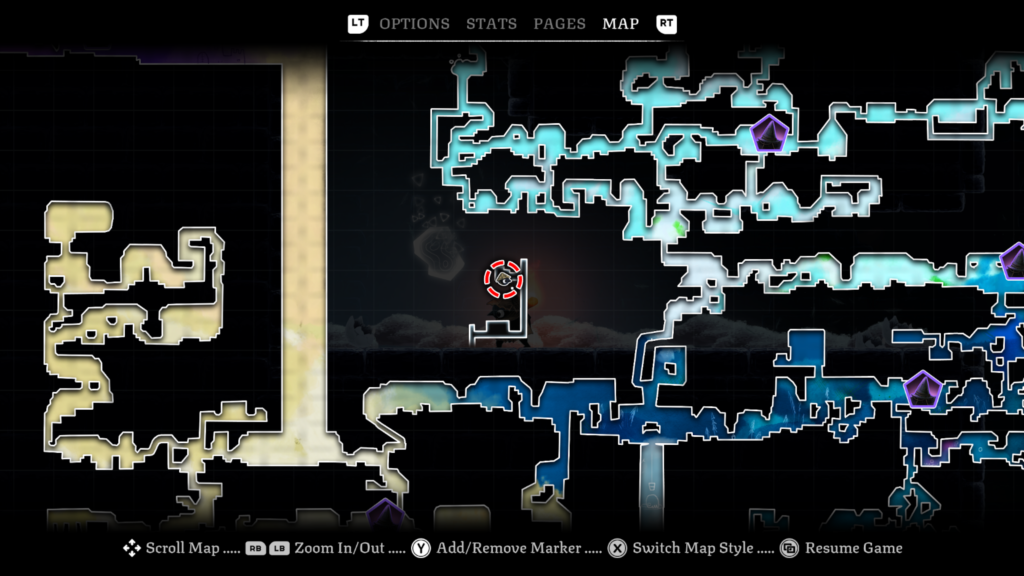
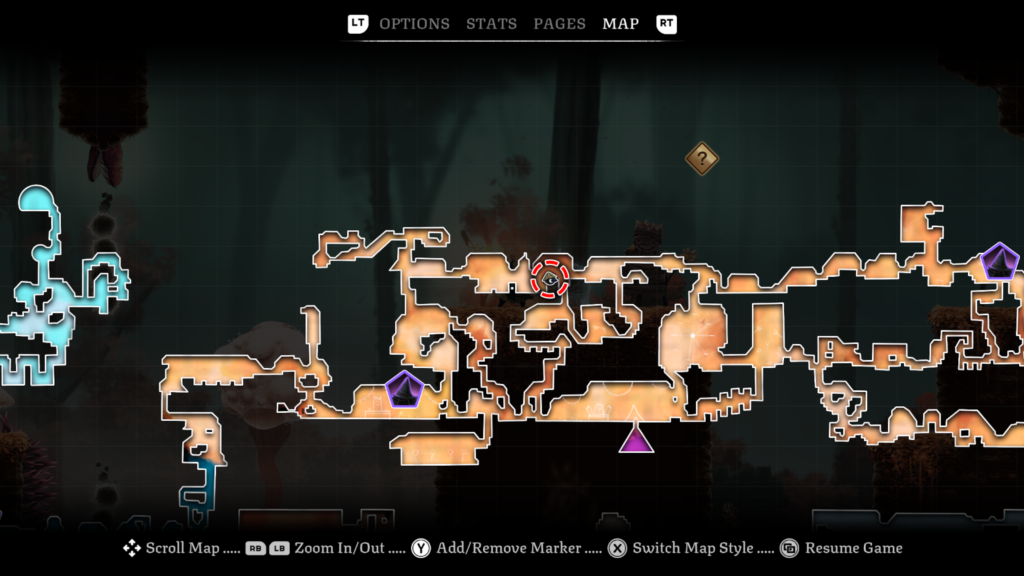
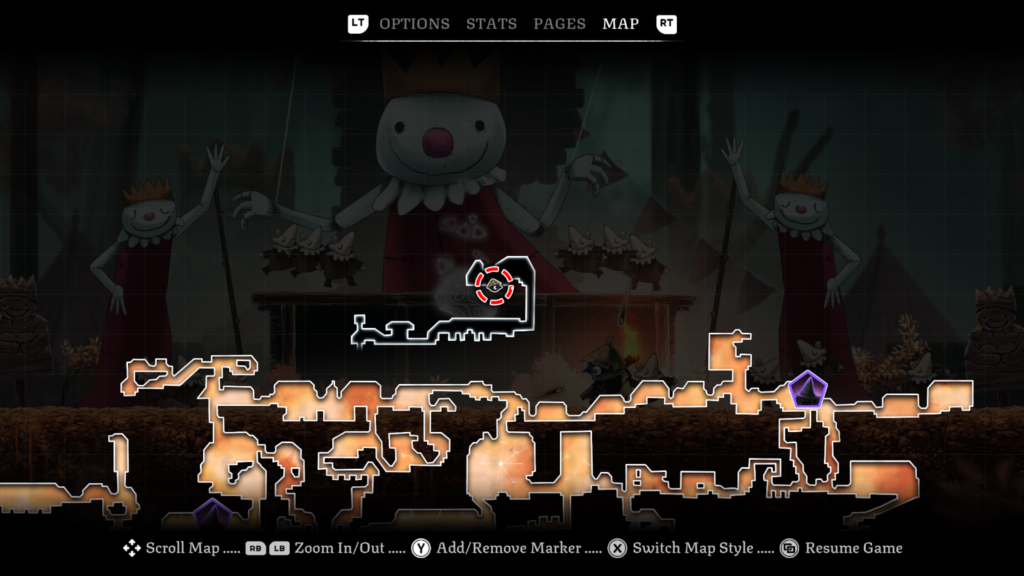
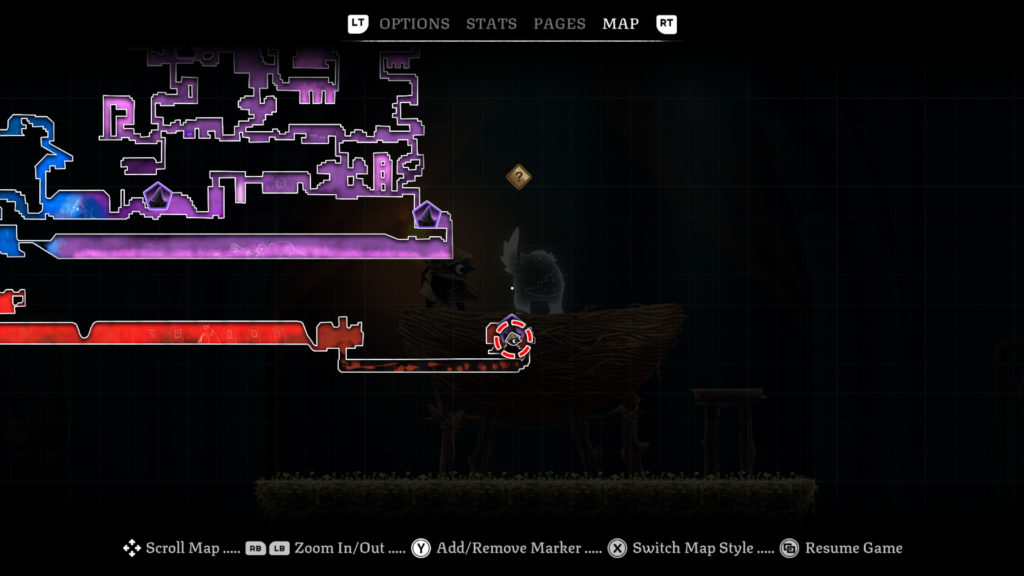
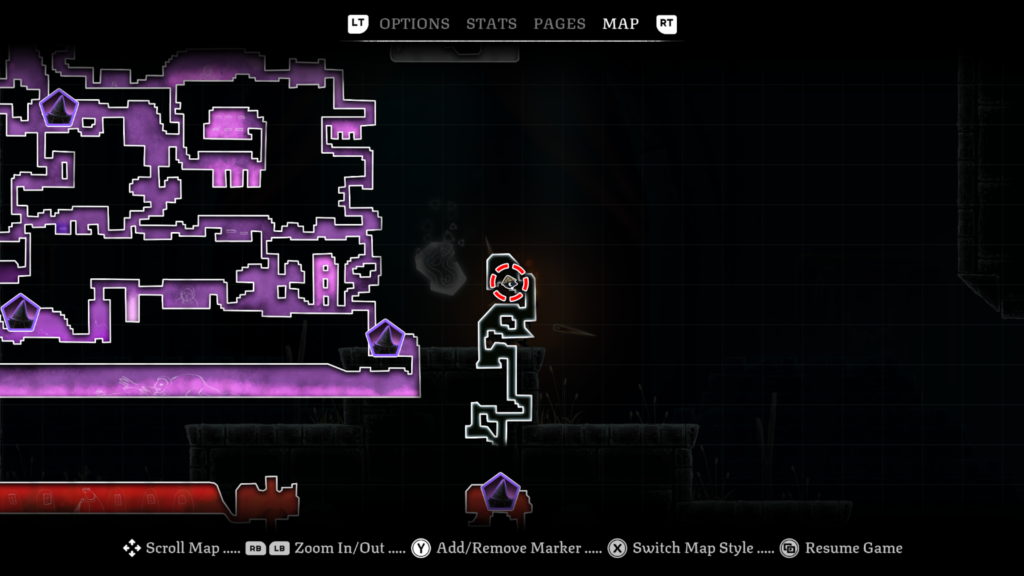
Once you have the Soar ability fire yourself upwards from the ability nest to get to the top of a long passageway. There you will find a mysterious map that will five objective markers to your map, but no obvious way to get to them.
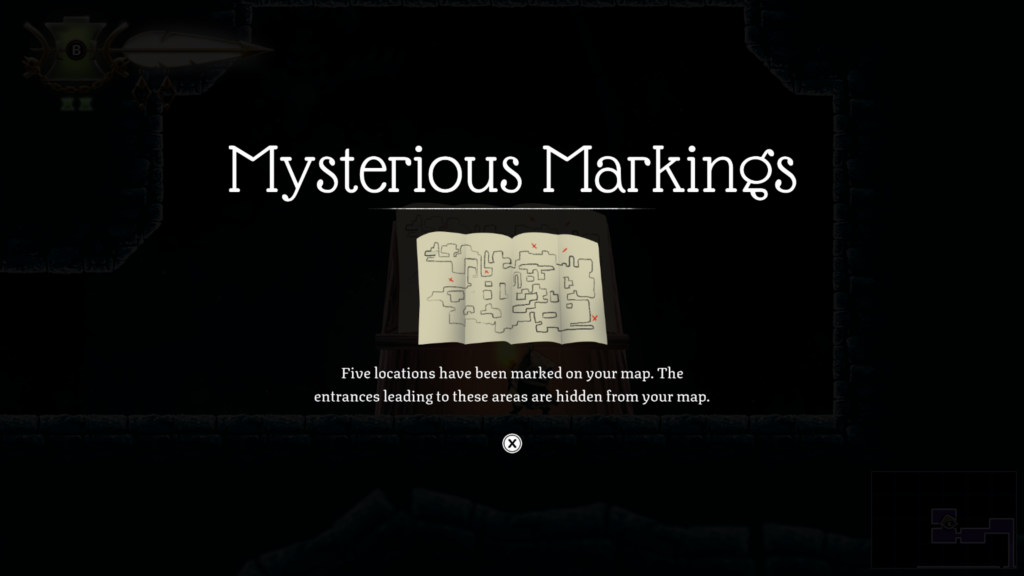
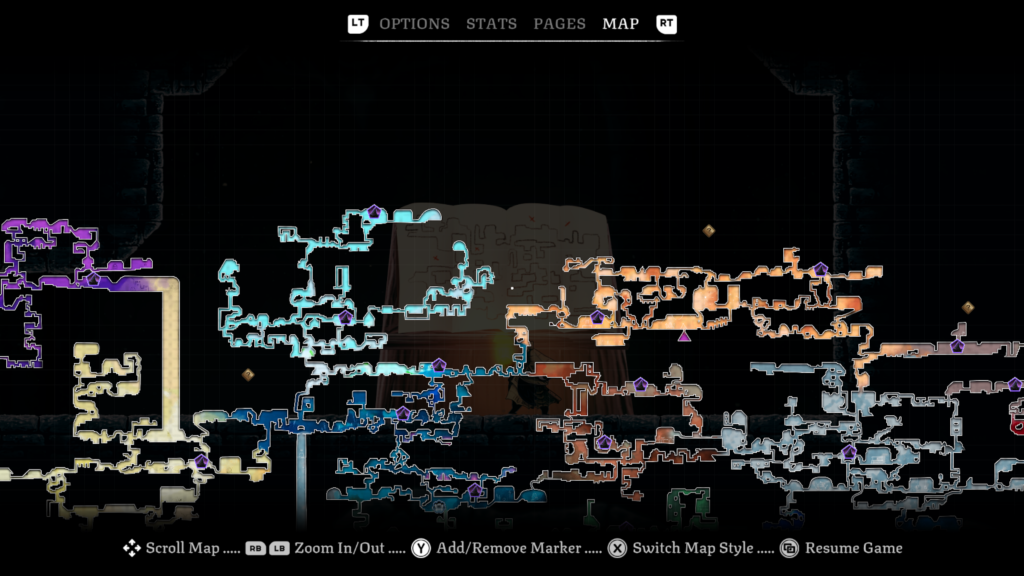
How to Find the Entrances to the New Areas
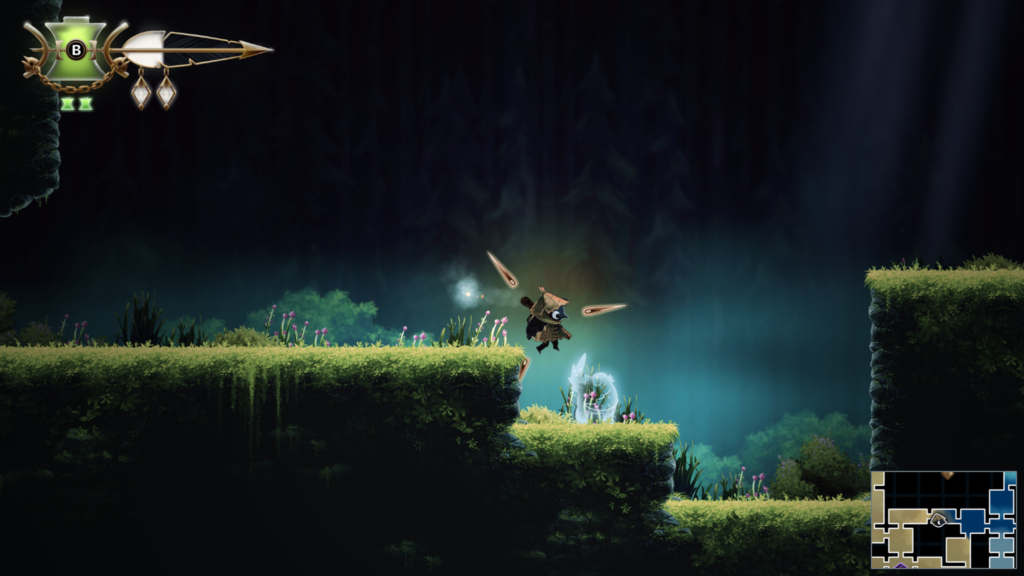
Most of the areas you need to go through to track down the five Spirit Fragments will require you to use the new Soar ability.
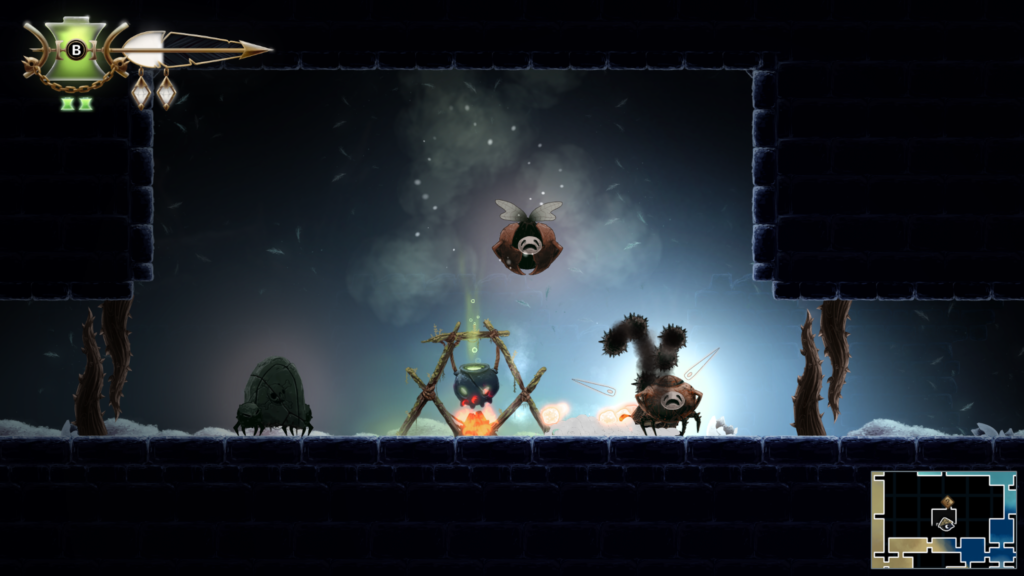
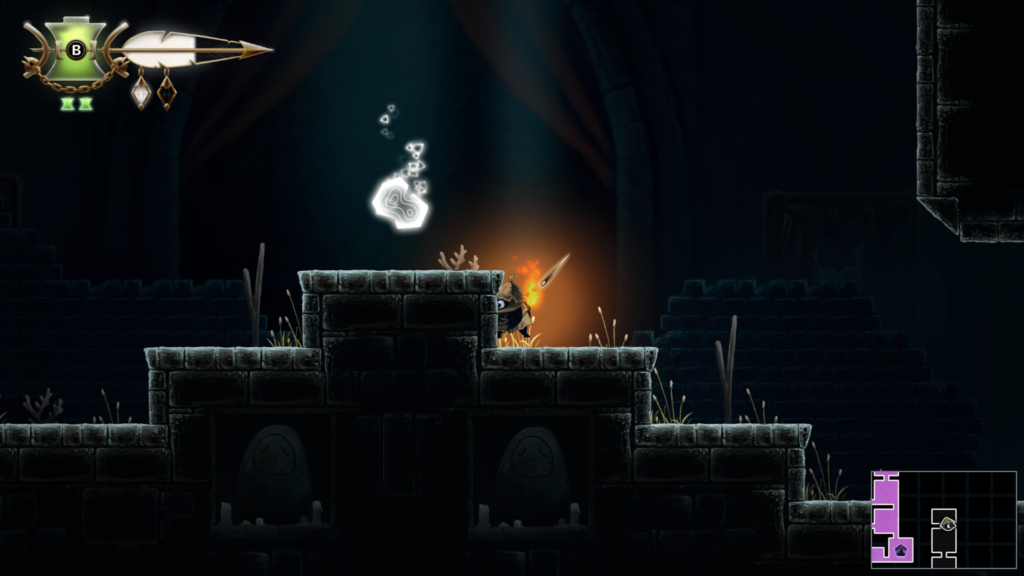
In each area you are looking for a spirit bird that will be pointing upwards. The locations are below the objective marker, sometimes a little to the side, but still below.
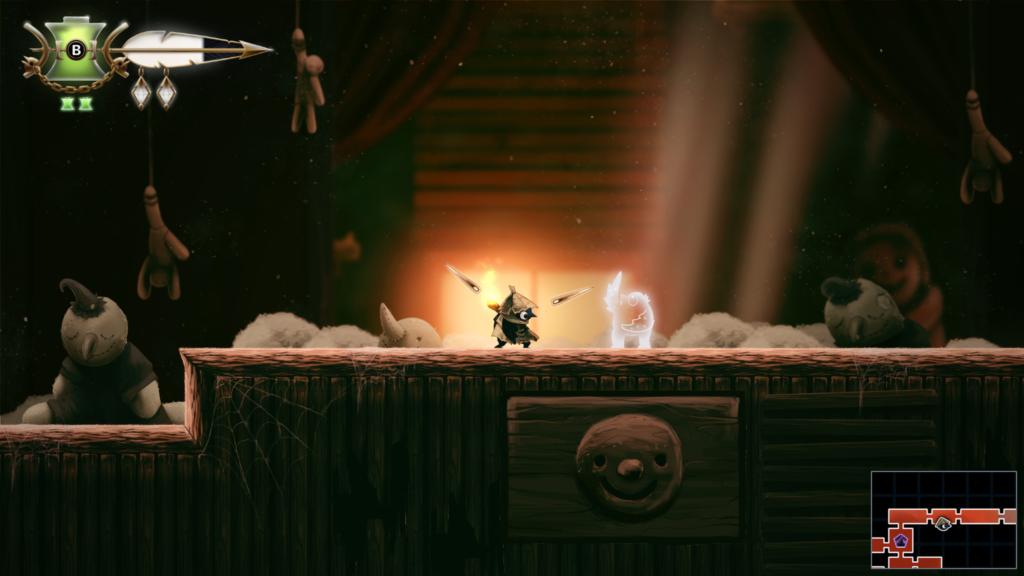
Spirit Fragment (1 / 5)
Location: Dollmaker’s House (pinky
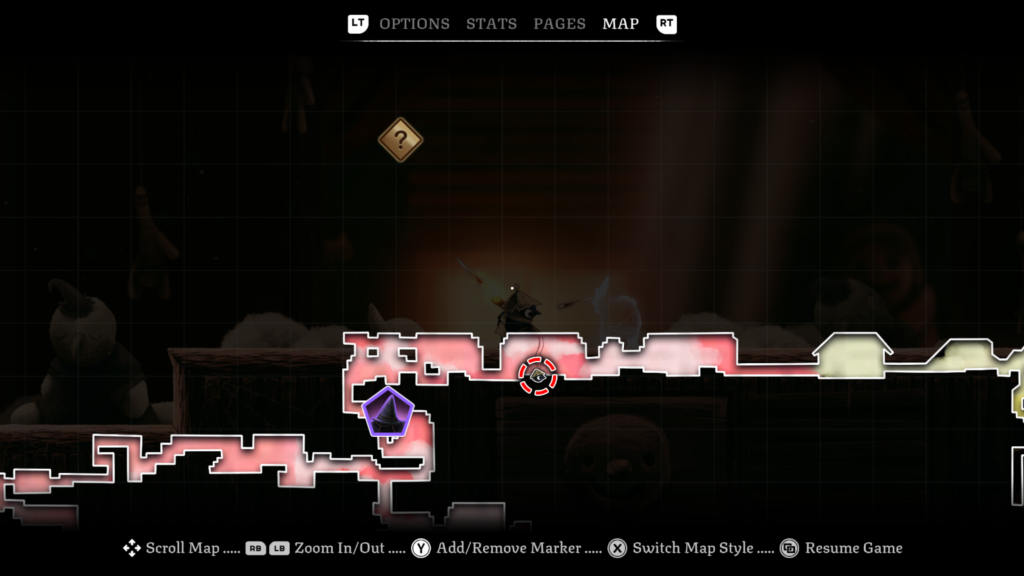
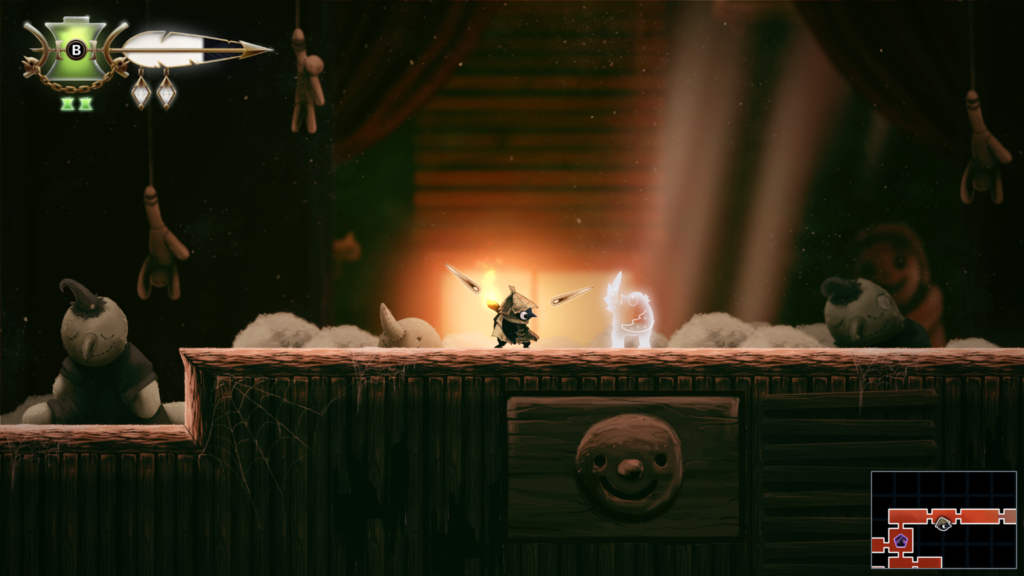
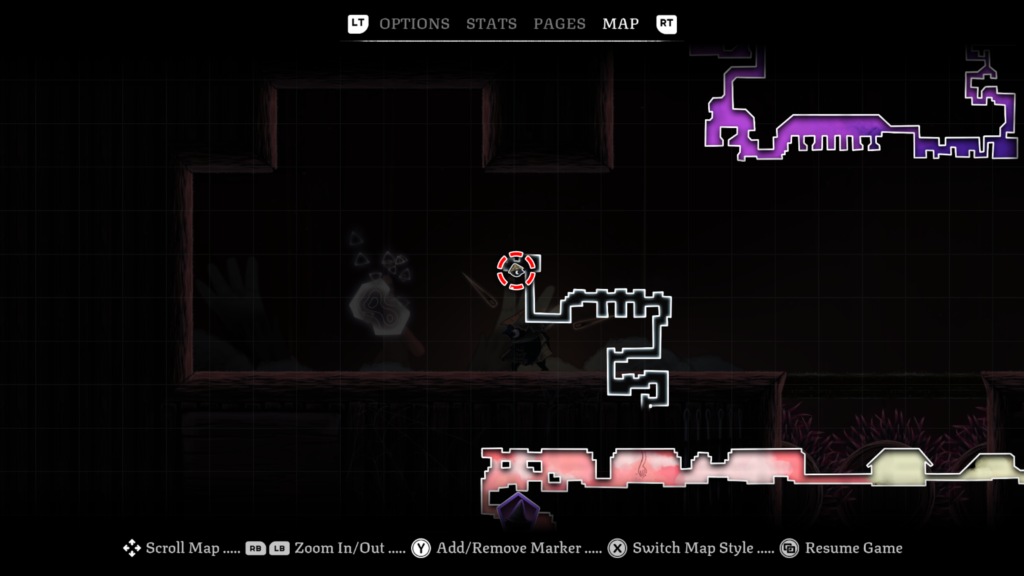
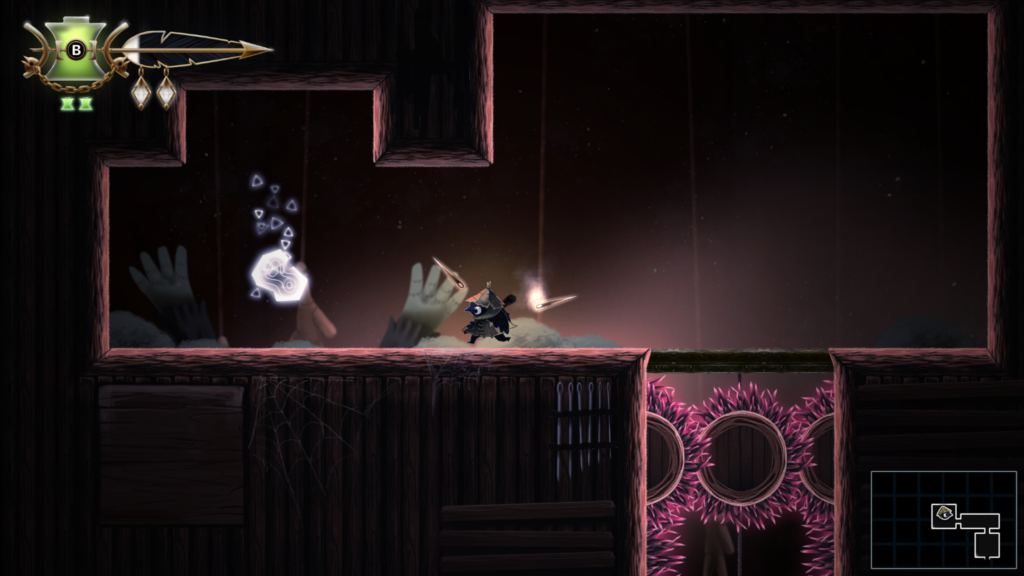
Spirit Fragment (2 / 5)
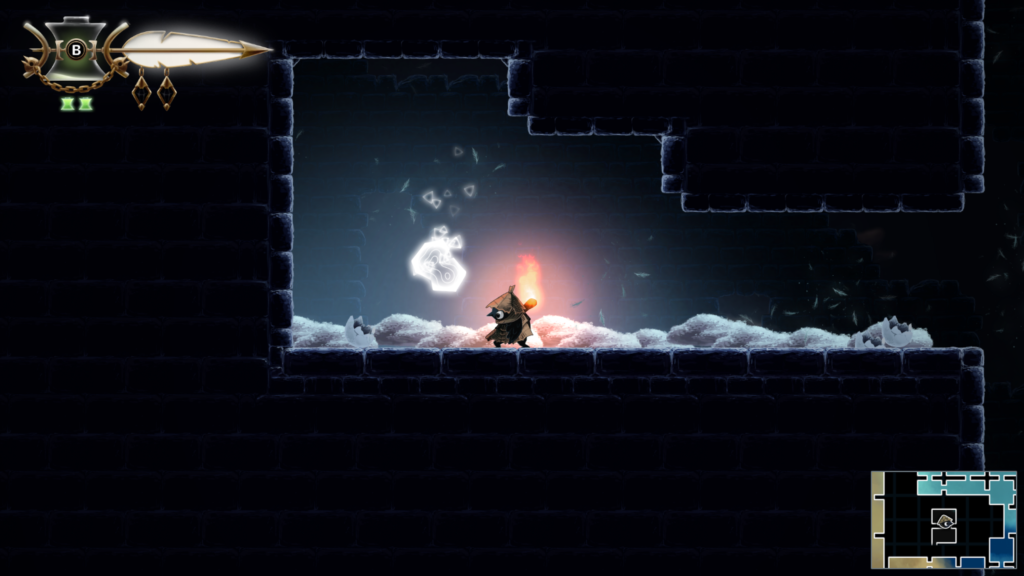
Location: Night Garden (blue area, the first location of the game)
You will have to complete a combat challenge to progress here, fighting several waves of enemies that includes enemy types from across all the areas in the game.
Spirit Fragment (3 / 5)
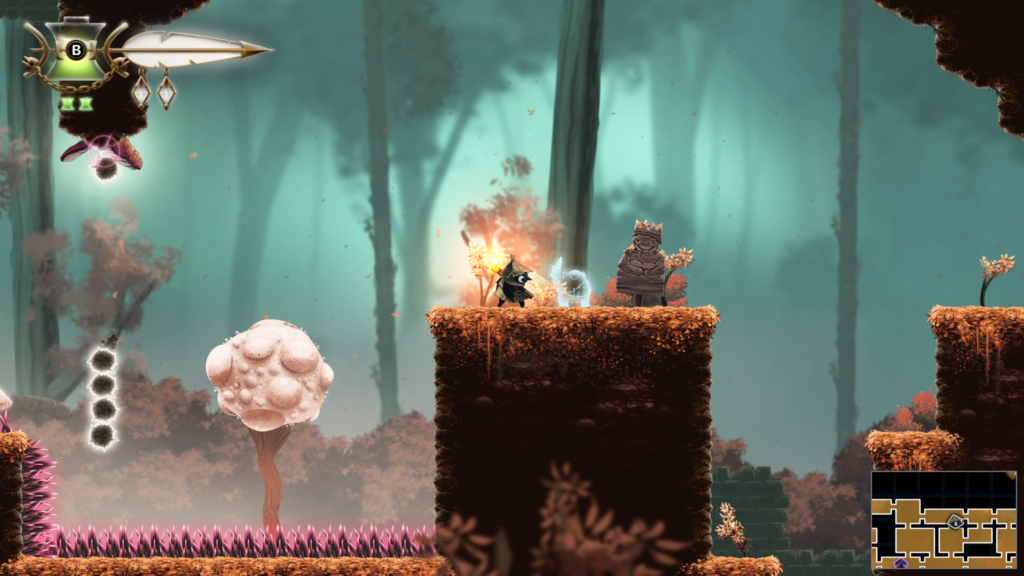
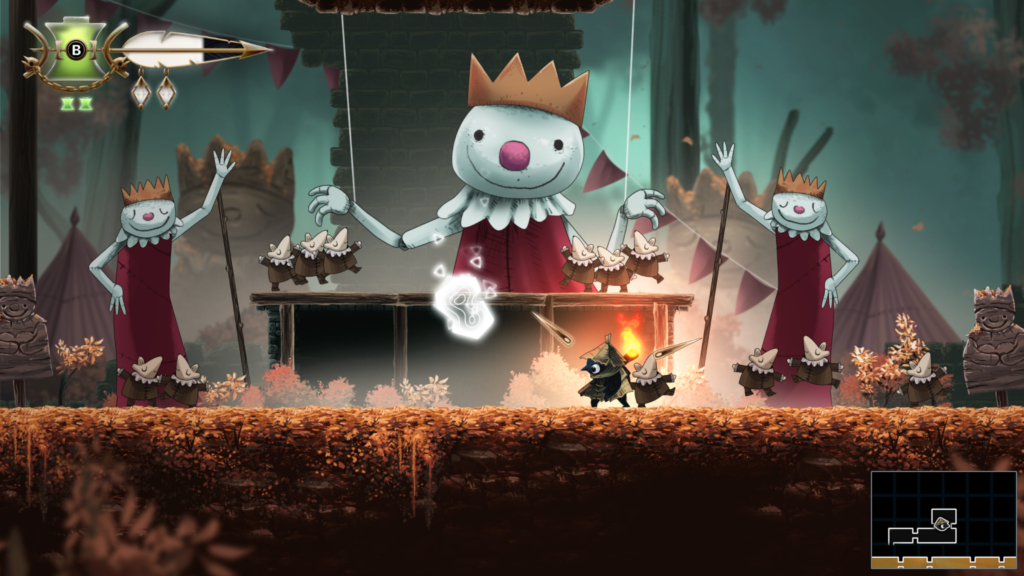
Location: Autumn Forest (orange coloured area)
Spirit Fragment (4 / 5)
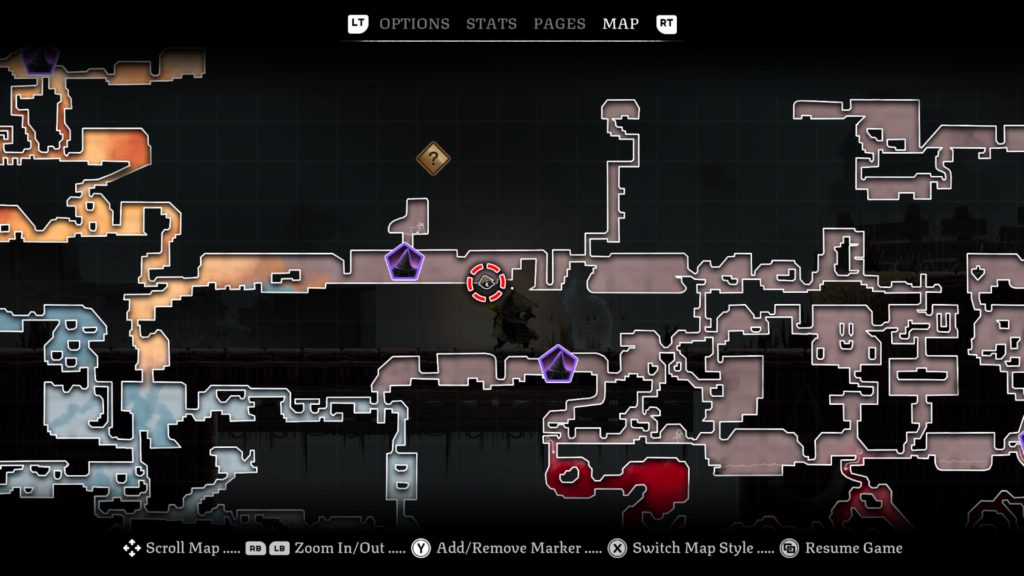
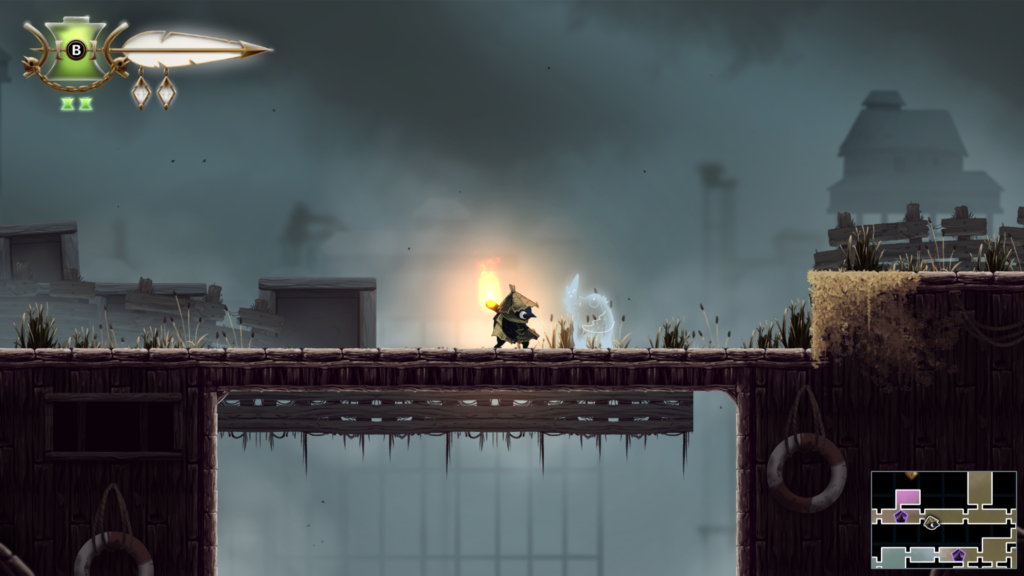
Location: The Docks (grey coloured area)
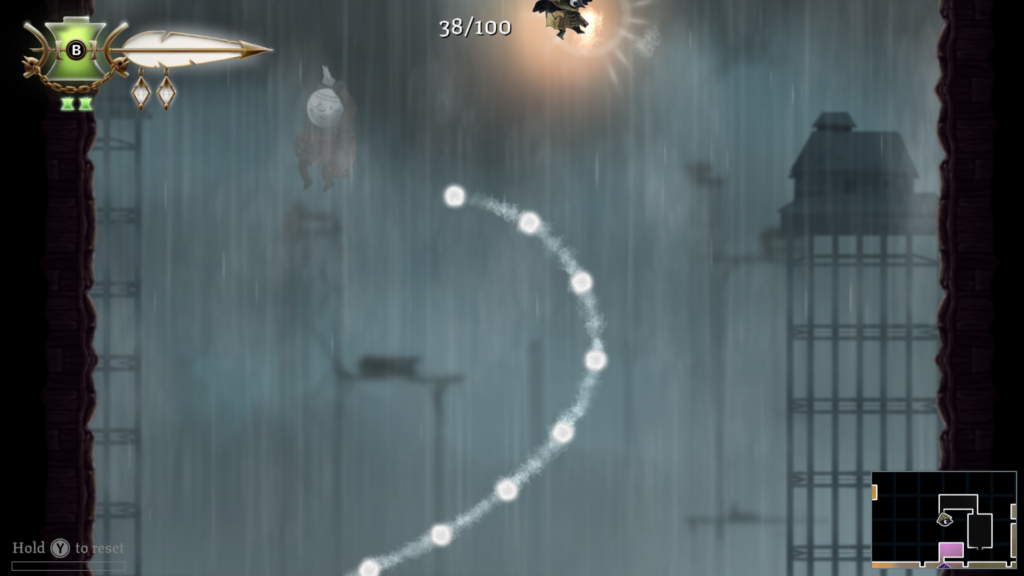
You will have to complete a challenge where you need to collect 100 “shiny things” as you fall. The shiny things will rise from the bottom of the screen. I recommend staying at the bottom as this gives you time to move upwards to grab any you miss.
If you miss one, you can reset by using the instruction on the bottom left of the screen (on Xbox it’s hold Y). You can also reset at the end of the challenge if you fail, I recommend this so you get an idea of what the patterns are.
Spirit Fragment (5 / 5)
Location: Dessicated Castle (red coloured area)
Together At Last
Once you have collected all five Spirit Fragments, the game will indicate your last location on the map, which is where you take the Spirits you have collected through the game. Remember, you will likely need to have returned the 20 spirits before this will unlock, but I can’t confirm that currently.
Head there and enjoy the final cutscene!
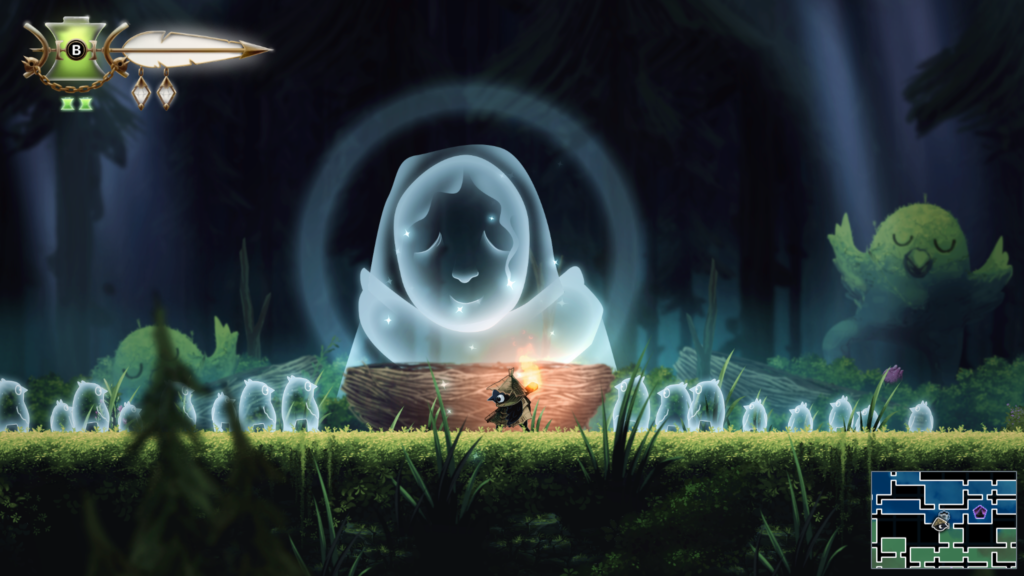
Trinket Slot 93 / 103: Location – Burial Vault (dark brown colour area on the map)
Abilities needed: Soar, Climb, Wall Sling
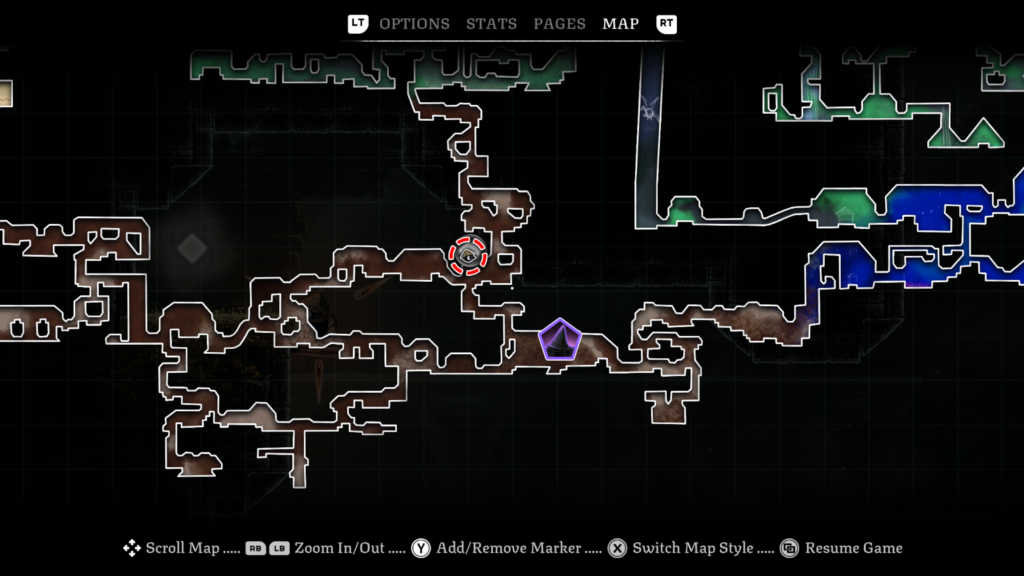
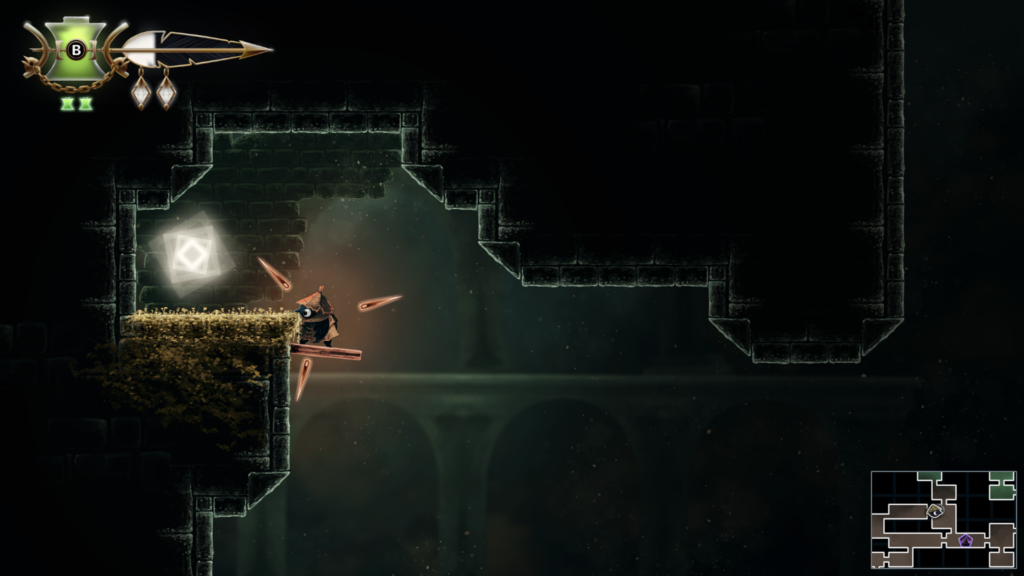
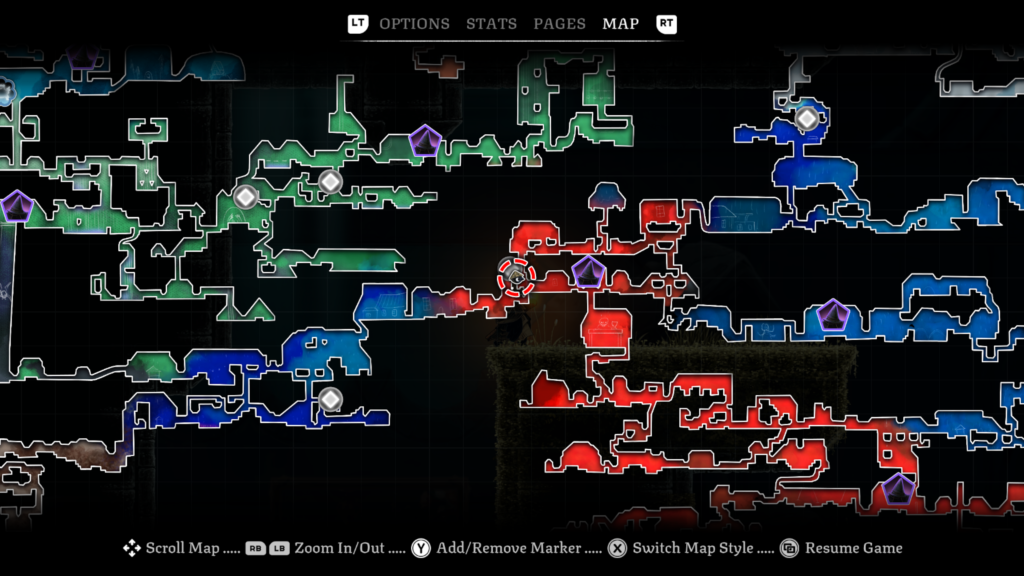
Trinket Slot 94 / 103: Location – Dessicated Castle (red colour area on the map)
Abilities needed: Soar
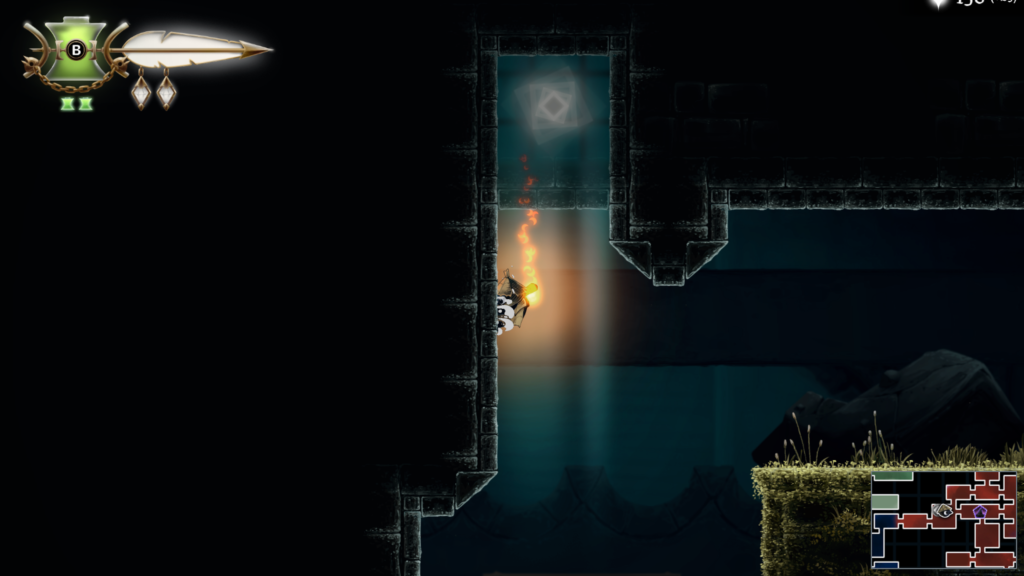
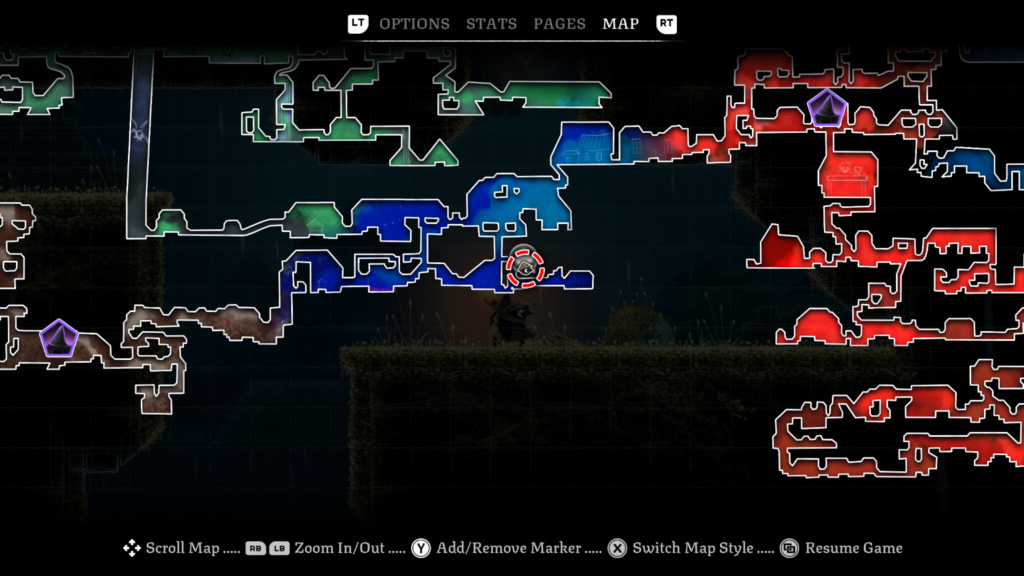
Trinket Slot 95 / 103: Location – Midnight Drench (dark blue colour area on the map)
Abilities needed: Soar
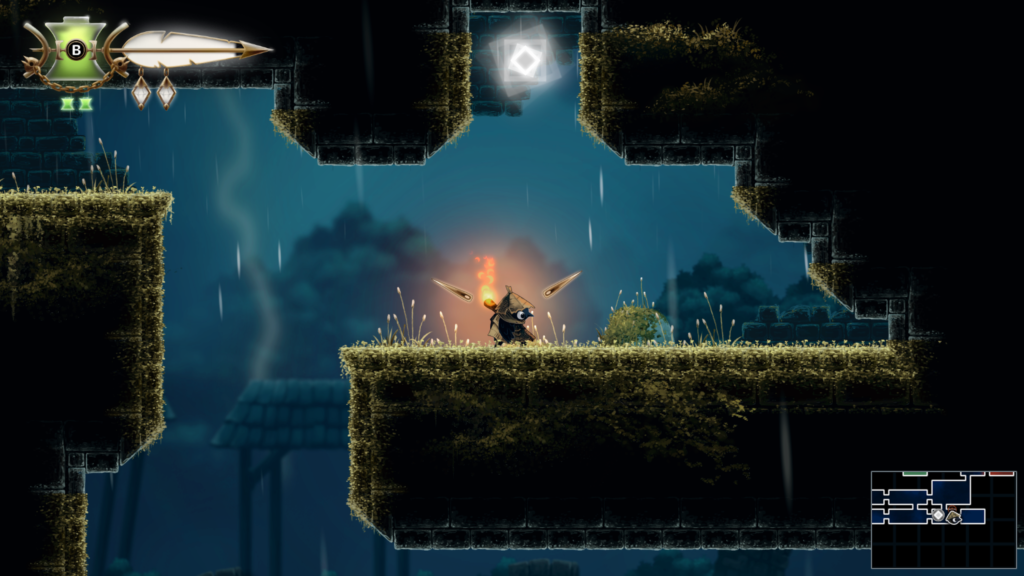
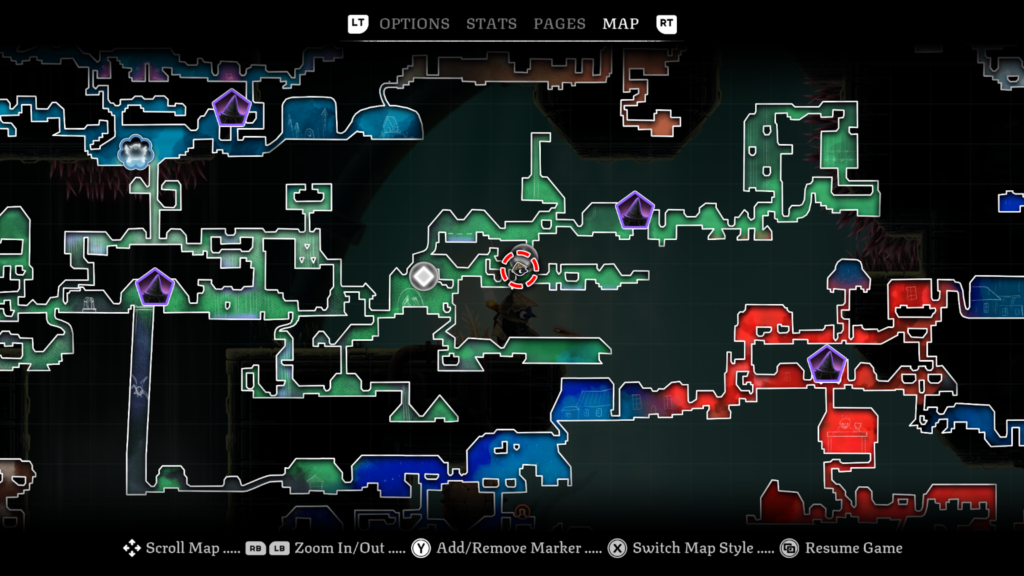
Trinket Slot 96 / 103: Location – The Drains (green colour area on the map)
Abilities needed: Soar
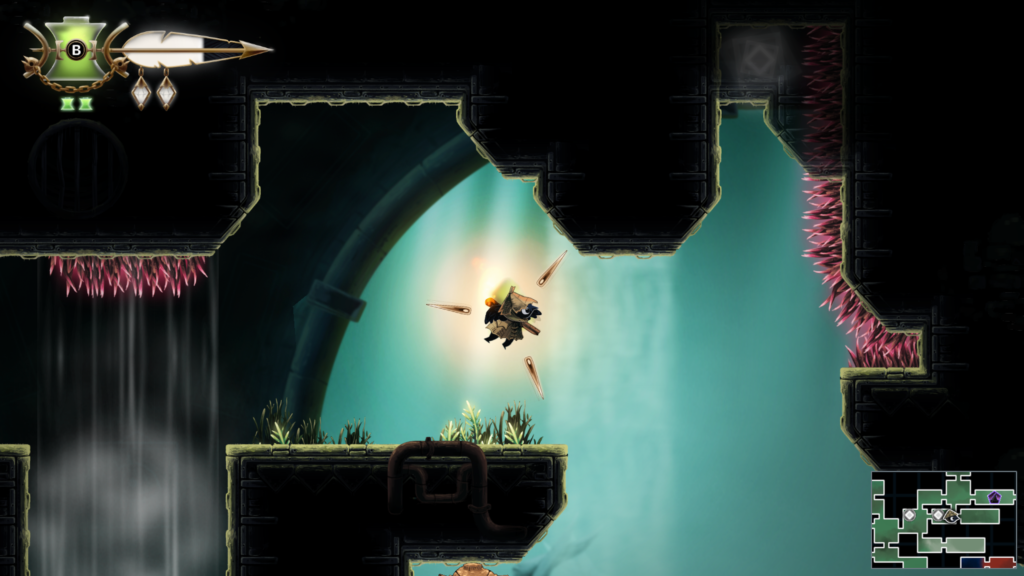
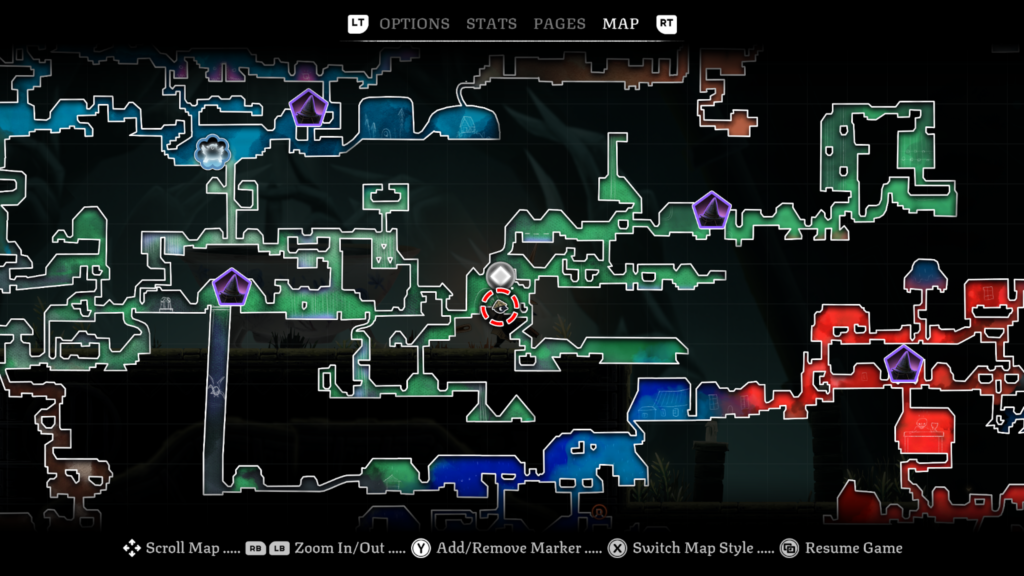
Trinket Slot 97 / 103: Location – The Drains (green colour area on the map)
Abilities needed: Hover
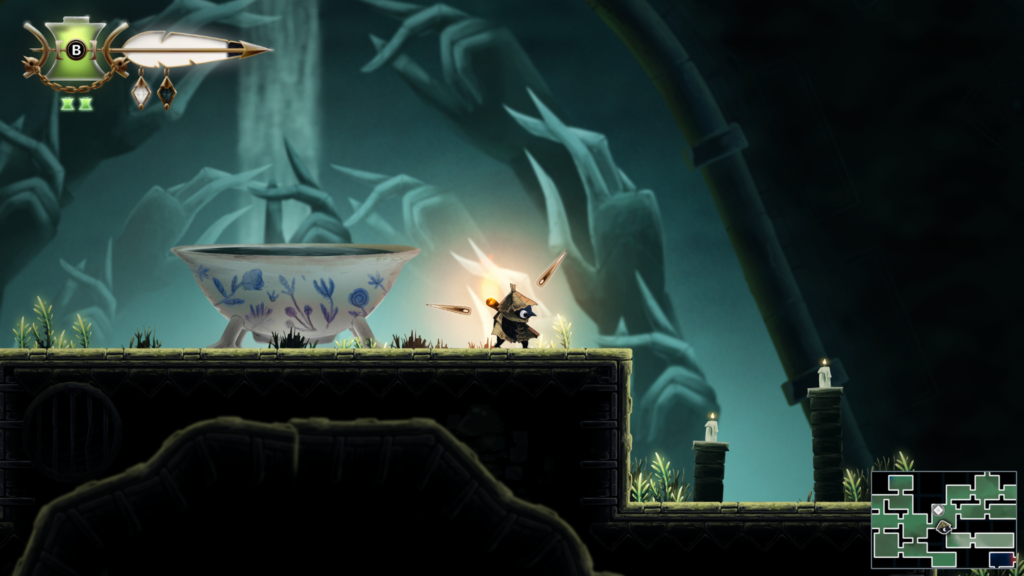
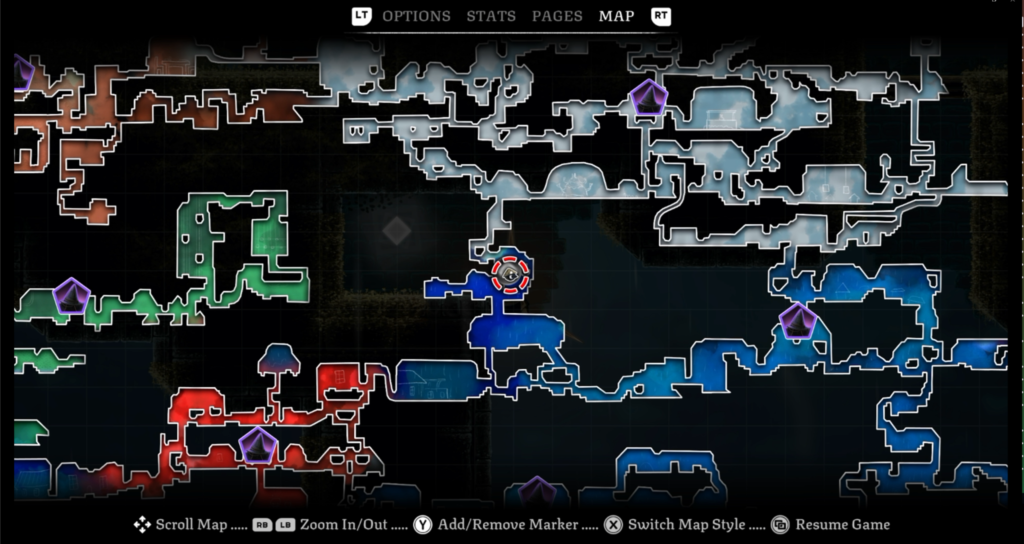
Trinket Slot 98 / 103: Location – Midnight Drench (dark blue colour area on the map)
Abilities needed: Soar
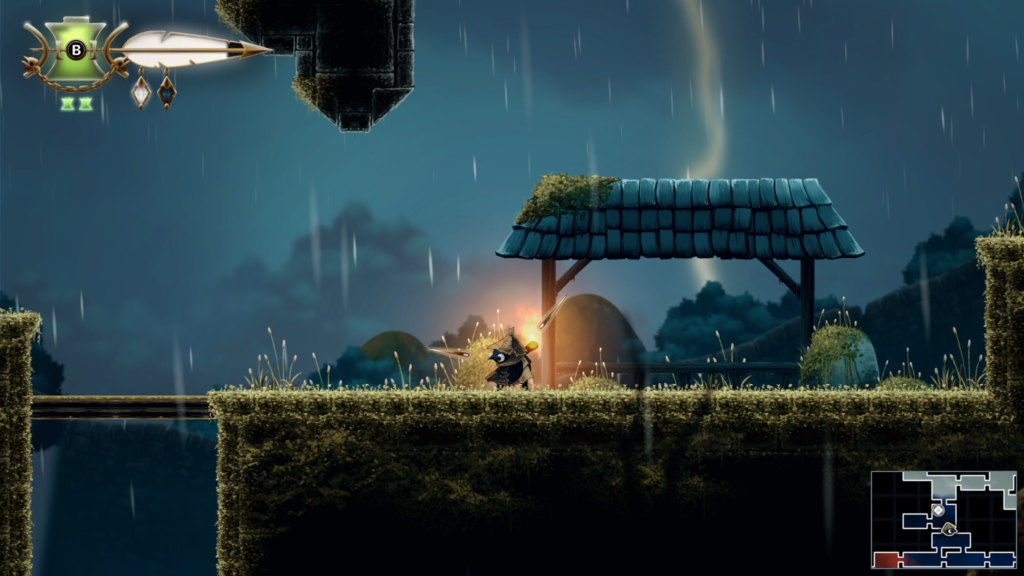
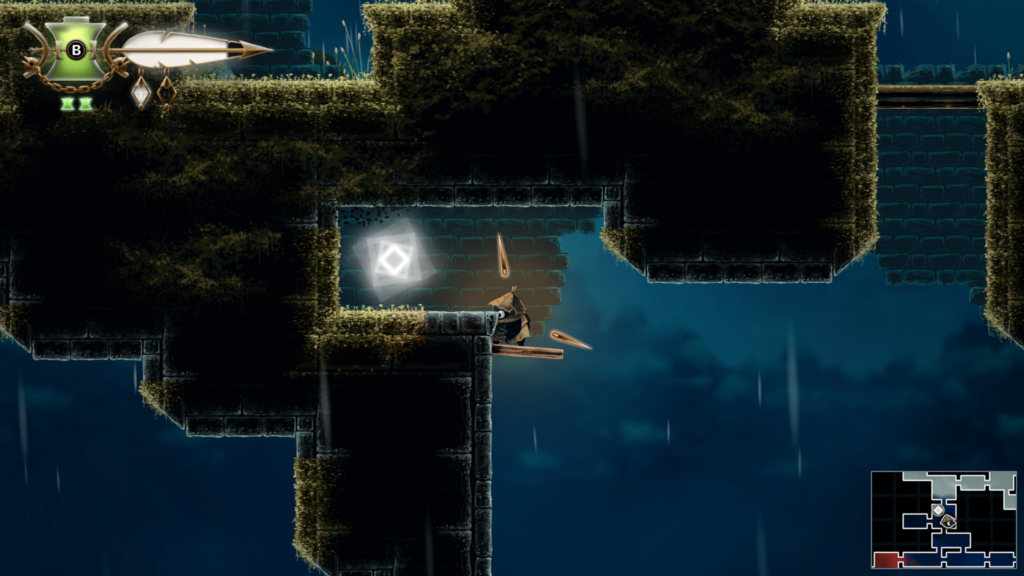
Trinket Slot 99 / 103: Location – Autumn Forest (orange colour area at the top of the map)
Abilities needed: None
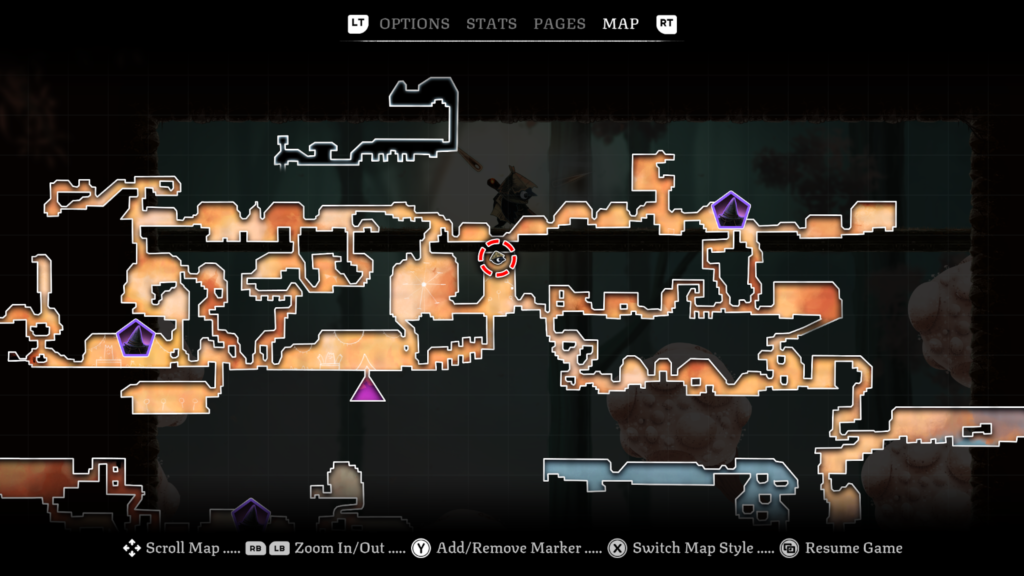
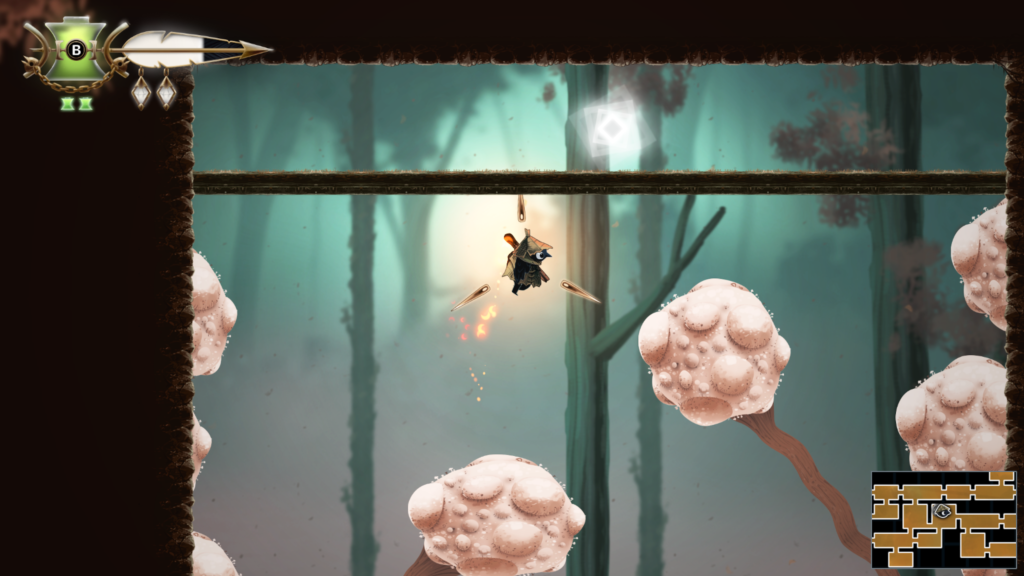
Trinket Slot 100 / 103: Location – Night Garden (mixed blue colour area on the map)
Abilities needed: Soar
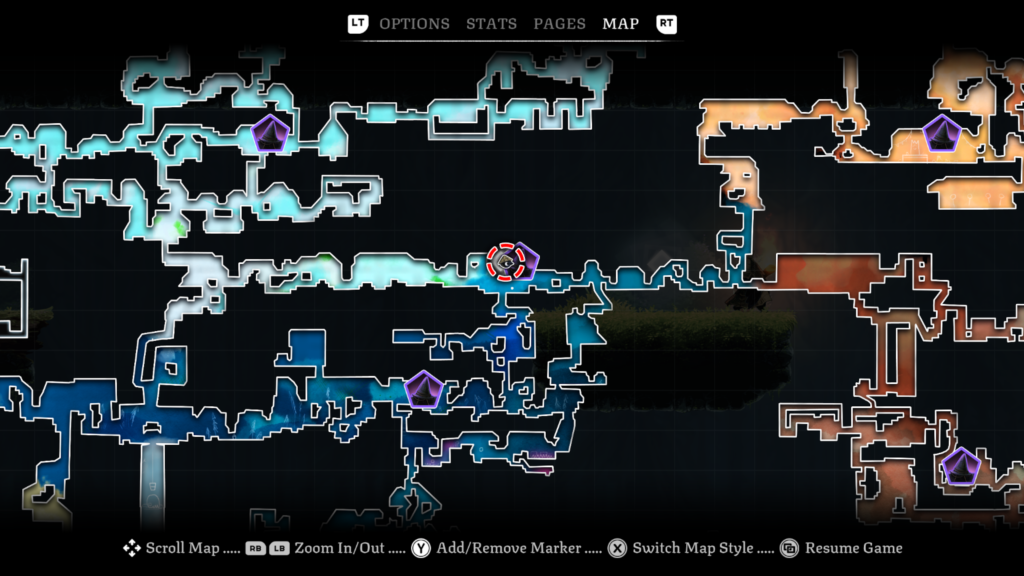
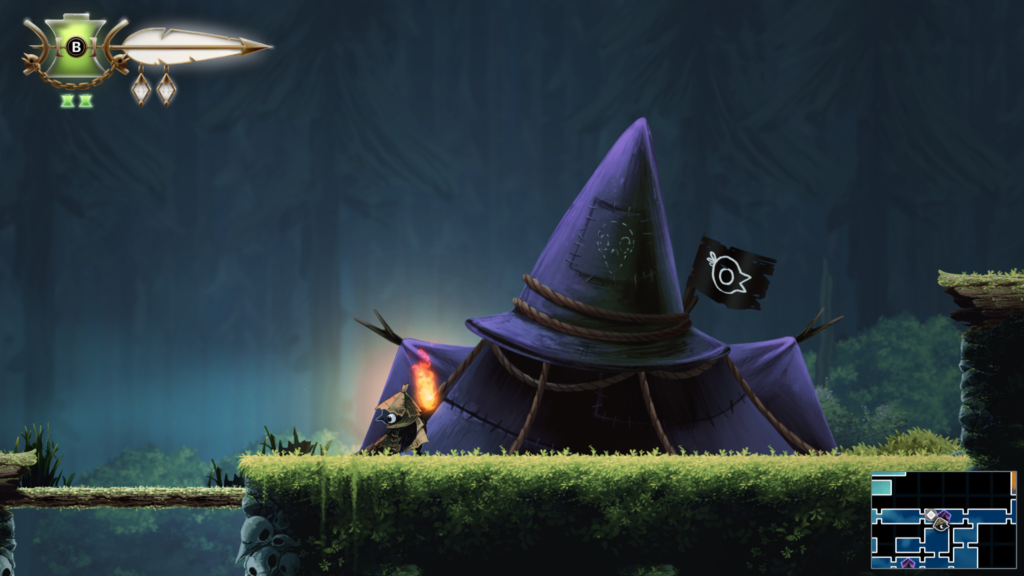
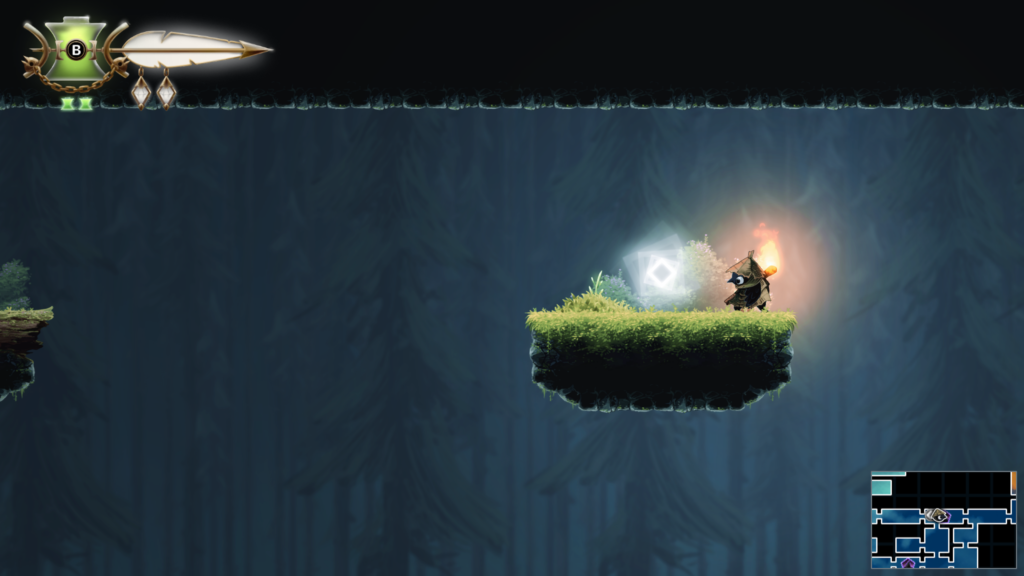
Trinket Slot 101 / 103: Location – Webdrench Inn (purple colour area on the map)
Abilities needed: Soar
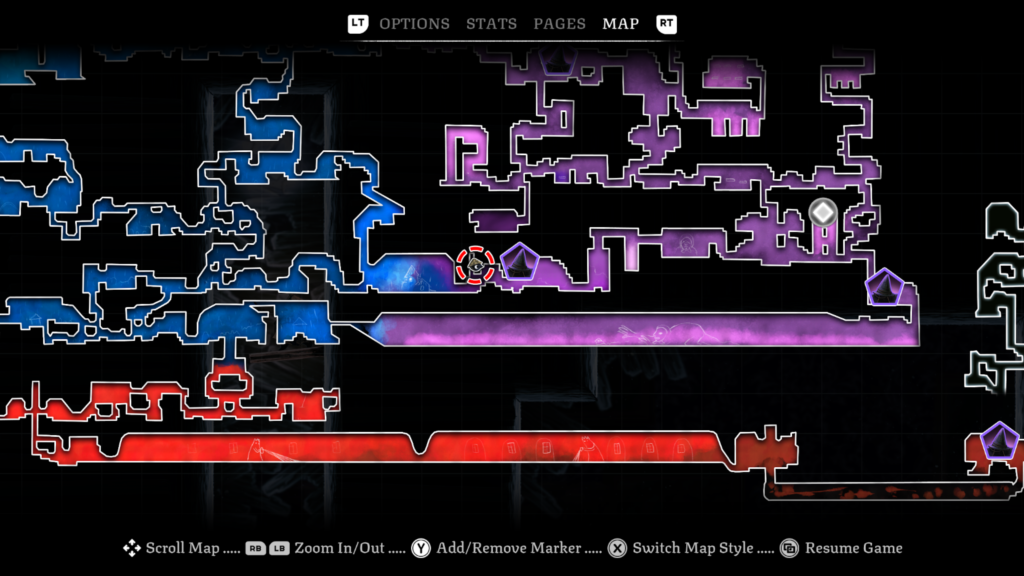
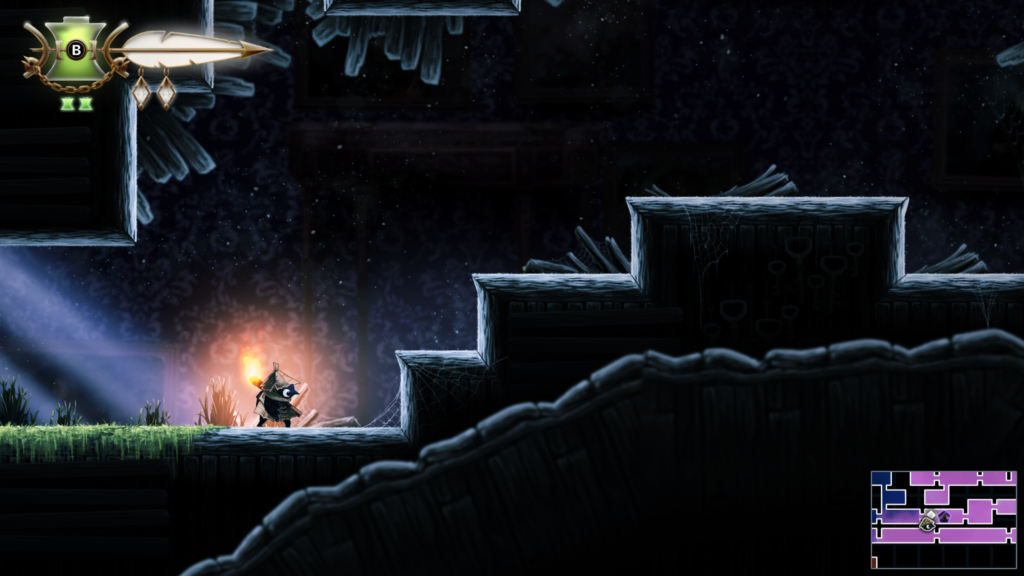
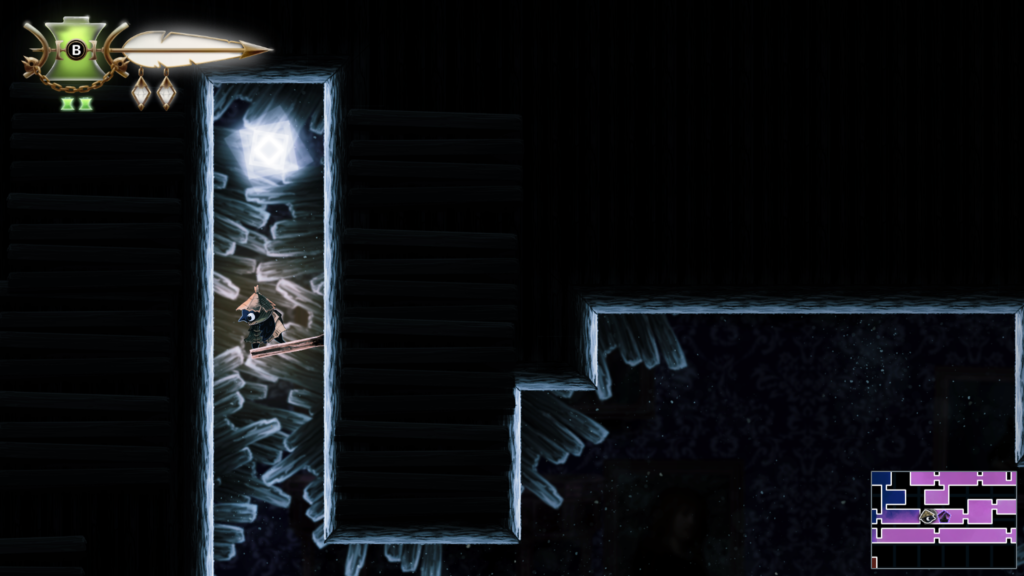
Trinket Slot 102 / 103: Location – Webdrench Inn (purple colour area on the map)
Abilities needed: Soar (if you get here earlier you can of course use the balls of web to get up there).
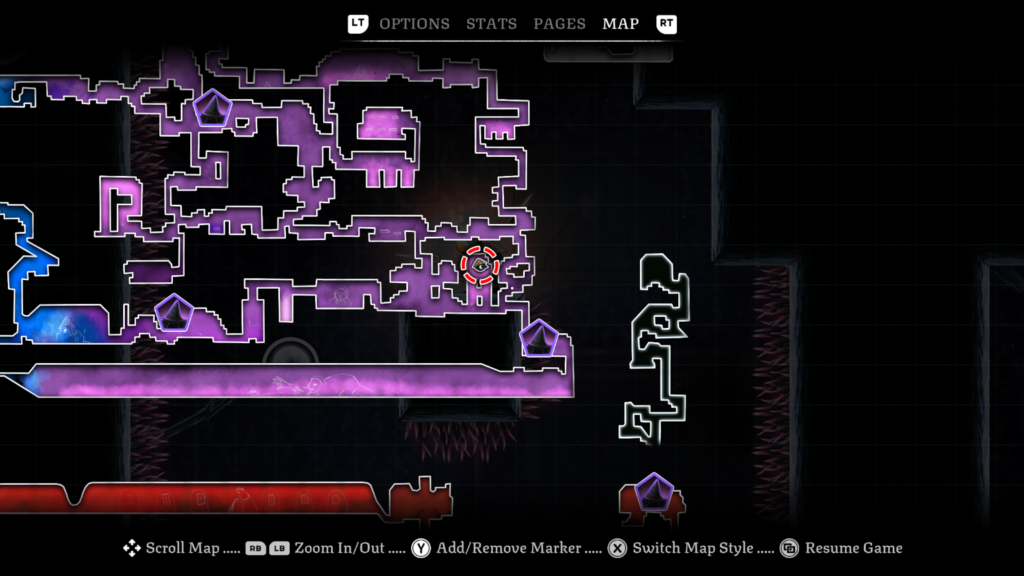
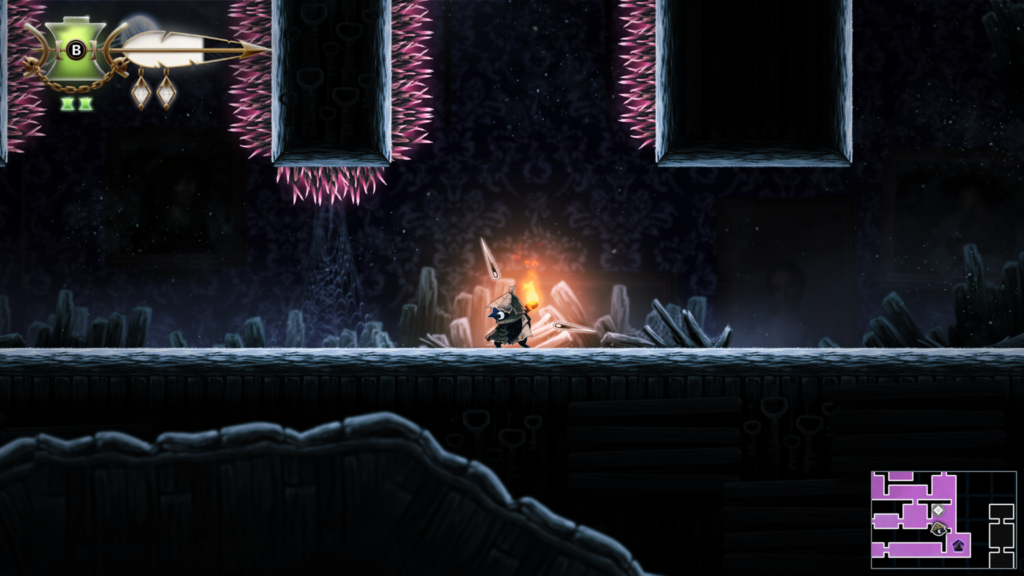
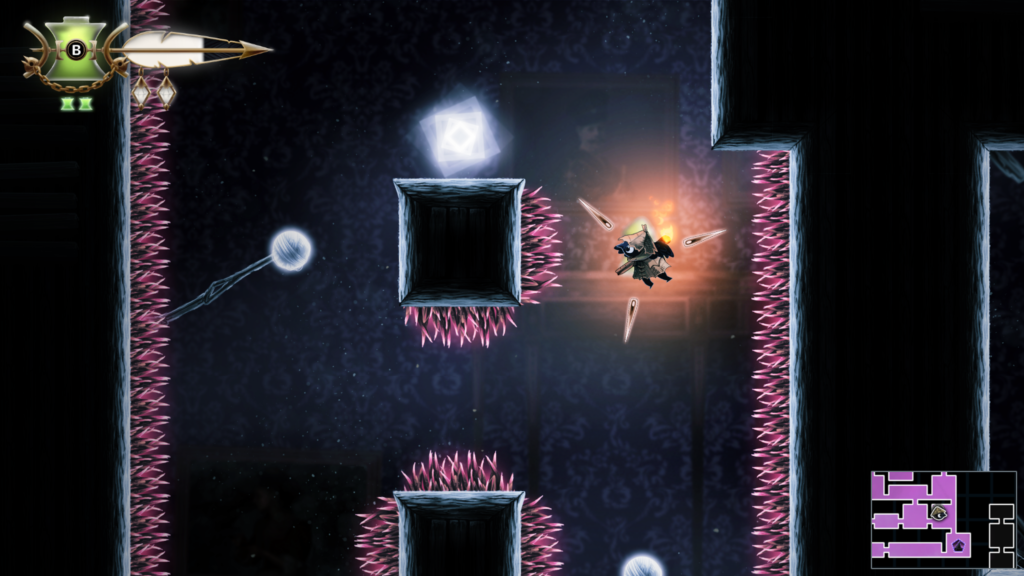
Trinket Slot 103 / 103: Location – The Docks (pale brown colour area on the map)
Abilities needed: Soar
You can grab any remaining trinket slots from Looter’s shop. If you’ve completed the game, they’ll be available at a heavy discount!
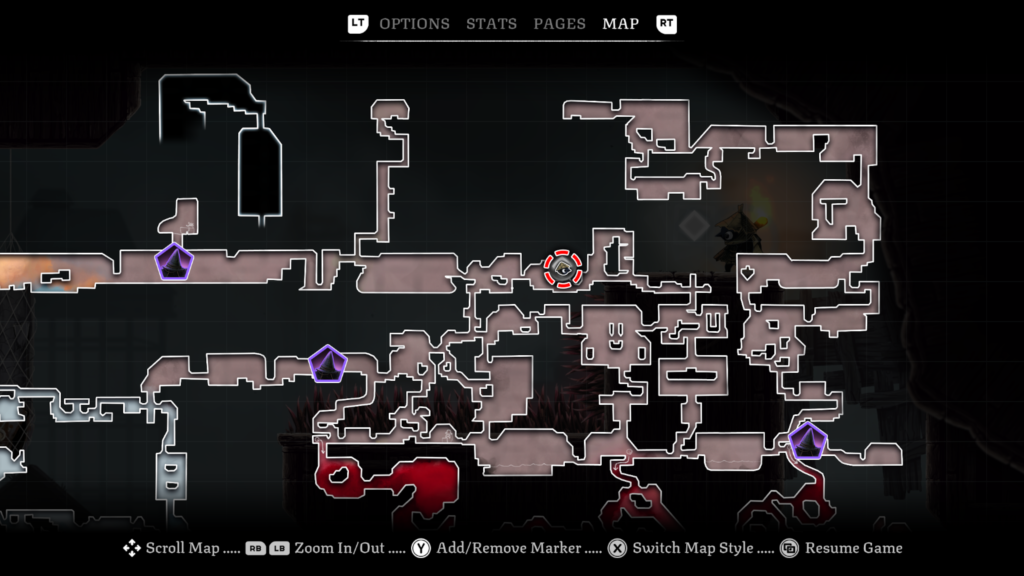
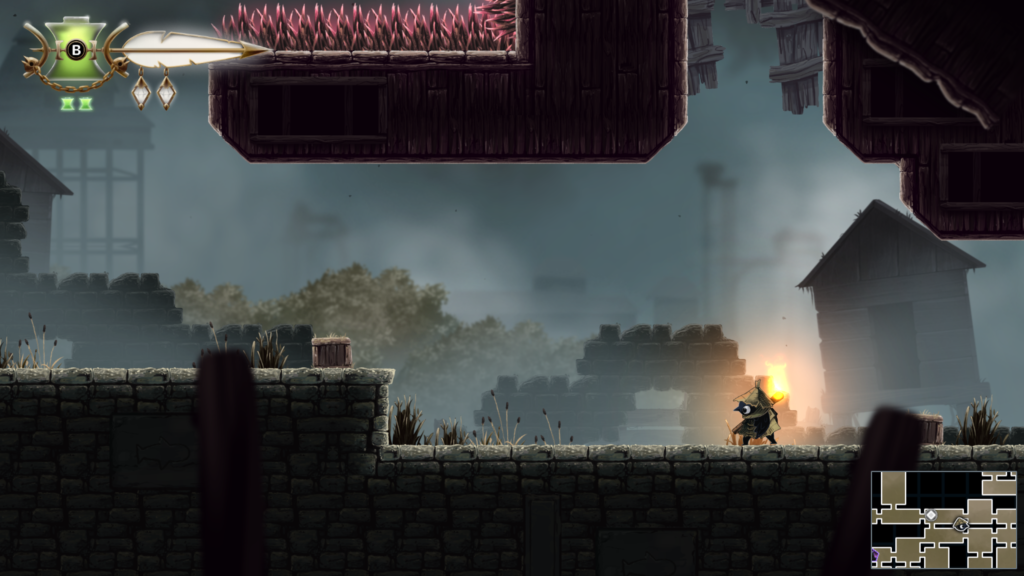
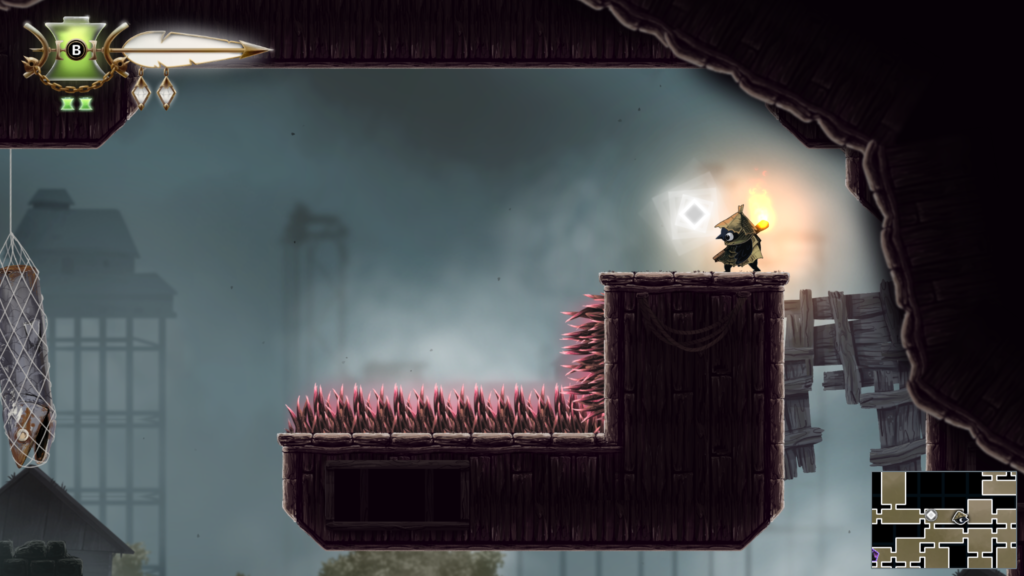
We hope you found this guide helpful. Check out more Well Dweller guides below:
Well Dweller Guides
- Well Dweller Achievement / Trophy List
- Beginner’s Guide
- All Time Trials Guide
- Find the Elevator Parts in The Drains
- Extend Your Flight Time in The Lookout Tower, Feather Locations
- Solve the Orb & Pillar Puzzles guide in the Autumn Forest
- Find the Gate Stones in The Docks
- Find Ilda’s Siblings in the Queen’s Castle
- Unlock the “Bouncing Bottles” achievement / trophy guide
- Unlock the “Snatched Up” achievement / trophy guide
- Unlock the “A Warm File” achievement / trophy guide
- Unlock the “Hide and Seek” achievement / trophy guide
- Unlock the “Taking a Break” achievement / trophy guide
- Unlock “The King’s Cap” achievement / trophy guide
- Unlock the Golden Gates and the “Stitched Up” achievement / trophy guide
- Unlock the “Late Night Guest” achievement / trophy guide
- Unlock the “Together at Last” achievement / trophy guide
Collectibles Guides
- All Trinket Locations (“Hobby Collector”, “Experienced Collector”, and “Expert Collector” achievements / trophies)
- All Spirit Locations (Full Flock and “Halfway There” achievements / trophies)
- All Story Page Location “The Tattered Doll”, “Above the Kingdom” and the “First-Born Daughter” achievements / trophies)
- All Trinket Slot Locations (“10 Slots” and “Fifty Slots” achievements / trophies).
Boss Fights
- The Groundskeeper – Night Garden
- The Swarm – The Bog
- The Lady of the Drains – The Drains
- Lida the Terrible – Graven Valley
- Shrine of the Seven Sons – Midnight Drench
- Starsinger – The Lookout Tower
- Forest King – Autumn Forest
- Creature from the Deep – The Docks
- The Colony – The Depths
- Dollmaker’s Mirror – Dollmaker’s House
- Gravedigger – Burial Vault
- Silver Doll – Queen’s Castle
- The Queen – Queen’s Castle