
In this guide we will show you how to find all of the Skulls in Halo: Campaign Evolved. There are 42 total Skulls, with 39 hidden across the game, three per mission. Some of the Skulls are very well hidden and require some intense exploration to locate without the use of a guide.
Nearly all Skulls are available on any difficulty and you are able to make use of starting at advanced Rally Points in the mission. If any Skull requires a higher difficulty it will be stated below. Loading into a Rally Point, collecting the Skull then backing out to the main menu will not void the unlock.
So, lets get to it.
Halo Campaign Evolved – All Skull Locations
There are three Skulls in the game that are made available to you without finding them. These are:
- Adaptation
- Reload
- Armistice
The rest of the Skulls can be found in each of the game’s missions. Here’s where they are all located:
Pillar of Autumn – 3 Skulls
1/3 Speed Limit Skull
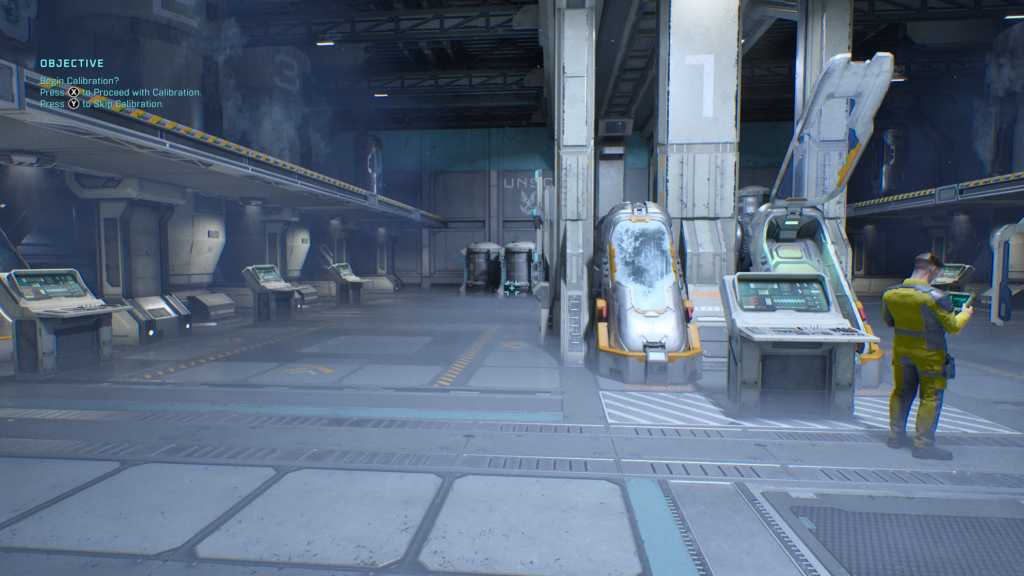
At the very start of the game, turn around and sprint jump on to the tankers at the back of the room:
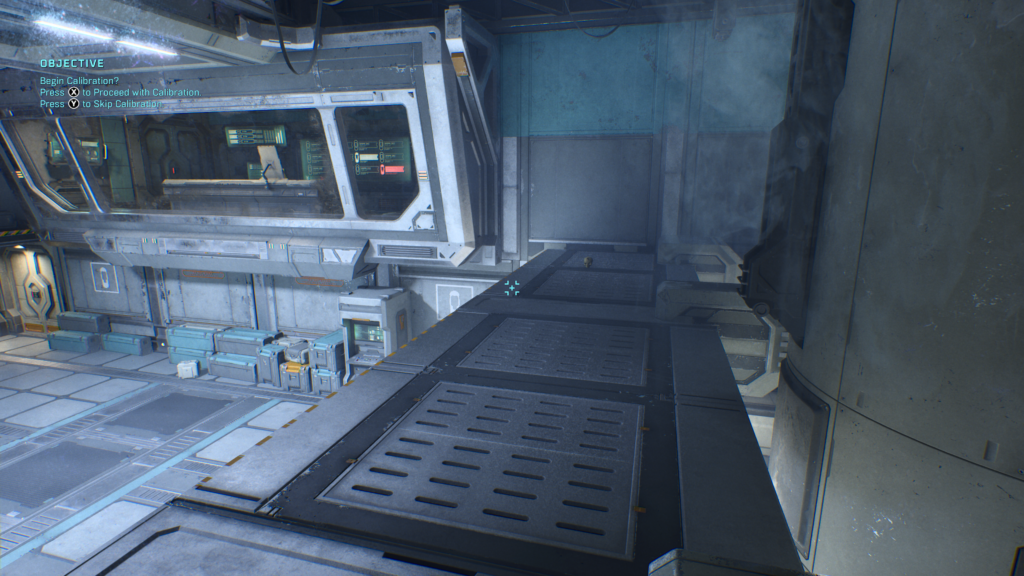
Turn around and walk down the walkway to find Skull #1:
2/3 Magnified Skull
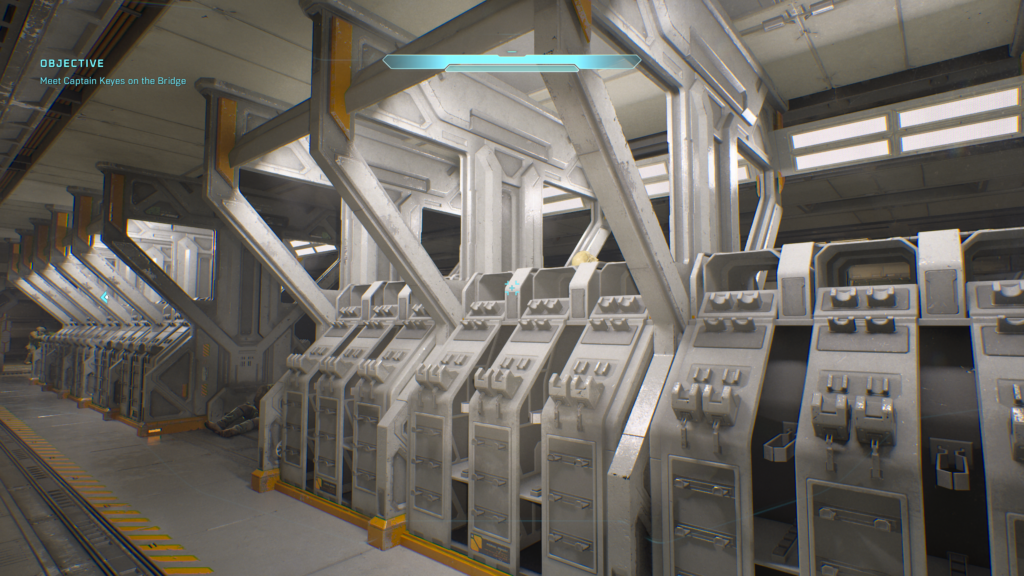
Very soon after, on your way to meet Keyes whilst you’re disarmed, you’ll pass some marines taking out Elites in the corridors. You’ll quickly arrive at room BO2L:
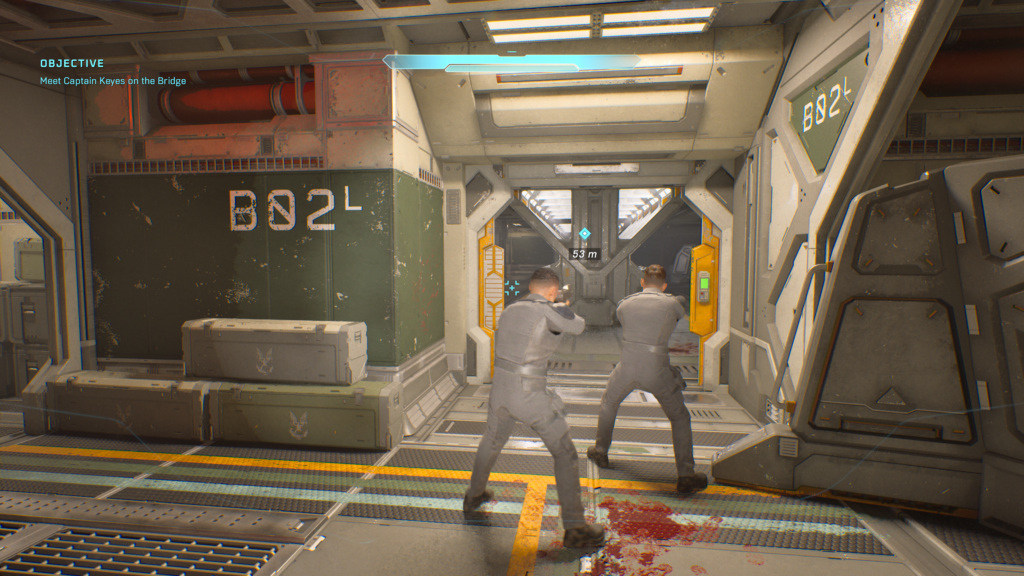
The Skull is easily located here on top of this object in the centre of the room:
3/3 Perspective Skull
Very quickly after the Magnified Skull, you’ll come to the section where you talk to Keyes. After the cutscene, turn back and head into the room and behind Keyes:
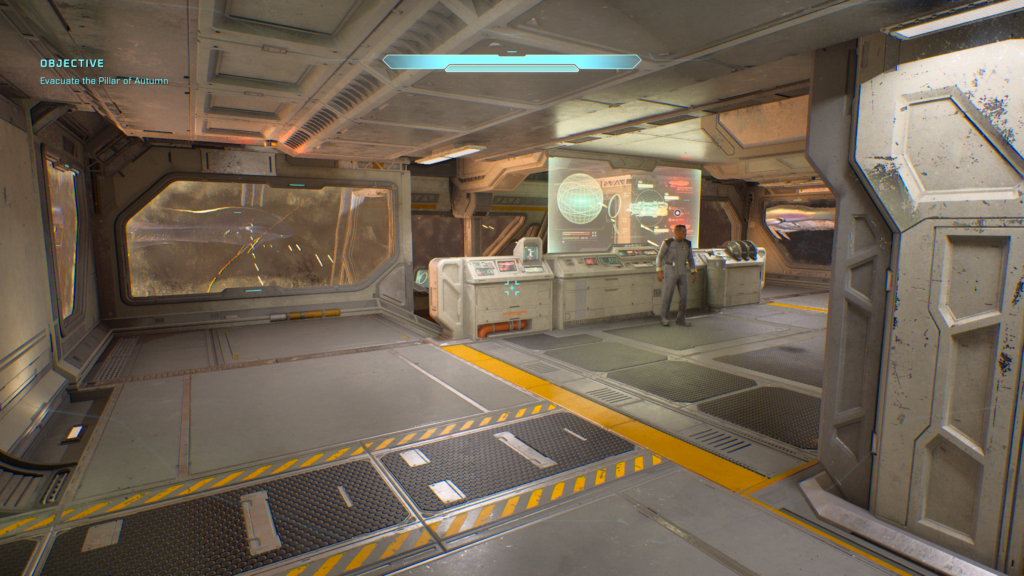
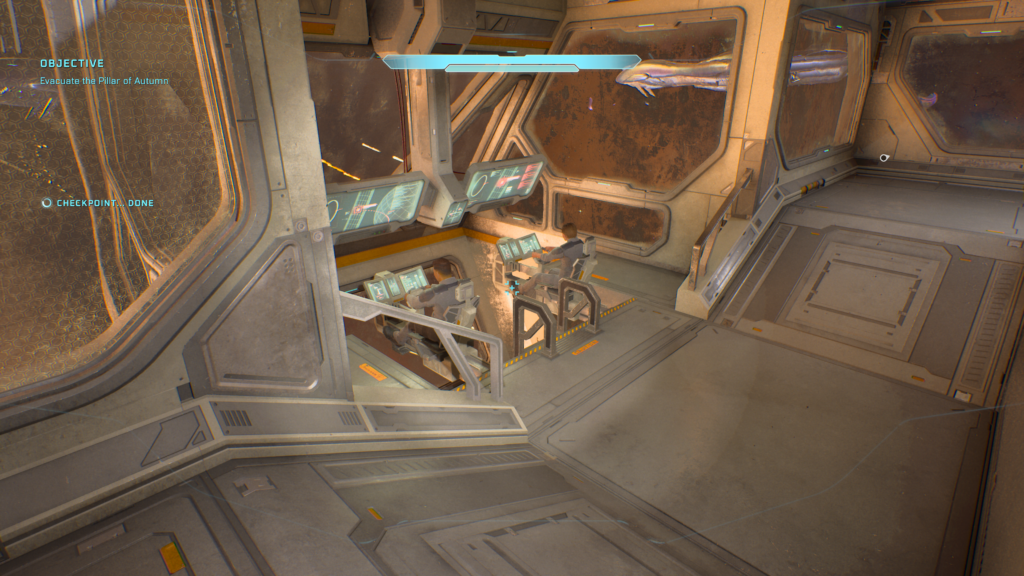
Head to the Pillar of Autumn pilots and drop down the ladder next to them:
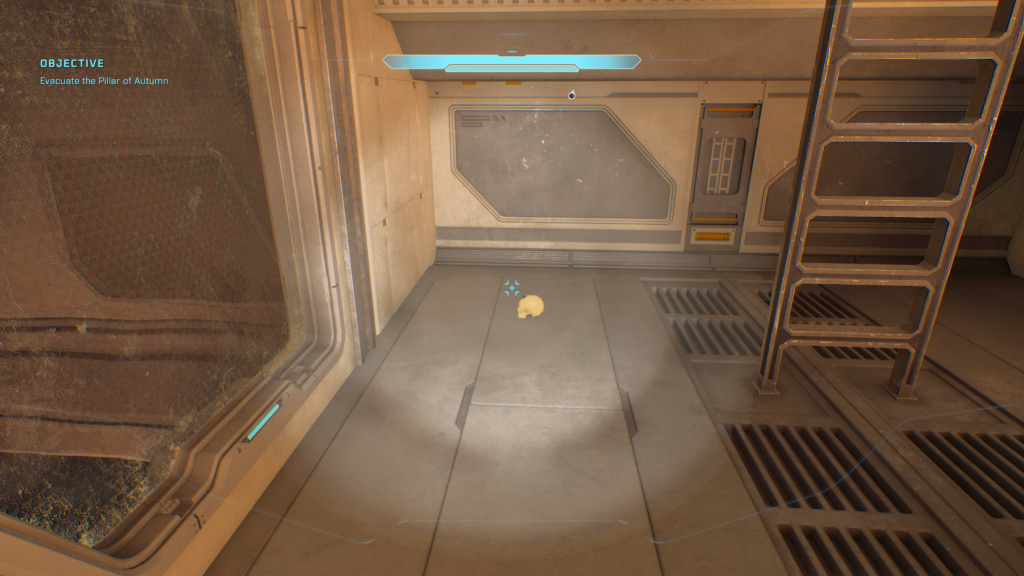
Turn around to find the Perspective Skull:
Halo – 3 Skulls
You can tackle the Skulls on this mission in any order. Just note that when you save all groups of marines, the mission will end.
1/3 Grunt Funeral Skull
Important: You need a grenade for this one.
After reaching the open area where you must save three sets of marines, one of the sections you’ll come to is here where you have to head into the bunker. After clearing out the Covenant and the marines leave on the dropship, head towards the high point of the structure:
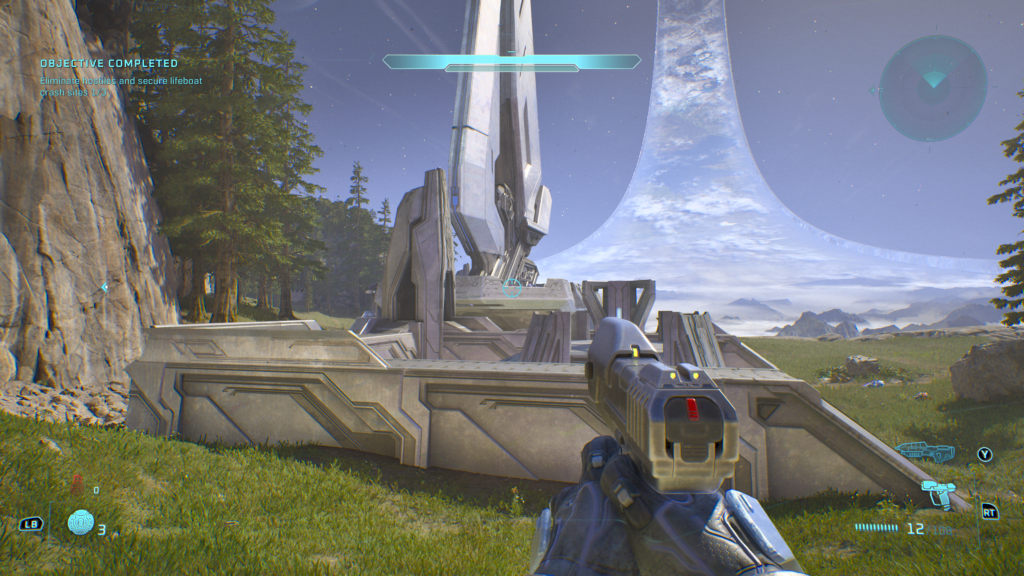
The Skull is at the highest point, and simply jumping up isn’t an option:
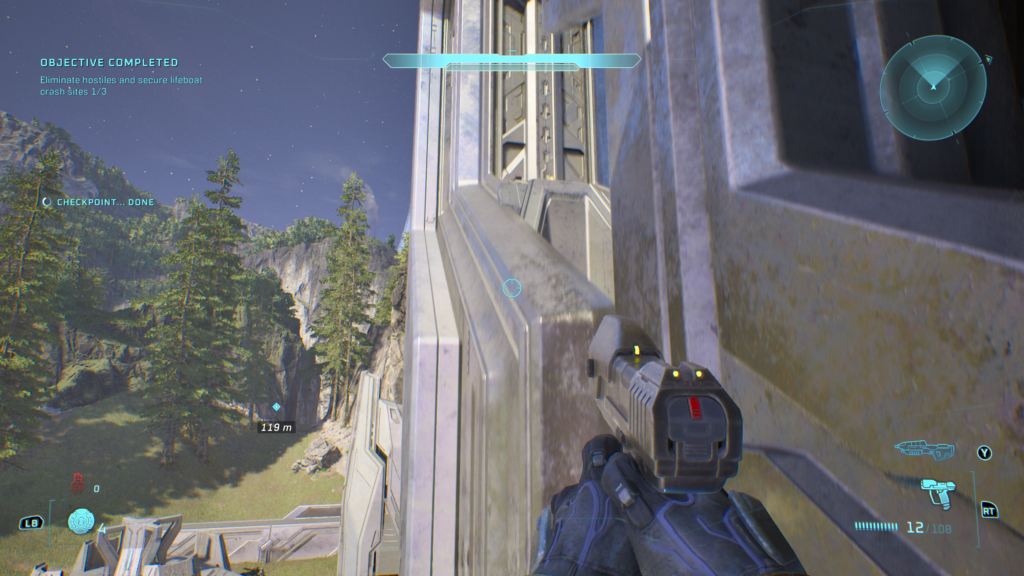
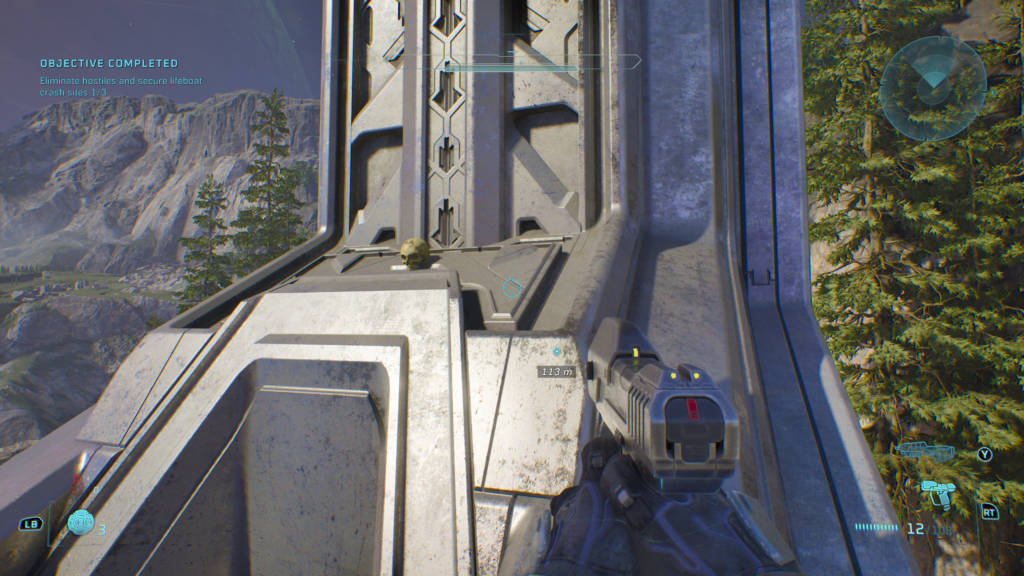
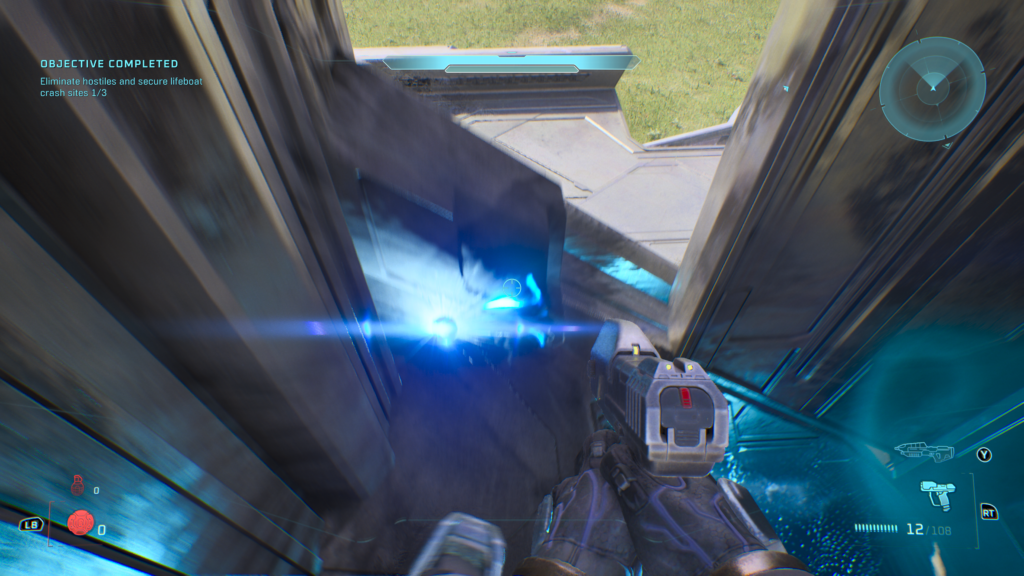
Instead, throw a grenade here and time your jump to be catapulted up to the Grunt Funeral Skull – just be sure not make it your own funeral in the process:
2/3 Give & Take Skull
You’ll come to save another group of marines at this structure, the marines will all be camped up high when you get there. Take out the enemies, evac the Marines and head to this location opposite from where the marines were originally located:
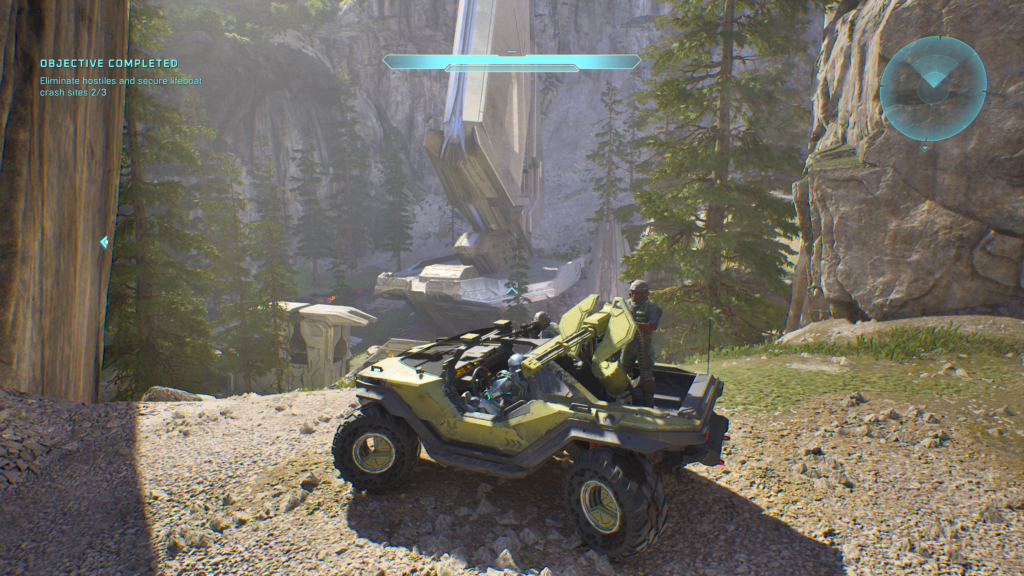
From the above, do a 360 to face this view. Follow the stream to the right into a cave:
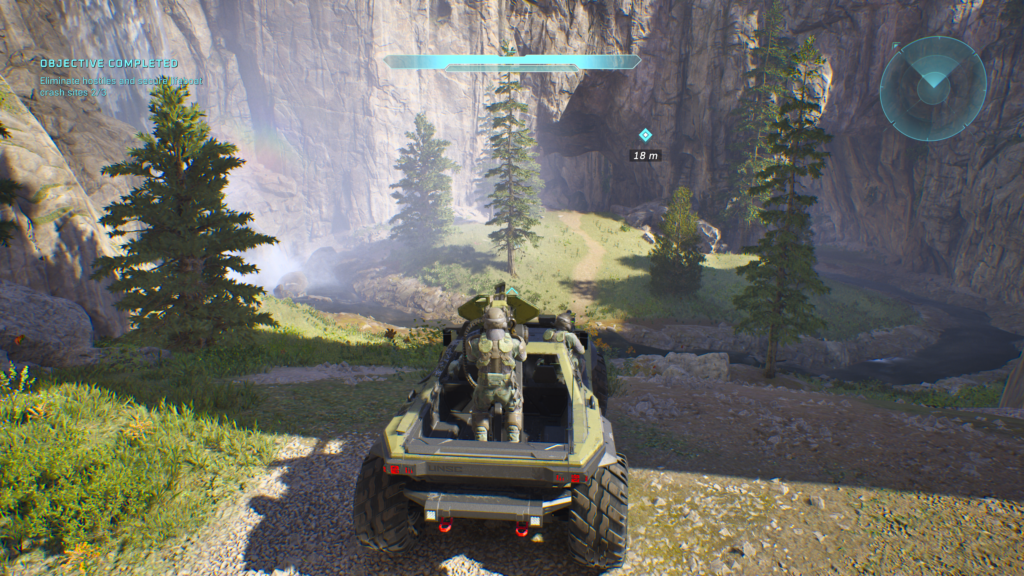
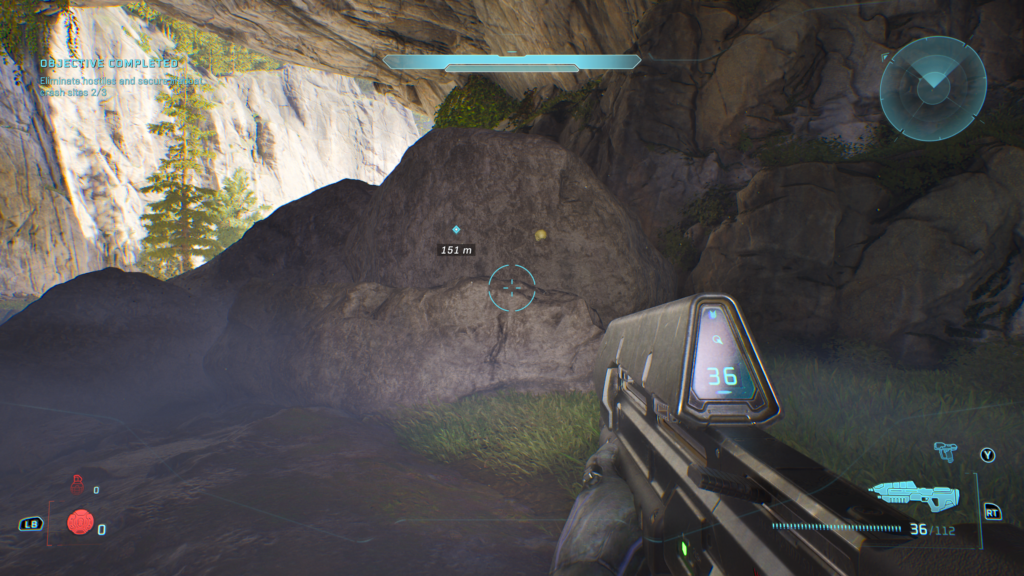
The skull is floating in the air just here:
3/3 The Floor is Lava
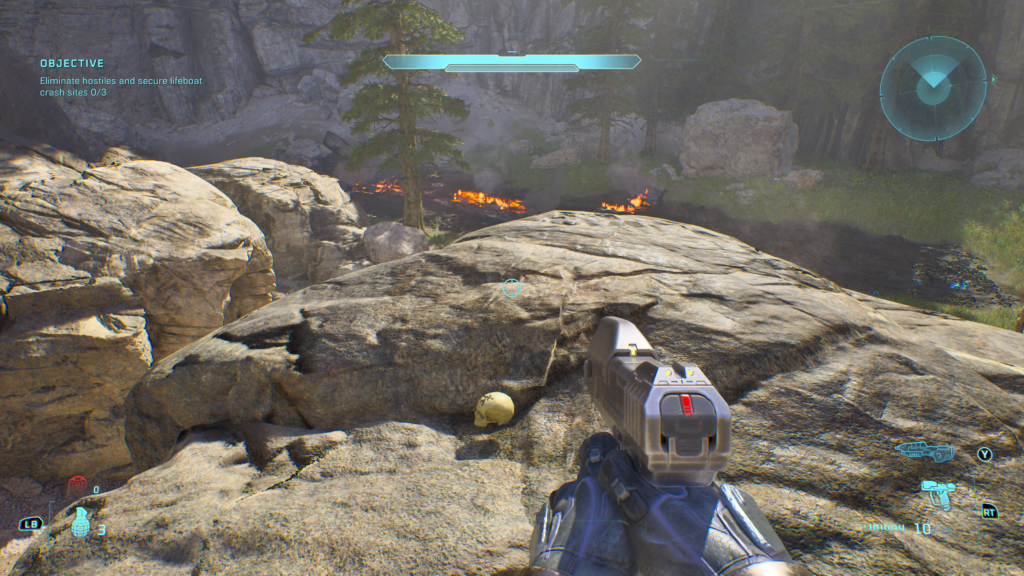
At the third location where you save Marines, you’ll see plenty of Jackals on the rocks sniping. Using this image as a reference point, you can just make out the Skull on the rock in front of you. You need to head into the distance and climb up onto the grass topped rock next to it:
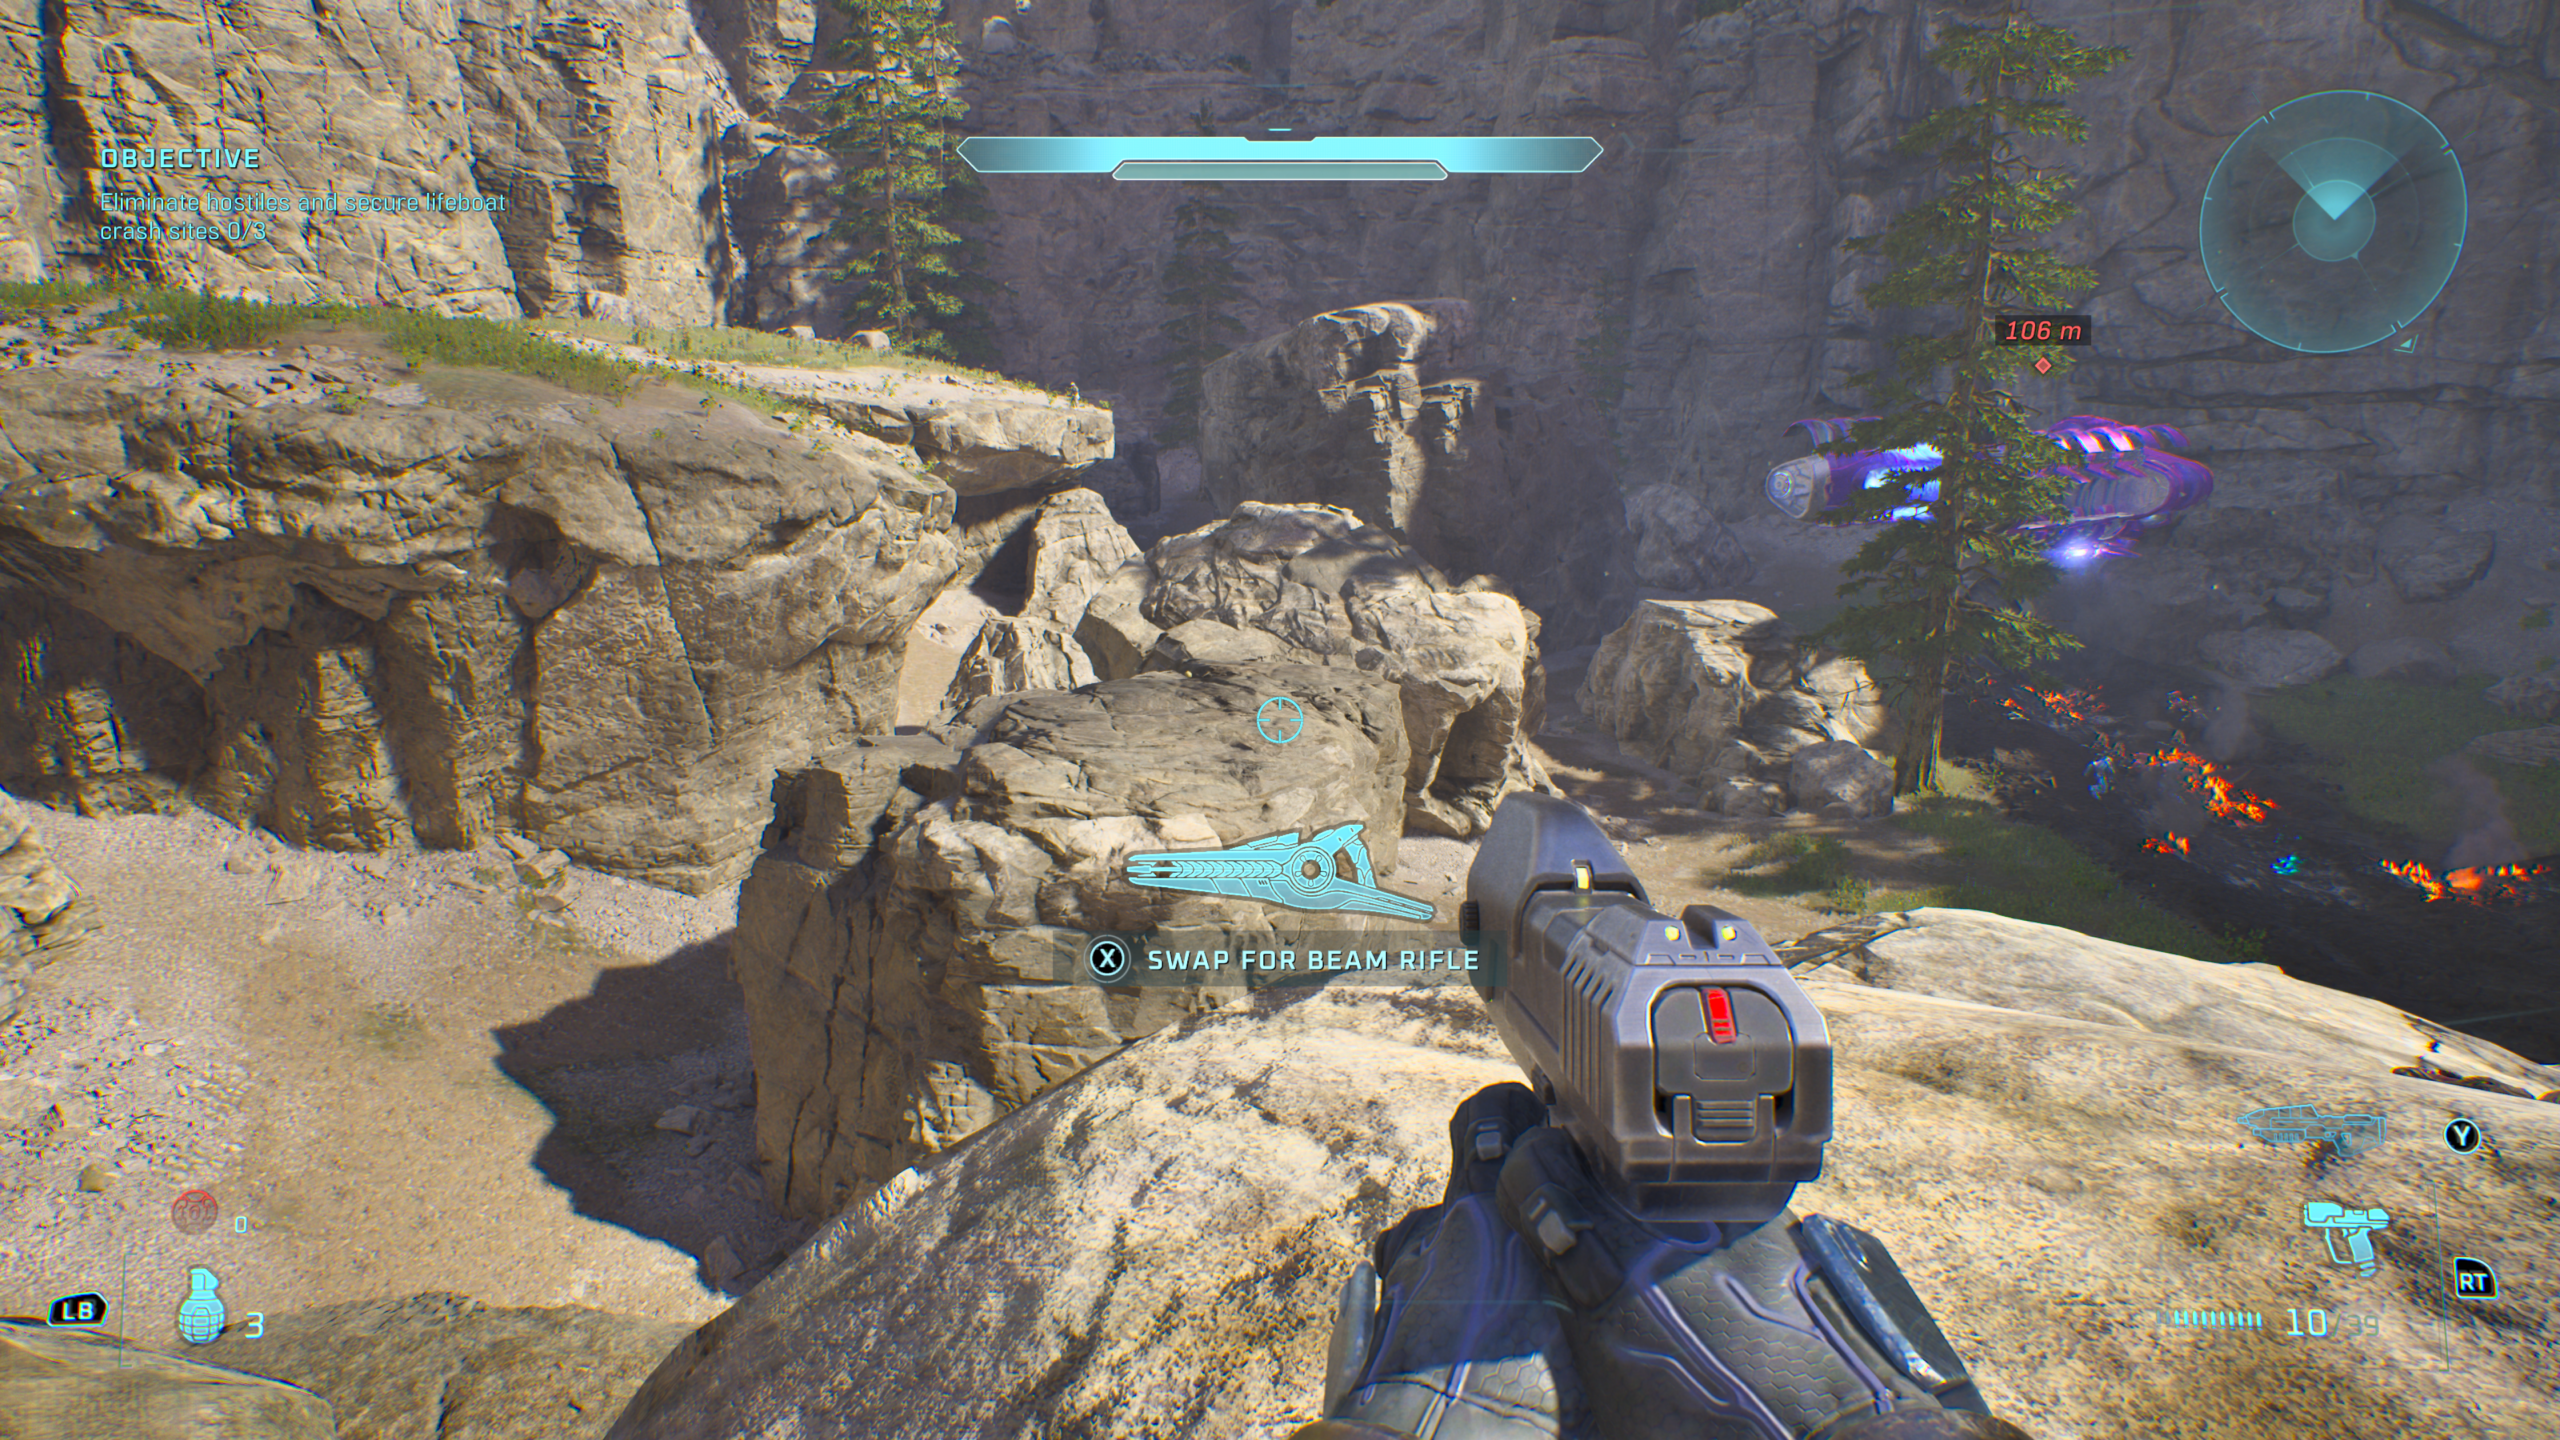
From the grass topped rock, simply jump down to grab your Skull:
The Truth and Reconciliation – 3 Skulls
1/3 Iron Skull
When you reach the area with the gravity lift that takes you onto the Covenant ship, take out all enemies but avoid getting in the lift. Instead, head to this location on the edge of the map:
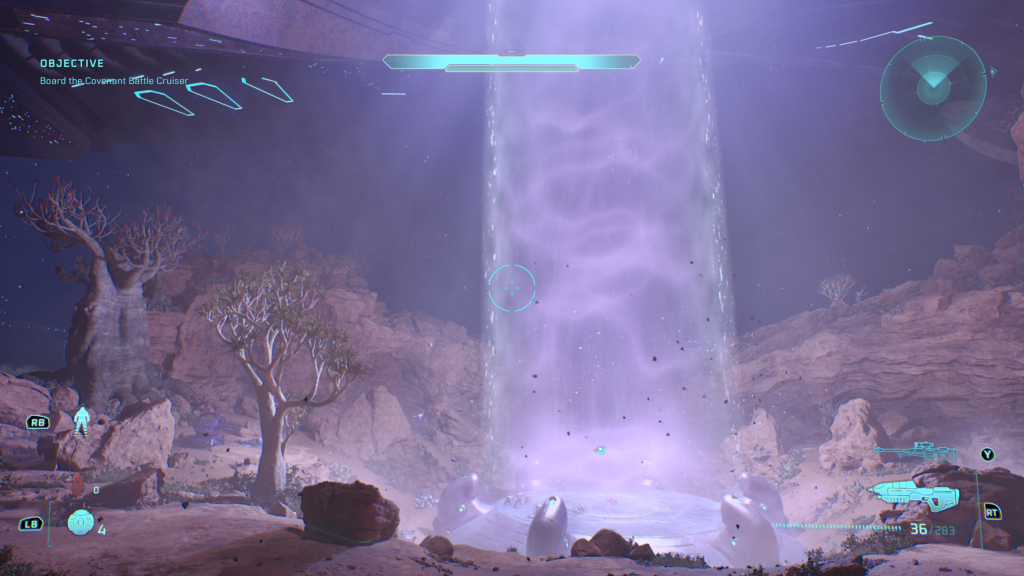
From here, spin around to face the edge of the map, right by some pink trees:
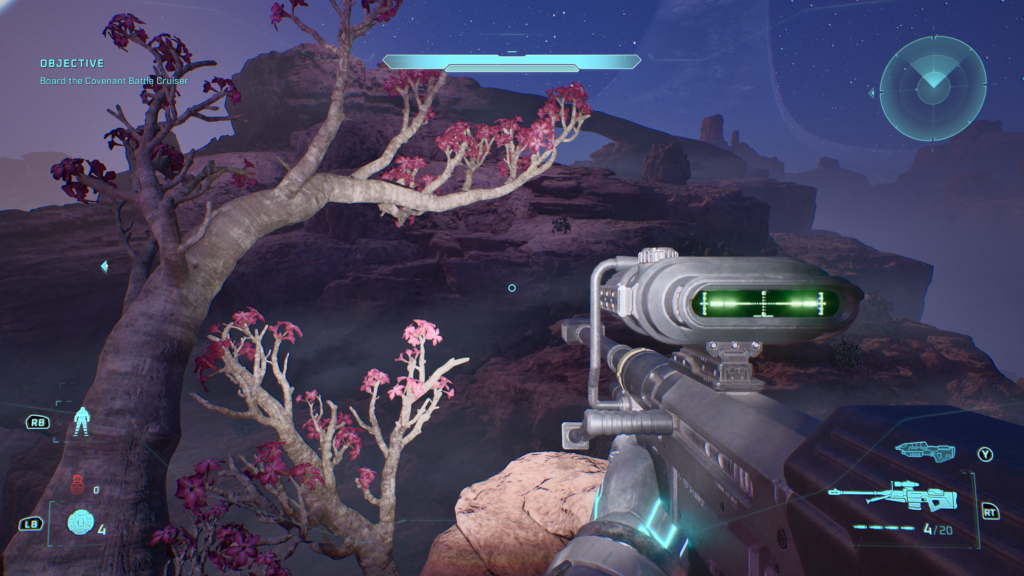
Look down off the edge to find your Skull:
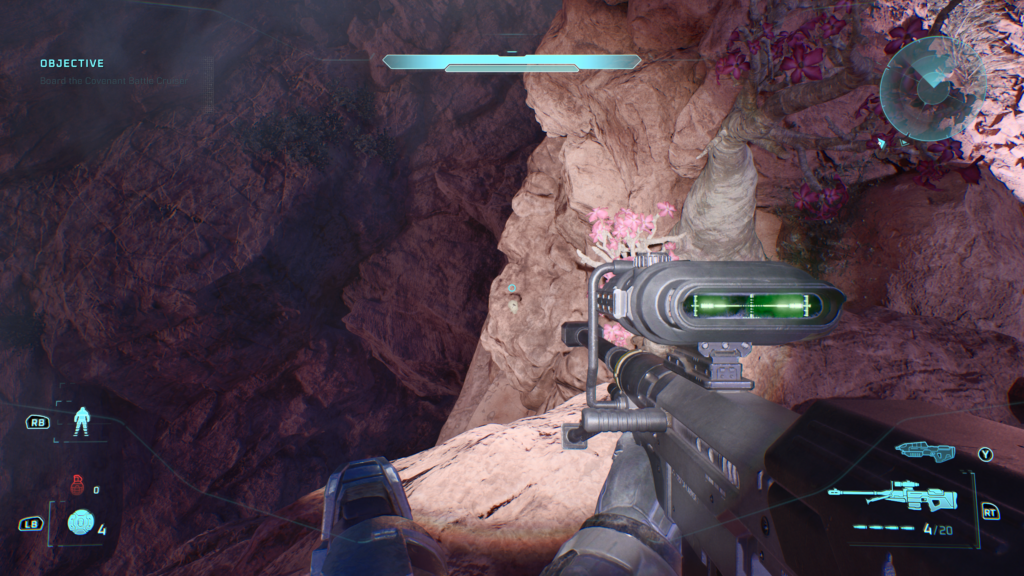
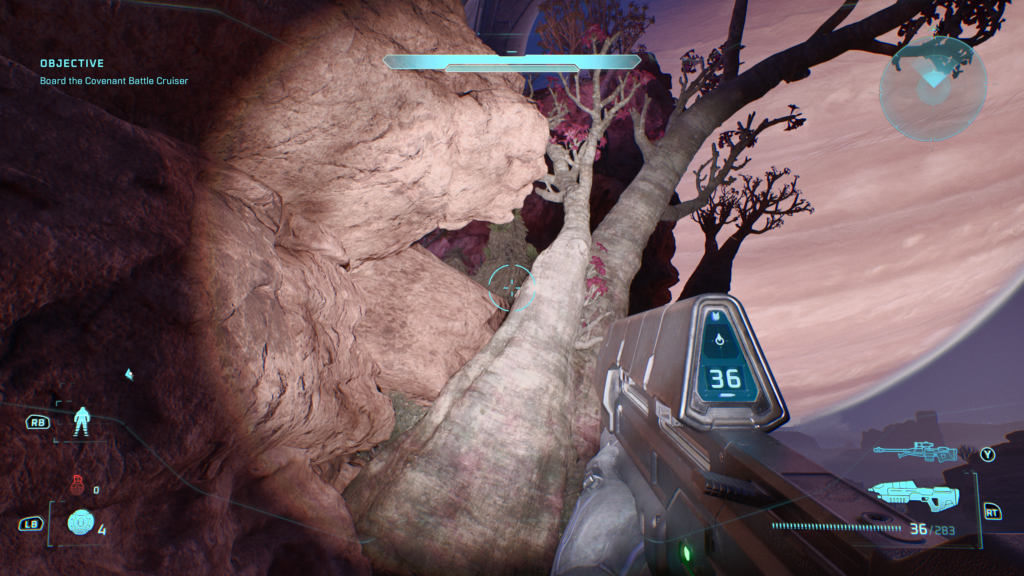
As something of an extra step here, if you want to get back up to the main area. Jump towards this tree and with enough wiggling and crouching, you can make space to climb back up:
2/3 Endurance Spec Skull
This is one of the trickiest to get in the game, it took me a long time to find and reach. I strongly recommend trying to get the game to trigger a checkpoint upstairs in this room before attempting, otherwise you’ll have to keep running back upstairs.
Early on aboard the Covenant ship, you’ll enter a room on high that has two Wraiths down low. Move to the far side of the room and look up at the pillars to see the Skull which we need to make three successful jumps towards:
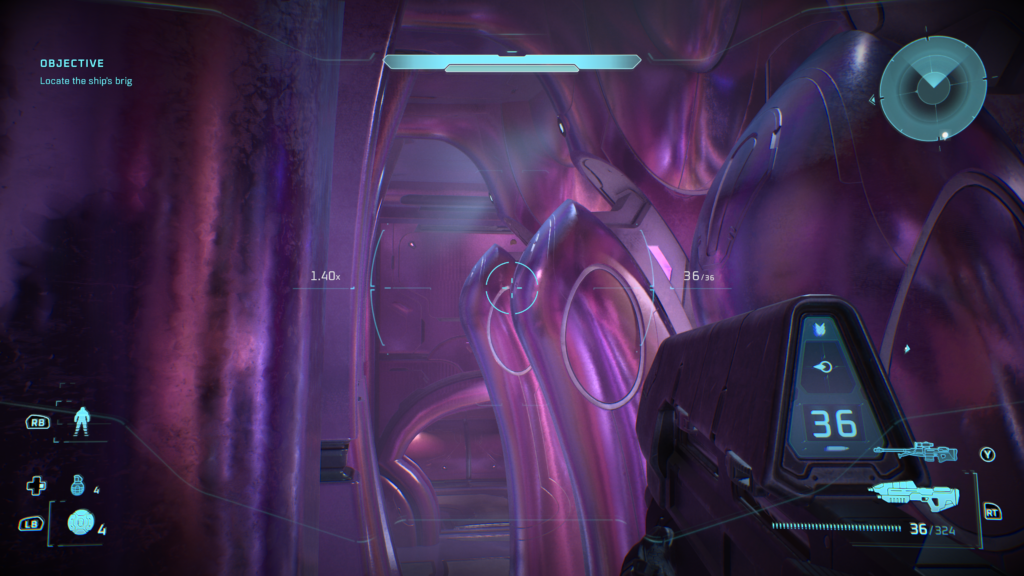
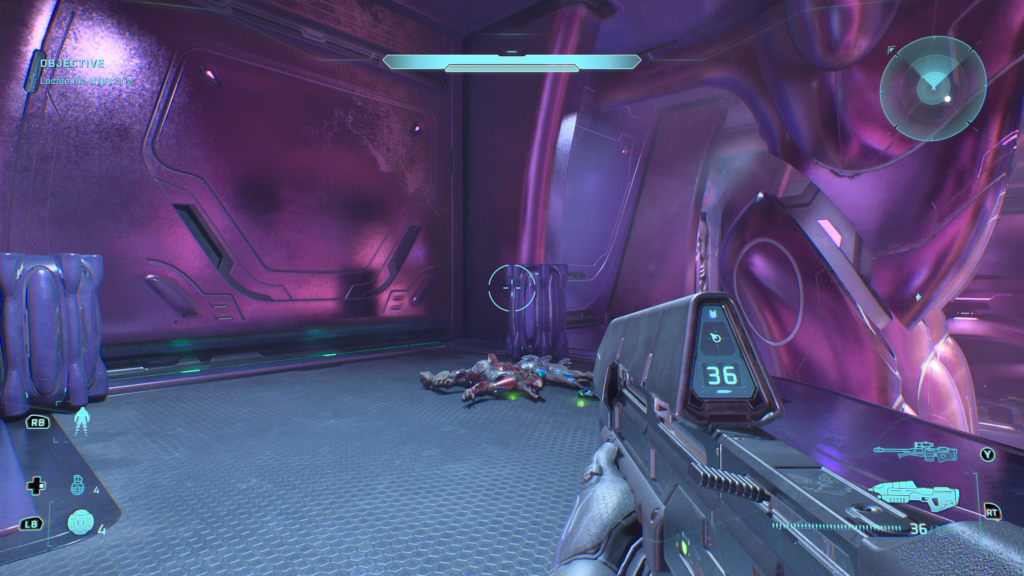
You’ll need to make sure there’s a box or other item you can sprint jump onto before you can jump high enough to make the first pillar. From there on, its three well-timed (and lucky) jumps to the Skull. Be sure to be holding the button to grab the Skull as you jump towards it:
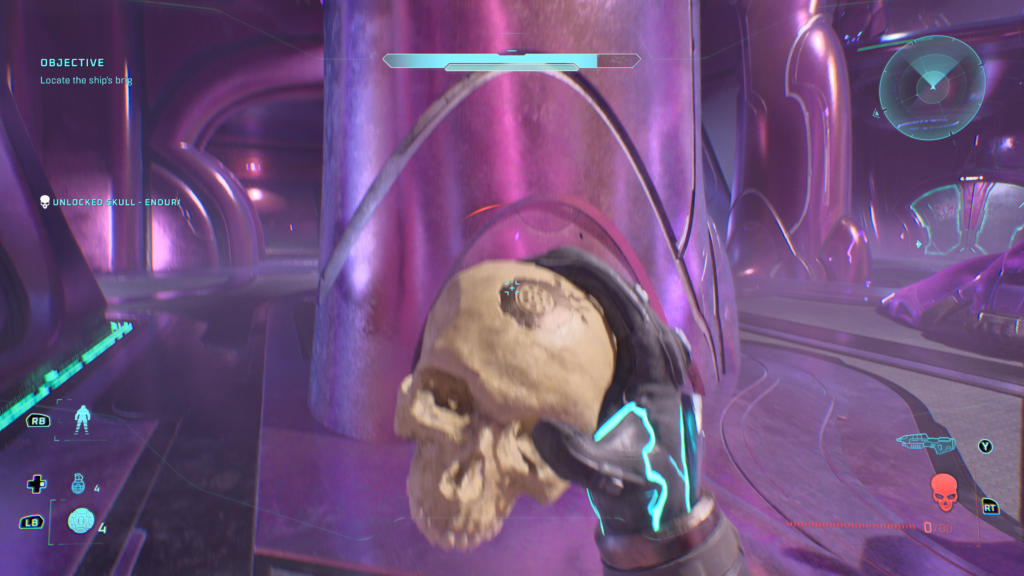
And with any luck, you’ll get it in less tries than it took me!:
3/3 Foreign Skull
Not long after, you’ll reach the hanger:
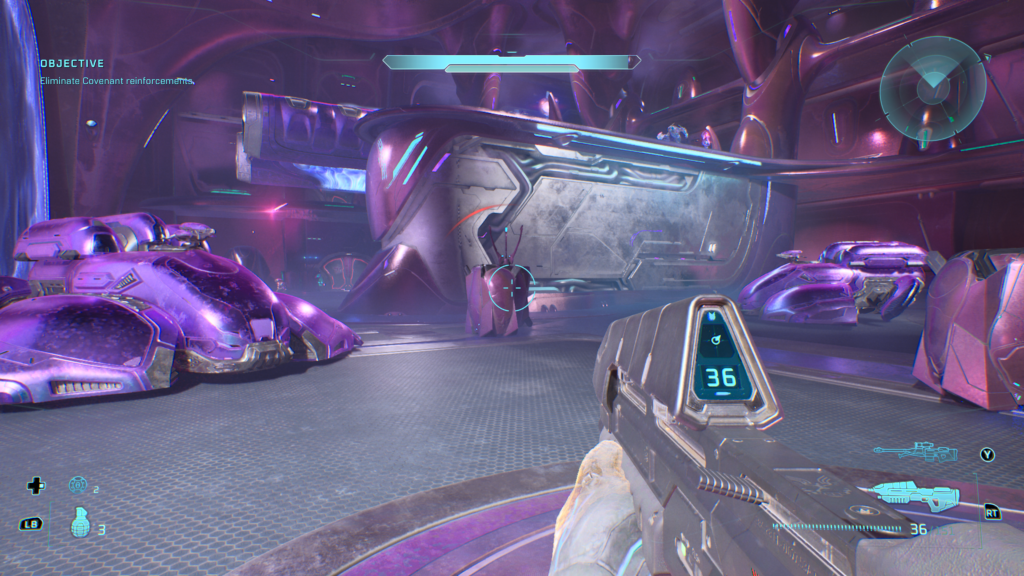
Avoid confronting any enemies for now and beeline to the far right corner of the room, towards a door where two Hunters will eventually come out of:
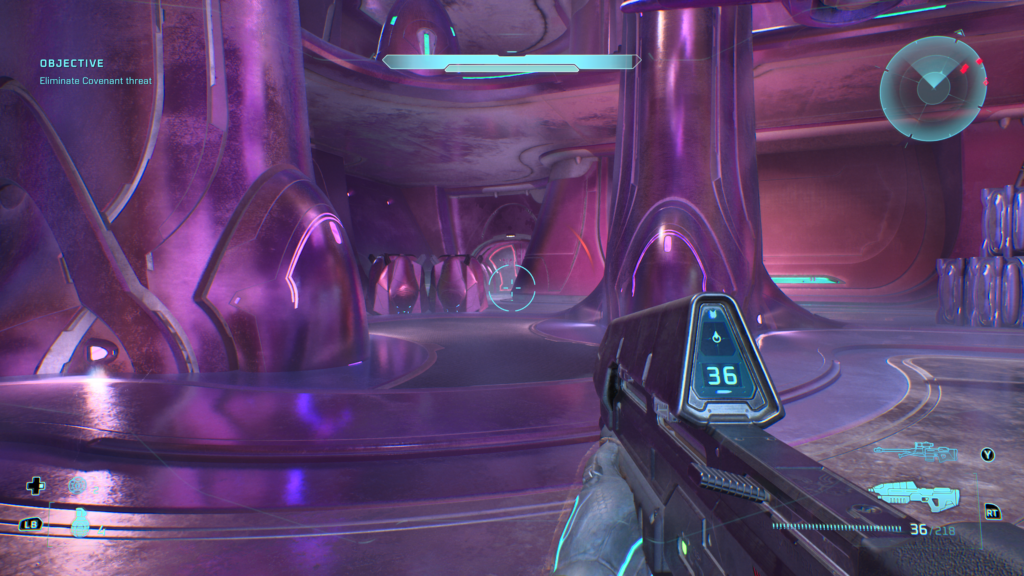
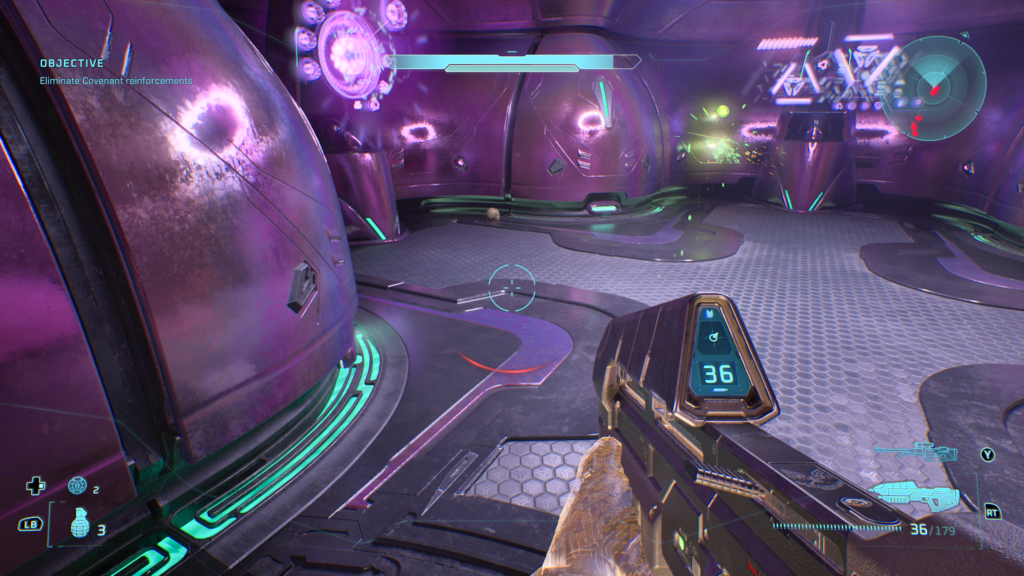
Linger around the door and wait for it to open. When it does, rush in and grab the Skull on the left. If you miss the opening, you’ll need to reload a checkpoint
The Silent Cartographer – 3 Skulls
1/3 Bandana Skull
Early in the level you’ll reach the first main structure:
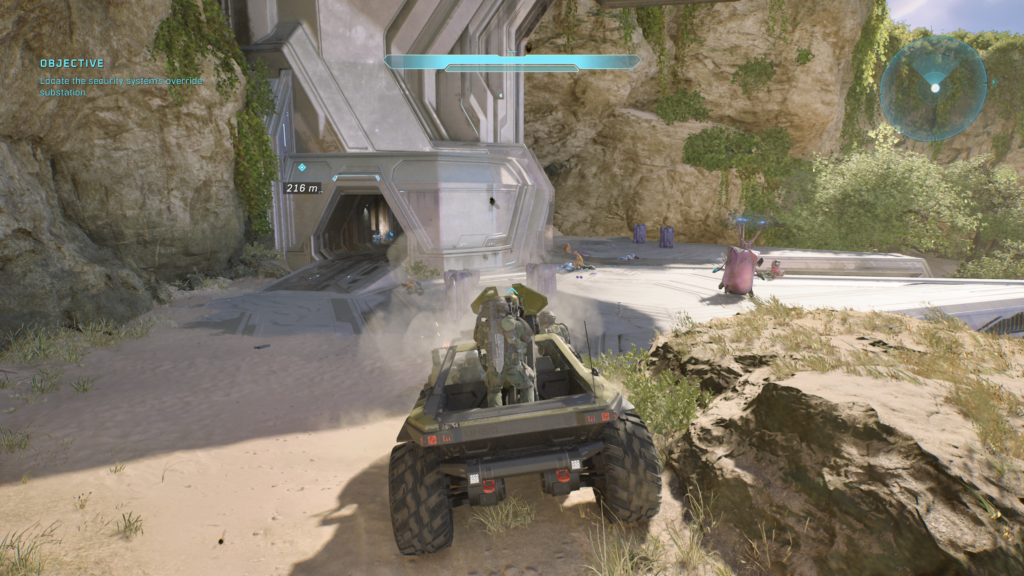
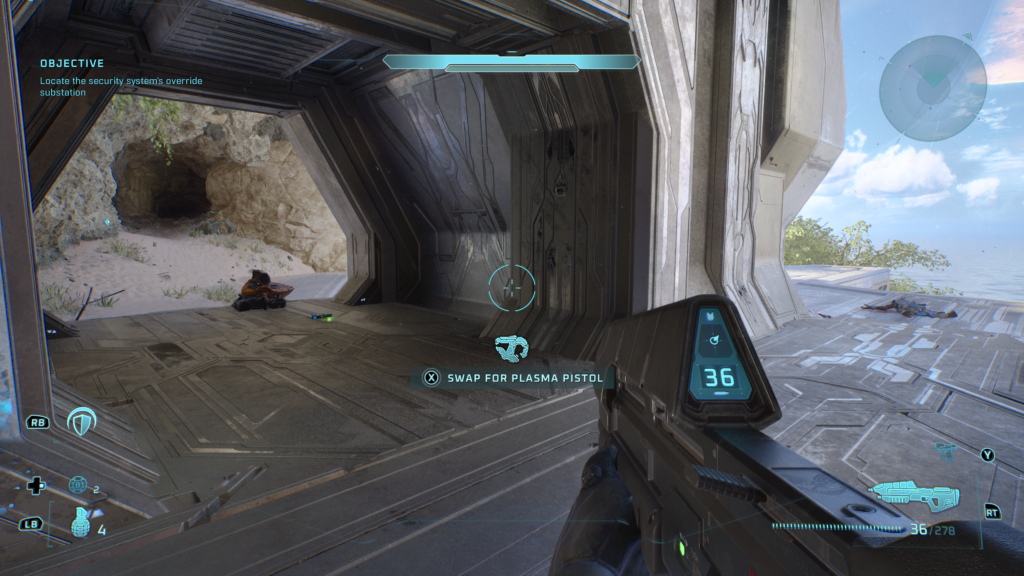
Head to the other side of the entrance, and into then into the nearby cave on the left in this image:
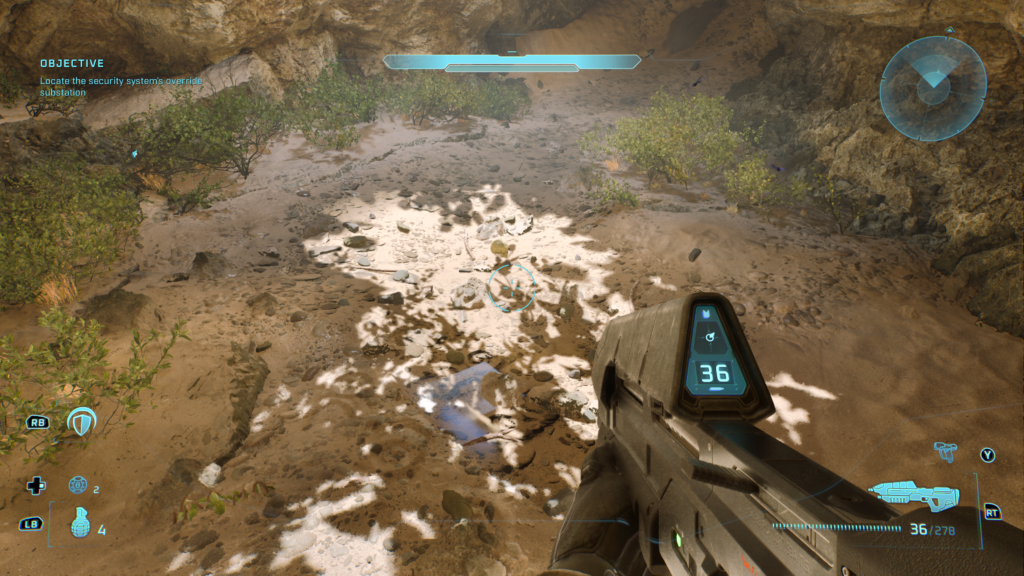
On the floor in front of you in the light is the Bandana skull:
2/3 Acrophobia Skull
A few moments later down the beach, you’ll head up a cliff and take out two Hunters here. if you played the original, you’ll definitely remember this section:
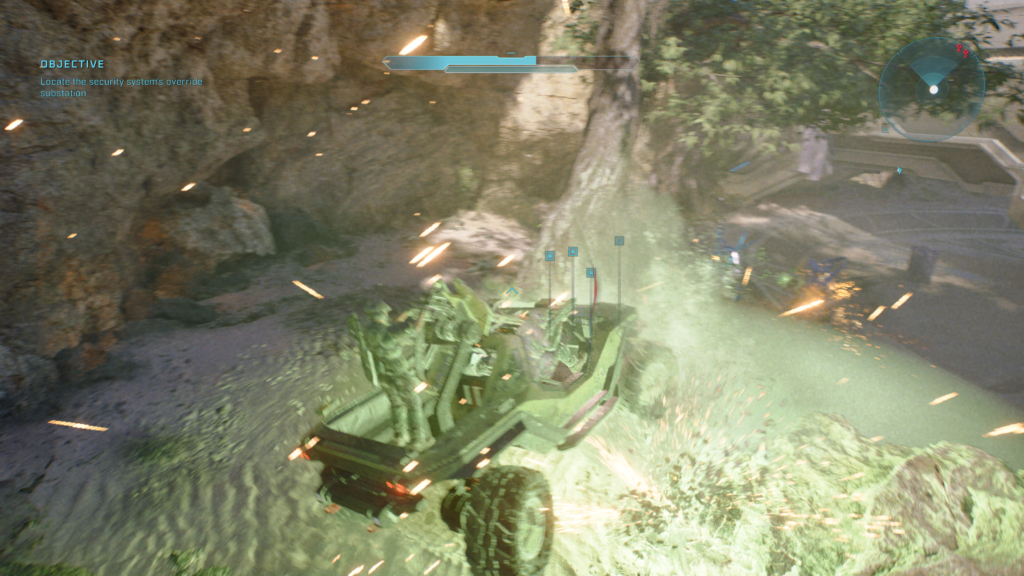
Take them both out then head to the back of the structure. Climb up the side:
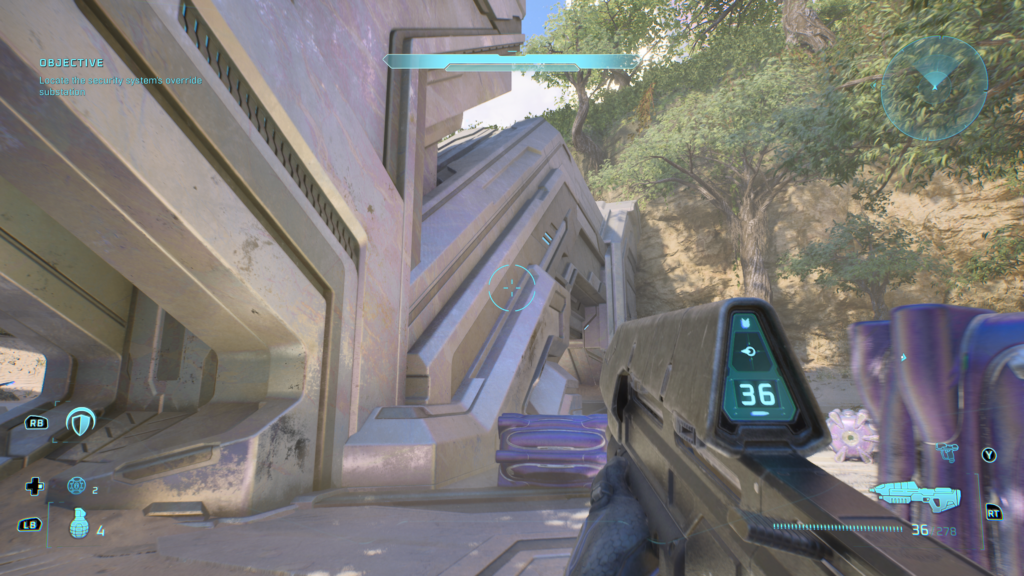
Once at the top, the Skull is on this ledge:
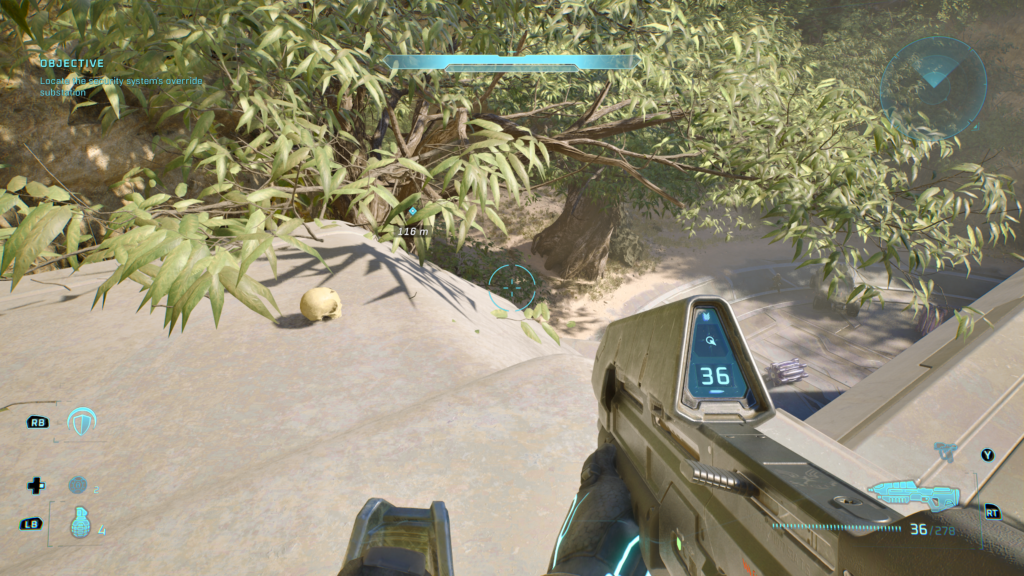
3/3 Hip Fire Skull
Once you’ve unlocked the door and made your way inside the structure, you’ll reach a room where you take out 2 Hunters:
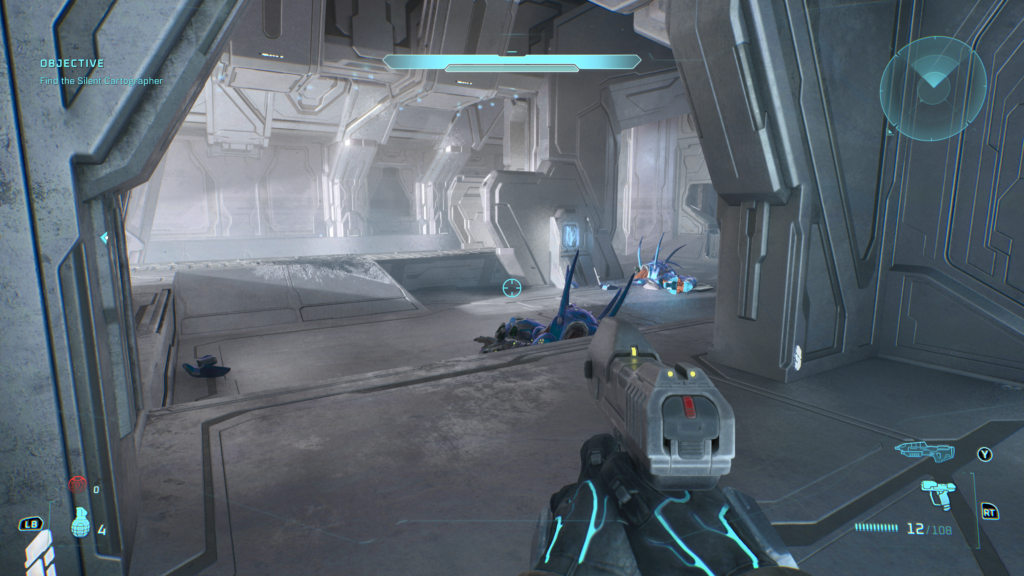
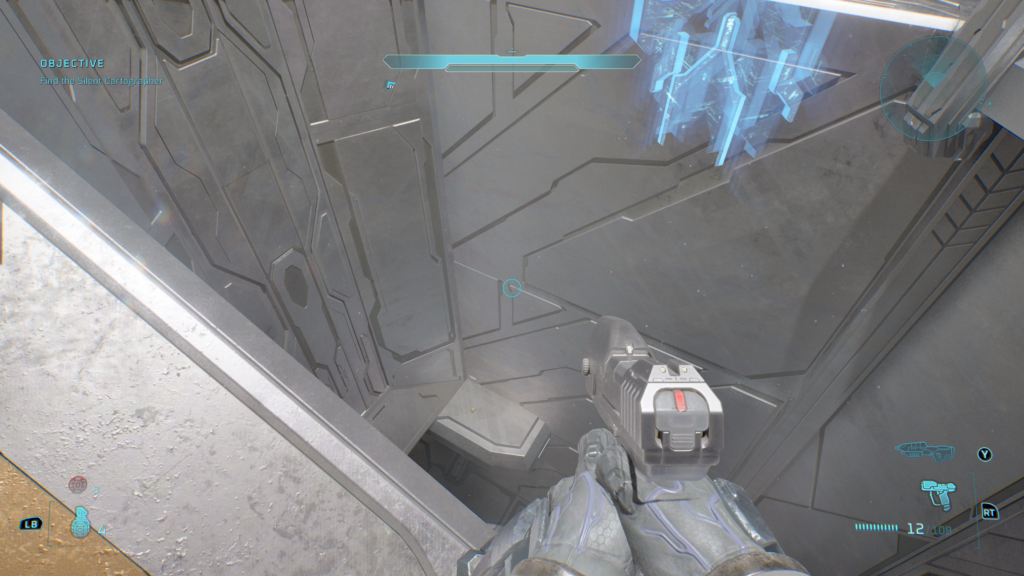
Take them out and follow the main path for a few seconds to immediately find a well-lit stair well. Once here, look down to find the Hip Fire skull which you can jump down to:
Assault on the Control Room – 3 Skulls
1/3 I Would Have Been Your Daddy (IWHBYD) Skull
(Rally Point Bravo)
When outside, you’ll reach the Scorpion Tank. Be sure to take it and ensure it doesn’t get destroyed by the Covenant:
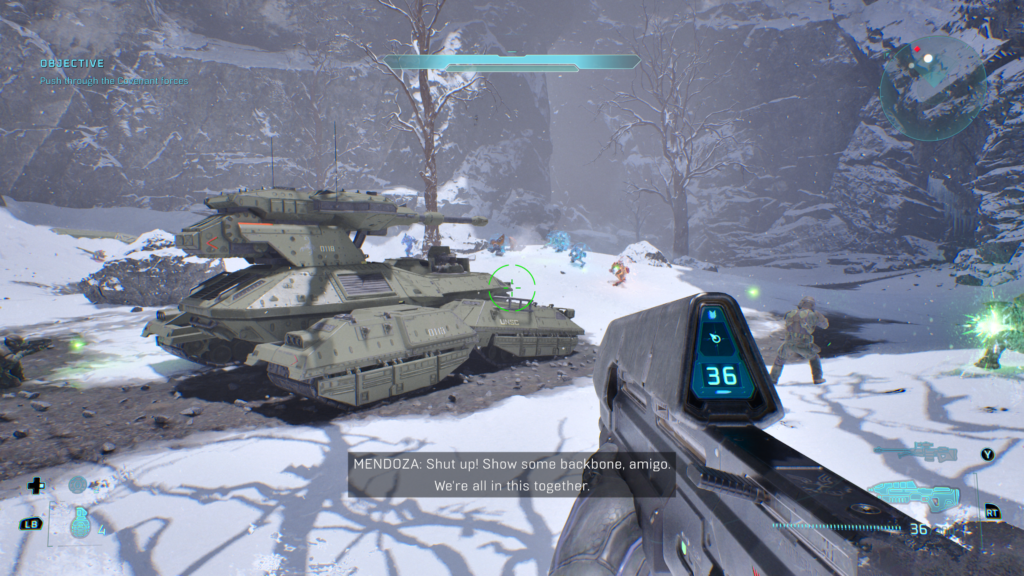
Proceed as normal till you get to this bridge. When you’re here, pass over to the other side and head as far left as you can:
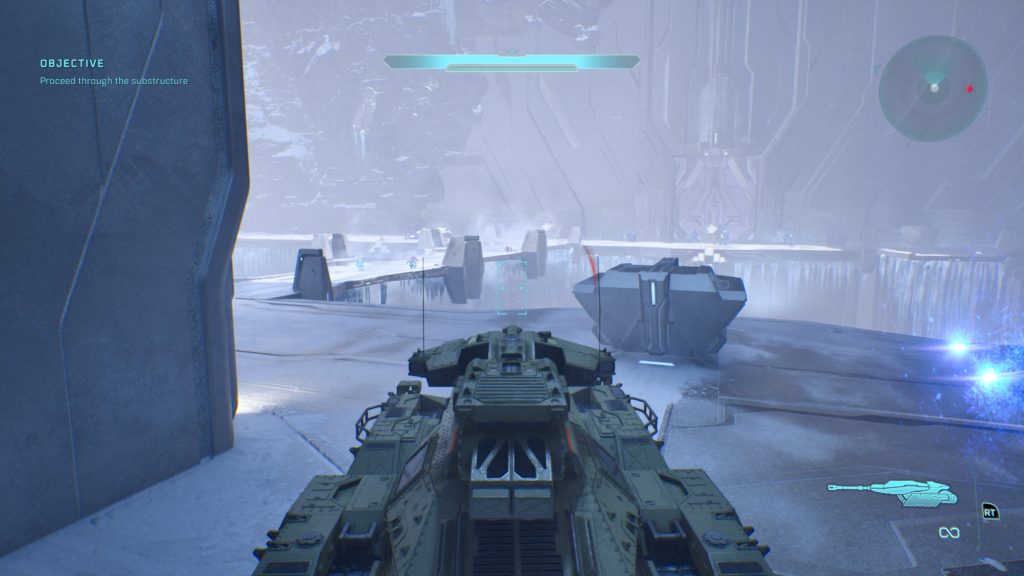
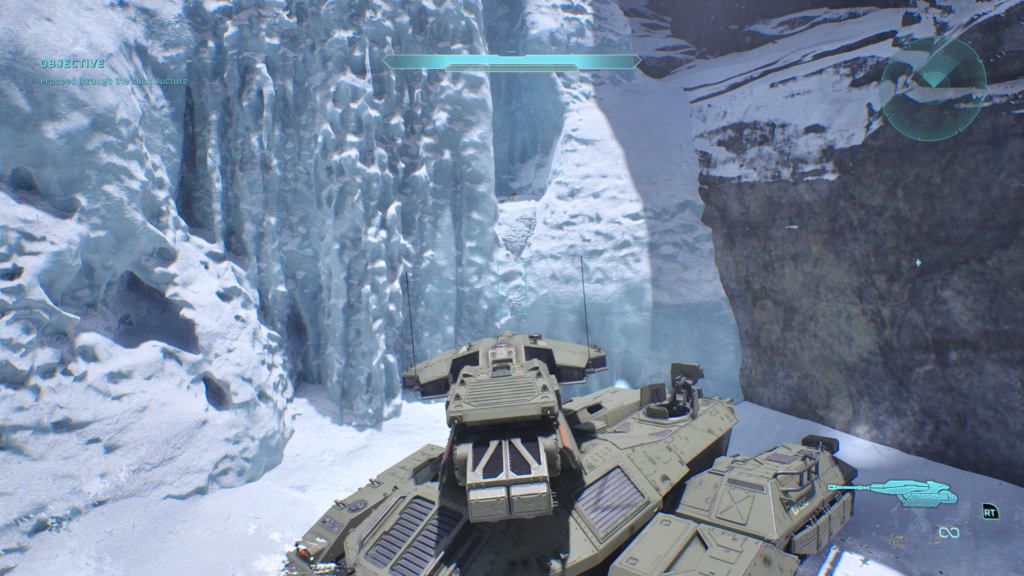
Once here, park the tank with the turret as close to the IWHBYD Skull which is on the small snowy ledge and jump up to grab it:
2/3 Angry
A little while into the mission, during the objective ‘Head for the Control Center Ziggurat’, you’ll come to these bridge-like structures:
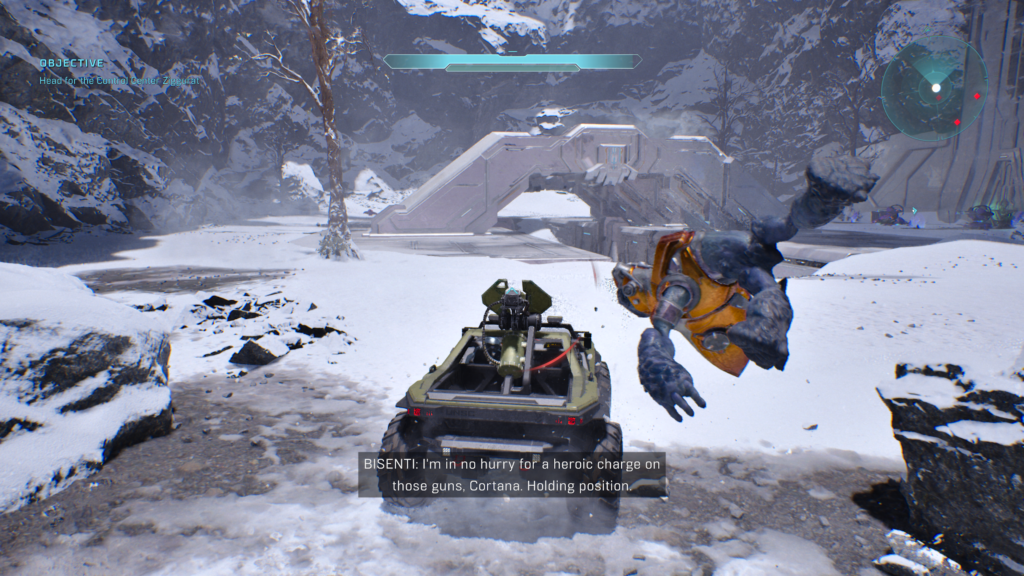
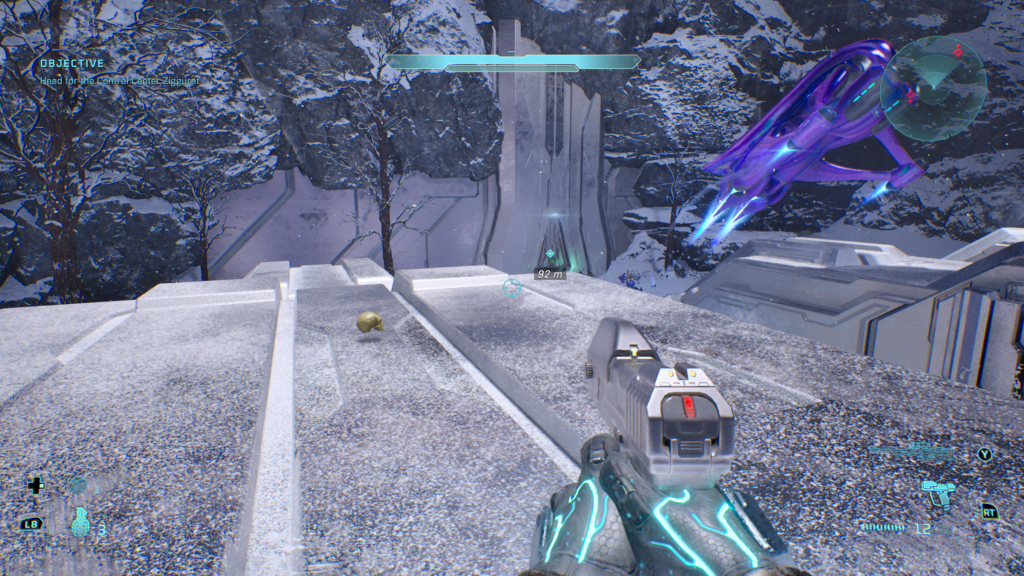
Head for the farthest one away to find the Angry Skull on top:
3/3 Cowbell Skull
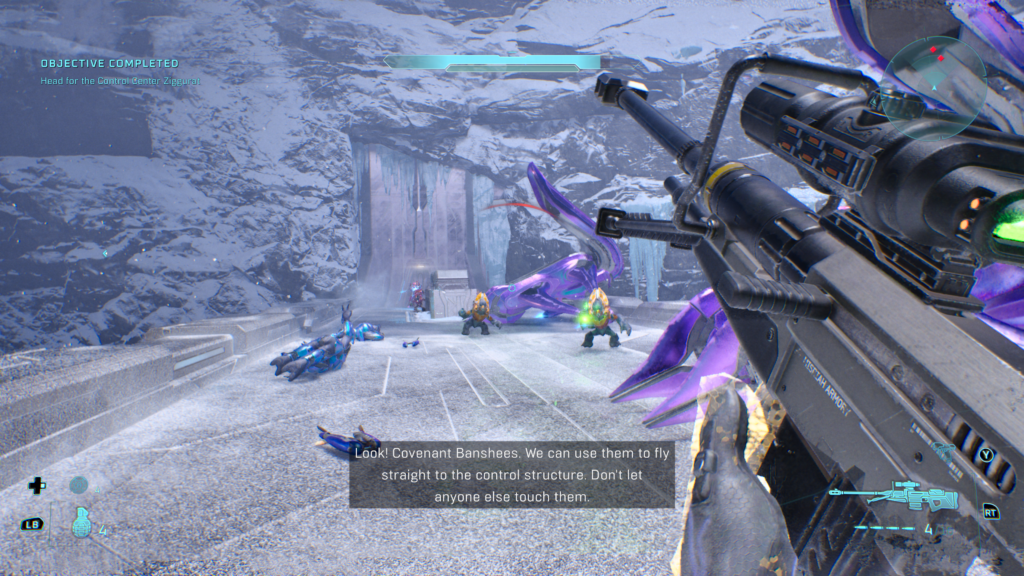
At the very end of the mission, you’ll come to the checkpoint that says ‘If I Had a Super Weapon’. Race through the door and take out the Elites to able to grab a Banshee. If you don’t get one, reload the checkpoint:
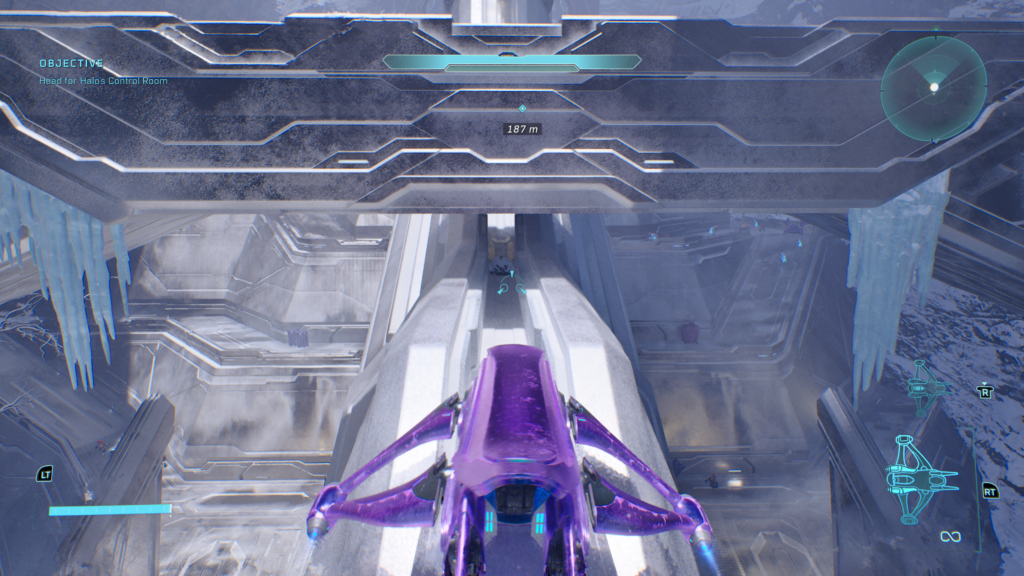
From here, fly to this location under the bridge further up the construct you are required to head to:
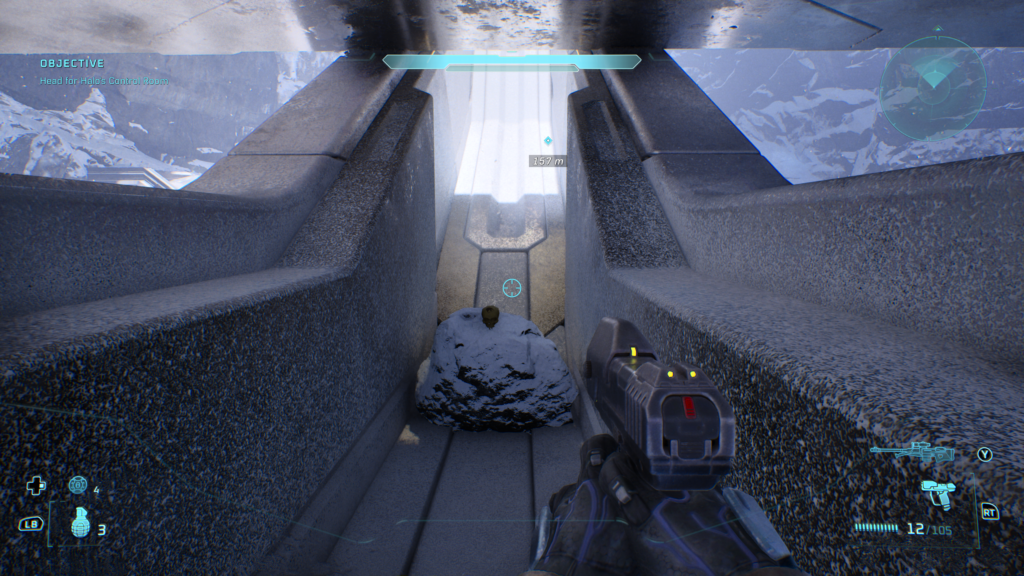
Just underneath is the Cowbell Skull:
343 Guilty Spark – 3 Skulls
1/3 Fog Skull
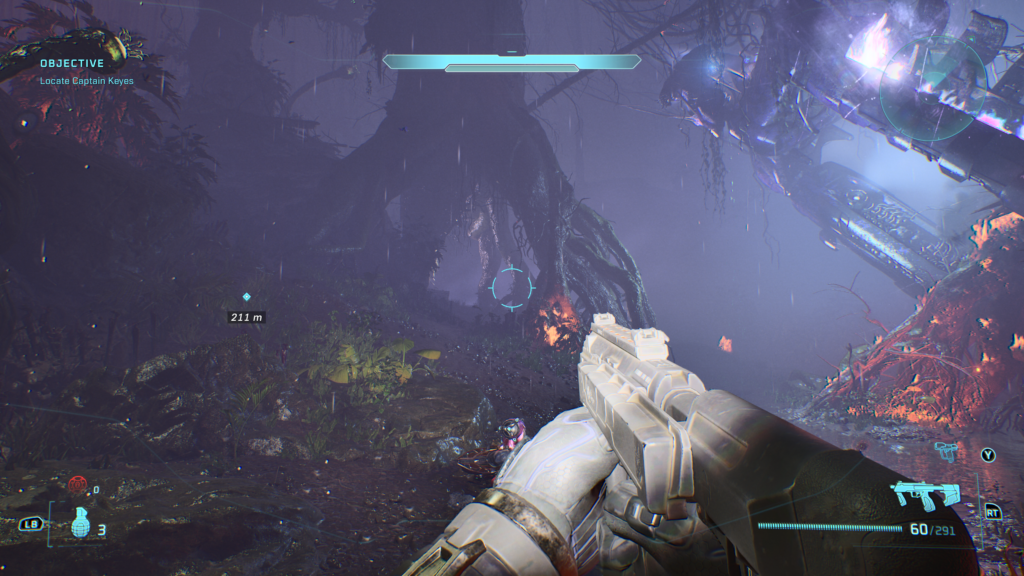
At the very start of the level, come past the downed dropship and follow the main path where some Cov are fighting. Pass those few enemies and head up the hill to the left of this tree:
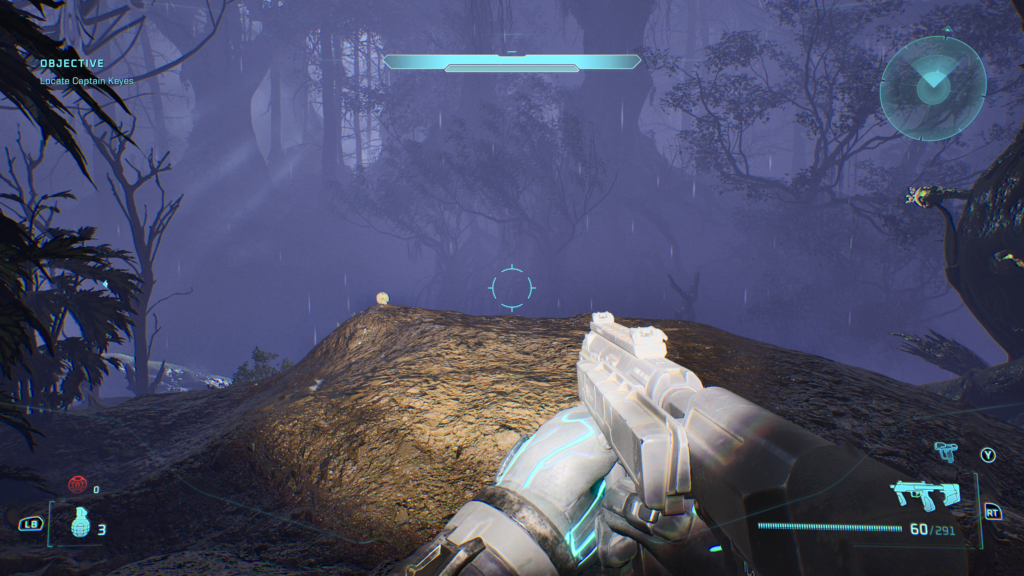
Once on the hill, jump up this ledge to the right:
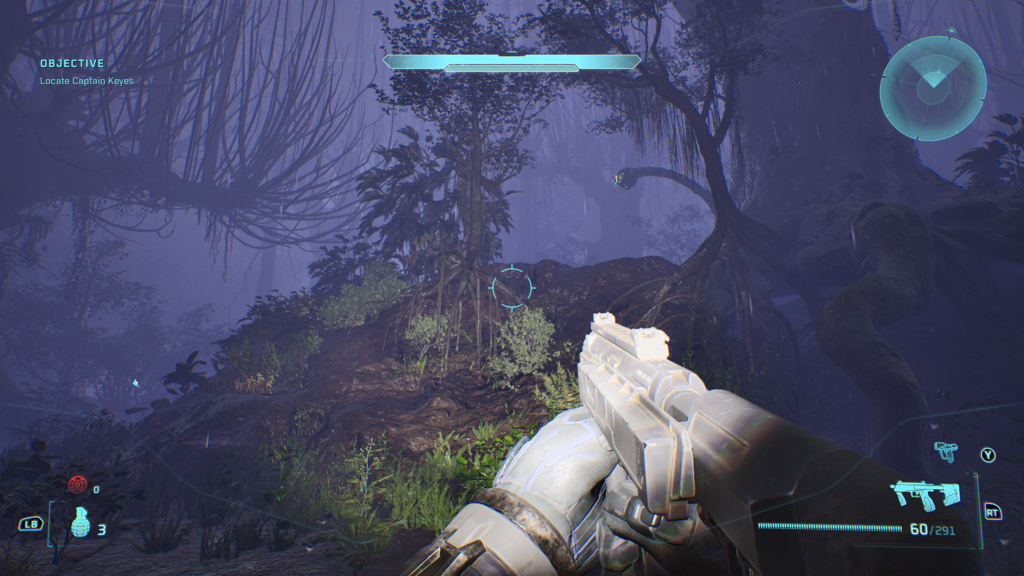
Your Skull is right in front of you:
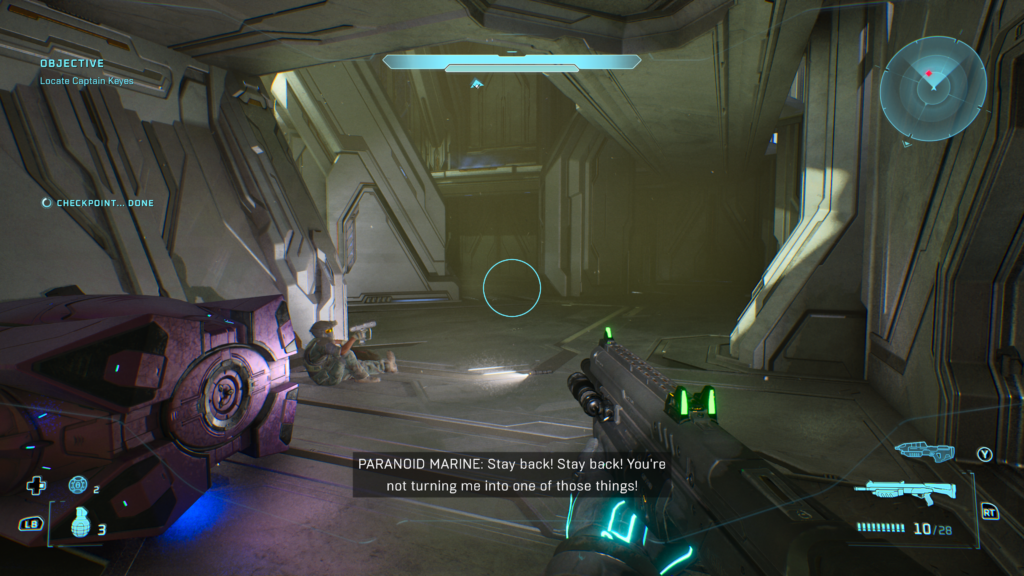
2/3 That’s Just… Wrong Skull
This is just cruel. Not too far into the mission, you’ll enter the structure. Natural progression will take you to the Paranoid Marine:
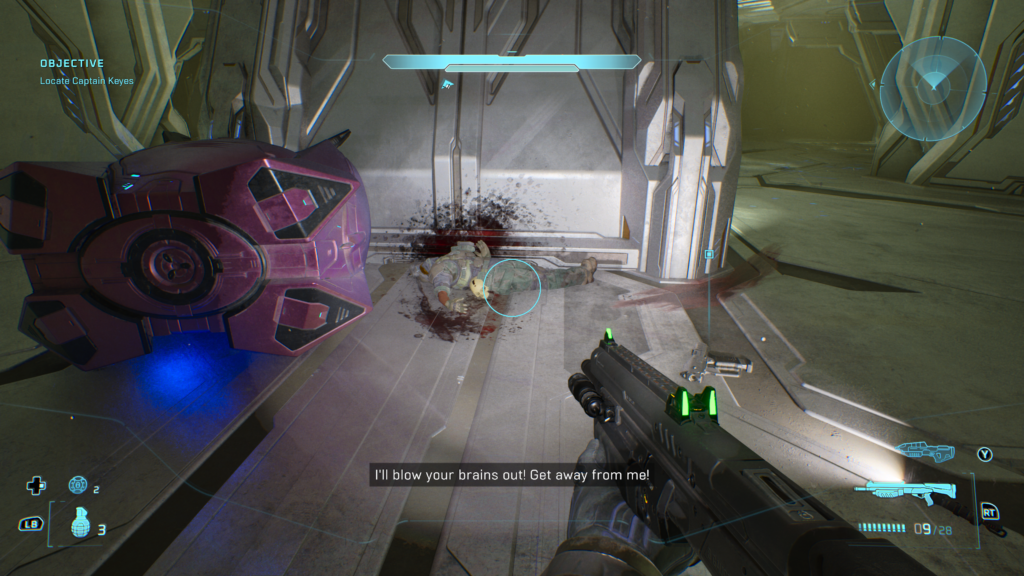
This ones as simple as blowing his poor nervous brains out to make him drop the Skull:
3/3 They Come Back Skull
At the very end of the mission you’ll be taking out enemies awaiting an aerial pickup outside this structure – important, don’t take out the enemies or it will end the mission:
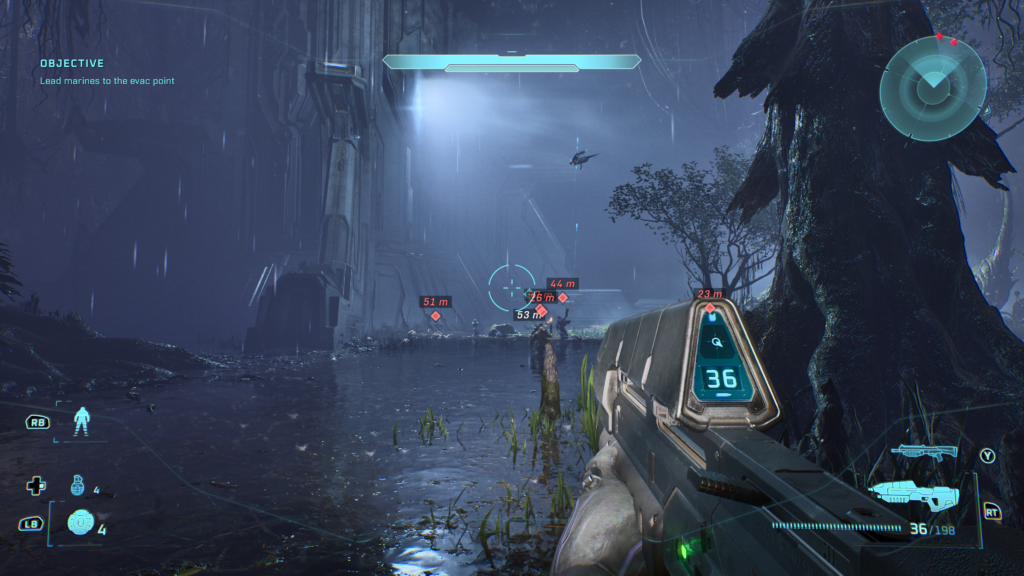
You need to head around the back of the structure and towards the large tree in the distance:
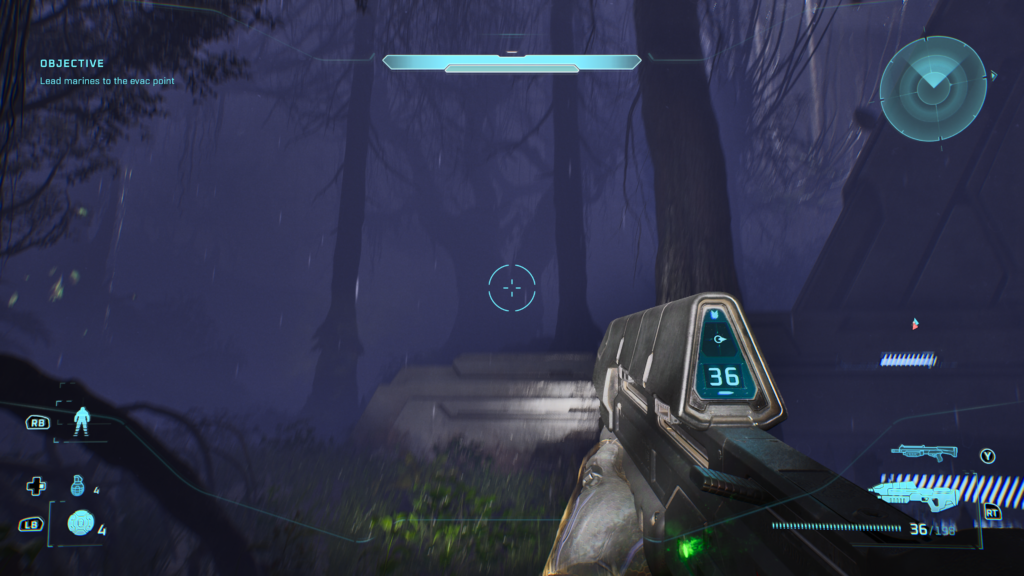
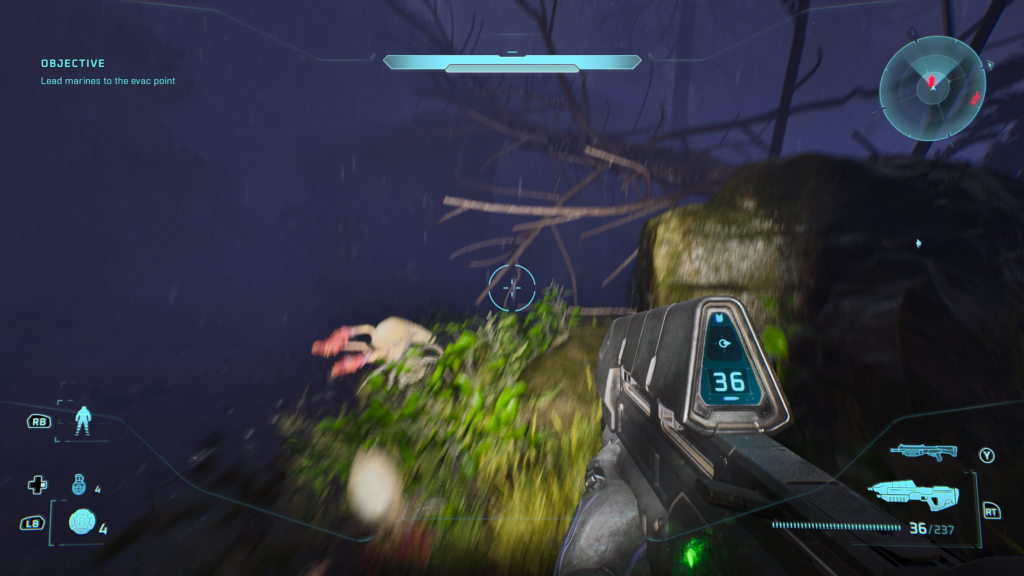
Once here, look for this long branch you can cross:
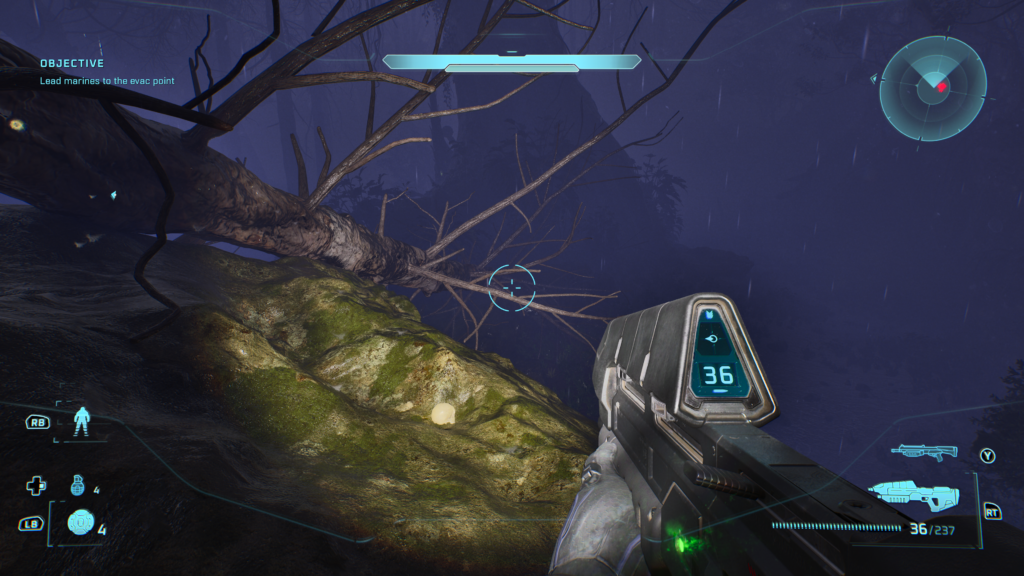
Head up to find your They Come back Skull:
The Library – 3 Skulls
1/3 Tilt Skull
Quite early in the level, you’ll come to the first section with the sentries:
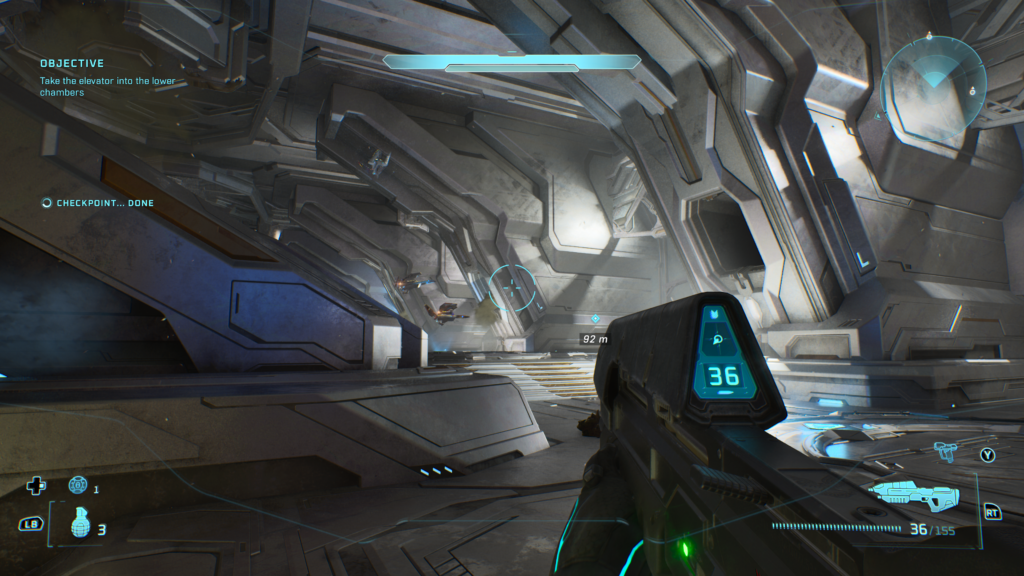
You want to turn around and climb above the door which brought you in:
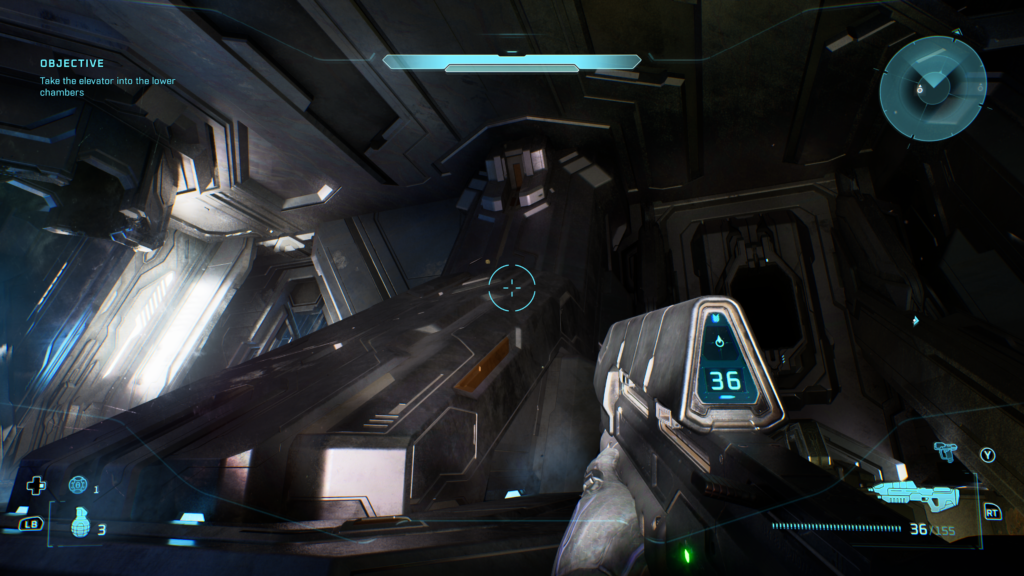
The skulls here in front of you:
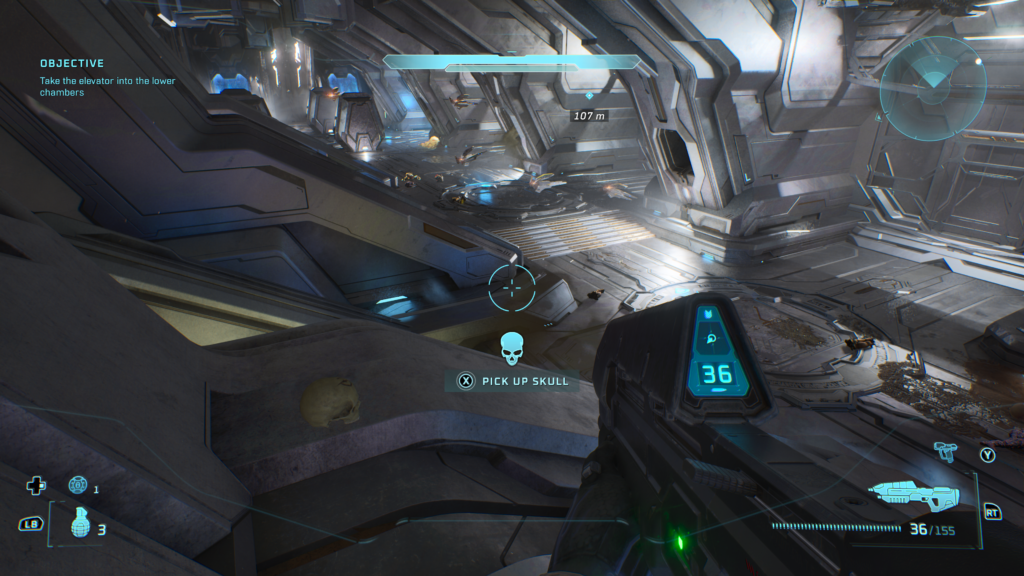
2/3 Pop Skull
Not longer after the previous skull, you’ll take a lift down where some enemies ambush you. Proceed in following Guilty Spark till you reach this door on the left that will open after you kill all enemies:
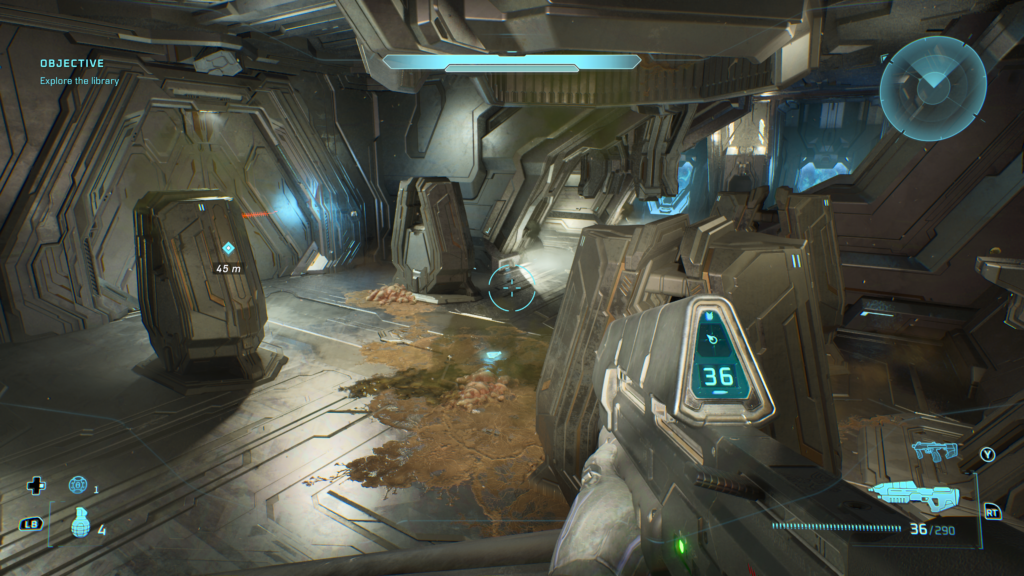
Look right, to see the Skull on the ledge:
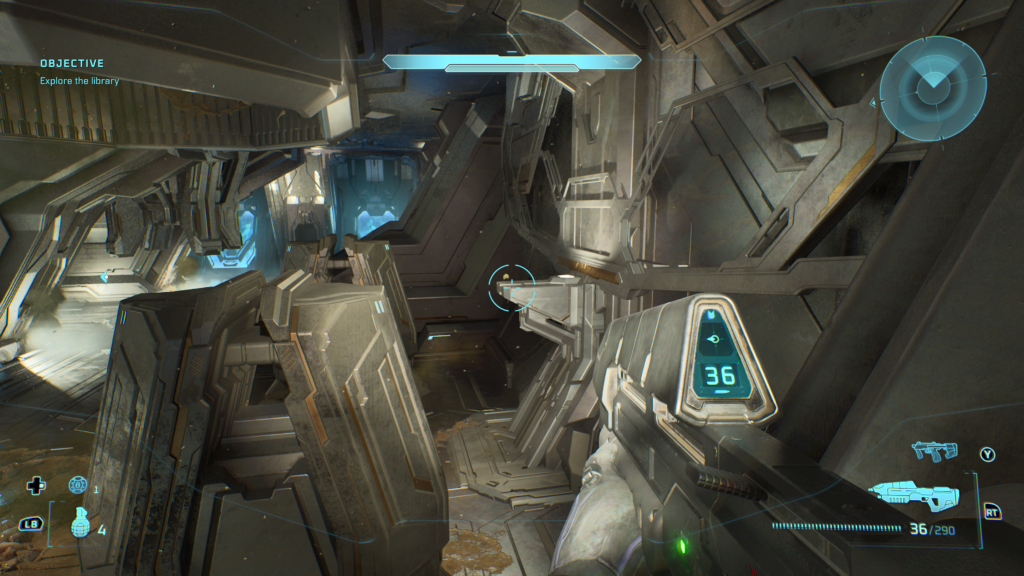
3/3 Famine Skull
Near the end of the level, you will take the final elevator down. Once off the elevator a group of Flood will ambush you from the door in the small dip ahead:
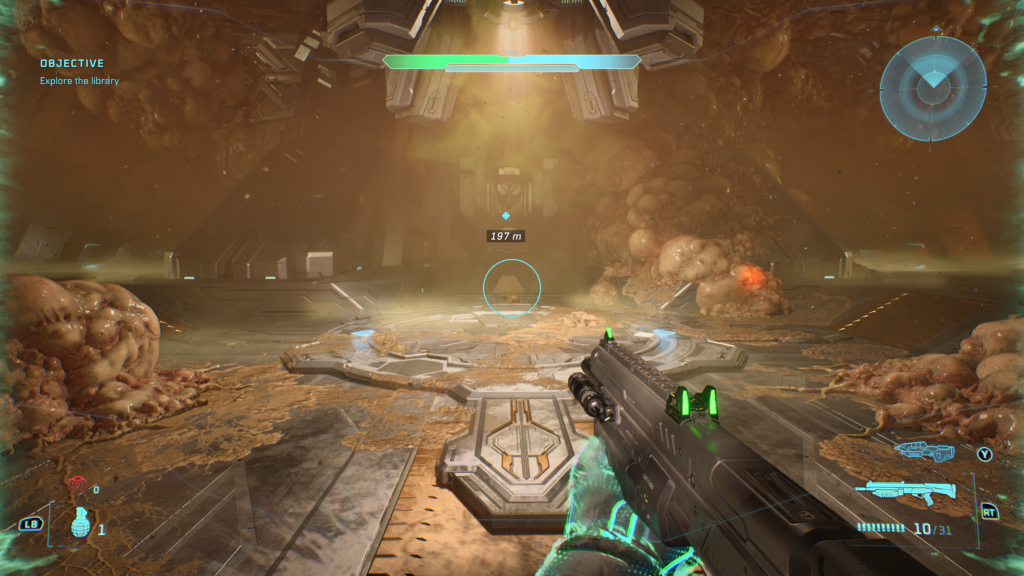
Take them out and head down the dip:
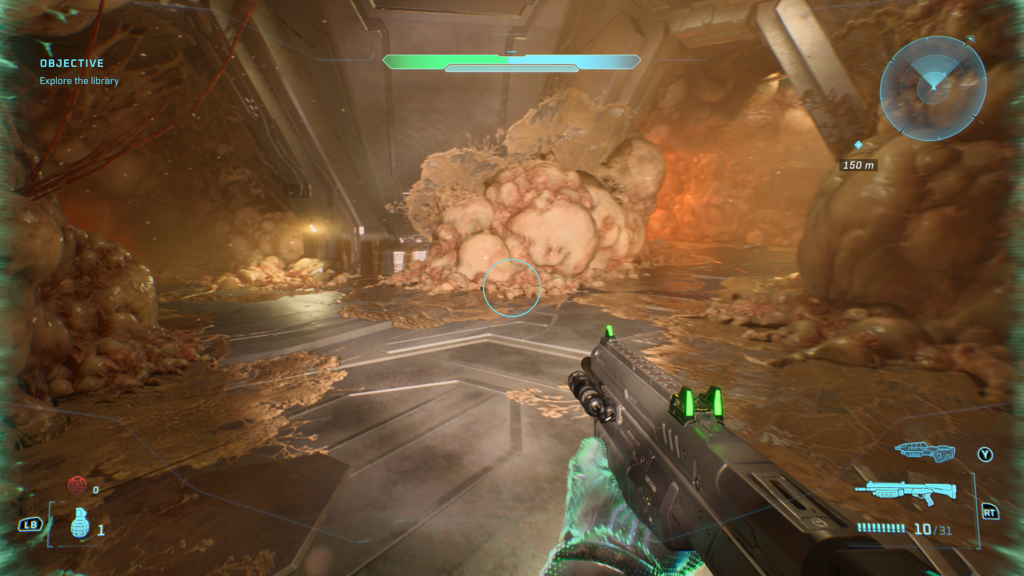
To your left is the Famine skull:
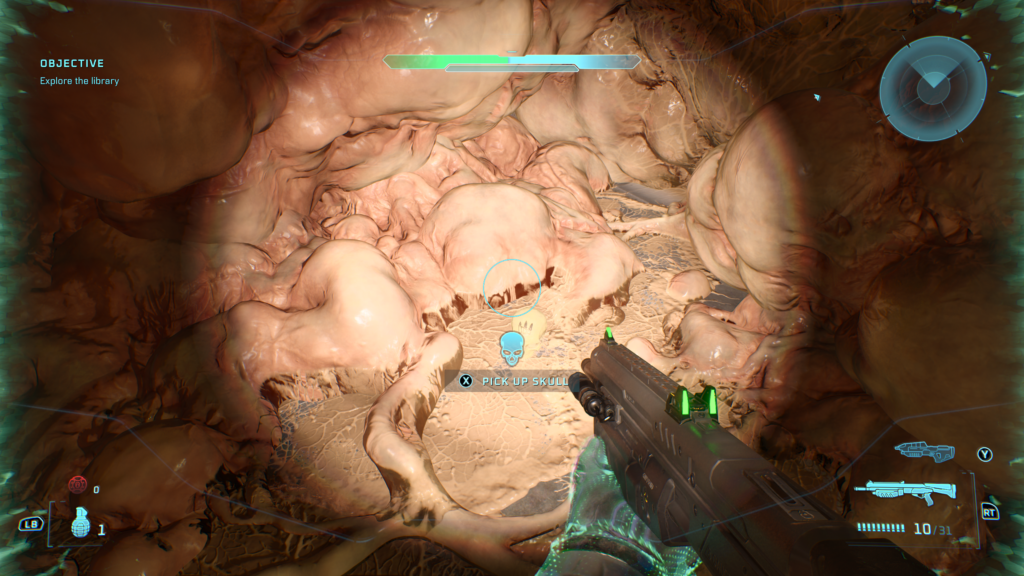
Two Betrayals – 3 Skulls
1/3 Tough Luck Skull
Very early in the level you’ll head outside and commandeer a Banshee. Once inside, head to the highest point of the structure you walked out of, using the cursor as a reference point:
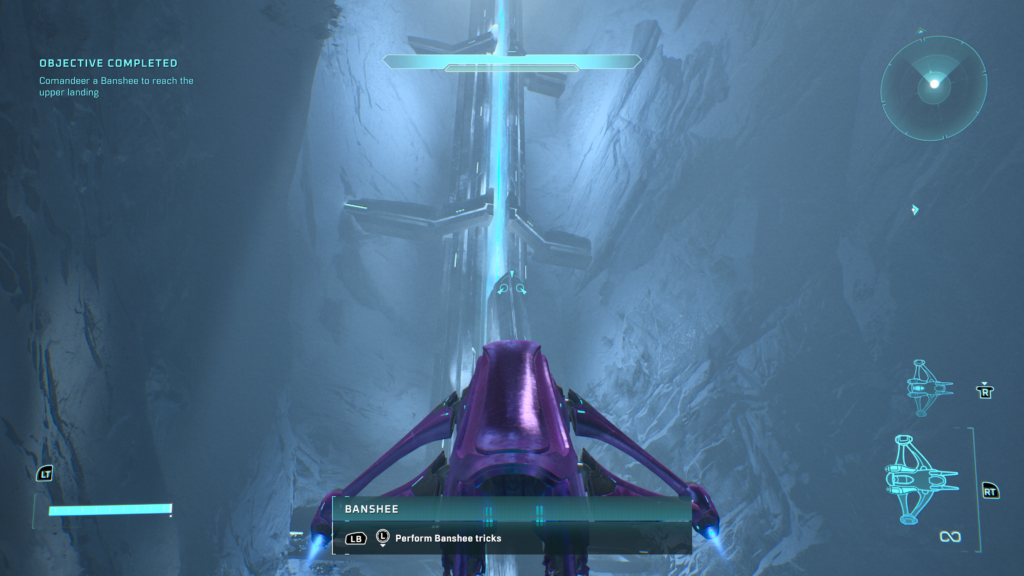
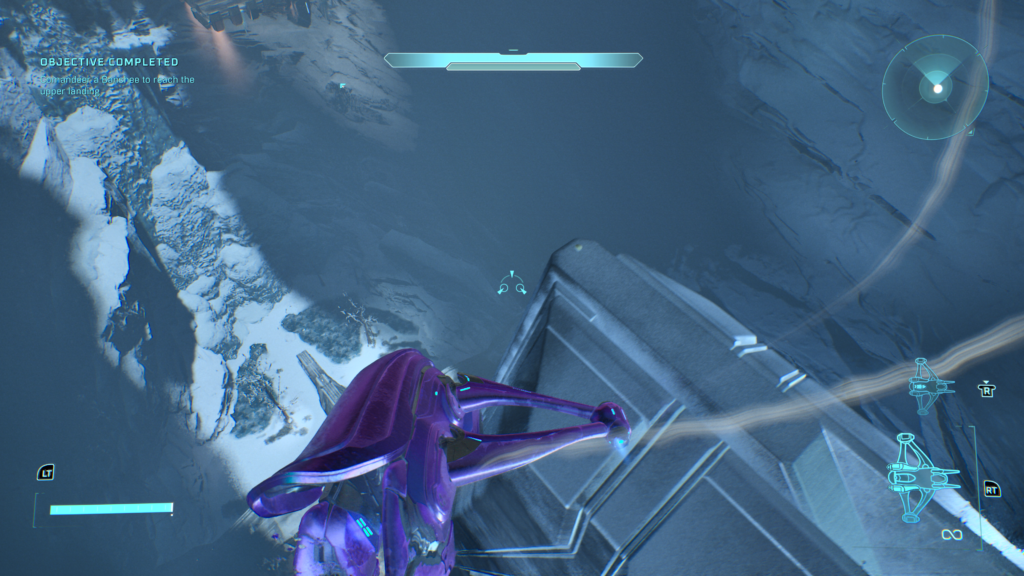
The skull sits on this ledge here. Good luck sticking the landing!:
2/3 Black Eye Skull
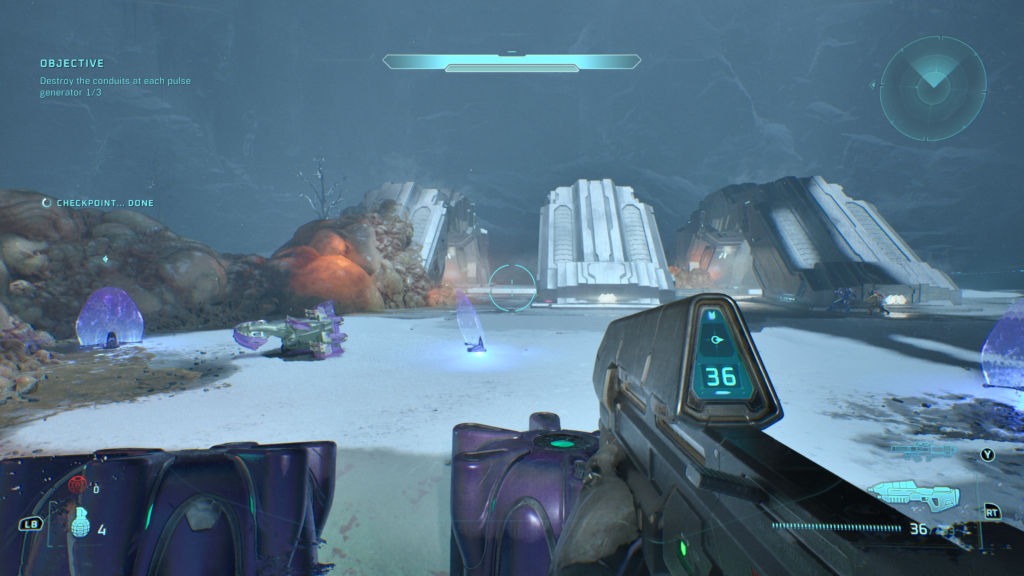
You’ll reach the these bridge-like structures that you will have seen on Assault on the Control Room, just now they’re covered in Flood sacks and gunk. Head up the middle bridge in front of you from this image:
Once here, keep crossing all the way over and head to where the reticle is on the image:
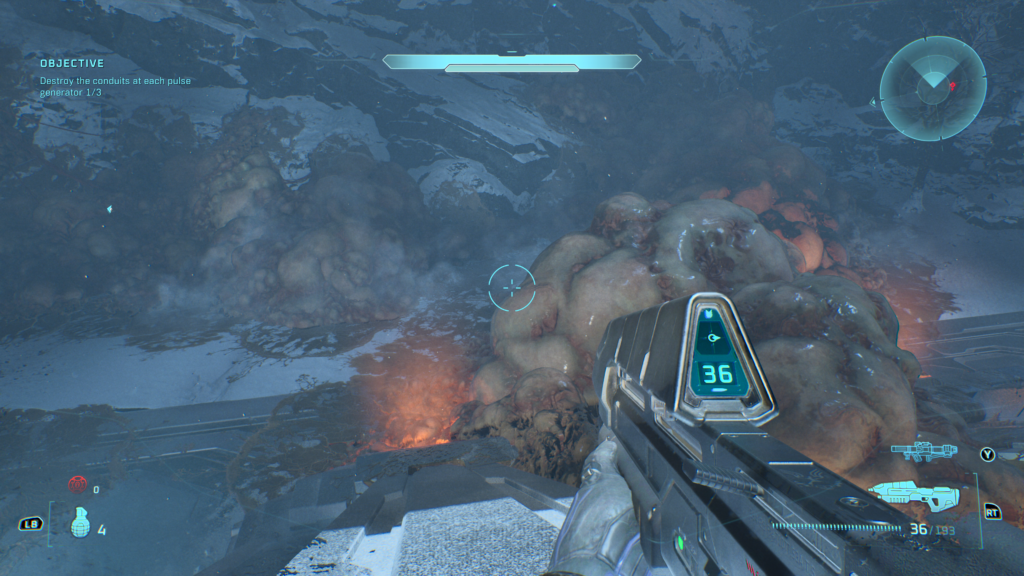
Veer round to the right between the Flood sacks to find the Black Eye Skull:
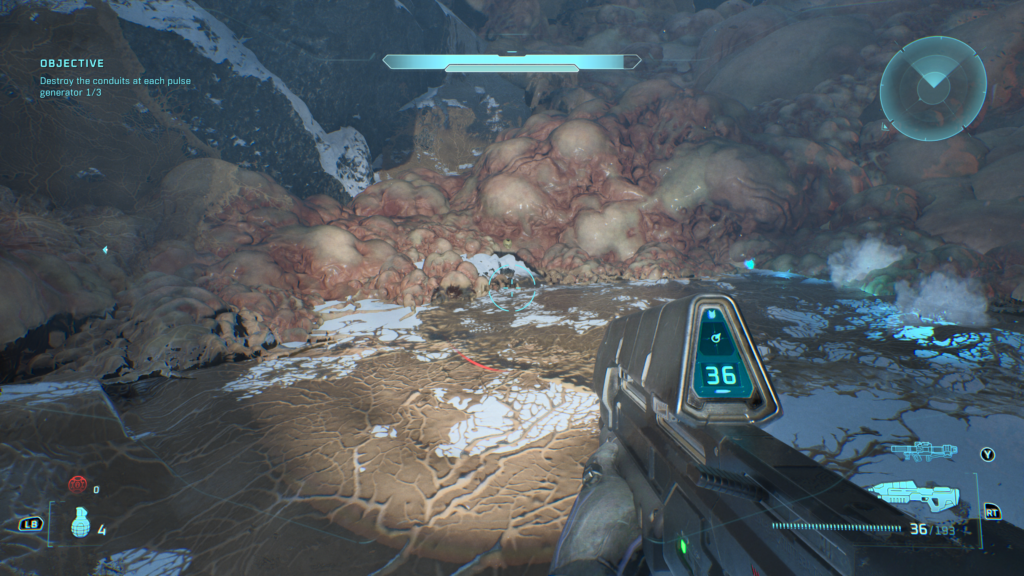
3/3 Mythic Skull
This Skull will be tough to acquire on harder difficulties due to enemy density and weapons. After you get the Banshee again much later in the mission, fly up to this area as required for progression. Clear out the enemies from the air then land:
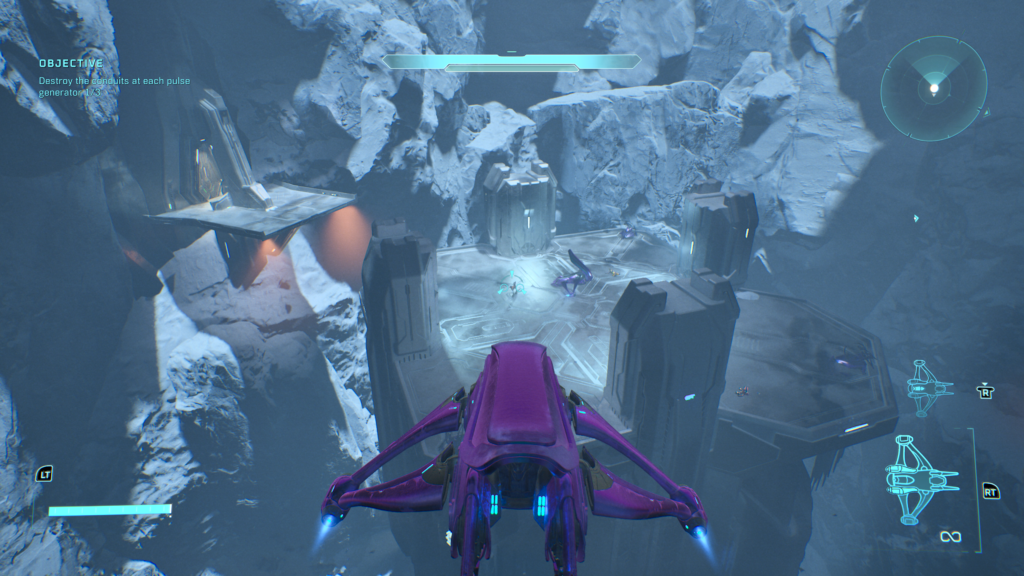
Once here, hit the button on the middle to open the door in the distance, then fly over:
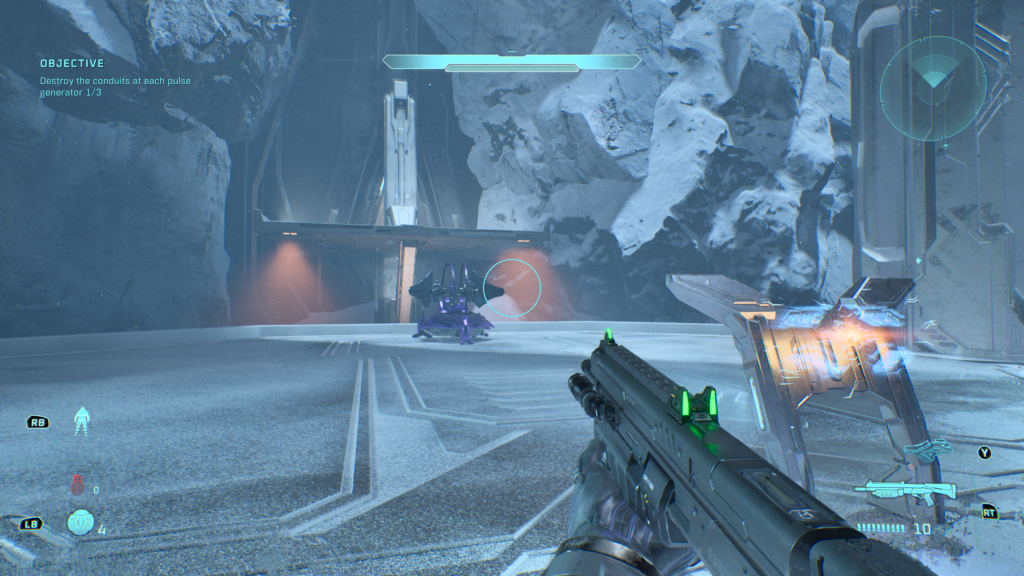
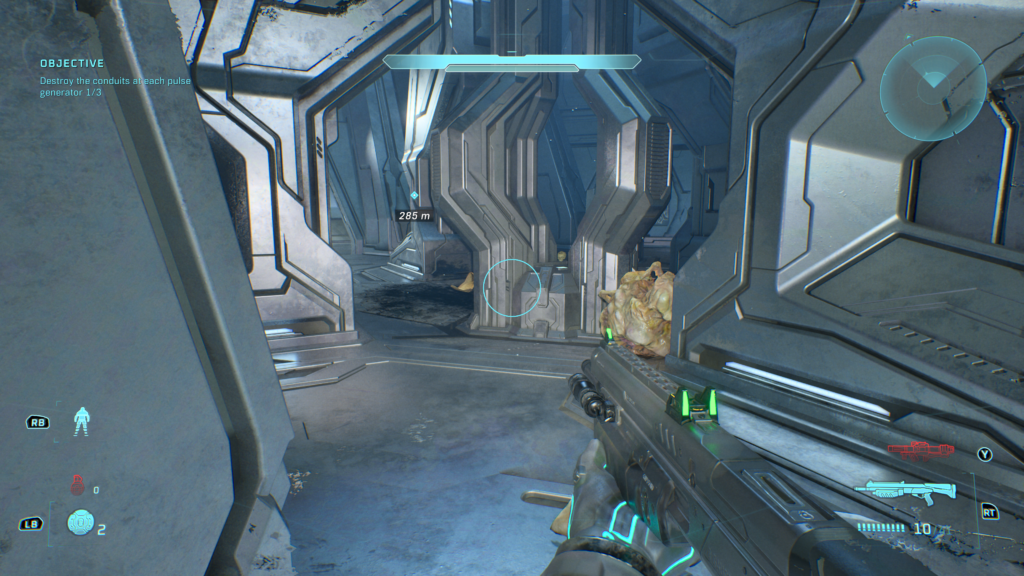
Head in the door then take on several rooms of tough enemies. Keep fighting all the way, eventually you’ll reach a room with the Skull in the centre. There’s nothing else here, so time to head back to the main mission path:
Keyes – 3 Skulls
1/3 Catch Skull
Catch must be obtained on Heroic difficulty
This can be a very tricky to get and does require some skill. From the very start of the mission, you need to sprint all the way to the gravity lift that gets you onto the Covenant ship. The Skull is in the gravity lift but only for a limited time. Thankfully, if you get killed on the way you can use checkpoints.
To make this a little easier, you should make use of the invisibility cloak. Equip it after the narrow rock corridor of exploding Flood. Equipping it after this point will likely allow you to make it to the gravity lift undetected:
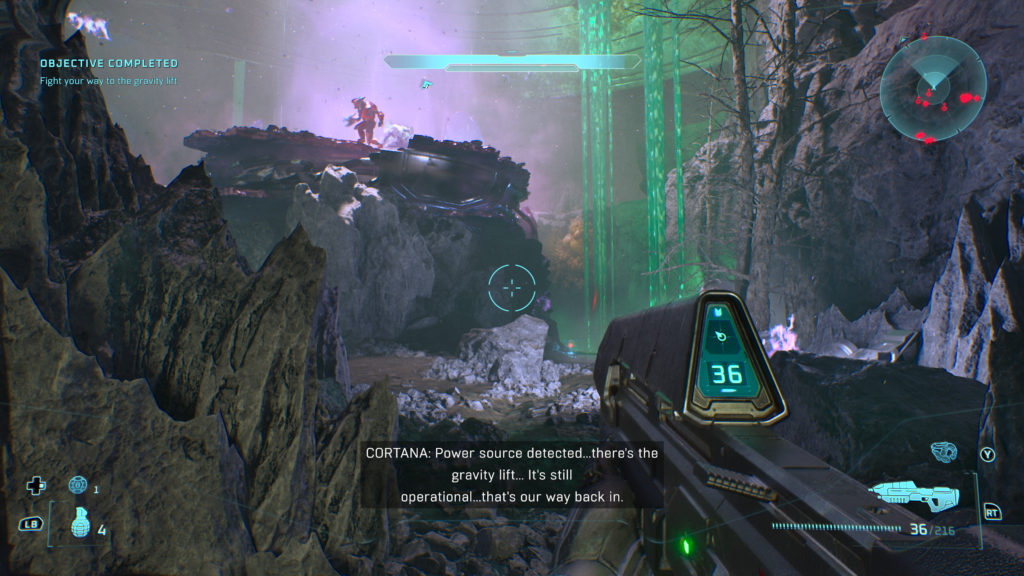
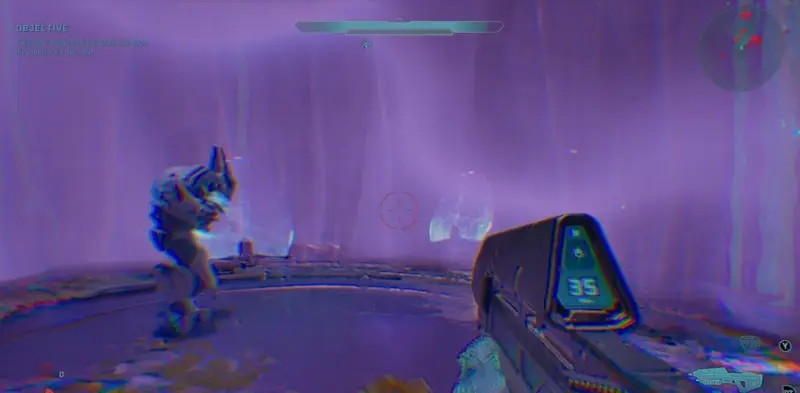
When you get into the lift, be sure to stand on the lift panel and take out any Covenant you can. When this Elite with an Energy Sword was pulled up in the lift, so was I:
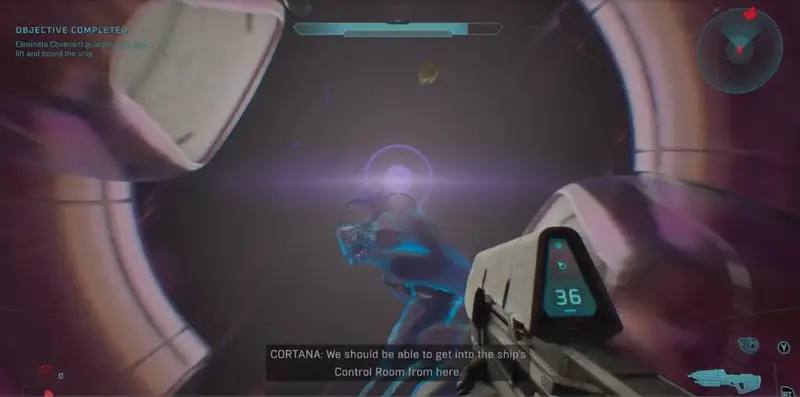
Be sure to be holding the grab button to get the Skull which you can see in the top of the image here:
2/3 Blind Skull
A little while into the mission, aboard the Covenant ship you’ll reach a room where Cortana says the Flood are stacking bodies and there’s a Wraith in the middle. Head to the bottom floor and through the big door to the ahead:
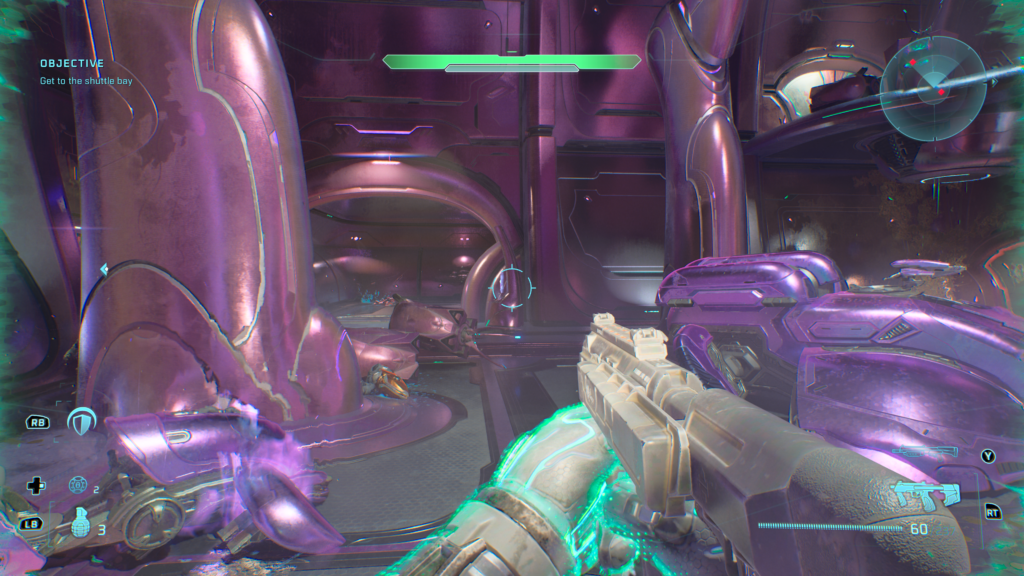
Crouch under the Wraith to the left and up the small incline:
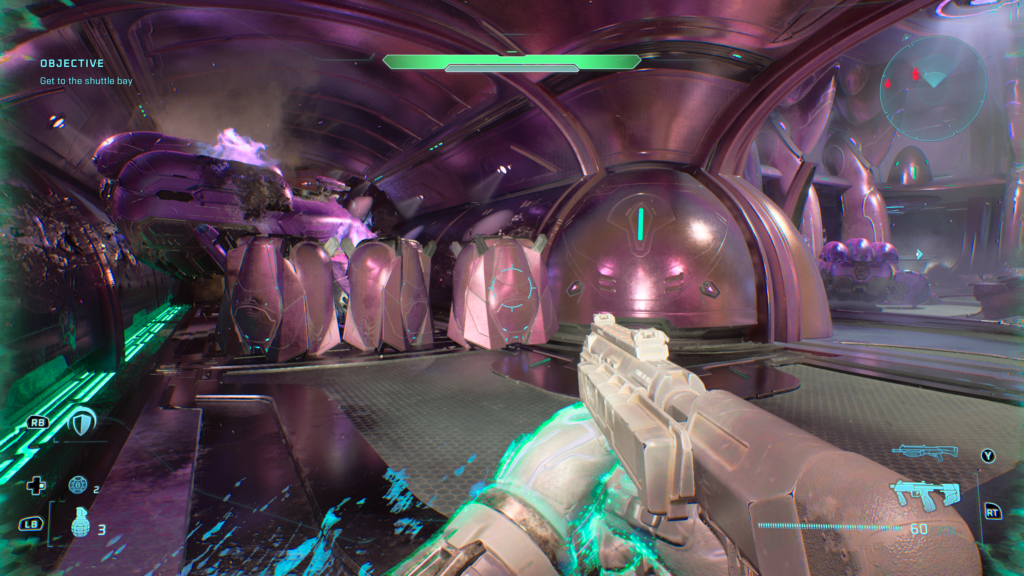
Just up here is the Blind skull:
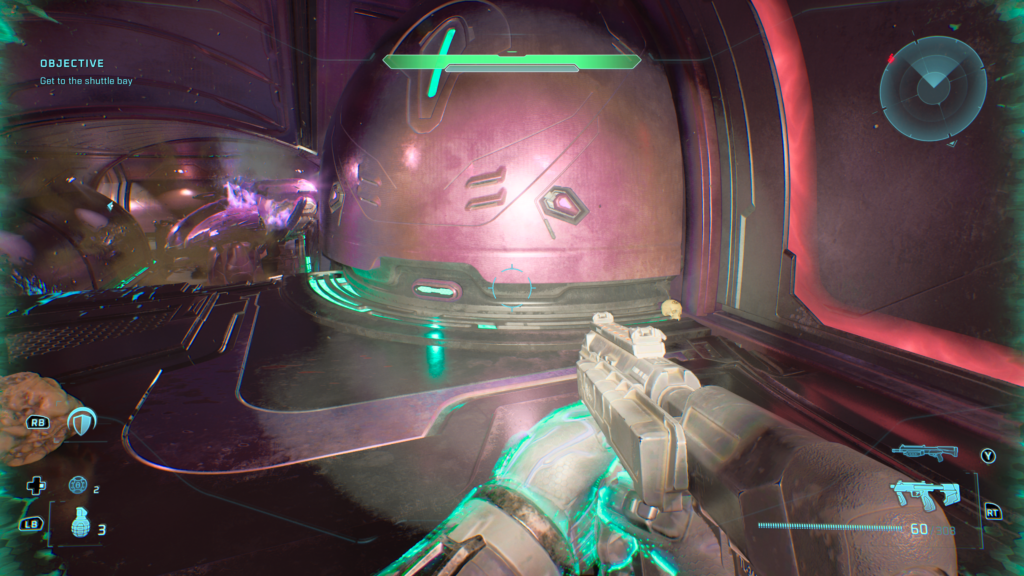
3/3 Pinata Skull
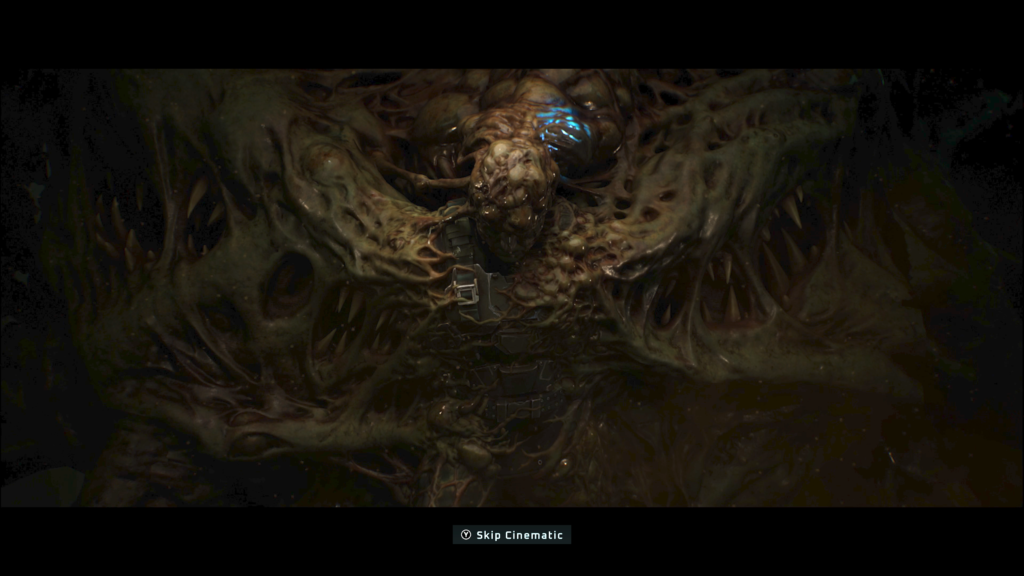
Obtainable quickly from Rally Point Charlie: Near the end of the mission you will find a dying Keyes. When you do it’ll trigger this cutscene which we won’t spoil any more of:
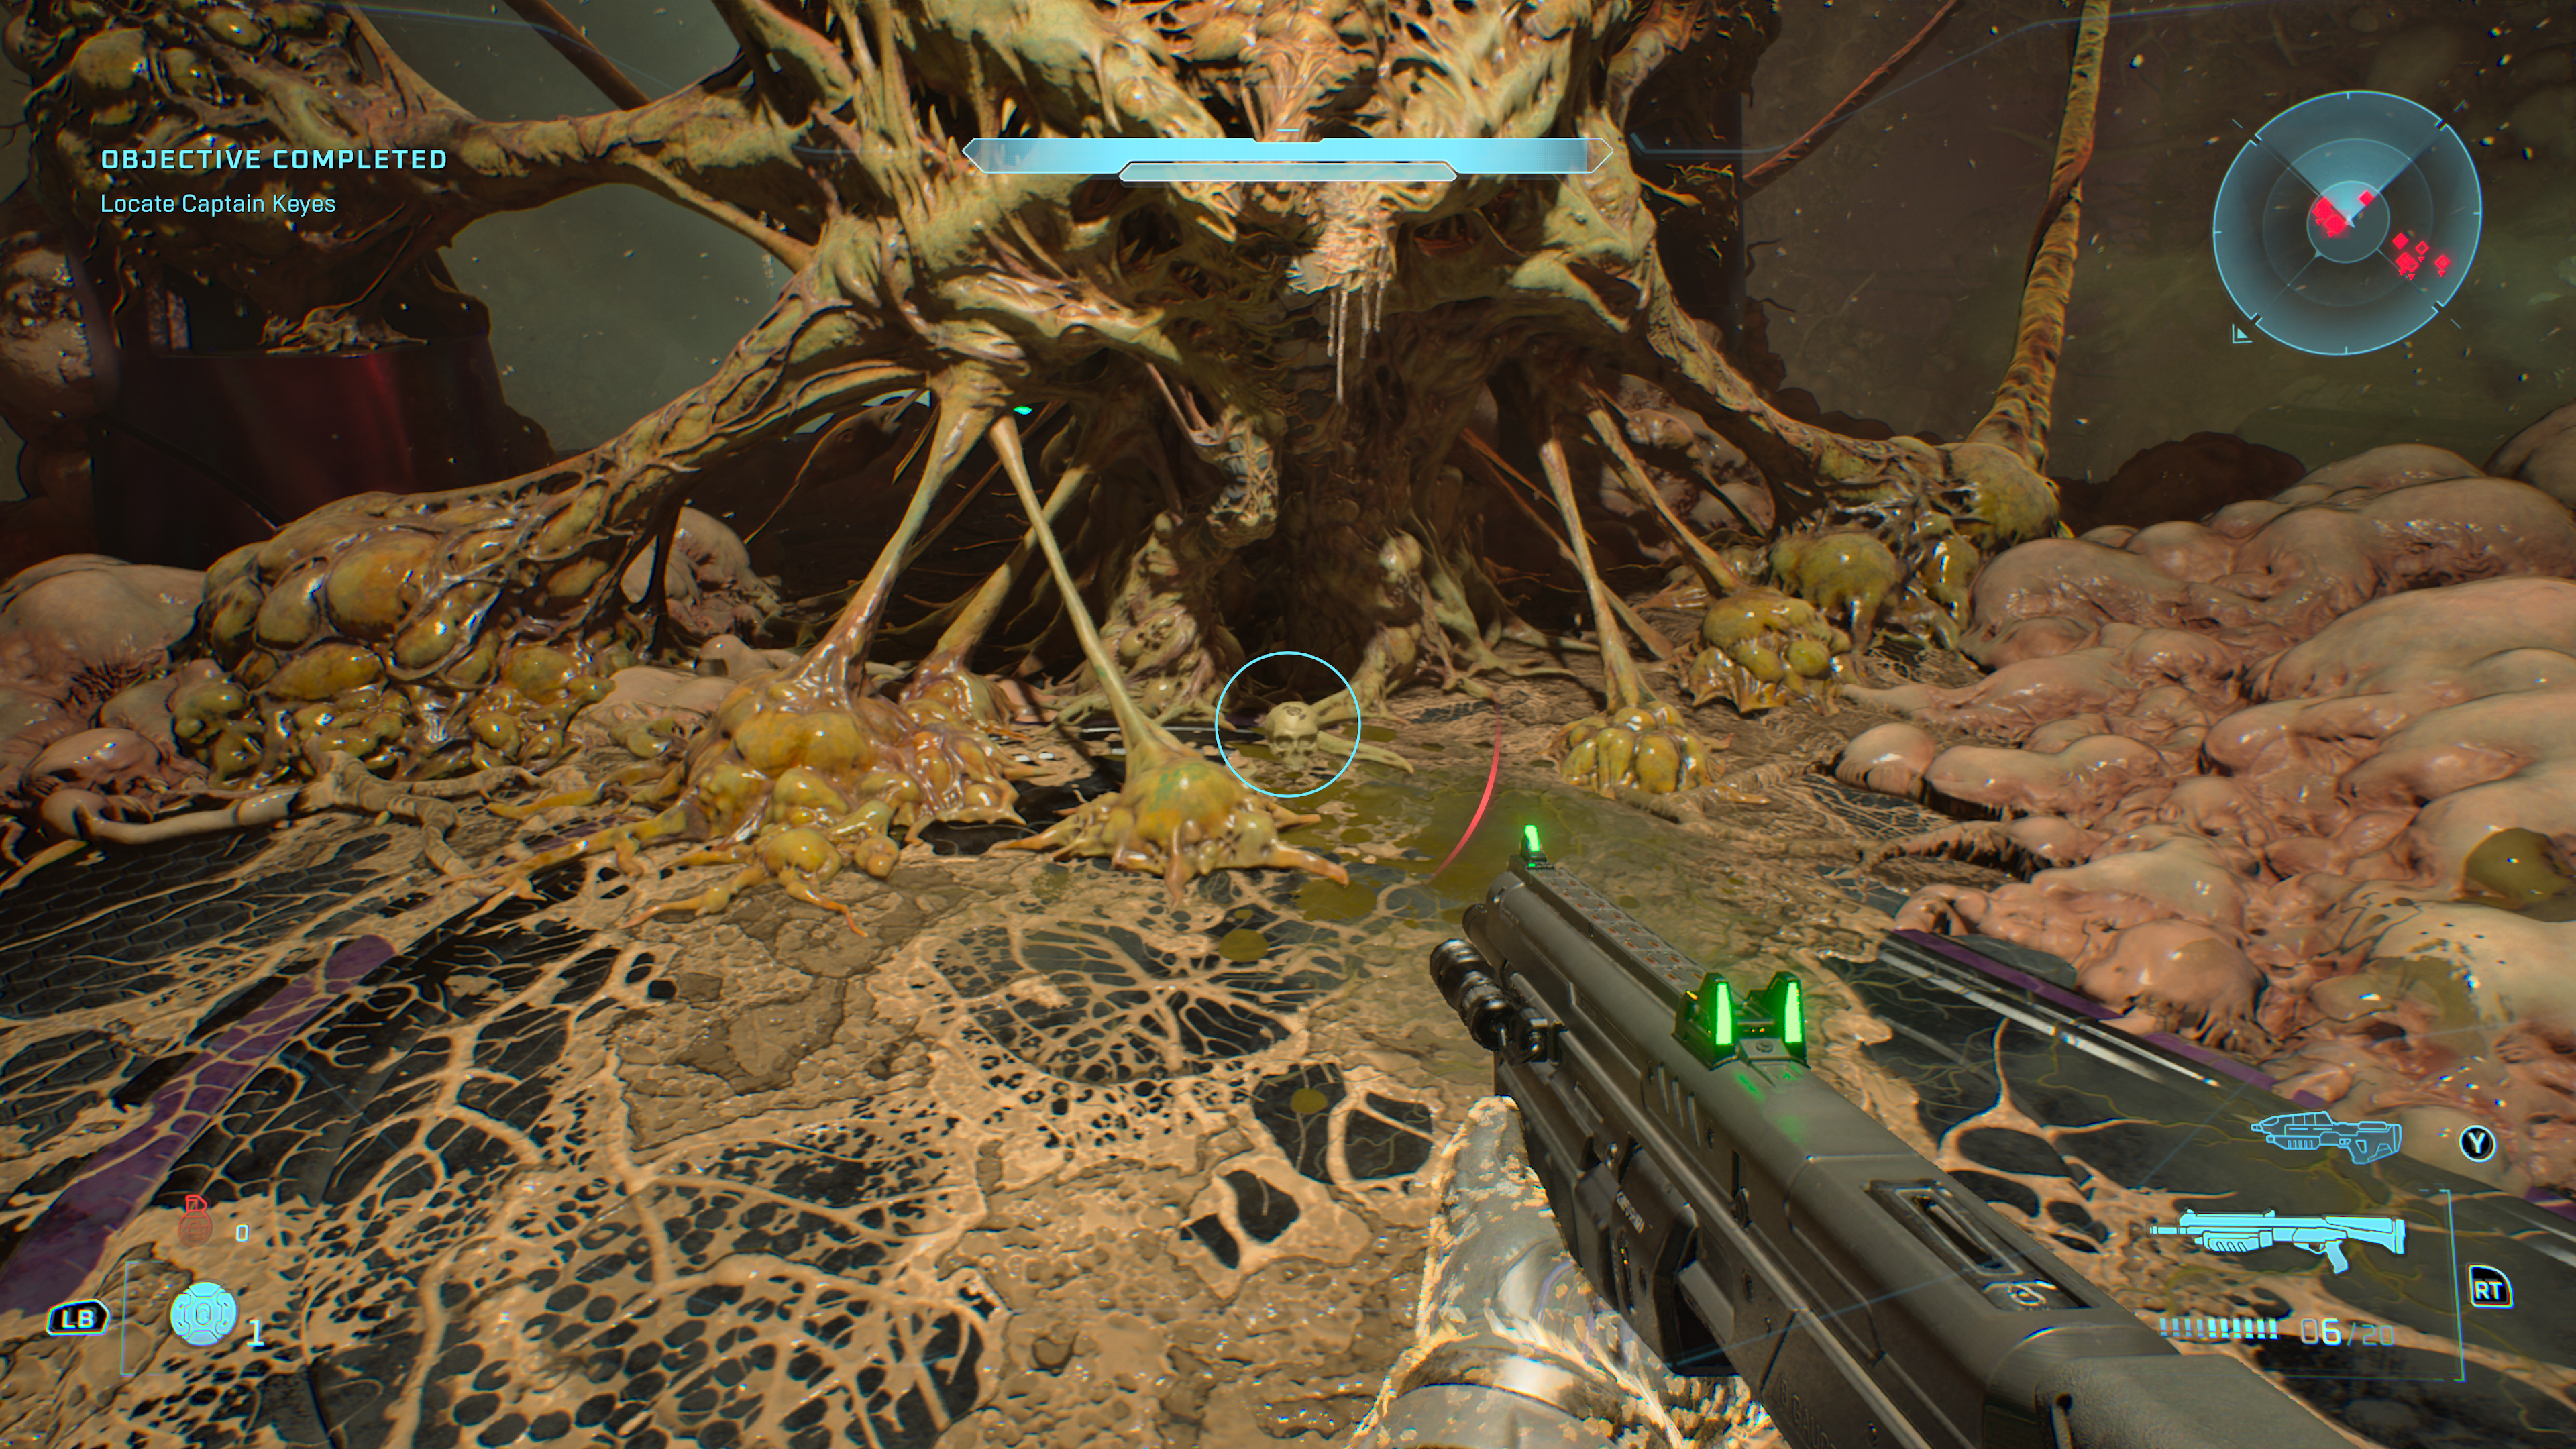
When the cutscene finishes, turn around and beat his Flood-infested body three times to make the Pinata Skull drop out:
The Maw – 3 Skulls
1/3 Stowed Reload Skull
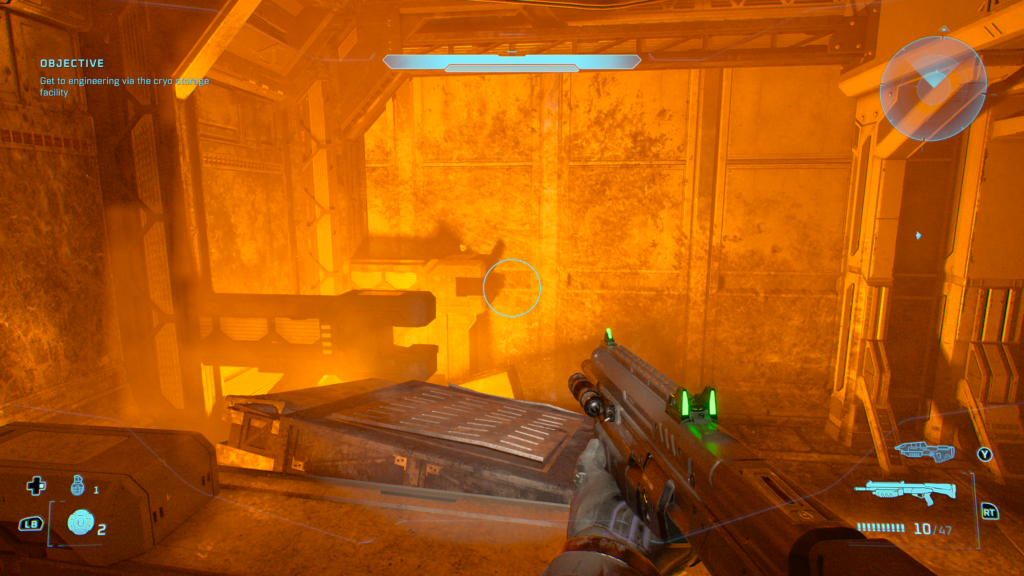
Quite far into the mission you’ll come to the cryochamber room where Sentinels and Flood are shooting the daylights out of each other. Let the room calm down a bit:
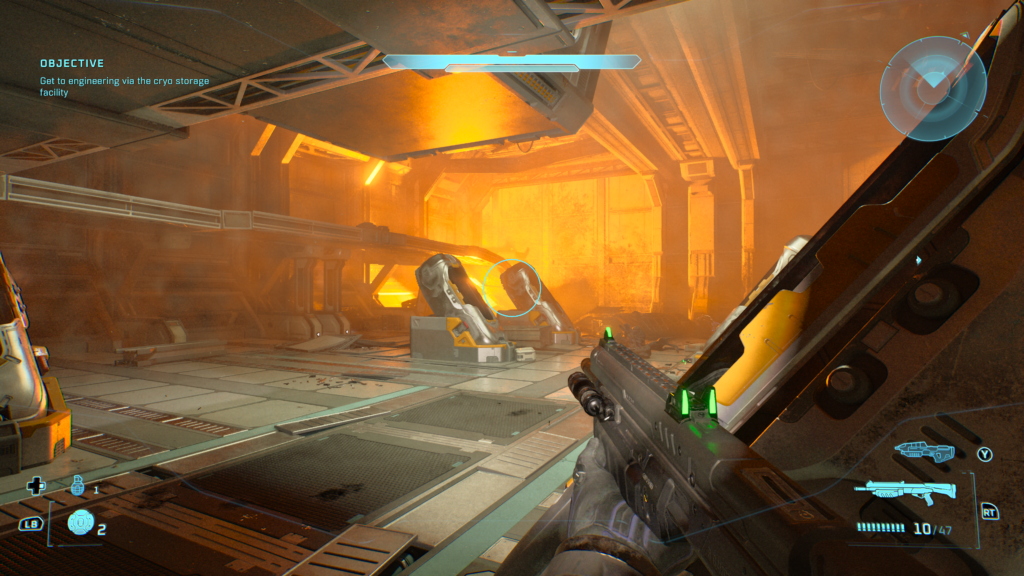
Once you’re in the clear, look for this skull high up in the far corner:
2/3 Boom Skull
A short while later you’ll get to the Engine Room where you need to take out four engines:
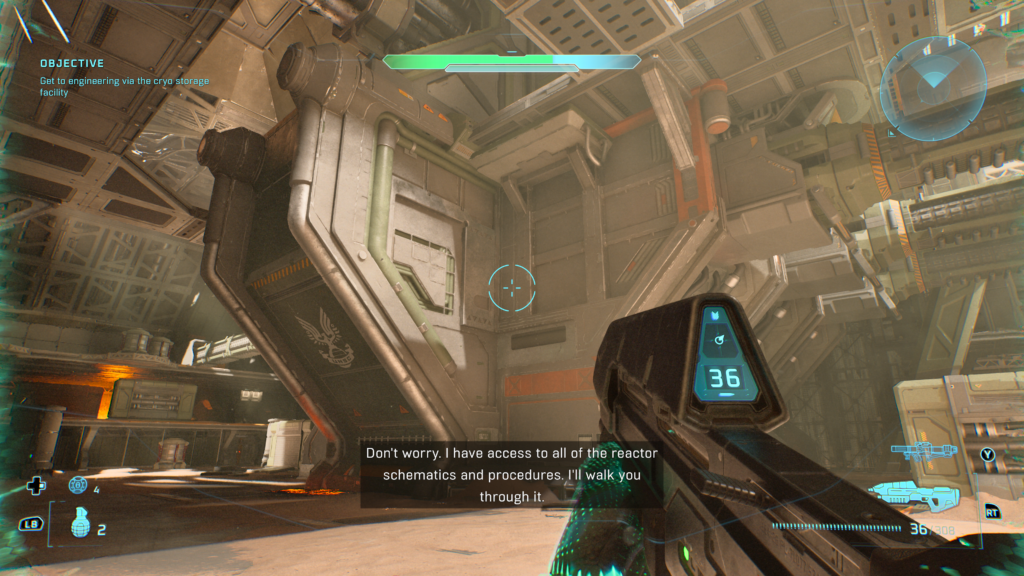
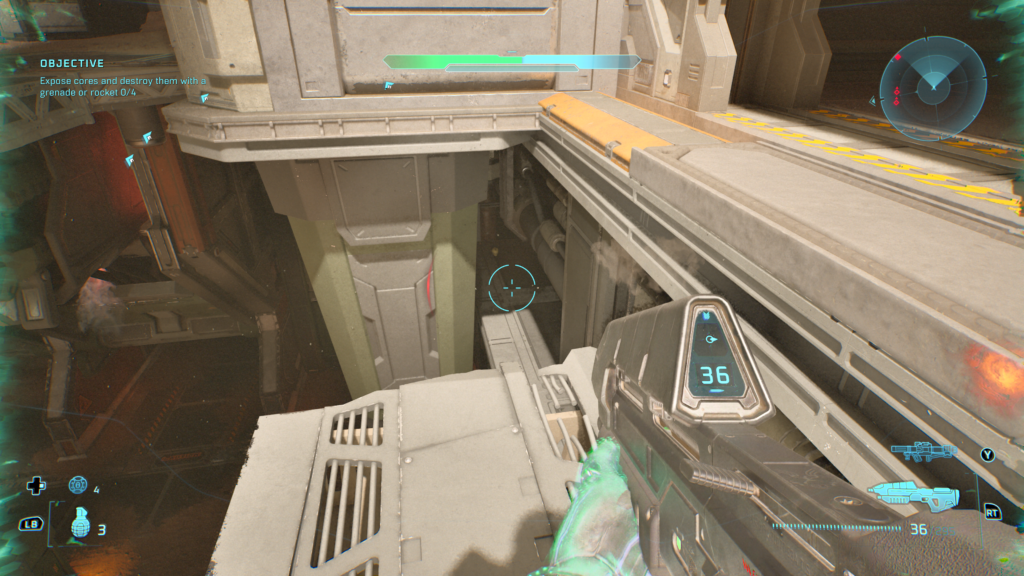
Head to the far side of the room from where you entered and up to one of the panels you’re supposed to interact with. You’ll see the box on a ledge to the left, jump to that:
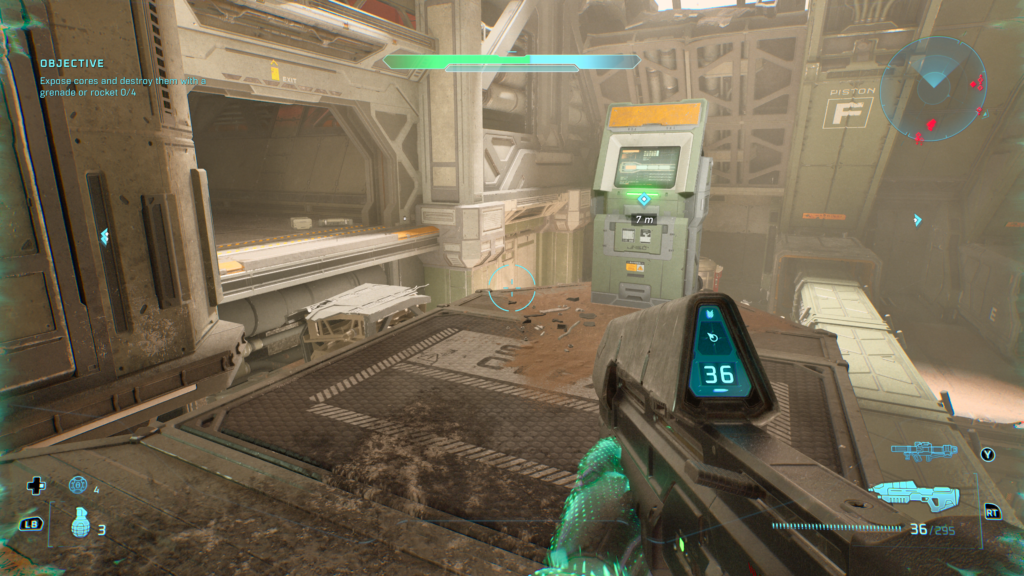
From there, turn around and you’ll see the Boom Skull tucked away on another ledge:
3/3 Thunderstorm Skull
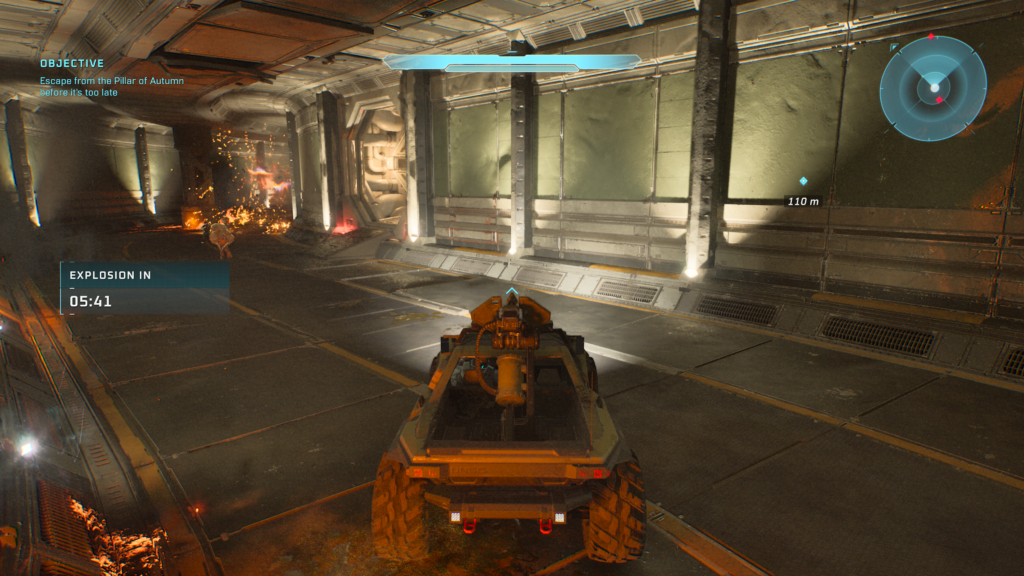
Very late in the mission you’ll gain control of a Warthog to escape. Not long into the journey you’ll be winding through roads to escape. When you reach around ~110m from your next checkpoint, take a right into the doorway here:
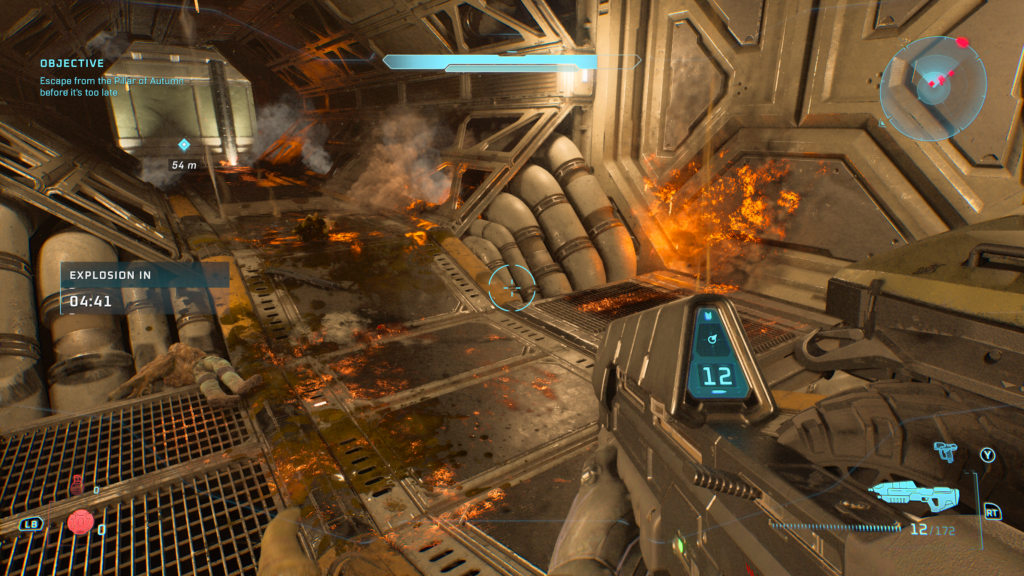
Once inside, in the middle of this small corridor is the Thunderstorm skull on the right hand side (note, lost my capture. The Skull is next to where the fire on the wall is):
New Mission 1: Boarding Action – 3 Skulls
1/3 Malfunction Skull
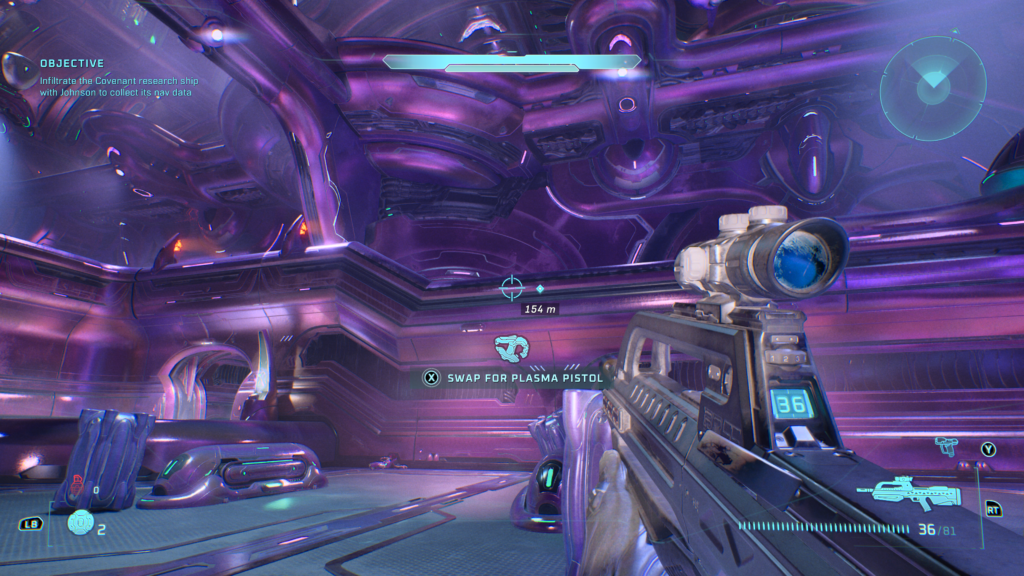
From the very start of the mission you’ll be able to hear the Skull, it’s located directly where the reticule is pointing:
Clear the first room and move to the second which you will also need to clear – it’s the top floor of this room near the Grunt-manned turret we need to get to:
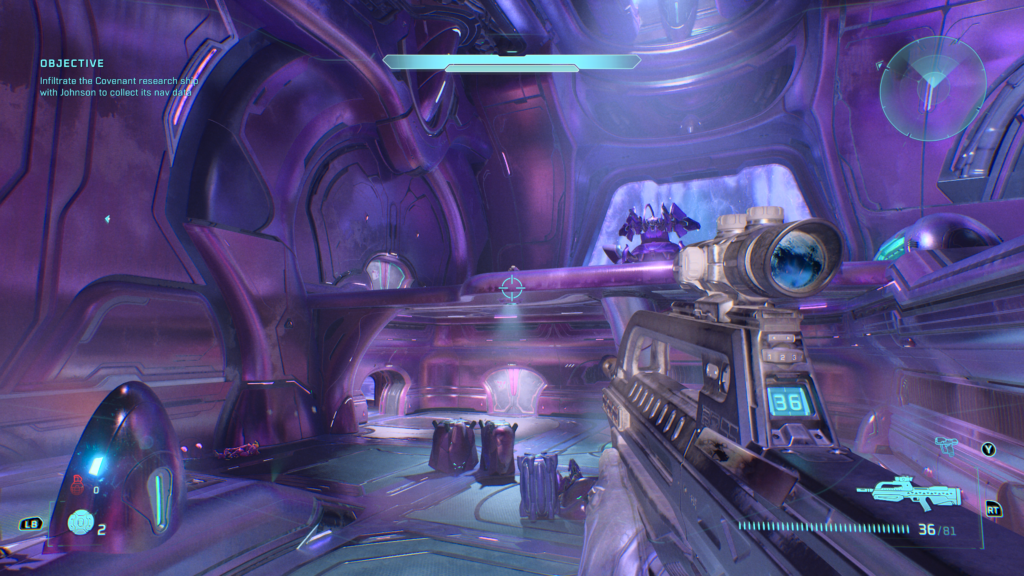
Keep killing enemies and pass through the hanger Banshees, eventually you’ll get upstairs. Cross this walkway between two turrets and then veer right through a door:
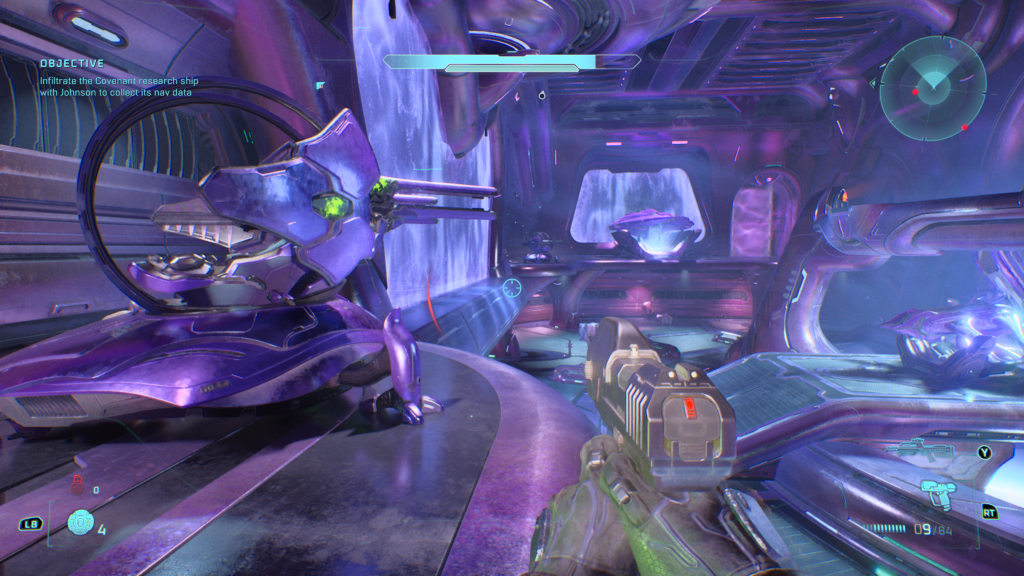
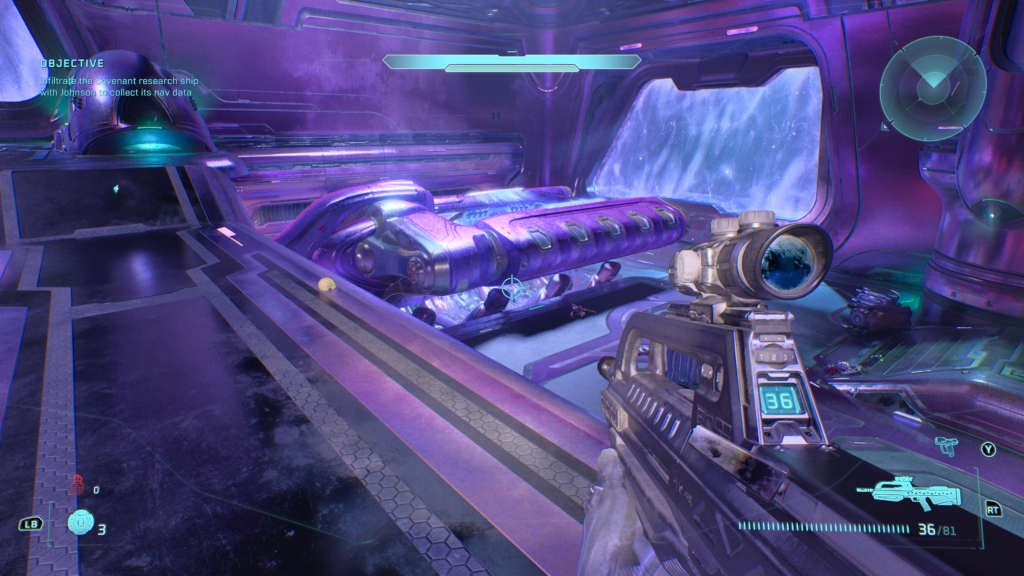
Eventually, you’ll be back above the start and can grab your Skull:
2/3 Johnny Ammo Seed Skull
About 15-mins into the mission you’ll reach a very gold room where you’ll split with Johnson, you’ll go down a lift and he’ll stay high. After clearing that room, you’ll reach the next which looks similar. You want to make your way up to him using the ramps in distance:
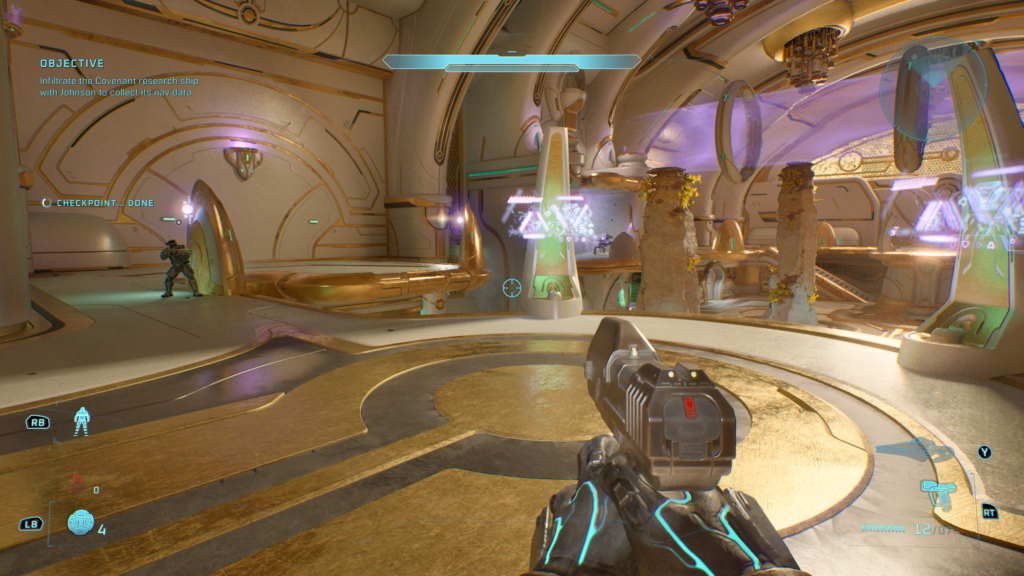
When here, turn around and go through the door to the left:
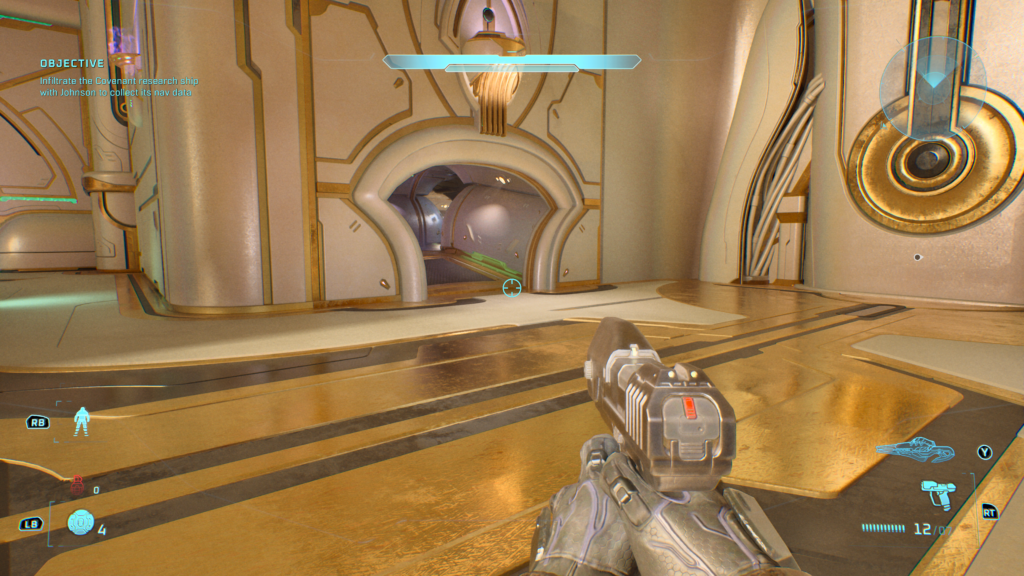
Several Elites will run at you here, take them out before heading onto the other side of the gap:
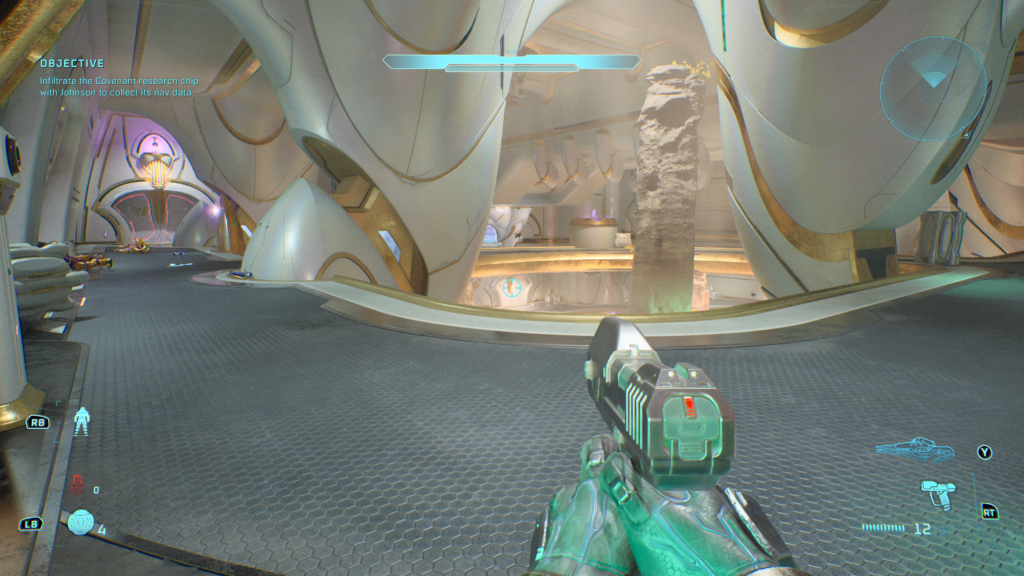
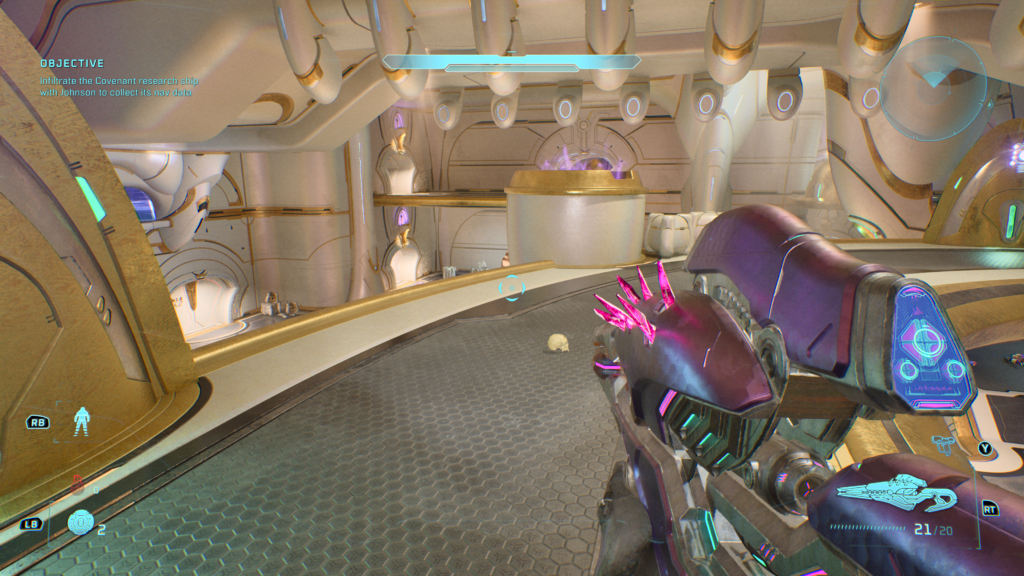
Just here is your Johnny Ammo Seed Skull:
3/3 Leadhead Skull
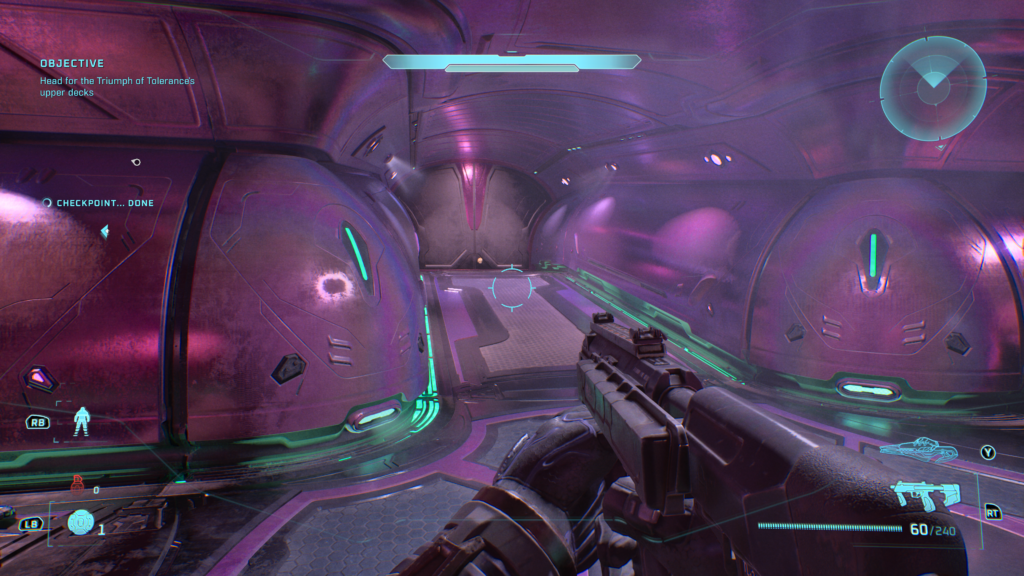
Quite an easy one. You’ll reach a section where Brutes keep dropping down from a lift and some Elites come out of the side doors. When you’re done killing everything, Johnson will say something about the lift and jump in it. Don’t follow him yet. instead, head through the door on the left:
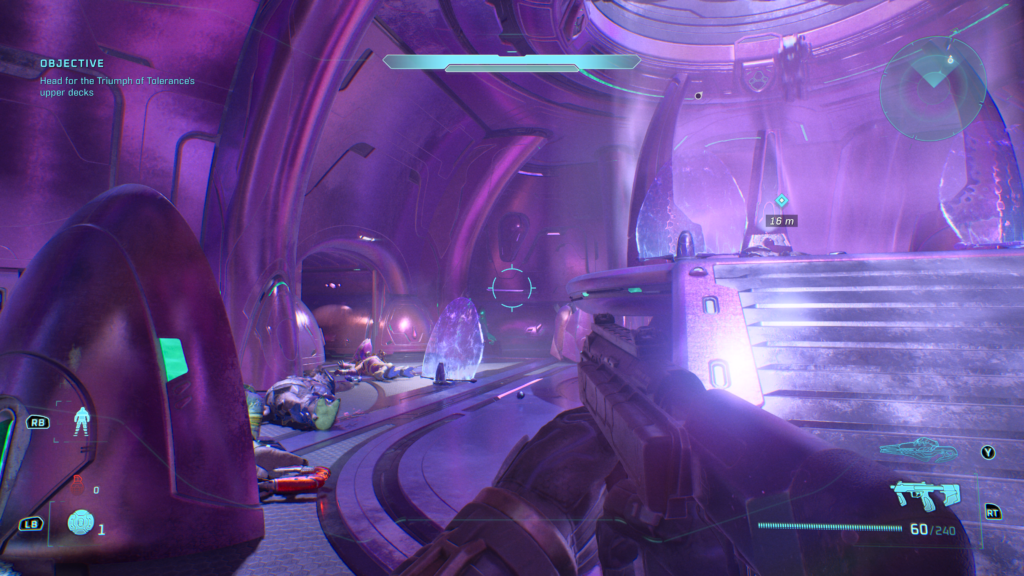
Your skull is inside, up the small incline to the left:
New Mission 2: The Most Dangerous Game – 3 Skulls
1/3 Temperamental
This is one of the difficult Skulls in the game as it has multiple steps at multiple locations. Please be sure to pickup Skull 2 (Recession, see below) in the process of getting this Skull.
During this mission there is an unkillable gold Elite who stalks you throughout the mission. You need to crack his armour before he runs away three times during the mission. It’s advised to use the unlimited ammo Skull if you have it, and absolutely ensure you keep a BR or other long range weapon throughout the entire mission.
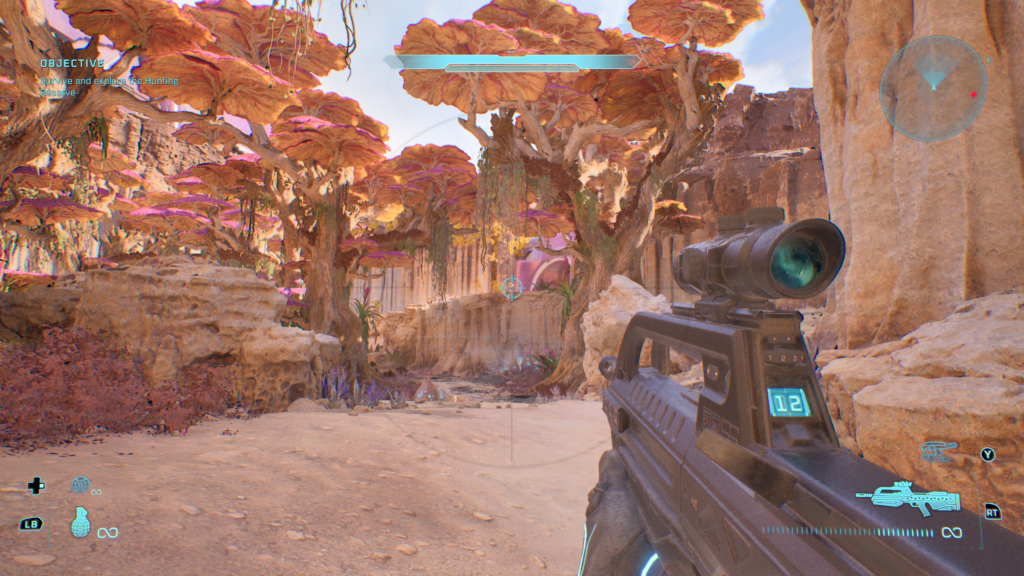
First, very early in the mission he will appear on a cliff on your right. Make sure to crack his armour:
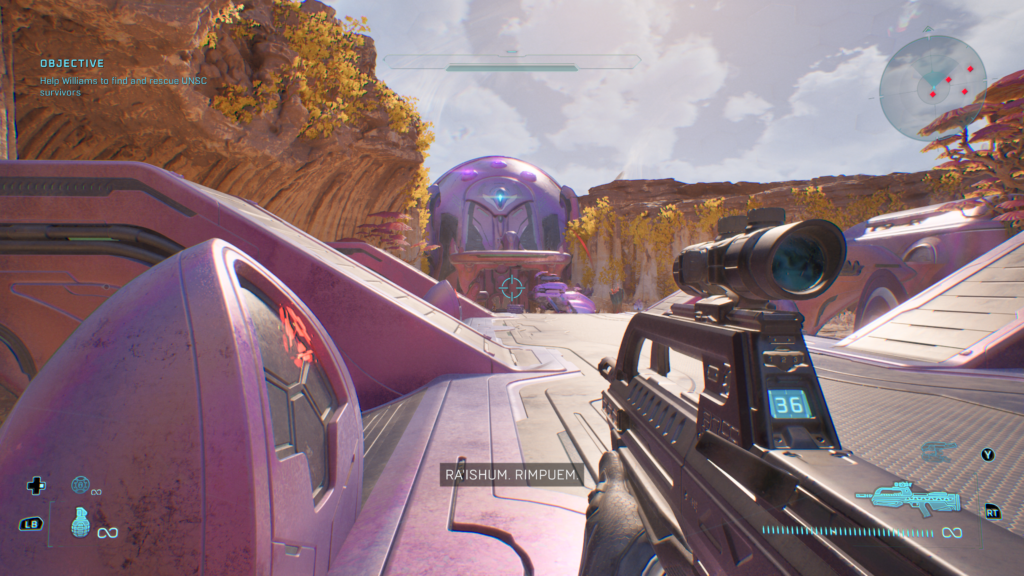
Second, he will be located at the end of the long bridge behind the Wraith. Crack him before he backs out through the door:
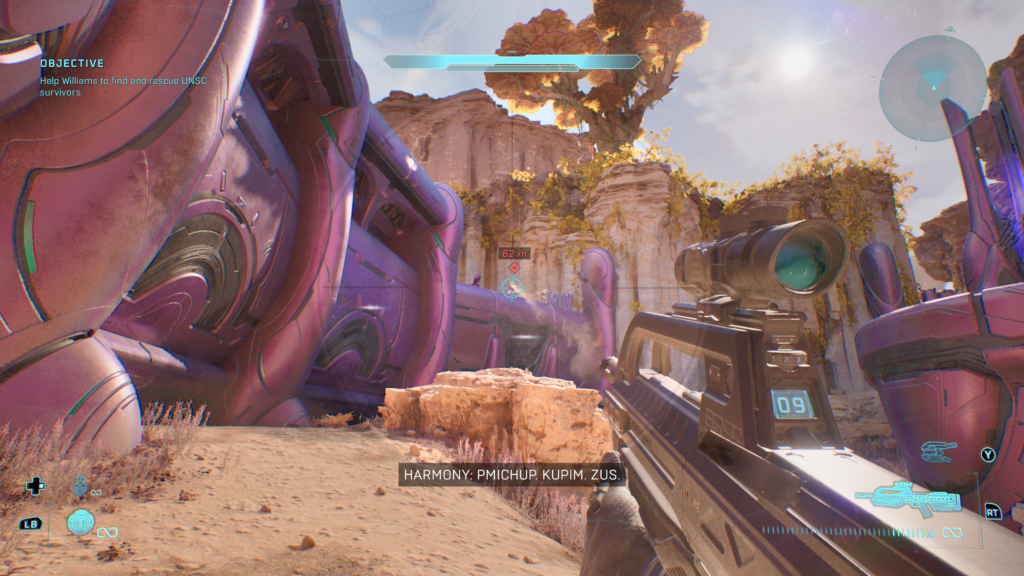
Finally, in this circular battle arena, he will be staring at your from a ledge on the left as soon as you walk in. Crack him before he backs away:
Once you’ve cracked him all three times, clear all other enemies out. the Skull will appear in this small monument in the centre of the same area:
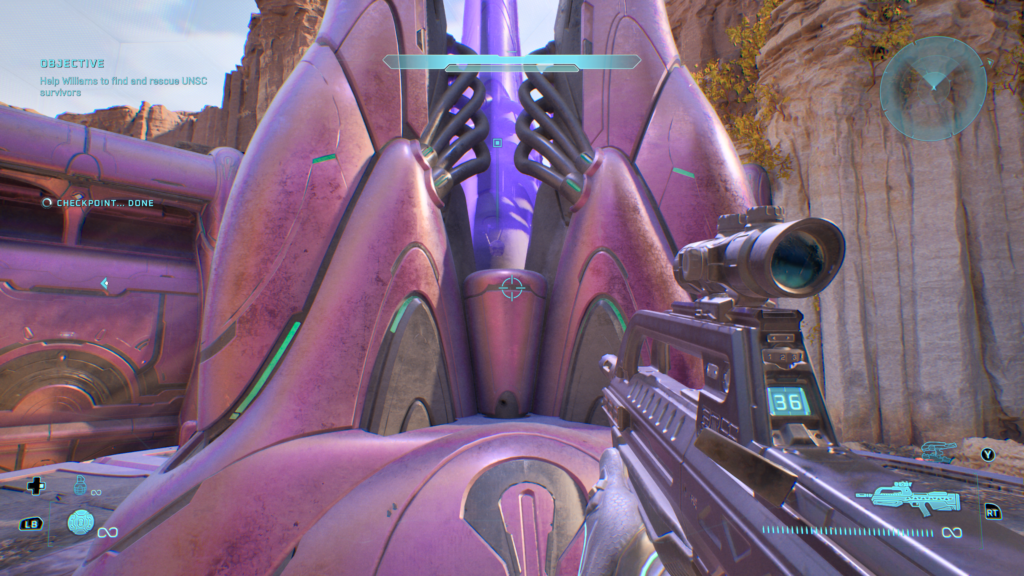
2/3 Recession Skull
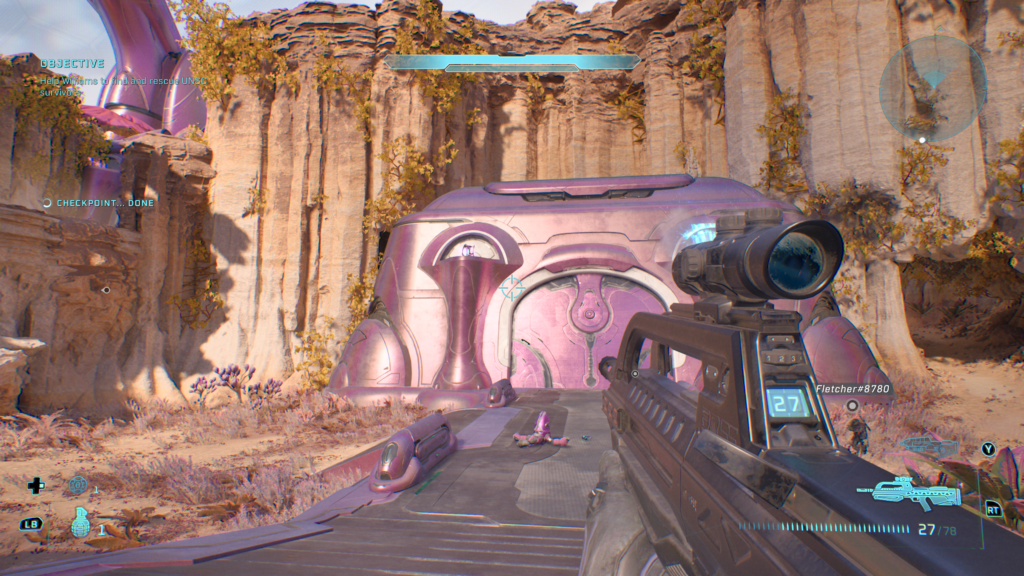
Relatively early in the level you’ll reach a section where Johnson heads high and the other NPC heads low, to take on a ton of enemies at a bridge, including a Wraith. On the side of the bridge you enter at, there’s a large locked gate. You need to shoot both barrels in the flames at the top to open it:
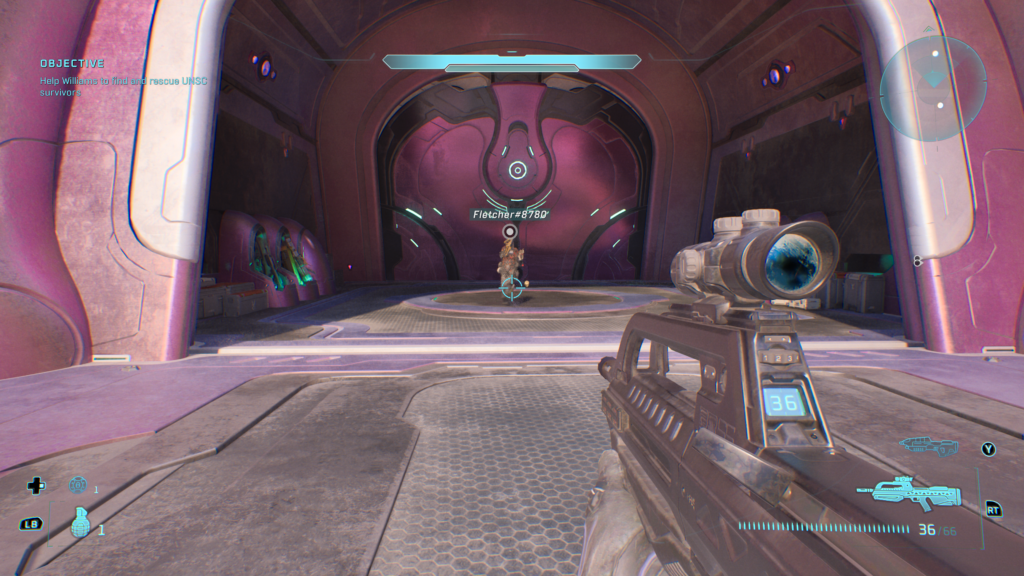
Once inside, the Skull will be there in the middle of the room alongside plenty of tasty weapons:
3/3 Ghost Skull
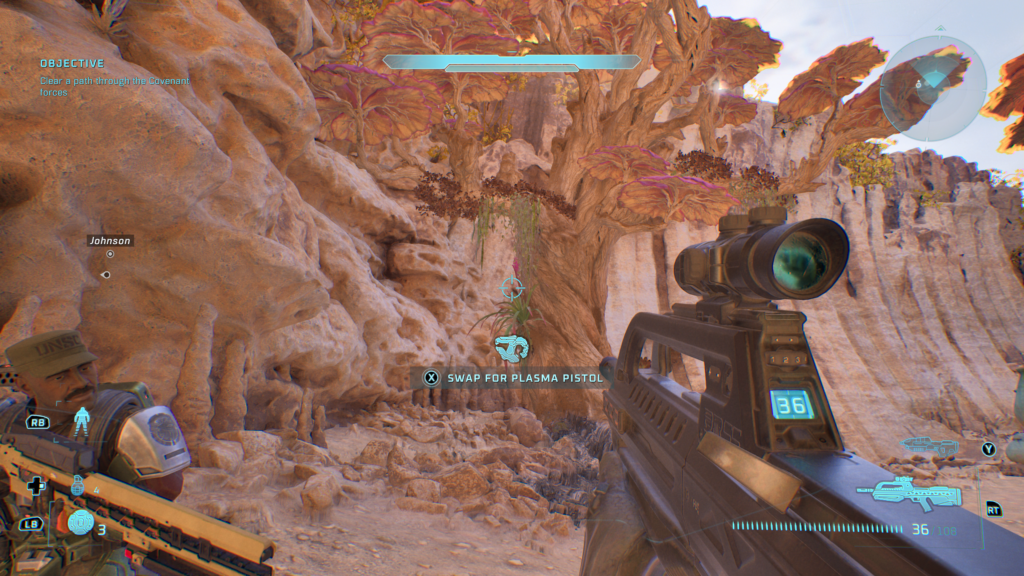
A while into the mission you’ll get back outside and come to this area and take out plenty of enemies. Once you have, veer left towards the tree with purple leaves:
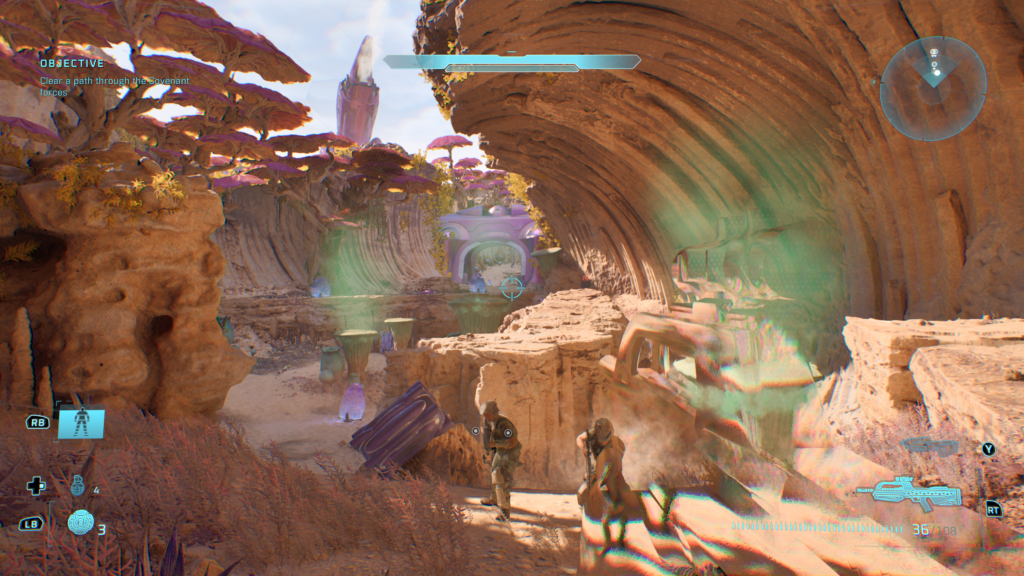
When you’re here, turn around and ascend the rock face, it’s quite tricky but you can use the tree branches to help:
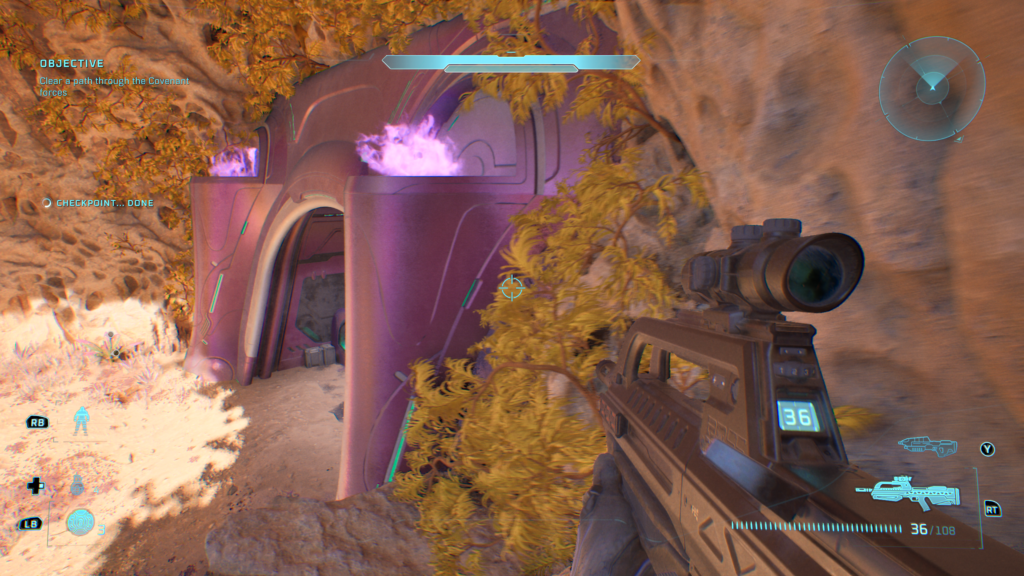
Once here, look back towards the door you originally came through. The skull is up high in the purple flames, use the rock face on the right to climb onto before jumping to the Skull:
New Mission 3: Heavy Burden – 3 Skulls
1/3 Eye Patch Skull
Roughly 15 minutes into the mission you’ll come to a section where you need to cross a bridge with Johnson. The bridge is to the right, instead head through the door on the left where an Elite comes out of:
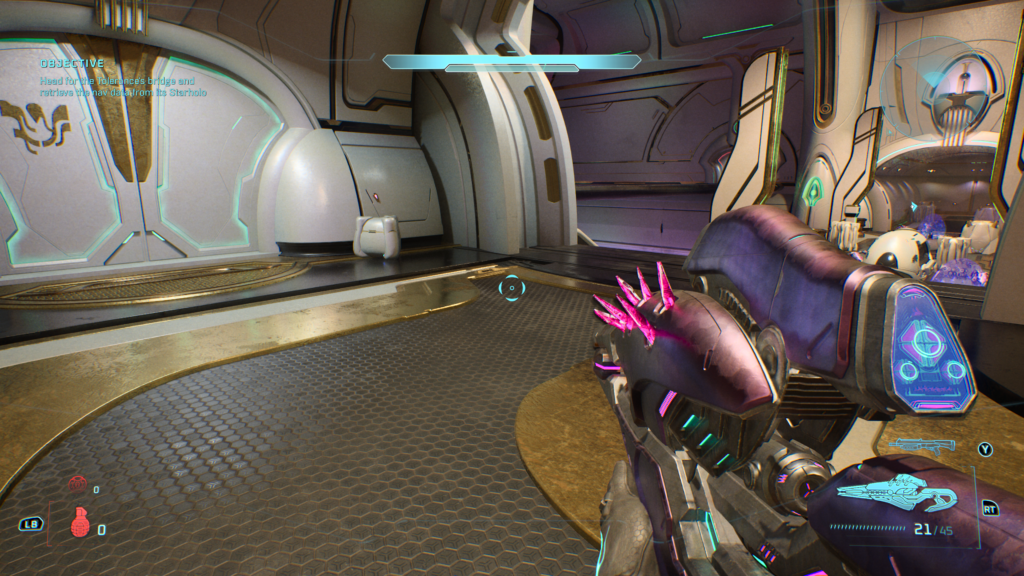
Once through, cross the bridge in front of you (adjacent to the one you should be progressing on):
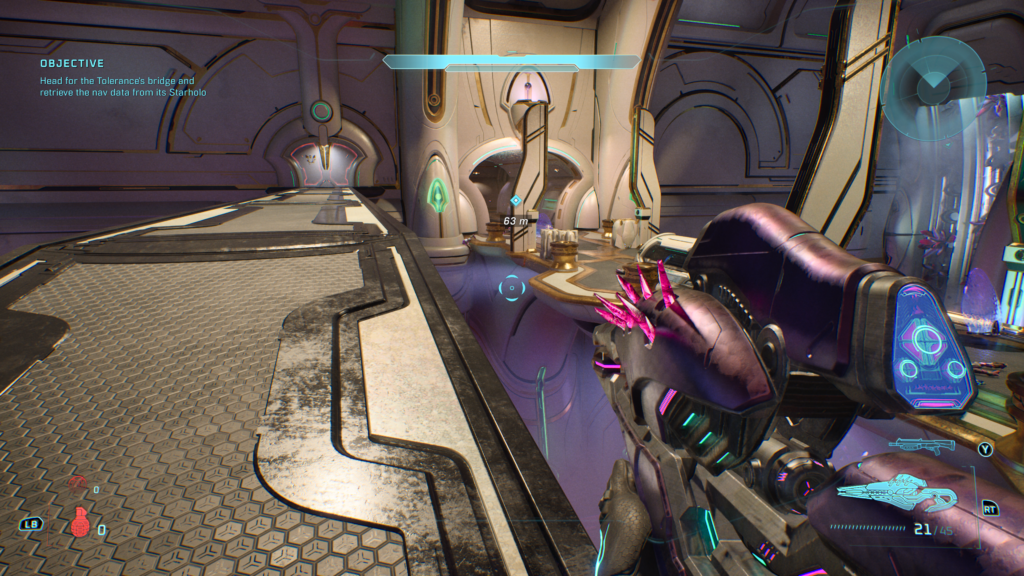
The Eye Patch Skull is to the right at the far side:
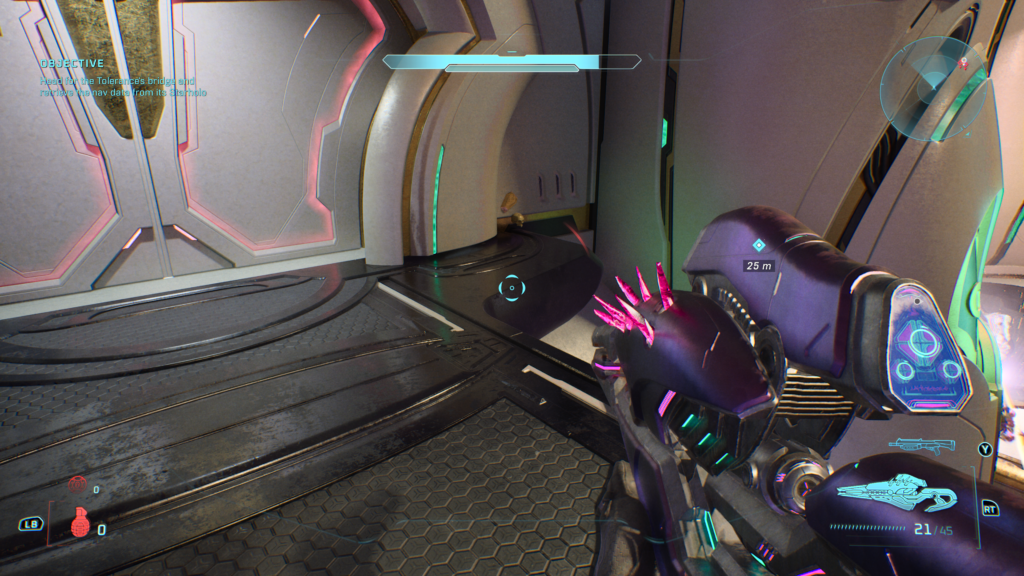
2/3 Grunt Birthday Party Skull
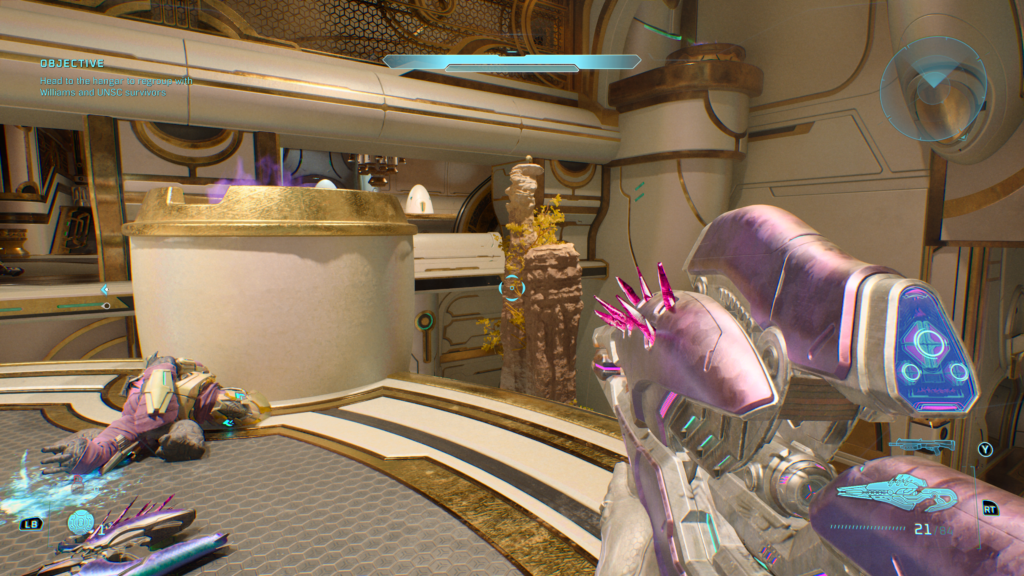
The one we all want! Later in the mission you’ll come to this room, entering to the top level. Look to the right and you’ll see the Skull on a vertical narrow stone pillar:
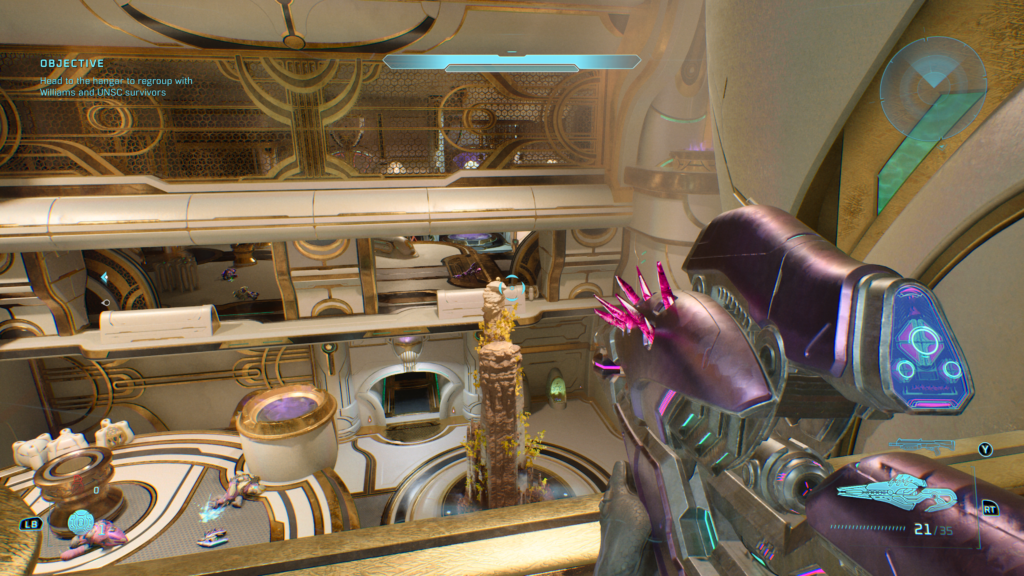
Drop down, then jump into the purple flame and then across to the Skull. In the words of the Grunts, yaaaaaay!:
3/3 Efficient
And, finally!
The final Skull in the game takes place during the elevator ride near the end of the mission. After disembarking and getting the elevator operational again, you’ll reach this section:
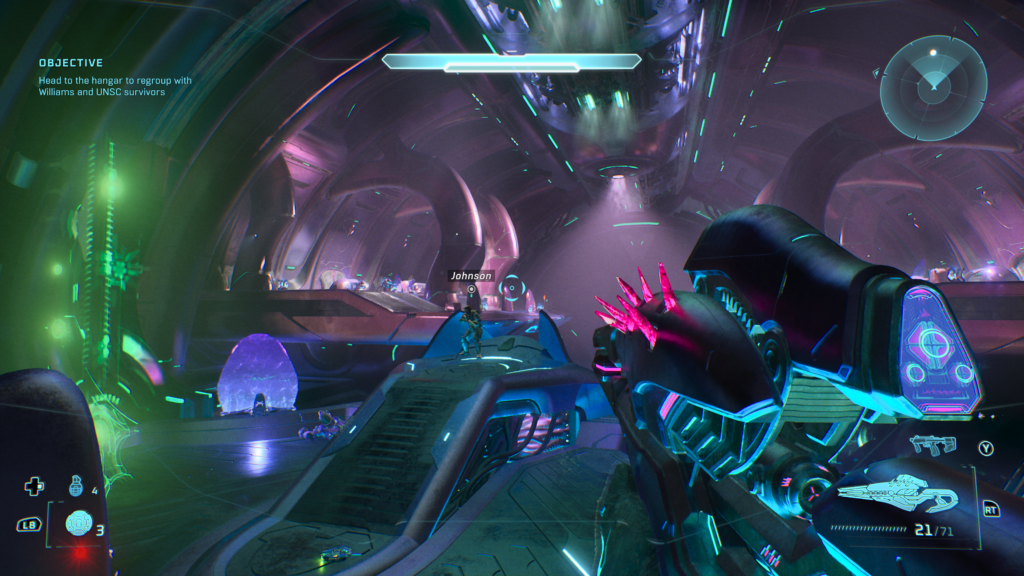
The Skull is on the left platform and you need to jump off to grab it within 10 seconds otherwise you’ll die from being out of bounds. It’s easier than it sounds. Stand at the back taking cover on a higher piece of your elevator. When it reaches this bit, jump off and head right:
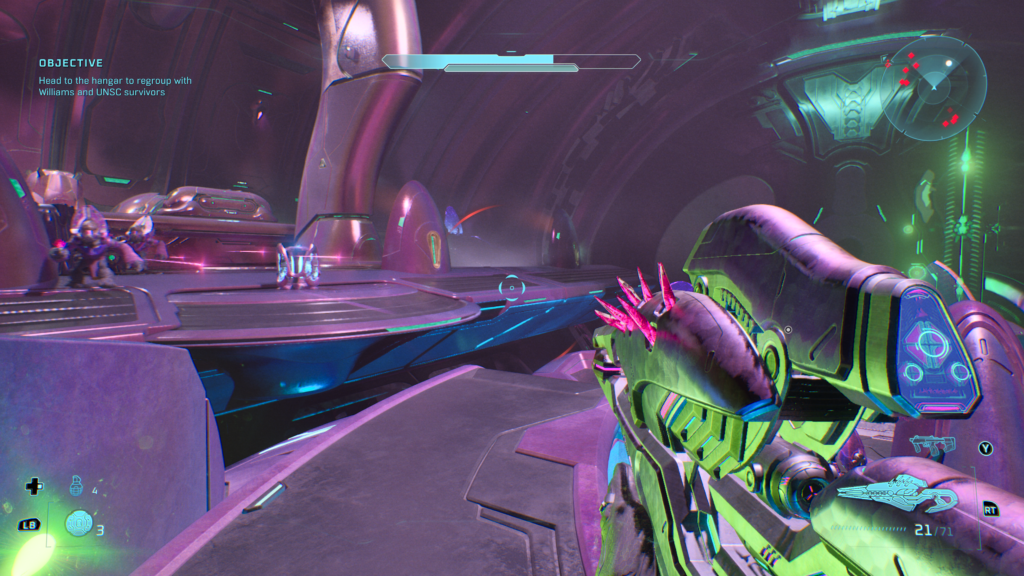
Your final Skull, Efficient is tucked away on the right. Now, good luck making it back onto your ride!
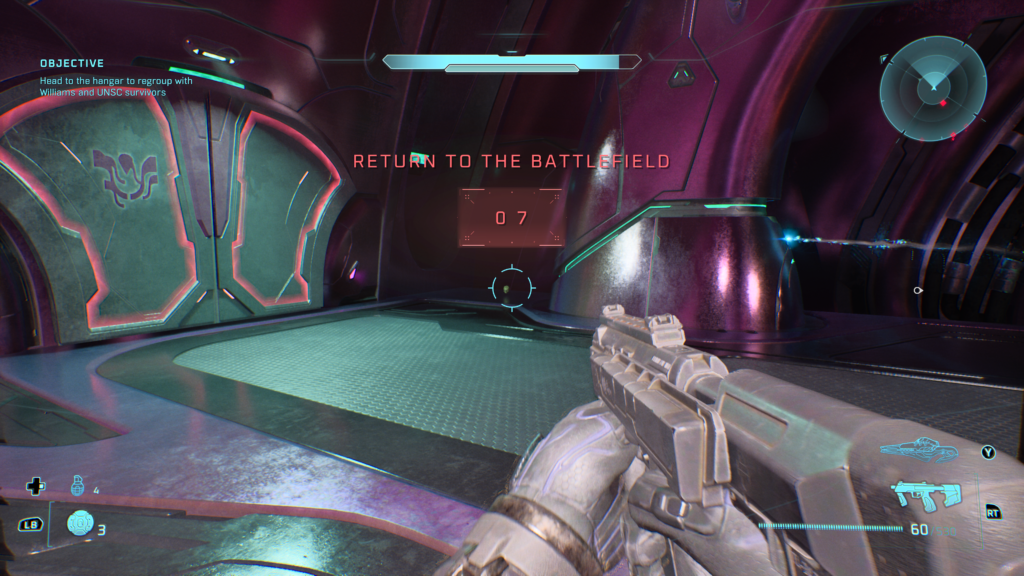
And by collecting that final Skull, you will unlock the Headhunter achievement / trophy, congratulations!
That was our All Skulls / Headhunter guide for Halo: Campaign Evolved. We hope it was helpful! You can find more of our guides for Halo: Campaign Evolved below, or read our full review here.
Are you enjoying Halo: Campaign Evolved? Let us know in the comments below, and join the Gamer Social Club Discord to talk about your favourite games, play in community game nights, take part in giveaways, and more!