Bond is back! Don’t miss a thing with the 007: First Light – 100% collectibles guide. Is that everything 007?
007: First Light is the first original 007 game release since 2012’s 007 Legends, and there’s a lot of hype and excitement for the game. It seems like IO Interactive, fabled Hitman developers, have gone all in to bring us the return to videogames Bond deserves.
In true Bond fashion, there are lots of key items to pick up and locate in the game’s missions. Collectibles, playing cards, legacy items. Only the truest 00 Agent will be able to track these down.
Luckily, we’ve got these dossiers of intel for you Agent.
Check out the launch trailer below:
007: First Light – 100% Collectibles Guide
We’ve listed the collectibles in the order they’ve been discovered. This isn’t necessarily the right order, or the most efficient way to locate them.
- 00: Prologue, “Against the Odds”
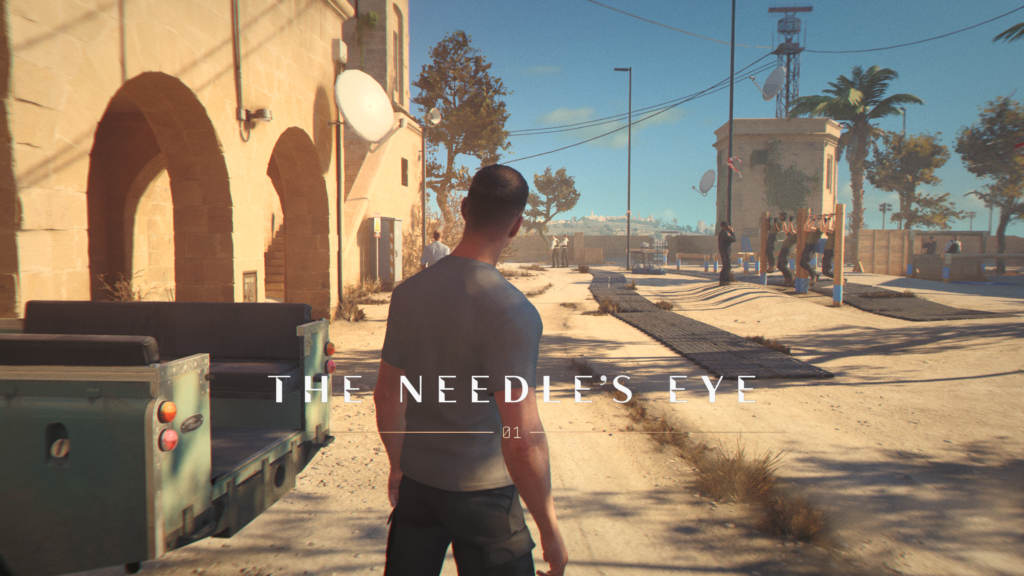
- Chapter 01, “The Needle’s Eye”
- Chapter 02, “A Night Out”
- Chapter 03, “All the Time in the World”
- Chapter 04, “The Past Never Dies”
- Chapter 05, “Beyond the Grave”
- Chapter 06, “Uninvited”
- Chapter 07, “Knightfall”
- Chapter 08, “Time to Die”
- Chapter 09, “Wave of the Future”
- Chapter 10, “For England”
00: Prologue, “Against the Odds”
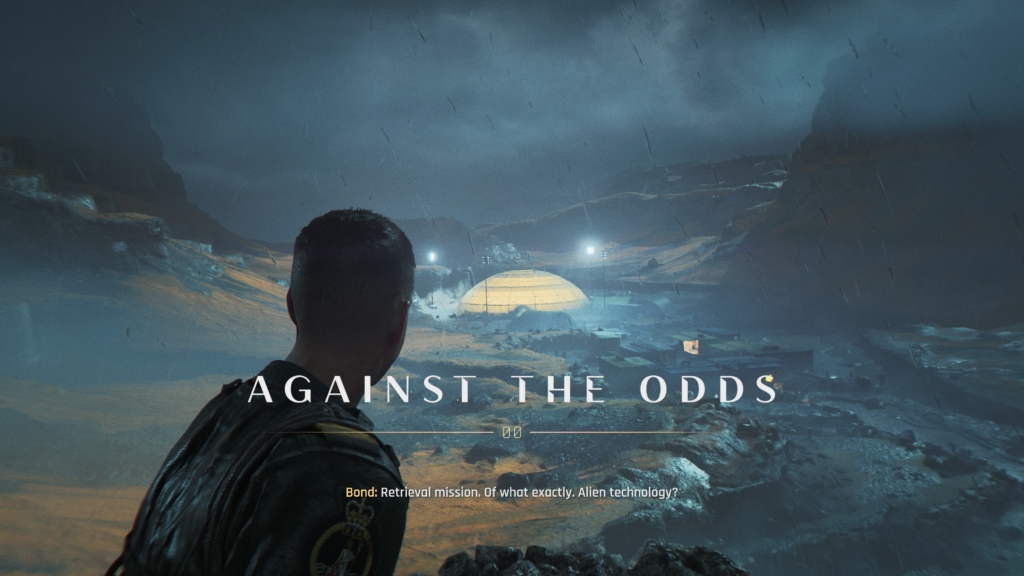
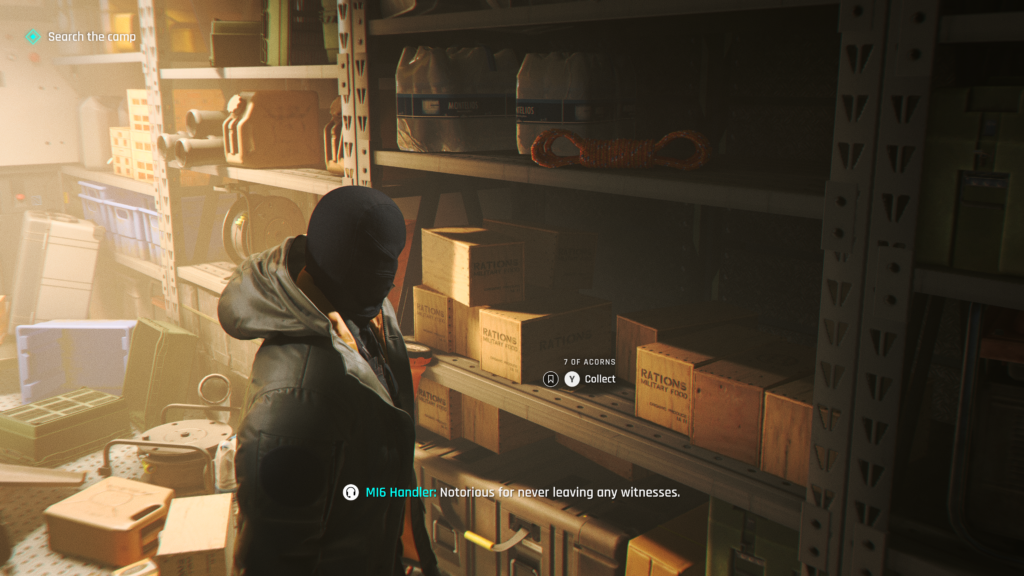
Playing Card (1 / 1) – 7 of Acorns
Once you’ve entered the base, you’ll grab a Parker jacket to warm up before searching for clues. After you’ve done in that room, you’ll head out and your objective will be to ‘search the camp’. As you make your way through a vehicle will cross your path and crash. You’ll be asked to control the vehicle to move it out of the way.
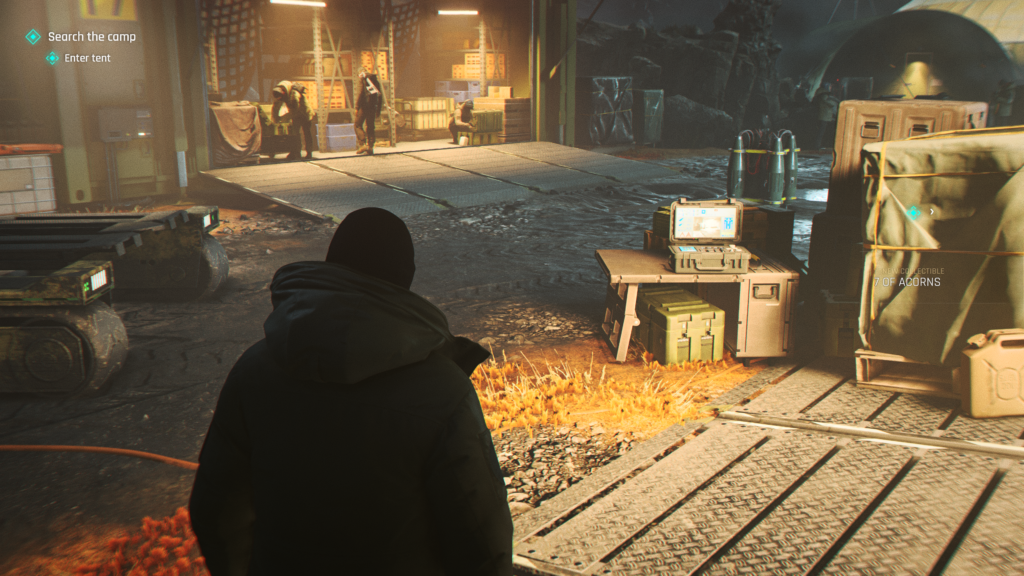
Once you’ve done that, turn around and look at some shelving to your right. The playing card is rest on there.
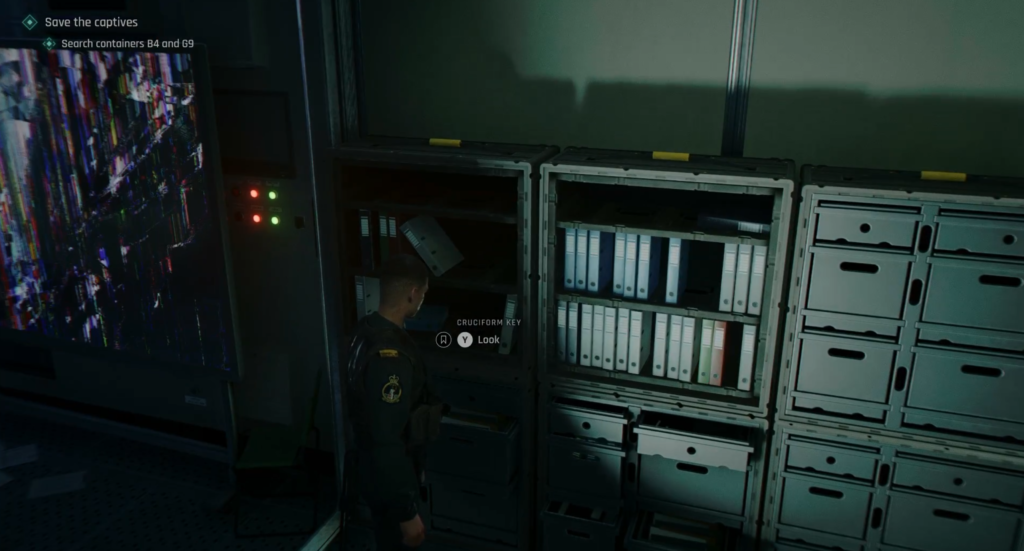
Legacy (1 / 1) – Cruciform Key
You’ll arrive at a section where your objective will be to “save the captives”. There will several cabins to explore.
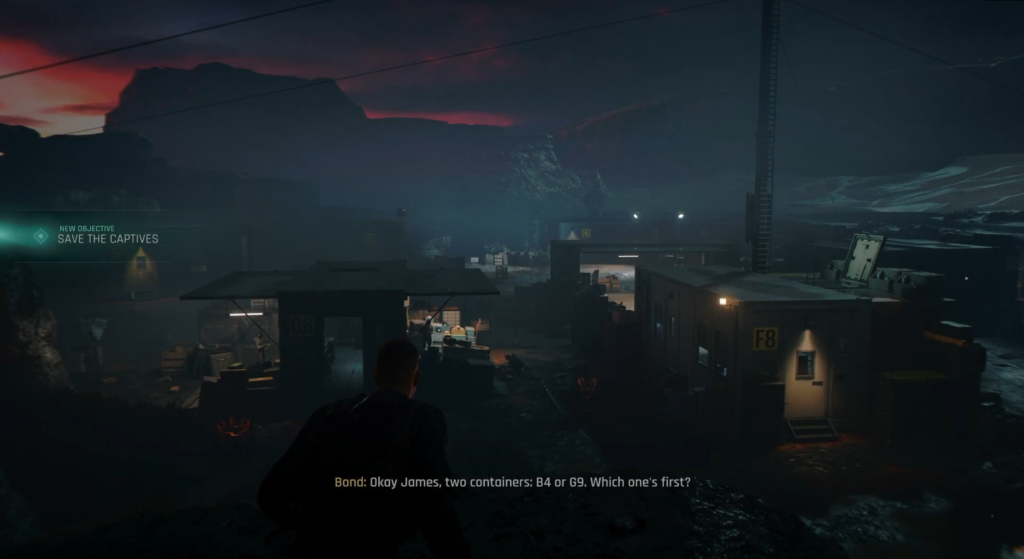
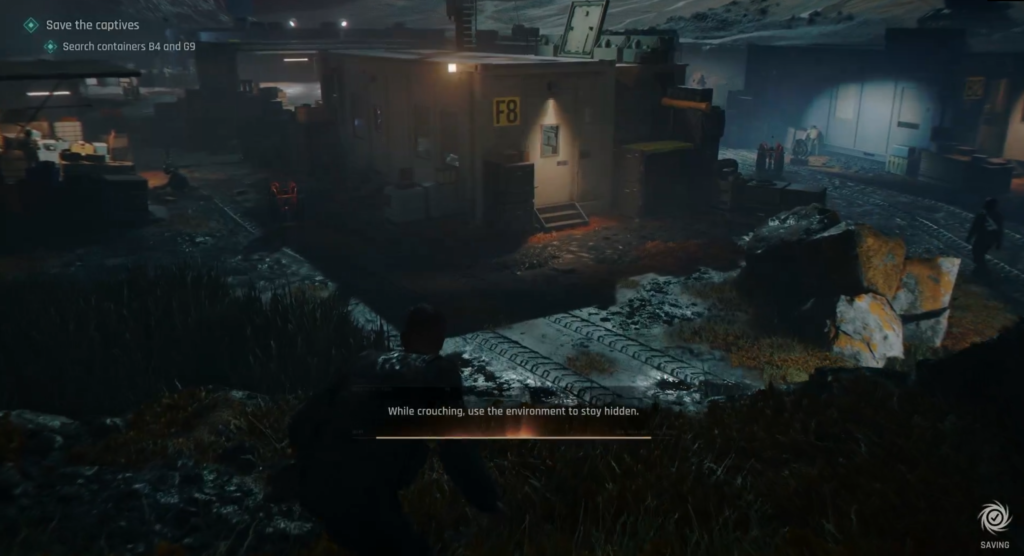
As you drop down, veer to the right to the cabin labelled F8. Go inside and you’ll find the collectible on a set of shelves against the back wall. It’s to the right of a smashed TV screen.
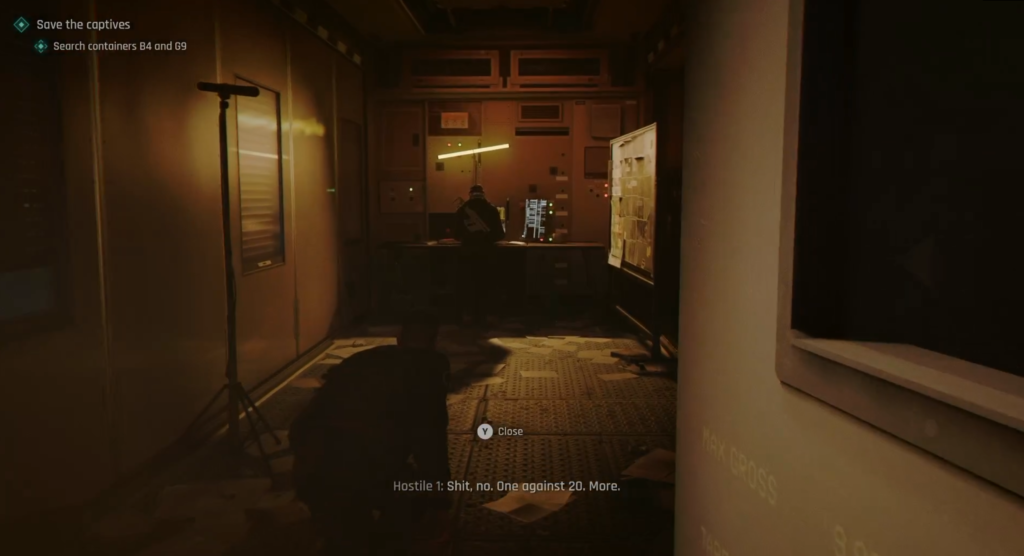
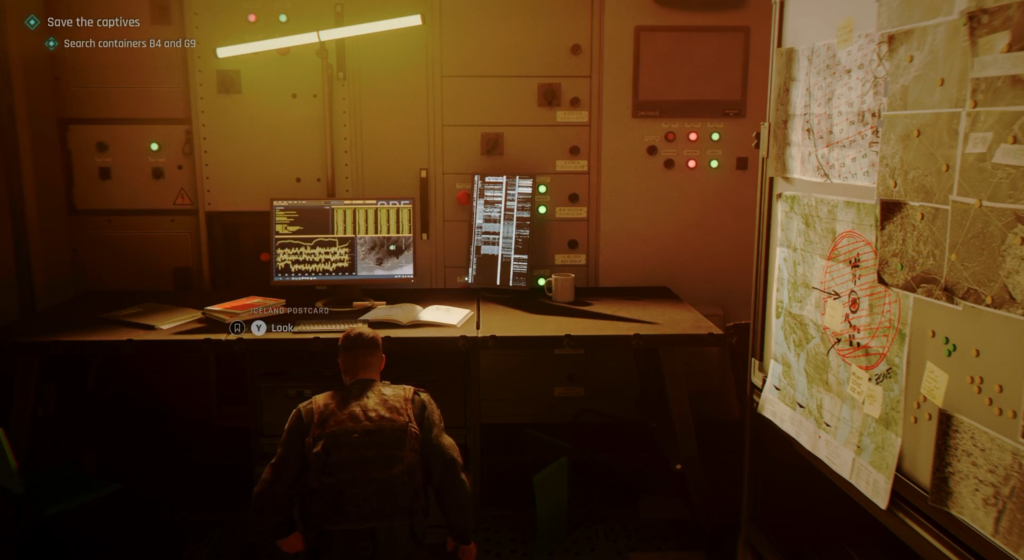
Postcard (1 / 1) – Iceland
Head out of F8, where the legacy collectible was and head to the left as you leave. You want to go into the cabin that is labelled B2, which is the next one over.
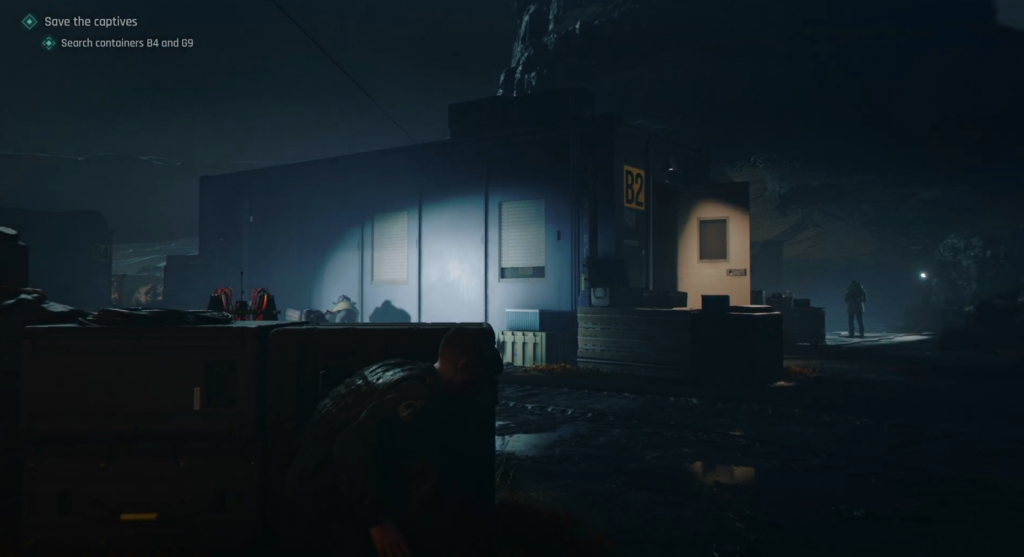
Head inside and you’ll need to take out the guard in front of you. On the table where he was stood is the postcard.
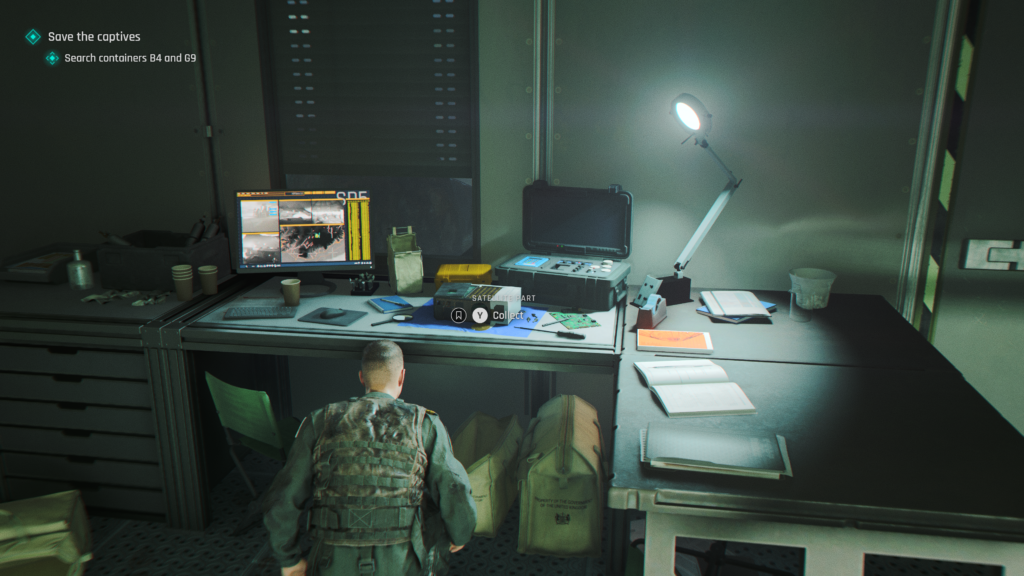
Memento (1 / 1) – Satellite Part
After you’ve left the tent where you were looking for the On-Board Computer (OBC), you’ll spot an MI6 engineer being taken away. This prompts the next objective to rescue the held MI6 operatives from locations B4 and G9. These are building numbers on the cabins scattered around the area. Head towards G9 first, it’s towards the left, and back of the play area.Use stealth, distractions and takedowns to make your way through.
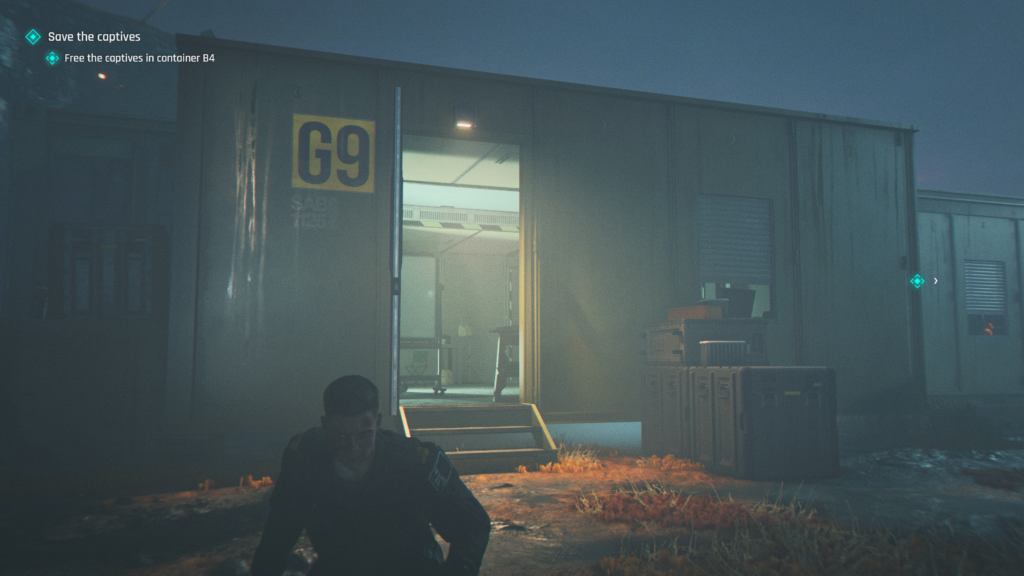
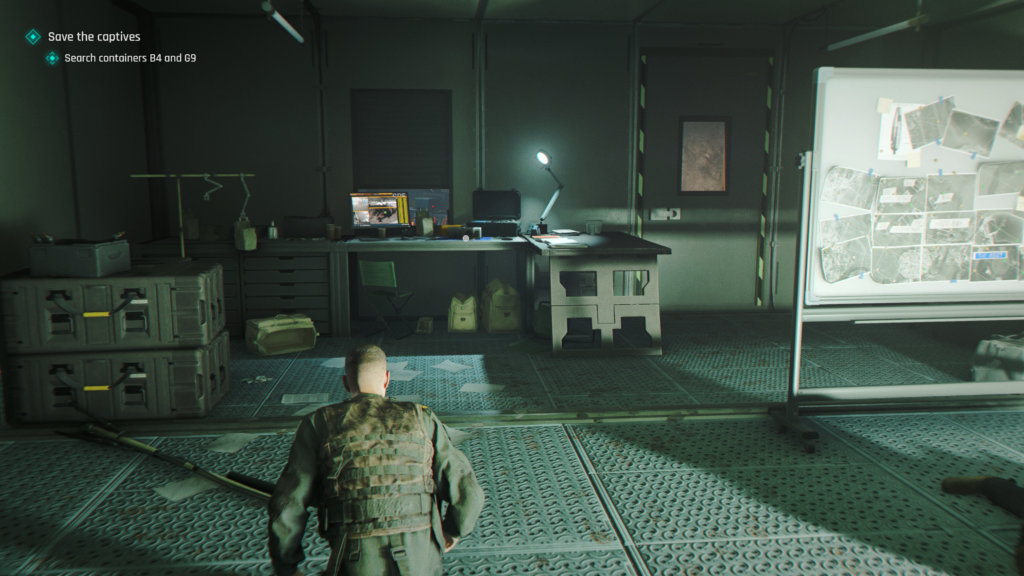
Head around the back of G9 (the door will be locked from the inside), and take out the guard by activating the radio and drawing him closer. Go inside and you’ll spot another guard looking at a large whiteboard. Deal with him and look to your left. On a desk is the collectible.
Chapter 01, “The Needle’s Eye”
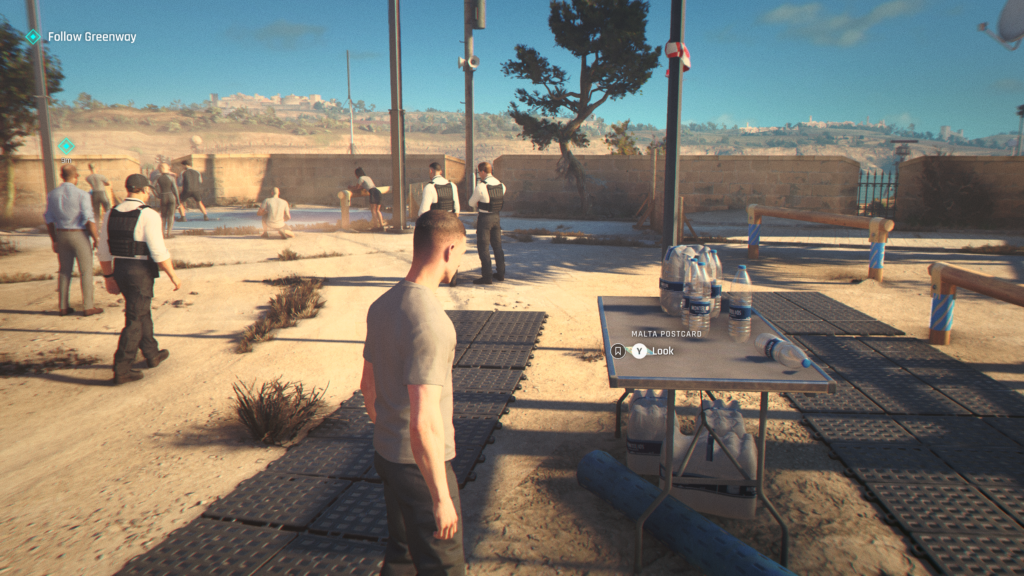
Postcard (1 / 1) – Malta
From the beginning of the chapter, head forward towards Greenway. On your right, just before you reach him is a table with the postcard on it. Inspect it to give you the option to collect it.
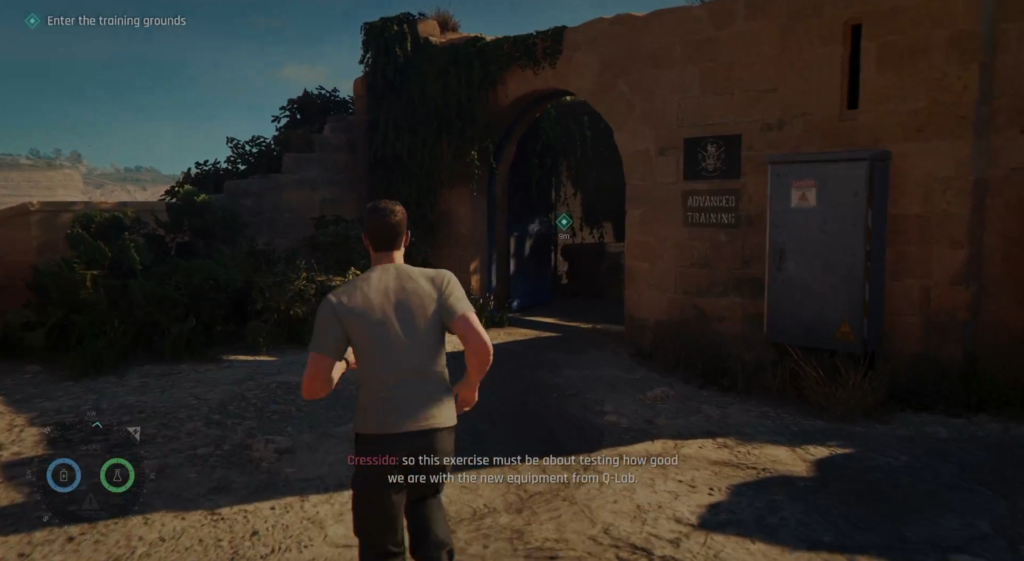
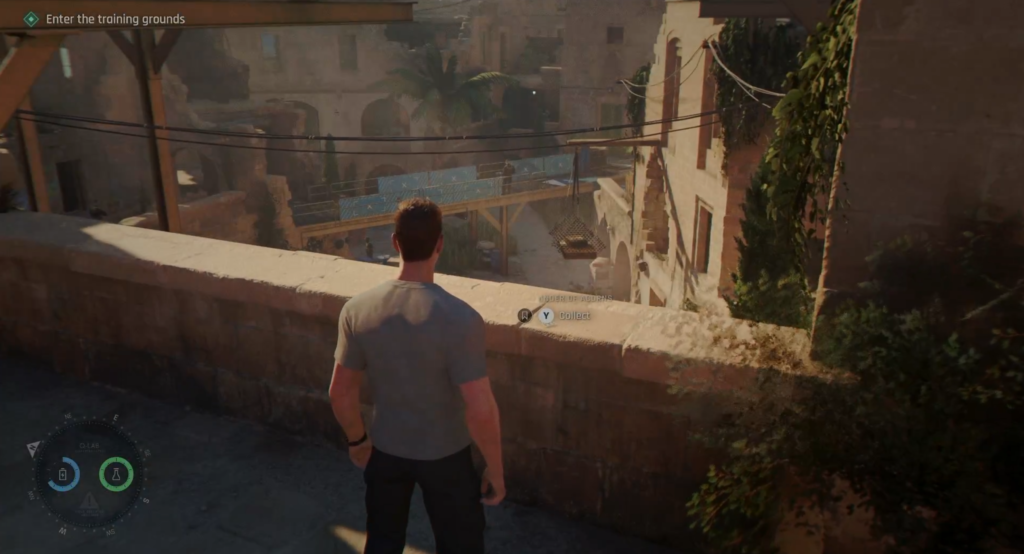
Playing Card (1 / 2) – Under of Acorns
When you reach the training exercise where you need to sneak around and get the flag. Proceed down to the start and use your Q-Watch to open the the first gate.
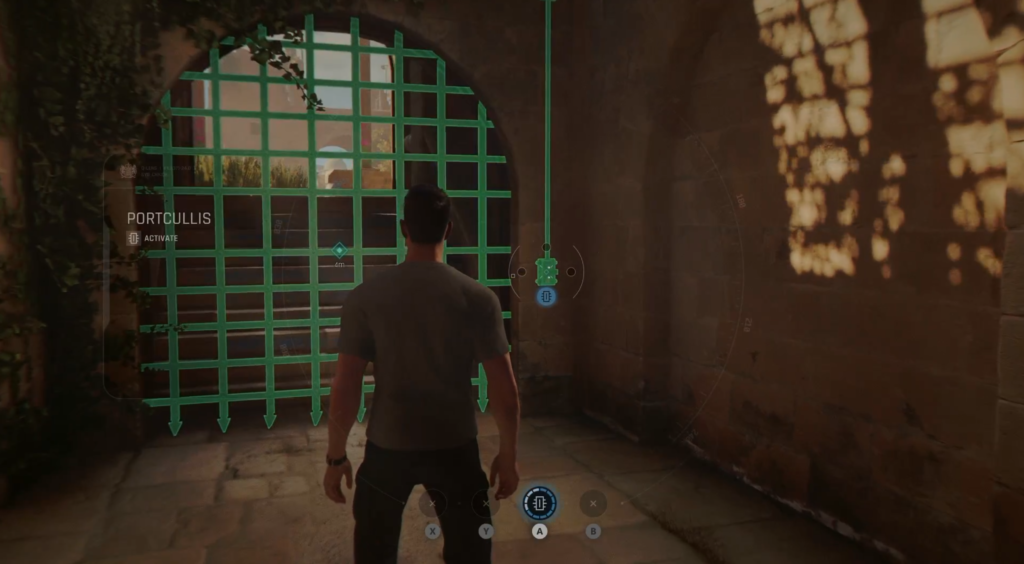
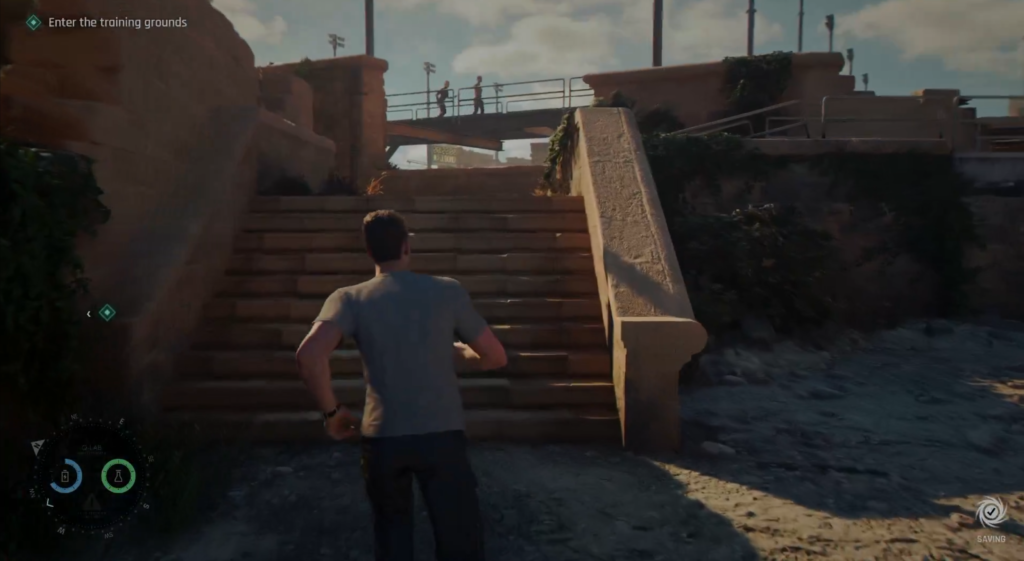
Turn around and go back up the stairs you just came down. At the top, take a left and up some more steps, at the top, move forward and grab the playing card on the ledge in front of you.
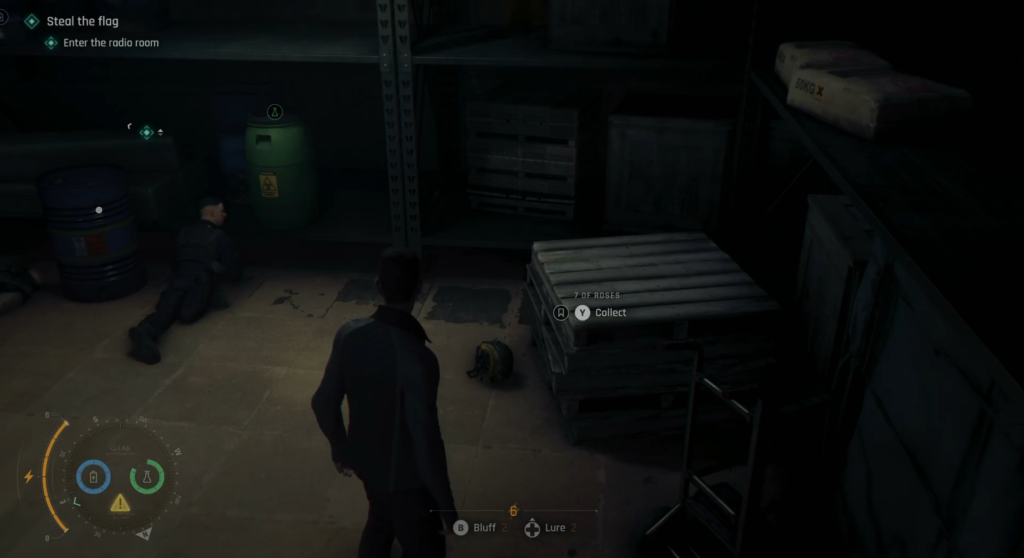
Playing Card (2 / 2) – 7 of Roses
You’ll grab this collectible during the night time ‘training’ activity, where you decide to do the unexpected. You’ll make your way down until you reach a lower bit where there’s a jeep and three enemies.
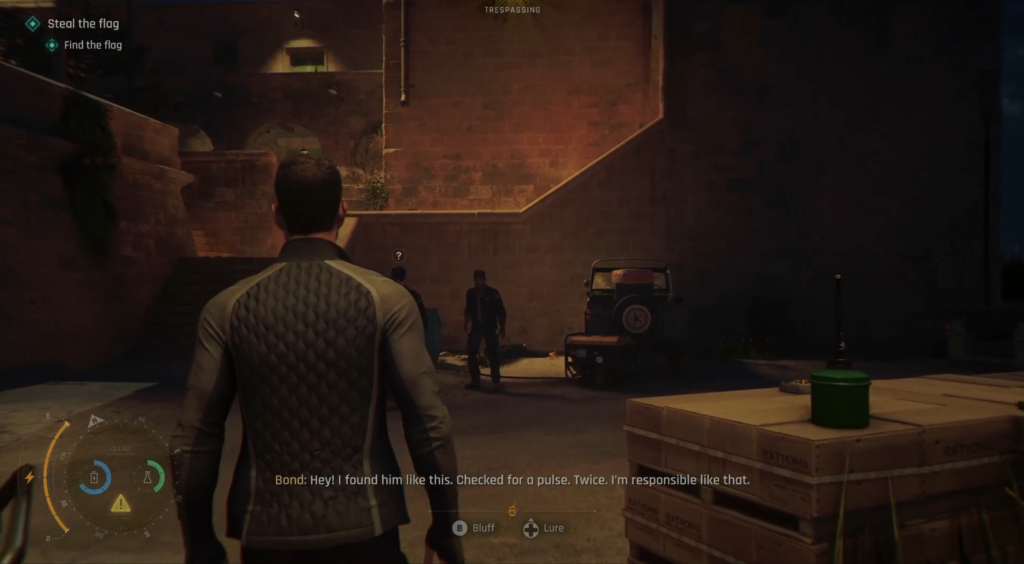
Deal with the guards and then head up the stairs to the left, and go left up the stairs. At the top are some guards standing around, on one of the crates if a ‘key to the compound basement’, you’ll want to grab that.
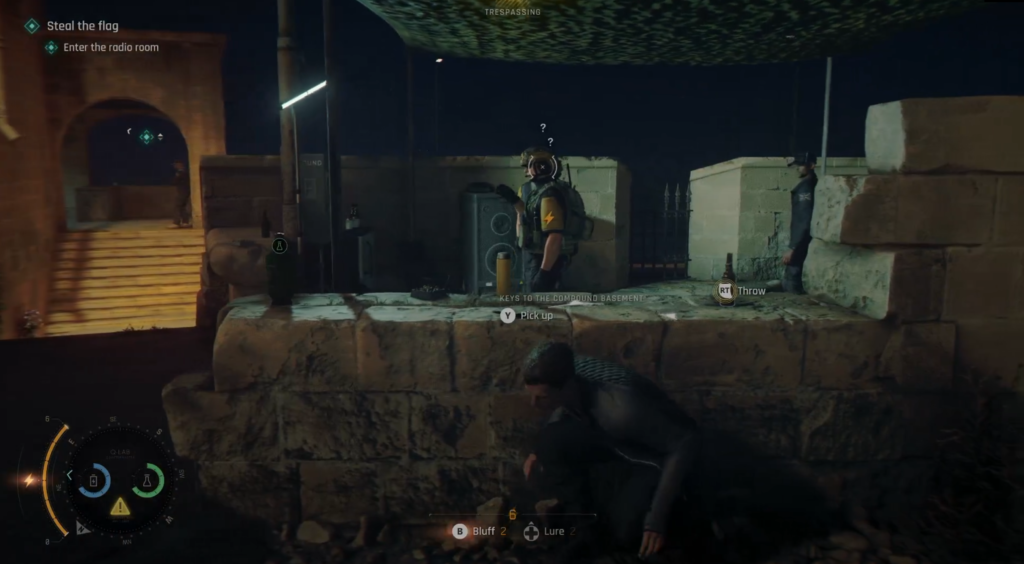
Carry on past this section and in front of you (as if you were carrying on forward from the steps you came up) you’ll see some steps down and two more guards chilling. Take a right from them you’ll go up a couple of steps that take you down to the harbour bit of the area.
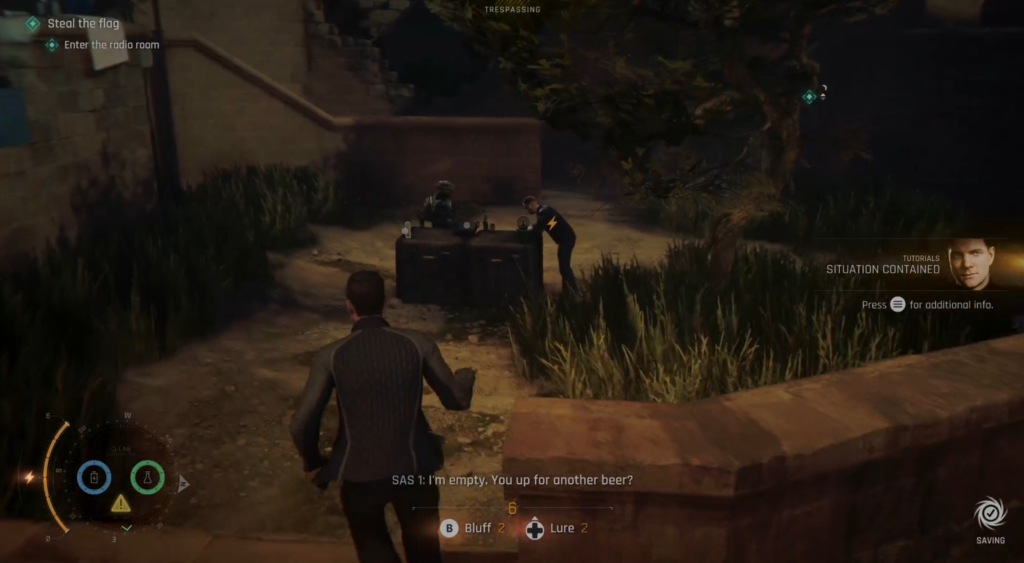
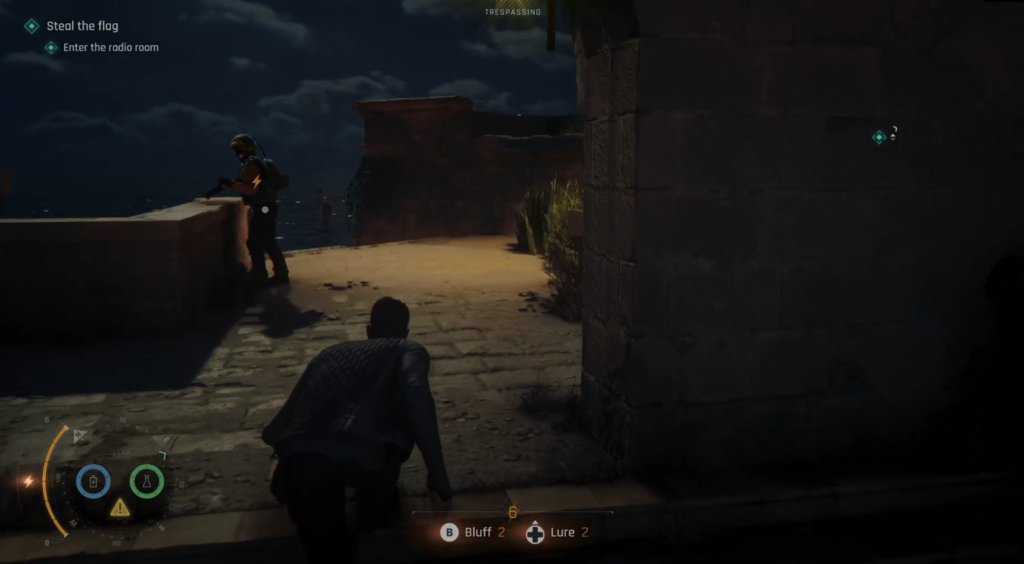
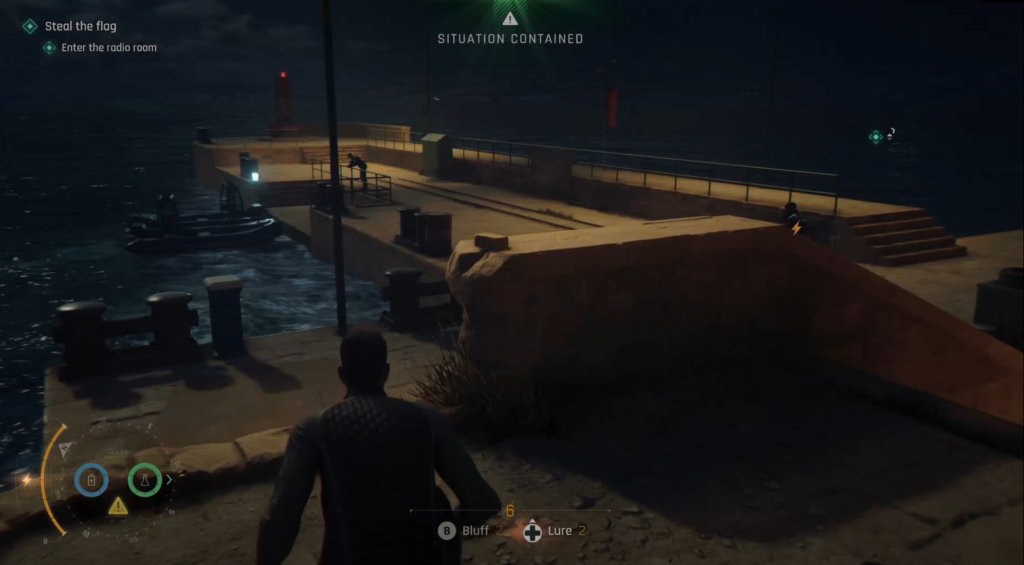
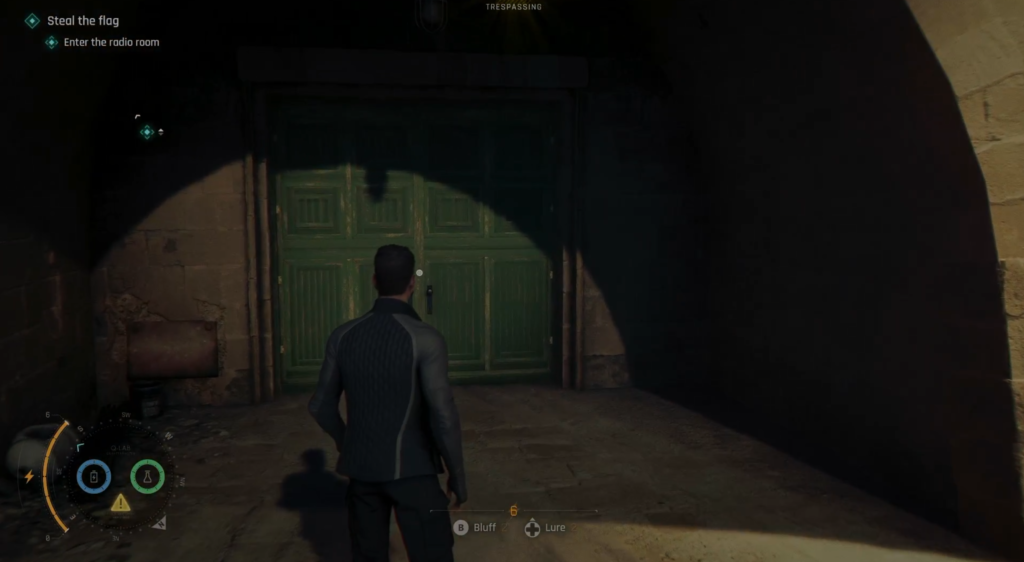
At the bottom of the steps, look to your right to spot a large green door. Head in (using the keys you collected earlier) and you’ll spot three enemies in front of you. Deal with them, and in the corner, on the right is the playing card on a crate.
After returning to MI6 from Malta. You can access this section from “The Heart of the Matter” chapter in the chapter select.
Intel (1 / 4) – 00 Recruits
Once you arrive in Q-Branch, you’ll need to speak with Q as part of your main objective.
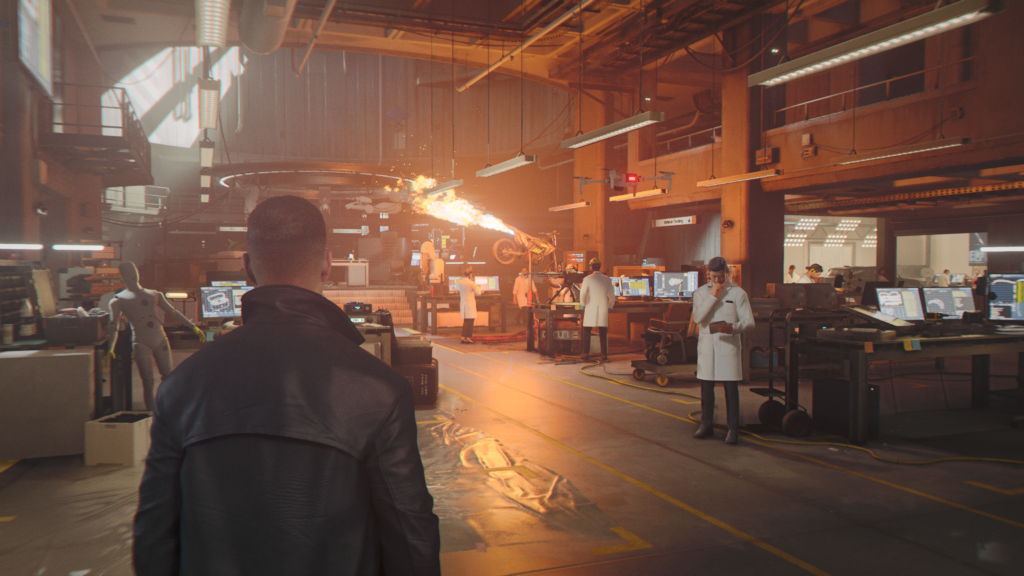
In the centre of the lab is Q on a raised section. Talk with him and he’ll let you select a Q-Watch and play with it a little. Once that’s done, head down the other side of the platform and slightly to the left towards a computer. Interact with the computer to get the intel.
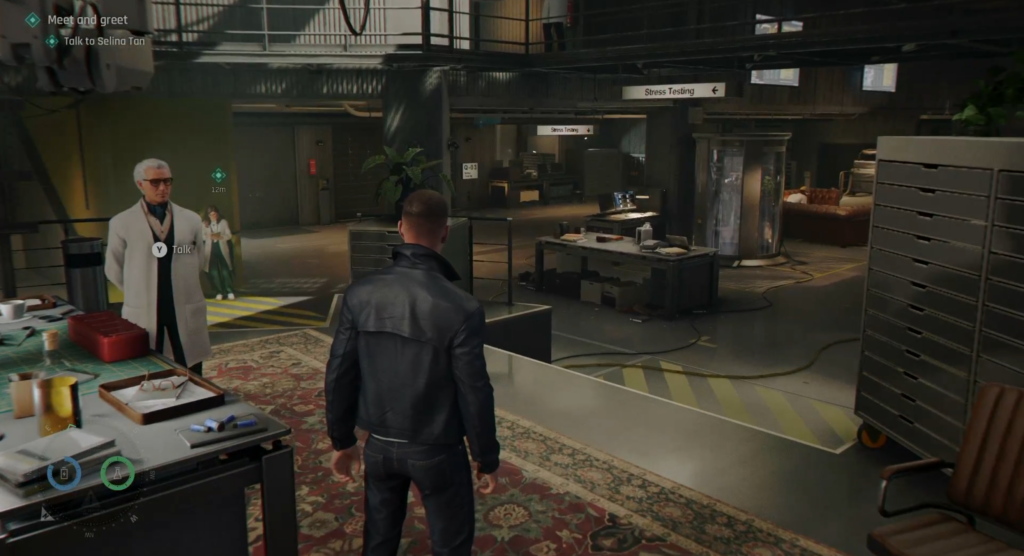
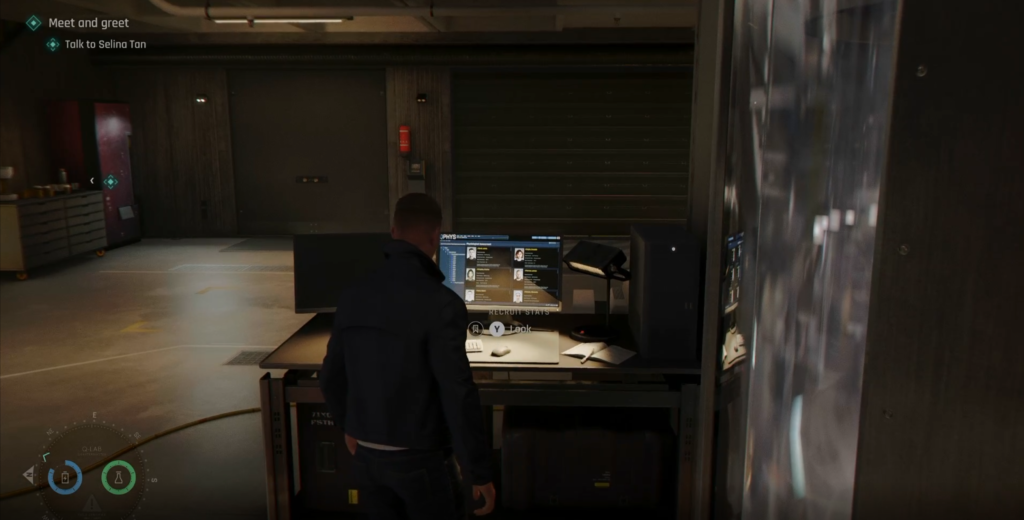
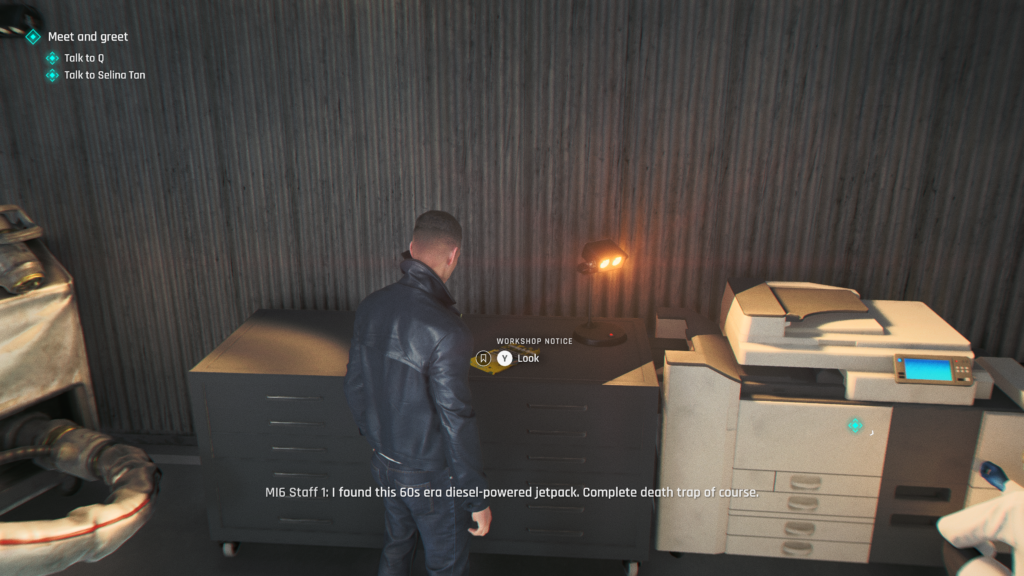
Intel (1 / 3) – Selina Tan
To the right of Q’s location, alongside a wall, are two scientists talking. Down from them is a table against the wall with a flyer on it.
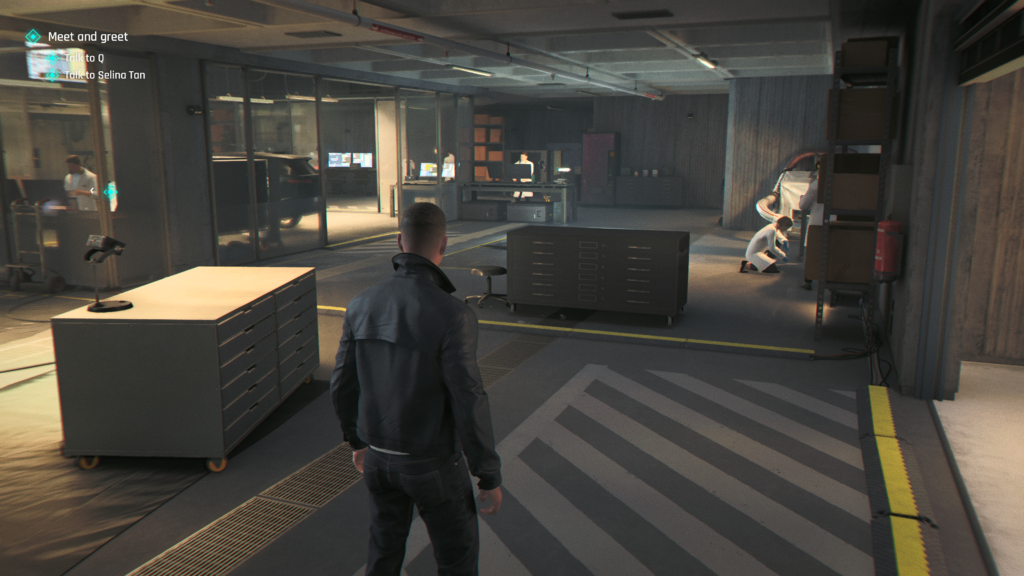
Intel (2 / 3) – Lennox Monroe
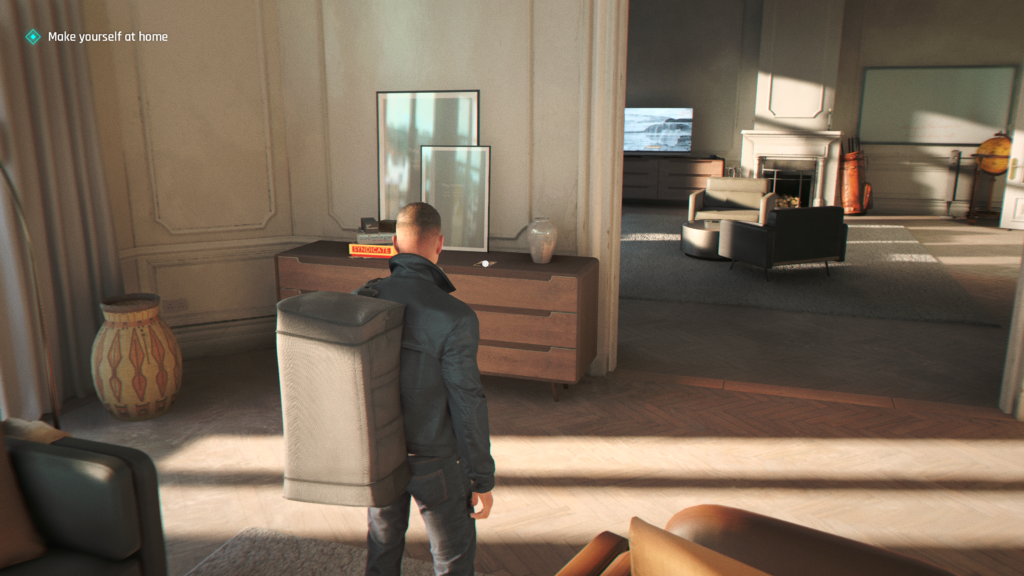
After returning Q-Branch you’ll head to your swanky new digs. You can access this section from “A New Home” chapter in the chapter select.
On entering the house, go into the main living space, where Monroe is (before the room with the TV). To the right is a dresser with a photo on it, left of the entranceway to the next living space.
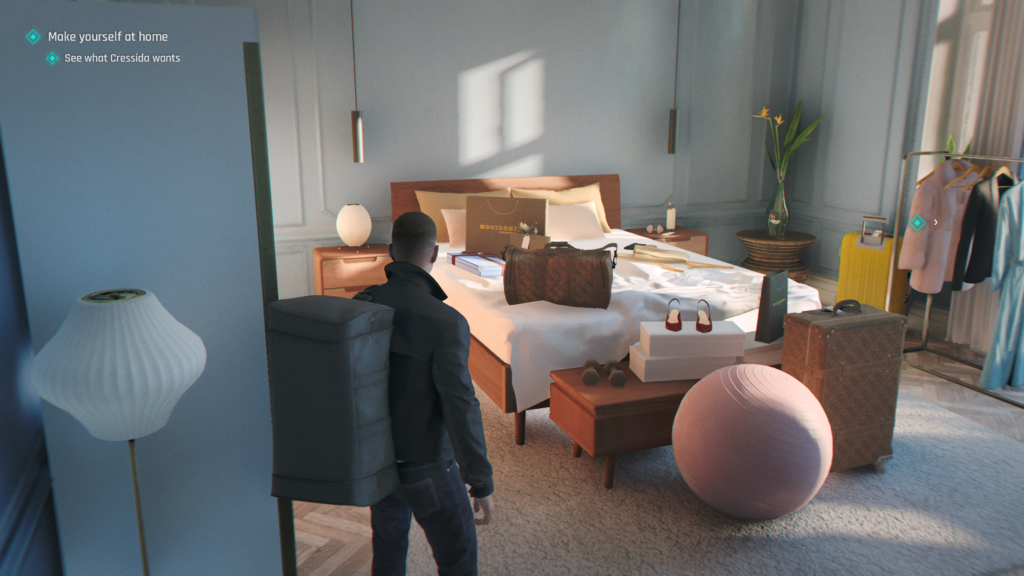
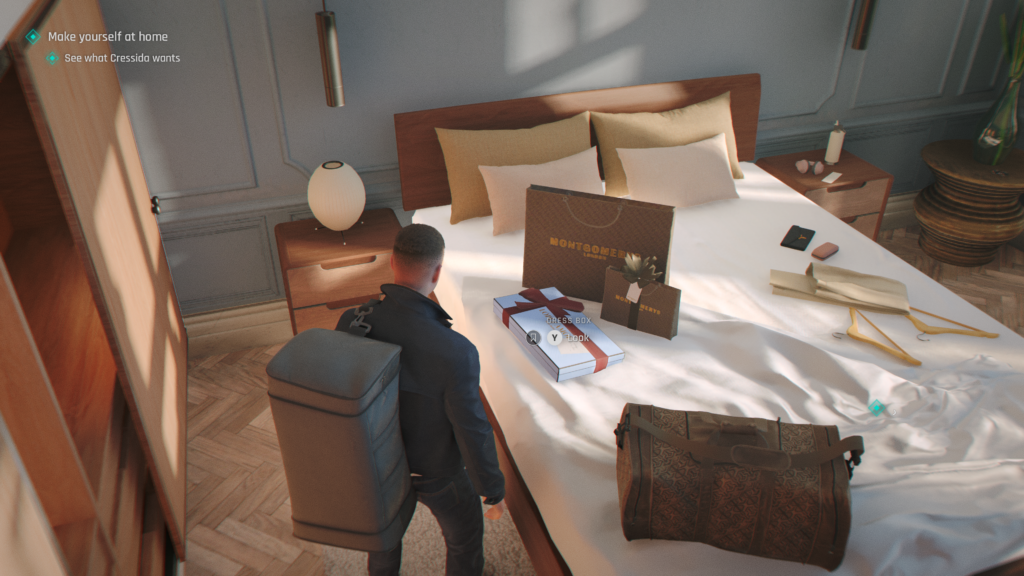
Intel (3 / 3) – Cressida Bright
You’ll need to go into Cressida’s bedroom to get your room key. On the bed, you’ll spot a white box, this is the collectible you need.
Chapter 02, “A Night Out”
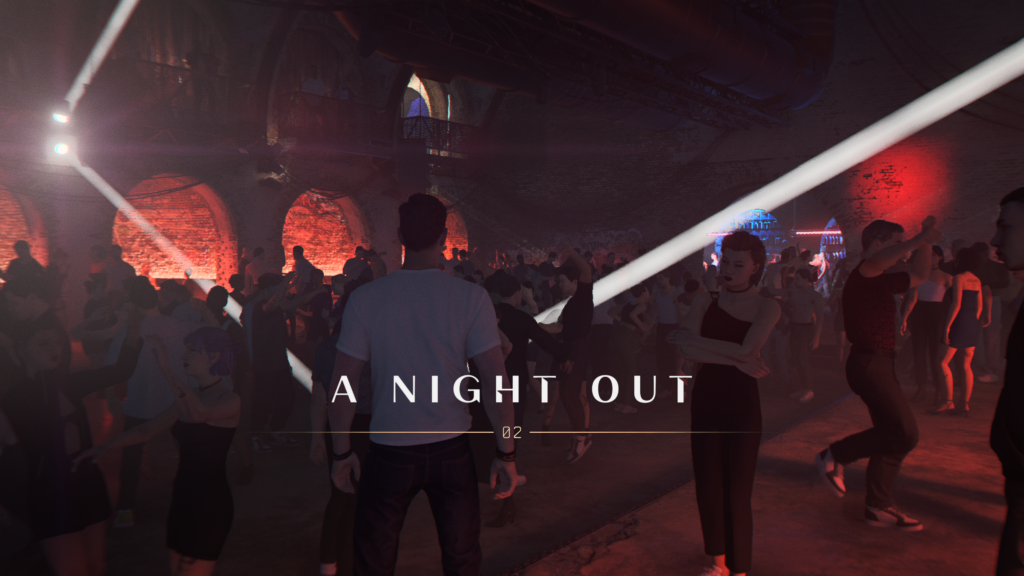
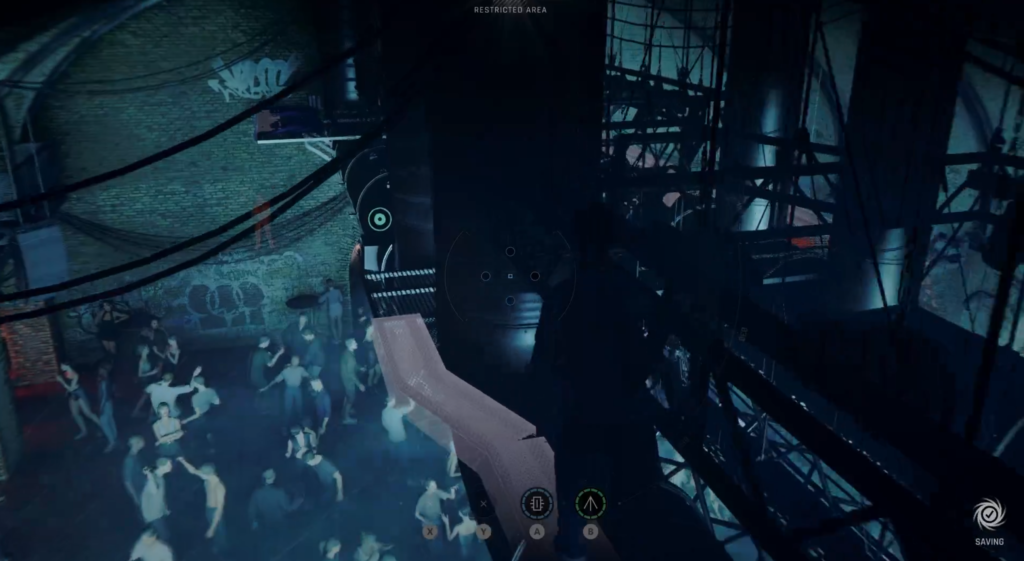
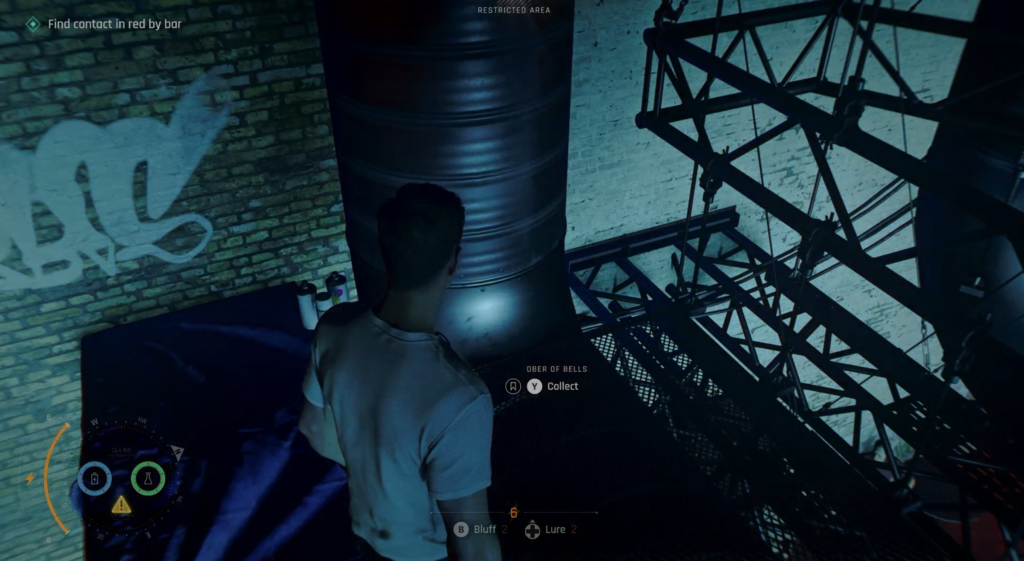
Playing Card (1 / 1) – Ober of Bells
From the beginning of the level, head to the back left of the dance floor (from where you start, walk across and veer to the left). Head to the side of the DJ stage and squeeze through the gap you’ll see on your left to take you behind the DJ stage.
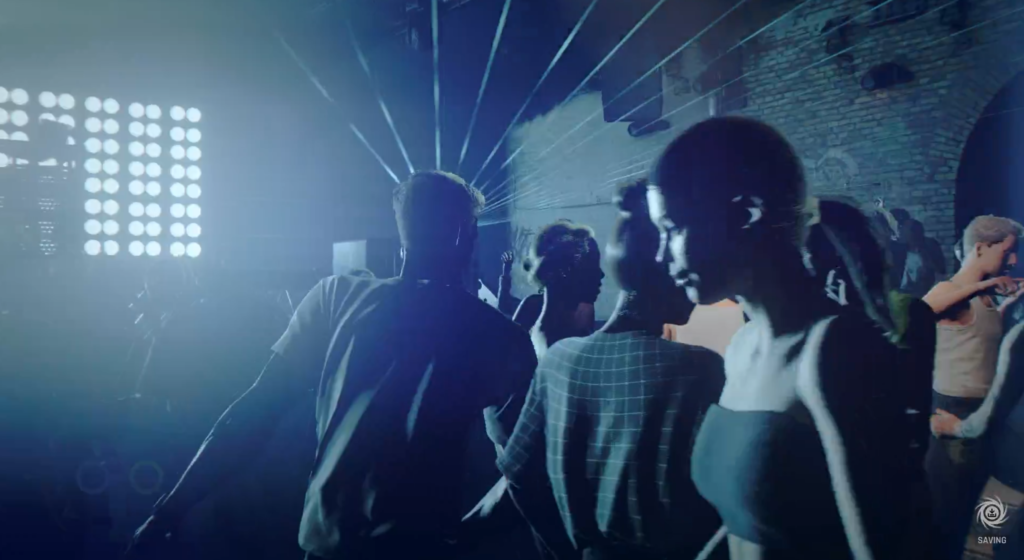
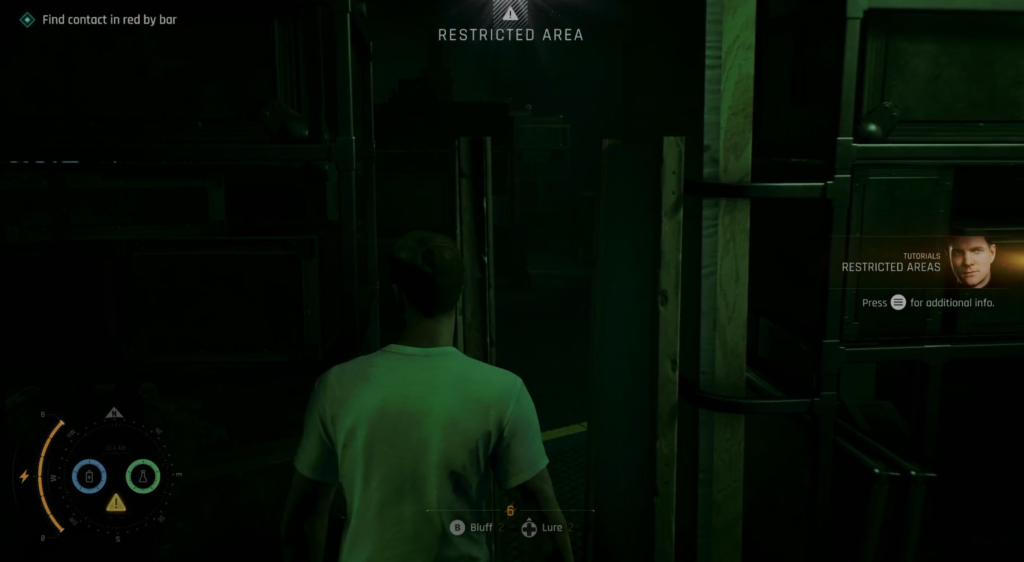
On your left as you enter the backstage area, you’ll see some platforms and rigging you can climb. Climb up and on to the rafters above.
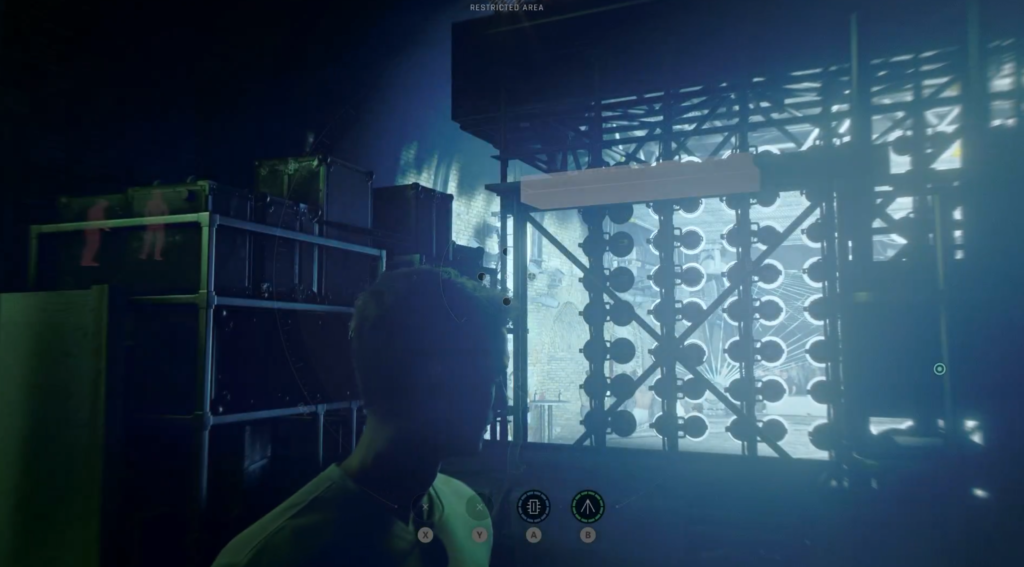
Shimmy across to the other side and at the far end you’ll find the playing card on the floor.
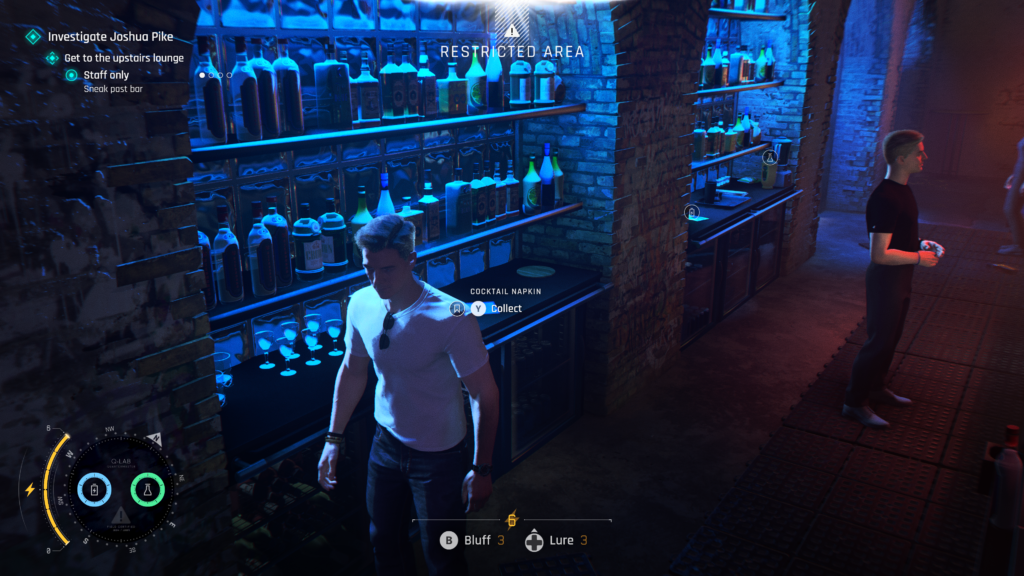
Memento (1 / 1) – Cocktail Napkin
From the beginning of the chapter, make your way across the dance floor and to the bar at the back of the room. Behind the bar is the memento next to some glasses. Wait till the bartender turns away to grab it, as behind the bar is a restricted area.
After returning to MI6 from the bar. You can access this section from “A Matter of Considerable Delicacy” chapter in the chapter select.
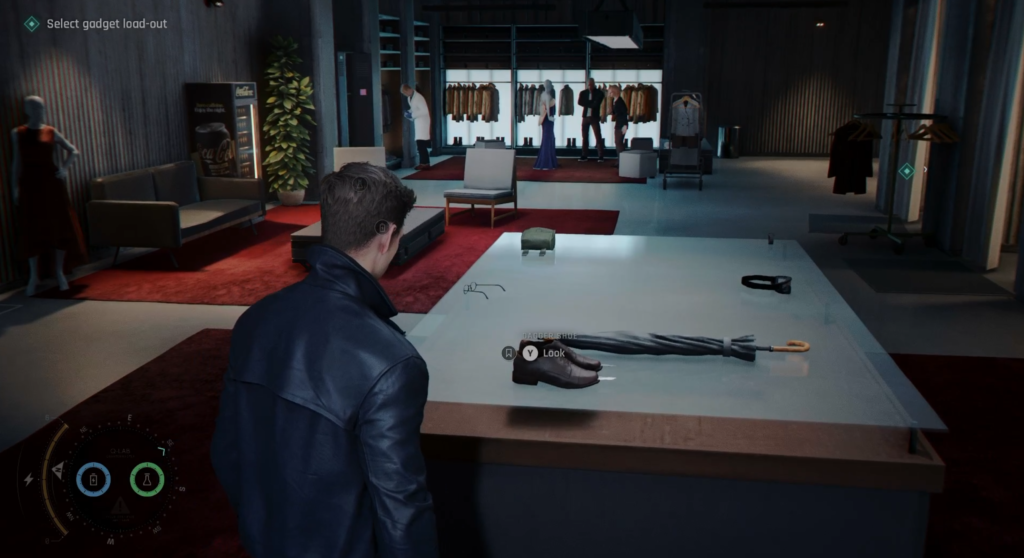
Legacy (1 / 1) – Dagger Shoes
In Q-Lab, near where you enter in the lift (behind you as you leave the lift) is the Wearables department of Q-Lab.
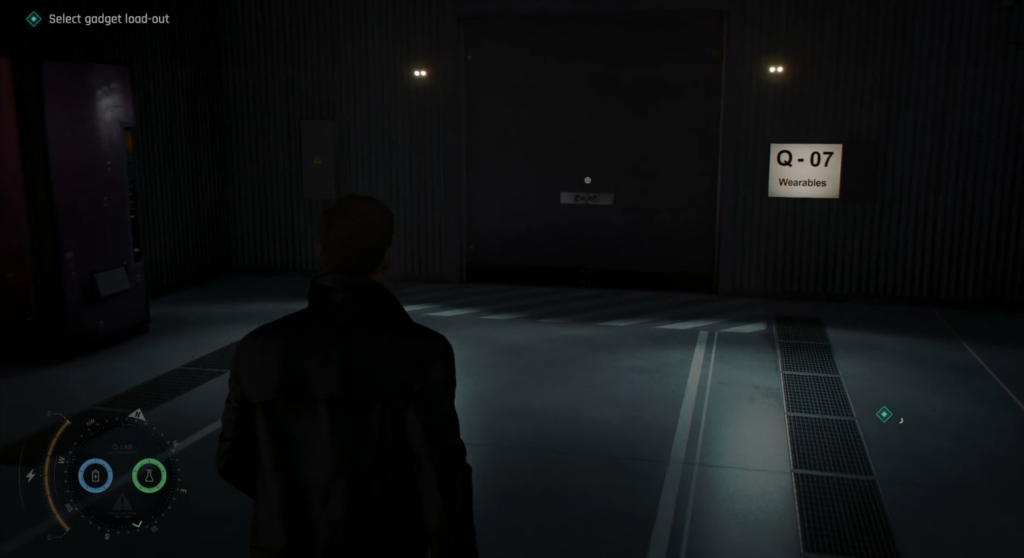
In the centre, on one of the counters is the collectible.
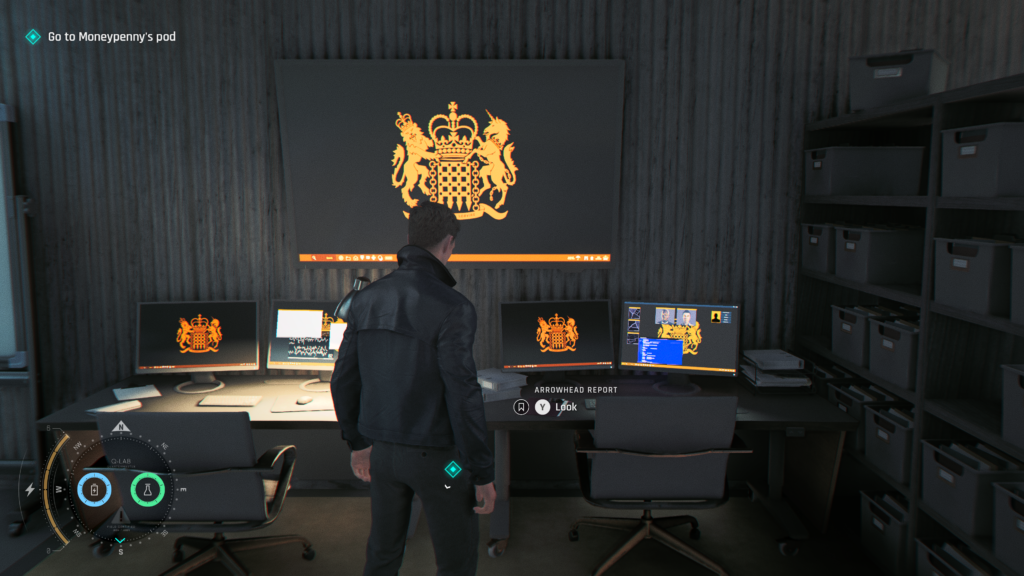
Intel (1 / 2) – Arrowhead Report
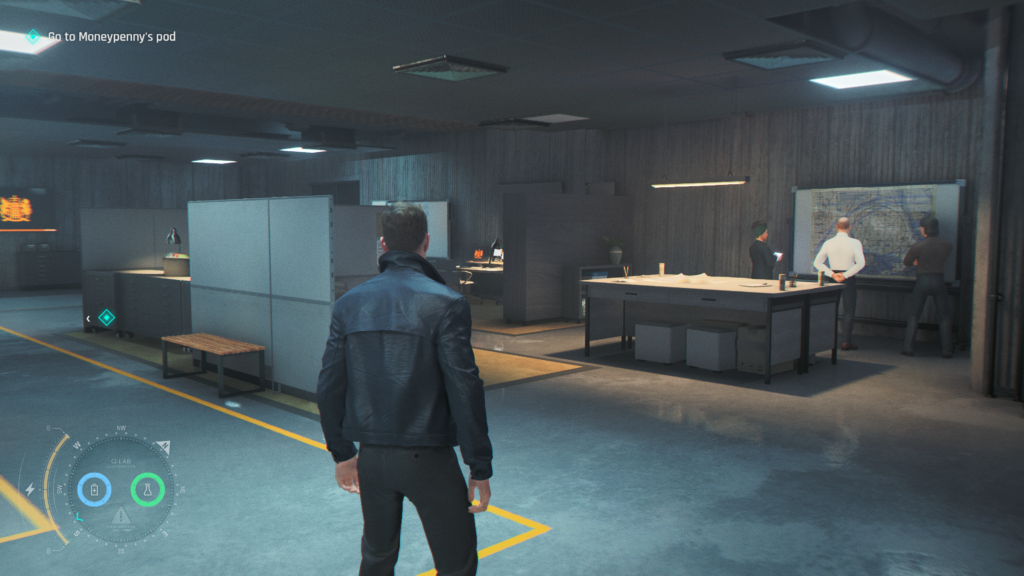
After visiting Q-Branch, you’ll need to head up to Operations in the lift to speak with Moneypenny. Once there, head towards the back of the office space where you’ll spot a desk with some computers on it, and a TV on the wall.
The intel is sat on the right hand desk.
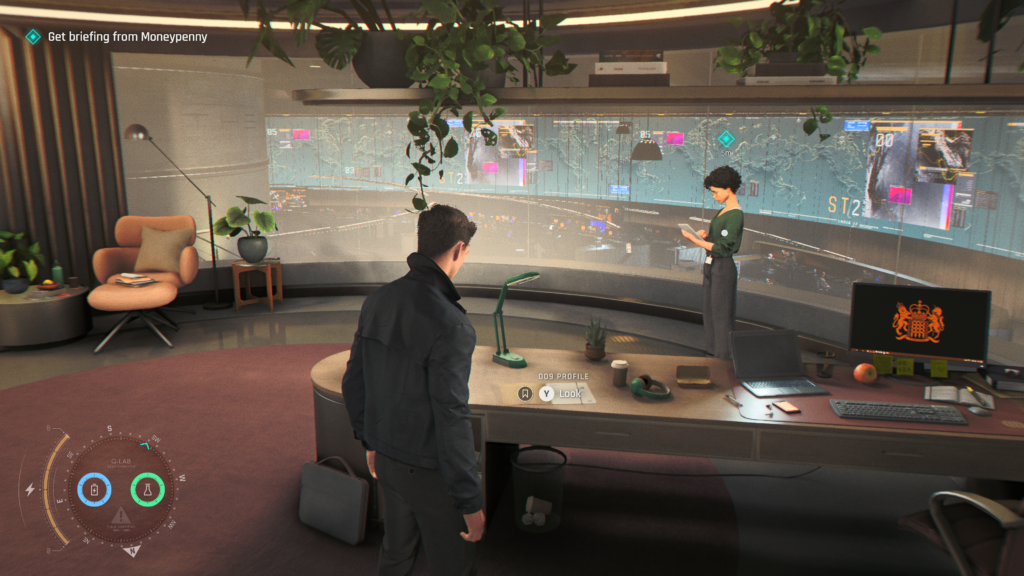
Intel (2 / 2) – 009 Profile
After reaching Moneypenny’s pod, there’ll be a cutscene with Greenway before you enter.
Once you regain control, before approaching Moneypenny, head to the desk on the right to pick up the intel.
Chapter 03, “All the Time in the World”
We’ve listed the collectibles in the order they’ve been discovered. This isn’t necessarily the right order, or the most efficient way to locate them.
Anything you miss can be collected by replaying the mission via the Chapter Select on the main menu.
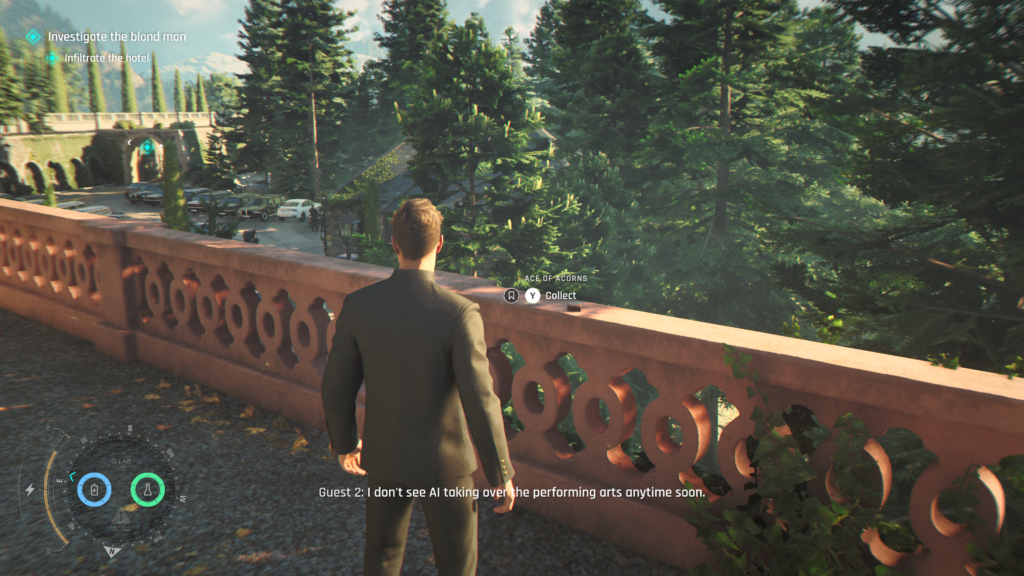
Playing Card (1 / 5) – Ace of Acorns
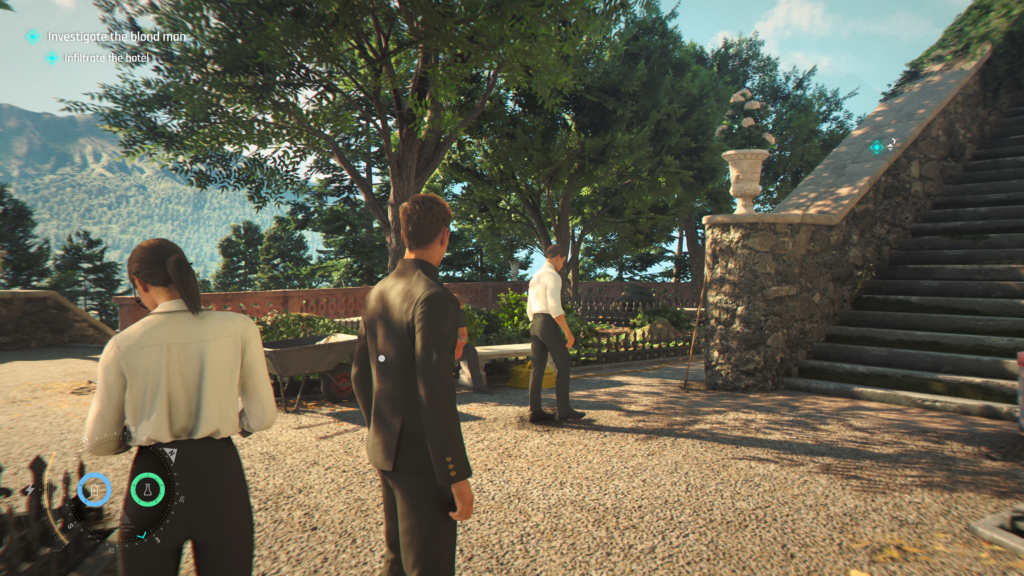
From the beginning of the mission, once you gain control of Bond in the car park, head up the stairs in front of you. Instead of following the bellhop up the second set of stairs, head to the left and down a set of stairs. This is where the bellhop was throwing the luggage over the balcony. The playing card is on the balcony.
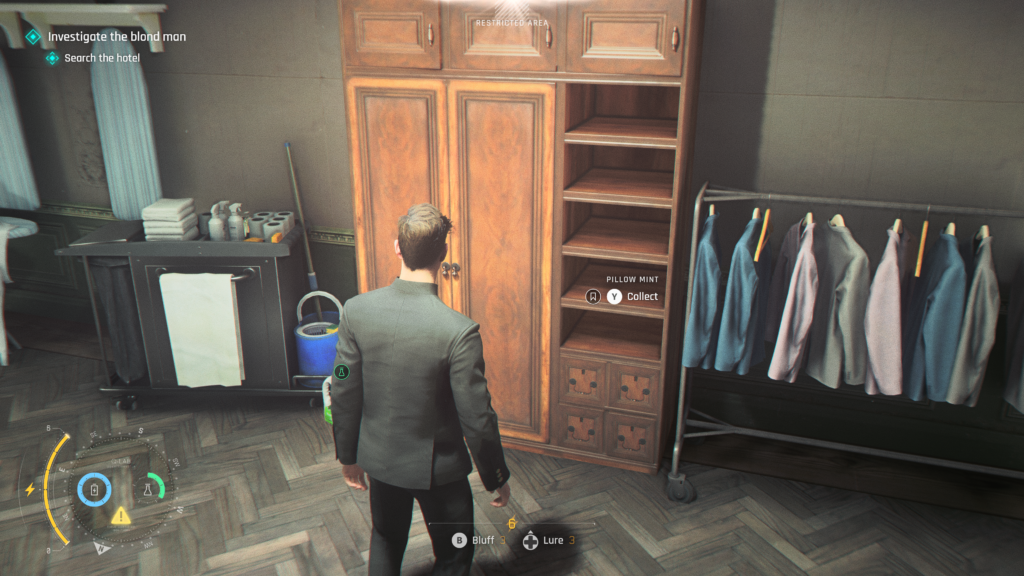
Memento (1 / 2) – Pillow Mint
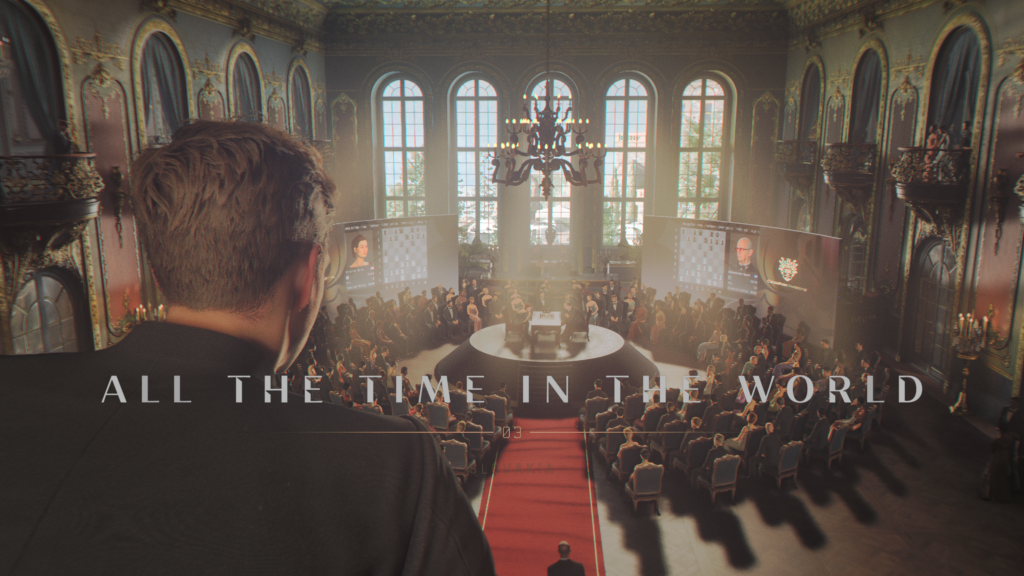
Once you’ve made your way into the building, past security, you’ll navigate a corridor until you reach the main hall. You’ll know you’re in the right place because the chapter title splash will appear.
From there, head to the left and you’ll spot a guard carrying the ‘staff key’. You need to distract him to successfully pickpocket him. Once you’ve done so, head into the ‘Staff Only’ room he was stood next to. Inside on a shelf as part of a wardrobe is the memento.
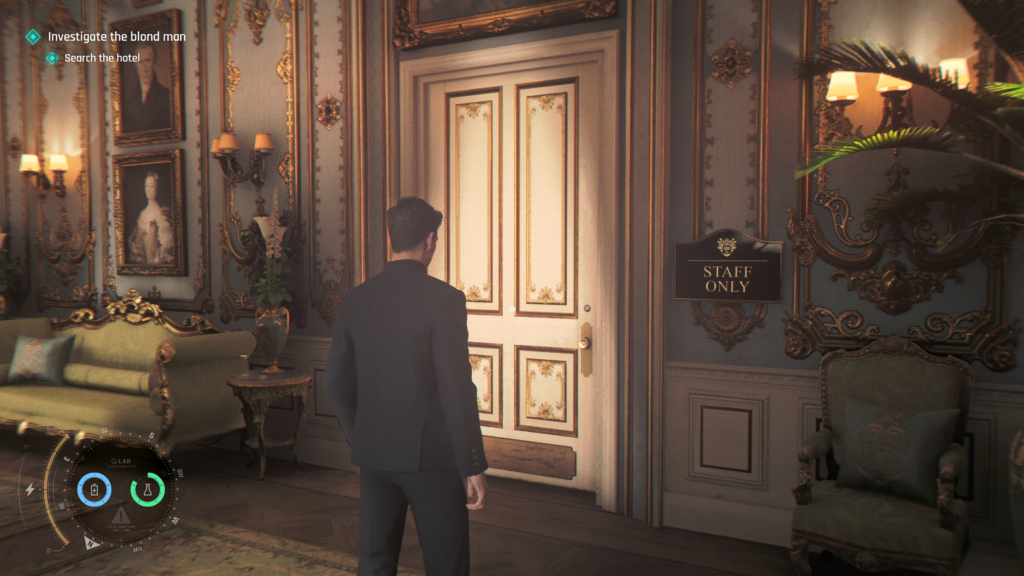
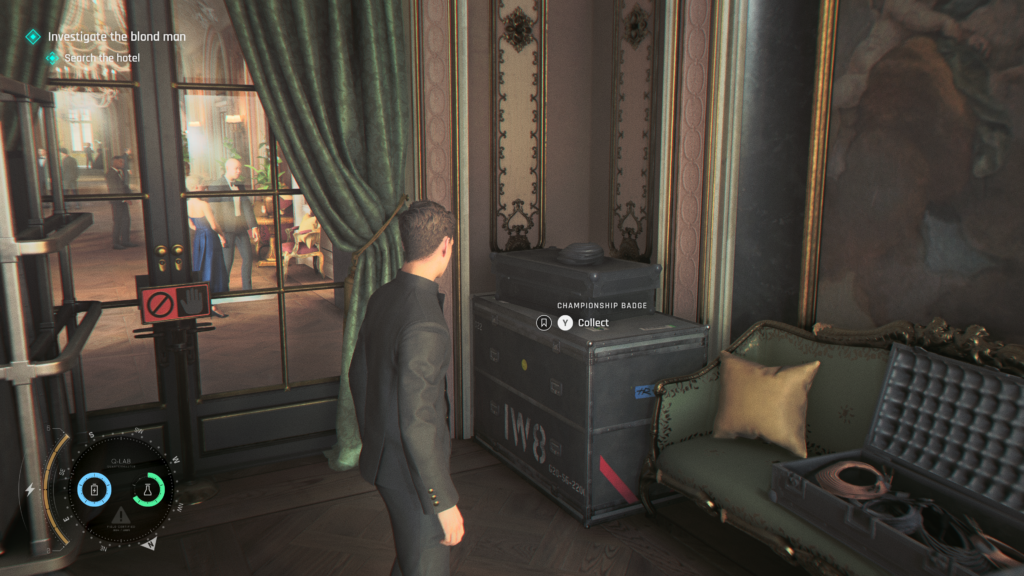
Memento (2 / 2) – Championship Badge
From the ‘Staff Only’ room, you can distract the guard blocking the corridor to the 200 rooms (you will head here later on). Get past him and make your way to the end of the corridor and out of the window
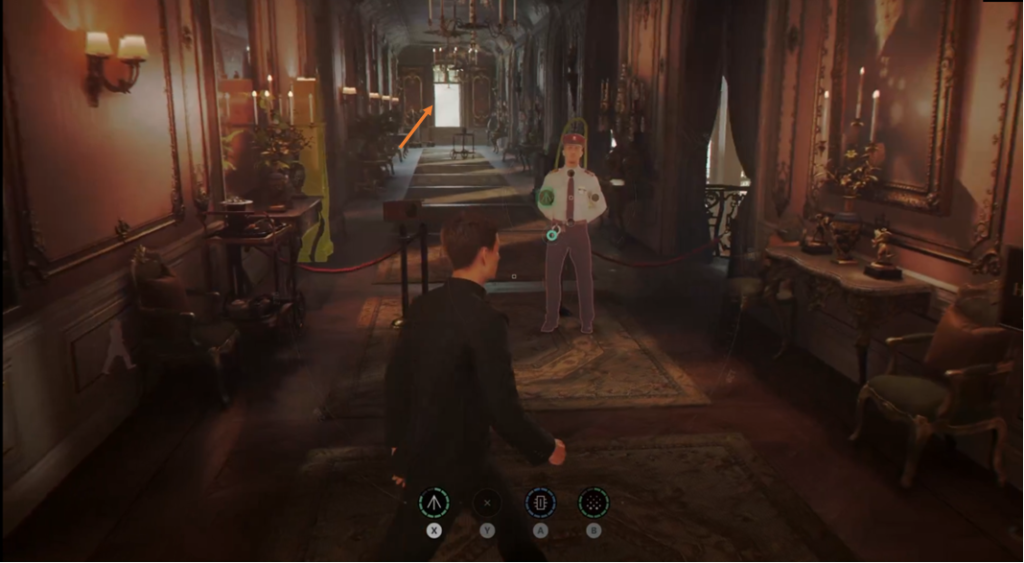
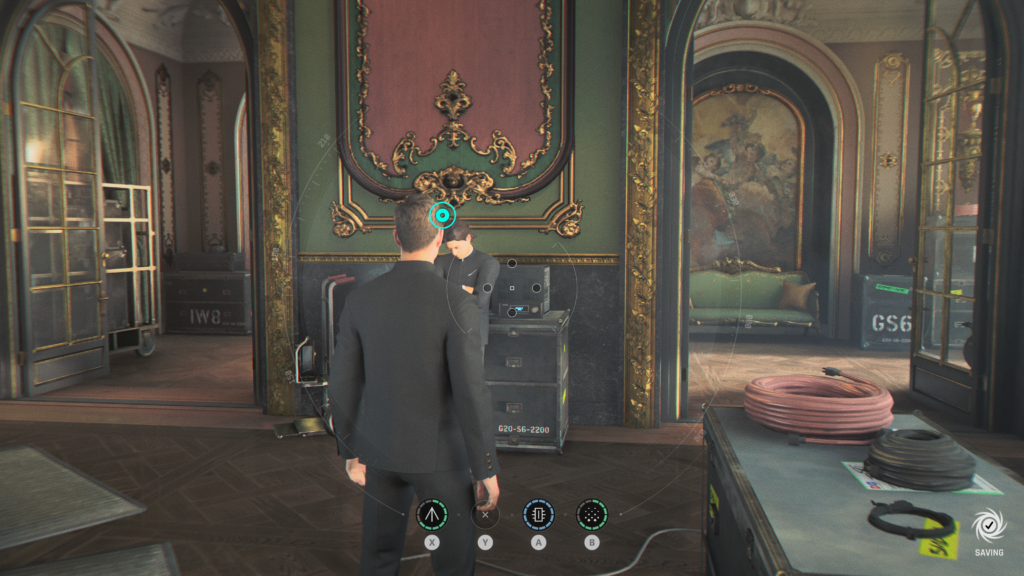
Climb out of the window and slide down the pipe on the left as you hang out of the window. You can jump through a window to a room behind the scenes of the chess tournament. You can eavesdrop on a couple of guards before one decides to take a nap. Before sneaking through into the room where they were, head to the back right of the room where you jumped through the window. The memento is on a crate.
Legacy (1 / 1) – Chess Biography
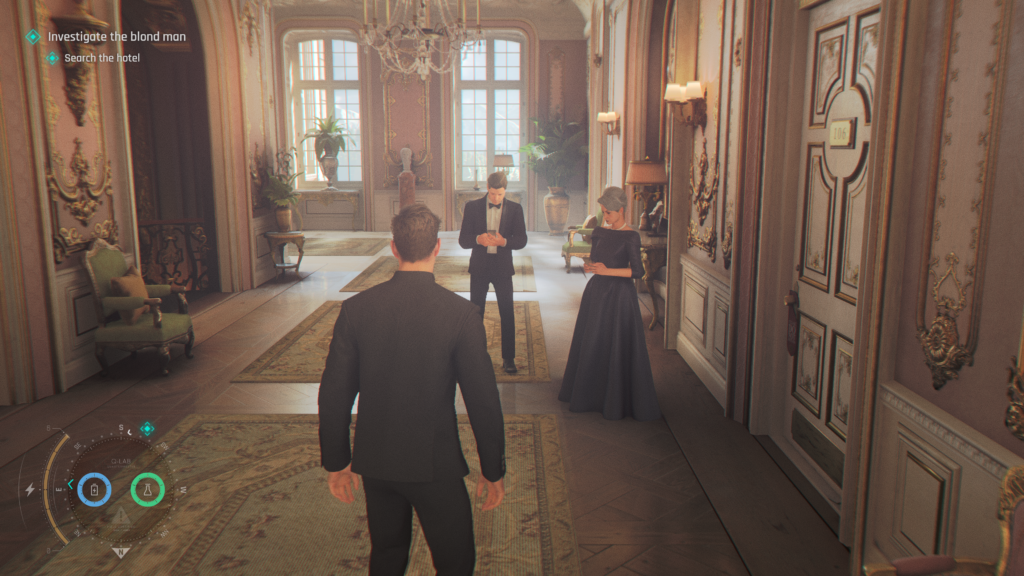
Return to the upper floor (where you first entered the area) and head to the back of the upper floor. If you head to the right corridor, you’ll see a couple who want to complain about the bellhop.
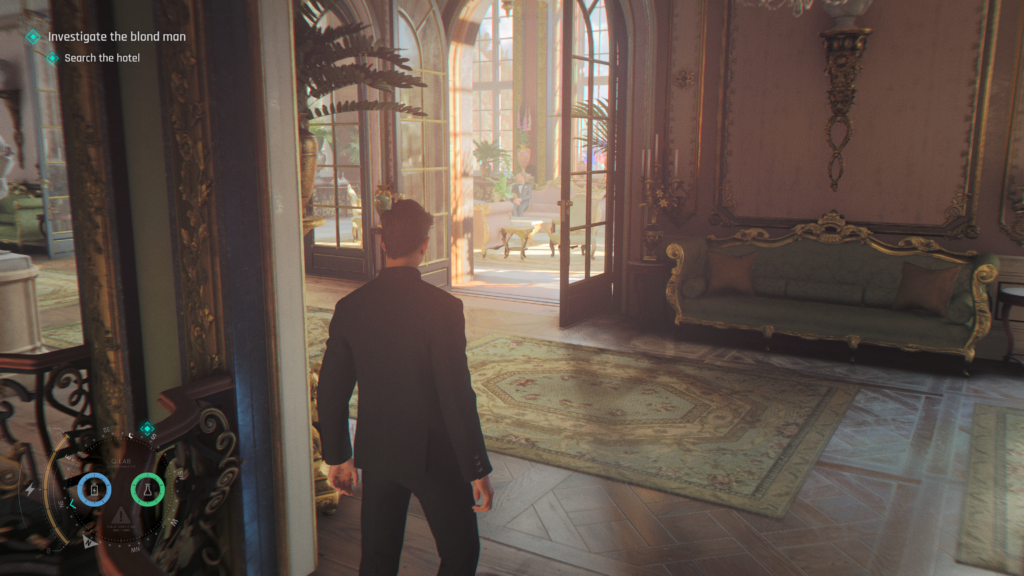
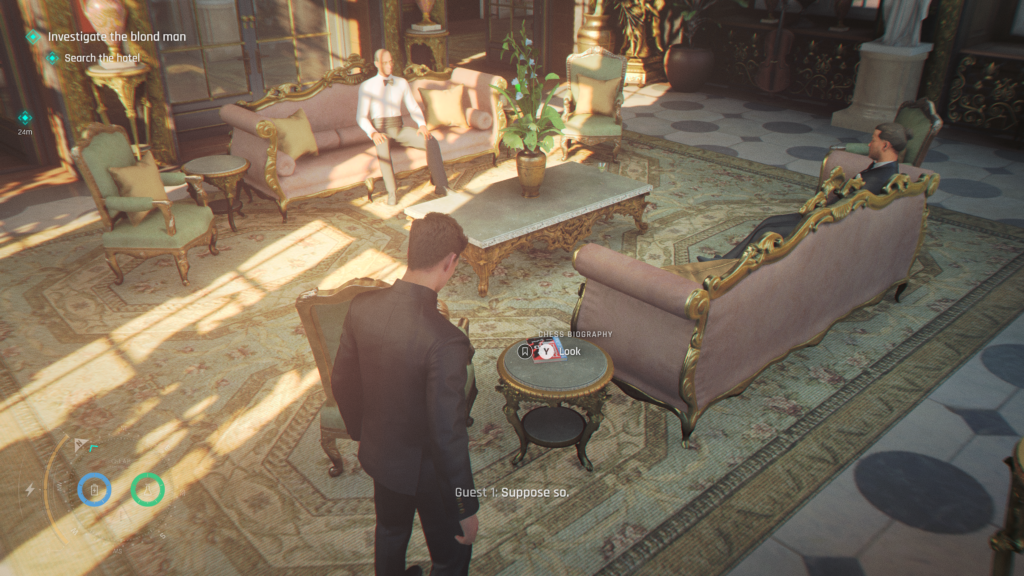
Continue past them and you’ll enter a square room with lots of plants and statues, with some couches in the centre. The legacy collectible is on a small table next to one of the couches.
Playing Card (2 / 5) – 6 of Roses
On the ground floor, near the entrance, there is a reception area on the left. To the left of the reception, head through the archway and you’ll see a ‘Staff Only’ door to the left. You can eavesdrop on a conversation here. Don’t go through the door, head back down the corridor and through the open double doors that should be on your left.
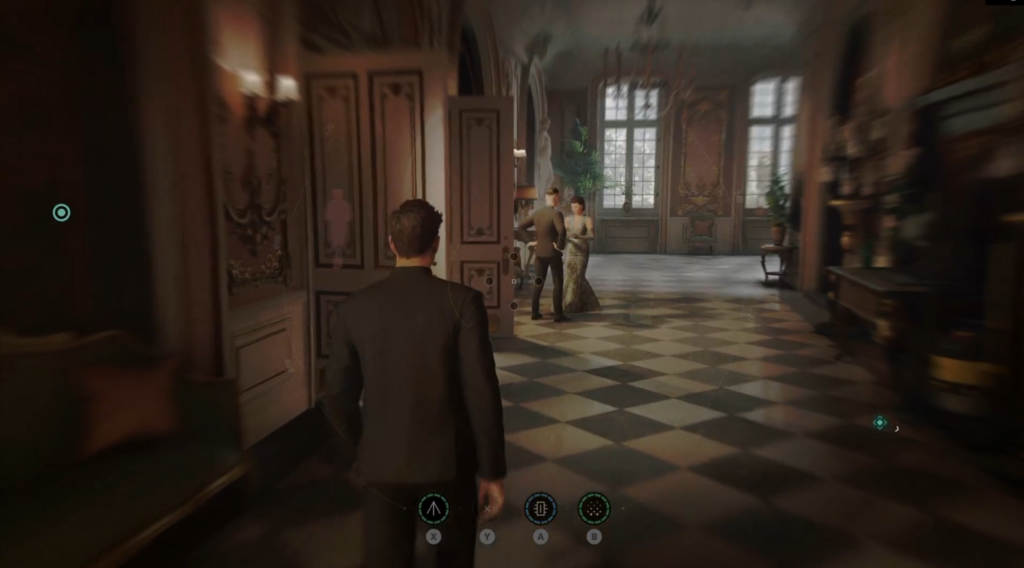
Go through the door, to the right is a guard leaning against a table in a restricted access. In front of you, is a double door, again marked ‘Staff Only’. You can head in here, and sneak / use your bluffs etc. to get round and go through the door at the back right of the room.
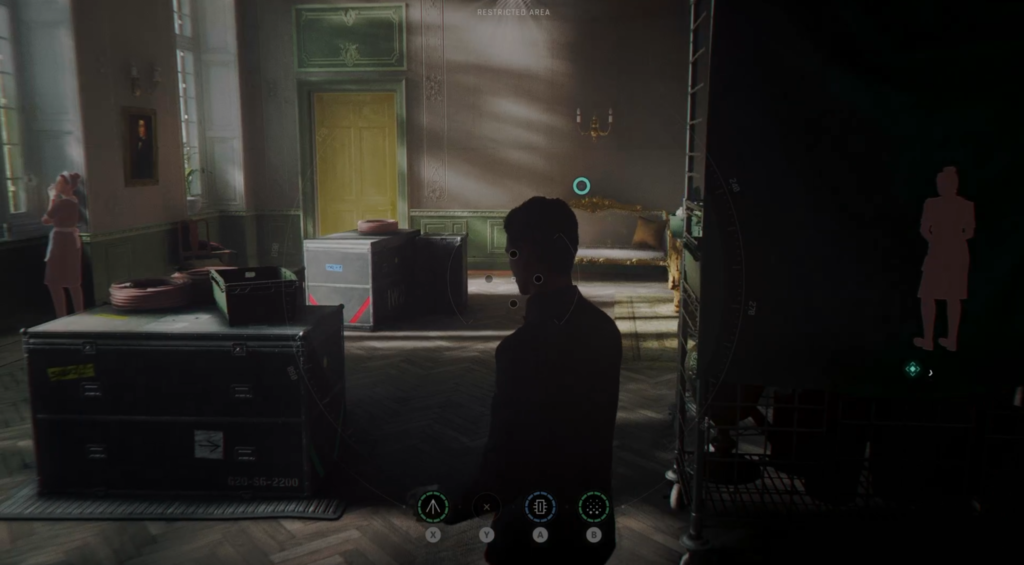
Once in the next room, you’ll see it’s an office with some bottles of wine on display. Behind the desk at the back is a safe you need to unlock to get the playing card. The code is the year of the bottle of Sacramental wine, 1952.
Enter the code and grab your reward!
Postcard (1 / 1) – Slovakia
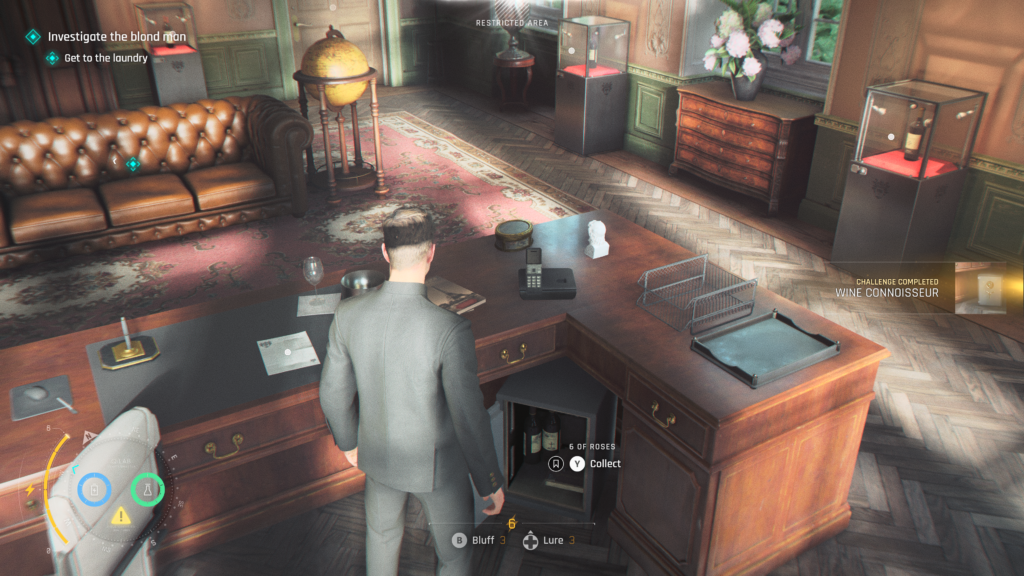
You’ll need to enter room 206 as part of the main mission objective. Sneak past the guard that’s blocking the way (as we did earlier). A maid has a keycard for room 205, you’ll need to distract her so you can successfully pickpocket the keycard to the room.
Once inside the room, head to the right side of the bed to spy the postcard on the bedside table.
Playing Card (3 / 5) – 6 of Acorns
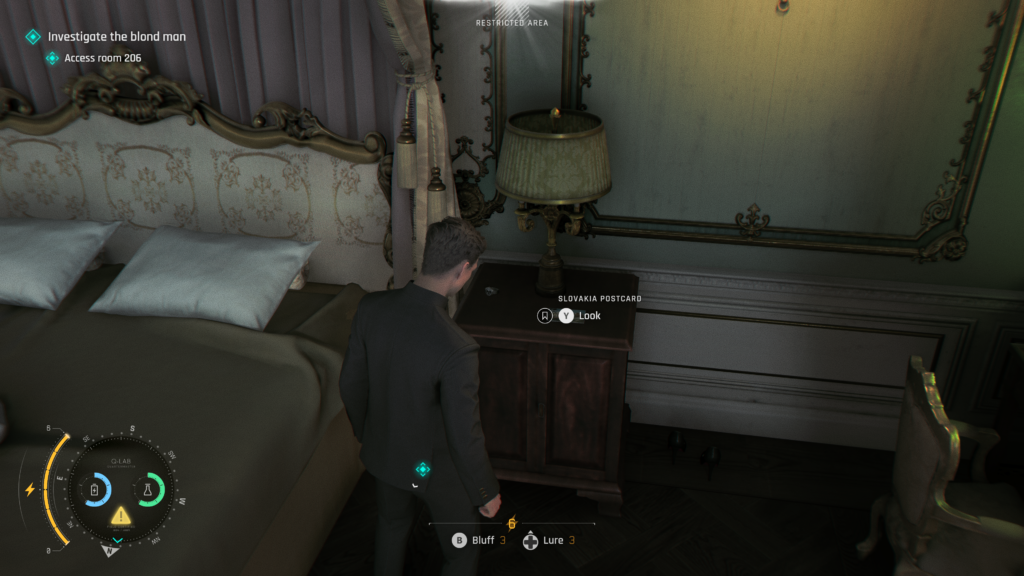
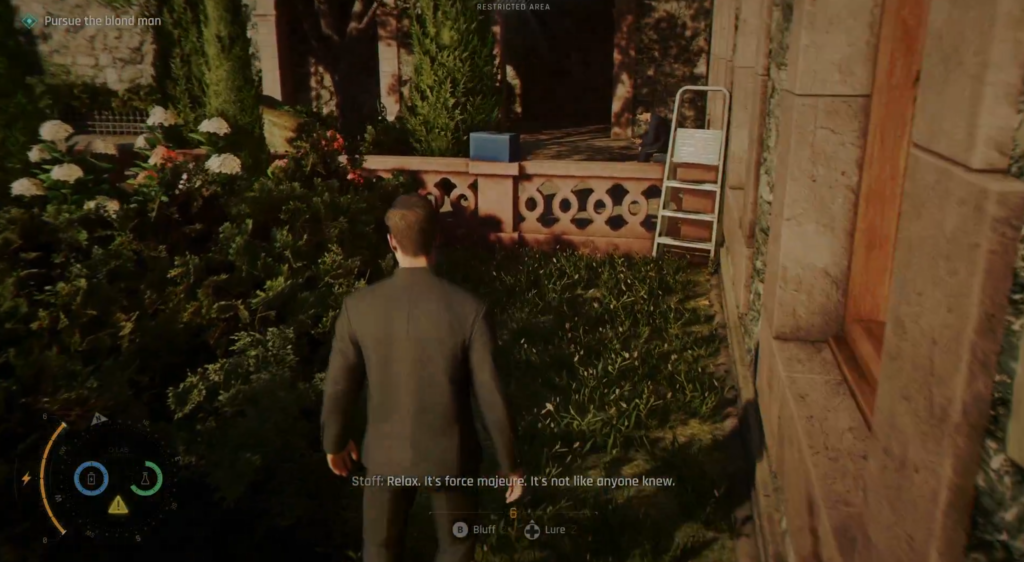
We’re in pursuit of the blond man! After you’re done in room 206, you’ll exit and there’ll be a short cutscene with a maid. Once you regain control, head out the window we did earlier to climb down the pipe to the lower floor, behind the chess championship area.
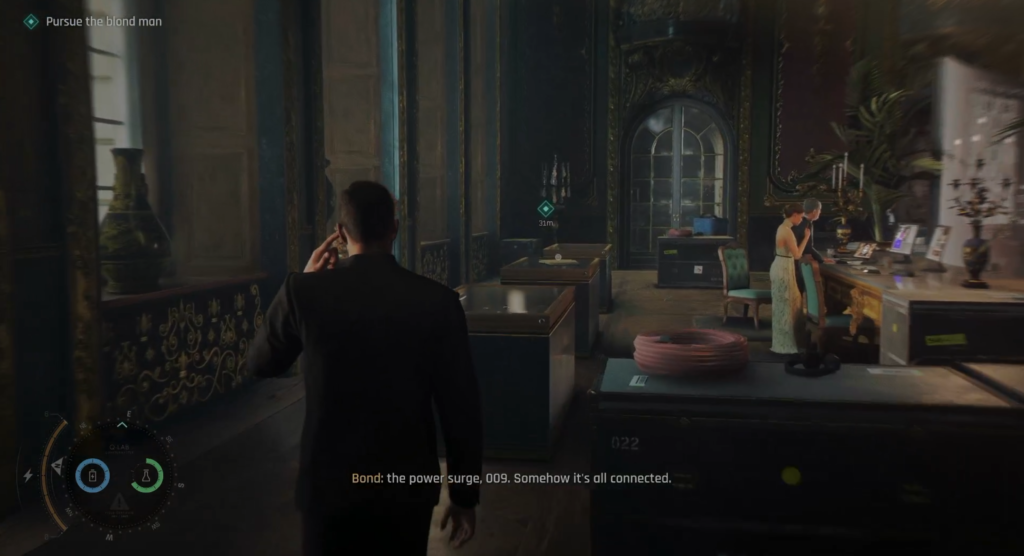
Cross the backstage area into the corridor (slightly to the right to leave the main hall). You need to hop out of the window on your left to go outside and cross back into the corridor to get around the guard. This will take you to a corridor where you can eavesdrop on some guards.
Once you’ve done this, follow the cable on the floor the leave the corridor and head outside.
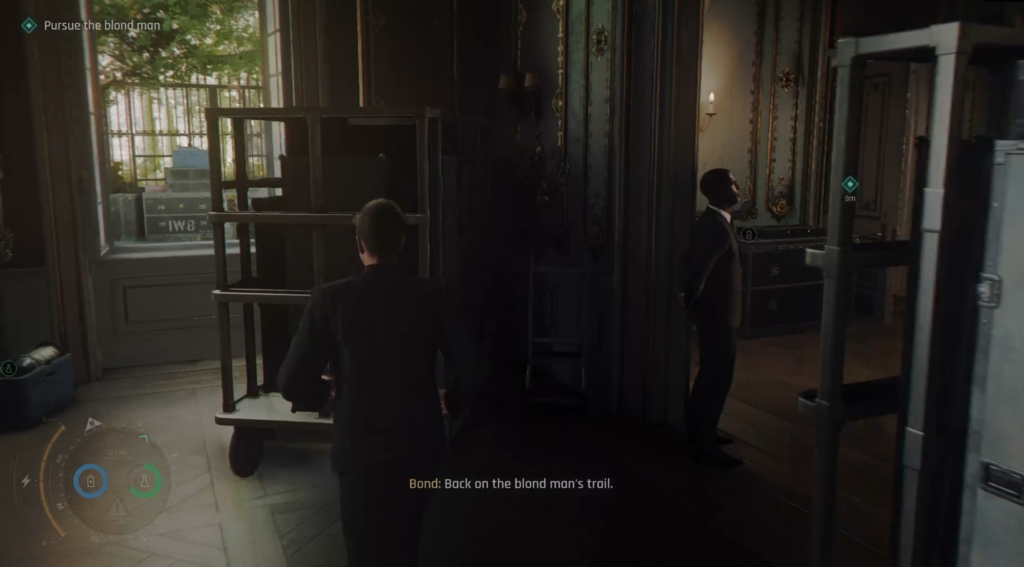
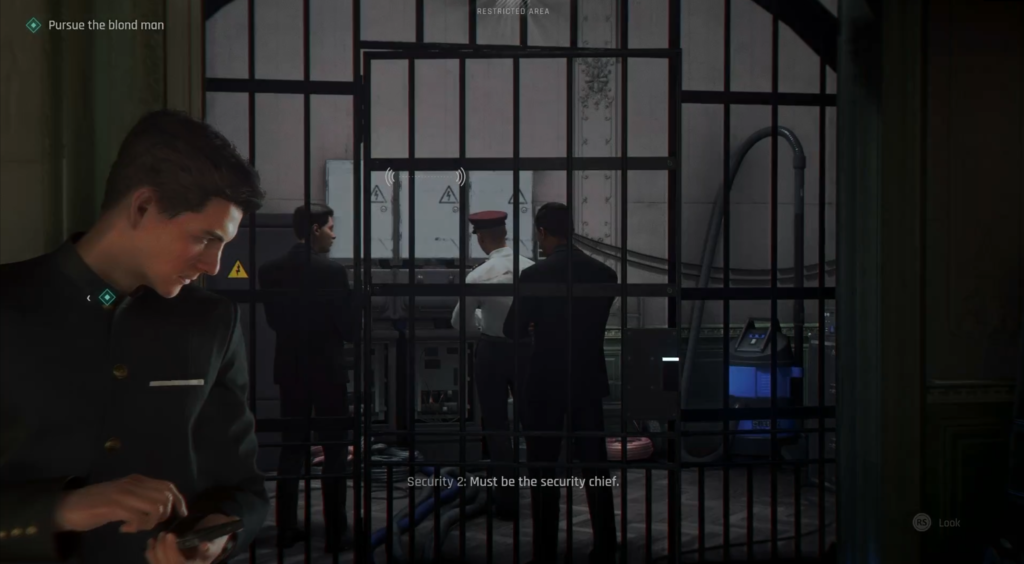
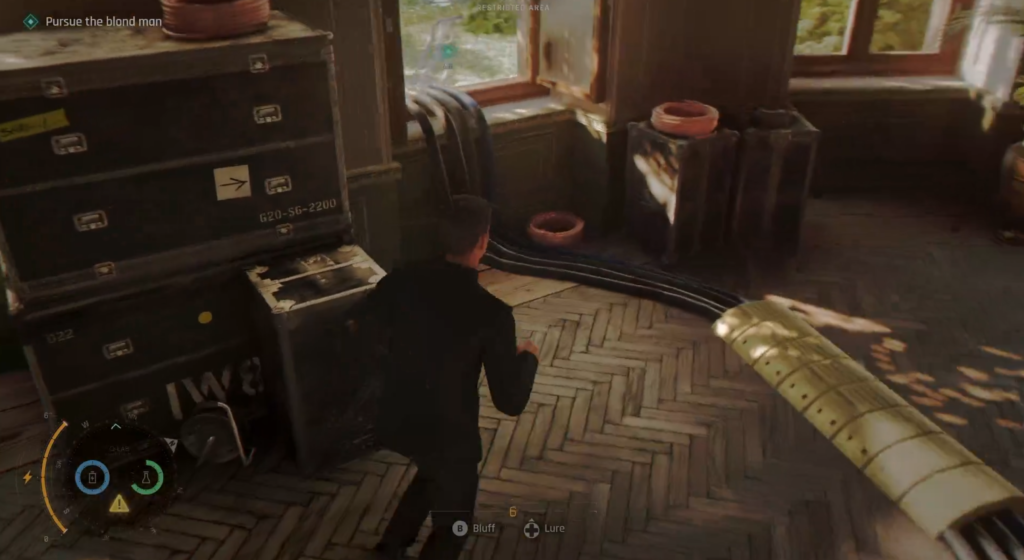
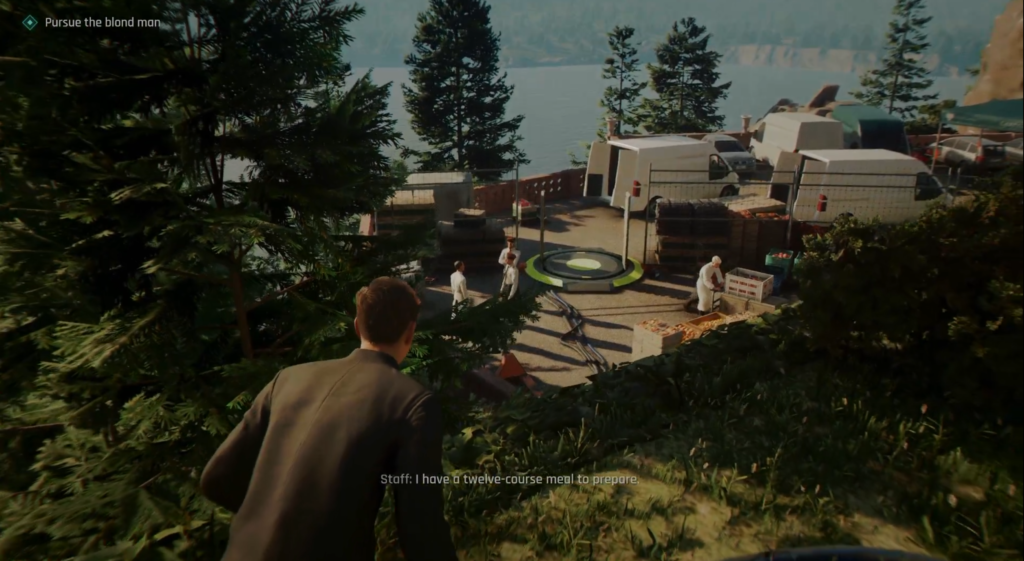
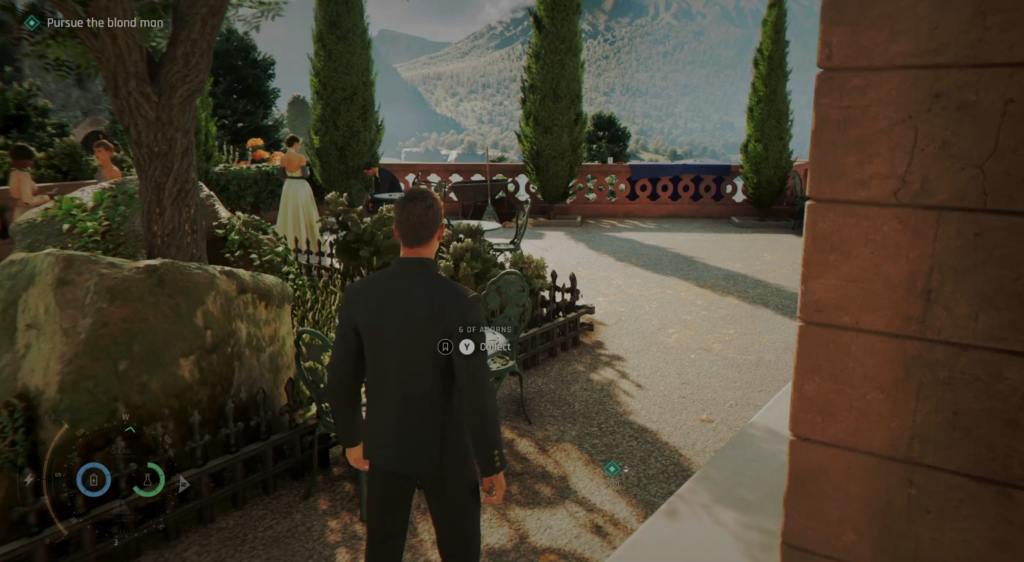
Once you’ve spotted the blond man, dressed as kitchen staff, you’ll head back towards the window you jumped out of, then head to the left. Hop over the wall and towards the indoor bit, just before going back inside, to your left on a small, circular table, is the playing card.
Playing Card (4 / 5) – Ober of Shields
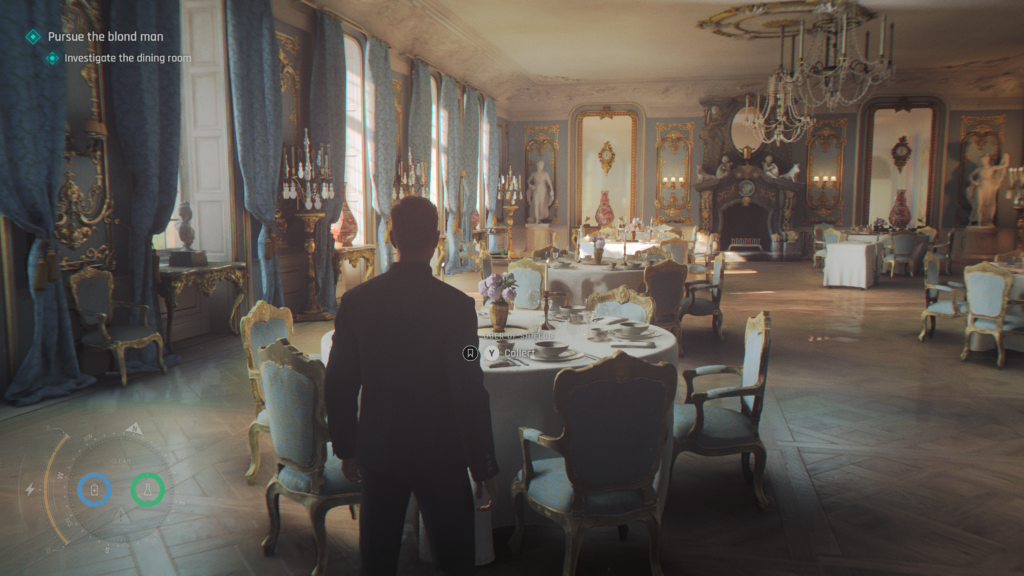
As you pursue the blond man, you’ll eventually end up in the large dining hall. This is where you need to solve the fireplace puzzle. Go to the back of the room, and on the back left table is the playing card.
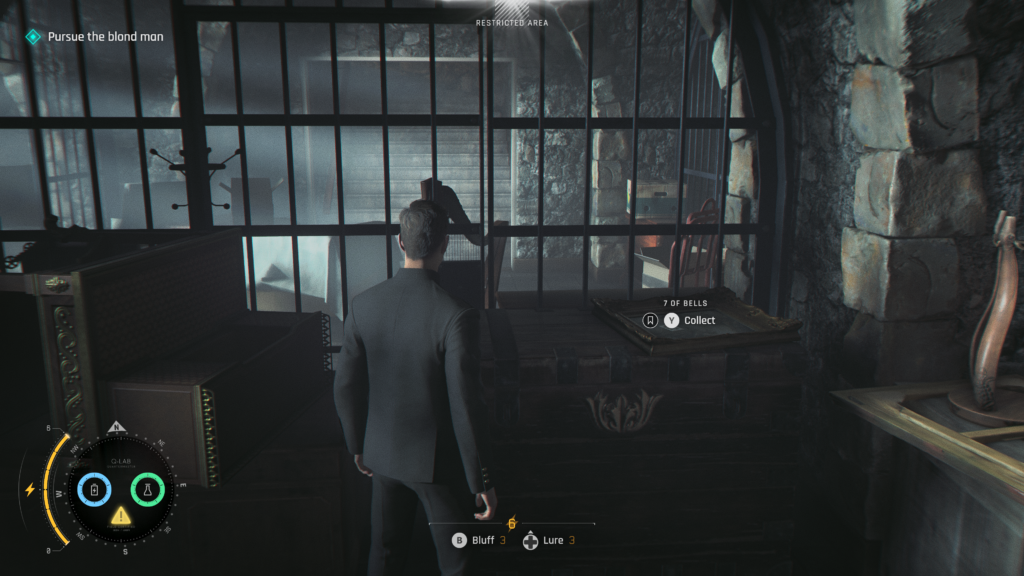
Playing Card (5 / 5) – 7 of Bells
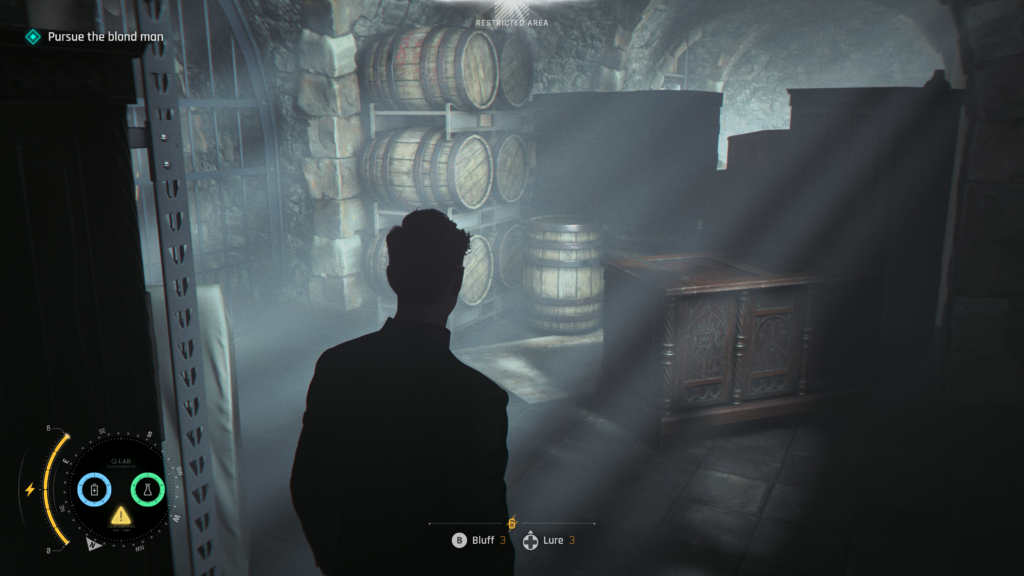
After you solve the fireplace puzzle, you’ll go down some spiral stone steps to a wine cellar. You’ll vault over a crate on the right and carry on. To progress, you’ll squeeze between two crates if you carry on forward. Don’t. Instead, take a left into a storage area and the playing card can be found on the right on a crate.
You can get this collectible when you return to MI6. You can access this section from the “Out of the Ashes” chapter in the chapter select.
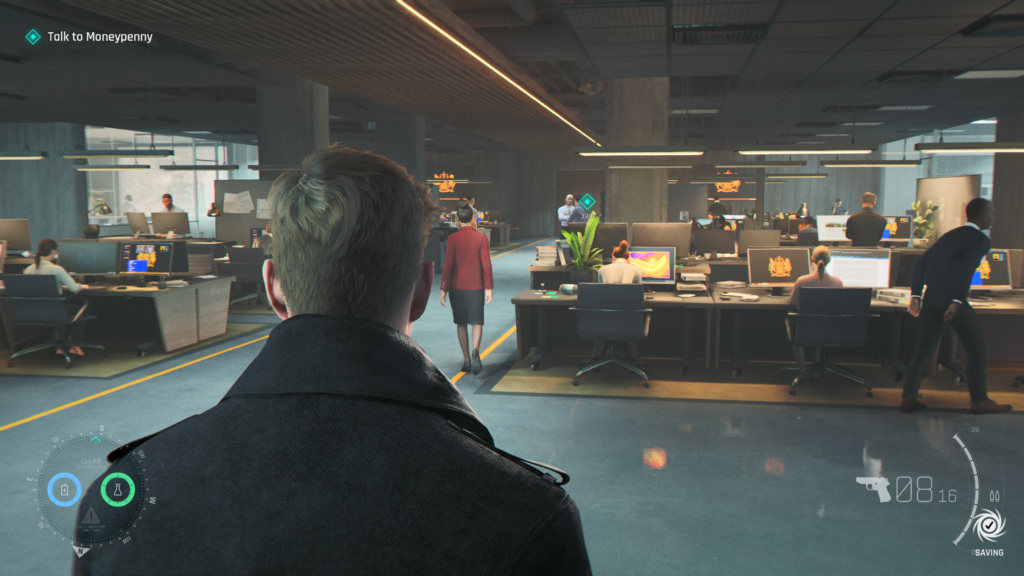
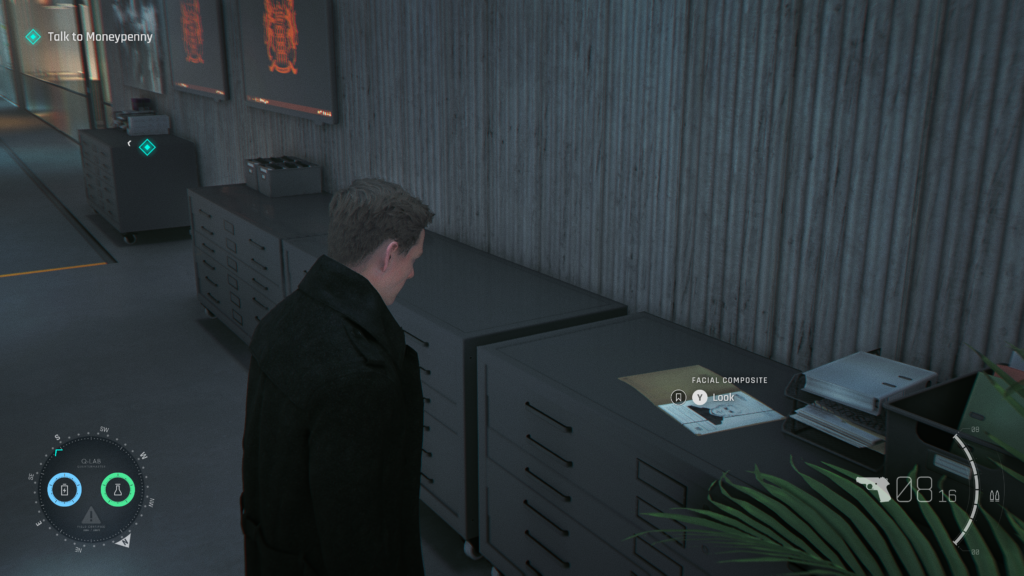
Intel (1 / 1) – Niko and Tero Murto
When in MI6, you’ll need to head to Operations to speak with Moneypenny. Once you arrive in the lift, take a right and then right again to go back on yourself down a corridor. To the back of the area, on the left, in a corner, is a desk with the intel on it.
Chapter 04, “The Past Never Dies”
From this point on, make sure you always have the Q-Laser option on your watch to make sure you can get to some of the collectibles for the rest of the game.

Playing Card (1 / 5) – 6 of Bells
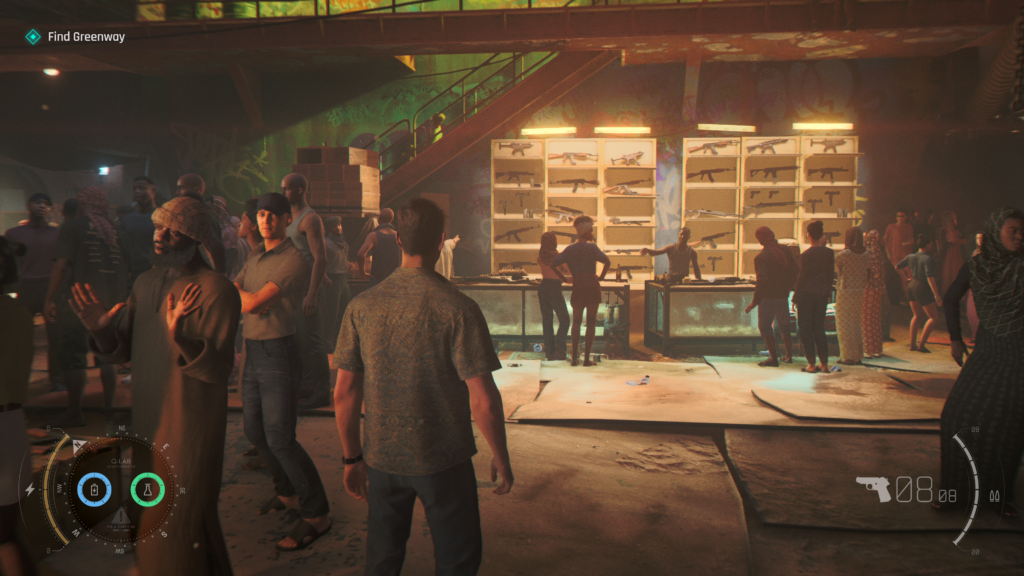
You’ll get this near the beginning of the level, after you’ve arrived at Alephi. Head forward with Greenway untill he disappears. From the guns shop in front of you head to your left.
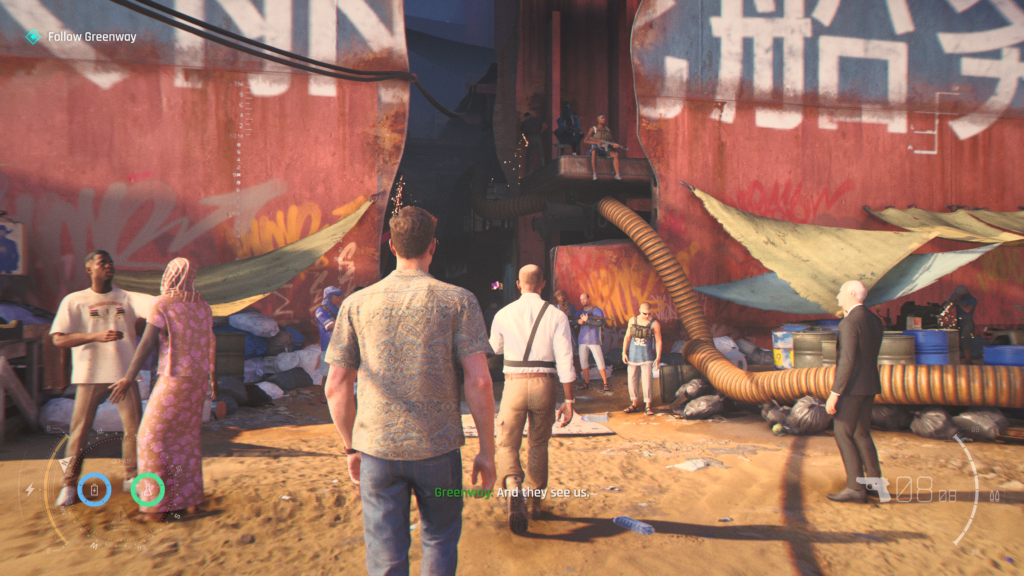
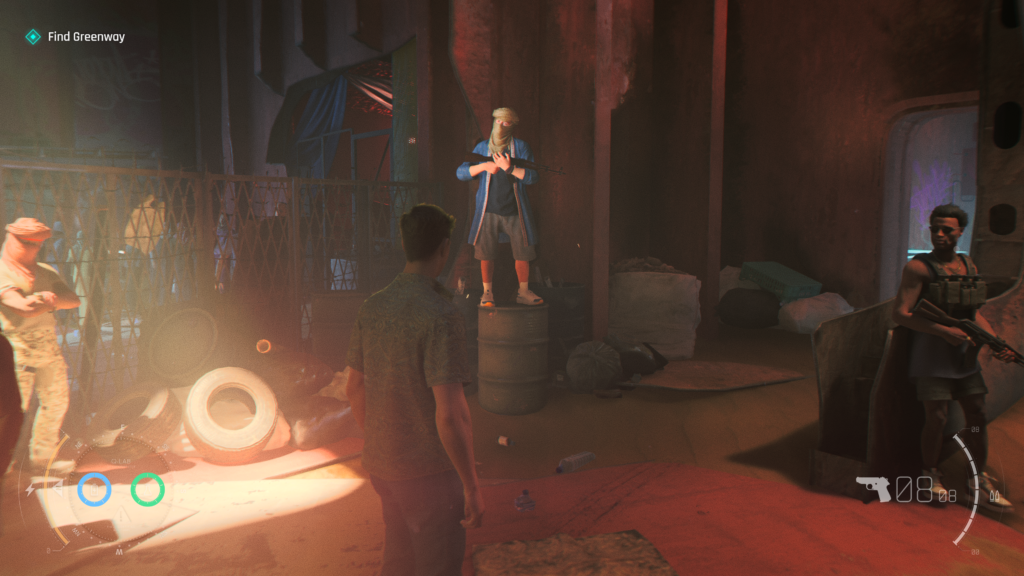
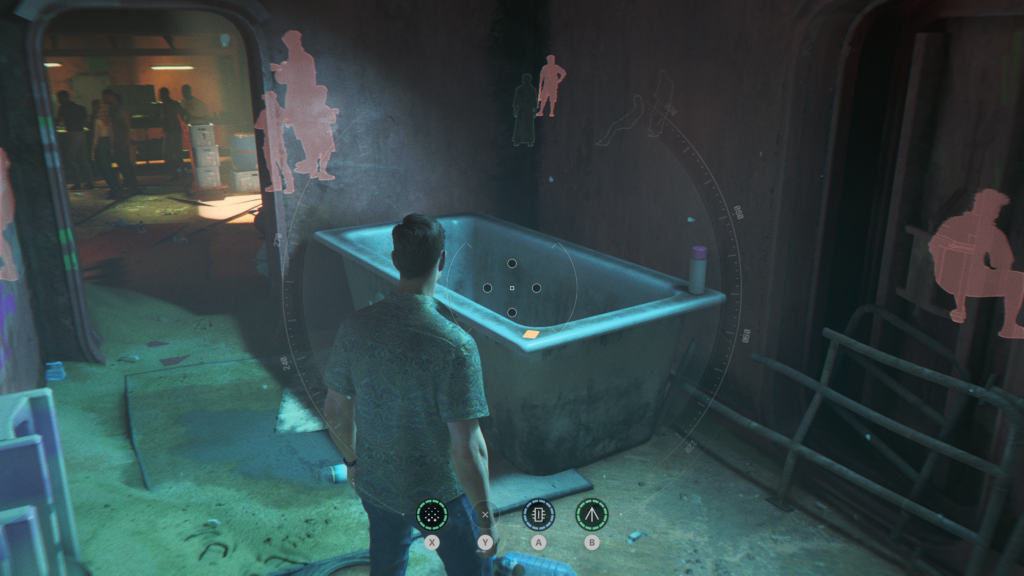
You’ll reach a fence where you can’t progress. To your right is a little entrance way into a room. Head in, and on the edge of the bathtub is a playing card.
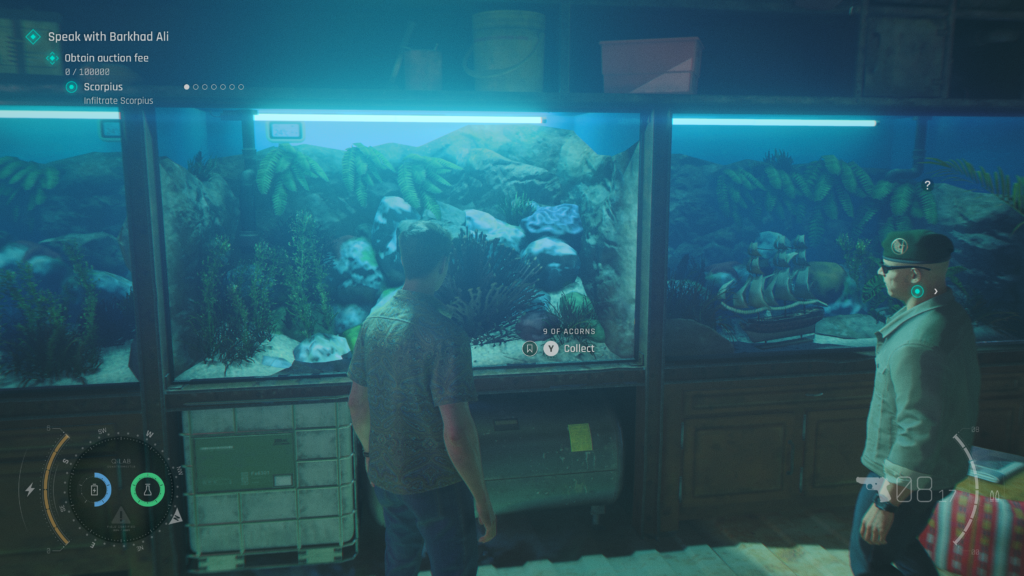
Playing Card (2 / 5) – 9 of Acorns
You’ll progress through the level until you are giving the main objective of acquiring the auction entrance fee. You’ll head down into the market area.
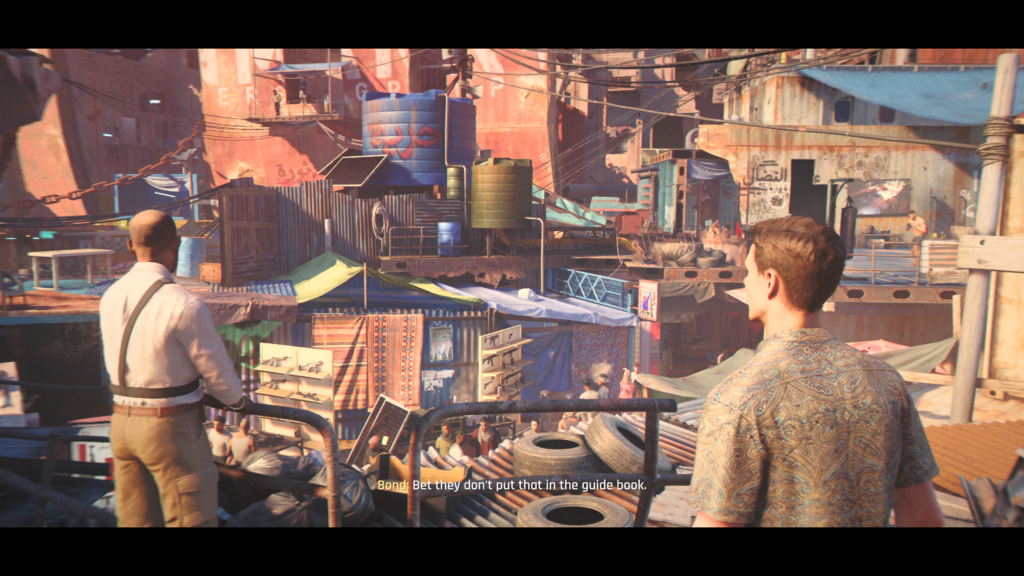
After descending the stairs, where you leave Greenway, head to the right. You’ll see an area with Mercenaries you can eavesdrop on, a truck, and several aquarium tanks. The playing card is in the central aquarium. You can use your Q-Watch to break the glass to get to it. I used the watch laser.
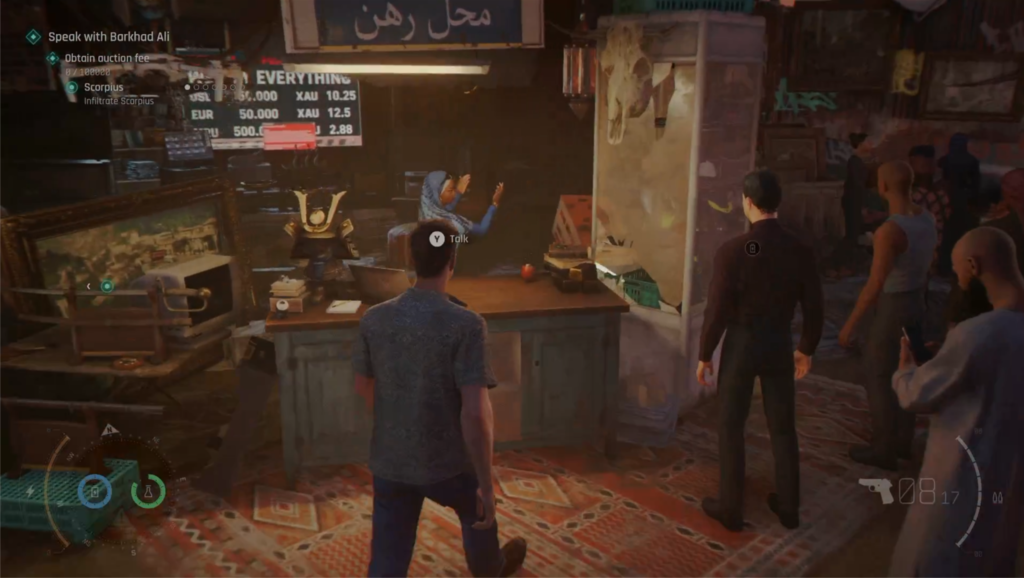
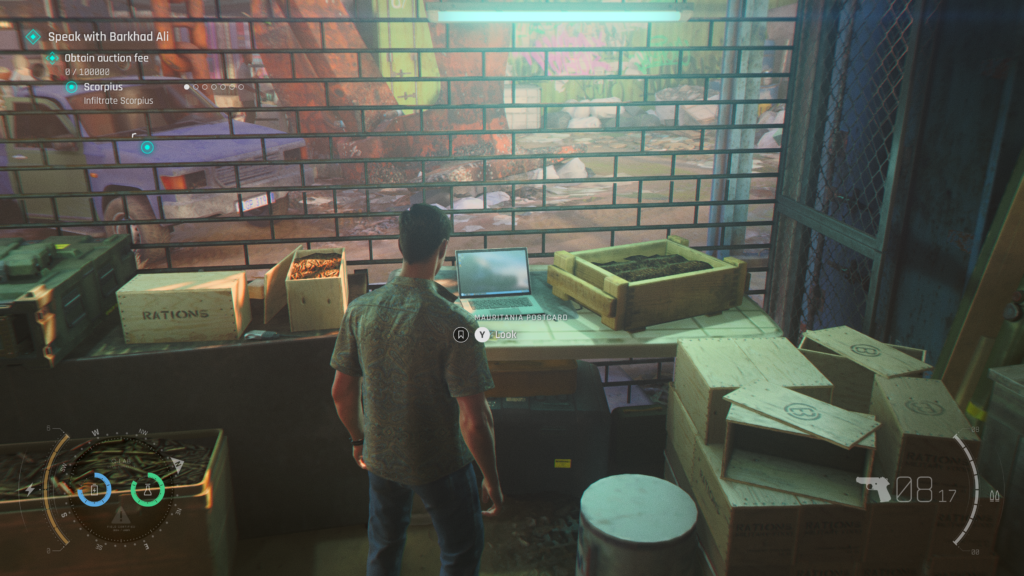
Postcard (1 / 1) – Mauritania
Just near the steps where you entered the market area, you’ll come across the pawn shop, where Nirmala works, a lady in a blue outfit.
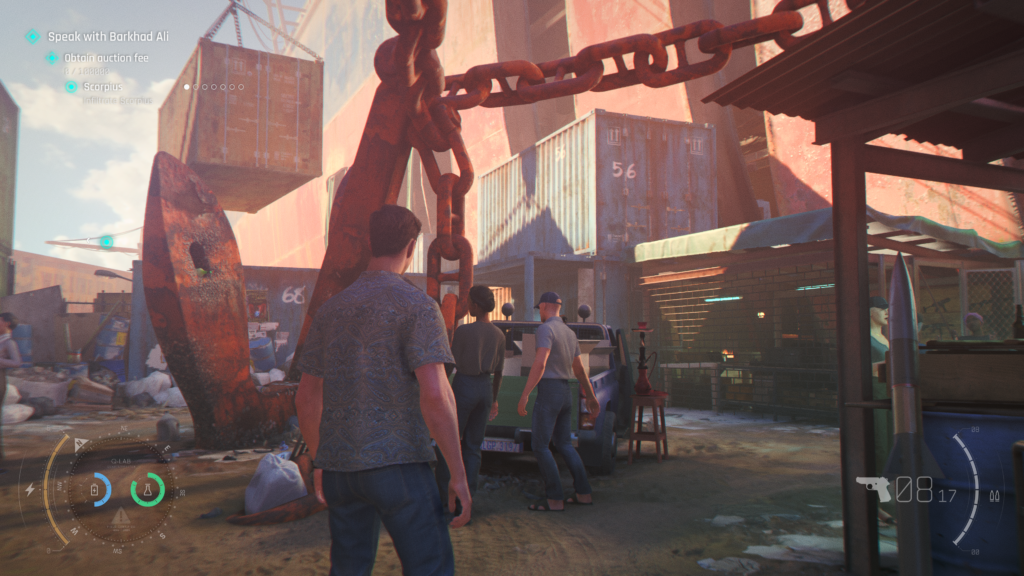
From this store, head to the right and into the back area, you’ll see a big red anchor in the centre of the area.
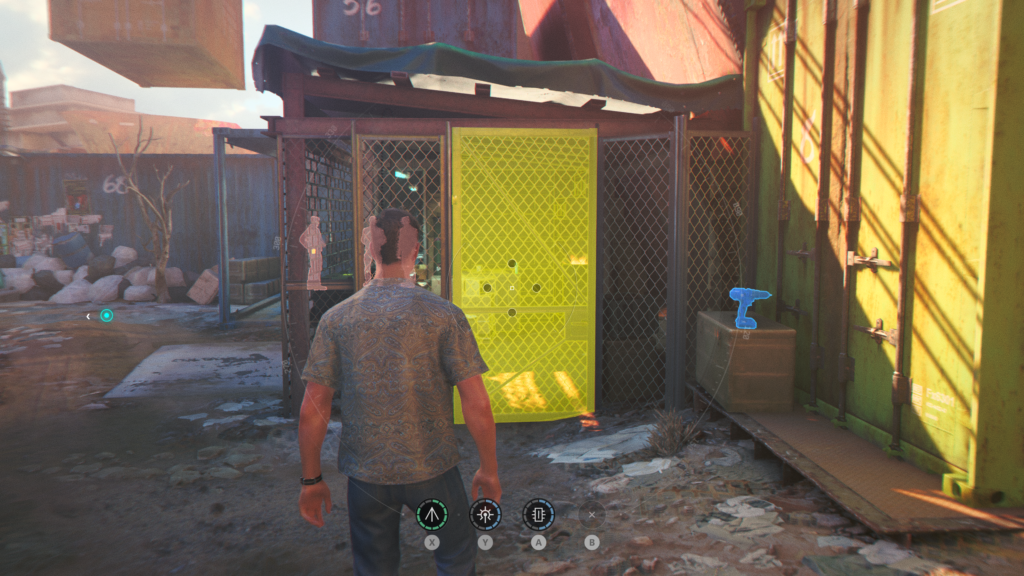
On the right of there is a caged off area, behind a locked door. You can use your Q-Watch laser to zap the padlock and get in. The postcard is on a desk on the left as you enter that caged off area.
Playing Card (3 / 5) – Ober of Acorns
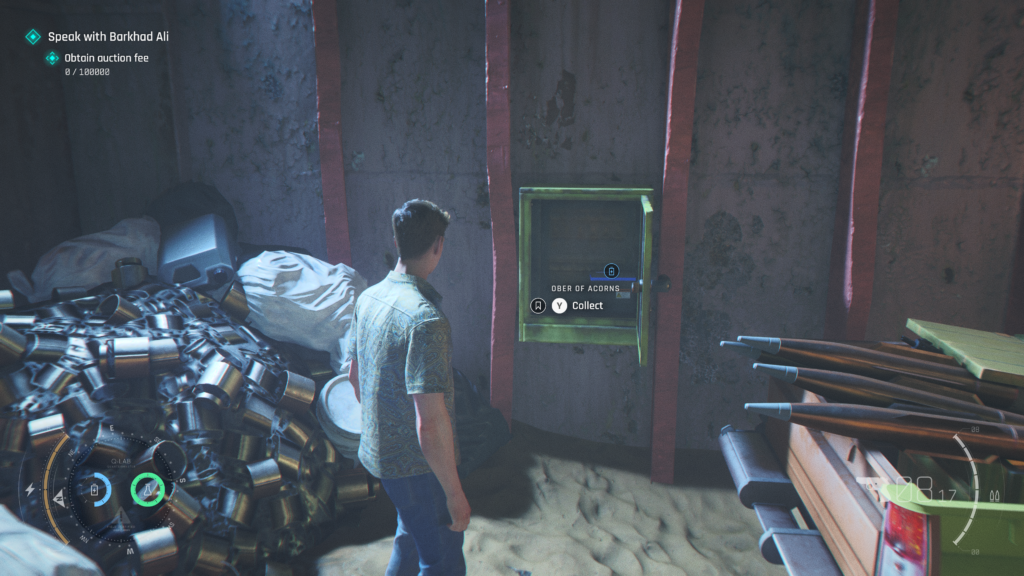
Go back out of the cage you were in to grab the postcard, and head to your left towards some men and a truck.
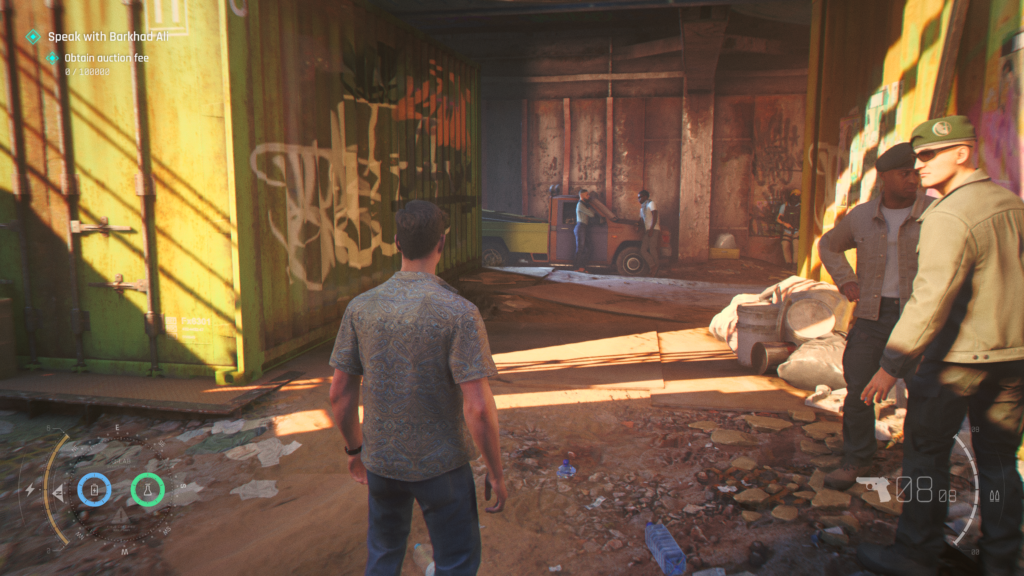
Head to the back of the truck on the left to see a power box that’s locked. You’ll need to use your laser watch to open it (if you don’t have it equipped you’ll have to replay the chapter to get back here with it equipped, make sure you start from “Out of the Ashes” chapter so you can select the laser attachment).
Intel (1 / 2) – Bawma
From the last collectible, turnaround, and head left into the next section of the market. This area has a big red buoy in the centre of the space.
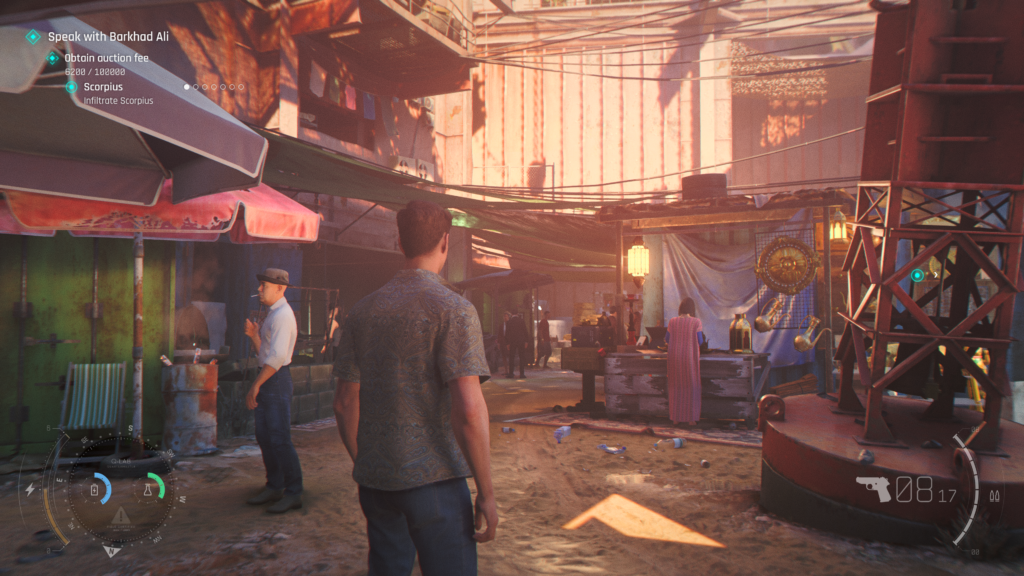
Head behind the buoy, the left of it, and on a crate / desk, you’ll see the collectible in a presentation box.
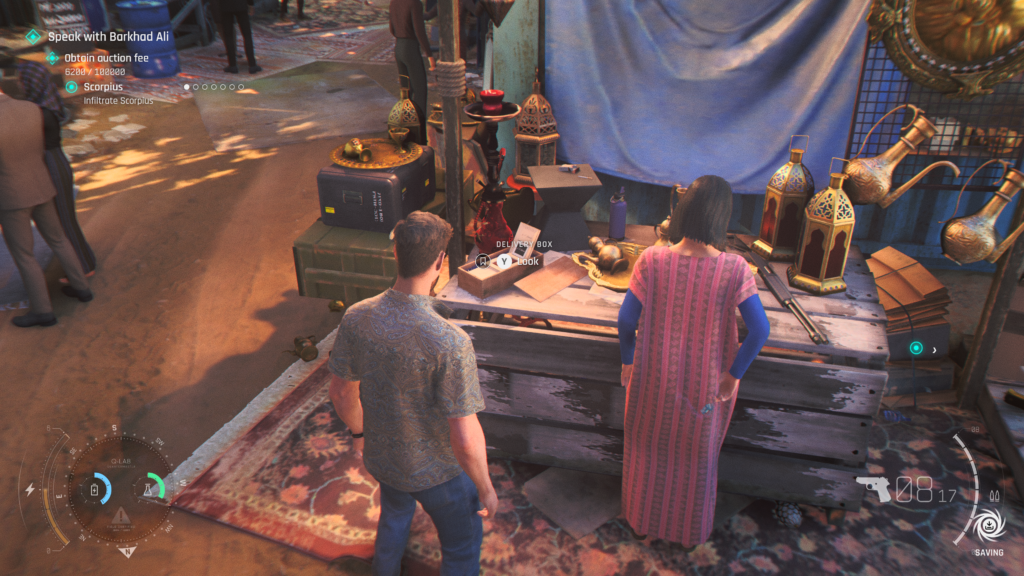
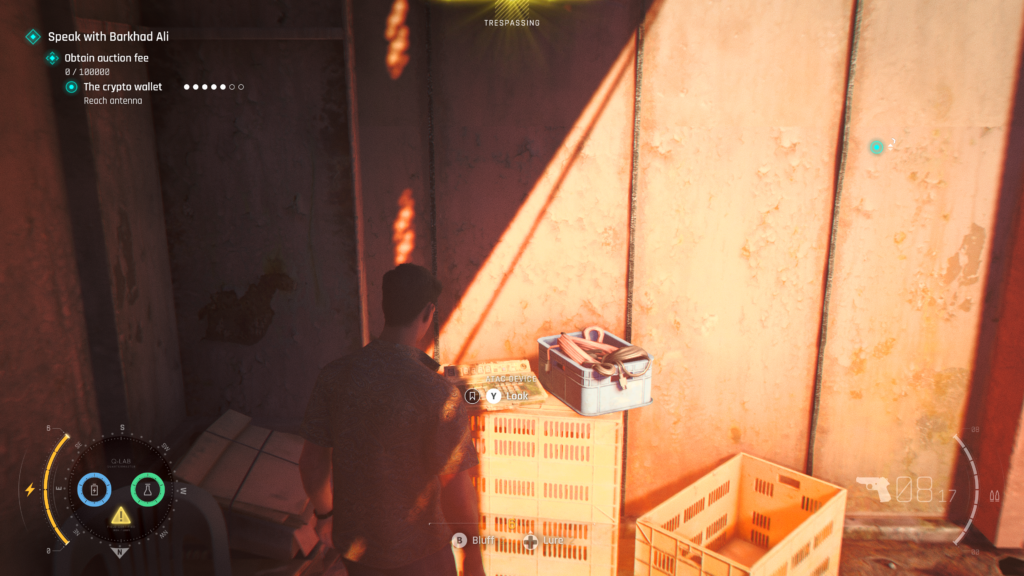
Legacy (1 / 1) – ATAC Device
This one’s a little involved. You have to follow the sub-objective of the Crypto wallet in your quest to raise the money to get into the auction. To the right of the Bawma intel (above), you’ll spot an eavesdropping spot where you can listen in on a guy talking about the cryptowallet. You’ll need to hack his phone and tail him (follow the instructions on screen).
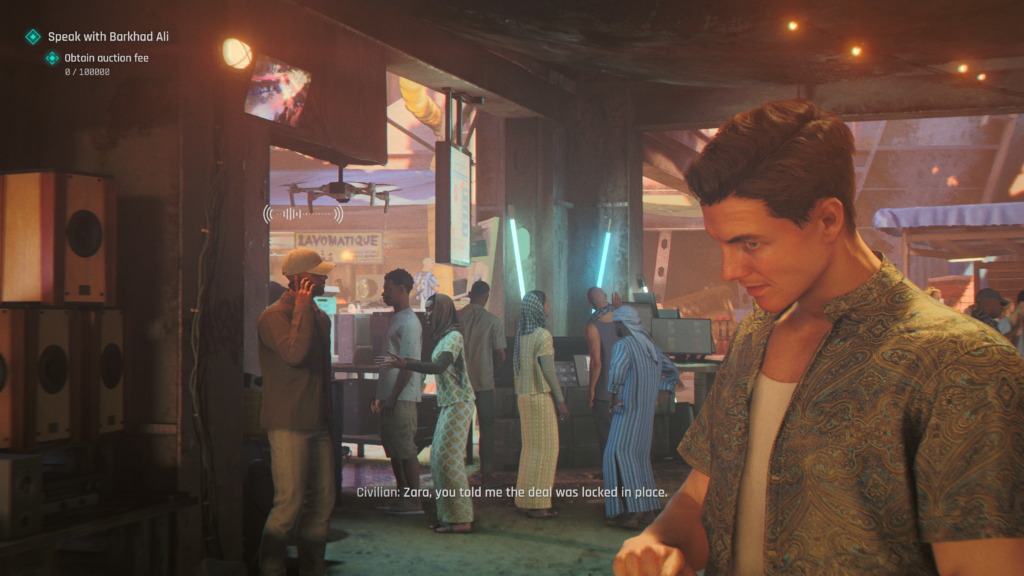
Once hacked, the objectives will you have follow a signal (and helpful objective markers) that eventually take you through a gate that’s to the right of the laundromat area (you’ll pickpocket someone along the way too). You’ll head up some stairs and have to do some navigating of this area to progress.
Follow the path round, taking out enemies as they appear, and you’ll reach a pipe that you have to climb up.
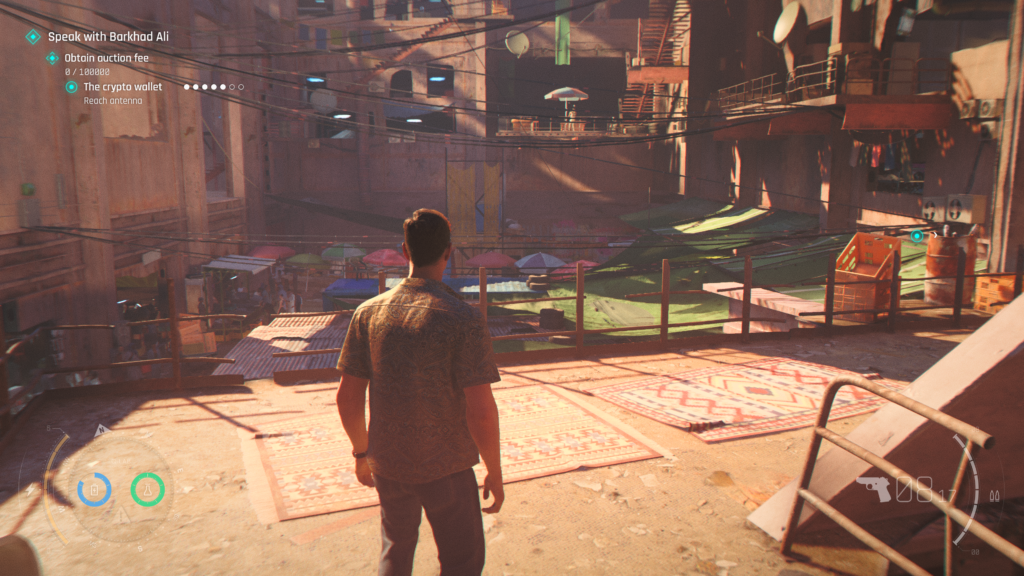
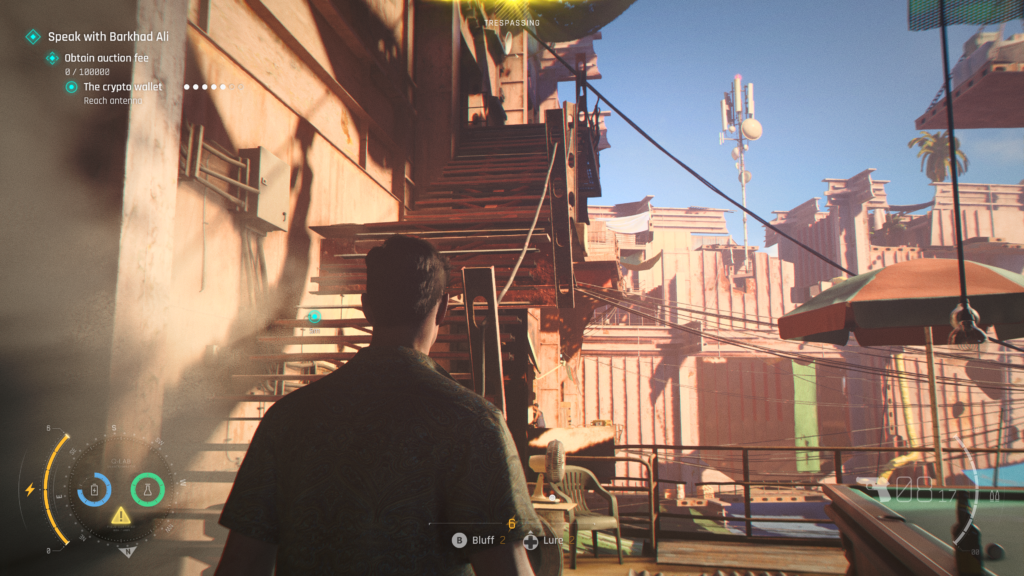
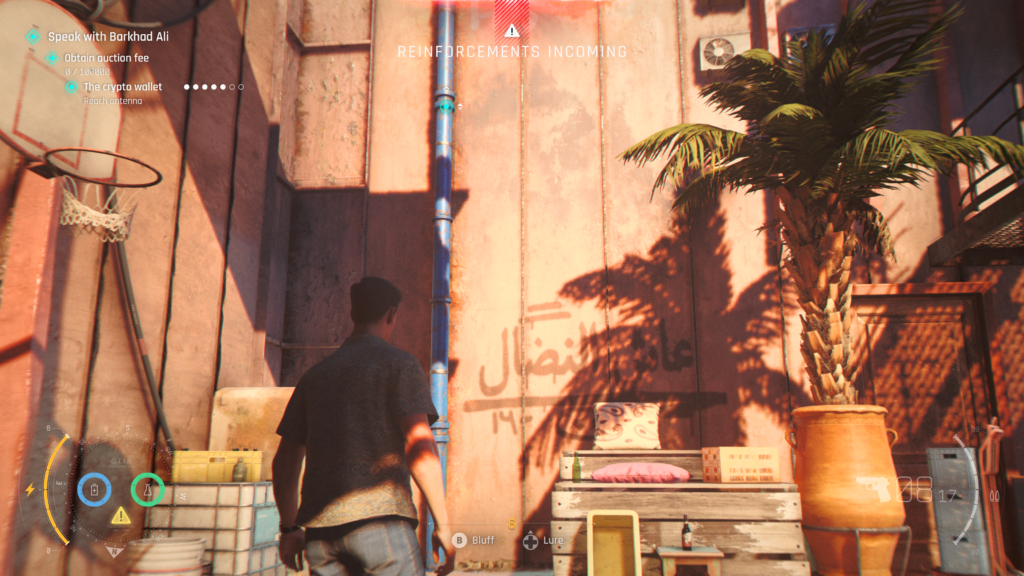
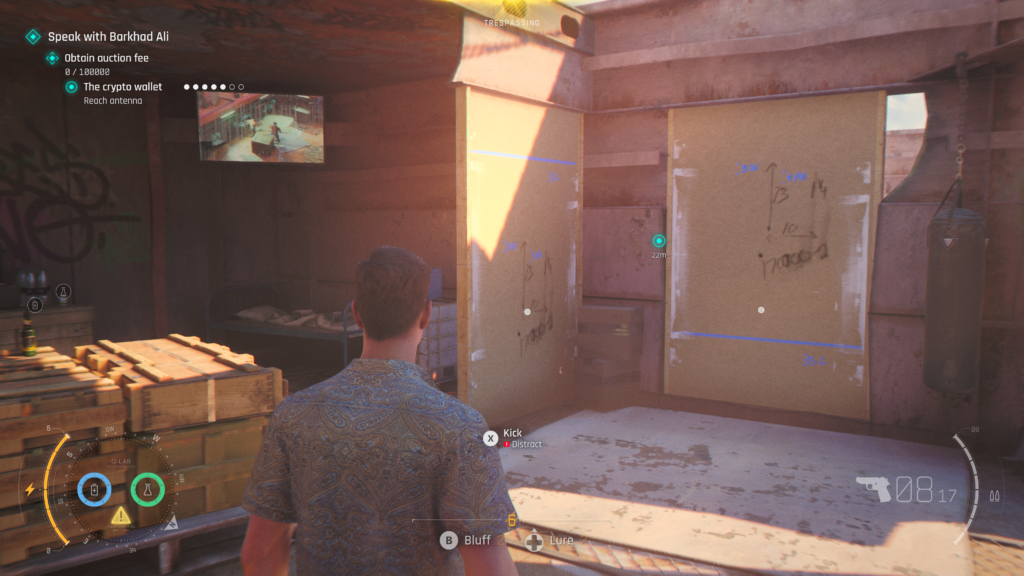
At the top of the pipe, you’ll fight a Brute type enemy in a small space. Once done, continue forward (by kicking the wall in) to find the antennae you’re heading towards in direct view. You’ll need to climb around the environment to get there. You’ll jump down to a walkway below and on to the centre point, directly below the antenna. When you’ve gone round to the right, the ledge you’re hanging onto will say “7” with an arrow pointing upwards.
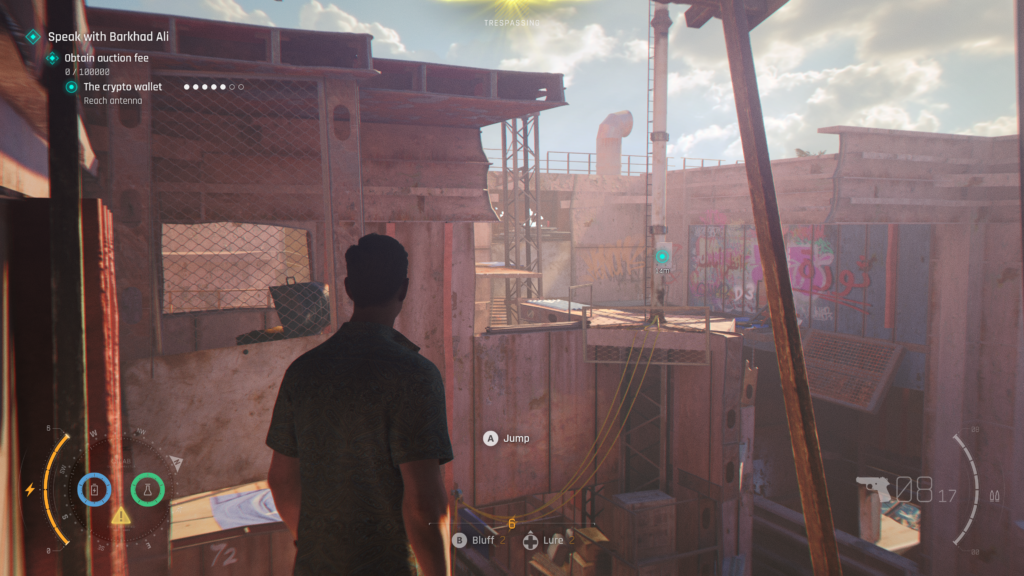
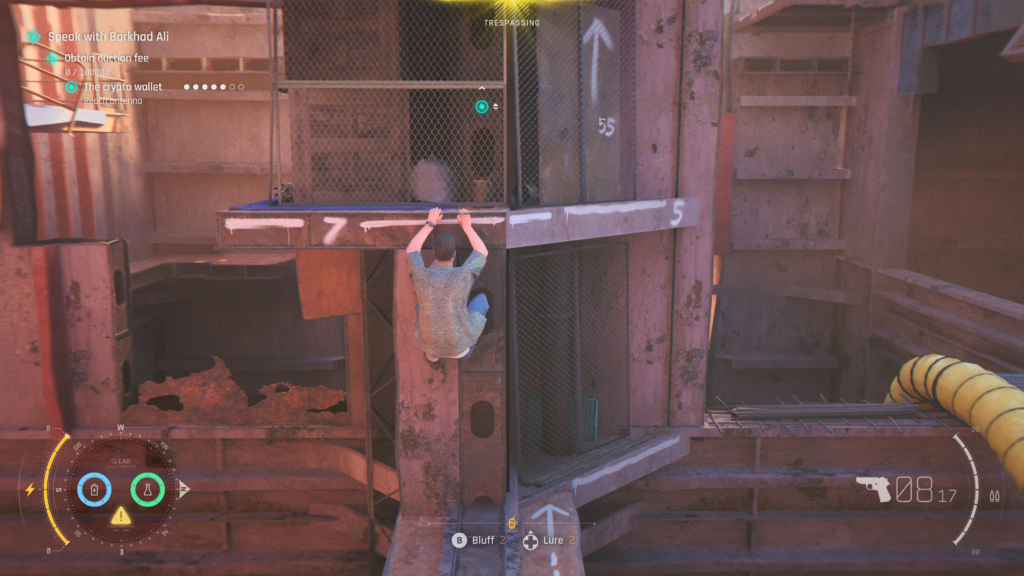
Don’t go up, drop down and turn around, following the path round to find the collectible.
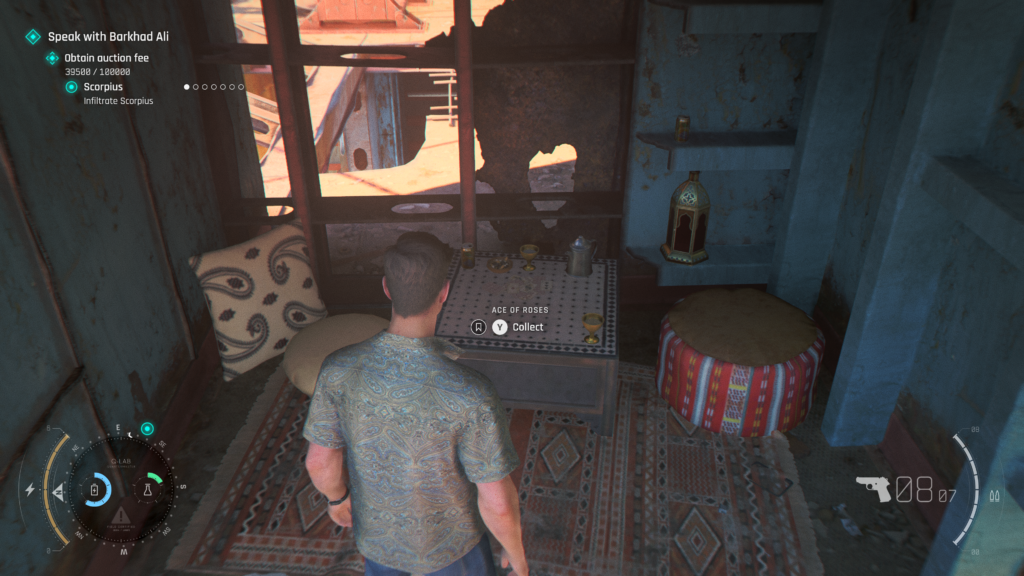
Playing Card (4 / 5) – Ace of Roses
One of the opportunities to make some money to get into the auction is to become a fighter. It’s in the market area, a stall will have some big television screens next to it.
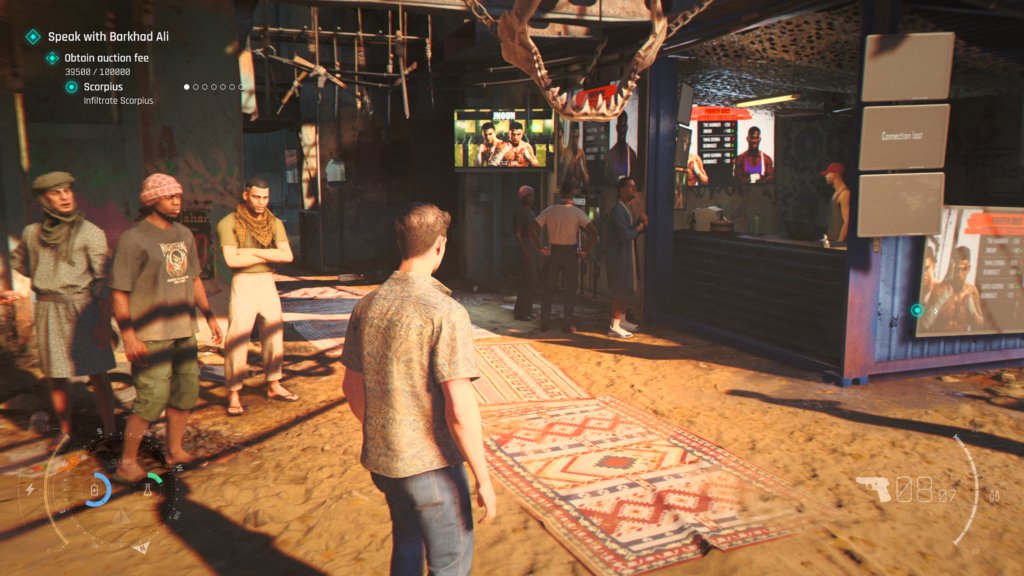
Head inside and up the stairs to the main bar / fighting area. Turn back on yourself and stay to the left and head out on to the rooftop training area.
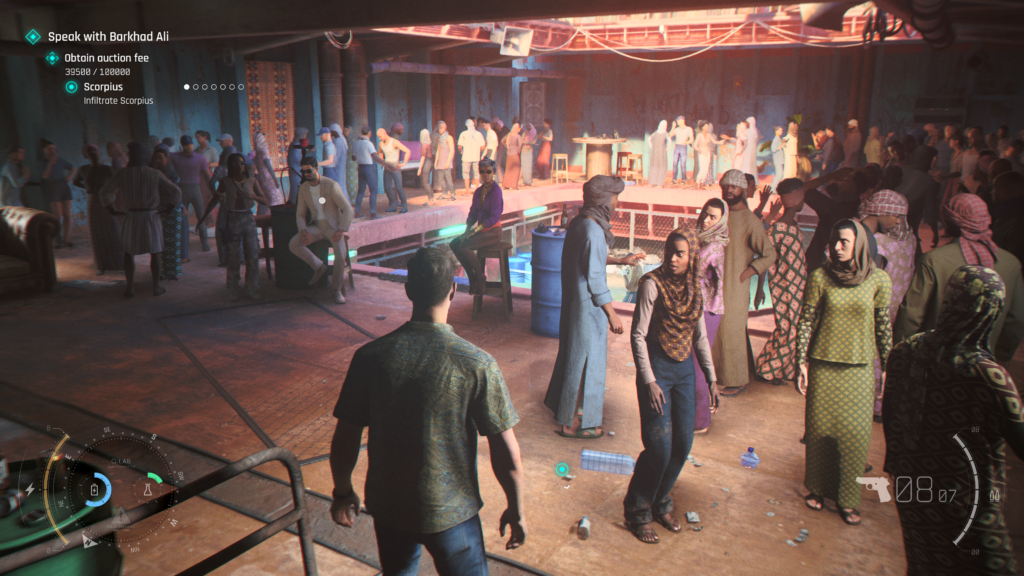
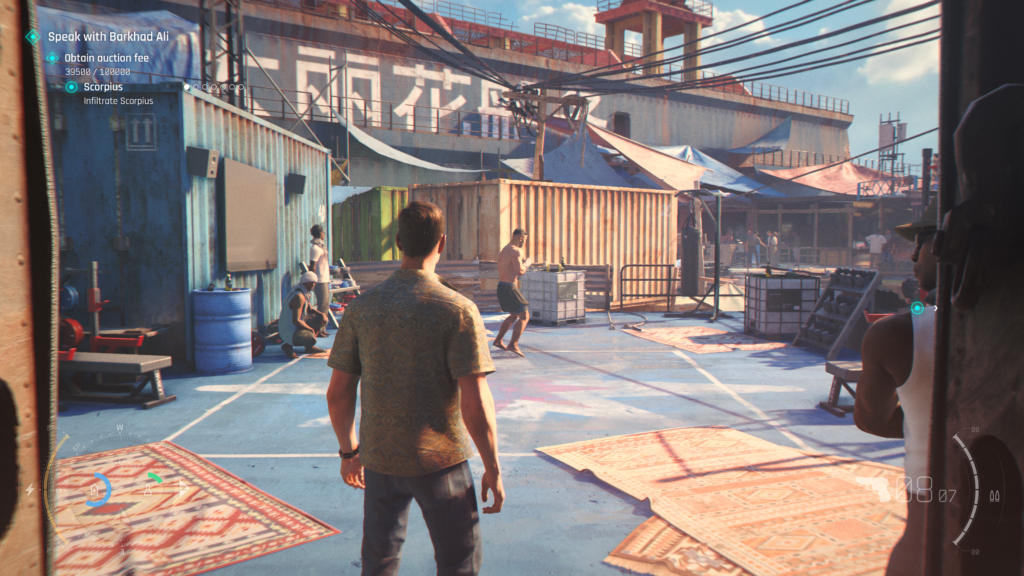
Once outside double back on yourself to the right to find a small room with the playing card in there on a small box.
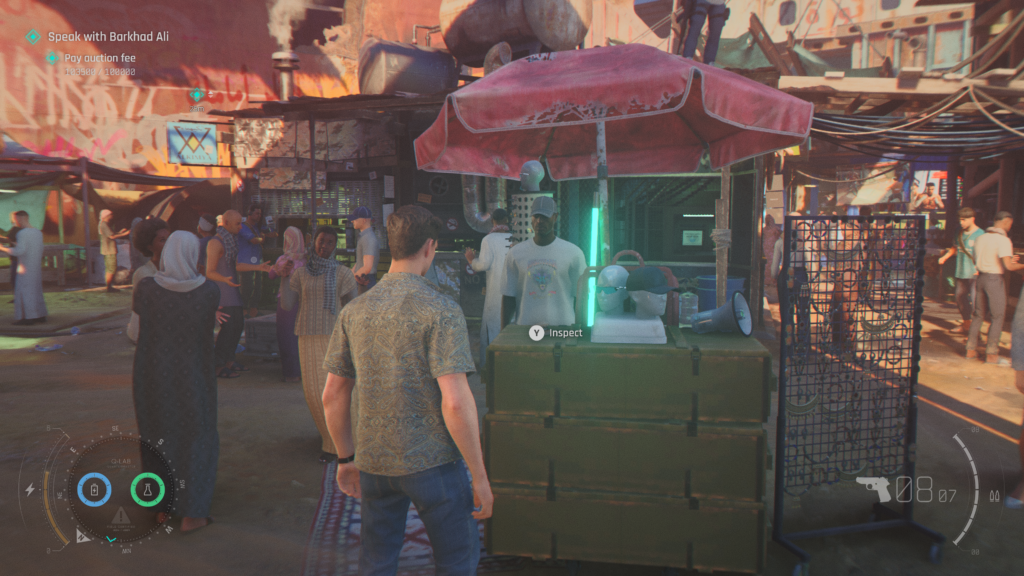
Memento (1 / 2) – Pirate Grillz
Once you’ve collected enough money to enter the auction return to the pawn shop, where Nirmala works, a lady in a blue outfit, it’s near the steps you need to use to leave the market to go to the auction.
Turn around and walk forward to spot a guy selling some questionable items under a red umbrella. It doesn’t flag as a collectible when you look at it, but after some bartering from Bond you’ll add it to your collection.
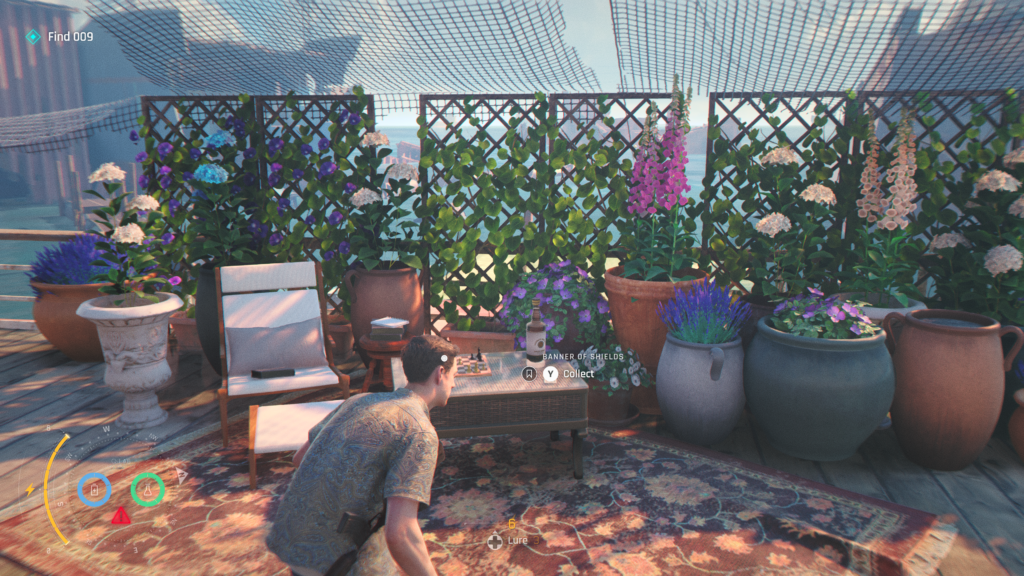
Playing Card (5 / 5) – Banner of Shields
Much later, you’ll sneak through several section of enemies and climb your way to the boat where you will be meeting Greenway. This is the boat that is booby-trapped, with tripwires and lasers around.
After the first section of tripwires, you’ll ascend some stairs to the next floor which is surrounded by flowers and flower beds. A small cutscene illustrates hidden laser wires.
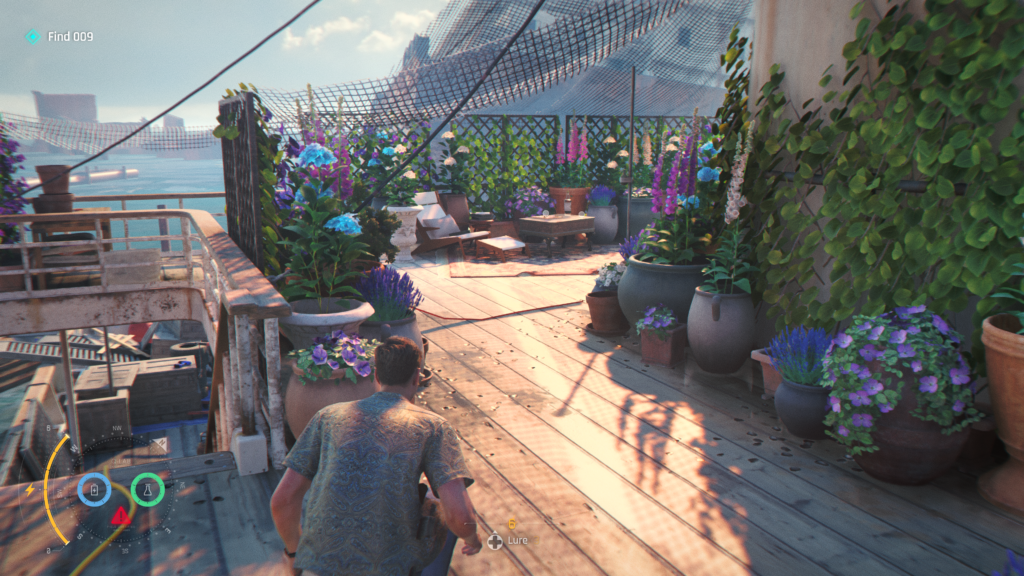
Turn to the left at the top of the stairs and go back on yourself, you’ll see a table with a chessboard on it, including the playing card next to it.
Intel (2 / 2) – John Greenway
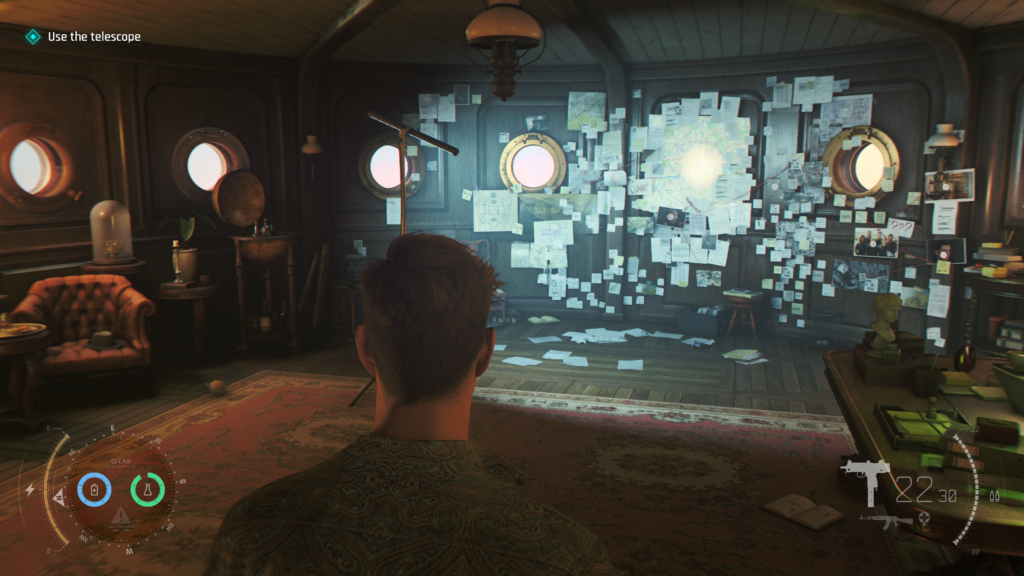
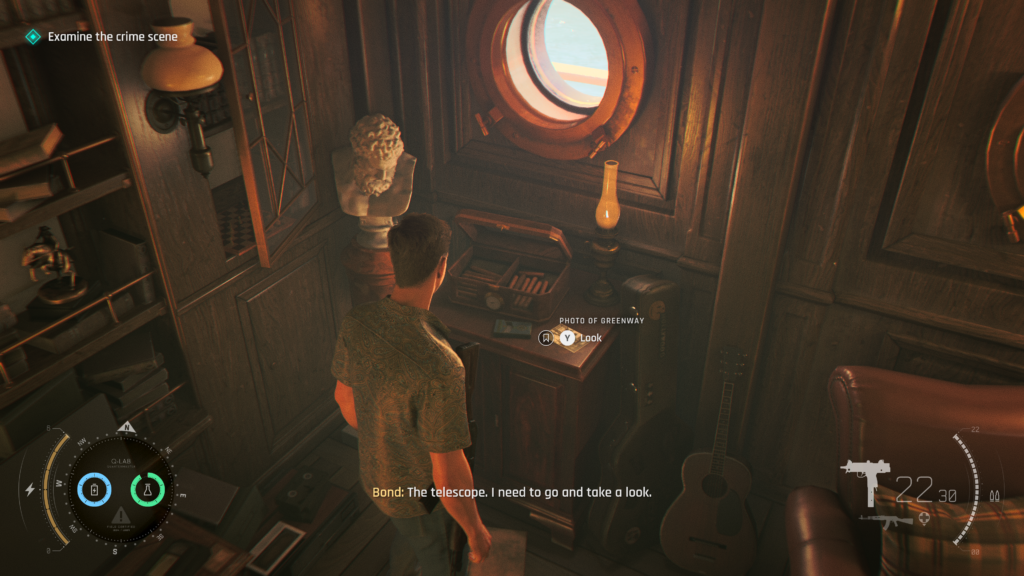
Once you’ve gone inside the boat, and are investigating 009s hideout. You’ll enter a backroom with lots of photos and clues on a wall. To the left, on a dresser, is the collectible.
Memento (2 / 2) – Crocodile Tooth
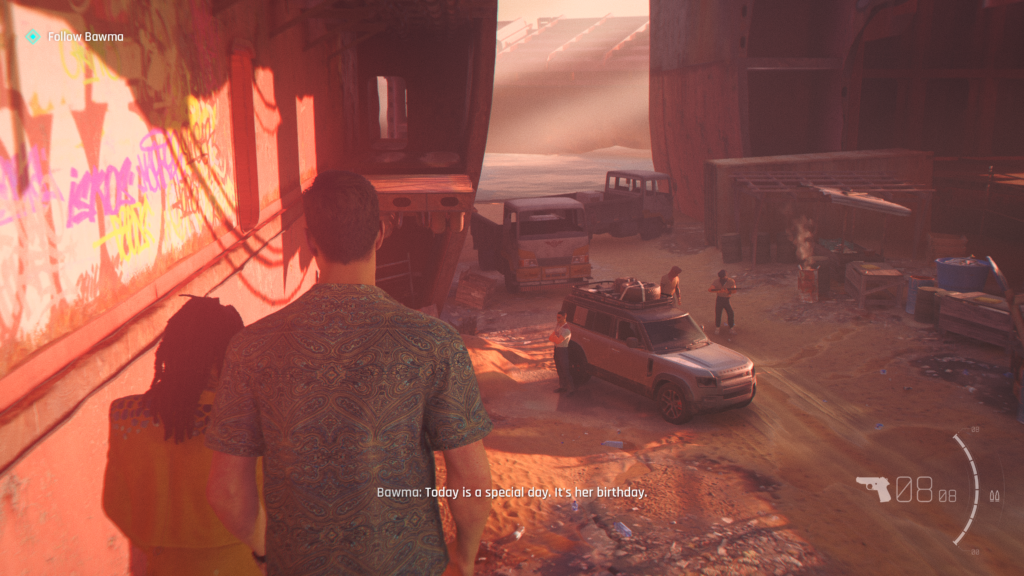
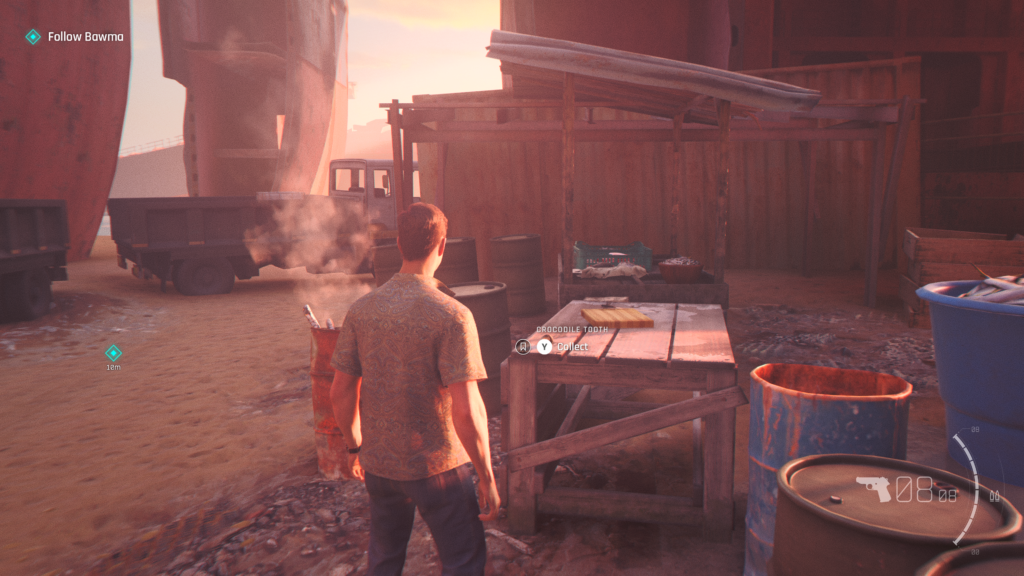
As you’re about to leave the area, you’ll head to the Jeep with Bawma. Don’t get in the jeep straight away, head across the path to a table with the collectible on it.
Chapter 05, “Beyond the Grave”
We’ve listed the collectibles in the order they’ve been discovered. This isn’t necessarily the right order, or the most efficient way to locate them.
Anything you miss can be collected by replaying the mission via the Chapter Select on the main menu.
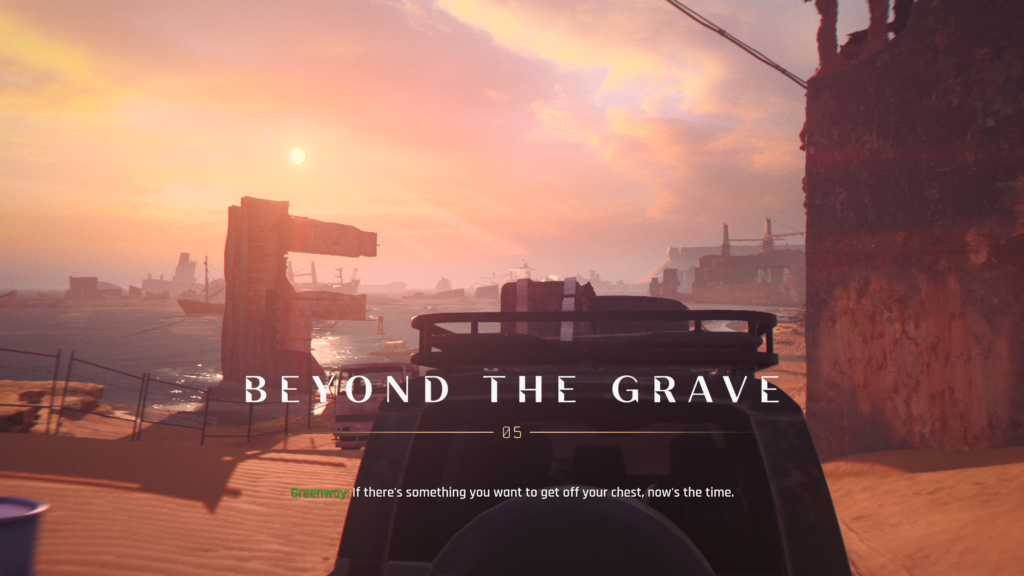
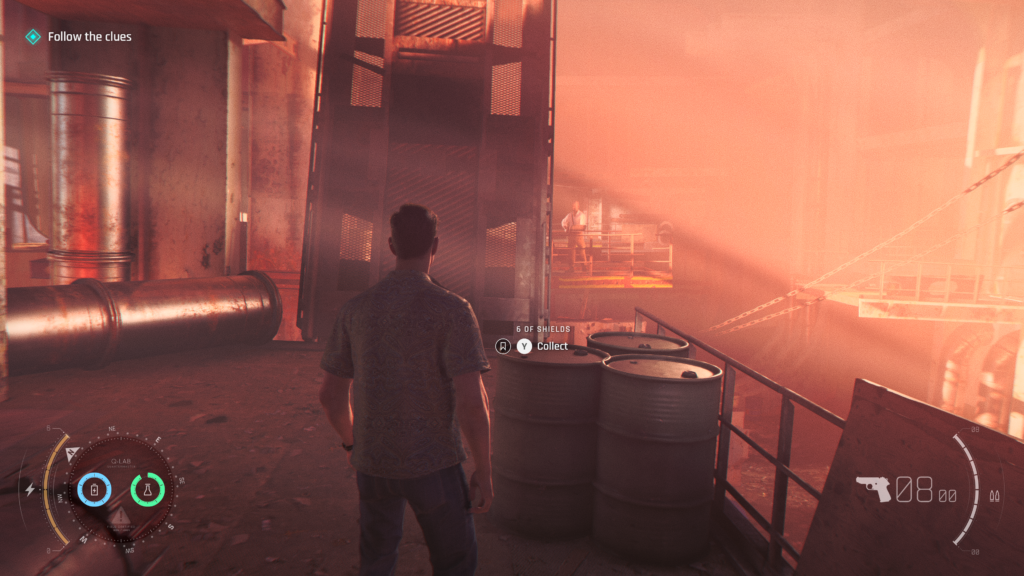
Playing Card (1 /1) – 6 of Shields
Near the beginning of the level, you’ll need to navigate through a dilapidated boat. You’ll reach a section where you need to lower a bridge to let Greenway across so he can help you open a door. Just before the bridge, on the right, on a barrel, is the collectible.
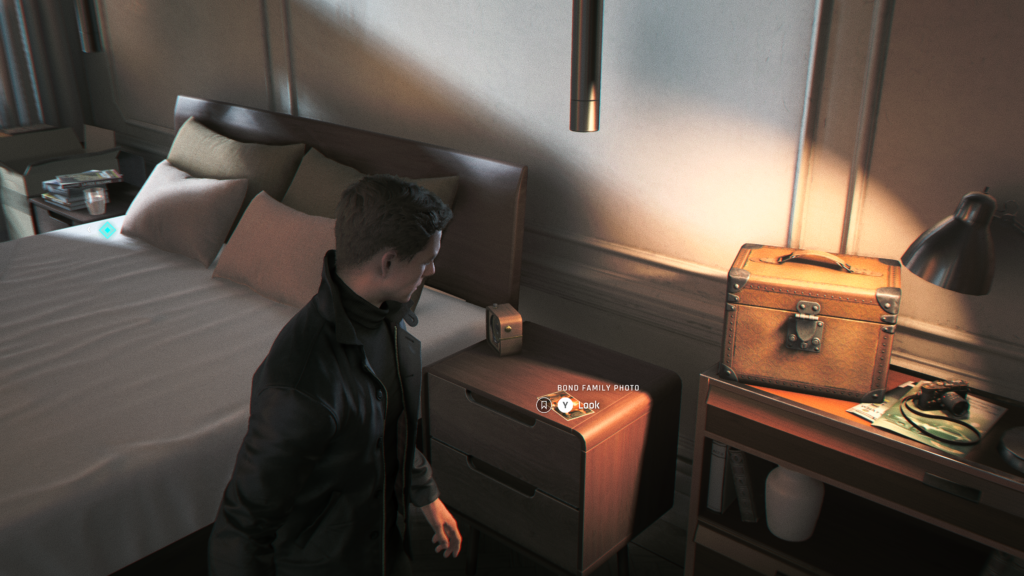
Intel (1 / 1) – James Bond
When you’re back in the apartment in London. Head to your bedroom, to the right of the bed is the photo. Be sure to grab this before interacting with the main objective item in this room as well.
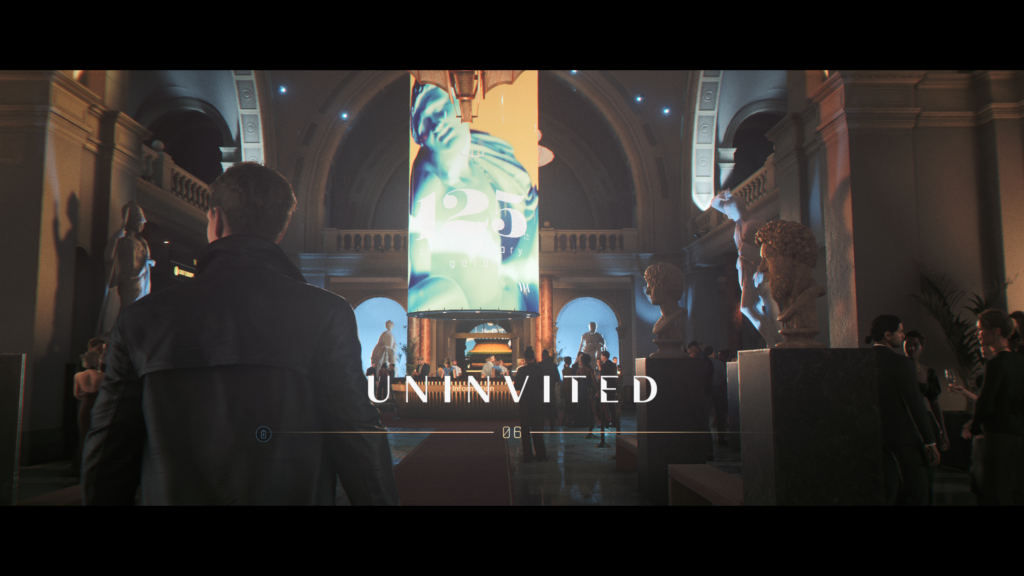
Chapter 06, “Uninvited”
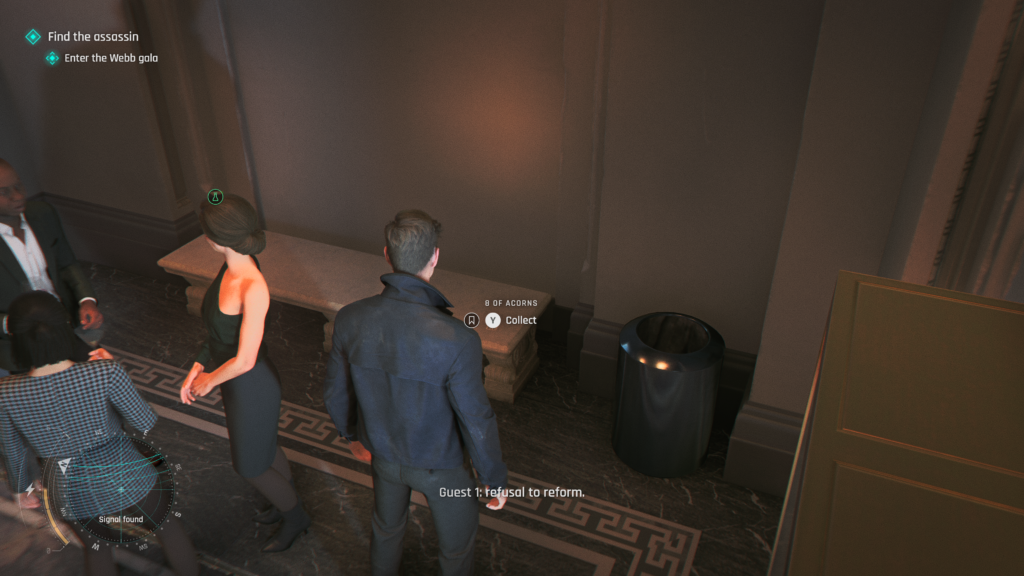
Playing Card (1 / 5) – 8 of Acorns
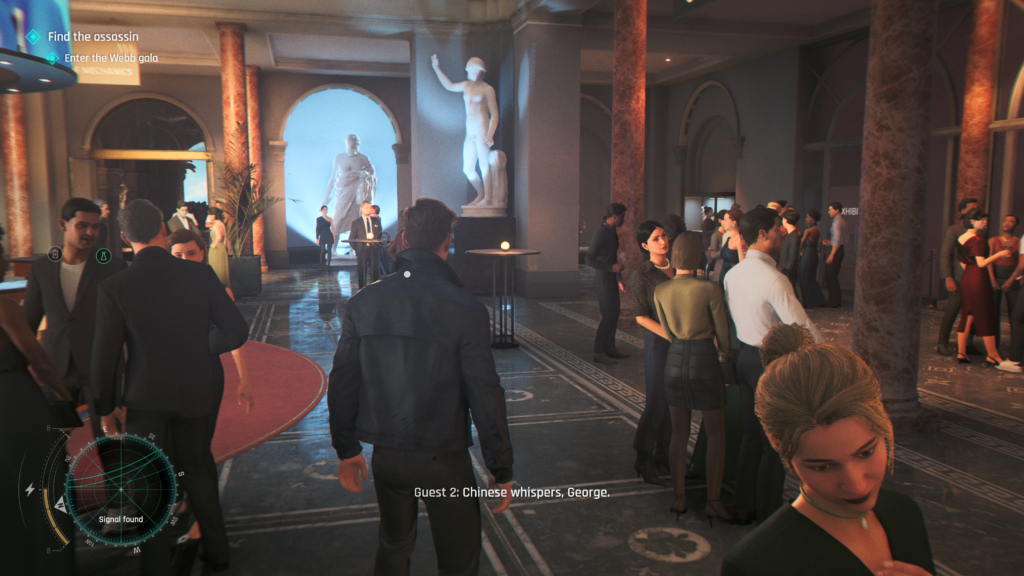
At the beginning of the level, in the reception area, head to the back right of the large room. Underneath a balcony, where guests are mingling. On a stone bench on the back wall is the playing card.
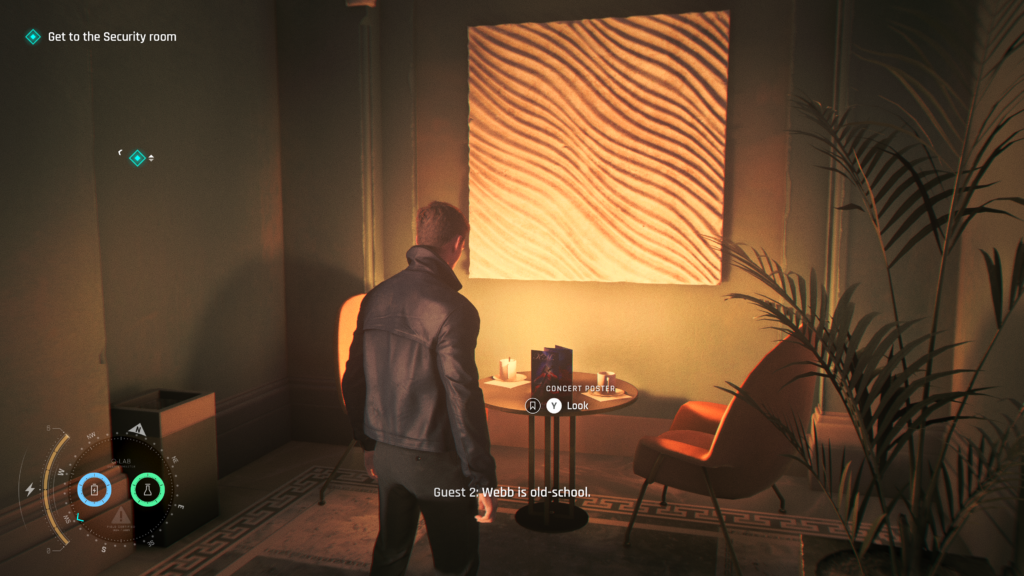
Legacy (1 / 1) – Concert Poster
After failing to track down one of the twins, you’ll re-enter the main hall (with the bar in the centre).
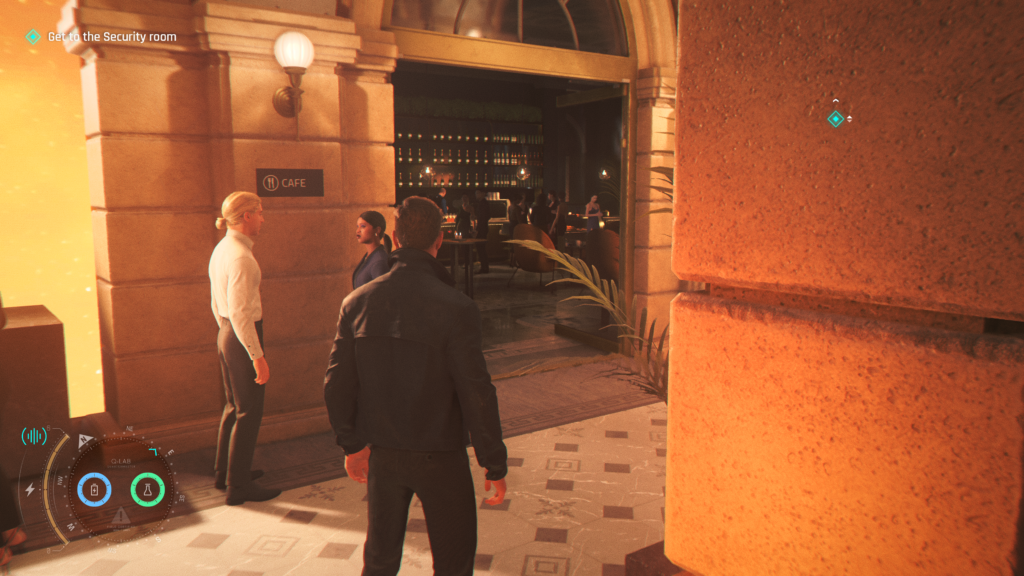
Head to the back right from where you re-enter to find the ‘cafe’. To the back right of the cafe, on a small table is the collectible.
Intel (1 / 2) – Webb Industries
After failing to track down one of the twins, you’ll re-enter the main hall (with the bar in the centre). If you approach the right side of the bar, there will be an opportunity to eavesdrop on a PR woman making a call about someone running late. Speak to her to pick up a sub-objective that should get you through security, but you need a camera.
If you head forward from the PR woman, and up the small steps and then to the left, into the side room, you’ll see a sectioned off area on the left. This is the Press area, but you don’t have any ID to get in. There should be two guards in this section, one at the entrance and one at the back.
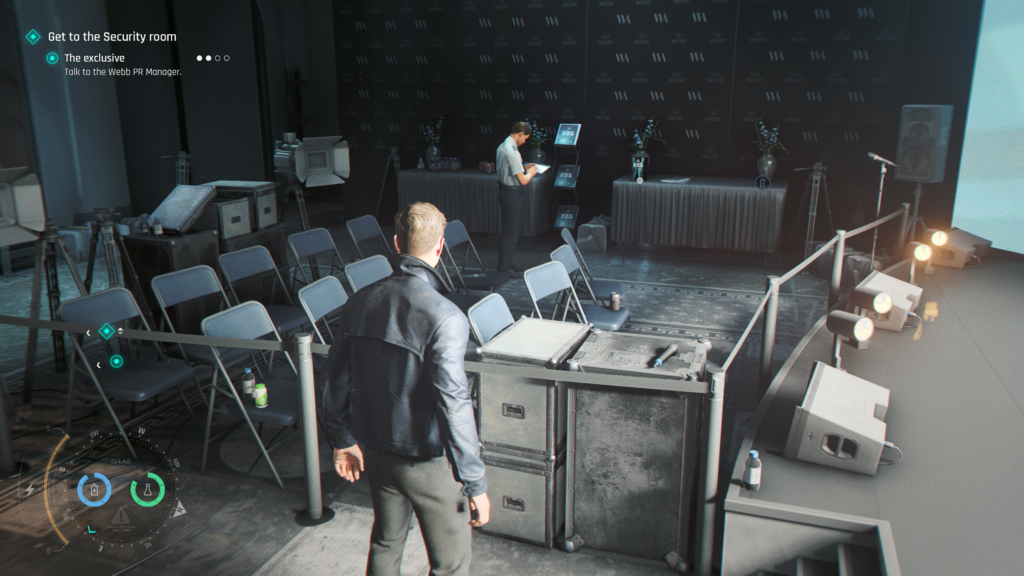
I used my phone dart to make the entrance guard ill, and used my phone on the microphone at the back right to distract the other one, allowing me to sneak in and grab the camera in the centre. Directly to the right is collectible.
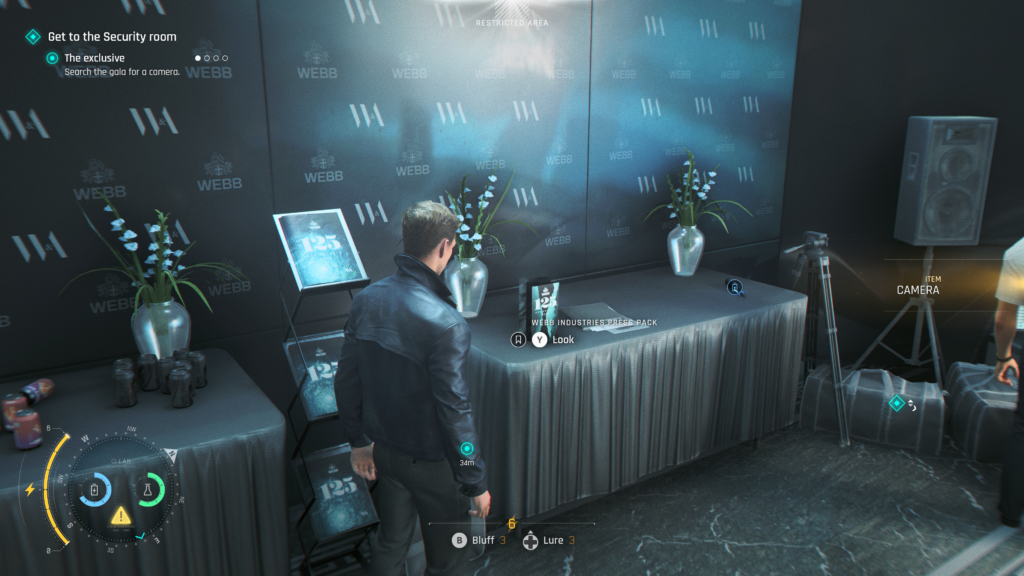
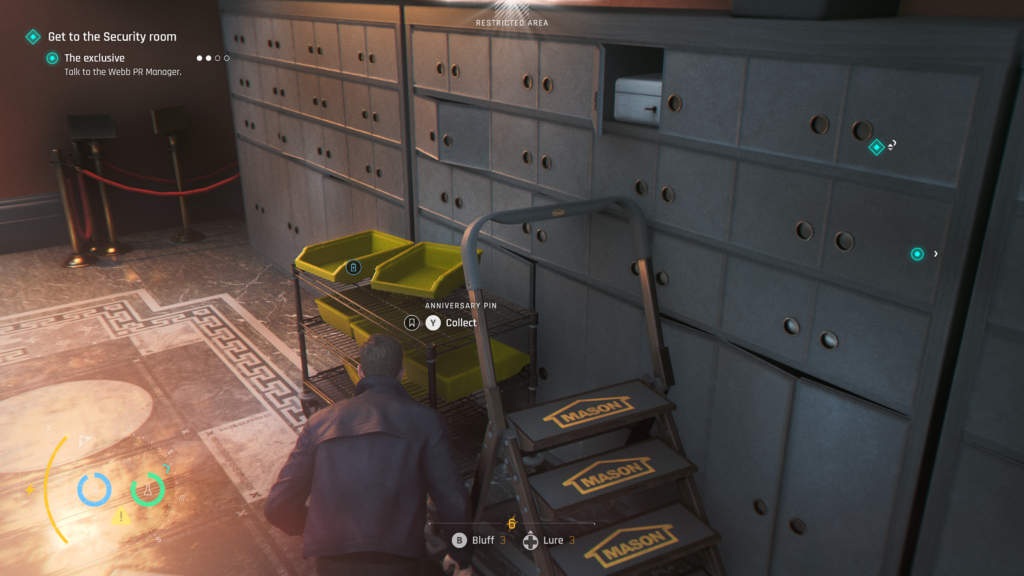
Memento (1 / 2) – Anniversary Pin
If you leave the area above where you collected the intel on Webb Industries and turn right, you’ll see a ‘staff only’ area. You should be able to eavesdrop on the guard and get a sub-objective that gets rid of him (or you can use your dart to make him ill and sneak past). Either way, you want to go down that corridor.
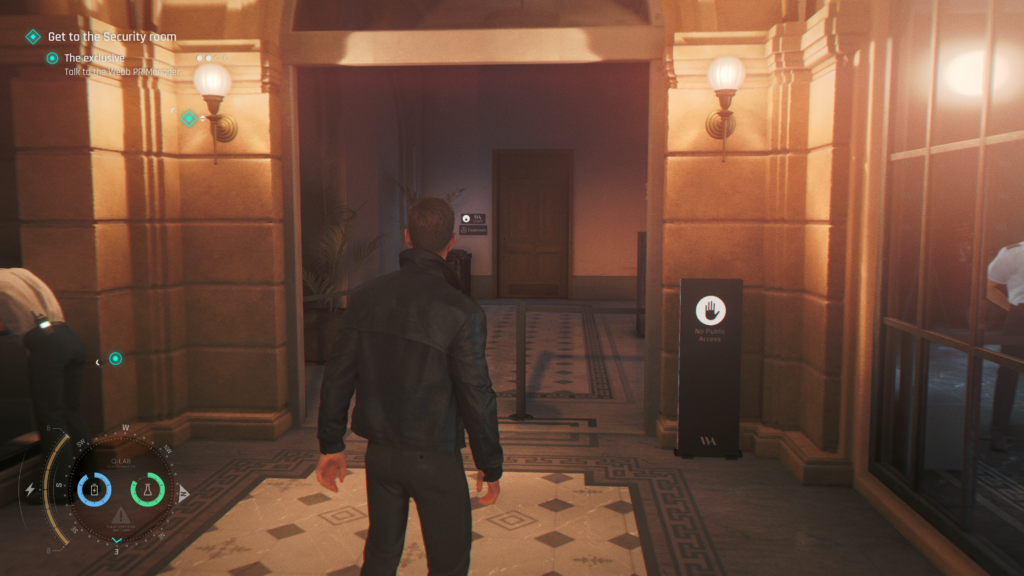
The door at the end takes you into the cloakroom. You’ll want to take an immediate right, and sneak through the gap behind the coat rail and staff member. On the right, on wire shelving unit, next to some yellow trays.
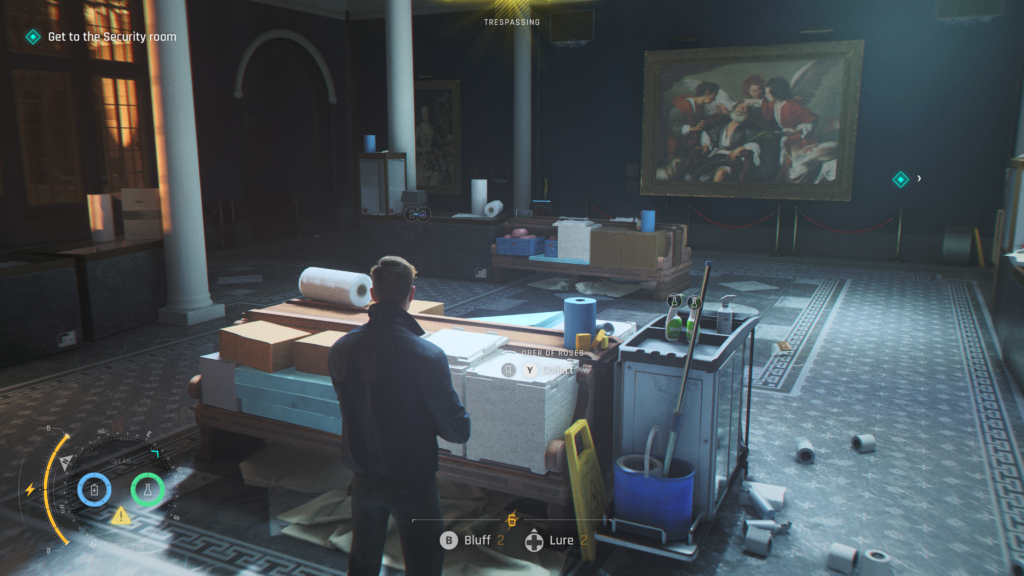
Playing Card (2 / 5) – Ober of Roses
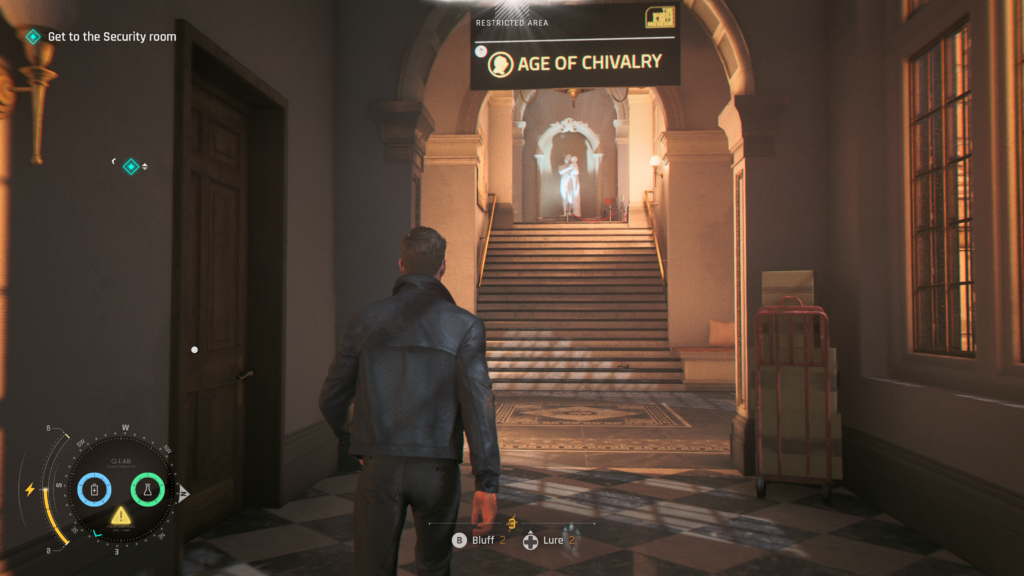
In the same room as the previous collectible, head forward through the door in front of you.
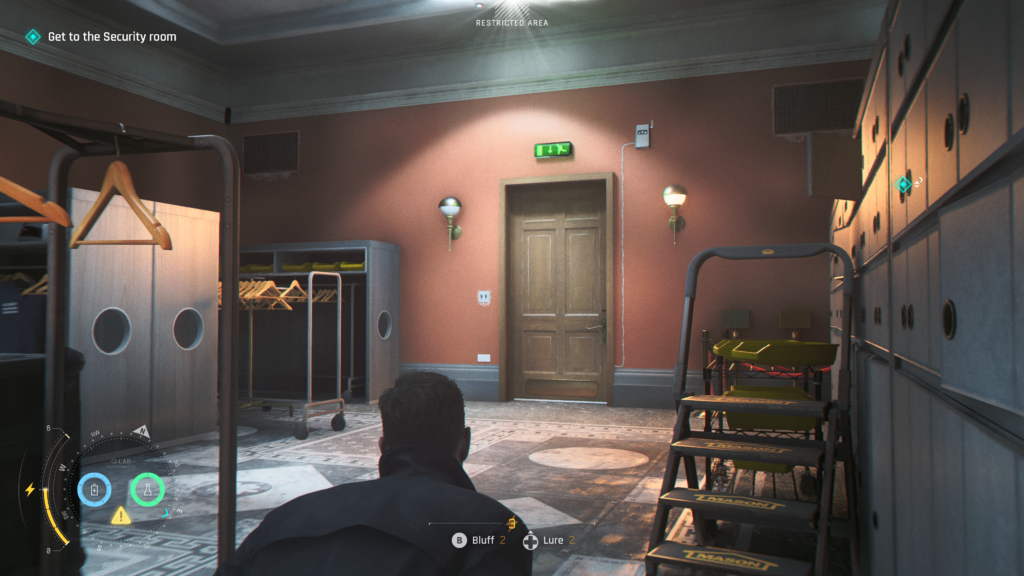
Head through the door, and up the stairs on your left to the ‘Age of Chivalry’ exhibit. Go into the exhibit and deal with the guards. The playing card is in the centre, next to a cleaning cart.
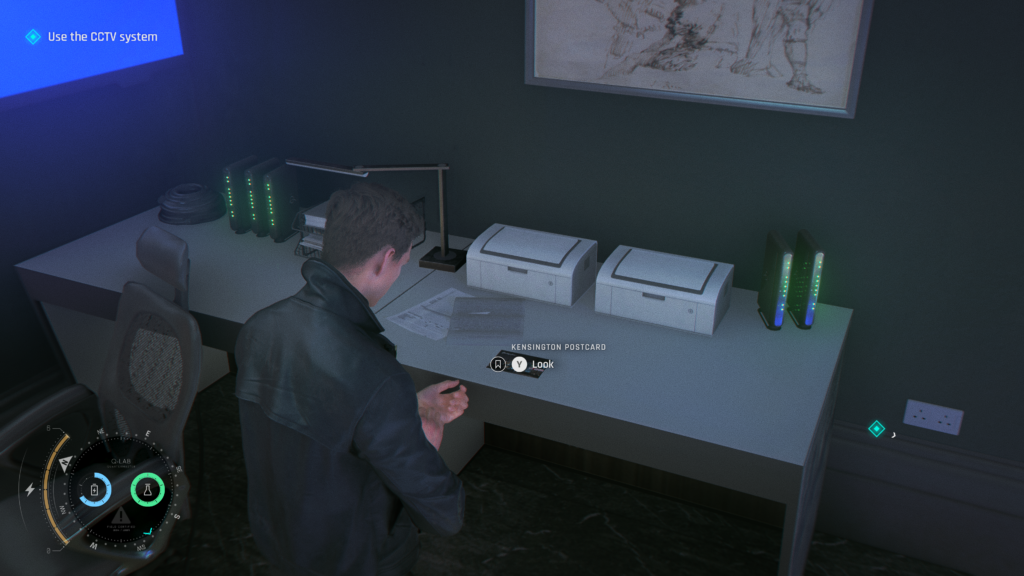
Postcard (1 / 1) – Kensington
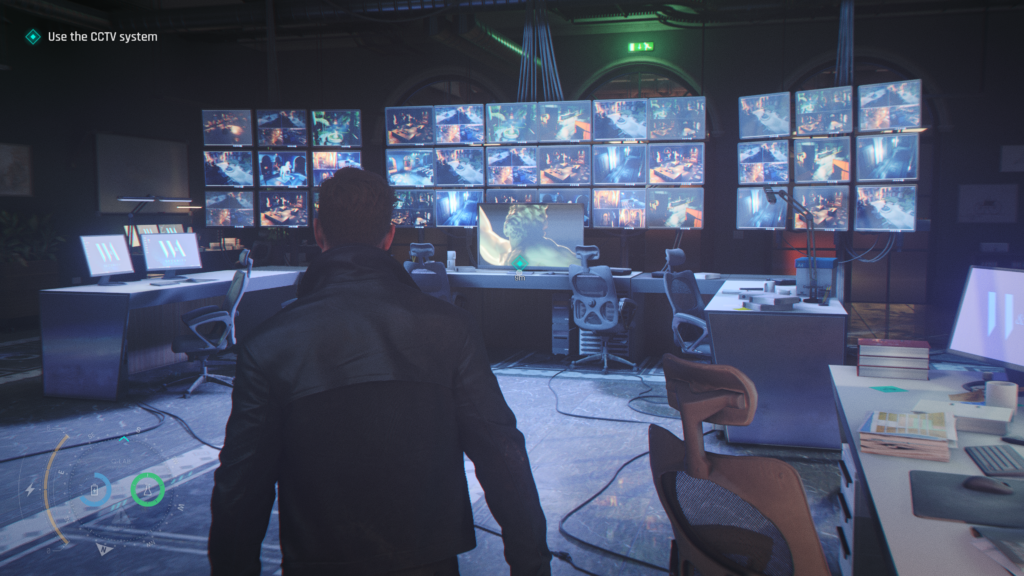
Later on, when you manage to sneak into the security rooms, you’ll eventually make it to the CCTV room (the room with lots of monitors). To the back left of the room (when looking at the monitors) is the postcard on a table.
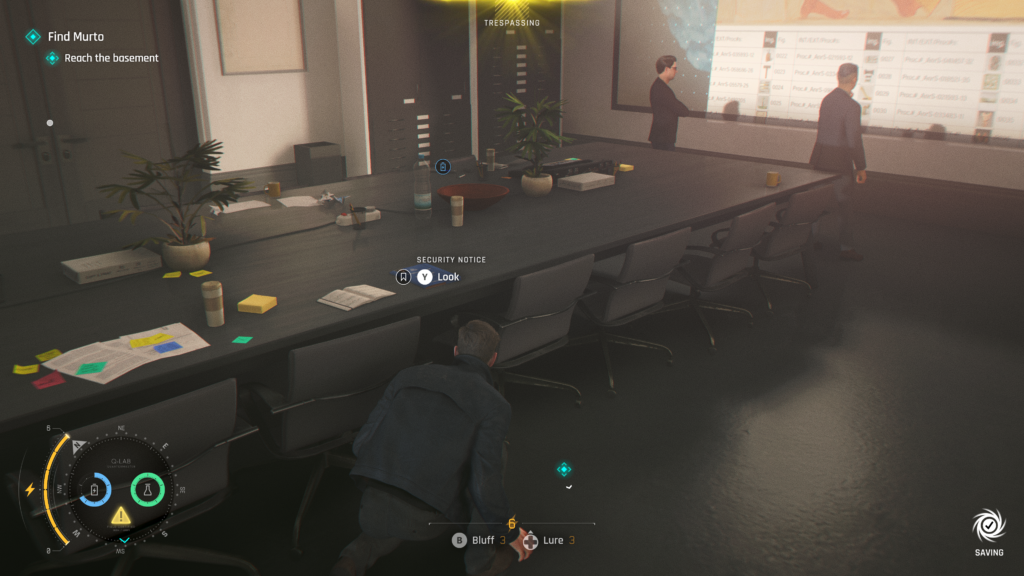
Intel (2 / 2) – Stephen Bright
After leaving the CCTV Room through the main doors (near the entrance where you first entered the area). Head to the left, your main objective is to go down in the lift (elevator). Just to the left is a door, go through that door to a room with a large screen and two men looking at it. On the long table in the middle on the right side of the table is the security notice collectible.
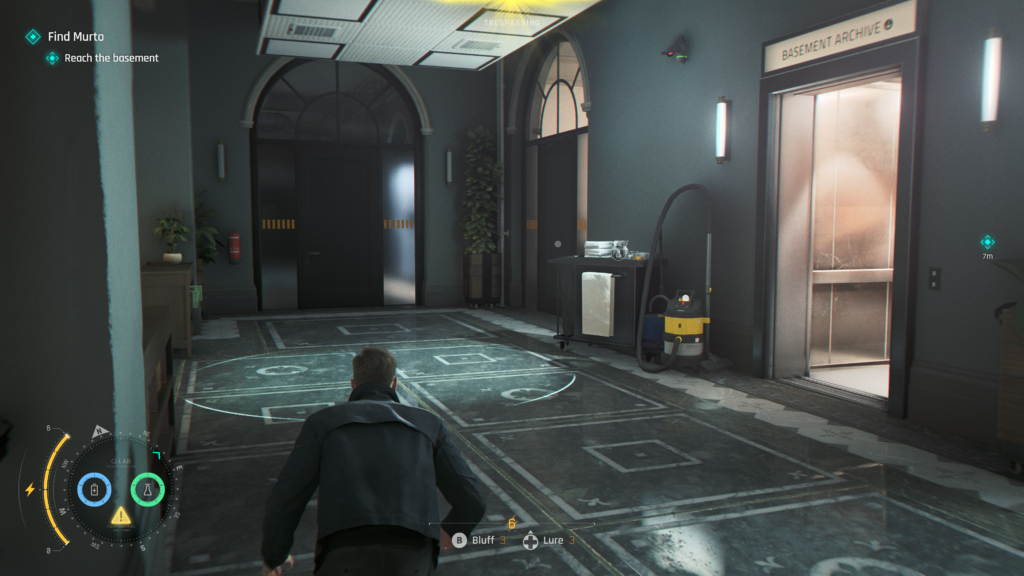
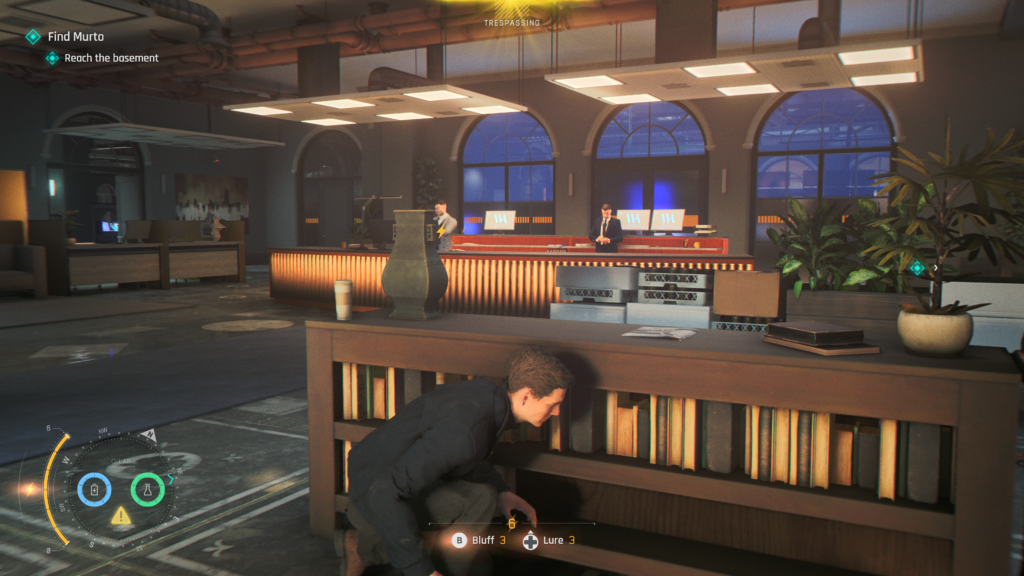
If you head here from entering the security area, take a right from the main entrance (facing the CCTV room) and head down the side (watching for guards).
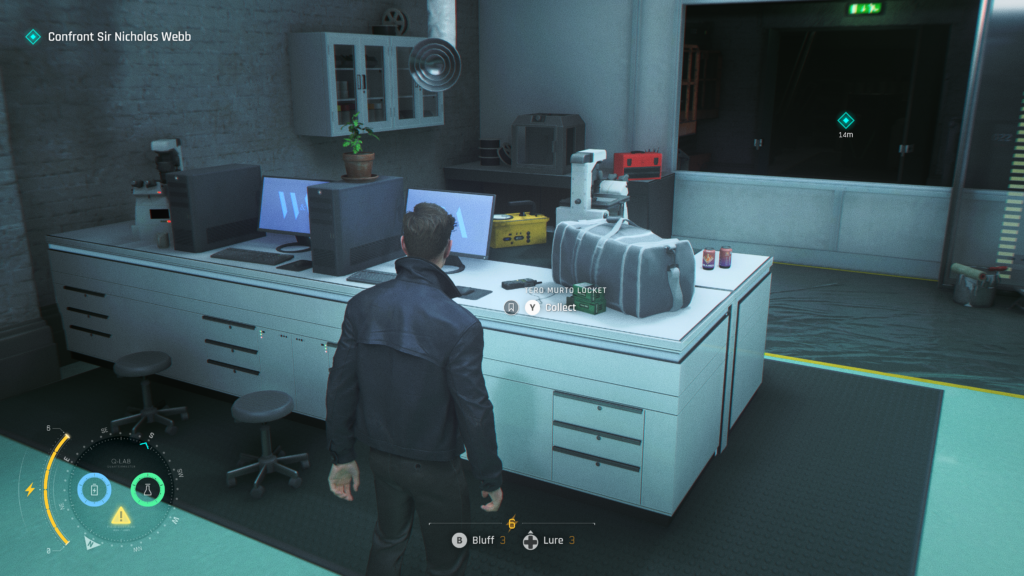
Memento (2 / 2) – Tero Murto Locket
After the boss fight with Murto, you’ll head out into a corridor. In the room on the left is the collectible. You can’t get to it from here, the door is locked with a keycard and there is no keycard to be found (that I could see anyhow).
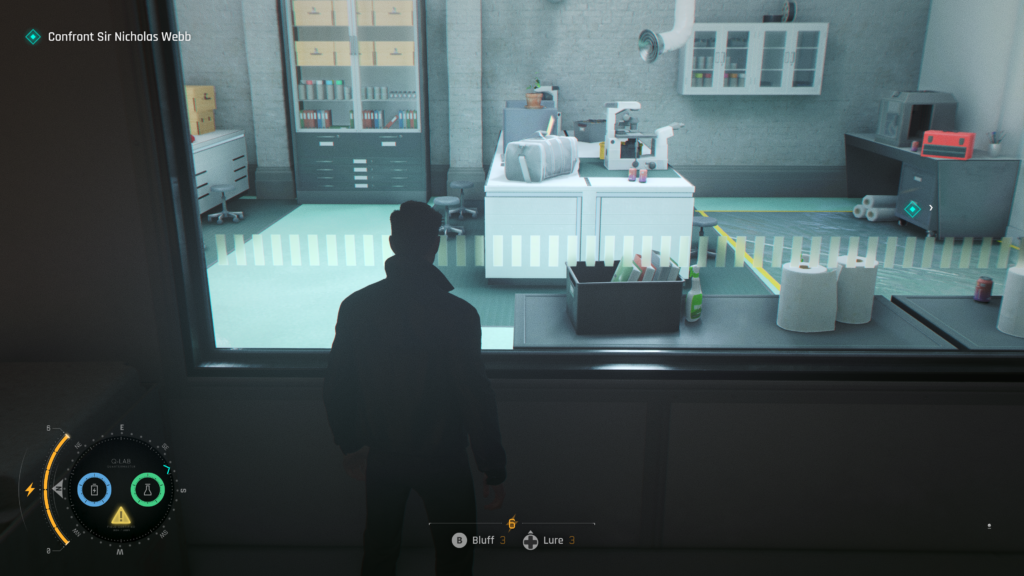
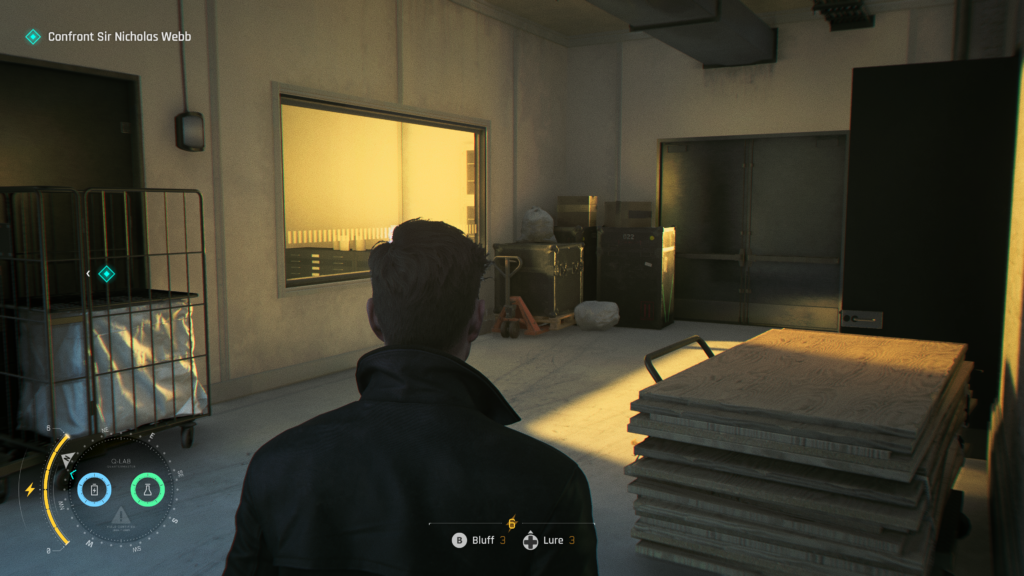
To get this, carry on forward, squeezing through the gap on the right at the end of the corridor. You’ll go through some maintenance passageways and climb a ladder to the next floor. As you emerge into the corridor, take a right to find a set of open double doors and stairs down. Head down and you’ll be able to hop into the previously inaccessible room by vaulting over the window.
The collectible is on a desk in the centre of the room.
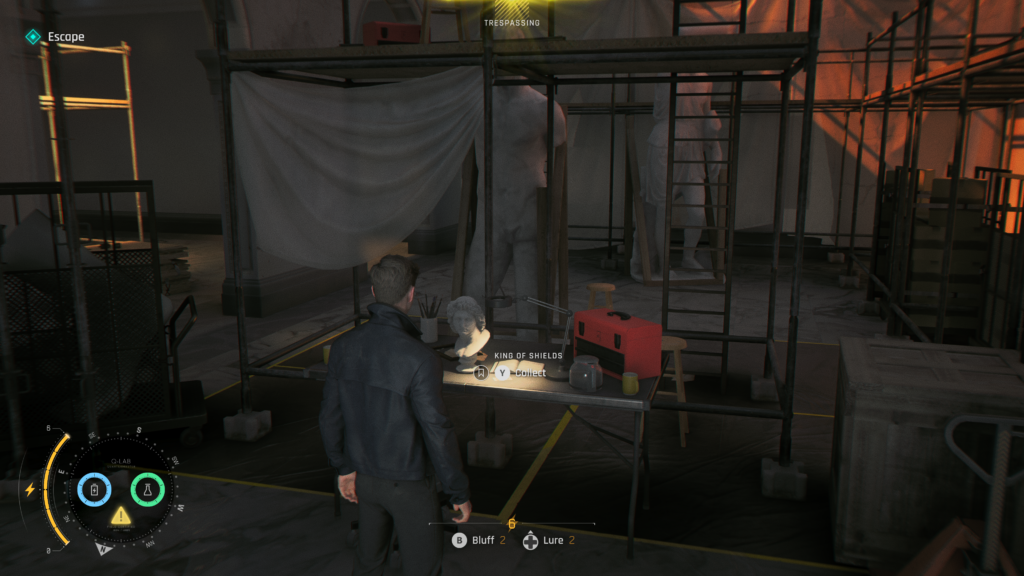
Playing Card (3 / 5) – King of Shields
After the interrogation scene with Damien Webb, once you’ve gained control of Bond, turn around and in the same room, on a table is the collectible.
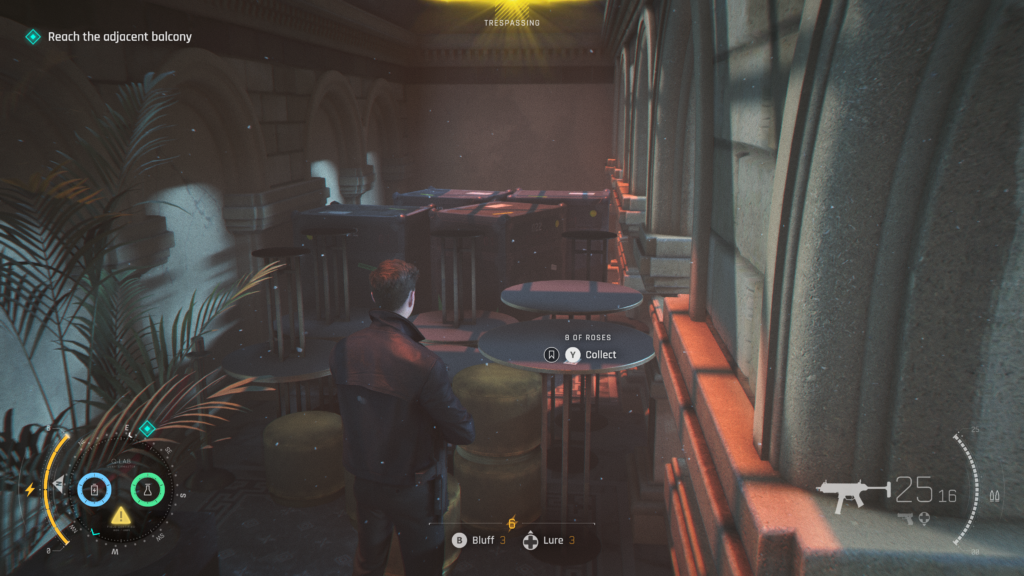
Playing Card (4 / 5) – 8 of Roses
Much later on, you’ll be attempting to escape and have to sneak / shoot past several rooms of enemies. You’ll eventually end up high above the main hall, climbing across some circular lighting rigs above.
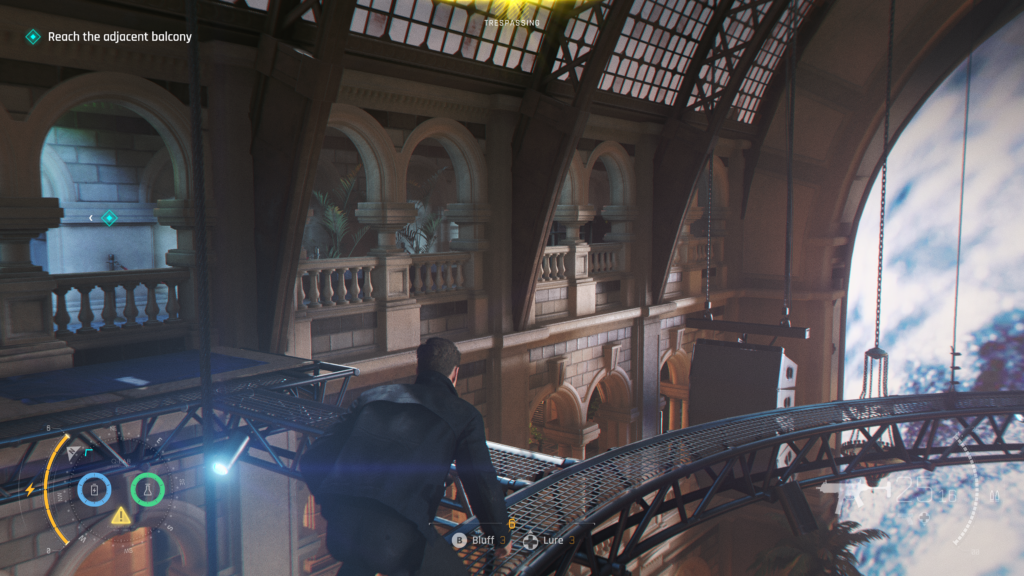
After crossing the second one and reaching the ledge on the other side, you’ll see a door straight in front of you. Don’t go through, instead turn right and at the end of the small pathway, you’ll see the playing card on a circular table.
Playing Card (5 / 5) – 9 of Shields
In the courtyard area where you need to escape, and there’s a lot of enemies. From the start of this area, head to the right, heading down the stairs that will be to your right.
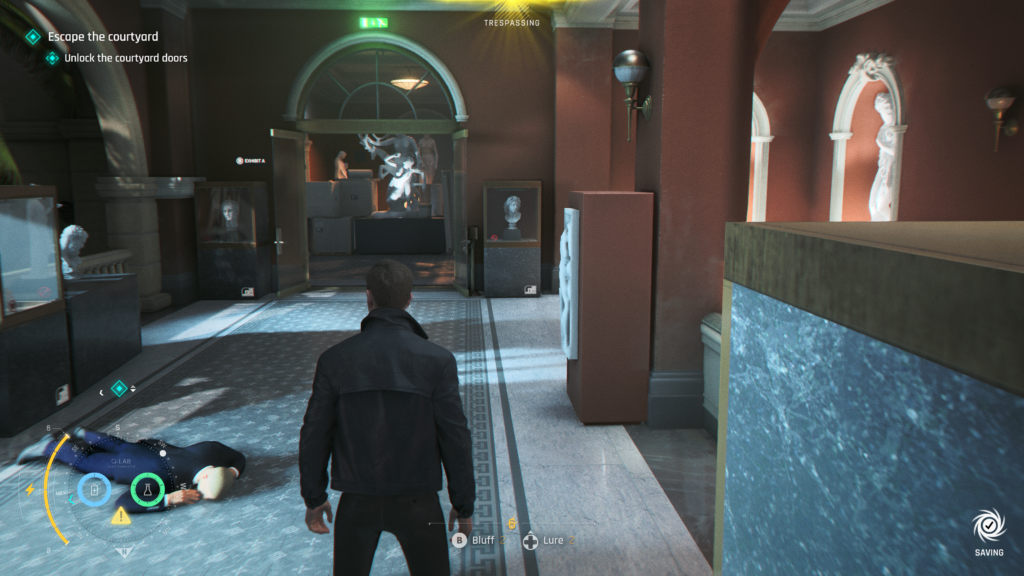
Once at the bottom, head right. You’re aiming for the ‘Dining Area’ which is to the back right of this section. Sneak past the guards however you like to make it to that area. You can either head into the Dining Area proper and go in the vent to the right, or look to the right of the entrance, left of the stairs to see a vent you can go in.
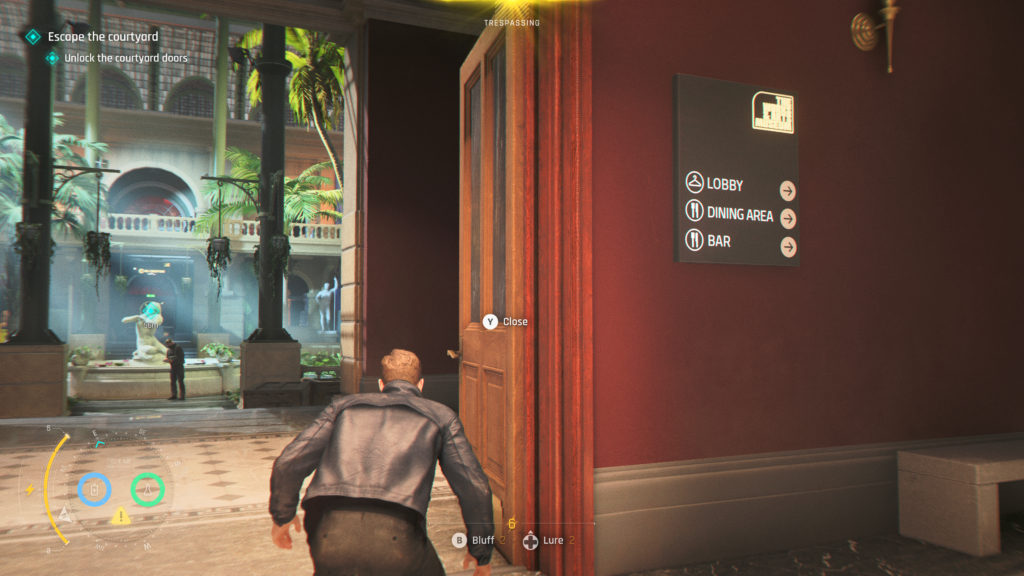
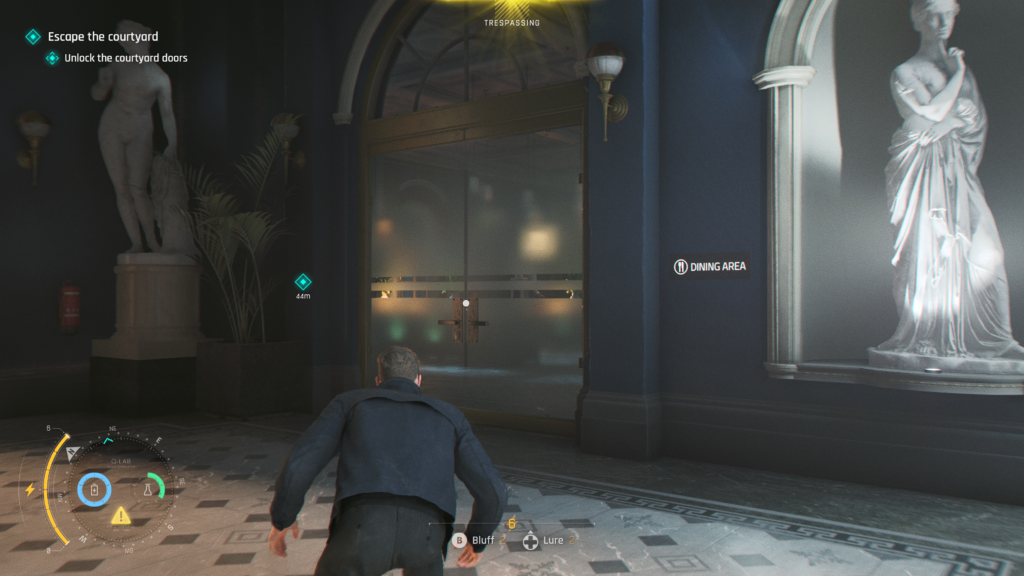
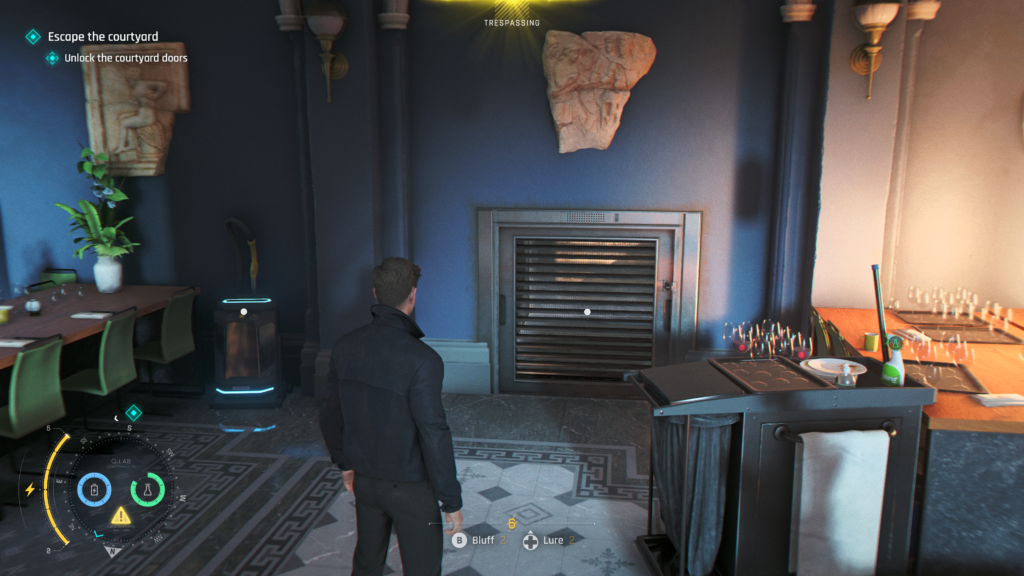
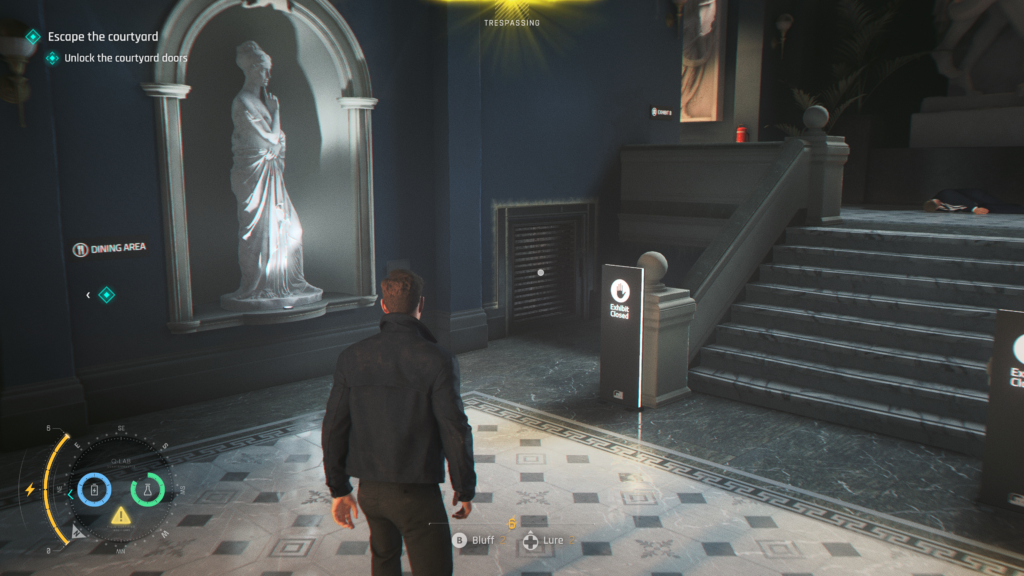
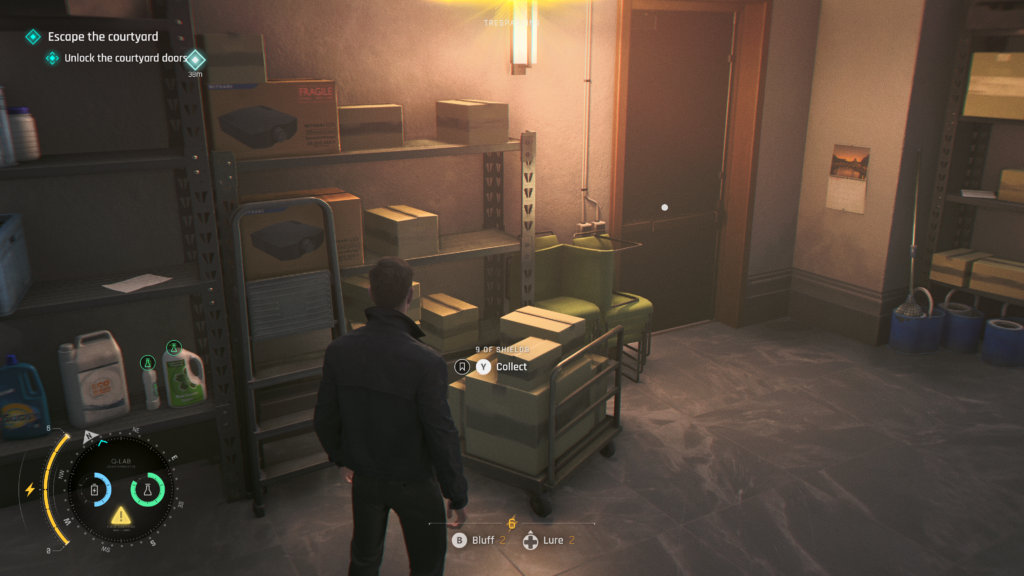
Get through the vent to the other side to find the collectible in a store room, on your left as you exit the vent.
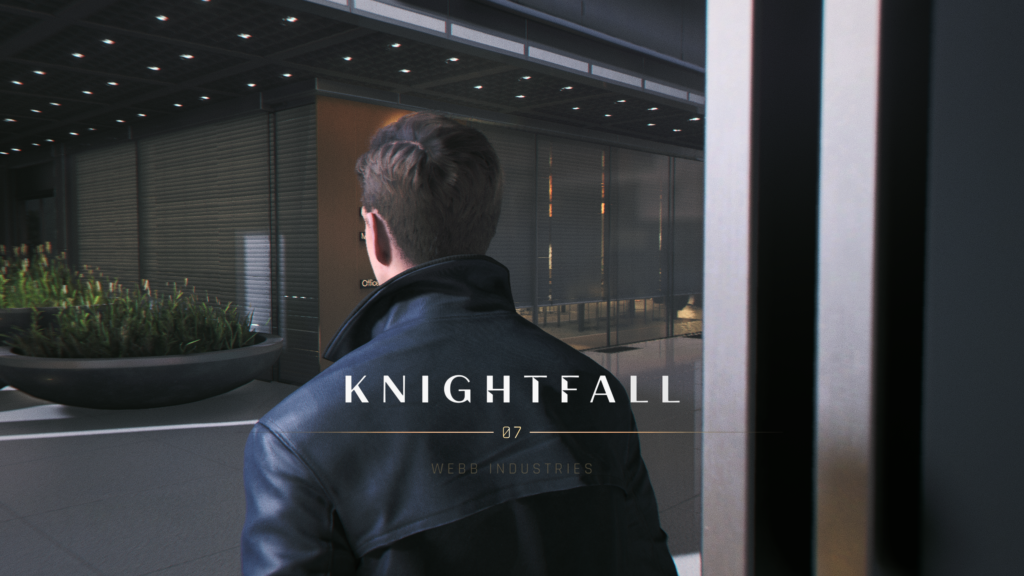
Chapter 07, “Knightfall”
Postcard (1 / 1) – City of London
Near the beginning of the level, you will be trying to figure out how to get to the next floor so you can get through locked doors at make your way to the perch. Greenway will give you a prompt telling you he’s found a way up, and offers to give you a boost by the statue on the balcony.
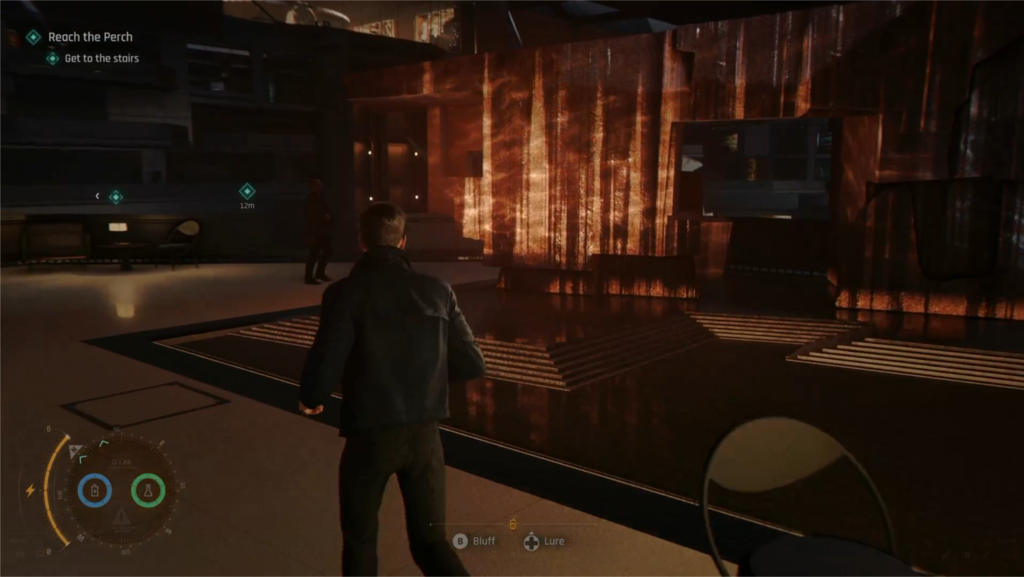
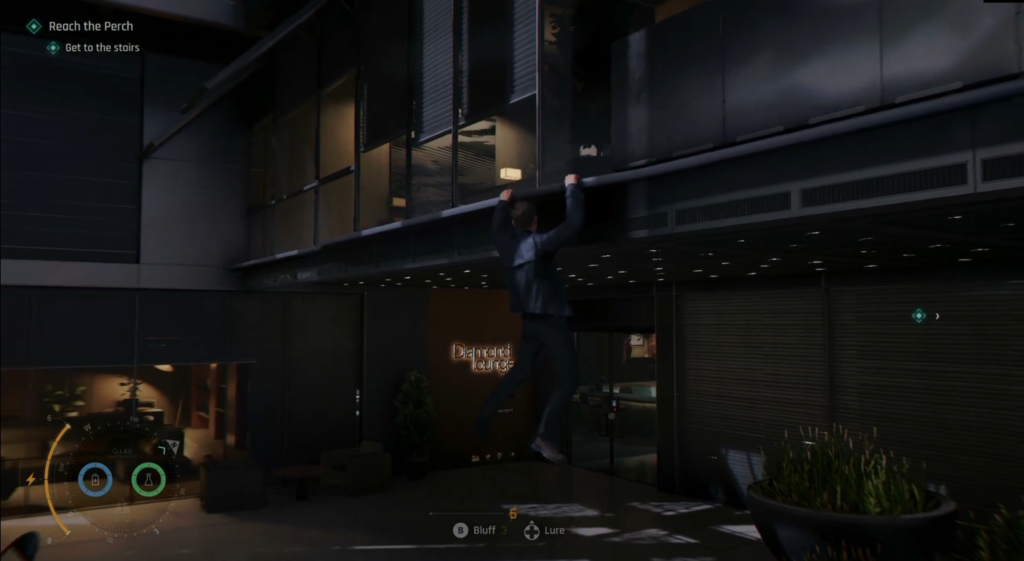
Climb up and follow the path to the balcony above. You’ll need to climb over the edge and shimmy across to an open window into another office.
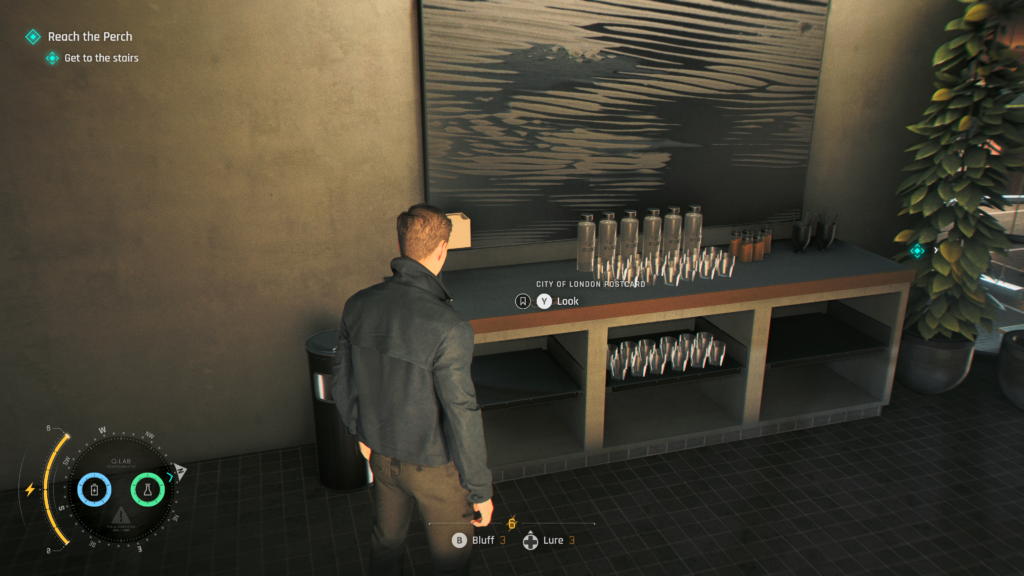
Once you’ve reached the open window, climb inside and the postcard will be on your left on a cabinet with glasses and cocktail shakers.
Intel (1 / 4) – Roger Finch
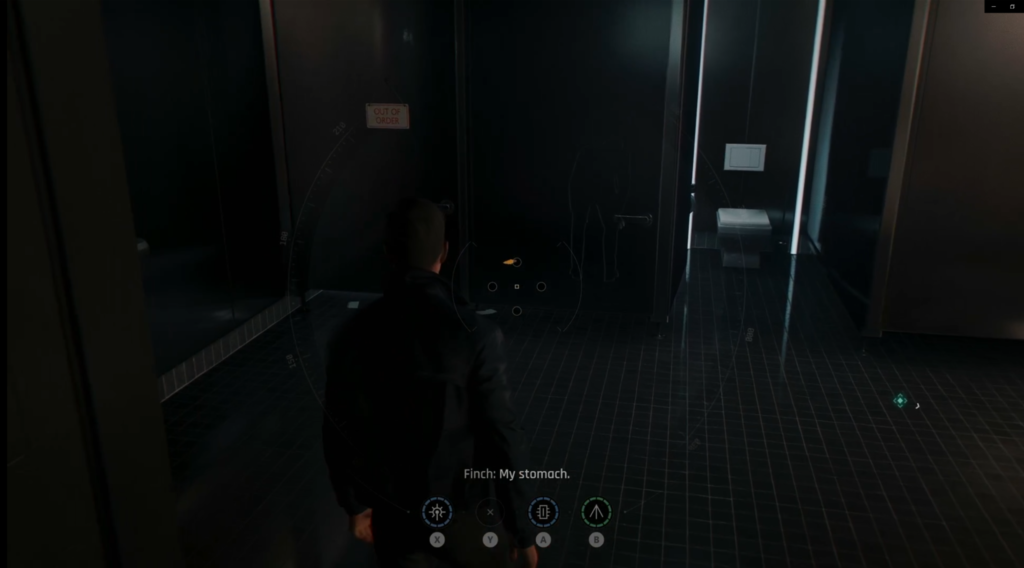
Head downstairs from the previous collectible and you’ll see some toilets ahead of you. In one of the stalls will be Roger Finch, the poor sod who took a sickness dart to the neck during the intro cutscene to the level.
In the bathroom stall to the left on the floor is an office keycard. Grab it.
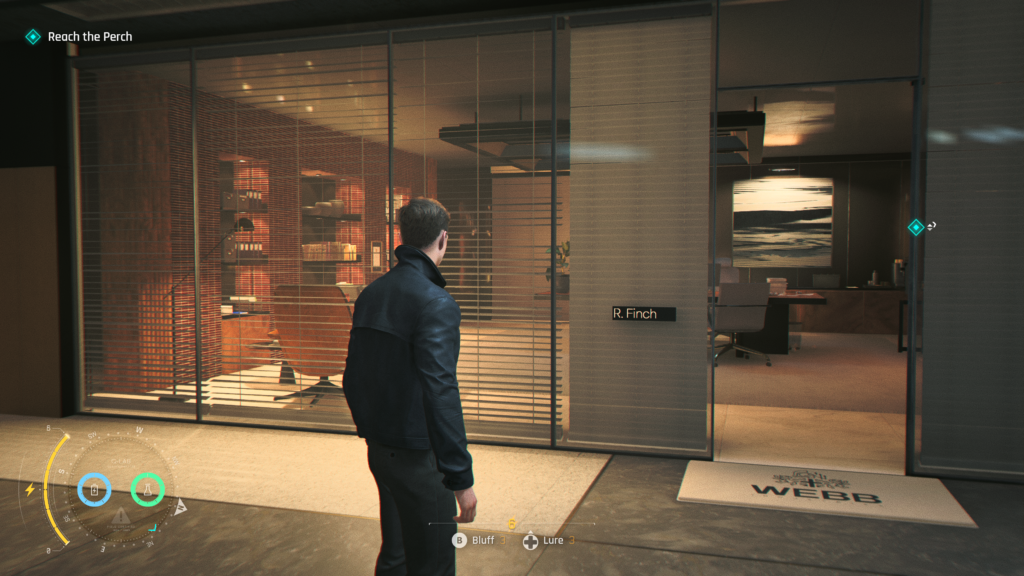
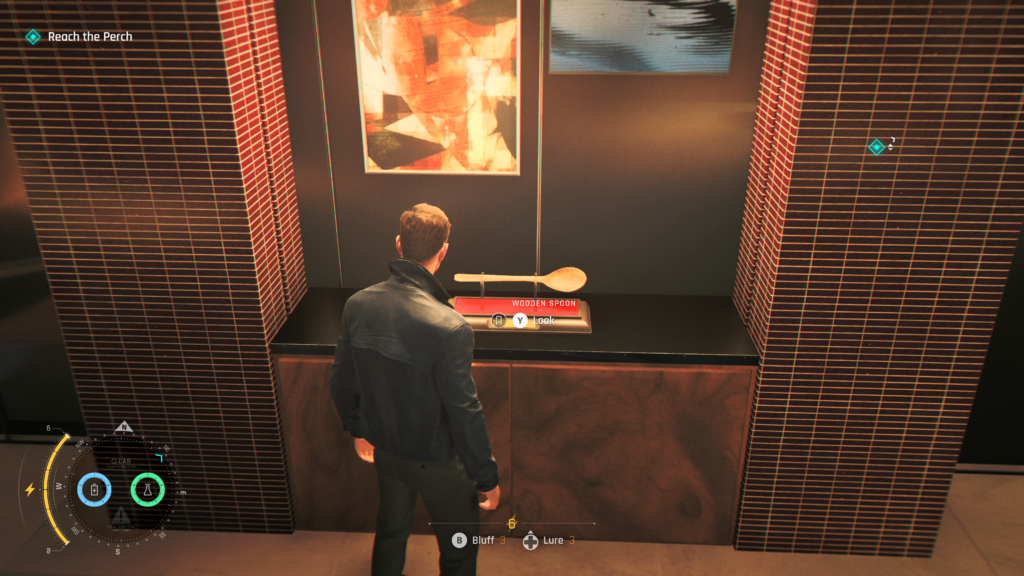
Head back towards Greenway where you need to progress with the main mission and on your left after going through the previously blocked door, you should spot Roger Finch’s office. Use the keycard to get in and on the right of the office is sizeable wooden spoon, that’s your collectible.
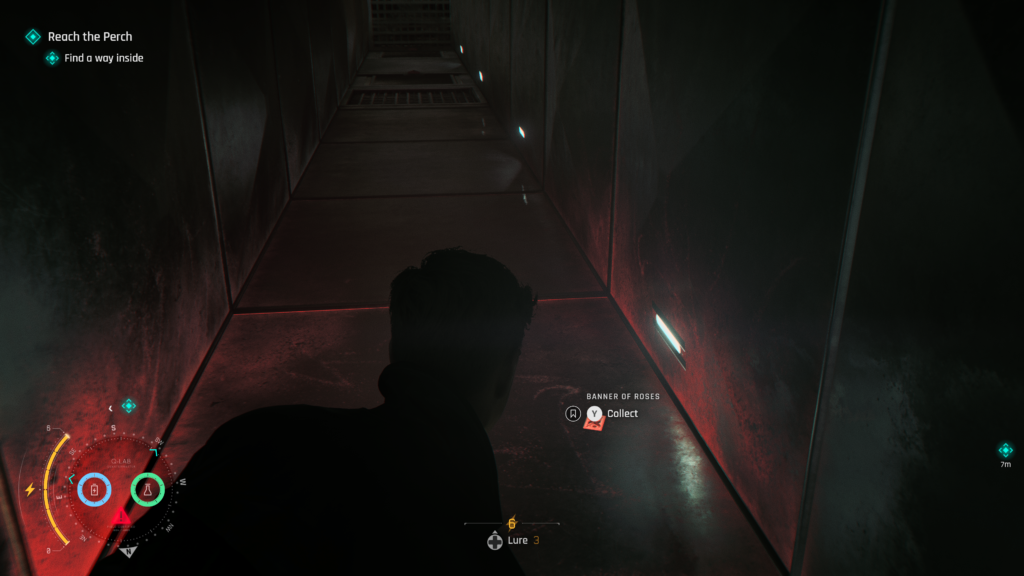
Playing Card (1 / 5) – Banner of Roses
You’ll arrive at another blocked area with Greenway. You’ll need to find a way into the East Wing area to let Greenway in. From the East Wing entrance that’s locked turn around, on your right as you approach), to see the entrance to a ‘Maintenance’ room.
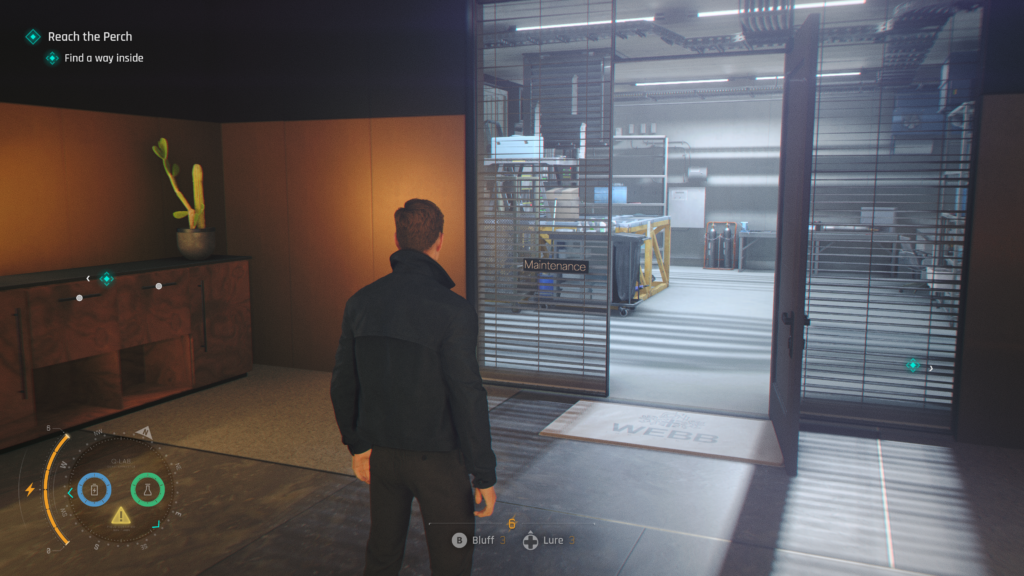
Once inside, use your laser watch to open the air vent in the roof (above the yellow blocks in the centre).
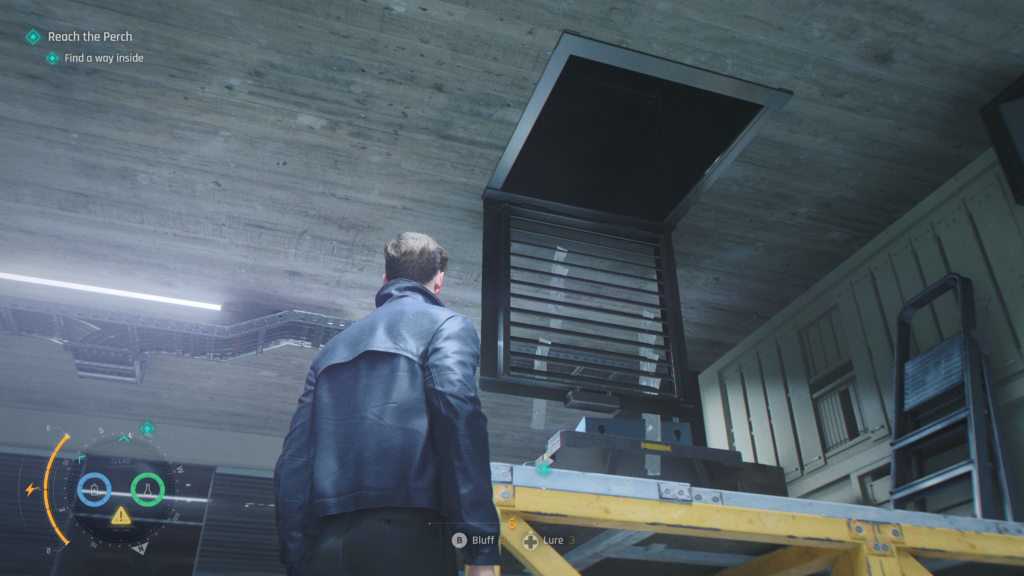
Climb up in to the vent and the playing card is, inexplicably, up there.
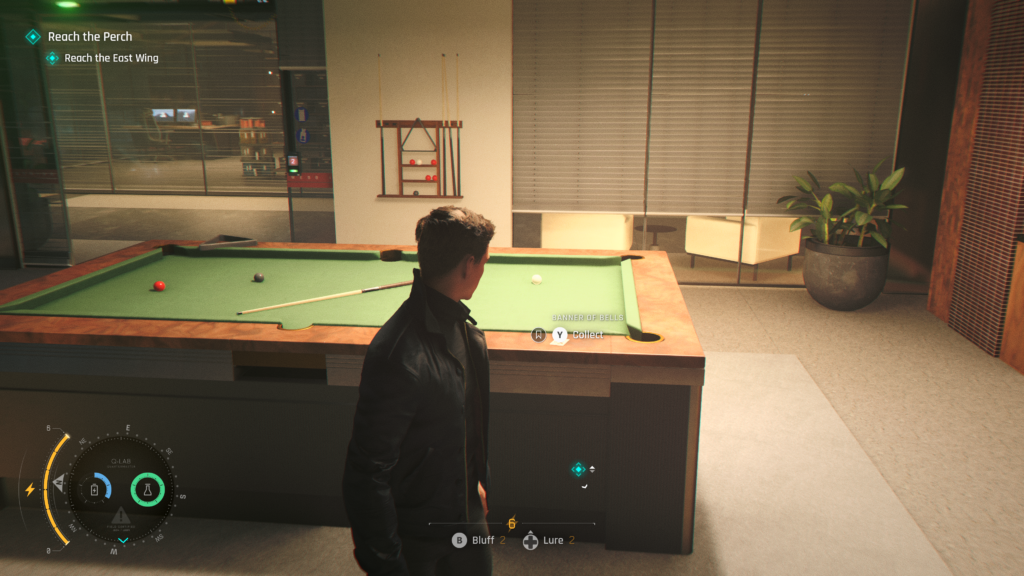
Playing Card (2 / 5) – Banner of Bells
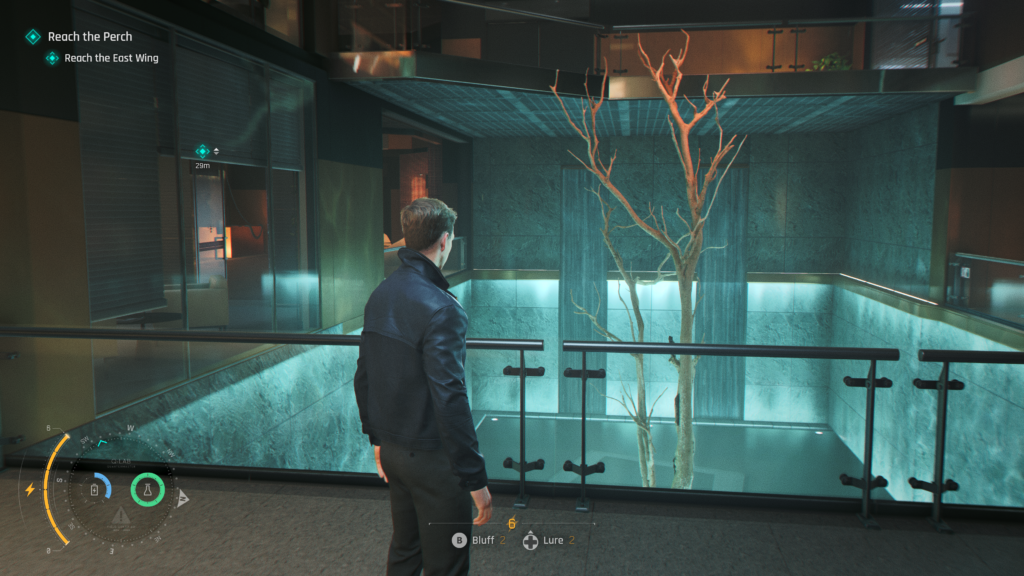
After you’re pause and chat with Greenway, by the tree and water feature below. Shimmy around said water feature using the ledges, until you get across the other side. Look to the left to spot a room with a pool table in.
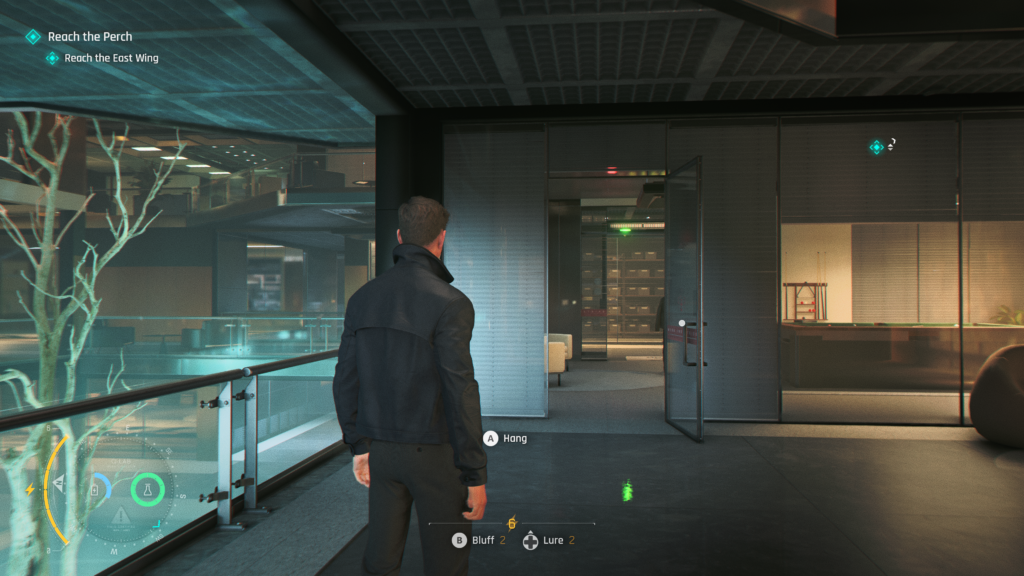
Use your Q-Watch to unlock the door and Greenway will walk through and unlock another door for you so you can now enter the room with a pool table.
On the pool table is the playing card.
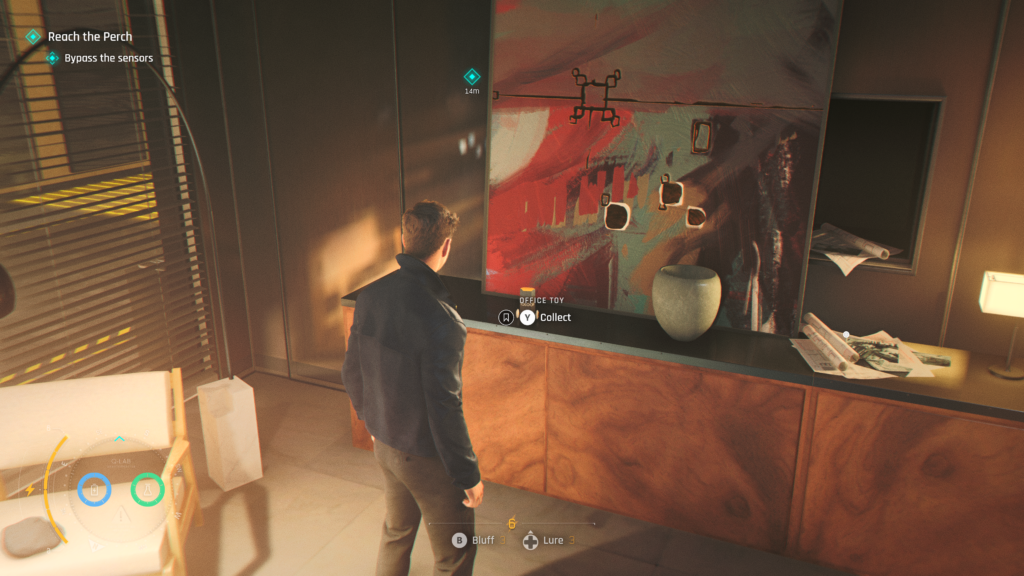
Memento (1 / 1) – Office Toy
Later on in the level you’ll reach a corridor where there are lasers blocking your way. You’ll find an alternative route to your right that Greenway helps open up with you. Once through, you’ll go into a vent. Move forward a little and you’ll see the vent splits into two.
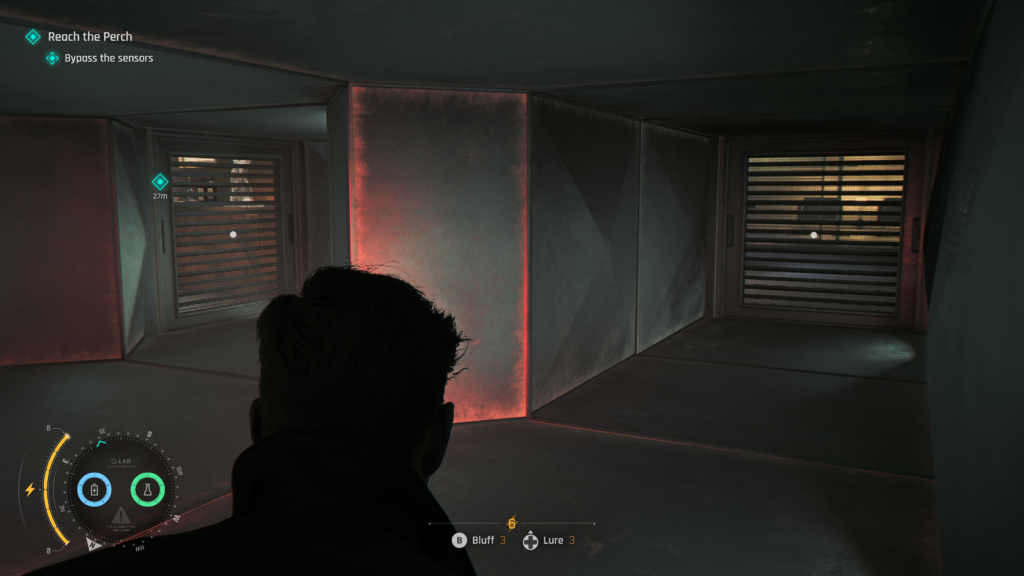
Head to the left and into Isola Vale’s office. You’ll find the collectible on cabinet to the right of the room, near the window.
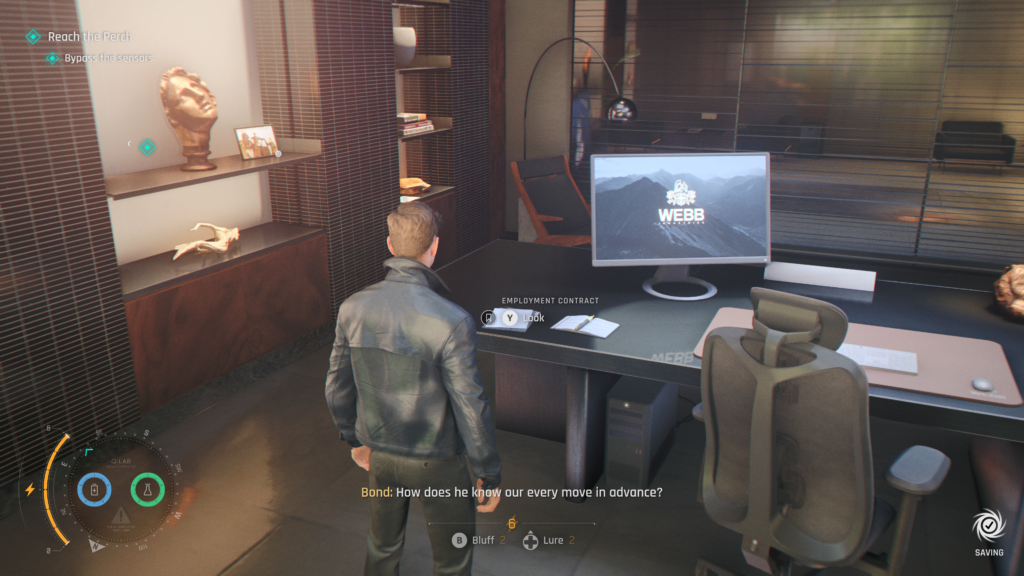
Intel (2 / 4) – Isola Vale
After going to Isola’s office (above), head back into the vent and head left. This will take you into Damien Webb’s office. On the desk, to the left of the computer is the intel.
Playing Card (2 / 5) – 7 of Shields
You’ll ascend another floor and reach the /Level 3′ area. At the end of the corridor, you’ll spot an unconscious guard who’s dropped the keycard you need to progress. Before carrying on look to your left and head into the office with the name ‘Bohr’. It’s to the left of the office where you crawl through the broken glass into the room with another unconscious guard.
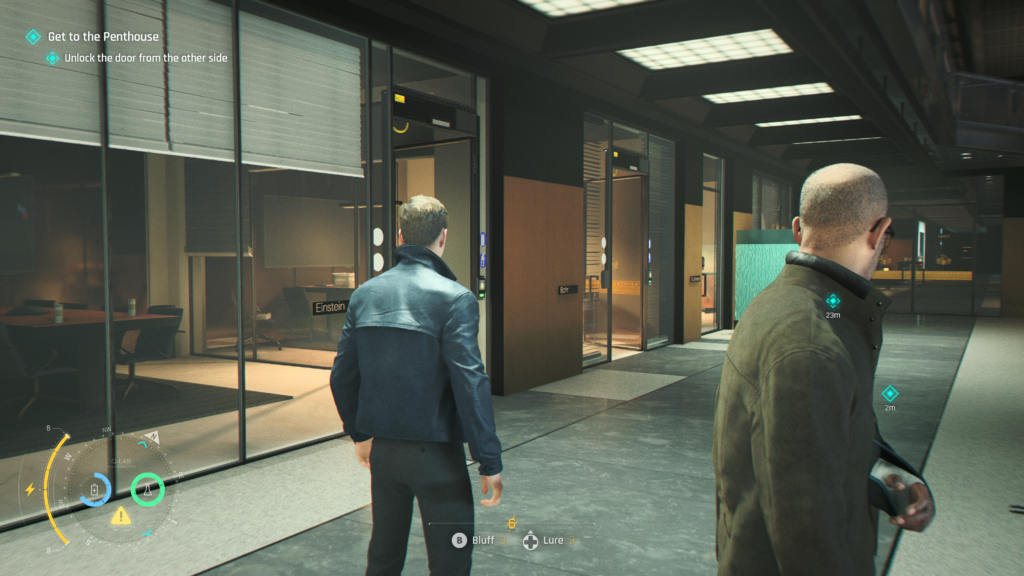
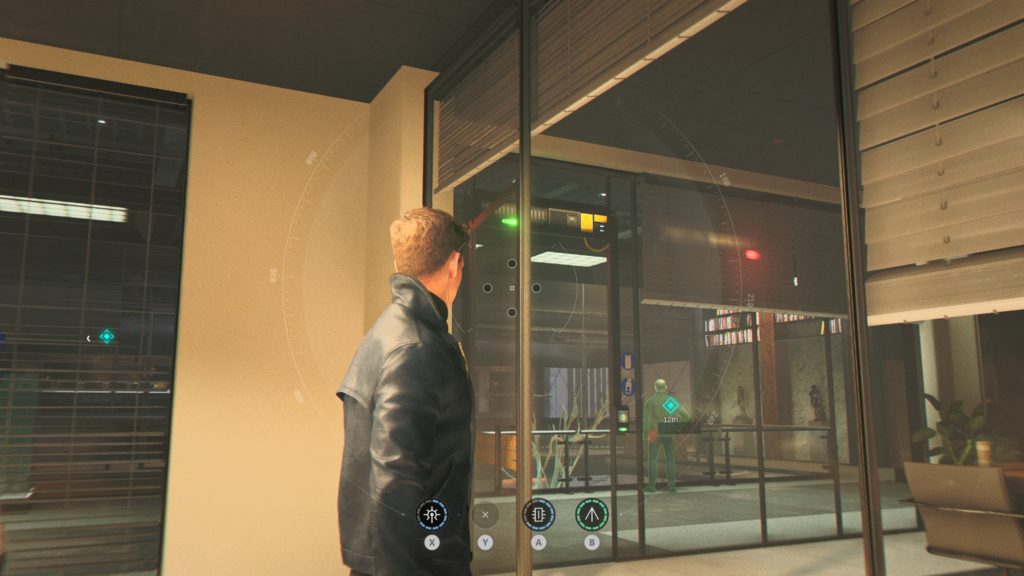
Once in there, look into the locked room on the left through the glass, and use your Q-Watch to unlock the door by targeting the mechanism above the door.
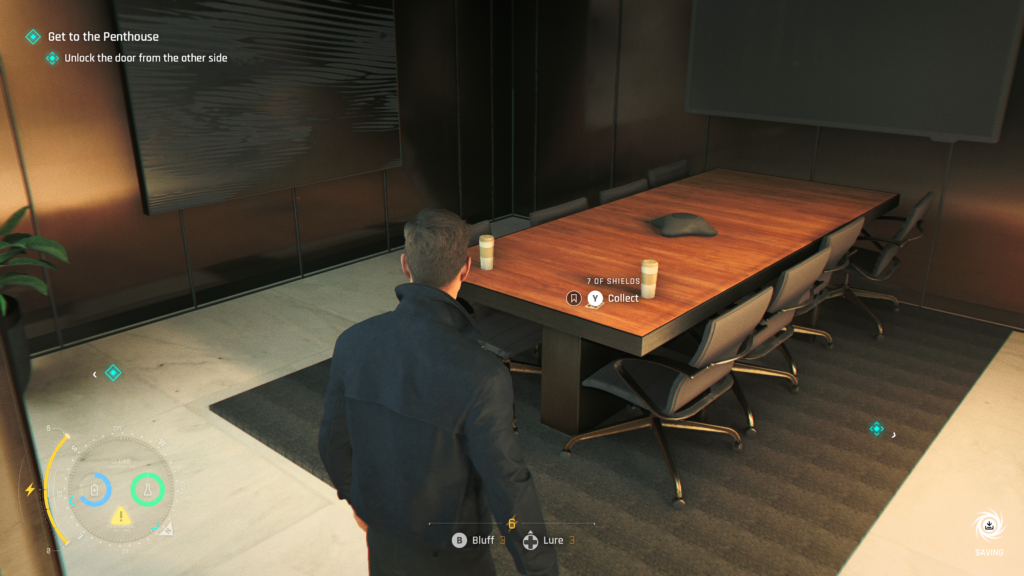
Return to the now unlocked room and you’ll spot the playing card on the table as you enter.
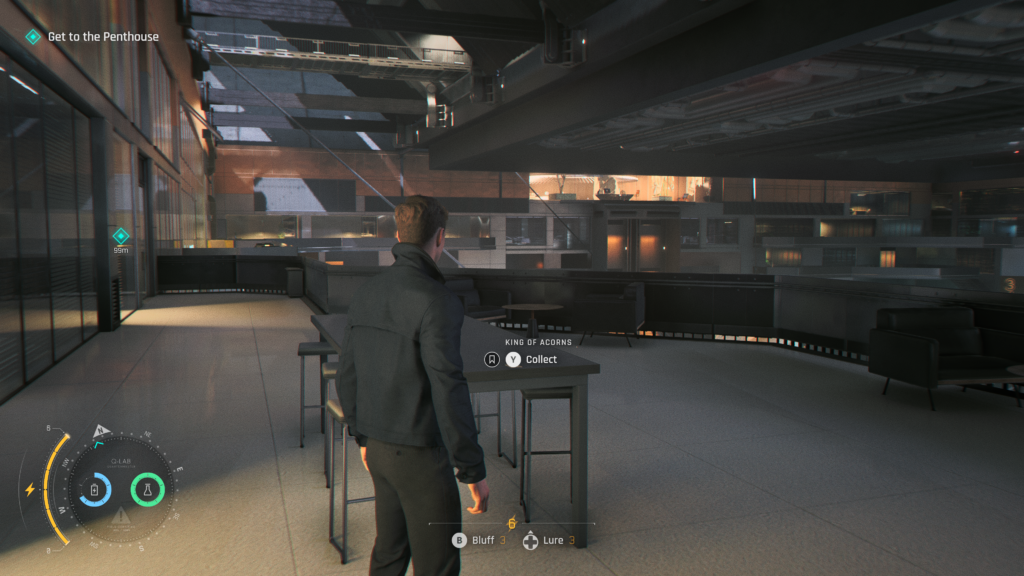
Playing Card (3 / 5) – King of Acorns
Once you have retrieved the Level 3 Access Keycard, head back to where you entered the area, near the Perch Access door.
Looking back down the corridor (where Greenway will likely be waiting ), look to the right and go through the door out on to the now accessible balcony.
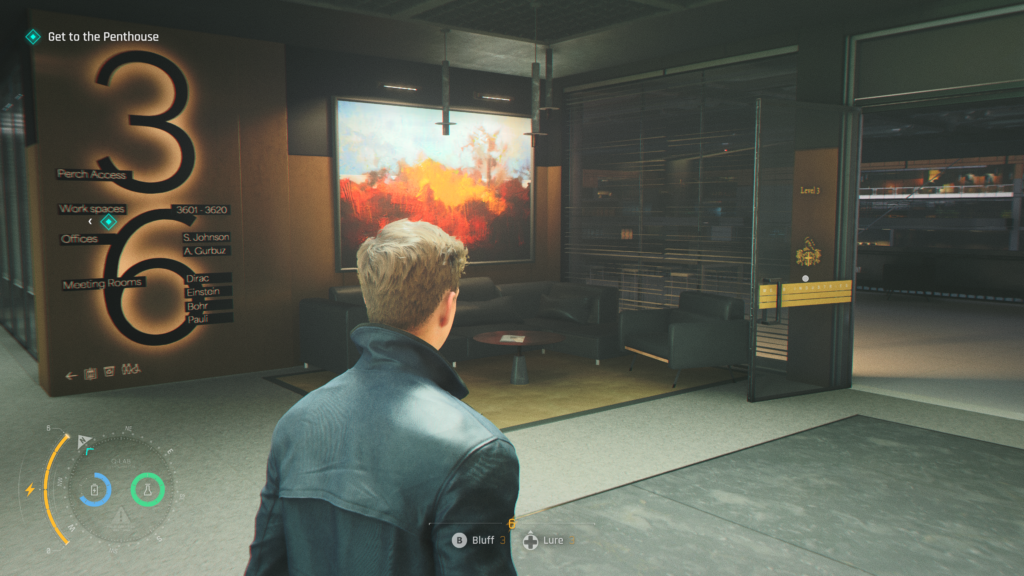
On a table out there is the playing card.
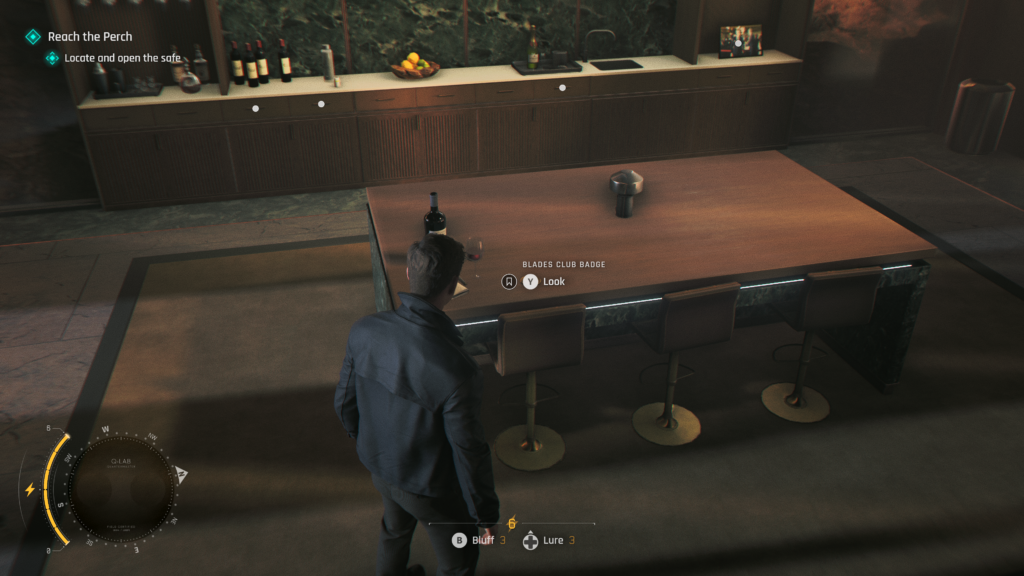
Legacy (1 / 1) – Blades Club Badge
A little later, you’ll enter Webb’s fancy office. On entering, head up the stairs to the right and you’ll see the collectible on a table.
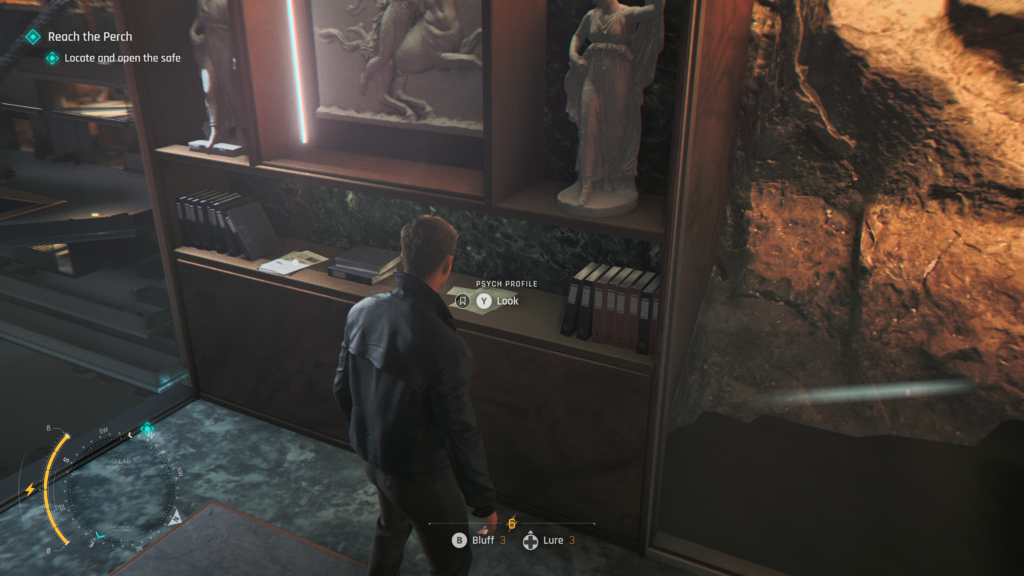
Intel (3 / 4) – Damien Webb
From the Blades Club Badge (above), head to the back of the office, by the window, sticking to the right side. On a shelf, you’ll see the ‘psych profile’ collectible.
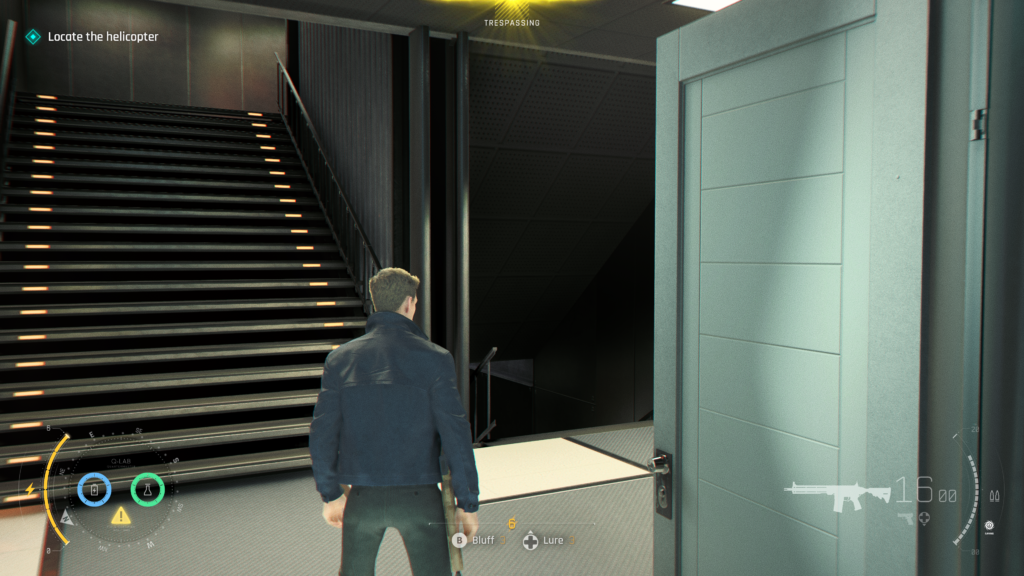
Playing Card (4 / 5) – Under of Shields
After a whole load of shoot out and combat, you’ll use a cargo carrier to cross a large gap. Once you drop down, two enemies will be waiting for a fist fight. Once you’ve taken them out, move forward until you reach a set of stairs, going up to the left, and down to the right. Head to the right, down the stairs to find the playing card on a crate.
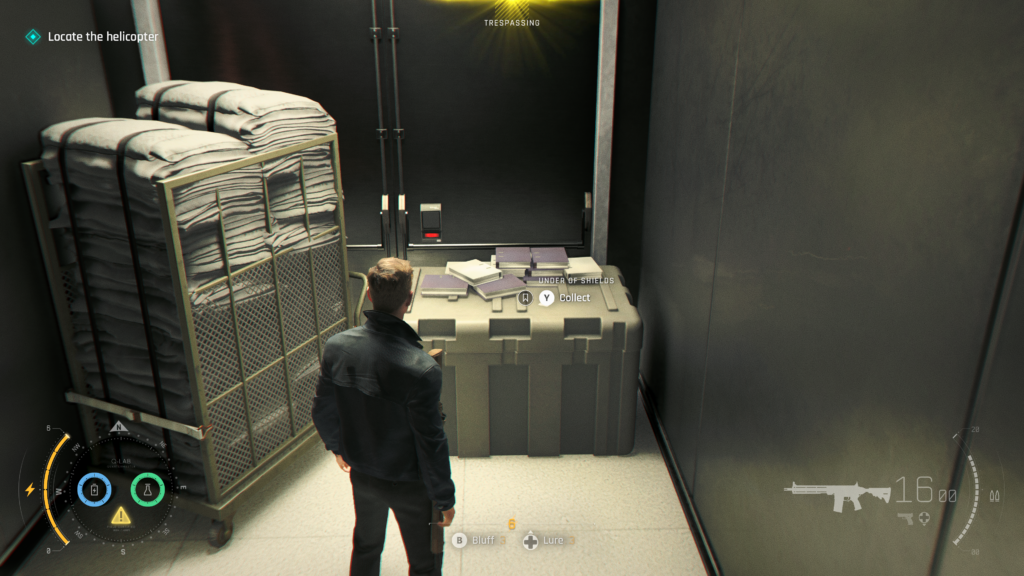
You can get this via chapter select using the “Going Old School” chapter.
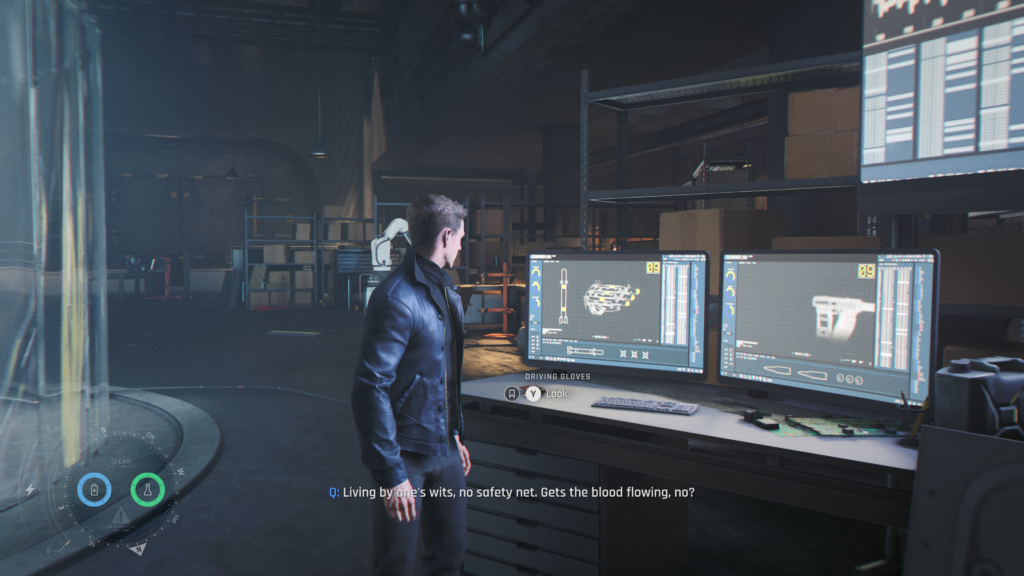
Intel (4 / 4) – Q
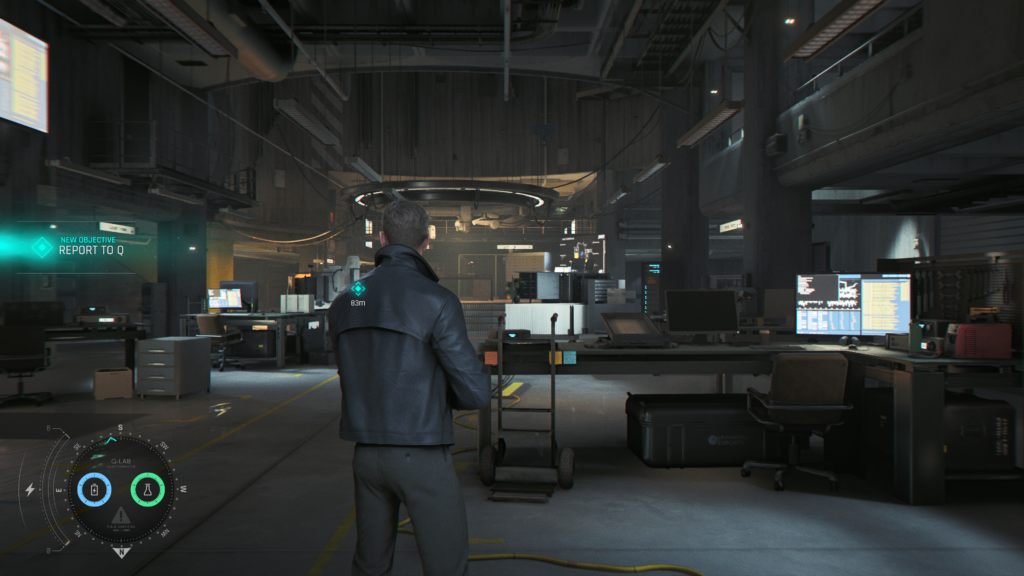
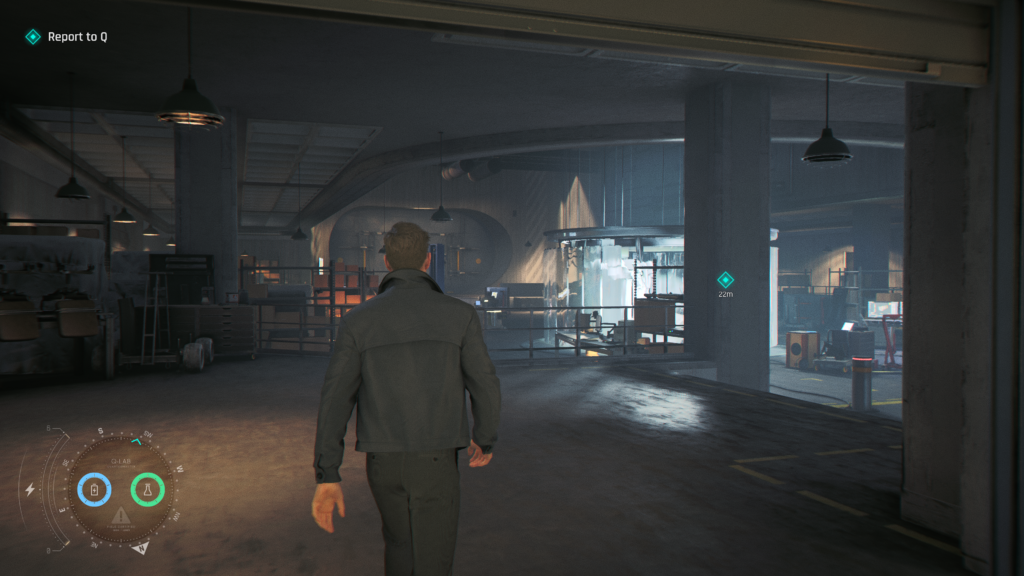
Once you’re back in MI^, you’ll need to report to Q. He’s in the back of Q-Labs working on a car. In that new back area, go to the right of Q and on a desk, to the left of a computer are Q’s driving gloves.
Chapter 08, “Time to Die”
Anything you miss can be collected by replaying the mission via the Chapter Select on the main menu. The collectible is logged immediately so you don’t need to play through to a checkpoint.

Postcard (1 / 1) – Vietnam
After you’re orientated to your room at the hotel, you will be taken to reception where Moneypenny wants you to scan the guest book. You’ll be given three names of people you need to put a Q-Tracker on. From the reception, head right and then stay towards the left and down the path.
You’ll come out to a small pool area where a guy is chatting to a woman and you can eavesdrop on the conversation. Here, you’ll learn that White is at the Ocean View Bar. Head past them and you’ll spot a fence you can vault over into some grass. Do this and you’ll enter the next area where Ellis White, one of your target is.
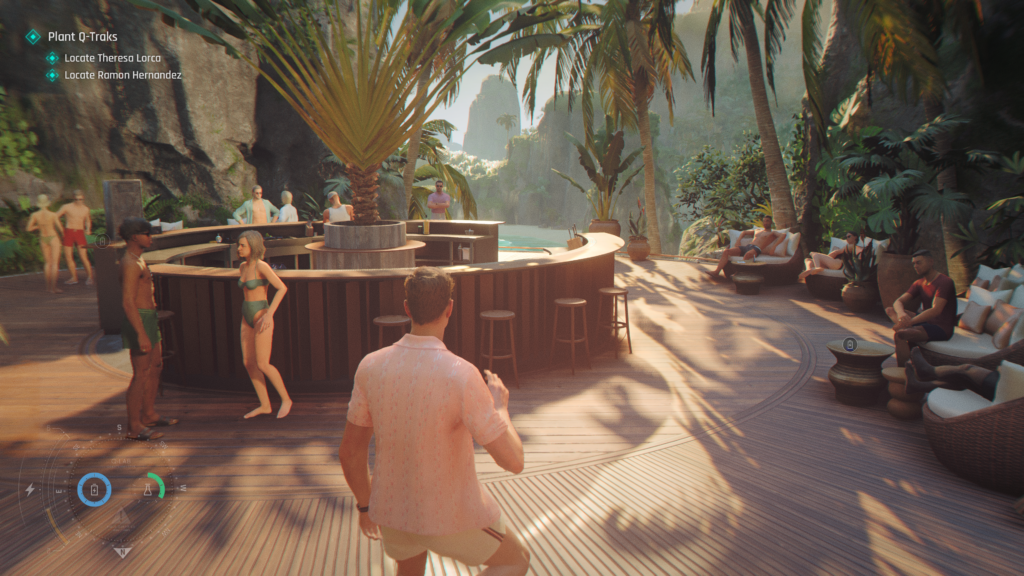
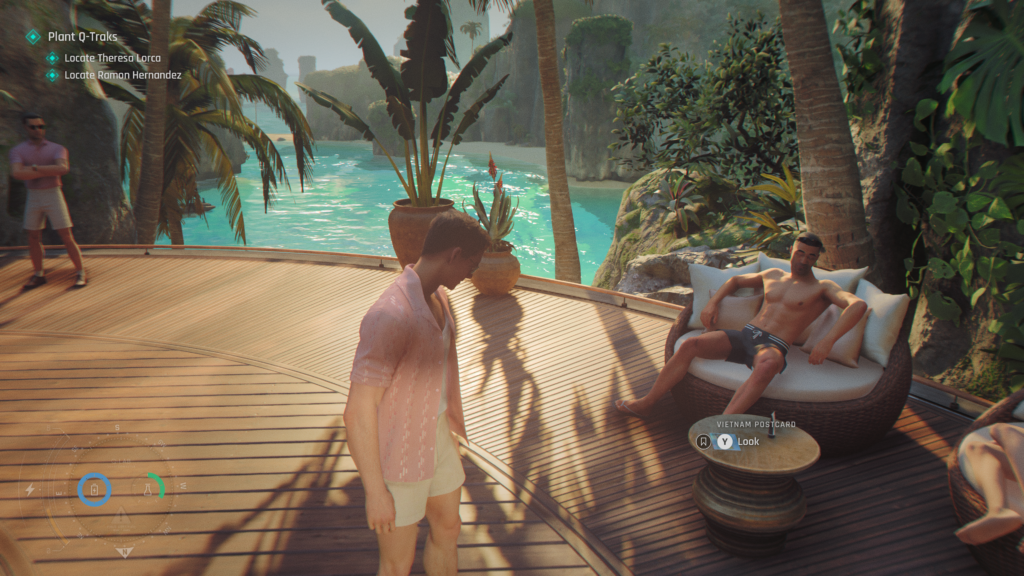
To the right of the bar, on a small table is the postcard. You might not be able to get to this until after you have completed the objective for Ellis and opened the mini-bar.
Playing Card (1 / 5) – 9 of Roses
From the last collectible head away from the bar, up the steps and to the path on the left. Take the first left at the point where there are multiple paths and head down the steps. Take a right into the cave at the bottom of the steps. Head in and you’ll be able to eavesdrop on a Yoga instructor in front of a locked room. He has the key you need to get into that room.
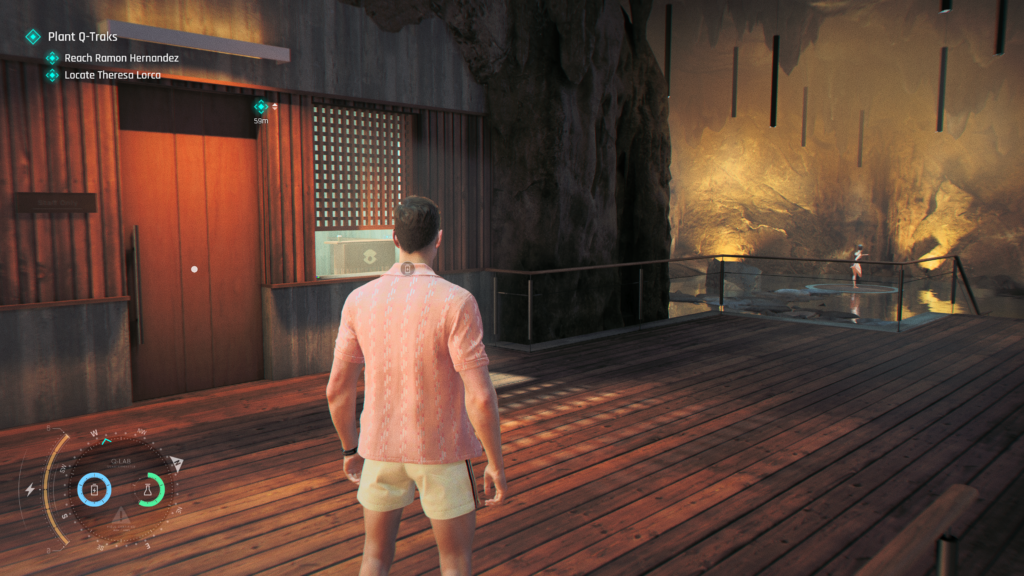
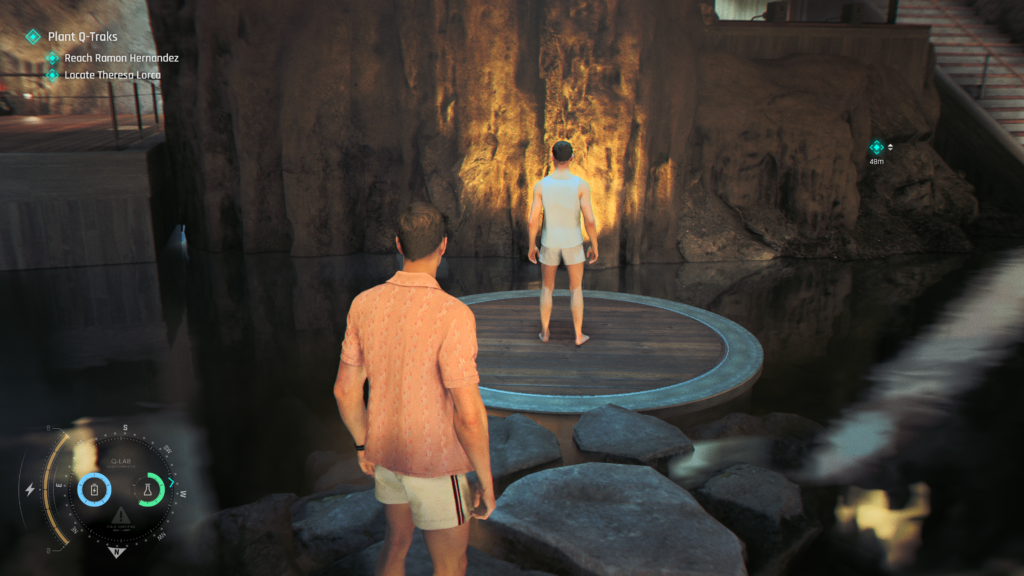
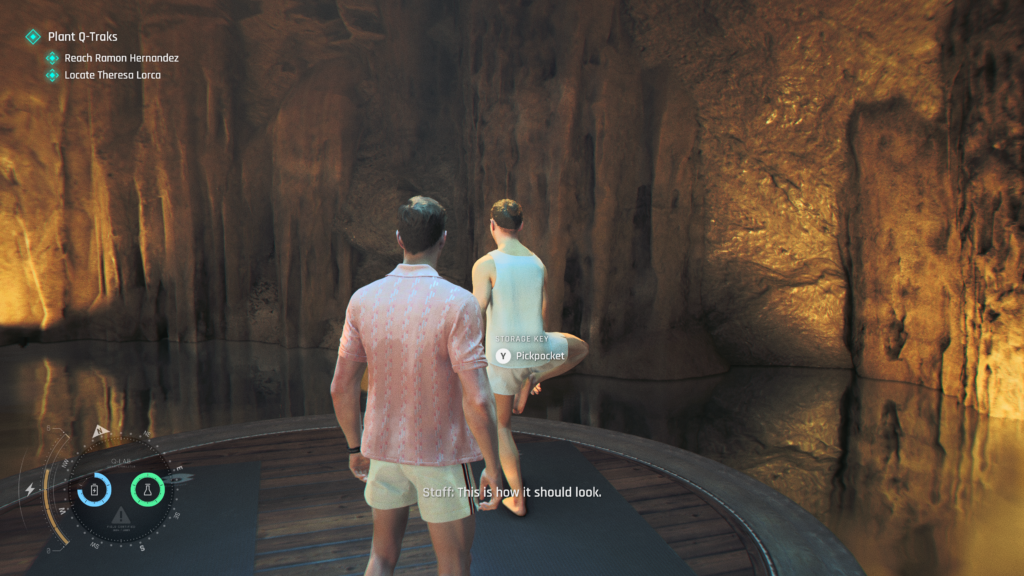
Continue forward, past the room and down some steps to find an empty Yoga space across from where the instructor is Yoga-ing. In the empty space, you’ll see a prompt to call him over for some help with your Downward Dog. When he starts demonstrating, you can pick his pocket and grab the key.
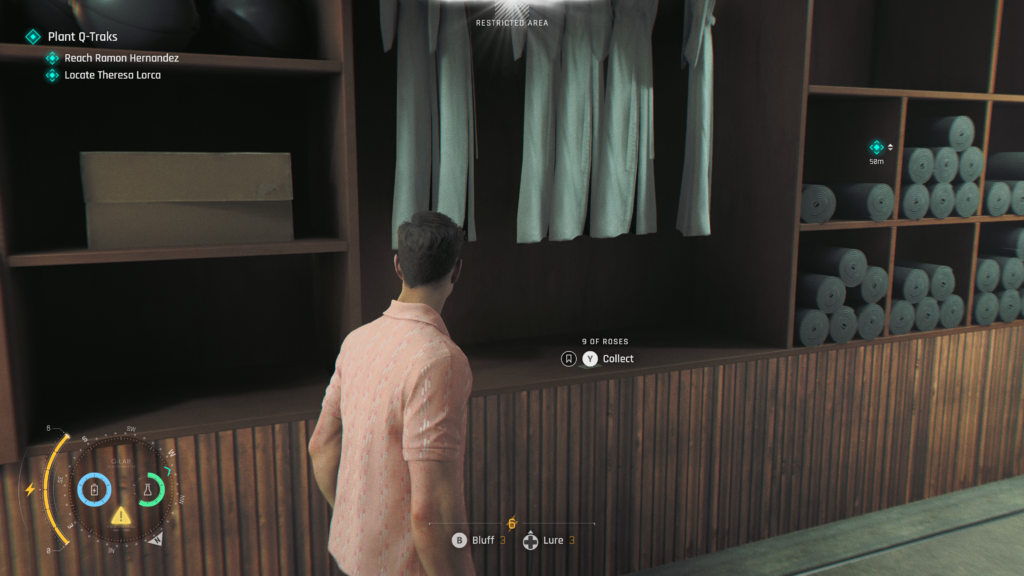
Head back up the stairs to the left and you’ll be able to open the locked door. The playing card is to the left of the room as you enter on the unit.
Legacy (1 / 2) – Tarot Deck
Be sure to grab the blue Yoga mat in the room where the last collectible was. You’ll need it to gain easy access to Ramon Hernandez’s suite.
Head back out of the cave the way you came in and head right up the steps. Before heading to the next set of steps you’ll spot some bushes you can walk through to cut across. Do that and continue forward, up some steps past some…admiring hotel guests. At the top of the path on the left you’ll see the entrance to Ramon’s room.
If you’re wearing the Yoga mat disguise, you’ll be able to walk straight in past the guards.
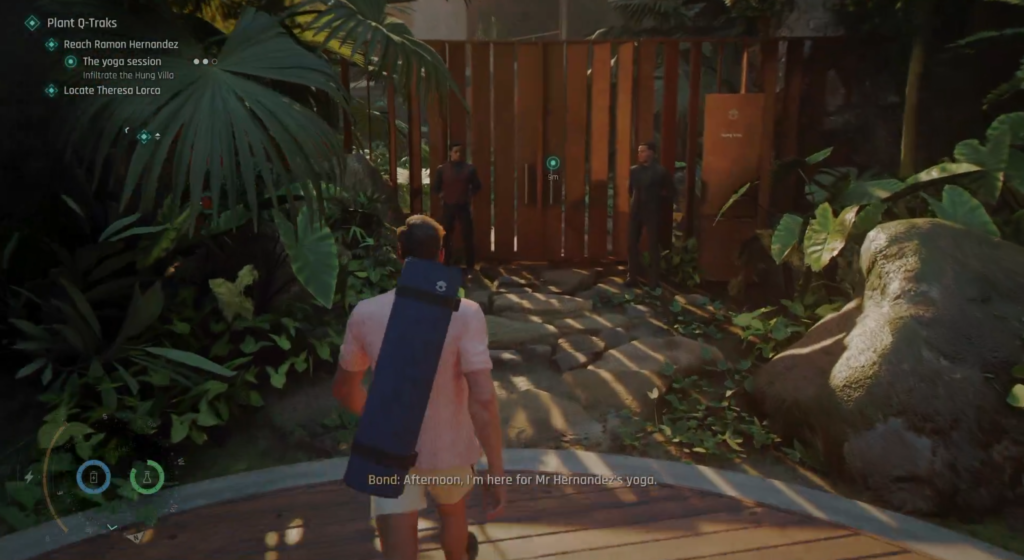
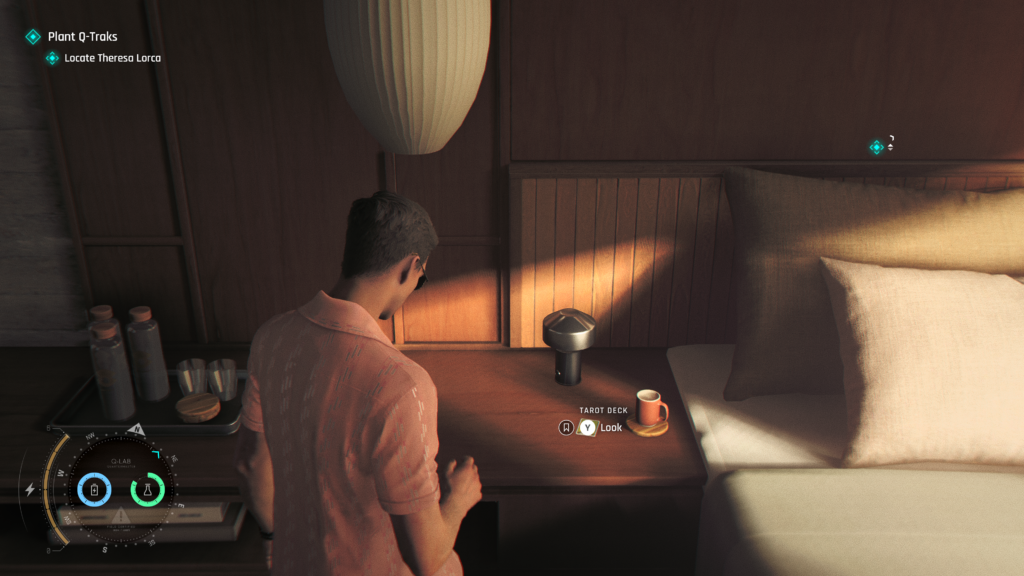
Once you’re on the other side of the fences, head into Ramon’s suite and speak with him. After the cutscene, you’ll be free to explore his suite. Head into his bedroom, and on the left of the bed, you’ll find the collectible.
Playing Card (2 / 5) – Under of Bells
Turn around from the last collectible and head to the door on the the right, go through and cross the bridge to the bathroom. On the left, on the sink, you’ll find the playing card.
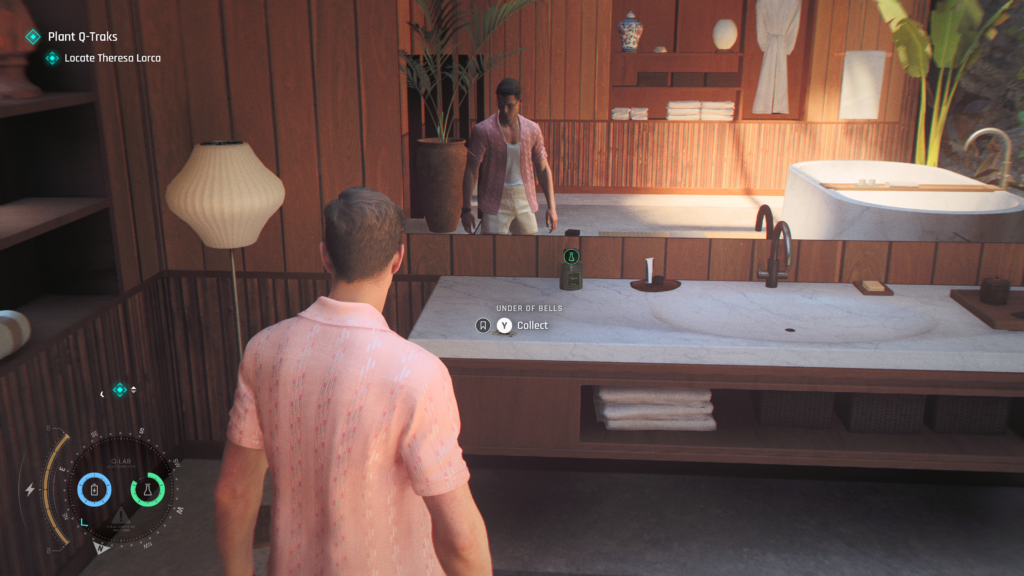
Playing Card (3 / 5) – King of Roses
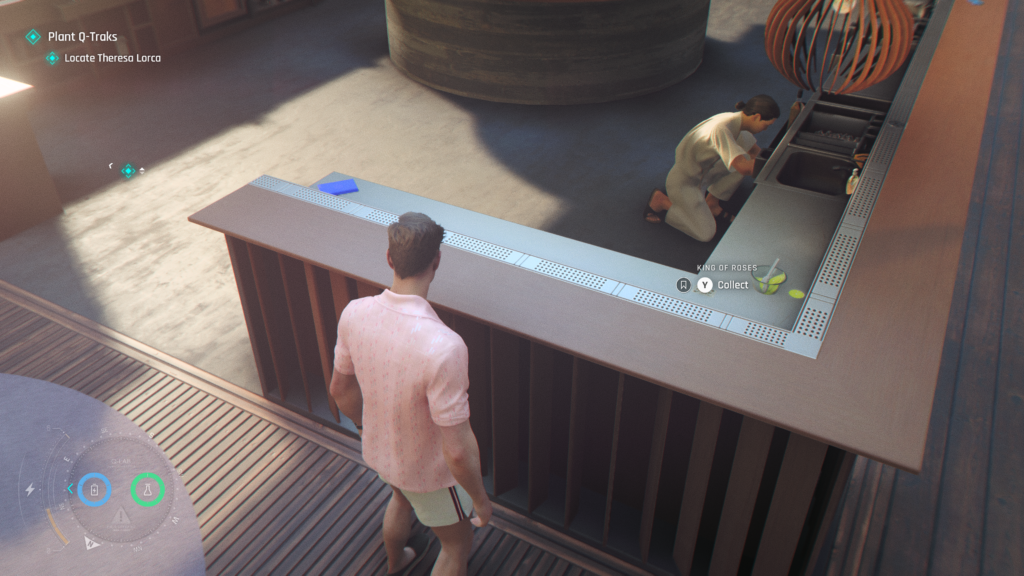
Leave Ramon’s suite from the main entrance and head up the stone steps straight across from the entrance. At the top, take a left to find a bar area.
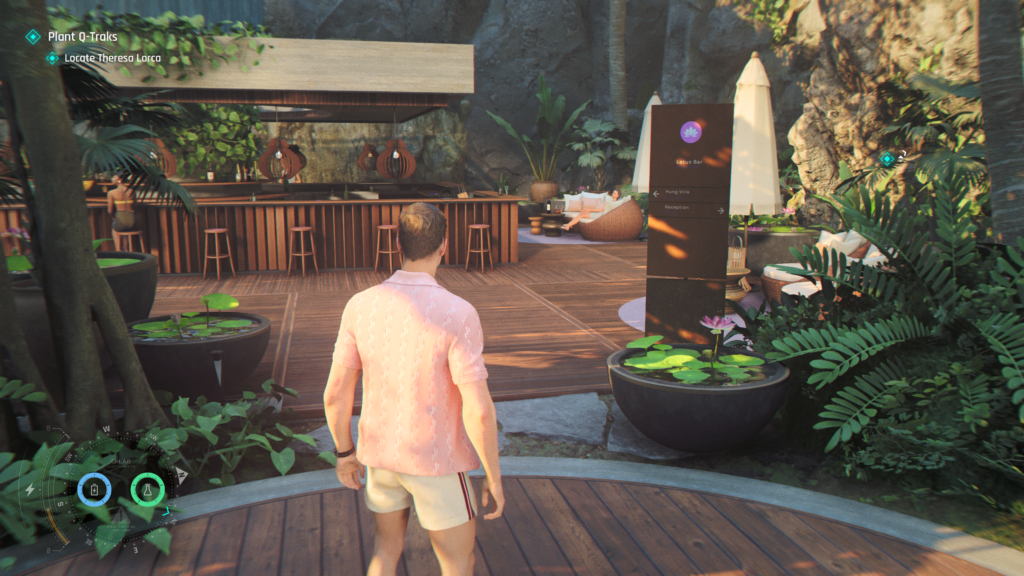
On the right hand side of the bar, you can grab the playing card from the bar area, to the back right of the space.
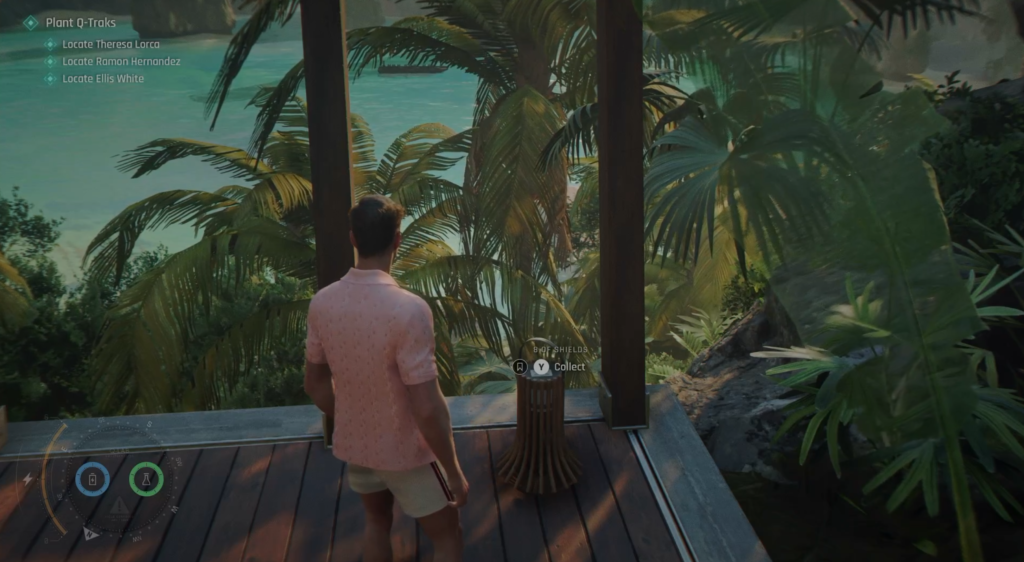
Playing Card (4 / 5) – 8 of Shields
From the main reception, where you signed the guest book, head down and aim for the Velvet Lantern bar. The signs around the resort will direct you. From bar, head down to a covered yoga area. On the right is the playing card.
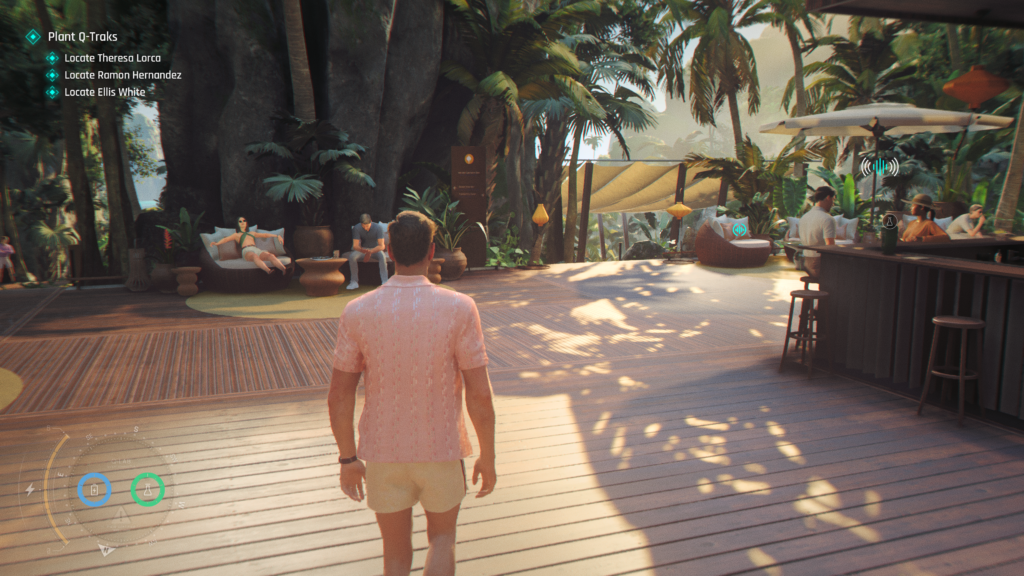
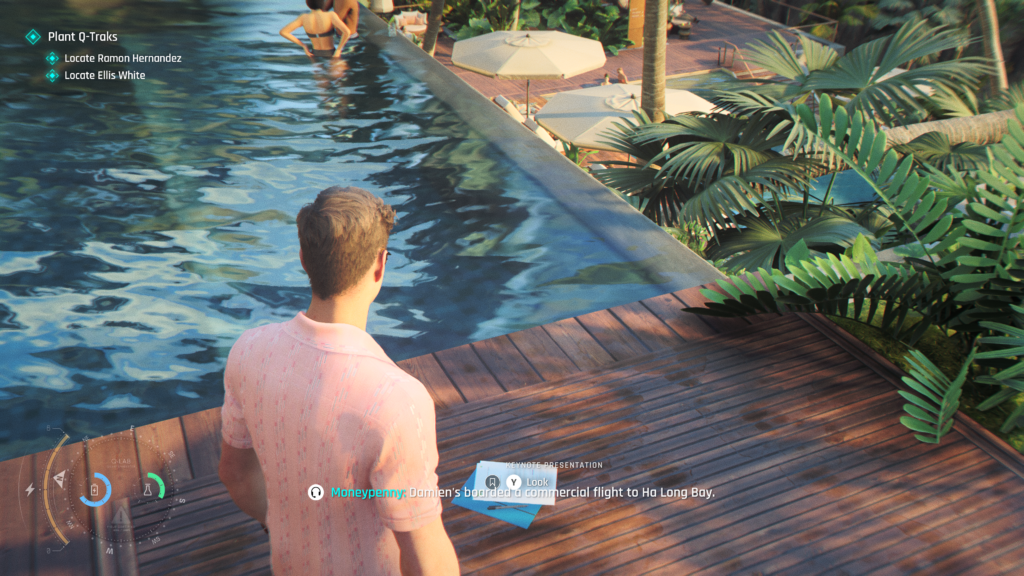
Intel (1 / 5) – Theresa Lorca
After speaking with Theresa as part of the main objective. Just to your left, is the intel on the floor.
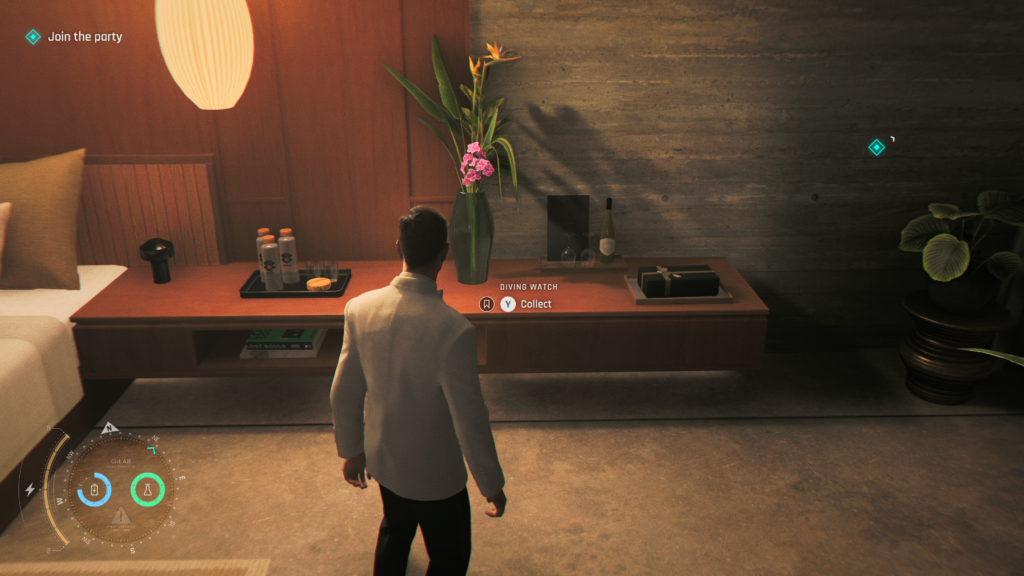
Memento (1 / 2) – Diving Watch
As Bond prepares for the evening party, you’ll have to do a mini-game where you tie a bow tie (now, really 007!). Once you gain control, look to the right of your bed to spot the collectible on the side.
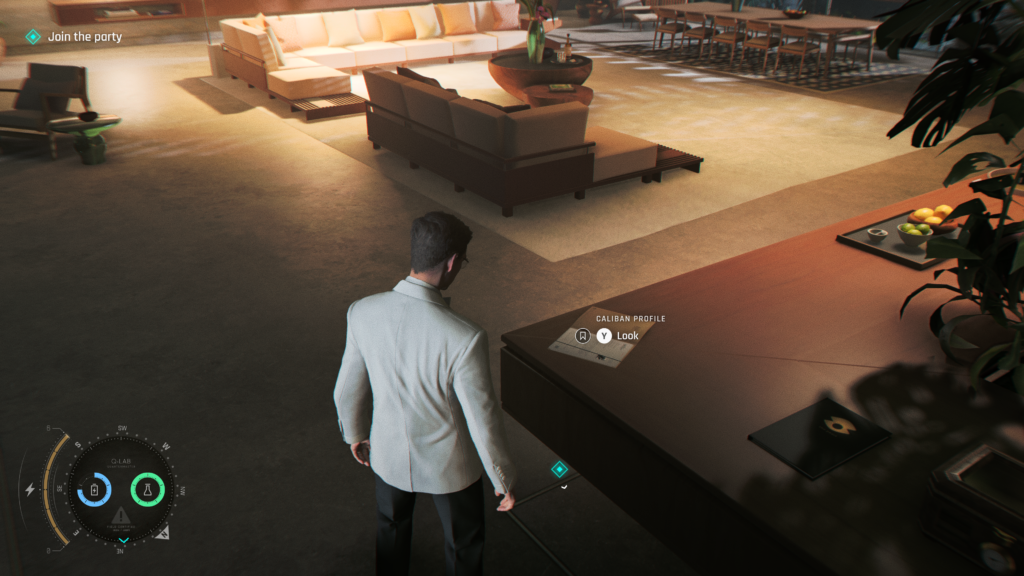
Intel (2 / 5) – Caliban
In Bond’s suite, before you head to the party, leave the bedroom from the left side and you’ll see the intel on the right as you enter the main living area.
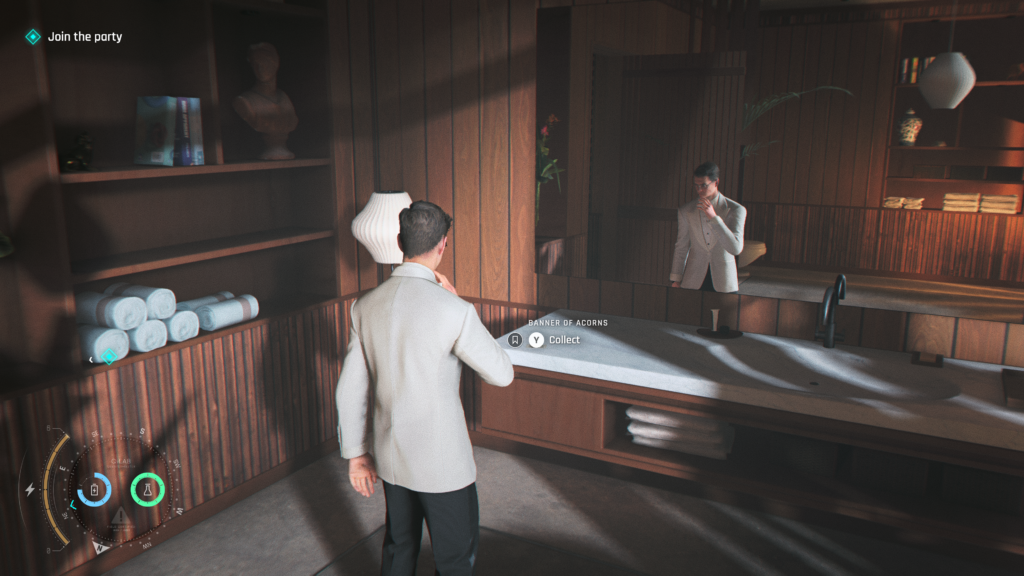
Playing Card (5 / 5) – Banner of Acorns
Head into the bathroom, to the right from the last collectible, through the door and across the walkway. The playing card is on the left on the sink.
Intel (3 / 5) – Riptide
In the Quarry area, after Greenway helps get your cuffs off, immediately to your right is the intel, after you’ve regained control of Bond.
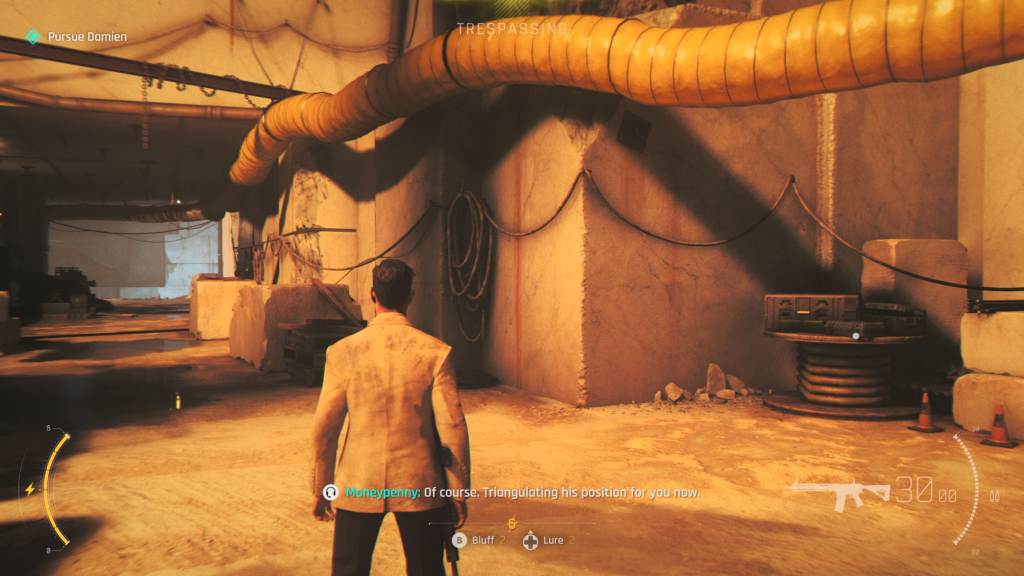
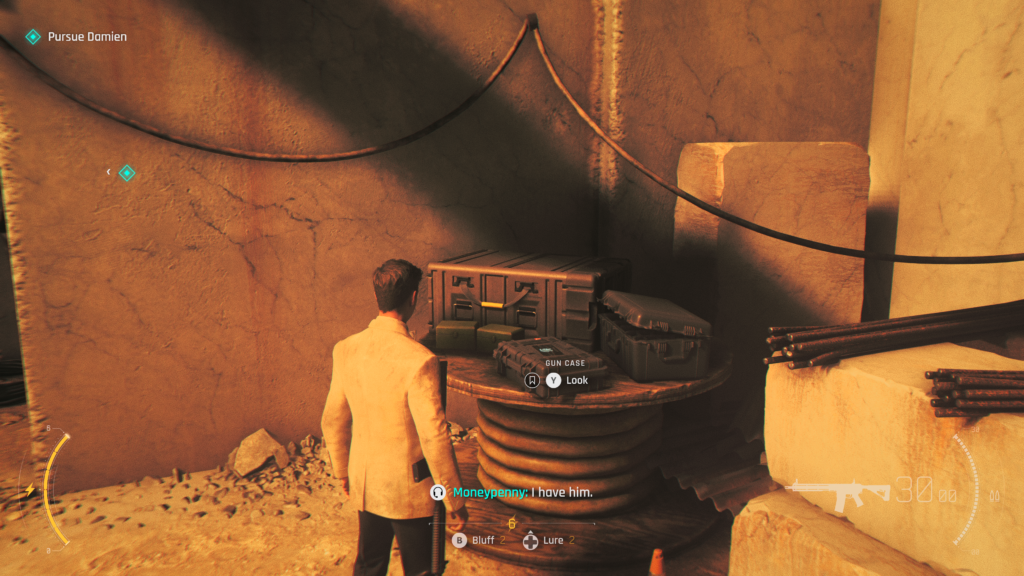
The next set of collectibles are when you have completed the Vietnam mission and returned MI6. You can replay the ‘Man of the Hour’ chapter if you miss anything
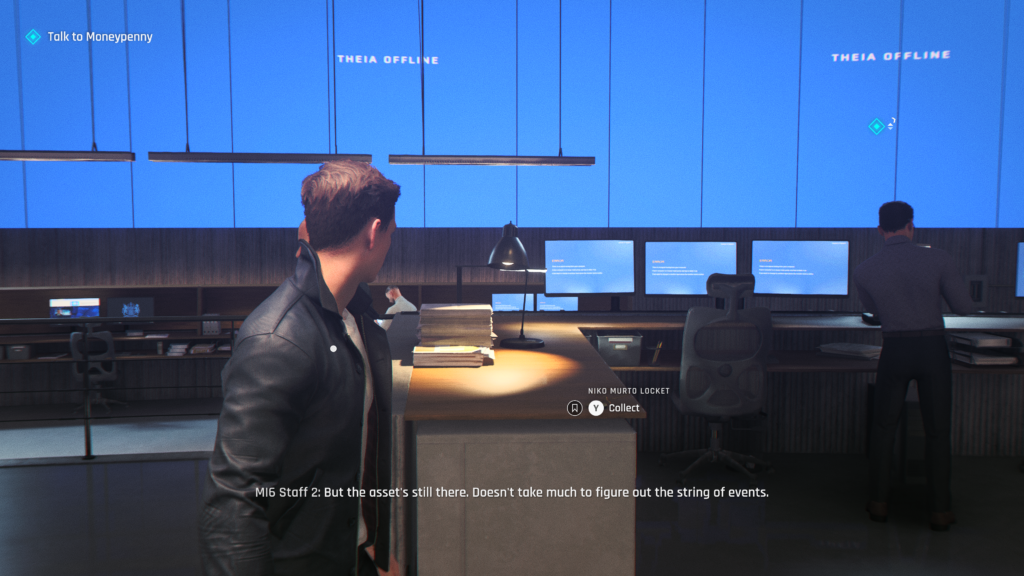
Memento (4 / 5) – Niko Murto Locket
When you gain control of Bond at the start of this section, in the large hall in MI6, head to the level down on the left. The collectible is on a desk.
Intel (2 / 5) – Rhys Beckett
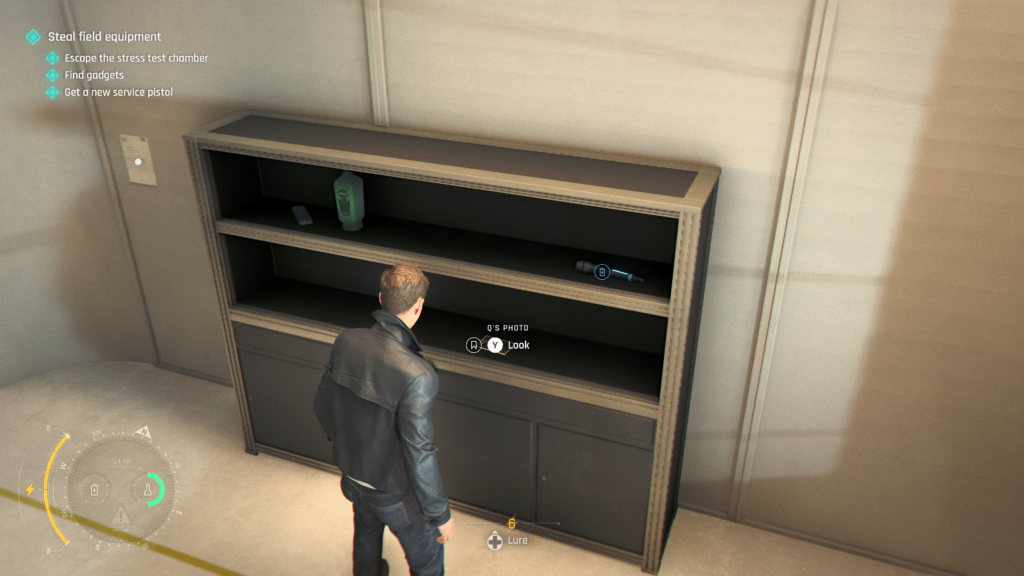
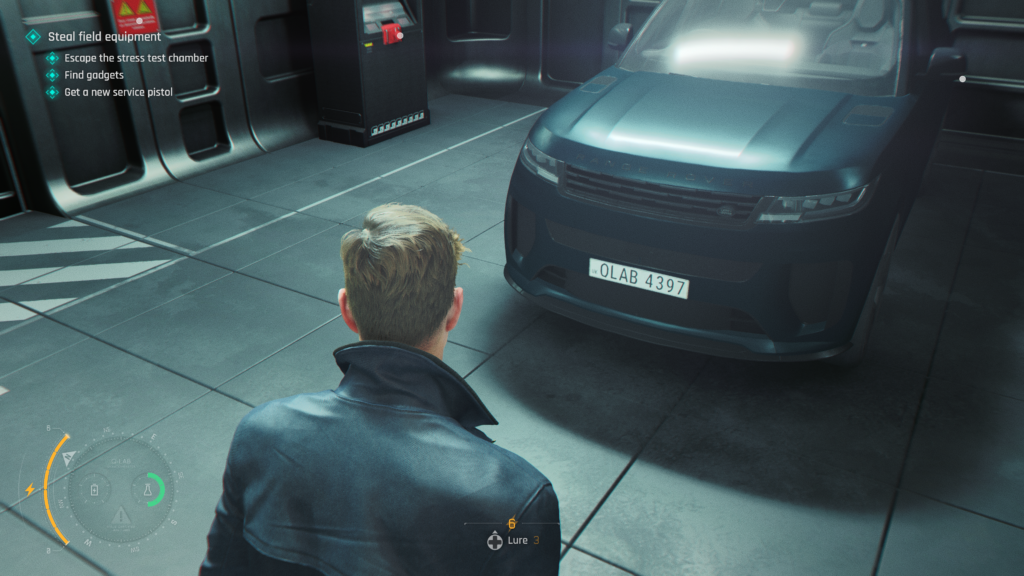
When you’re in Q-Lab, you’ll need to acquire equipment. Head to the ‘Stress Test’ area of the lab to get your Q-Watch. Once you’re inside and have grabbed your Q-Watch, head back to near the entrance to spot a locked cabinet that needs keycode inputting to reveal the collectible.
They code for the lock is 4397, it’s the number on the licence plate of the car in the garage in the same area.
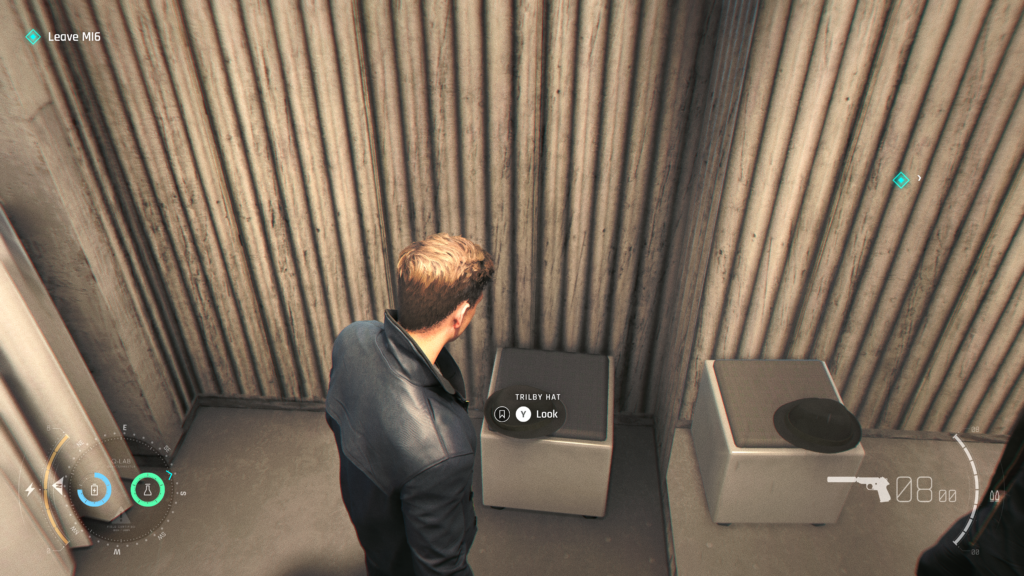
Legacy (2 / 2) – Trilby Hat
Near the entrance to Q-Lab, to right of the lifts, is the ‘Wearables’ section.
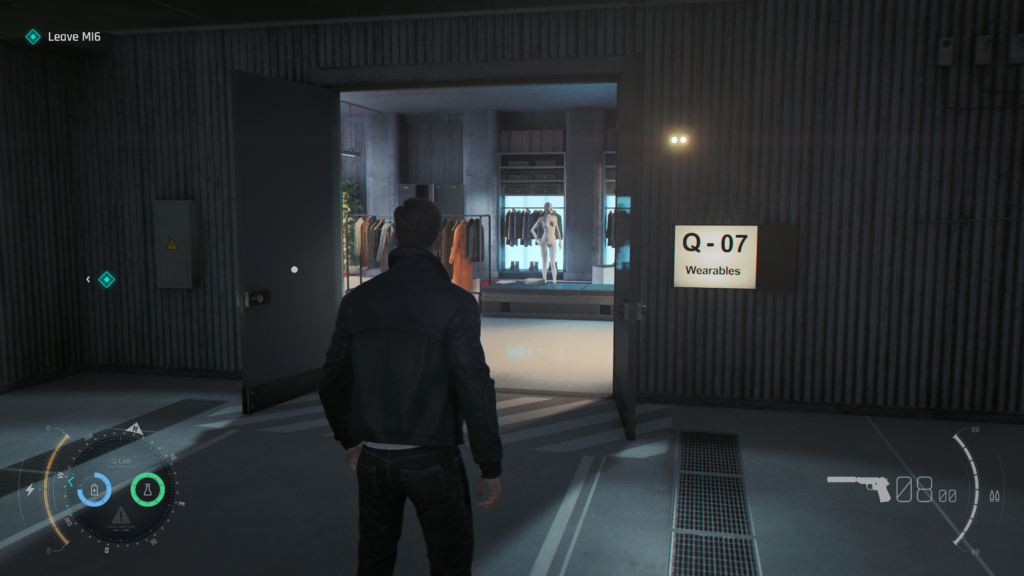
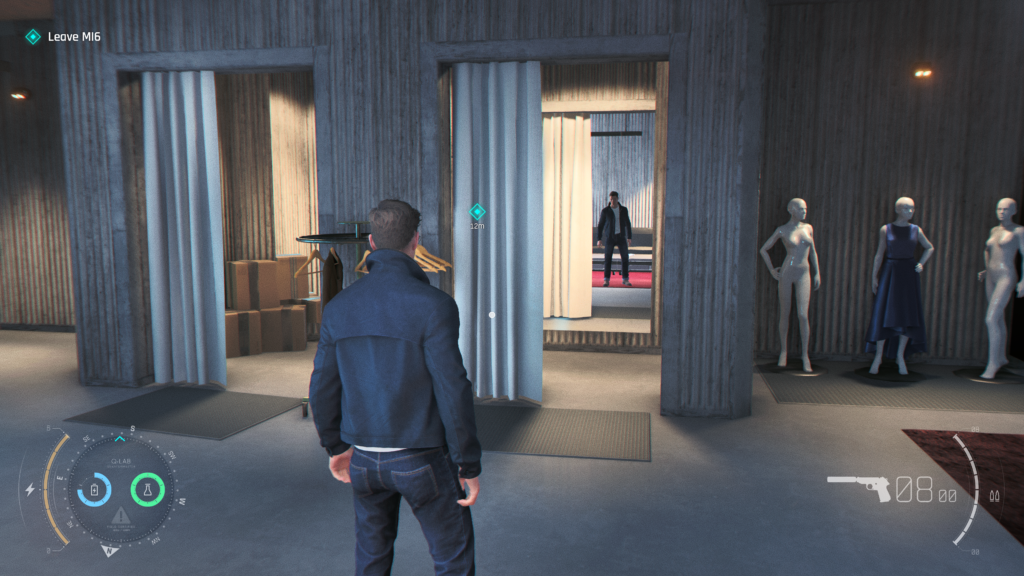
Head in and to the left, you’ll see two changing rooms next to each other. Head into the one on the right, and on a stool is the collectible.
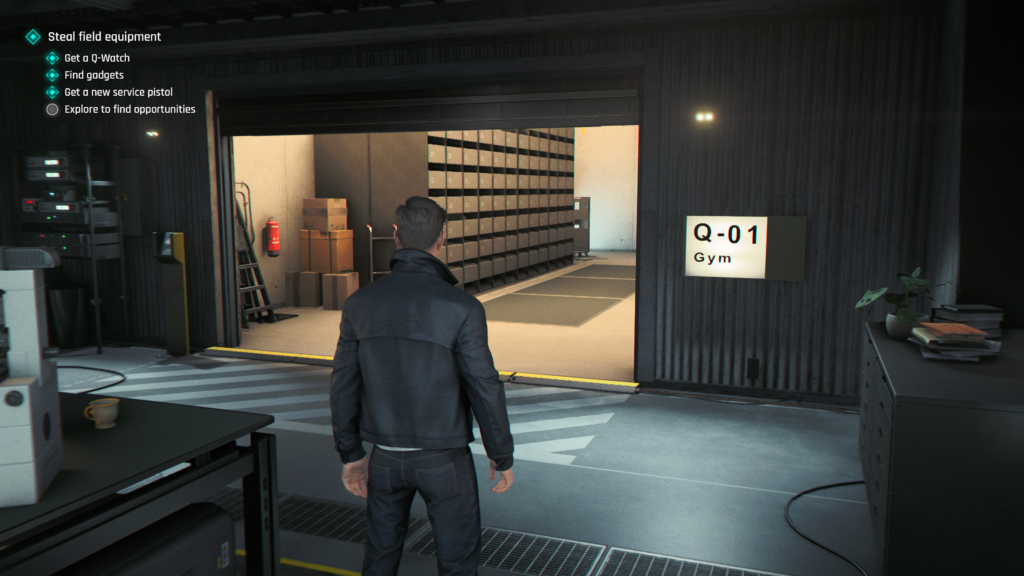
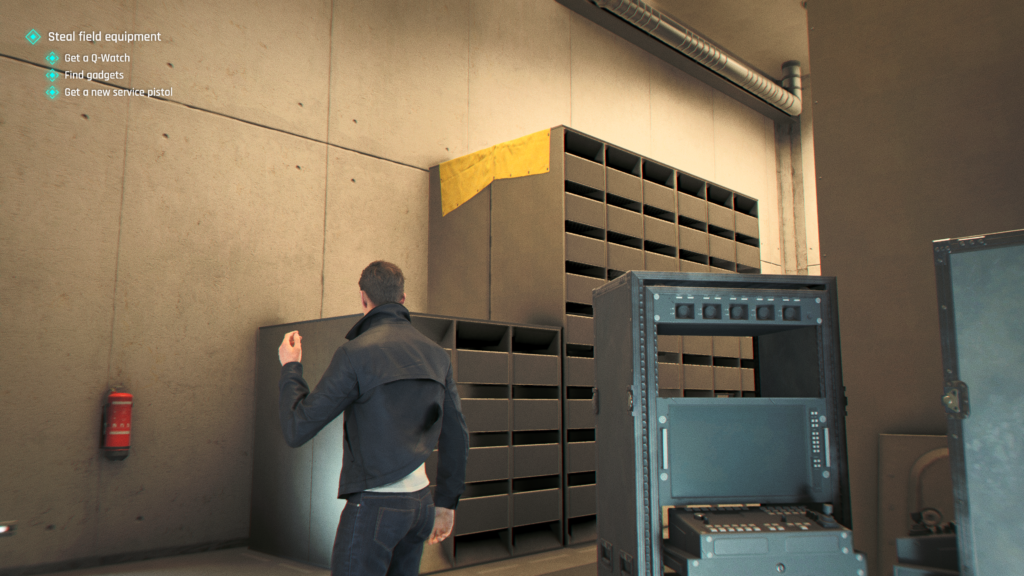
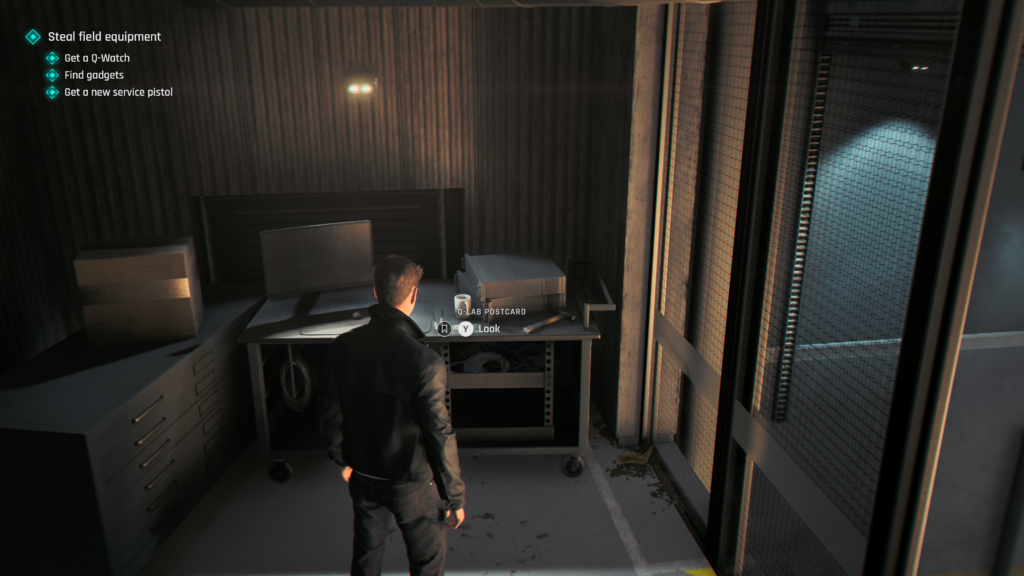
Postcard (1 / 2) – Q-Lab
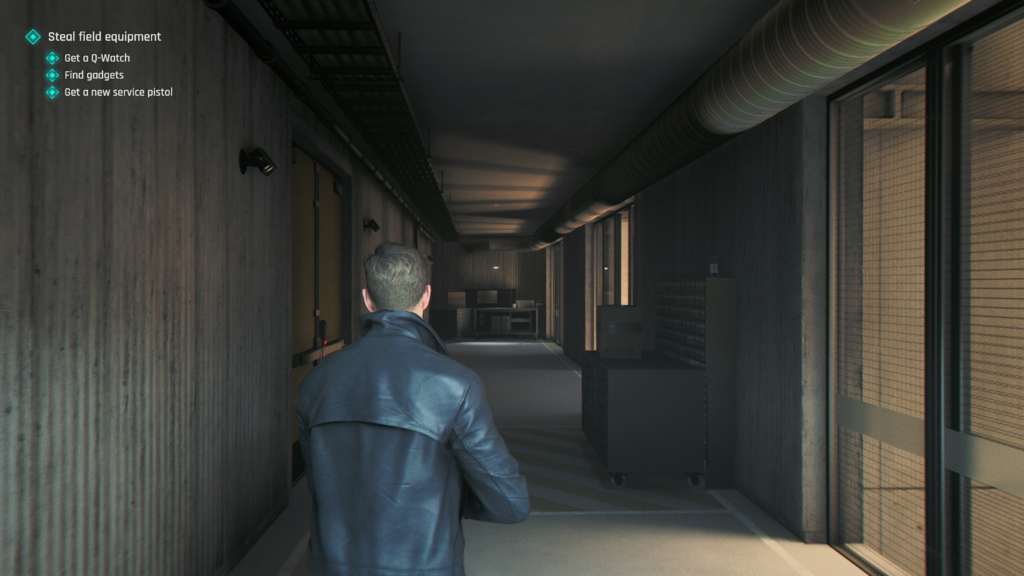
Look for Q-01 Gym and head in (it’s to the left and back towards the lift from the centre platform. Head in and climb up the crate on your right. Get up the wall and jump across the other crates on your left. Head to the back of the room and leap to the corridor where the open window is, at the end of the corridor is the postcard.
Chapter 09, “Wave of the Future”
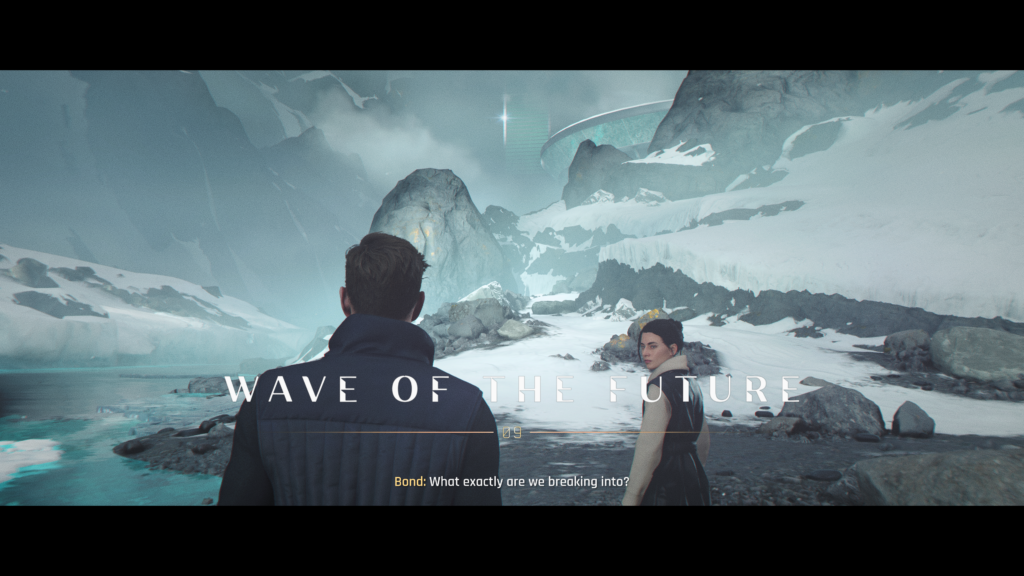
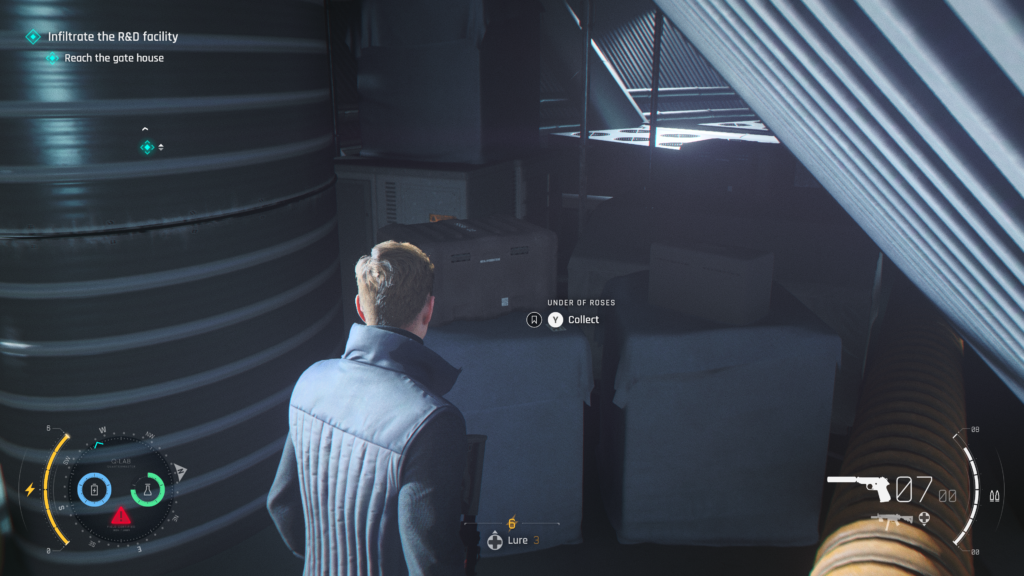
Playing Card (1 / 3) – Under of Roses
After you’ve scaled the snowy terrain and got underneath the cable car area, you’ll have to work your way through a few enemies before heading inside.
You’ll be in maintenance space.
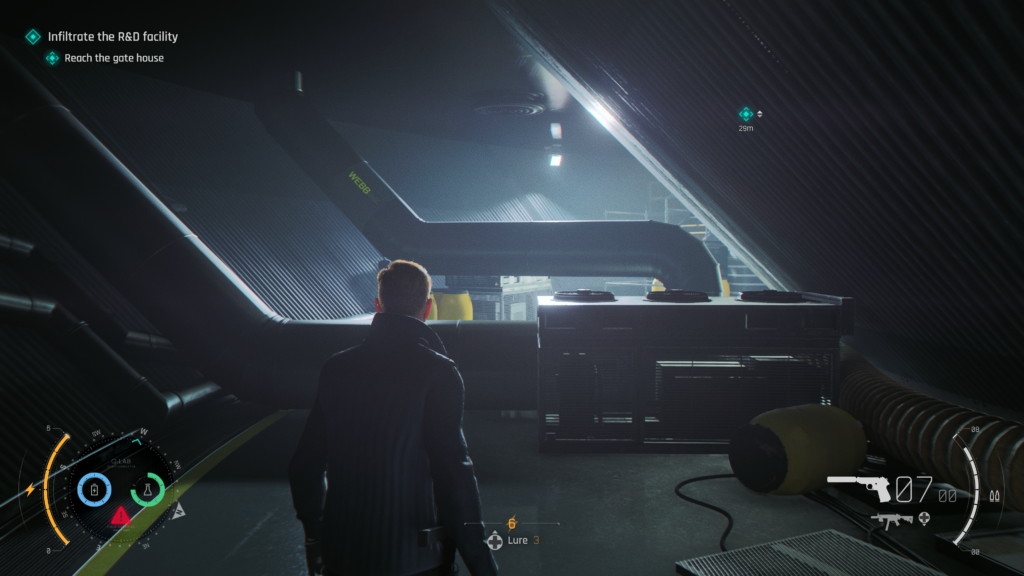
Head forwards and over and under the obstacles. On your left will be some stairs to go up to progress. Don’t yet, look to the right to spot the playing card on some boxes.
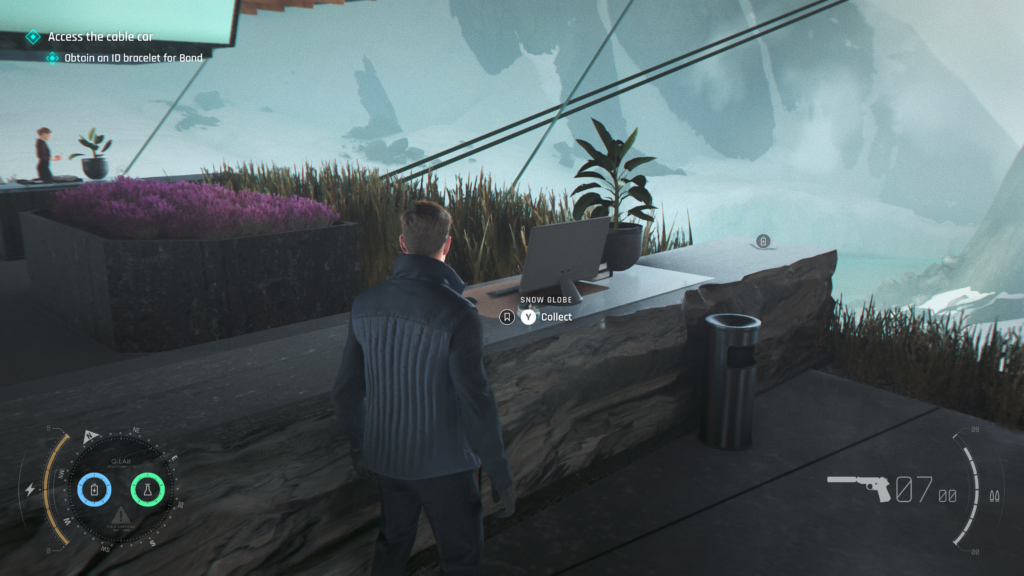
Memento (1 / 2) – Snow Globe
Once you’ve met up with Isola, you’ll head up looking for ID bracelets. Go up the stairs to the lobby / waiting space and head towards the centre, looking for a reception type desk in the middle.
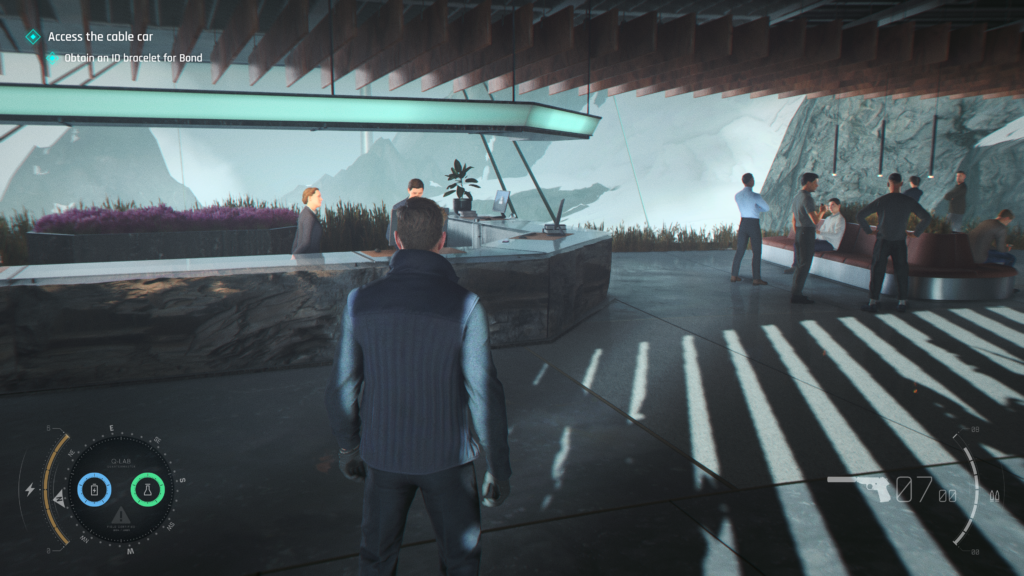
Head to the right side of the desk (when looking at as in the picture above) and you’ll see the collectible by a monitor.
Head back up the stairs to the left and you’ll be able to open the locked door. The playing card is to the left of the room as you enter on the unit.
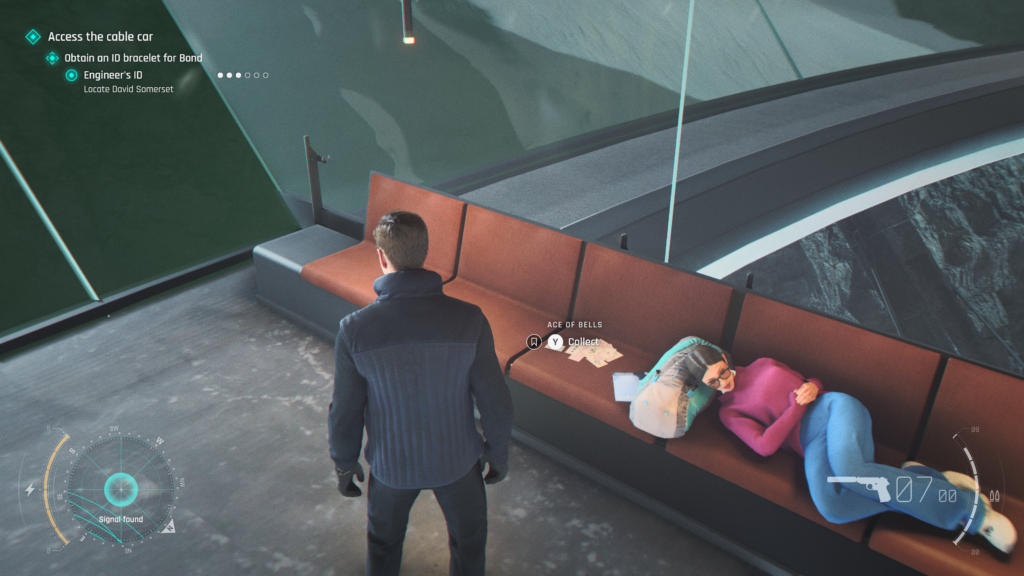
Playing Card (2 / 3) – Ace of Bells
From the reception desk, head to the right and keep going until you can’t go any further. To your right are some stairs down, and to your left are some people resting on a sofa.
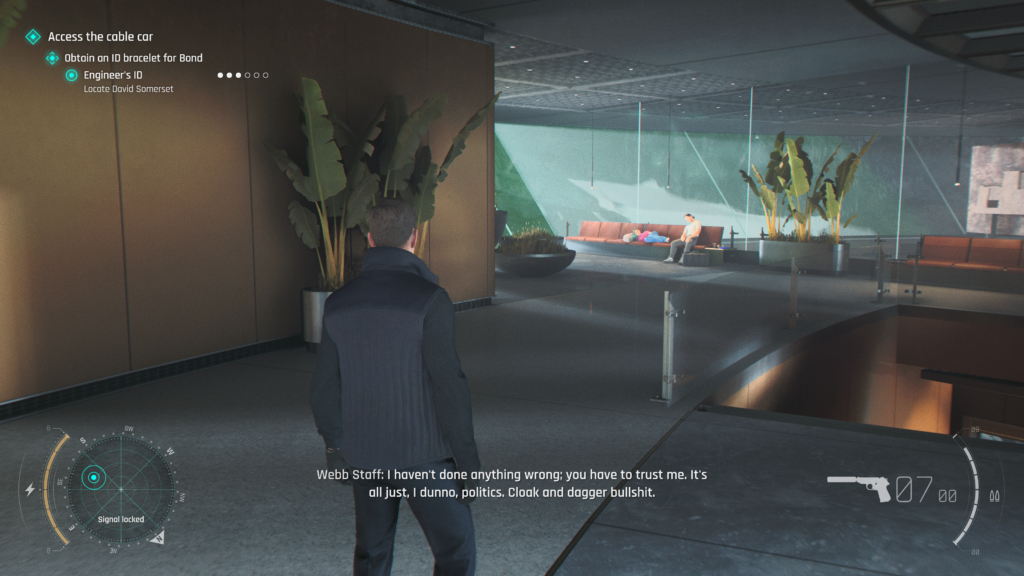
On the left of the woman sleeping is the playing card.
Playing Card (3 / 3) – 9 of Bells
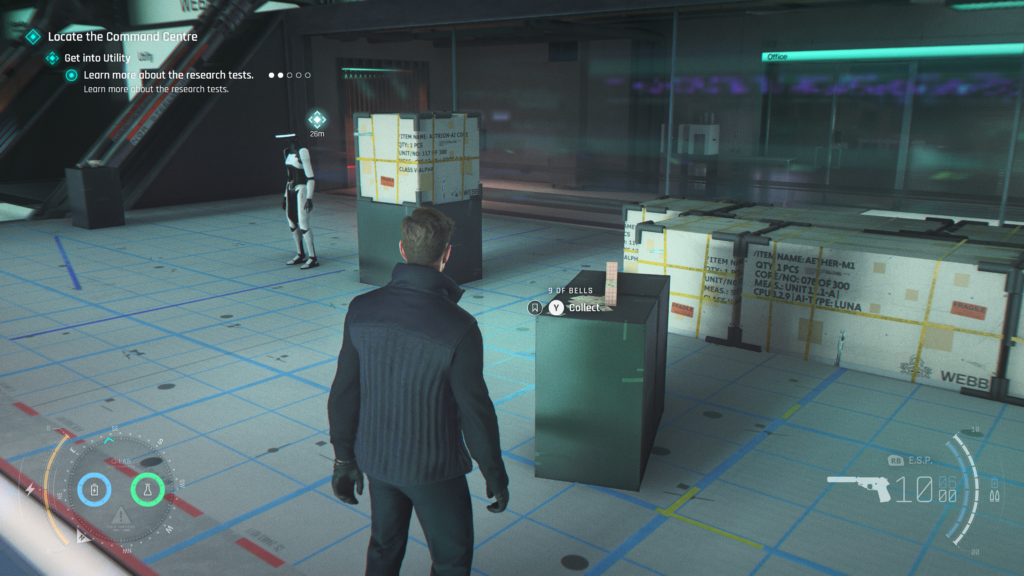
Later on, when you enter the Robotics lab, head to the experiment towards the back, near the entrance to Utility where you need to head. On the right of the experiment where the Android is mimicking the women doing Yoga like poses is the playing card on a box.
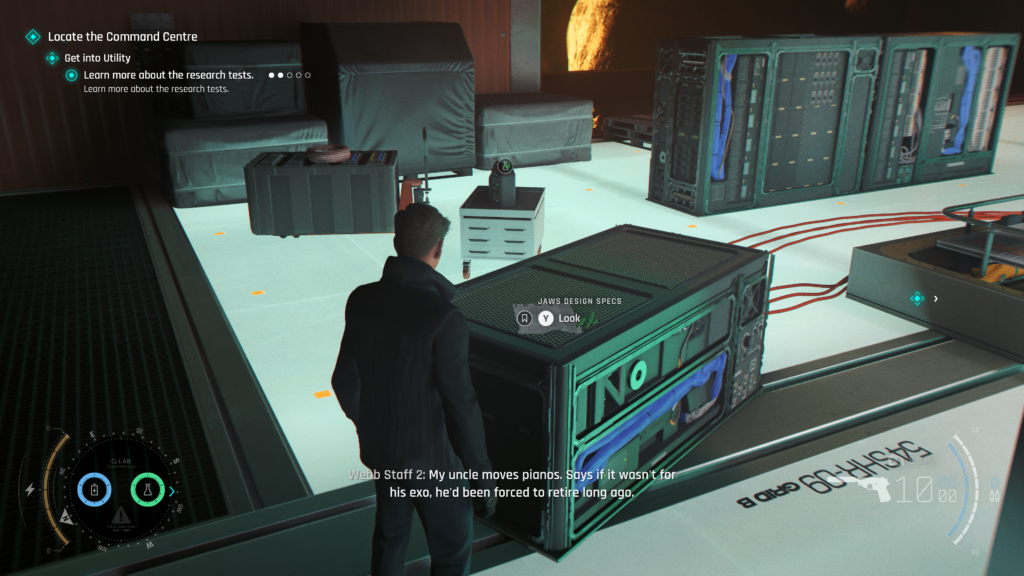
Legacy (1 / 1) – JAWS Design Specs
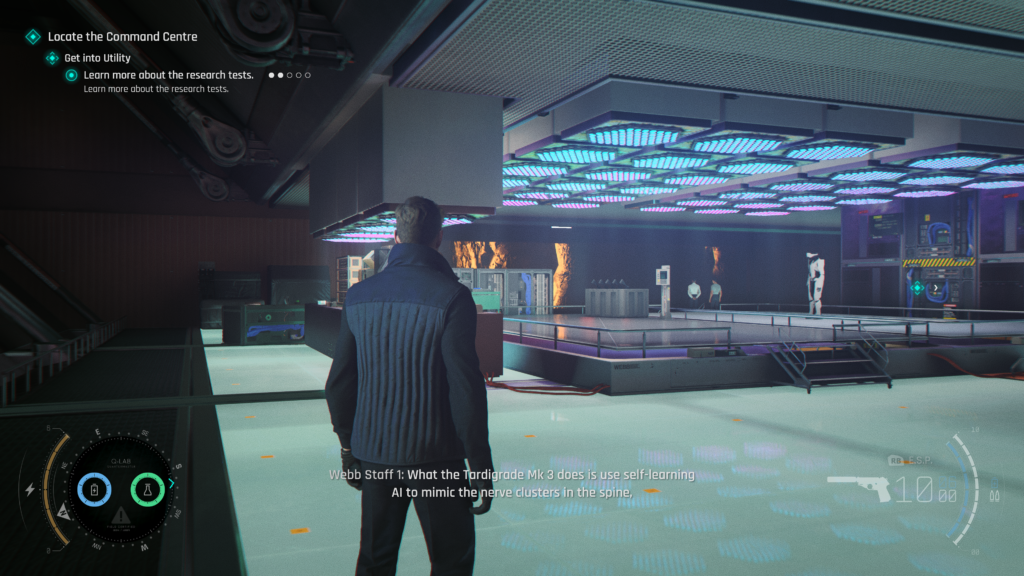
From the entrance of the Robotics lab, head to the very left, and in the corner, on a console, are the specs.
Intel (1 / 2) – M
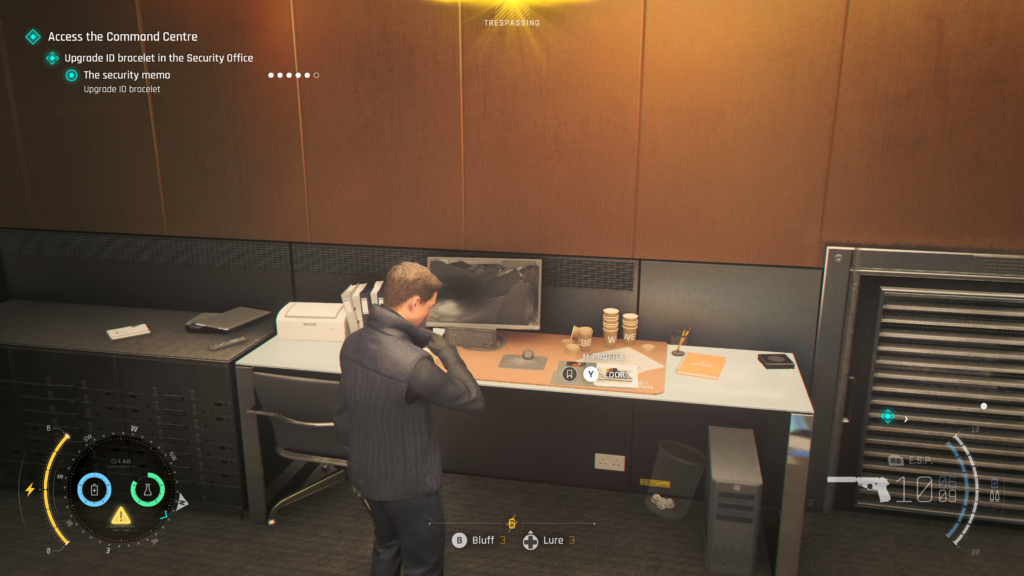
Much later, you’ll need to get into the security room to upgrade the security clearance of your ID wristband. While in there, look for the intel on table, to the left of the vent.
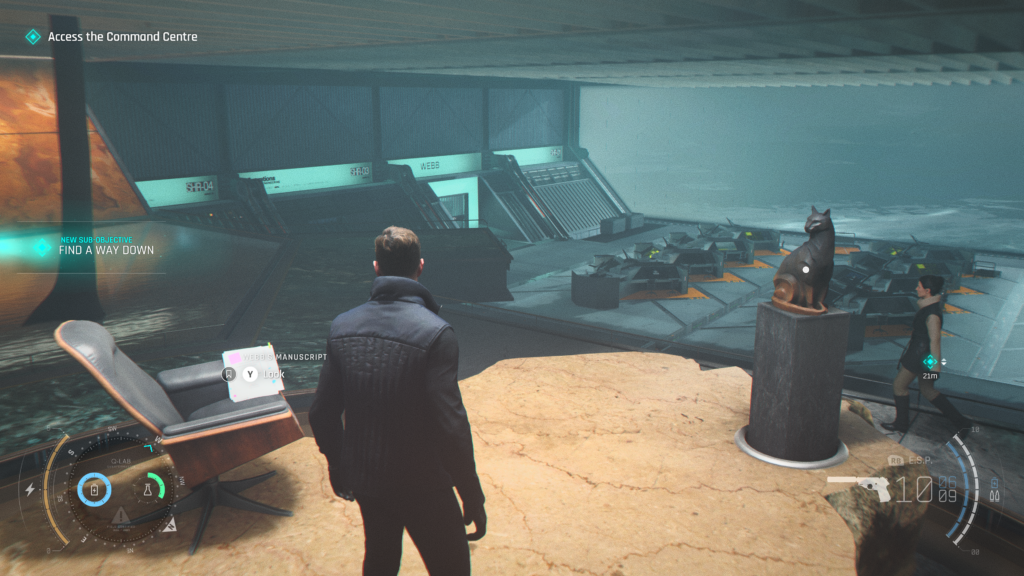
Intel (2 / 2) – Nicholas Webb
Once you’ve gained access to the command area, you’ll see Nicholas Webb’s grand throne, complete with rotating cat statue. On his chair is the intel.
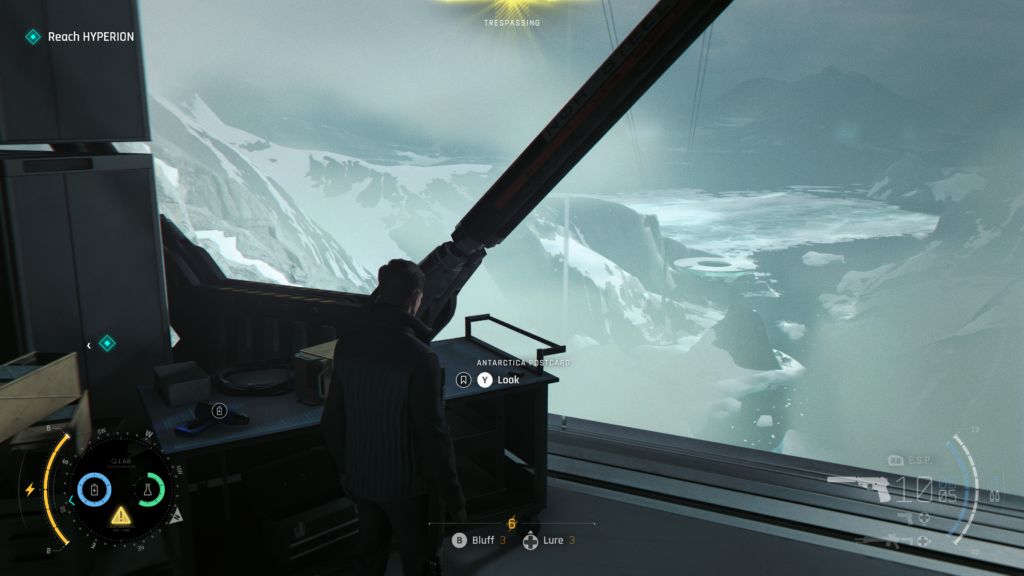
Postcard (1 / 1) – Antarctica
After dealing with the Android and using the lift controls to get through the door, you’ll be prompted to climb through a vent on your left in the next area.
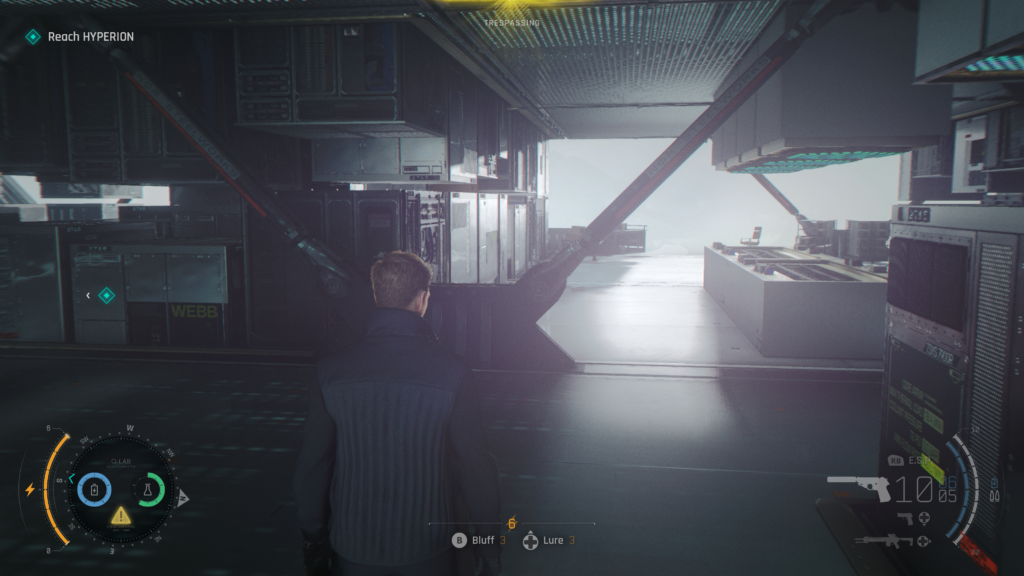
Instead of going to the left, head straight forward towards the window, and on the left on a console, is the postcard.
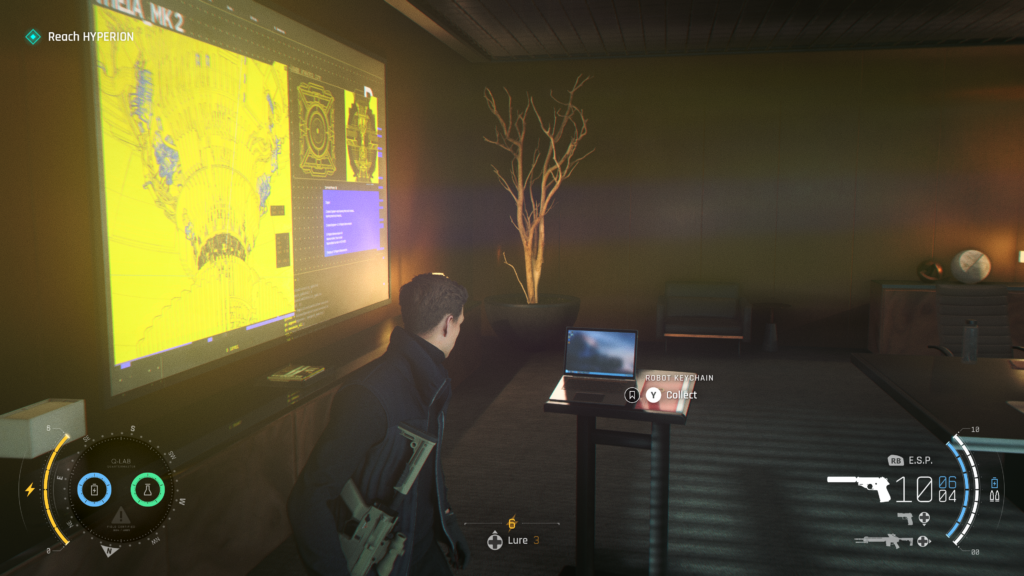
Memento (2 / 2) – Robot Keychain
Later on, you’ll need to climb down through some impressive machinery and into a vent. After crawling through the vent, you’ll land into an office room, where a laptop is presenting something on a screen.
The collectible is sat on the table with the laptop.
Chapter 10, “For England”
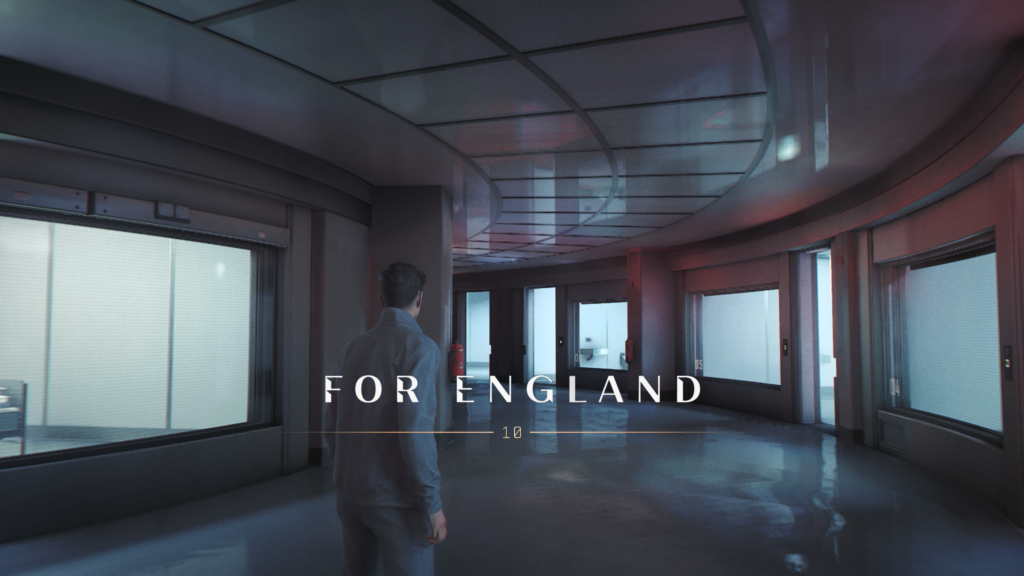
Playing Card (1 / 3) – King of Bells
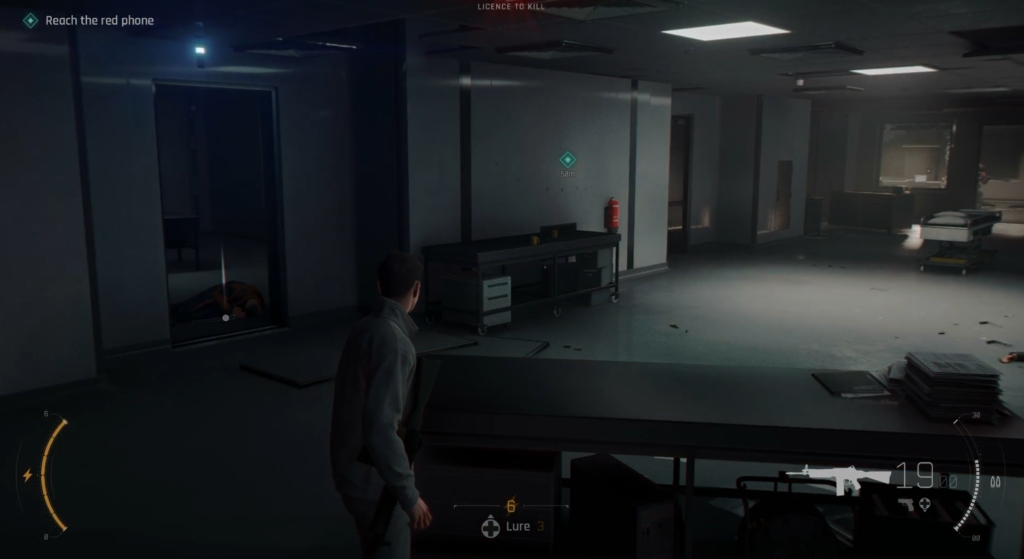
Near the beginning of the game, you’ll enter a space with several rooms and enemies patrolling. Near where you enter the area, look to the left and enter the doorway you’ll see to your left.
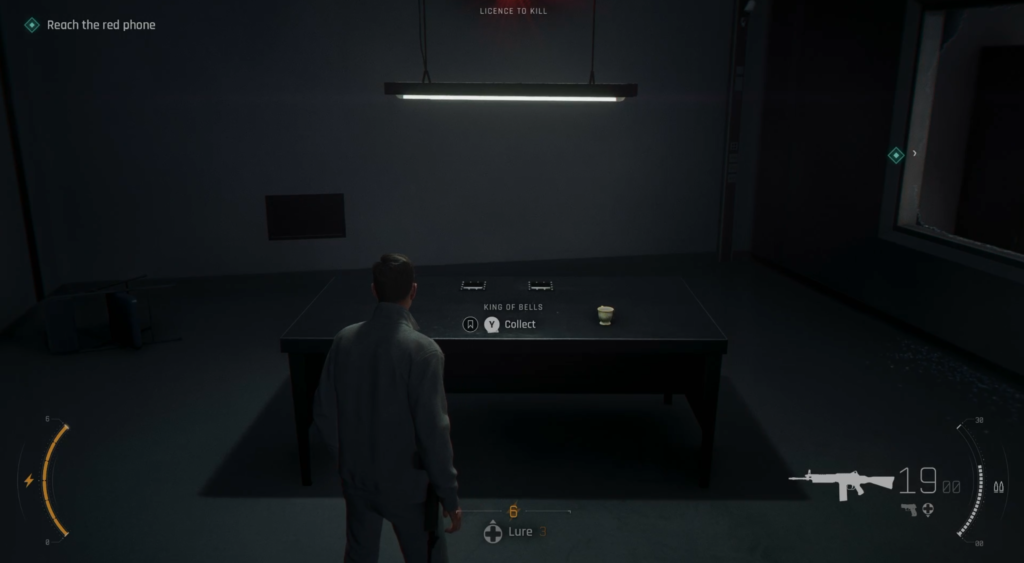
In the room, you’ll find the playing card on a table.
Postcard (1 / 1) – MI6
After making your way through some more enemies and reconnecting with M, who will reactivate your Q-Lens, you’ll enter a utility corridor. You’ll need to squeeze through a gap to progress.
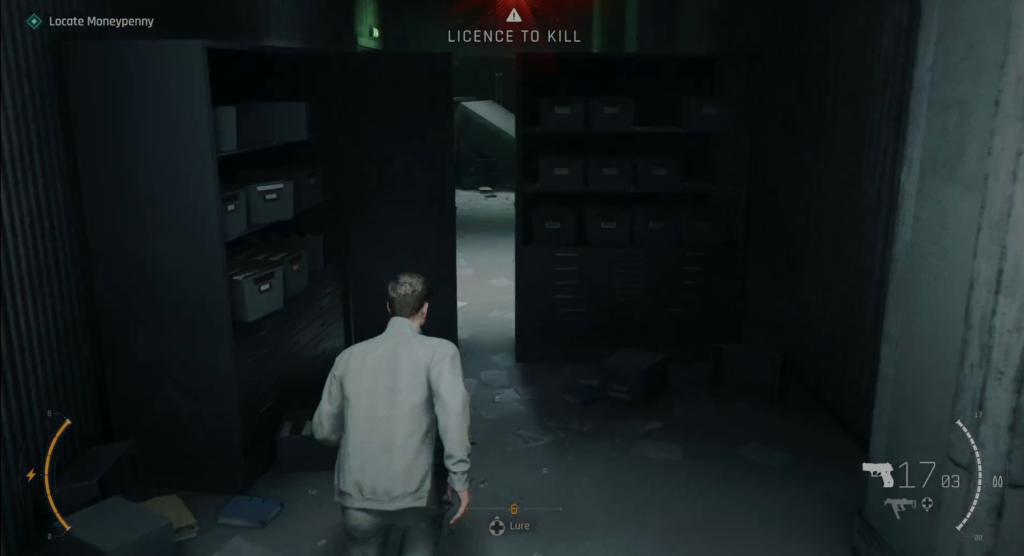
Immediately as you pass through, on the floor, to your immediate right, is the postcard. Easy to miss.
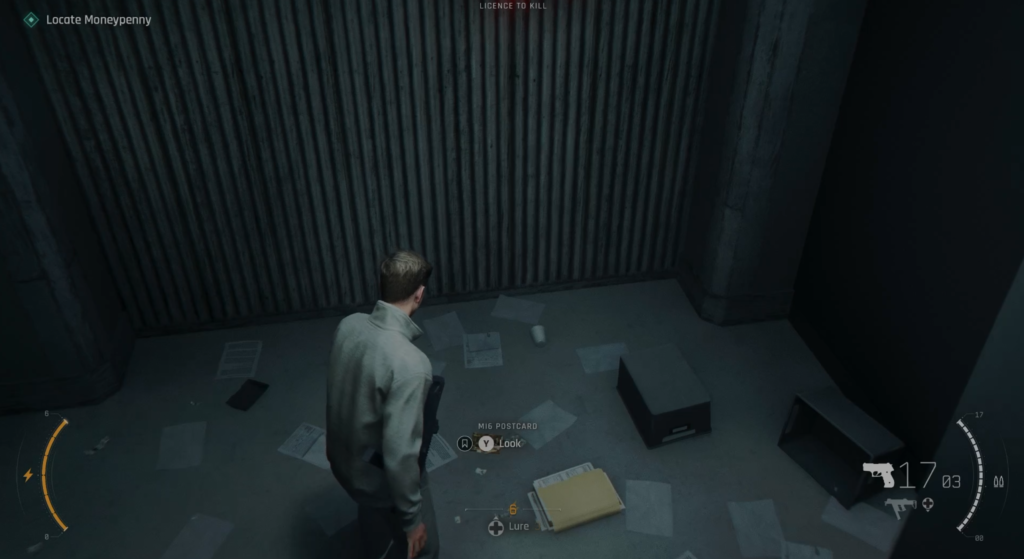
Playing Card (2 / 3) – Ace of Shields
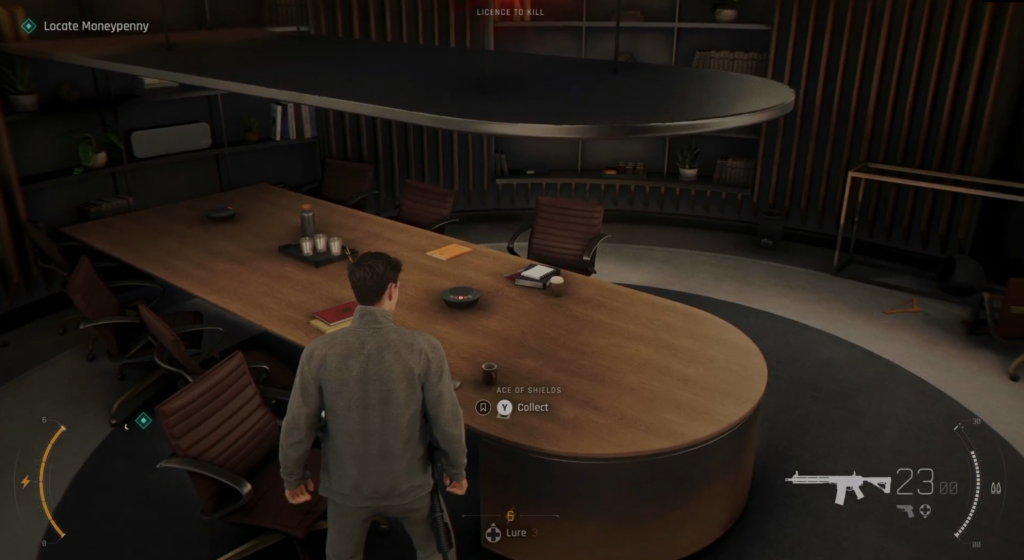
After you’ve made your way through some offices taking out a whole load of enemies, you’ll head through a set of double doors, in search of Moneypenny. You’ll arrive in the area where her office pen is (to the right). Head to the pen on the left first of all (don’t go to Moneypenny’s, it’ll trigger a cutscene where you’ll miss the collectible).
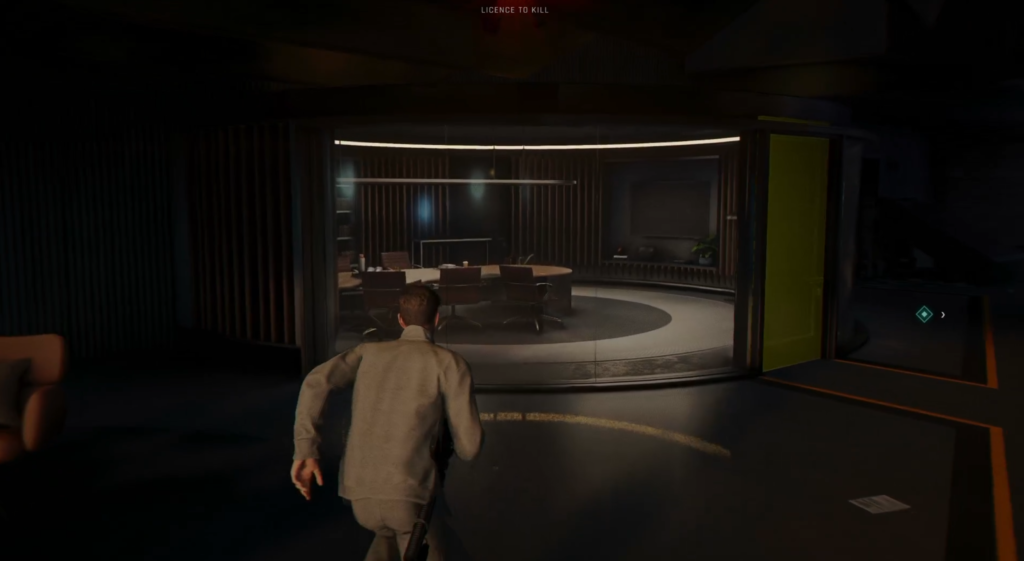
As you enter the office, on the table in front of you is the playing card.
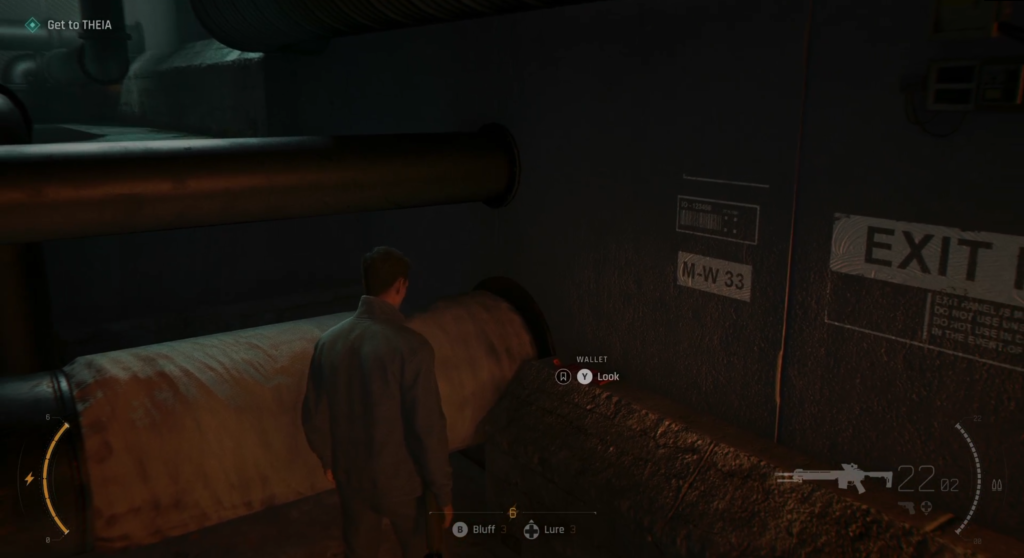
Intel (1 / 1) – Eve Moneypenny
You’ll enter some more maintenance tunnels and have to pass through a vent that has an activated fan on. Once you’ve found the fusebox (N.B: it’s behind you (and up a bit)) you’ll be able to head through.
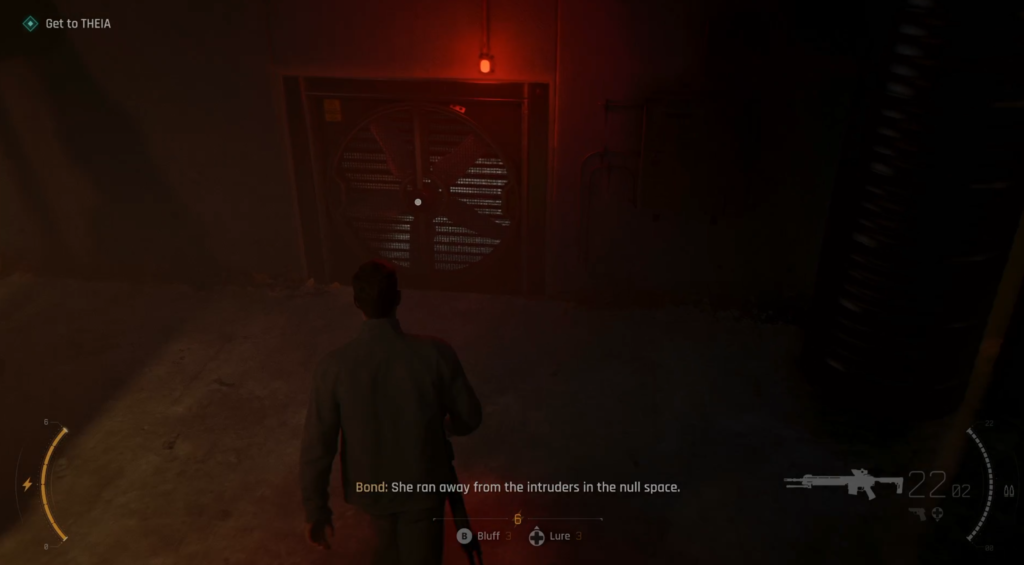
As you’ve head through, look to you left on a pipe. You’ll see the collectible.
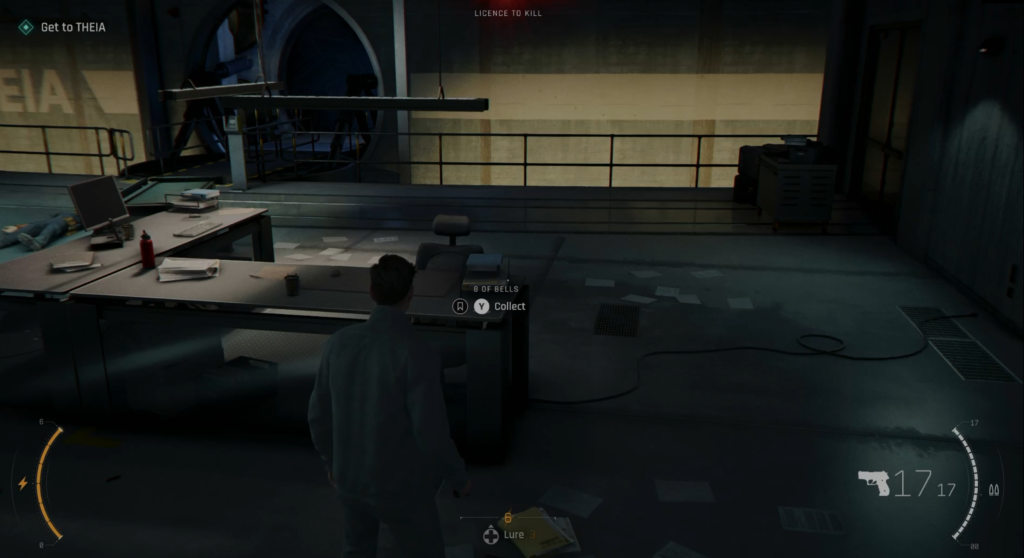
Playing Card (3 / 3) – 8 of Bells
You’ll pry open some lift doors before dropping down and into the lift proper. When the doors open, you’ll need to take out three enemies. After doing so, head to the desk on the right to find the playing card.
If you progress forward to the door in front of you, you’ll trigger a cutscene and you can’t get back to it without a replay.
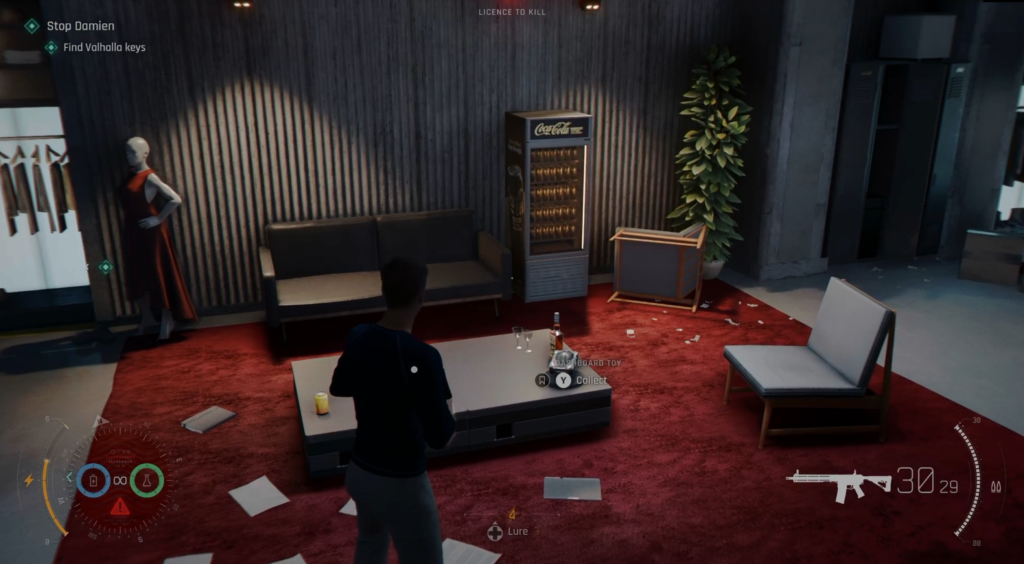
Memento (1 / 1) – Dashboard Toy
Later on, you’ll arrive at Q-Lab to take out some enemies. You’re objective will be to retrieve the keys for the Valhalla. These keys are in Wearables at the back (near where you enter from the lifts normally). Once inside, head towards the centre, opposite the two changing rooms, you’ll see the collectible on a low table.
That’s all we’ve found in the Chapter 10. If you’ve been following these guides, that’s everything!
007: First Light Guides
- Achievement / Trophy List
- 00 Prologue – “Against the Odds” collectibles guide
- Chapter 01 – “The Needle’s Eye” collectibles guide
- Chapter 02 – “A Night Out” collectibles guide
- Chapter 03 – “All the Time in the World” collectibles guide
- Chapter 04 – “The Past Never Dies” collectibles guide
- Chapter 05 – “Beyond the Grave” collectibles guide
- Chapter 06 – “Uninvited” collectibles guide
- Chapter 07 – “Knightfall” collectibles guide
- Chapter 08 – “Time to Die” collectibles guide
- Chapter 09 – “Wave of the Future” collectibles guide
- Chapter 10 – “For England” collectibles guide