Cthulhu: The Cosmic Abyss has a ton of collectibles scattered throughout its Lovecraftian-inspired world that are well worth picking up if you simply stray off the beaten path. In today’s guide, I will be showing you where to find all the perks in Cthulhu: The Cosmic Abyss by chapter. I will have a short description for each perk’s location down below to make your life easier, but without further ado, here is our Augmented Agent trophy/achievement guide for Cthulhu: The Cosmic Abyss.
Check out our Cthulhu: The Cosmic Abyss Review for our full thoughts on the game.
Augmented Agent Trophy Guide
The Augmented Agent trophy/achievement is unlocked by finding all of the Evolutions in the game. They appear as slabs of stone about the size of a large book with a glowing symbol on it. Interacting with the tablet will unlock the Evolution stored on it, allowing you to equip it in the menus.
There are 15 perks total, and I have divided them by chapters to save you from the dreaded spoilers.
Chapter 2 Evolution Locations
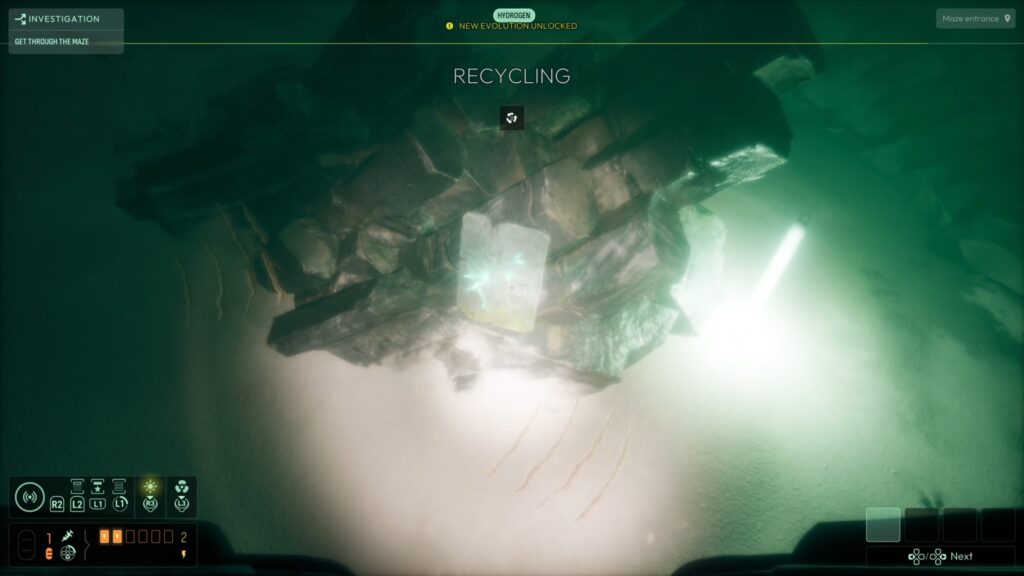
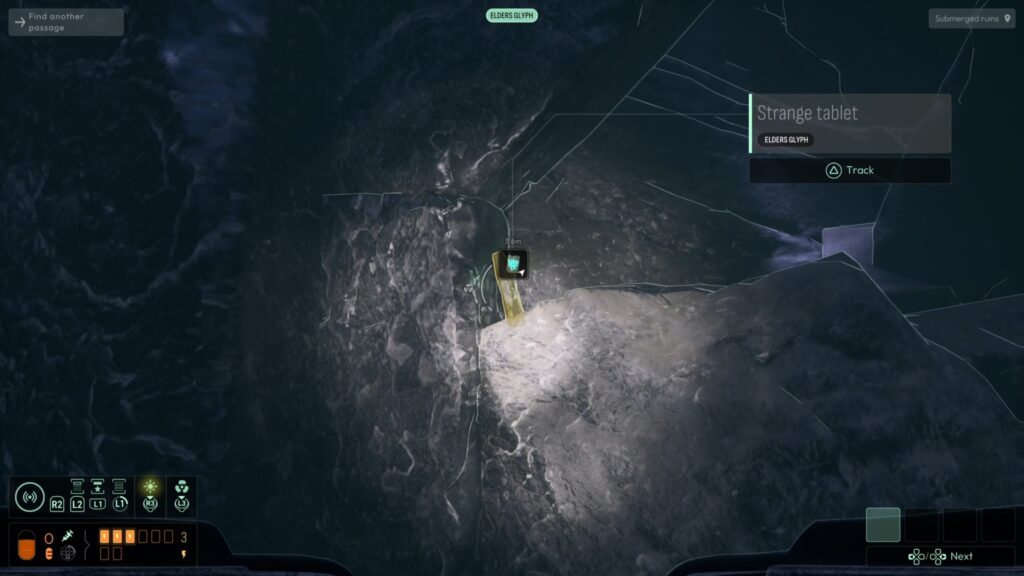
Evolution #1: Located in the maze to the left as soon as you come in. Unmissable, as it is tied to the story and used as an introduction to finding perks scattered around the various chapters. This is where you also learn the Elder Glyph sonar, a vital part of the collectibles journey, as it allows you to find Evolutions and the obelisks that let you equip more of them.
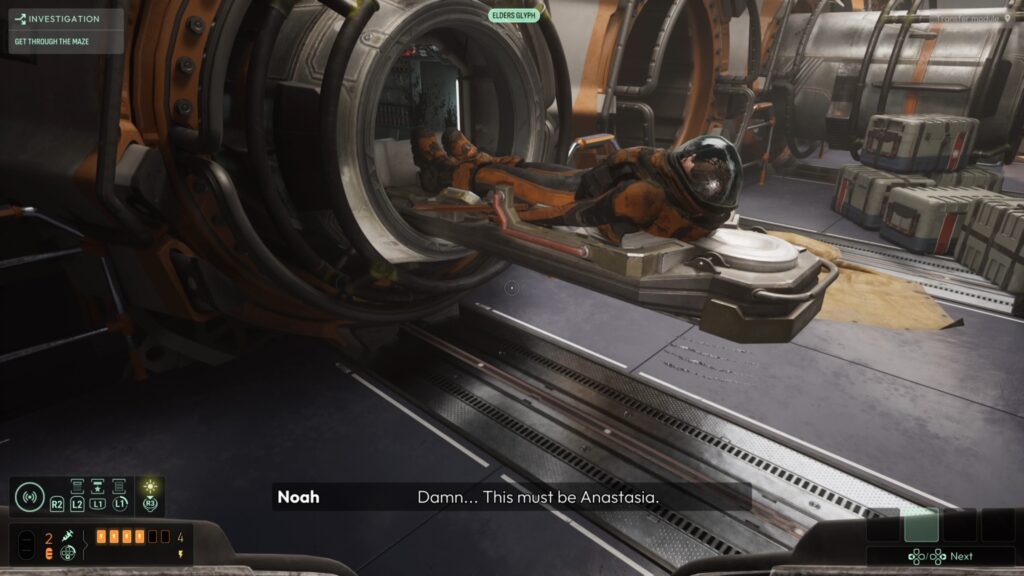
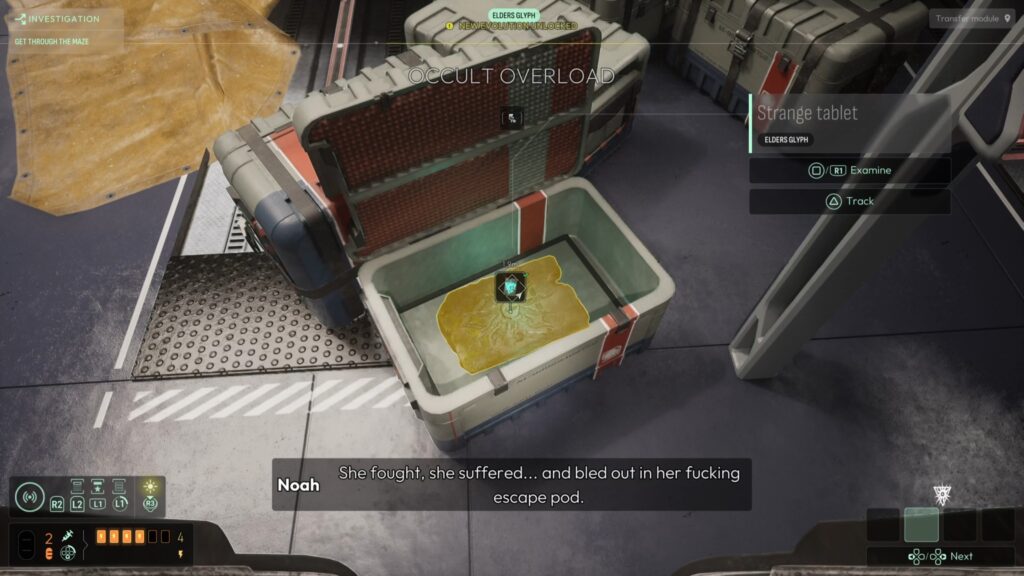
Evolution #2: This perk’s location is behind the water-locked doors in the station itself. This perk requires that you go along the Low Corruption Path, check out our Against The Tide Trophy Guide for help with that where you’ll have to fix the plumbing to access this section of the station. Once you’ve unlocked it and you have access to the room, the perk is simply in a closed box to the right of Anastasia’s body. If you can’t find it, equip the Elder Glyph sonar frequency, and it should pop up in your HUD.
Chapter 3 Evolution Locations
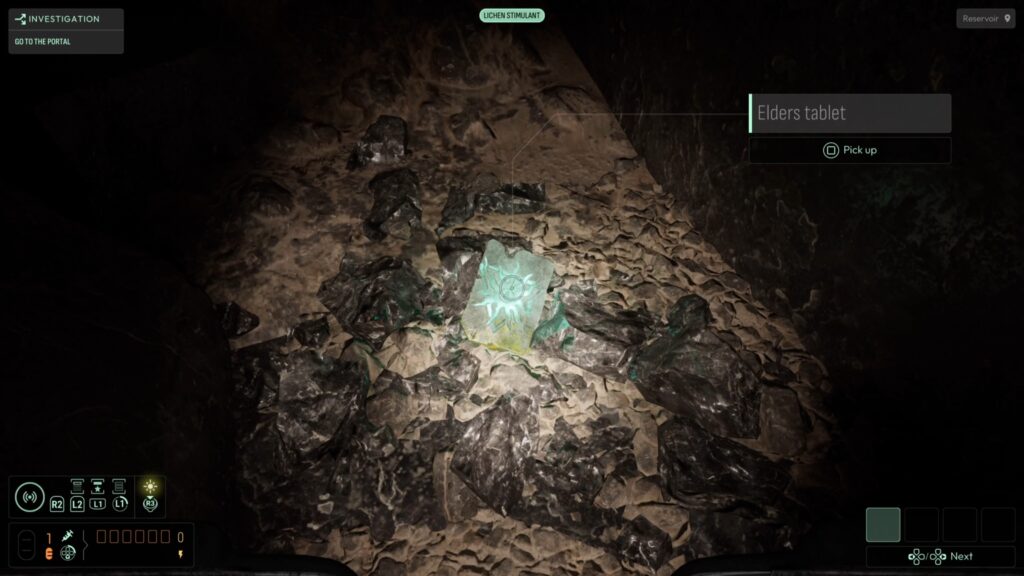
Evolution #3: The first perk in Chapter 3 is located after the cutscene with David Curwen, the crucified man. You are going to want to head towards the other lab located behind you to the right if you’re facing David. You will see a small stone bridge that connects the two areas, and what you’re going to want to do is head down the small path to the left until you reach a small cave. The third perk is located at the end of the path. If you can’t find it, equip the Elder Glyph sonar frequency, and it should pop up in your HUD.
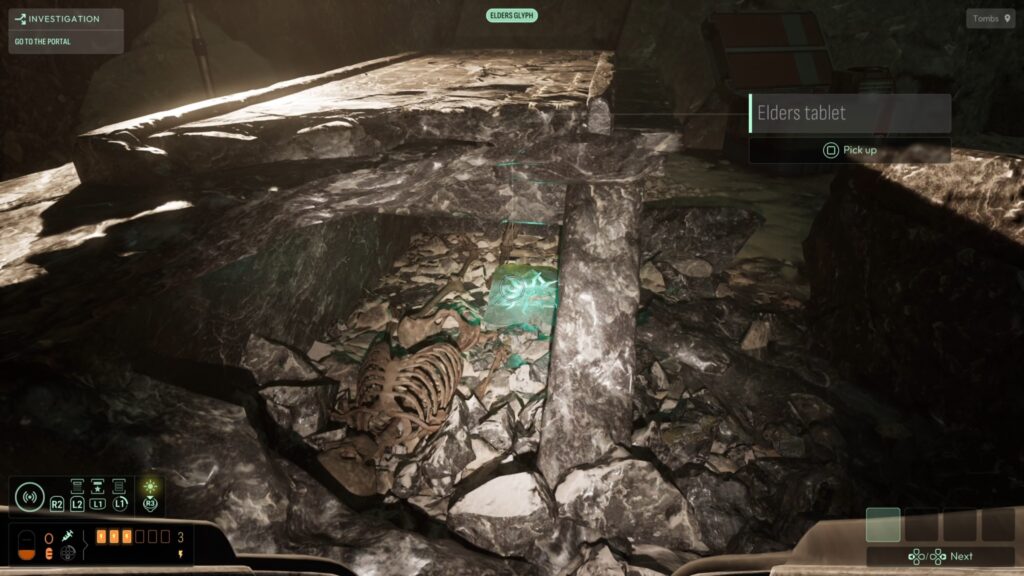
Evolution #4: This perk is simply down the stairs from where David is, to the right of the small camp. You’ll notice a sarcophagus with a chunk taken out of it. All you have to do is simply remove the chunk, and you should be able to pick up the perk. If you can’t find it, equip the Elder Glyph sonar frequency, and it should pop up in your HUD.
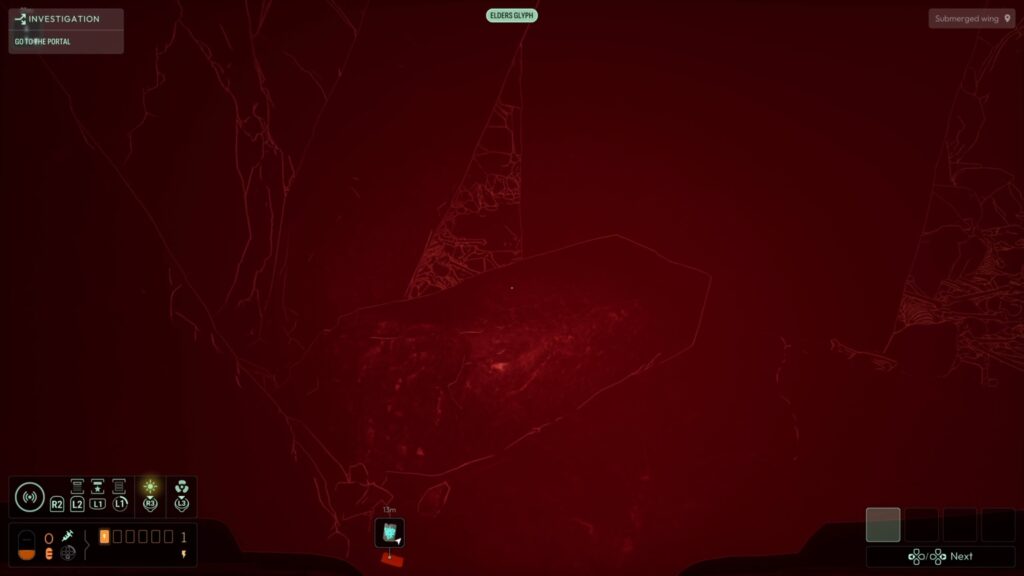

Evolution #5: This one is a little tricky. From our favorite man, David, head to the left into the room that looks like it’s flooded by blood and other nasty fluids. You are going to want to head to the submerged right doorway; the left is collapsed, so there’s really only one choice, and make your way down into the nastiness. The key here is to keep spamming your sonar, or you won’t be able to see. I recommend you equip the Elder Glyph sonar frequency so you have some kind of heading, but you do you. You see that this glyph is hidden behind a wall of stone that is impenetrable, but don’t fret. Simply look for the A-shaped stone column like above, and swim through it until you find it.
Chapter 4 Evolution Locations
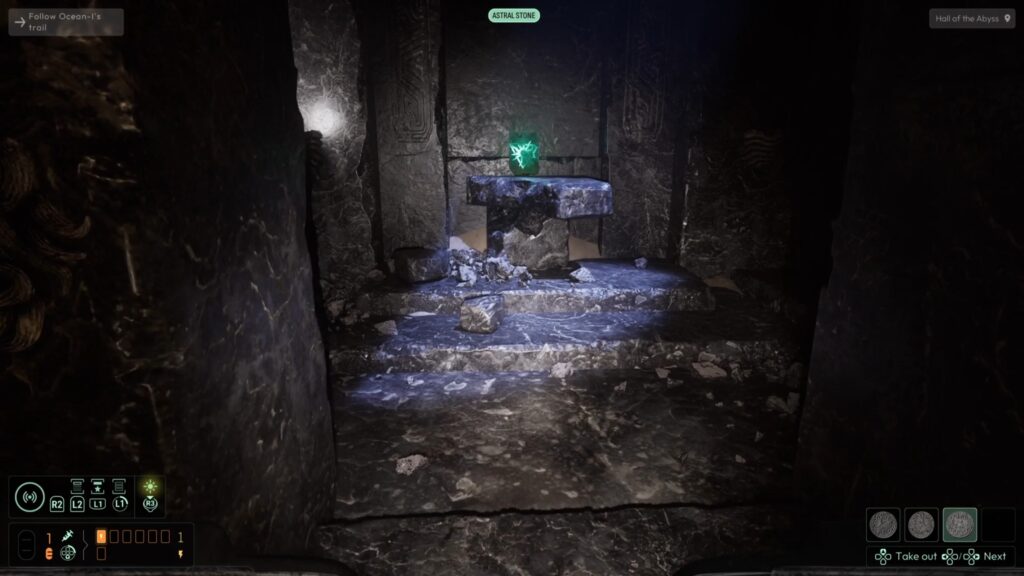
Evolution #6: The first perk you find in Chapter 6 is one that is tied to a bit of a puzzle that requires you to think outside the box just a little. Once you enter the room past the mass of bones with the hole you have to jump into in the middle, you’ll more than likely notice a Cthulhu-looking plaque on the left side next to a conveniently placed doorway. On the opposite side of the room, parallel to the door, is a stone amulet that appears as if it fits perfectly into the slot. Just kidding! What you’re going to want to do here is equip the Astral Stone sonar frequency you just unlocked from picking up the amulet, and head back towards the mass of skeletons.
Scattered amongst them are three amulets. Simply grab all of them and place them into the slot until you find the one that matches the insignia on the wall, and bam. The door should open, and the perk awaits.
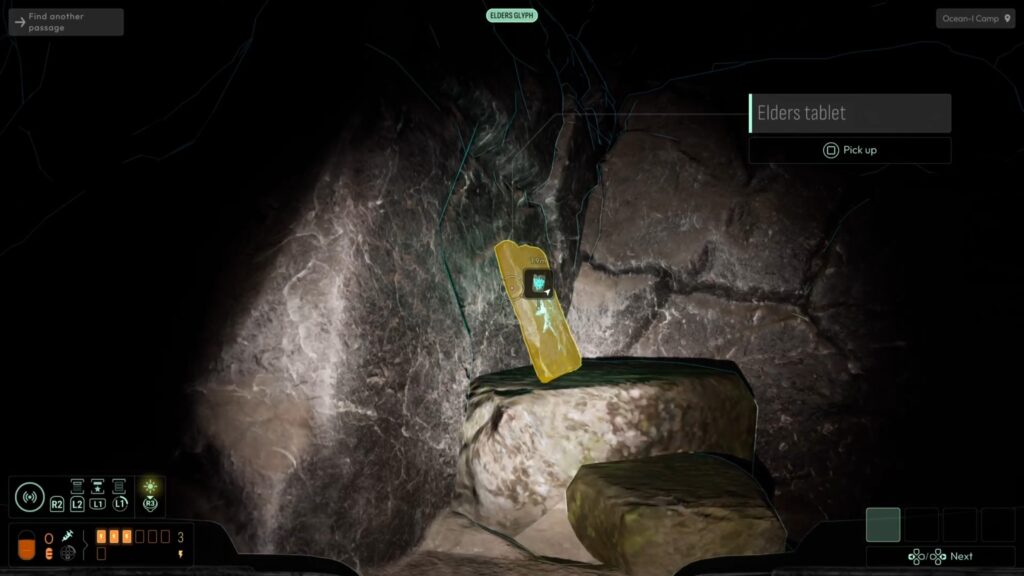
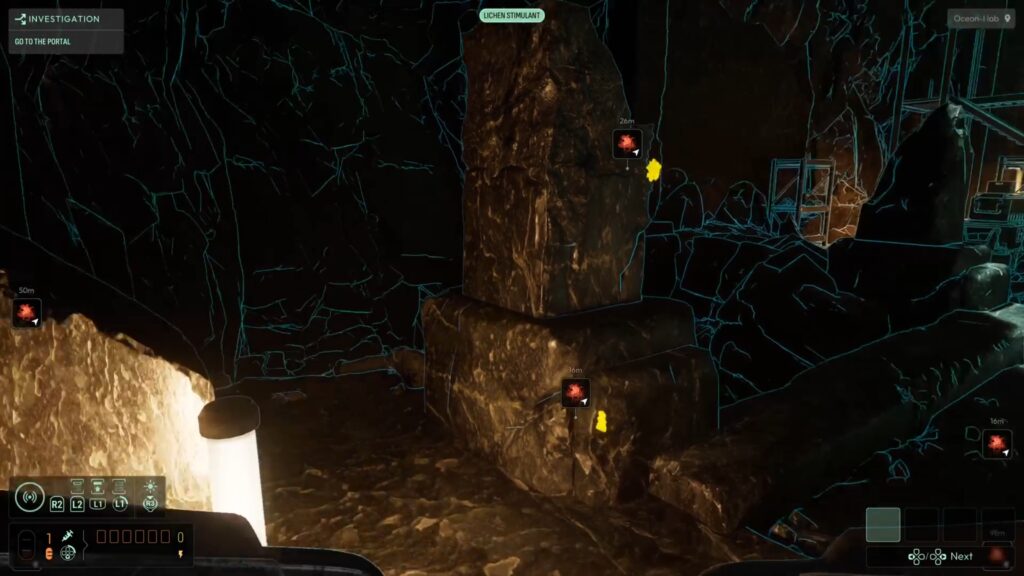
Evolution #7: The next perk is located right before Elsa’s camp on the left side, in some rocks. You will have to enter the water and stick left to get here, but there is very little you have to do but follow the path in front of you. It’s extremely hard to miss, and like the blue lichen in this area, it shouldn’t be too hard to find. If you can’t find it, equip the Elder Glyph sonar frequency, and it should pop up in your HUD.
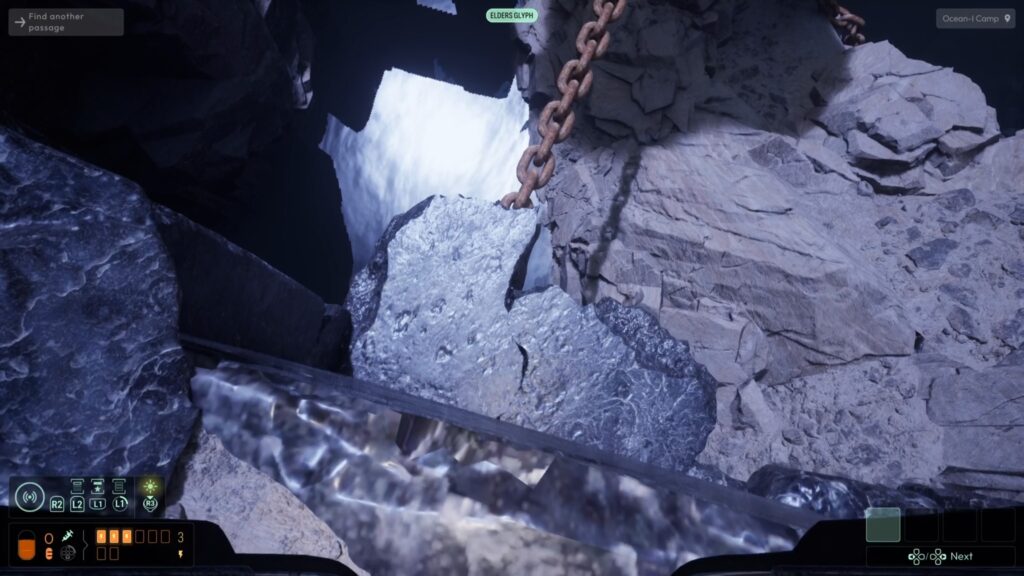
Evolution #8: After leaving Elsa’s camp, you will be tasked with finding a way to stop the current from flowing so you can get by. You will have to drop down on this chain to do so, and the next perk is to the right in the water, nestled between some stone pillars. If you can’t find it, equip the Elder Glyph sonar frequency, and it should pop up in your HUD.
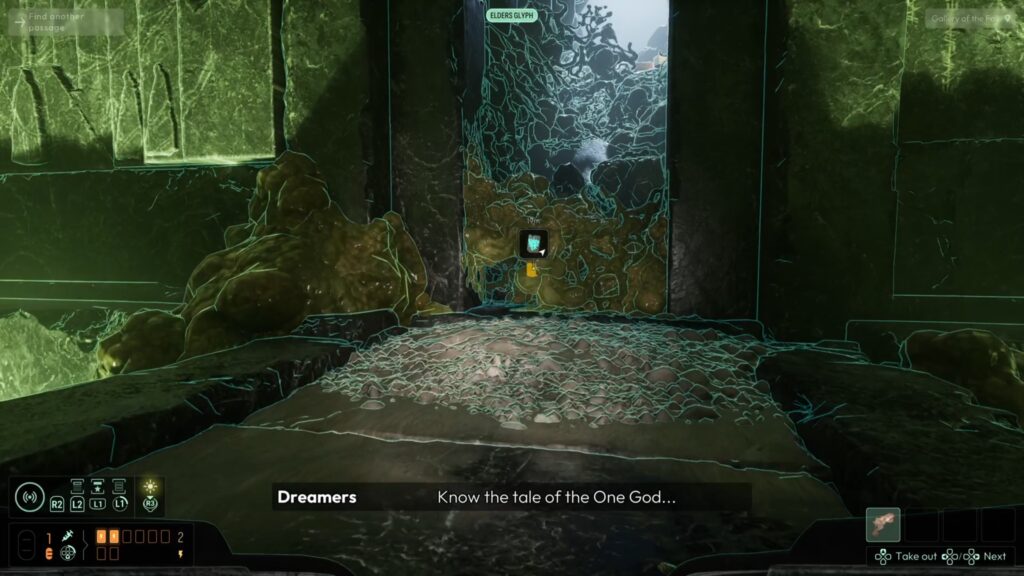
Evolution #9: After making your way through the waterways, you should end up in a big hallway that shows the different stages of Cthulhu’s imprisonment. In this hall, the next perk is to the right behind some nasty-looking organic material. Simply crouch and navigate through it, and you’ll be treated with perk number nine. If you can’t find it, equip the Elder Glyph sonar frequency, and it should pop up in your HUD.
Chapter 5 Evolution Locations
WARNING: Finding all the perks in Chapter 5 is, in every sense of the word, a pain. My recommendation is that you do not even attempt to get to them until you have a frequency where you can see the monsters’ tentacles (Human Blood, Shoggoth heart, and Macroplankton) and access to the metal pucks that allow you to open magnetized objects and doors.
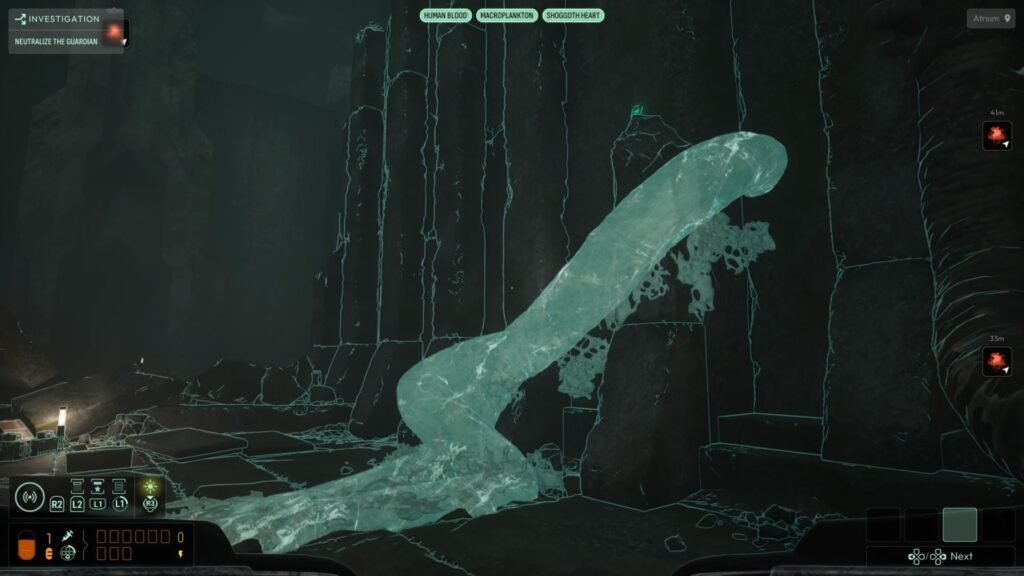
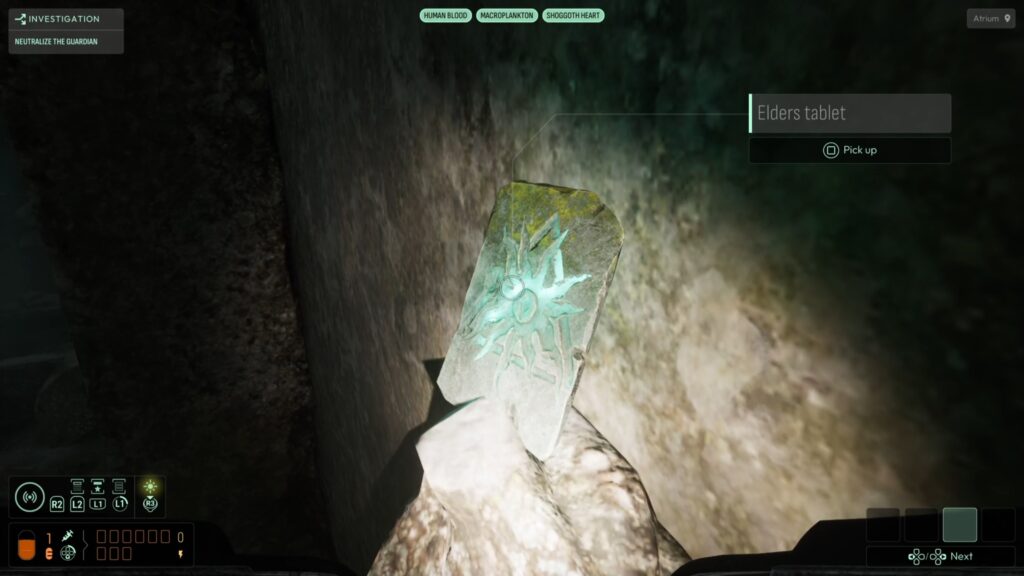
Evolution #10: The first perk in the area is located to the left of where you entered the citadel. Using the Human Blood, Shoggoth heart, and Macroplankton sonar frequency, you’ll notice the conveniently placed monster limb that leads up to a shiny blue trinket above. Quickly climb up this limb, and the perk will be waiting for you at the top. Just don’t get eaten by a grabber. If you can’t find it, equip the Elder Glyph sonar frequency, and it should pop up in your HUD.
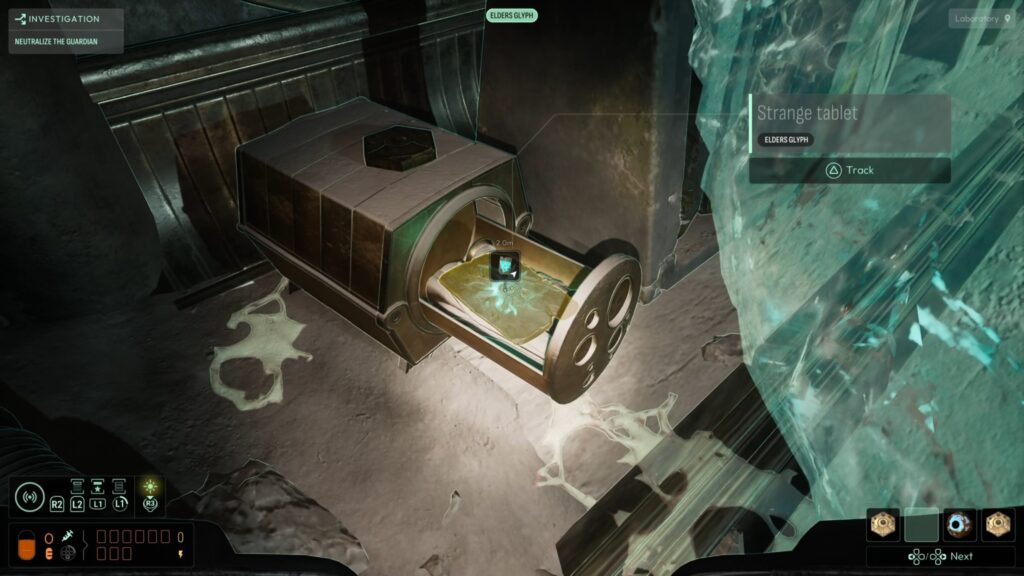
Evolution #11: The next perk is located in the same area where you first discover the metal pucks and the magnetic doorway that needs two pucks to open after crossing over from the middle. It will be on the right side of the second floor, and all you have to do to open this chest is place a puck on the top of it. Video shown for your reference. If you can’t find it, equip the Elder Glyph sonar frequency, and it should pop up in your HUD.
Evolution #12: For our next perk, we’re going to grab one of the metal pucks and backtrack to where we first discovered the sonar frequency to see the monster’s tentacles. Simply head back up the second floor, and when you go to cross the invisible tentacles, turn left instead of crossing over like you did to progress and place the puck on top of the chest to open it. Easy. If you can’t find it, equip the Elder Glyph sonar frequency, and it should pop up in your HUD.
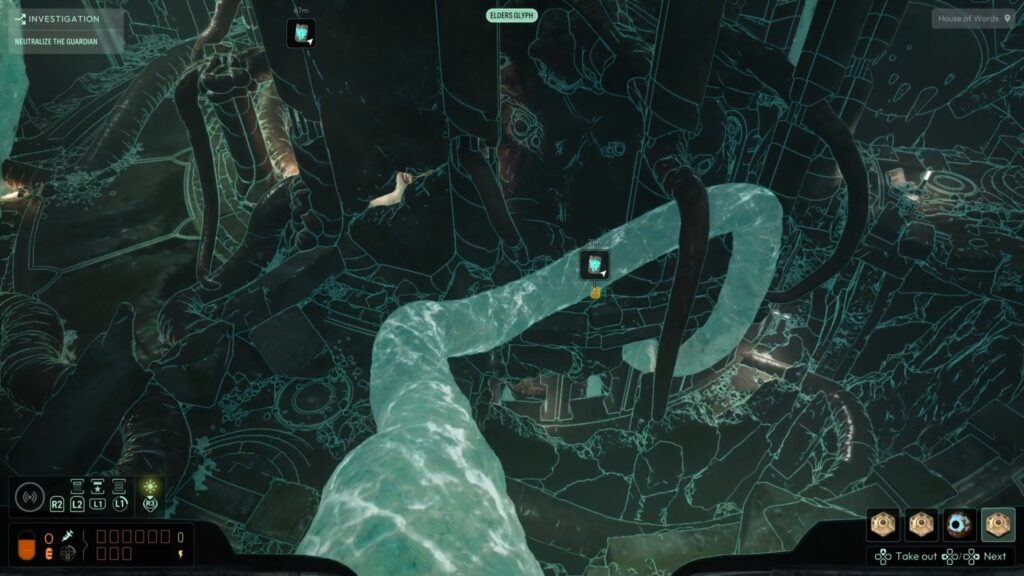
Evolution #13: This one is a huge pain, and I highly recommend you watch how I got there. First order of business is to equip the Elder Glyph sonar frequency so it pops up in your HUD. You’ll probably come to the same realization as me that it’s in a weird spot right in the middle of the map with no super obvious ways to get there. Simply follow my path, and you should be able to grab it easily.
Chapter 6 Evolution Locations
WARNING: This chapter is where things get a bit harder to explain if you aren’t at exactly the right place. Both of these are technically locked behind unmissable aspects of the campaign, BUT if you are not sure what to do, we can help.
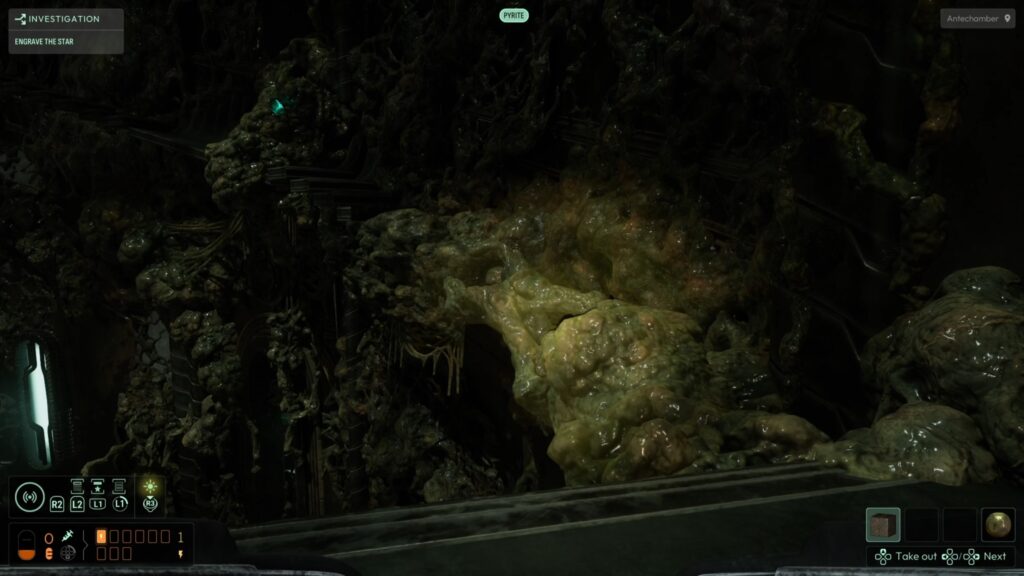
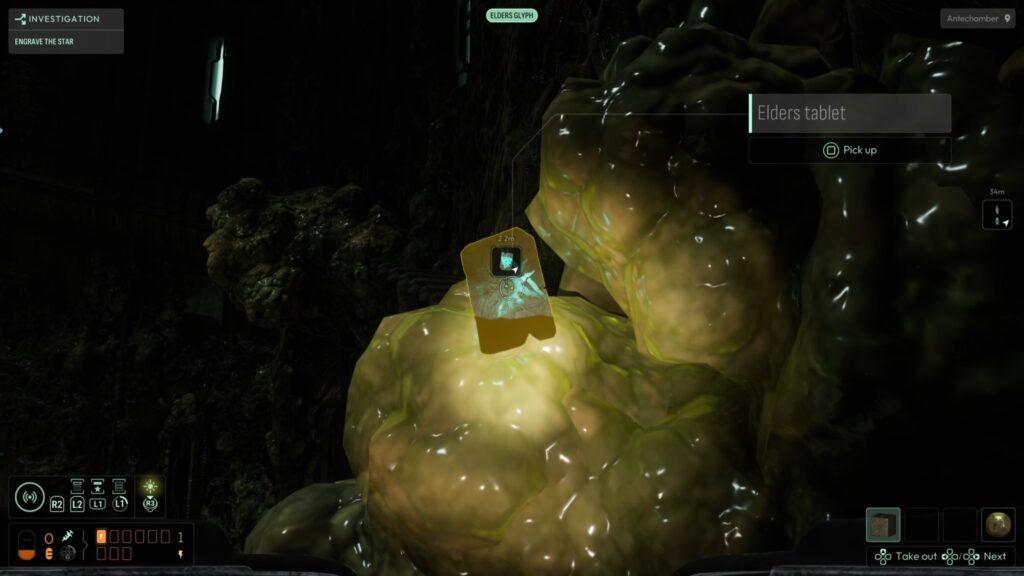
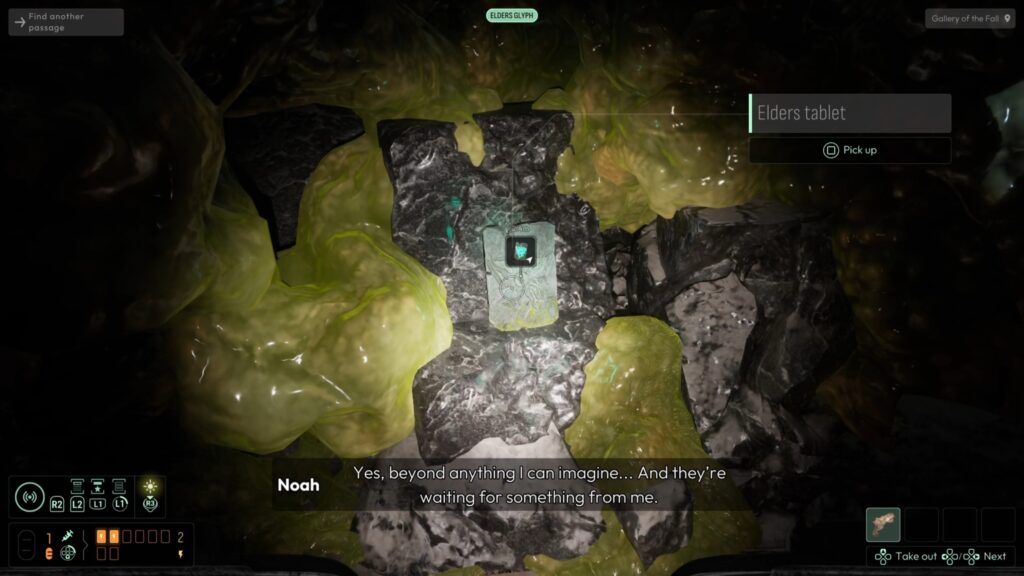
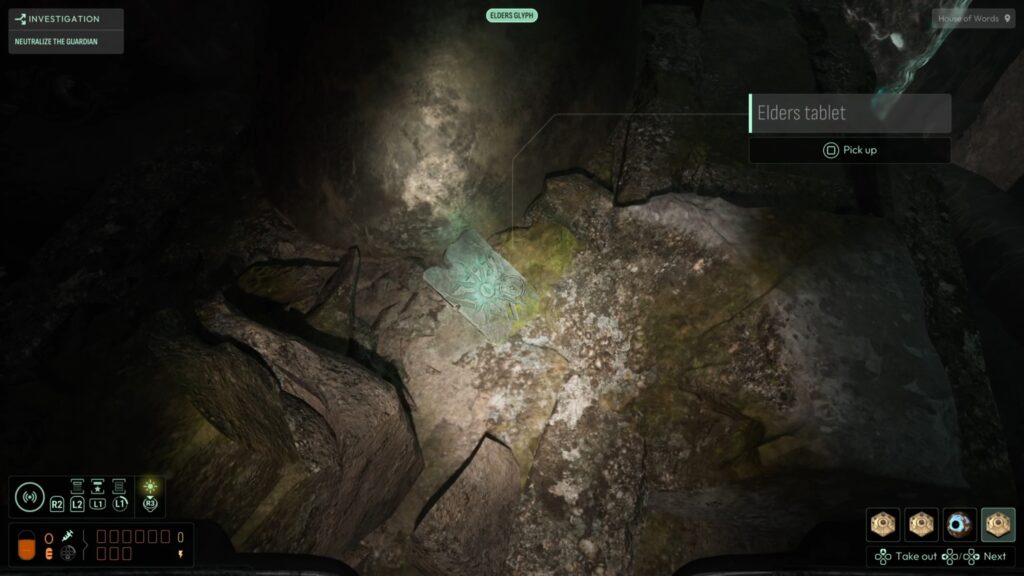
Evolution #14: The first perk in Chapter 6 is relatively easy to find, but won’t be accessible till you activate a very specific part when you head into the Yith’s past. You’ll know you’re at the correct point when your character remarks on the foundations shaking, and you’ll also notice more of the gross living matter spreading out from the walls. Simply head back up the stairs towards the doorway where you entered this room. Turn to your right, and you will see a rough-looking path made out of that same living matter with a blue light at the top of it. That’s our first perk! If you can’t find it, equip the Elder Glyph sonar frequency, and it should pop up in your HUD.
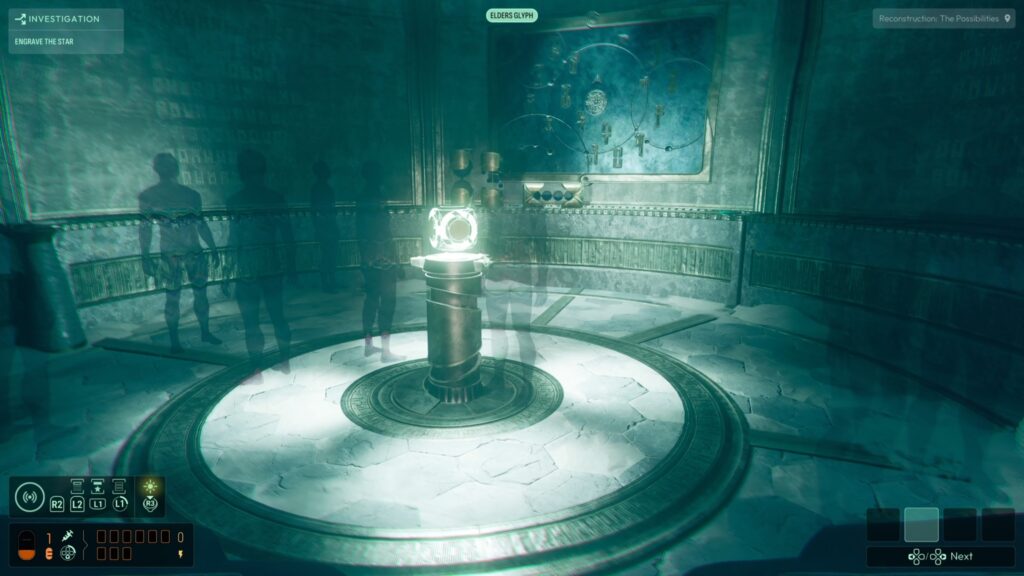

Evolution #15: The last perk in the game is the one that I missed on my first playthrough. After experiencing the first memory of the Yith’s past, you will be able to experience another one on the opposite side of the chamber to progress, and the last perk is in this memory on the right side of the room, right in plain sight.
With all 15 Evolutions collected, you will unlock the Augmented Agent trophy/achievement!
That was our Augmented Agent trophy/achievement guide! We hope it was helpful, and you can find more guides for Cthulhu: The Cosmic Abyss below.
Are you trying to unlock all of the trophies/achievements in Cthulhu: The Cosmic Abyss? Let us know in the comments below, and join the Gamer Social Club Discord to chat about your favourite games, play in community game nights, take part in giveaways, and more!
Cthulhu: The Cosmic Abyss Guides
- 100% Trophy Guide
- Full Charge Trophy Guide
- Artist Trophy Guide
- Against The Tide Trophy Guide
- Ph’nglui mglw’nafh Cthulhu R’lyeh wgah’nagl fhtagn Trophy Guide
- In Deep Waters Trophy Guide
- Linguist Trophy Guide
- Beyond The Senses Trophy Guide
- His Master’s Voice Trophy Guide
- Open Sesame Trophy Guide
- Where Am I? Trophy Guide
- Better Than Pandora Trophy Guide