
Like any good RPG, Final Fantasy Resonance has several side quests for you to undertake, and one of them has you bringing Tablet Shards to a mysterious “Princess” who resides in the Oblivion Palace. As well as getting you some powerful gear and items, the Princess’s Reward and Memento achievements/trophies are tied to this collect-athon, so here is our Tablet Shard guide to help you track them all down.
Check out our Final Fantasy Resonance Review for our full thoughts on the game.
SPOILER WARNING: While we avoid any narrative elements, this guide may contain spoilers.
Tablet Shards Guide
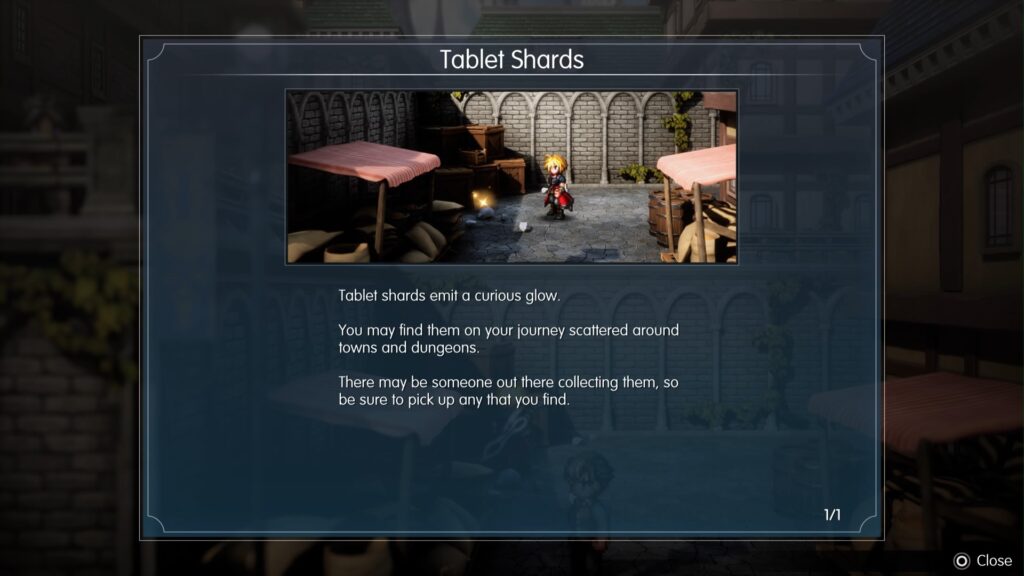
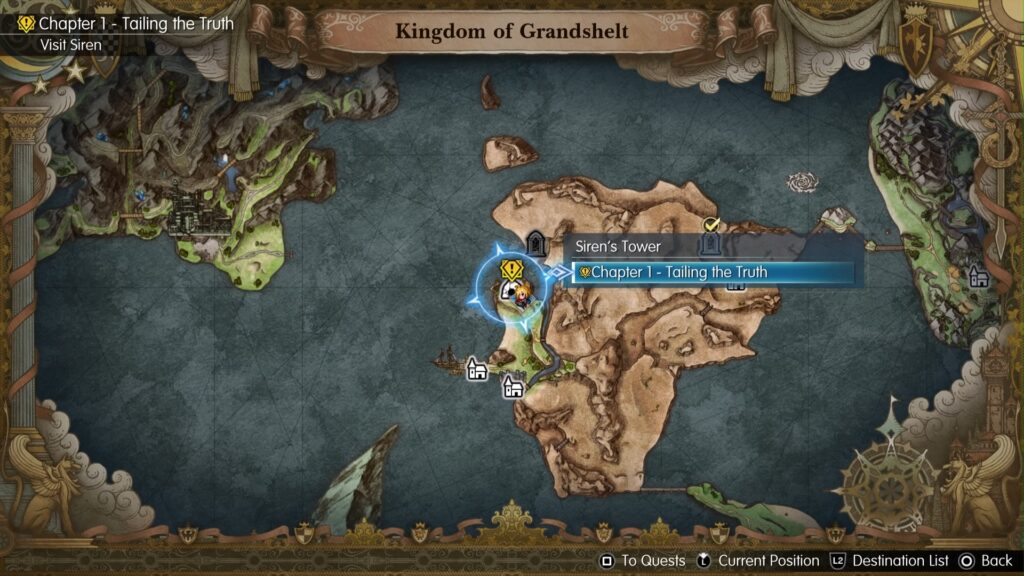
Scattered across the world of Lapis are many of these Tablet Shards, all with a distinct gold twinkling animation which makes them easier to spot, and none are hidden on the world map – just the locations you enter.
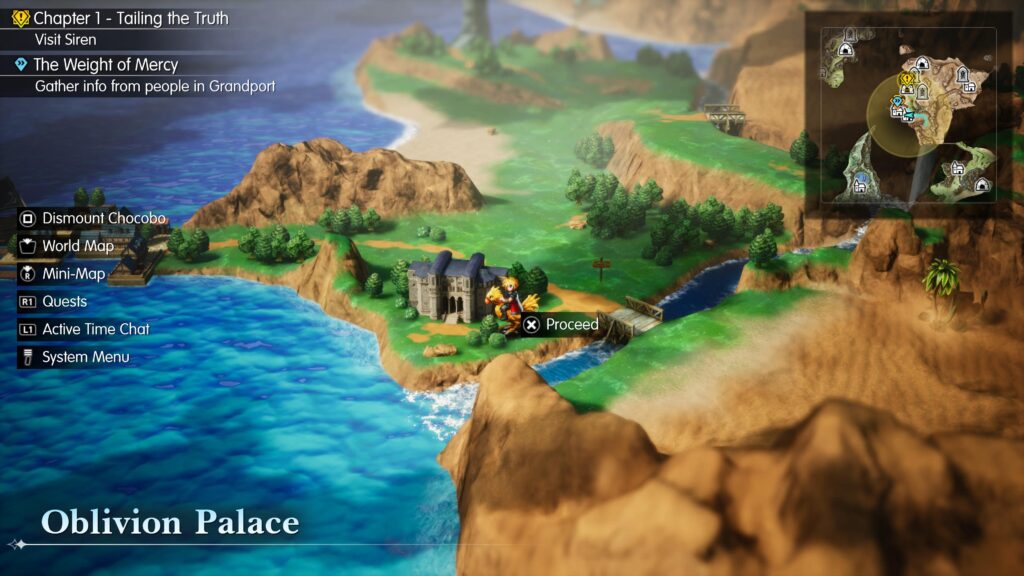
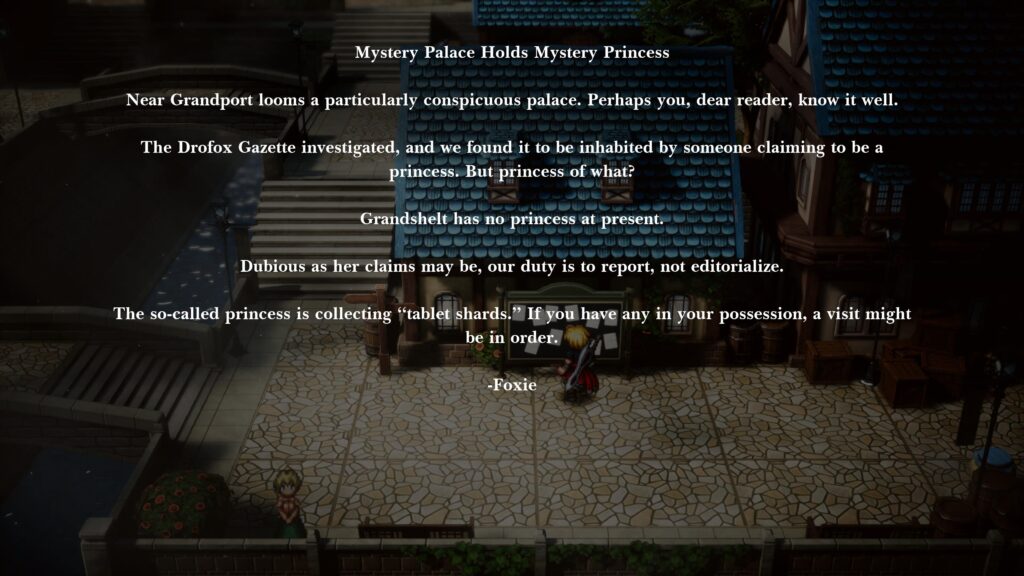
Take the Tablet Shards you find to the Princess in the Oblivion Palace, southeast of Granport Harbour. She has lost her memories except for knowing she is a princess, and returning the Tablet Shards seems to bring them back. She will reward you every time you give her a certain number of tablets by unlocking one of the chests in her treasure vaults.
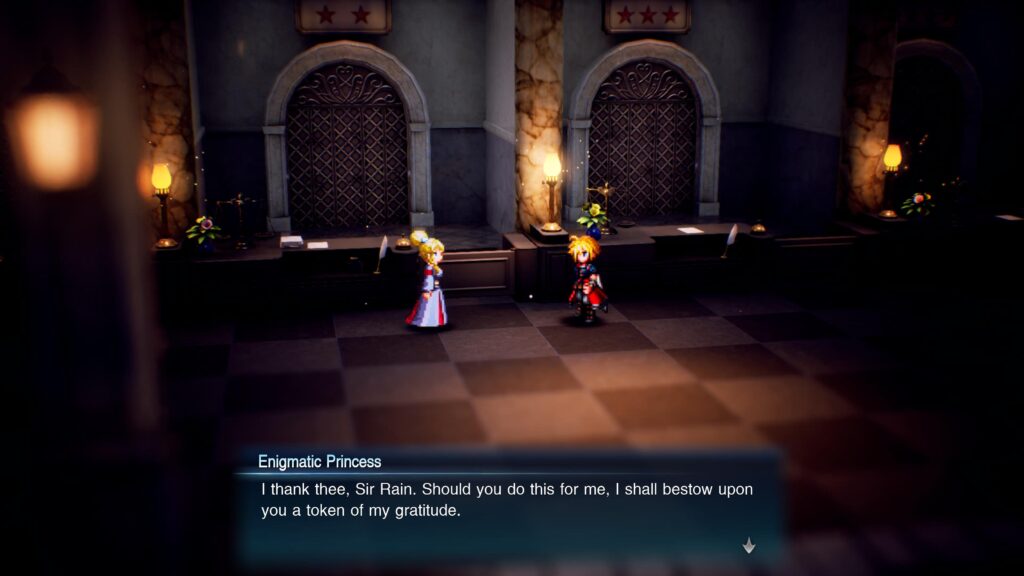
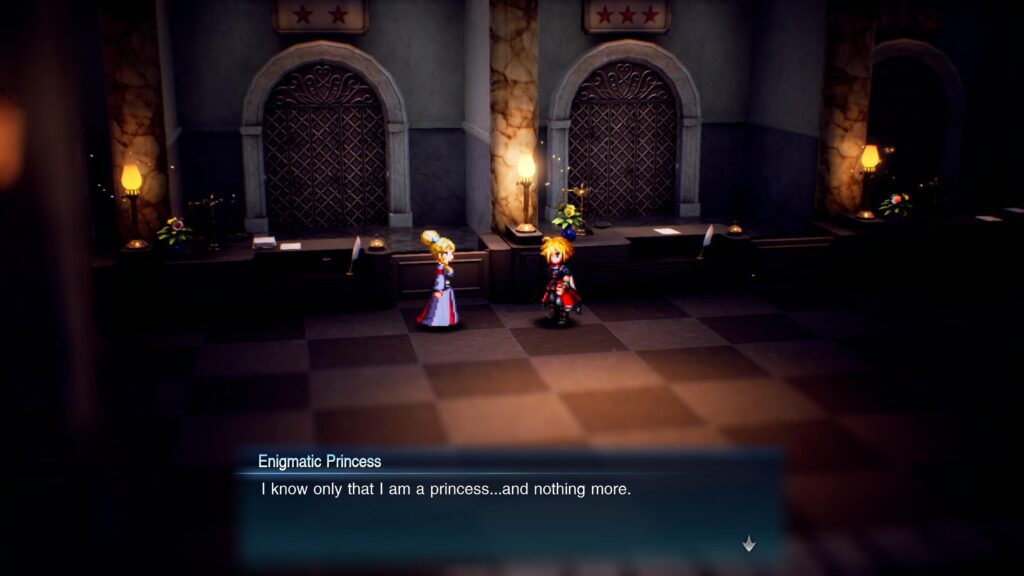
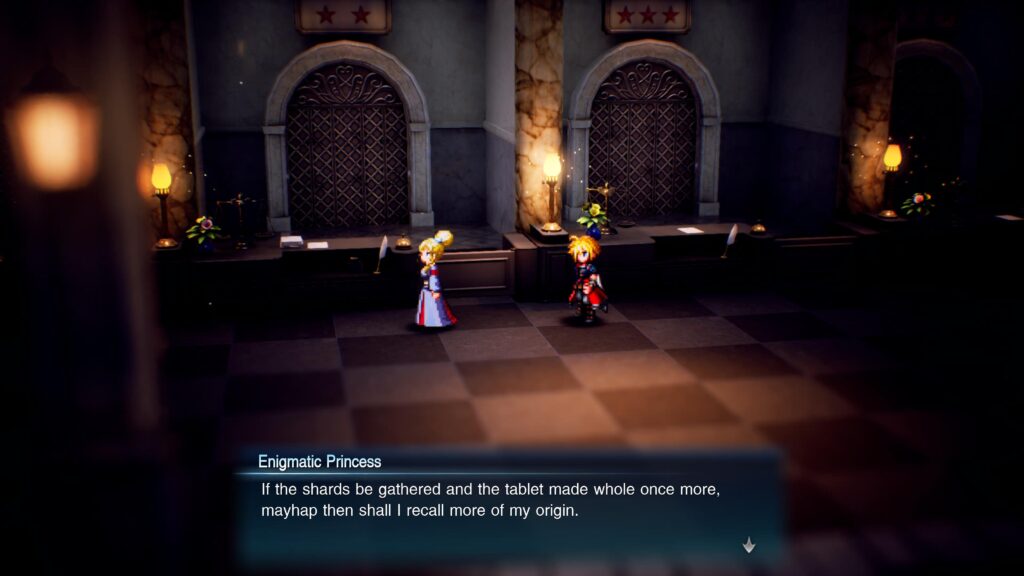
You will unlock the Princess’s Reward achievement/trophy for opening the first of her treasure chests and the Memento achievement/trophy for helping the Princess regain her second memory, which happens after giving her 60 Tablet Shards.
Tablet Shard Locations
Below is the location of every Tablet Shard in the game, grouped by settlement or dungeon and split into regions.
Kingdom of Grandshelt
- Grandshelt, The Royal Capital
- Town of Felicitas
- Village of Kol
- Kolobos Ruins
- Cavern of Swords
- Grandport Harbor
- Siren’s Tower
Dirnado, the Continent of Wind
Olderion Federation
Zoldaad Empire Territory
Mysidia, the Uncharted Land
- Mysidia, the Magiapolis
- Village of Sunioo
- Nameless Ruins
- Archwitch Fina’s Psyche
- Tower of Mysidia
- Archwitch Fina’s Psyche Part 2
Gronoa, The Shuttered Land
- Gaberada, the Undertown
- Research Center Ruins
- Rugged Mountain Path
- Town of Duggle
- Gronoa Shrine
- Sanctissimus Shrine
Kingdom of Pharm
Grandshelt, The Royal Capital
– 2 Shards –
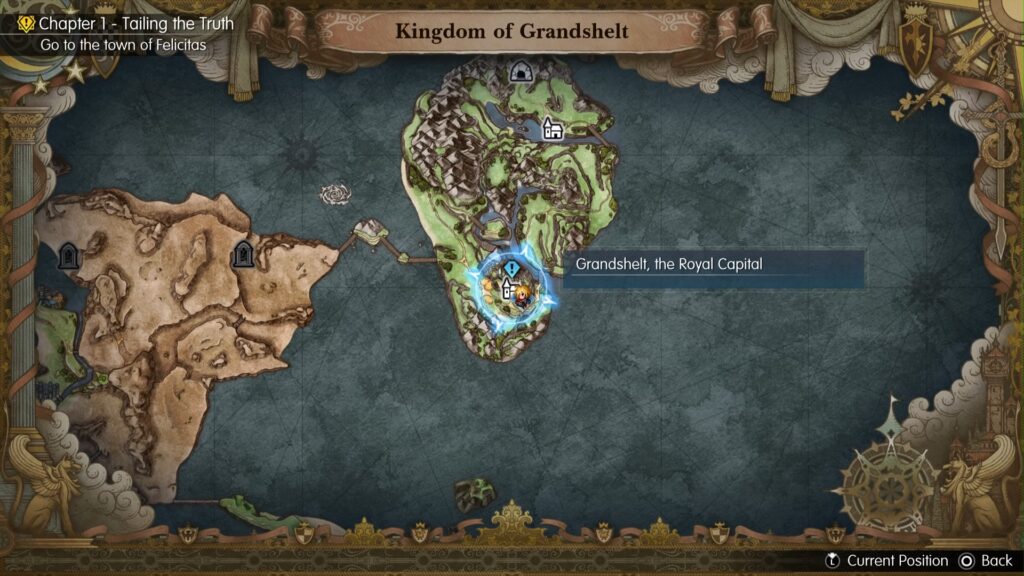
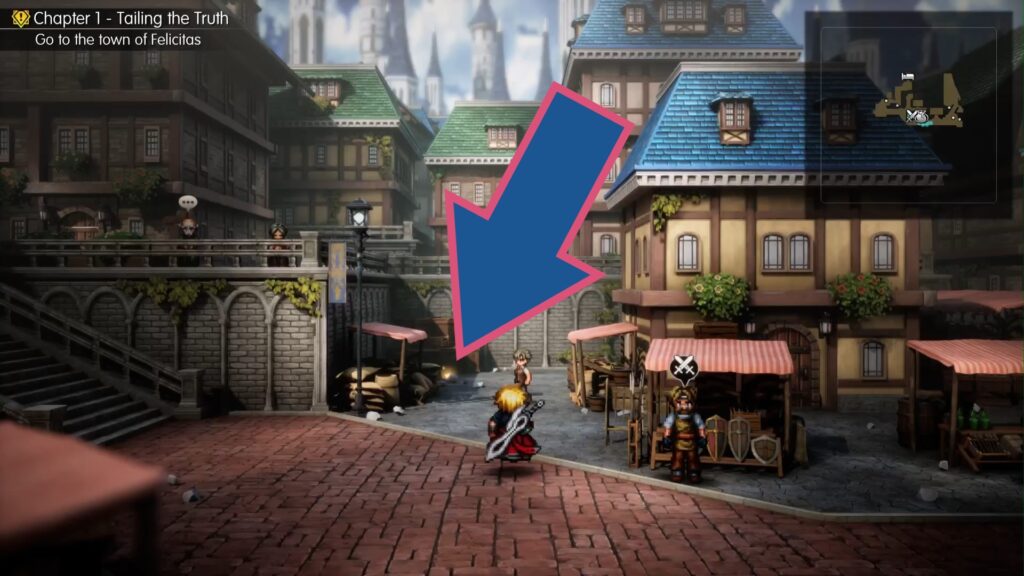
Head to the Commercial District and go to the back of the alley between the bottom of the stairs and the shop stalls. Look behind the piled-up burlap sacks on the left to find a shard.
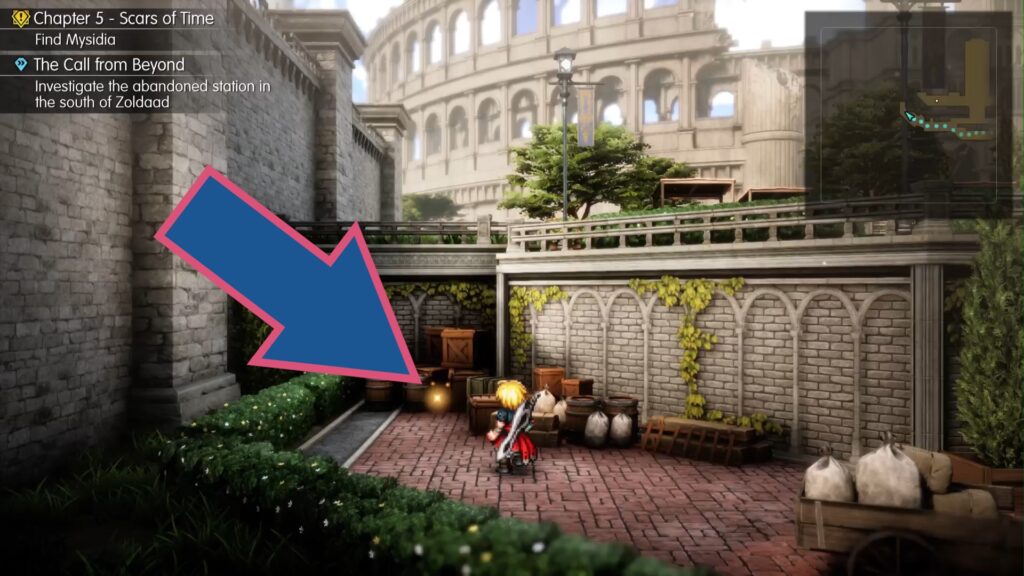
Can be reached once the Colosseum becomes available in Chapter 5. Go past the stairs leading up to the Colosseum and find another sparkling shard hidden amongst some boxes on the left.
Village of Kol
– 1 Shard –
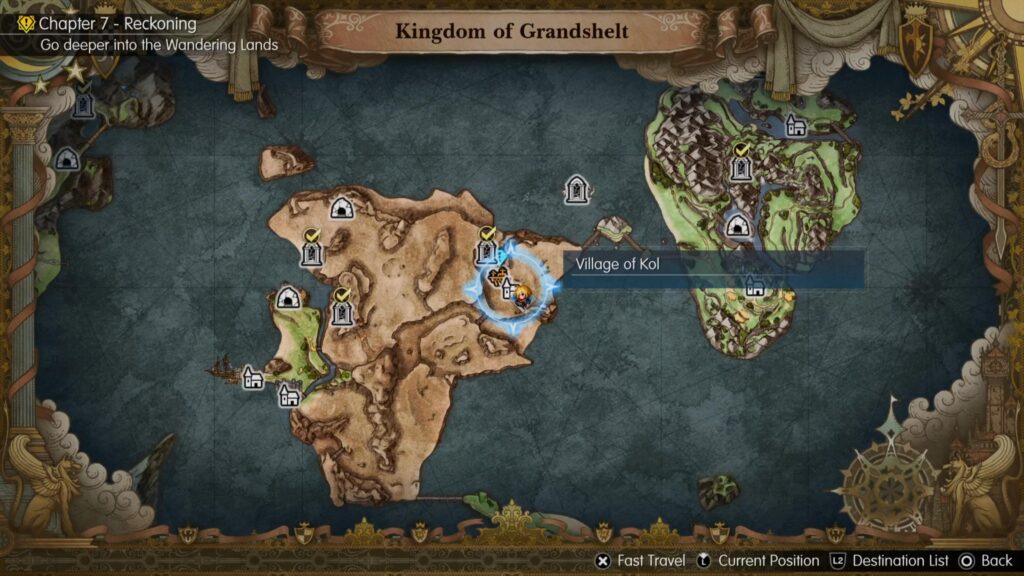
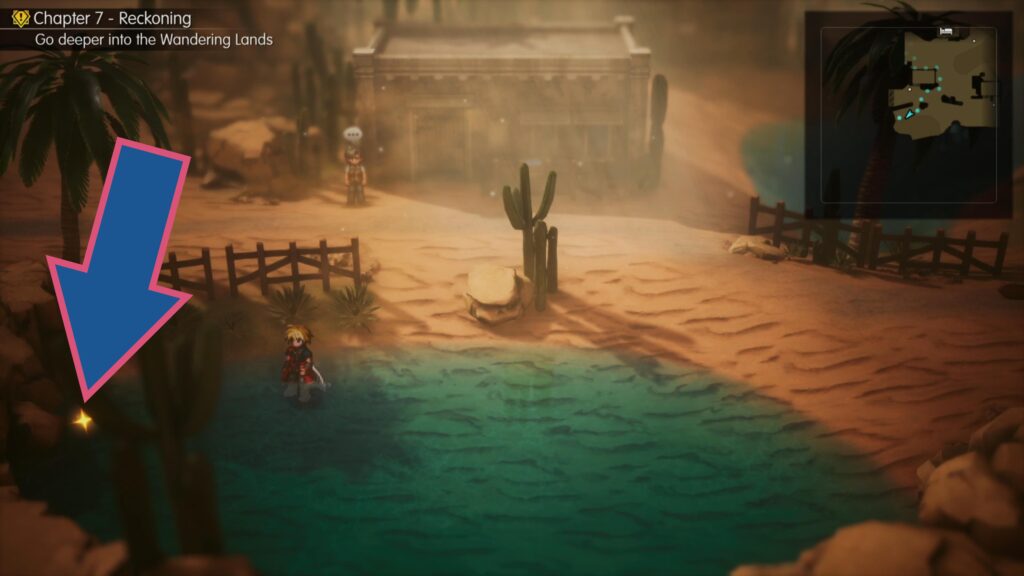
Look against the rocks on the left side of the smaller pool of water in the bottom left corner of Kol to find this shard.
Town of Felicitas
– 2 Shards –
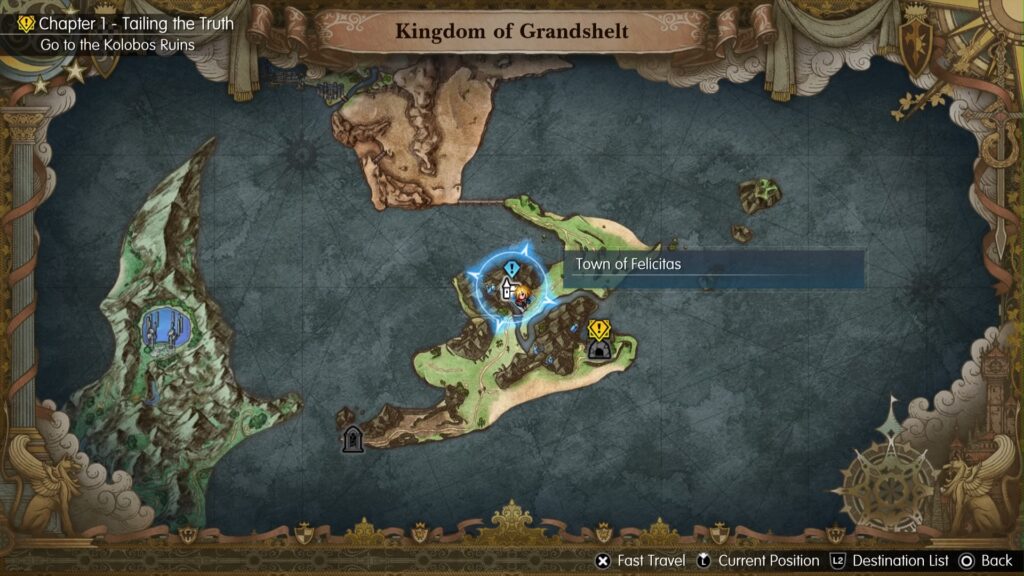
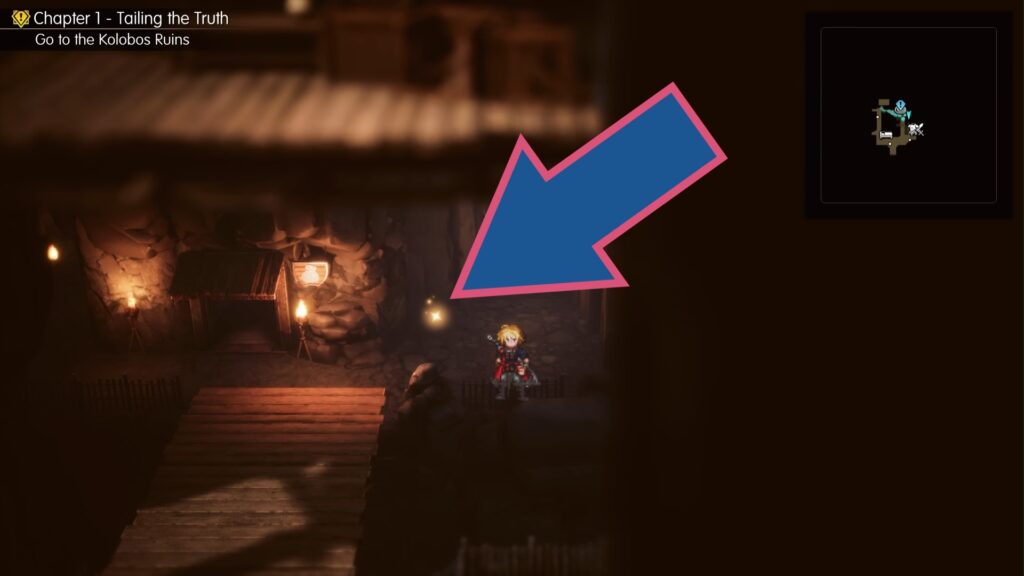
In the back right corner of the town, to the right of the Item Shop entrance, a shard glimmers.
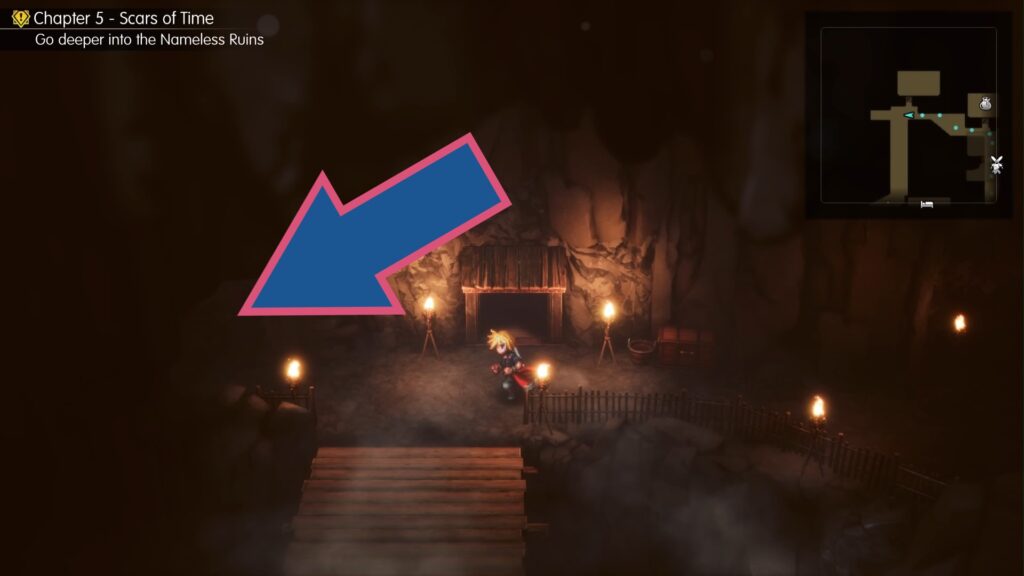
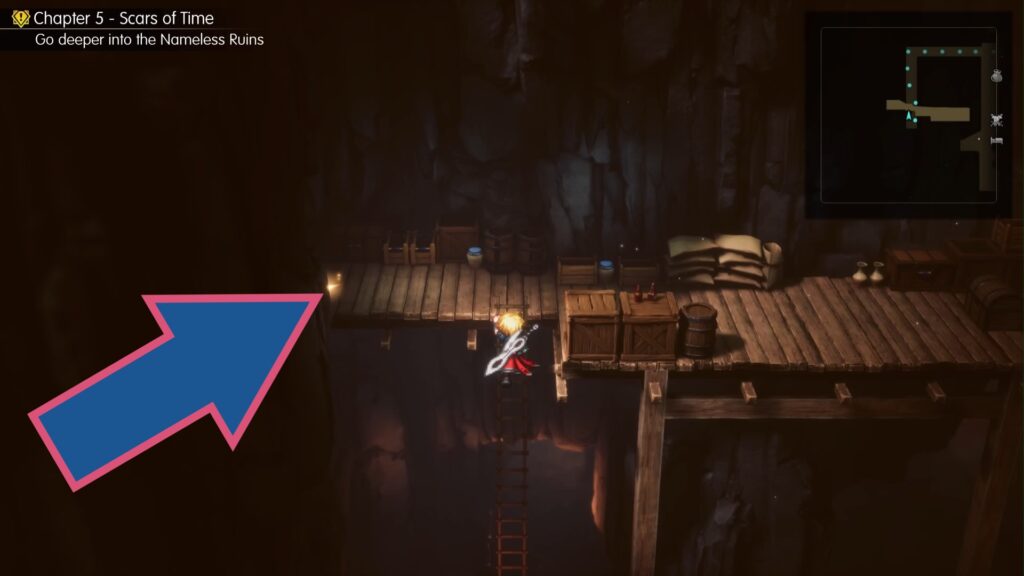
Head to the back left corner to find a hidden passage to the left of the bridge. Run to the end of it and then down to find a ladder up to a wooden platform with another glittering shard on it.
Kolobos Ruins
– 2 Shards –
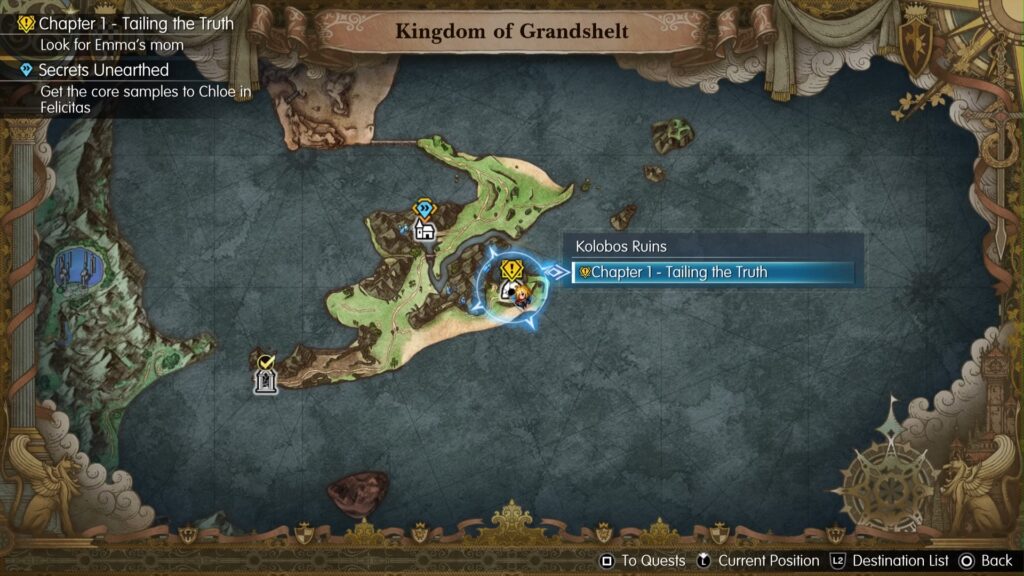
Look behind the machinery with green lights at the bottom of the stairs to find this shard tucked in the corner.
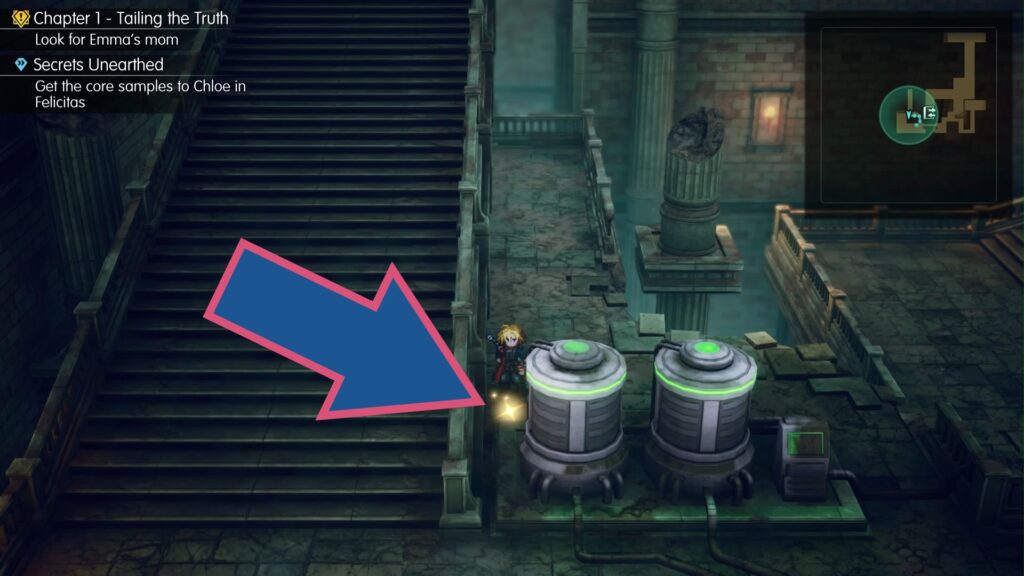
Cross over the bridge to the right of where you found the last shard and look behind the collapsed pillar to find a second shard.
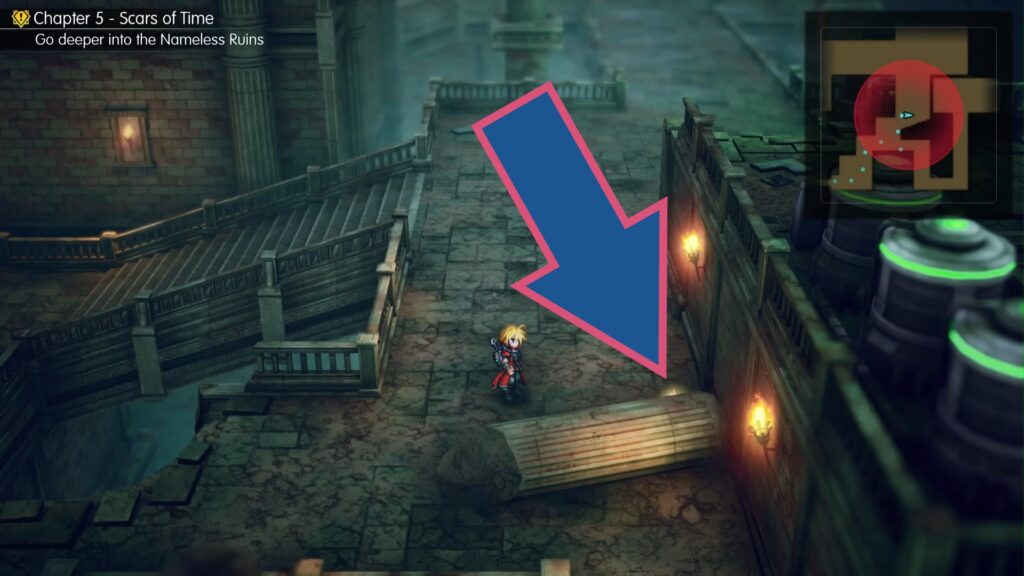
Cavern of Swords
– 1 Shard –
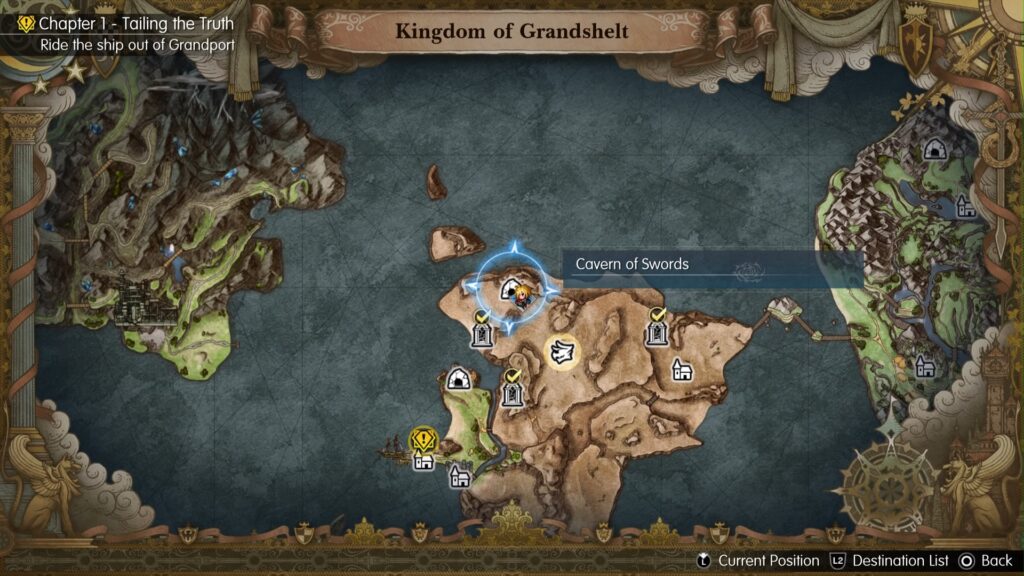
Travel to the northeast corner of the desert to locate the Cavern of Swords. Go inside, and at the back, next to a stalagmite, is a shimmering shard.
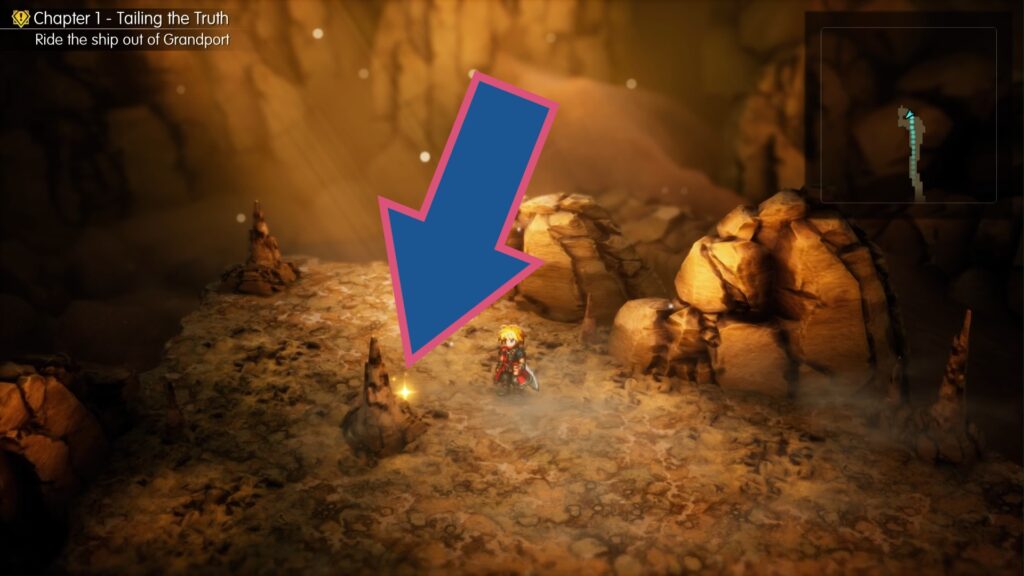
Grandport Harbor
– 2 Shards –
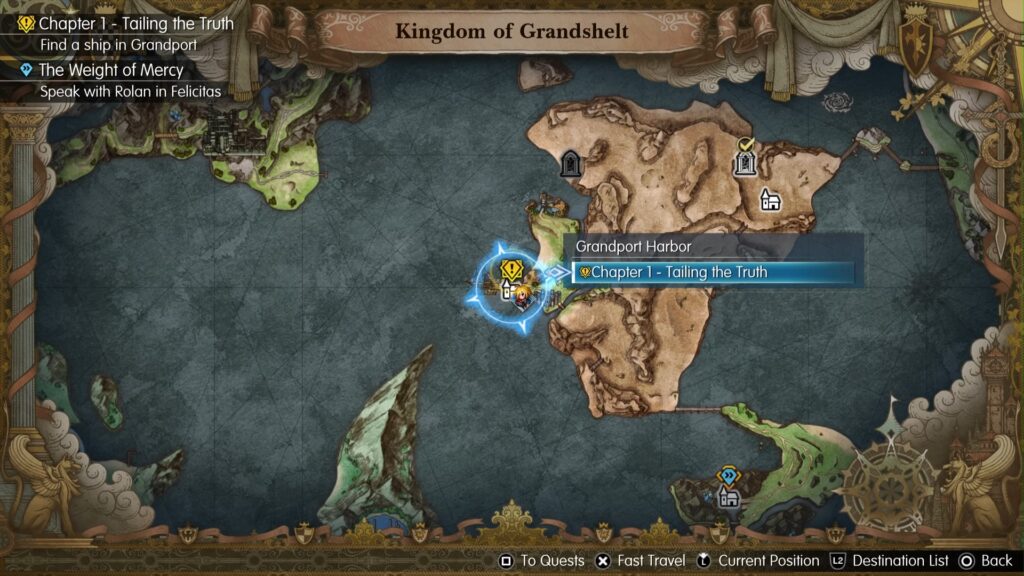
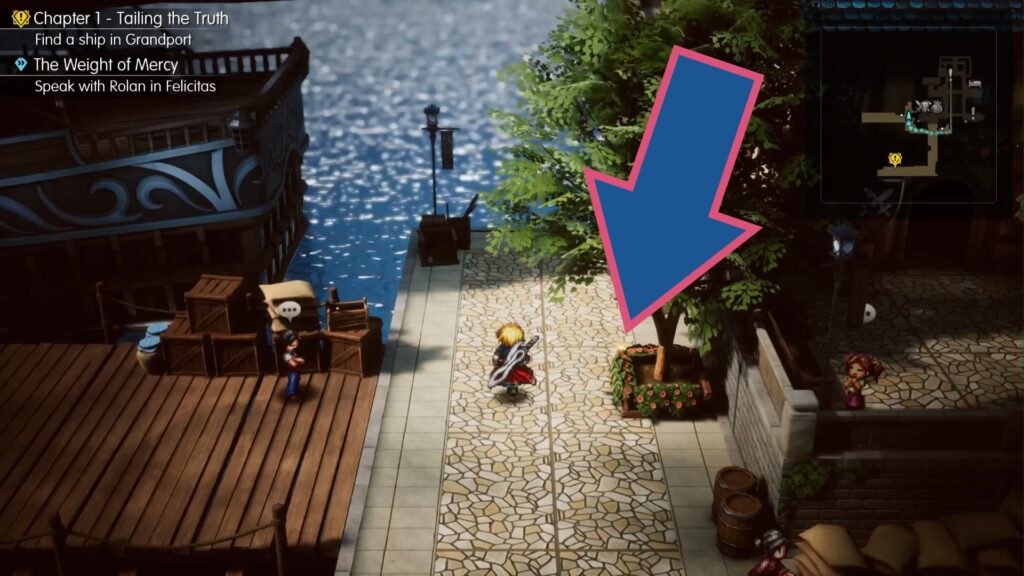
Look behind the tree opposite the upper pier to find this shard.
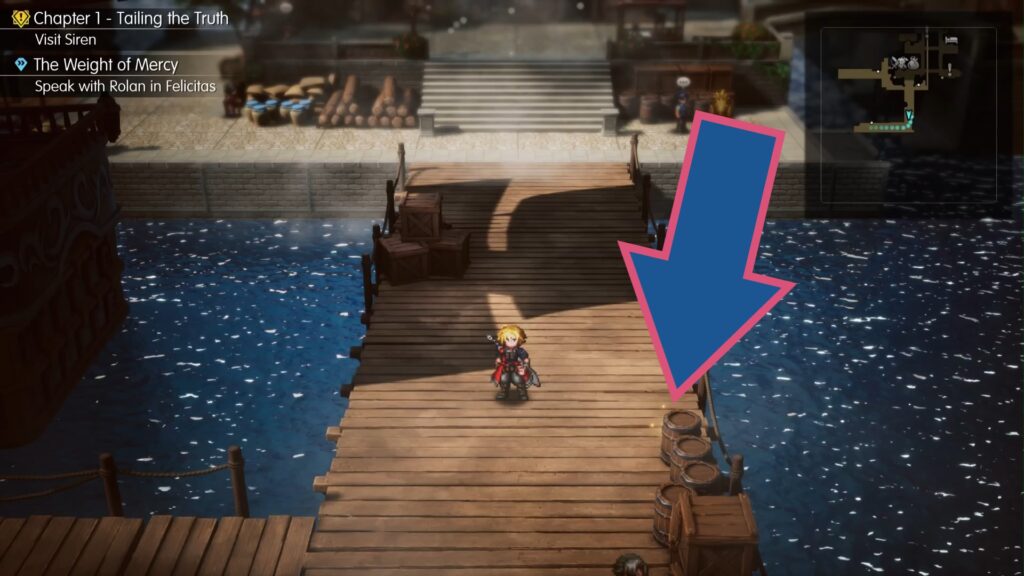
Check behind the row of barrels on the lower L-shaped pier to find another shard.
Siren’s Tower
– 3 Shards –
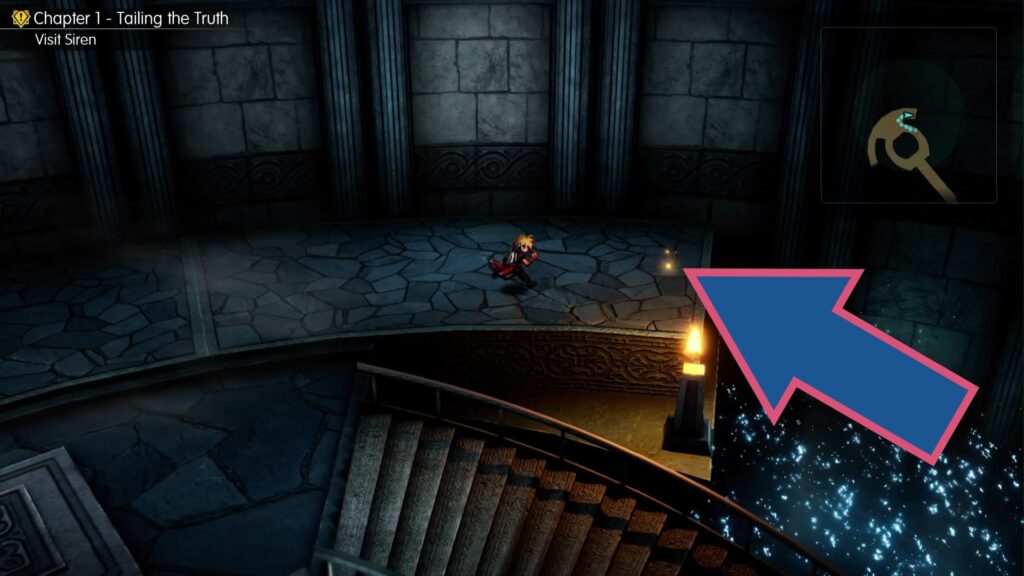
Go to the right of the large flight of stairs near the beginning of the dungeon to find this shard near the ledge.
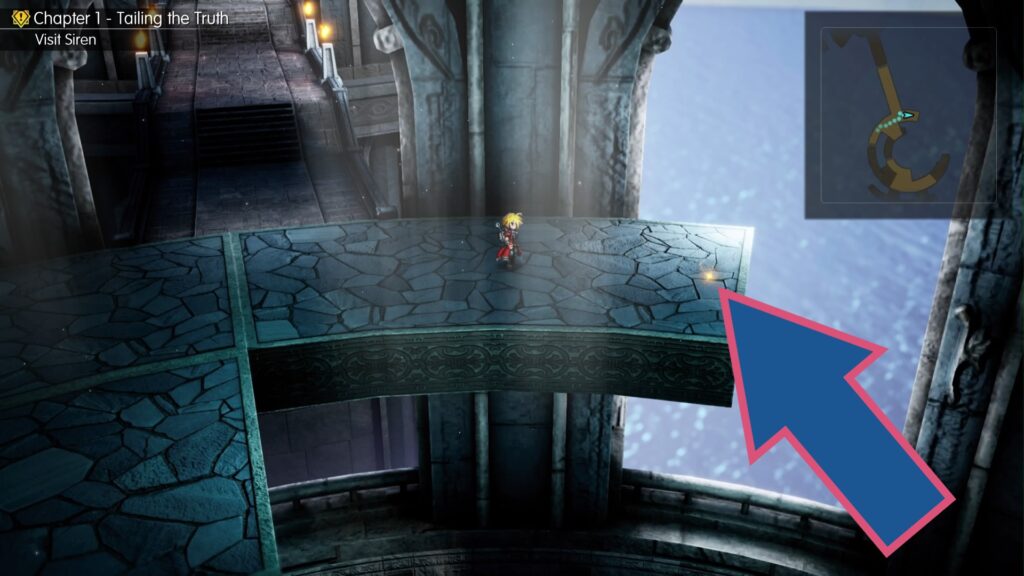
To the right of the long walkway leading to the next part of Siren’s Tower is a glittering shard.
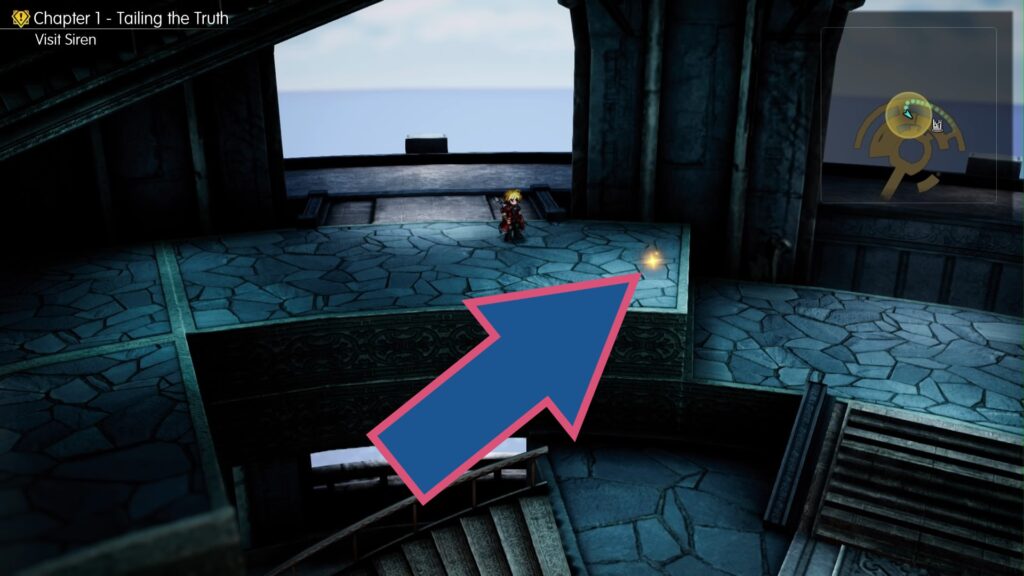
Walk out onto the balcony, go to your left, and go back through the archway to reach this sparkling shard on your way up Siren’s Tower.
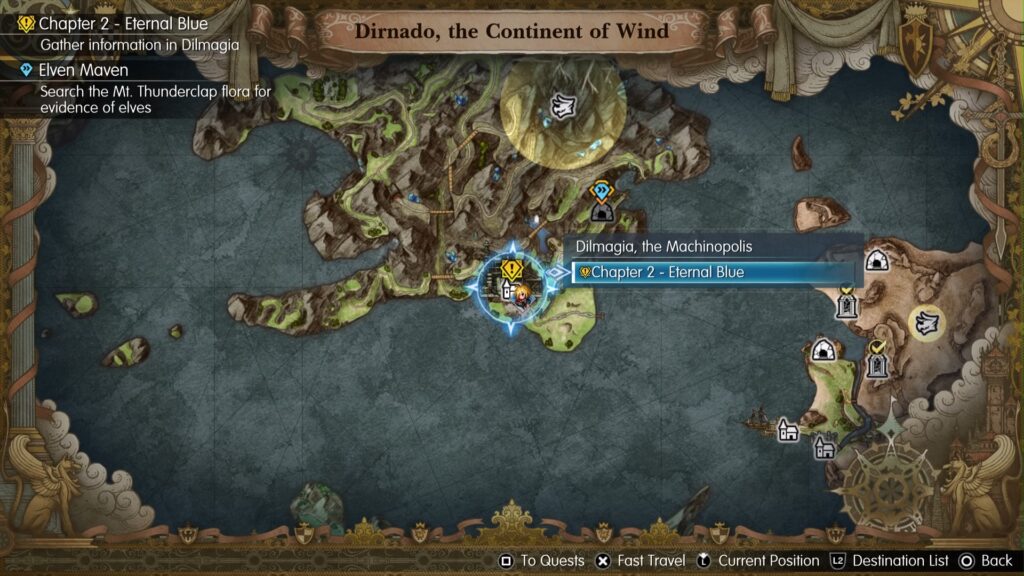
Dilmagia, the Machinopolis
– 4 Shards –
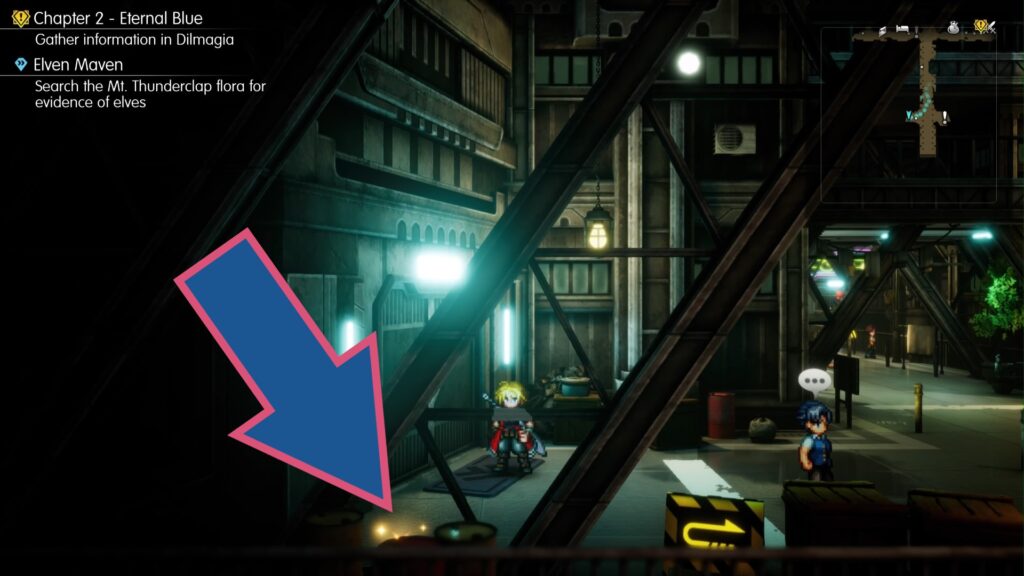
As soon as you enter Dilmagia, go to your left to spot that tell-tale sparkle nestled in the corner, obscured by girders.
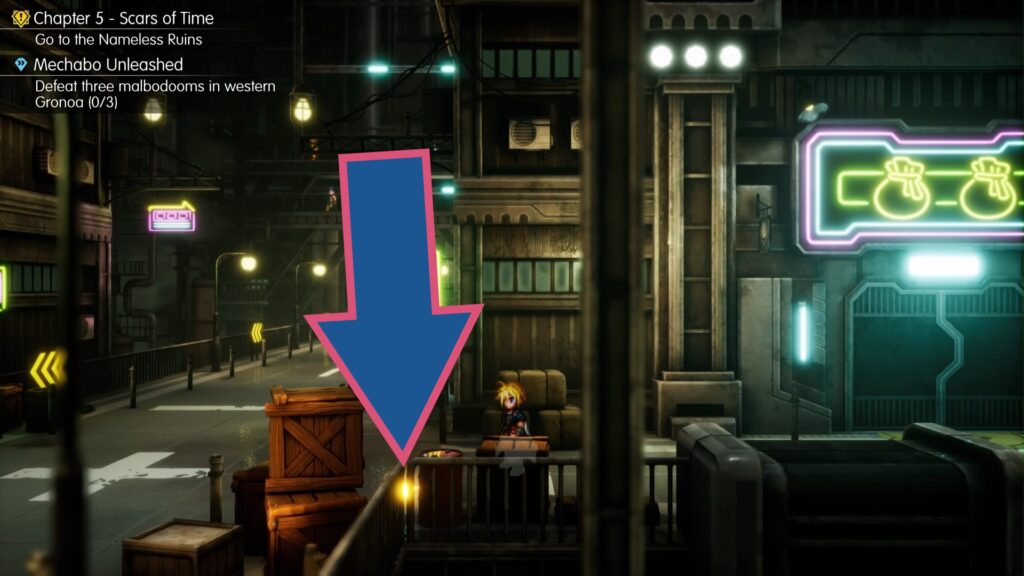
A shard is tucked between some wooden crates on the right side of the crossway near the Item Shop.
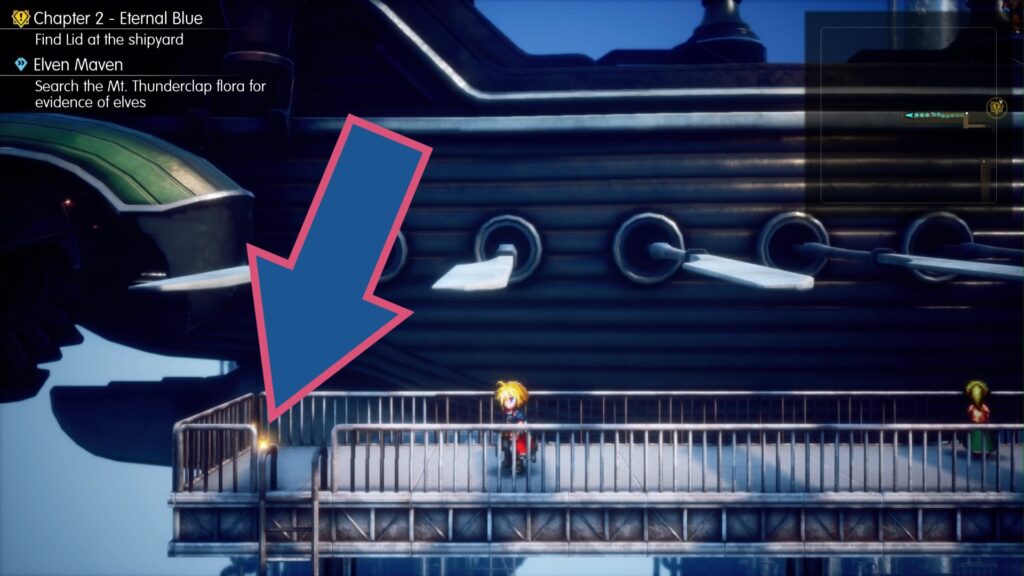
Head up to the Shipyard and go up the left flight of stairs to the higher gangway. At the end, next to the ladder, is another shard.
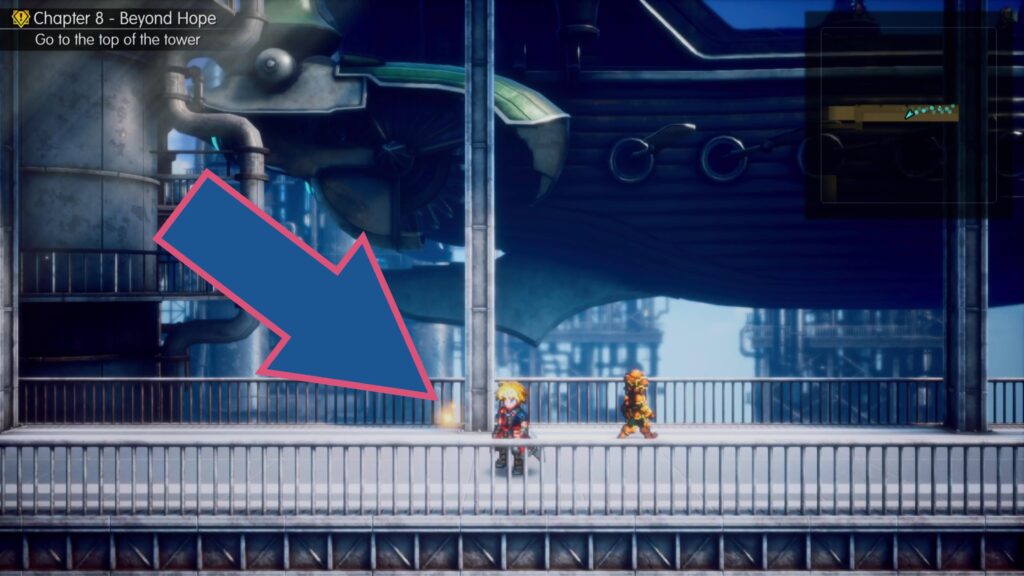
Mt. Thunderclap
– 3 Shards –
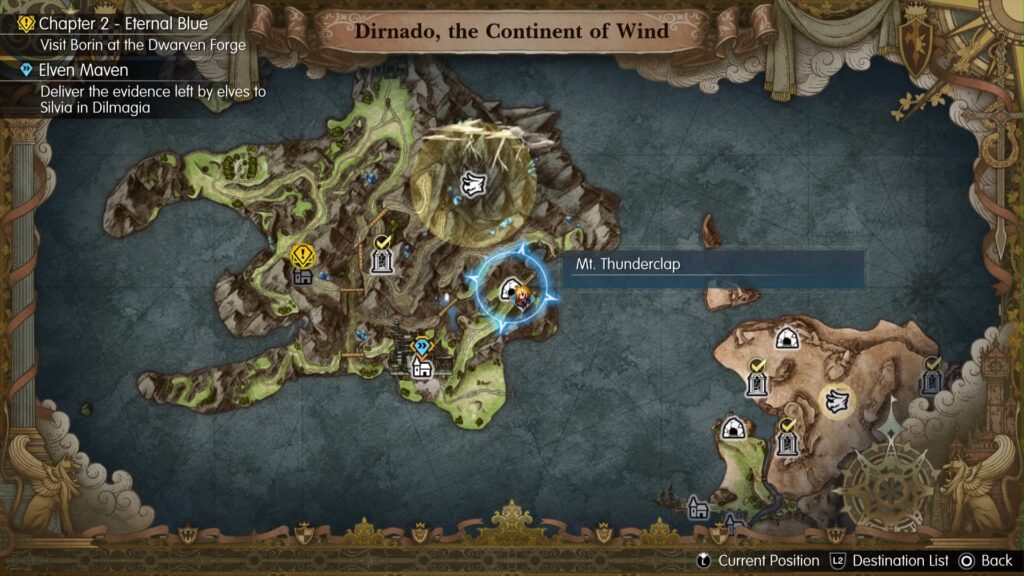
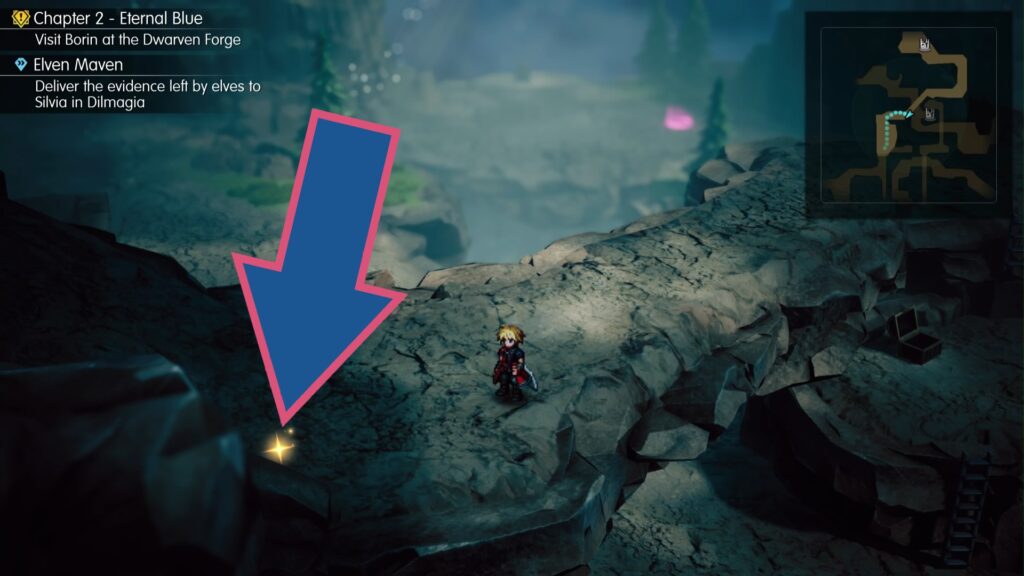
One shard is lying on the right side of the path between two slopes.
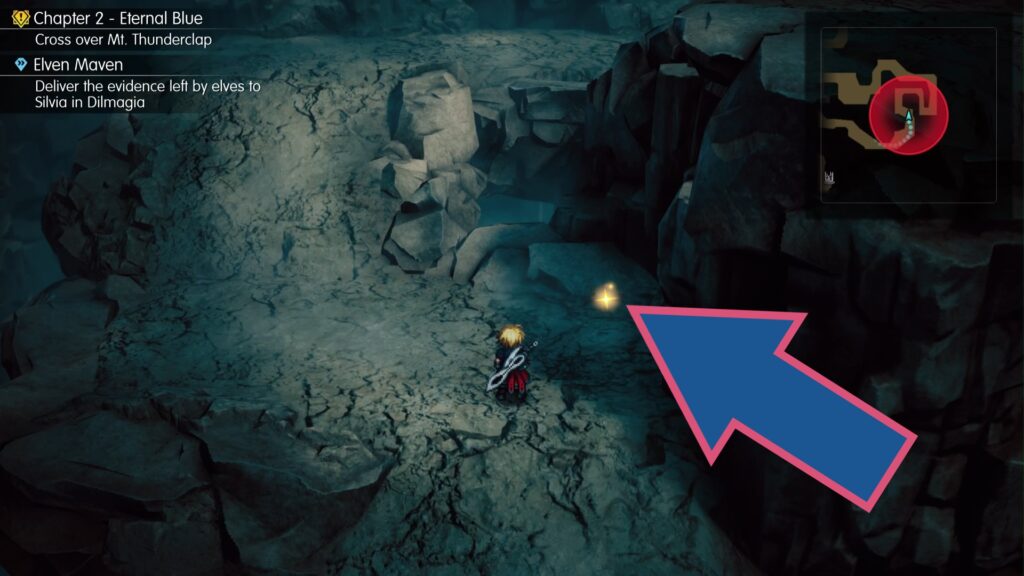
Head back to the beginning of the area and climb up the tall ladder to the left. At the top, continue forward to find this shard waiting.
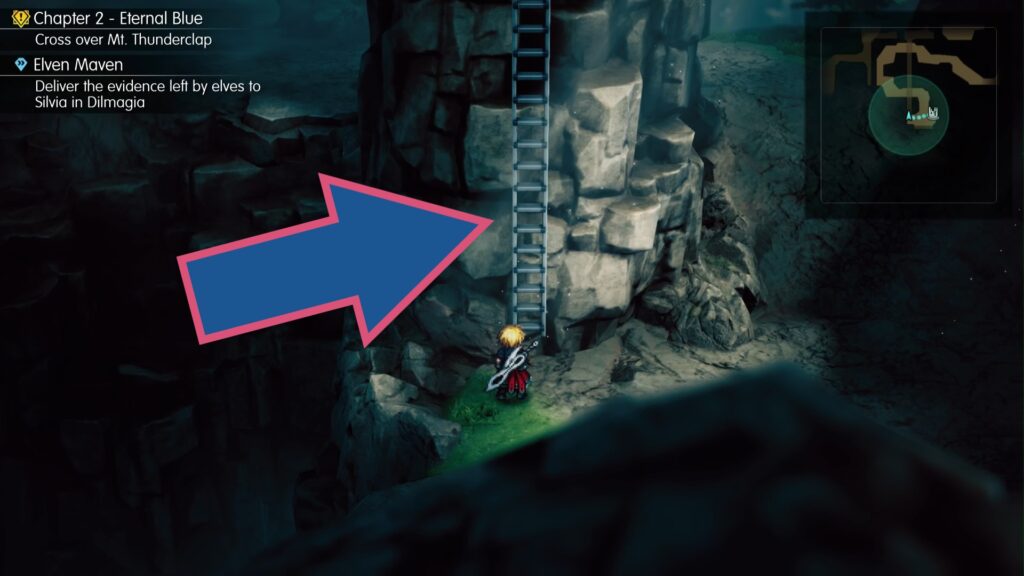
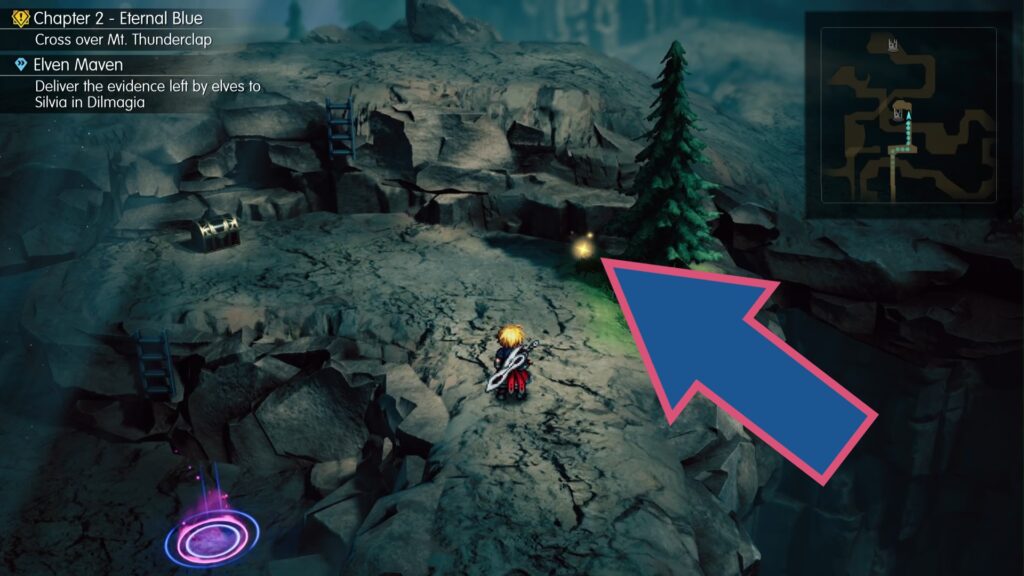
To get to this shard, you need to make your way through the main part of Mt. Thunderclap and then enter through the other way further up the mountain on the world map (the same way to reach the Esper, Ramuh). By the ramp near the entrance is the shard.
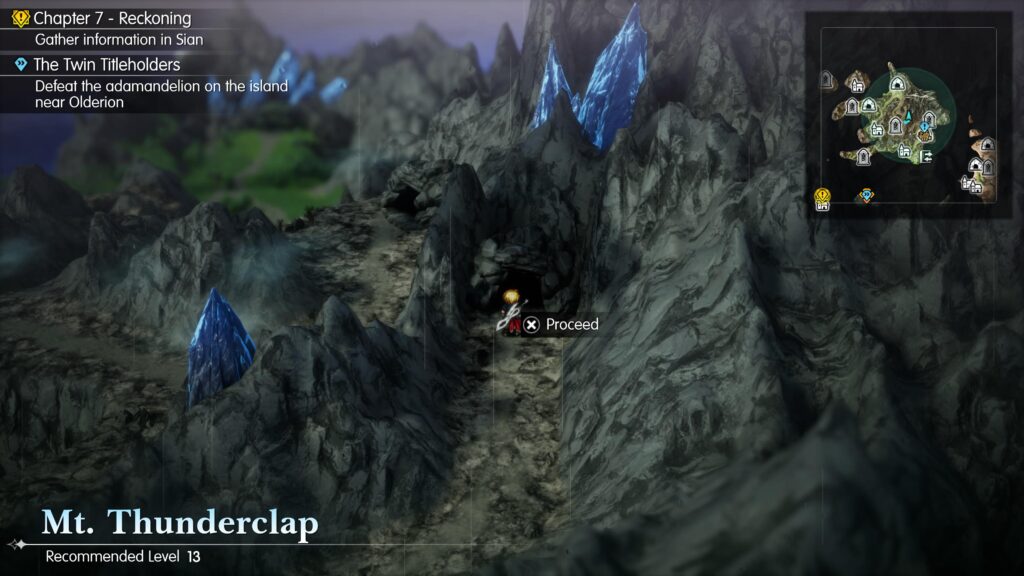
Dwarven Forge
– 2 Shards –
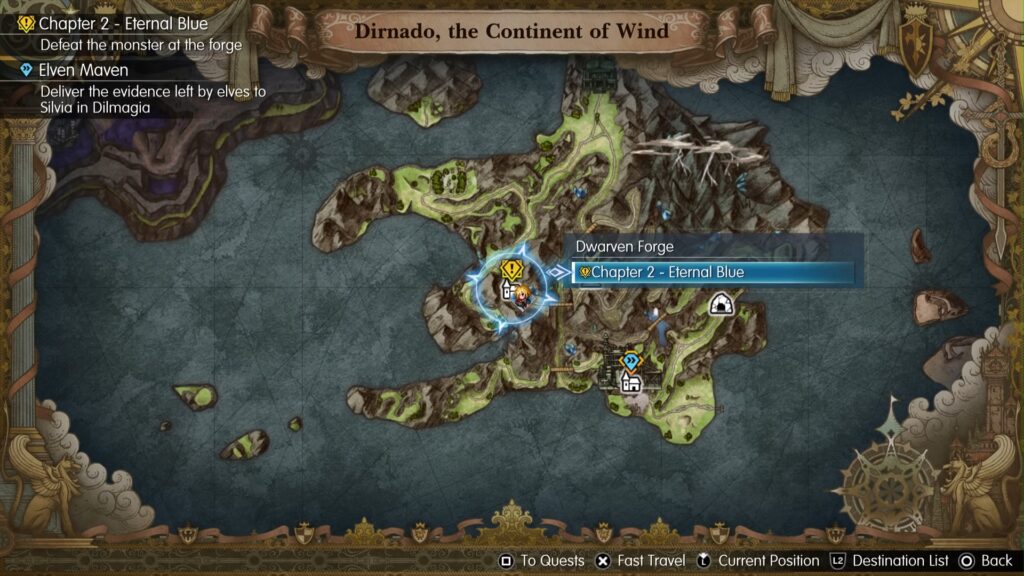
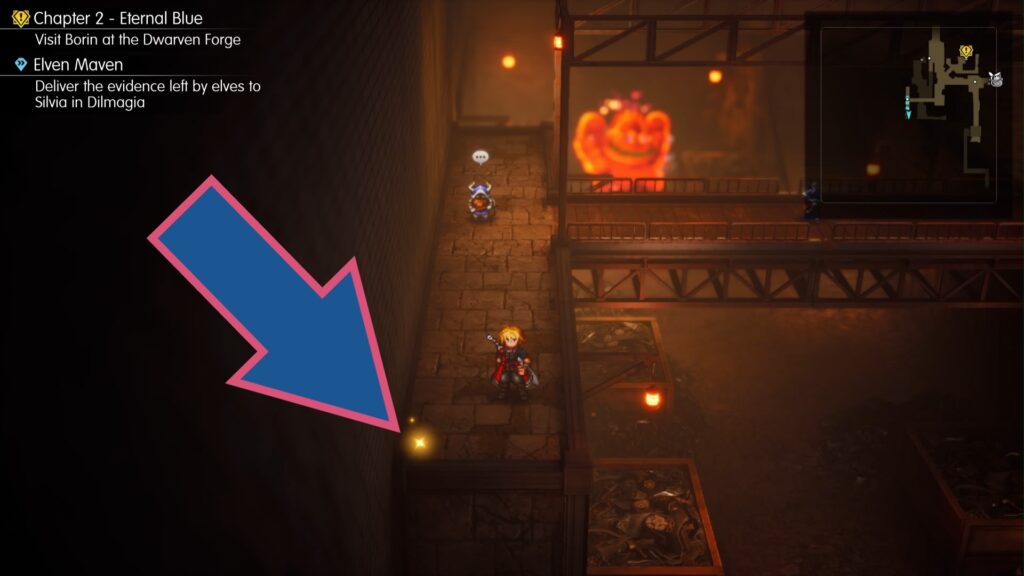
Go across the gangway over where the dwarves are mining and move towards the screen to find this shard at the end of the platform.
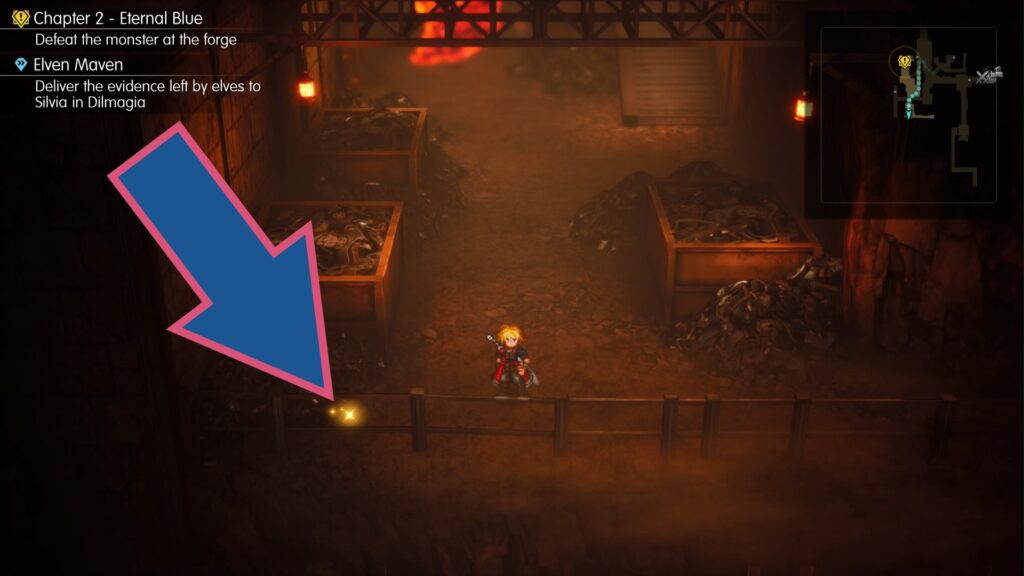
Go down the stairs to where the dwarves are mining, and look for this shimmering shard amongst the rocks near one of the metal containers.
Mobliz Shipyard
– 3 Shards –
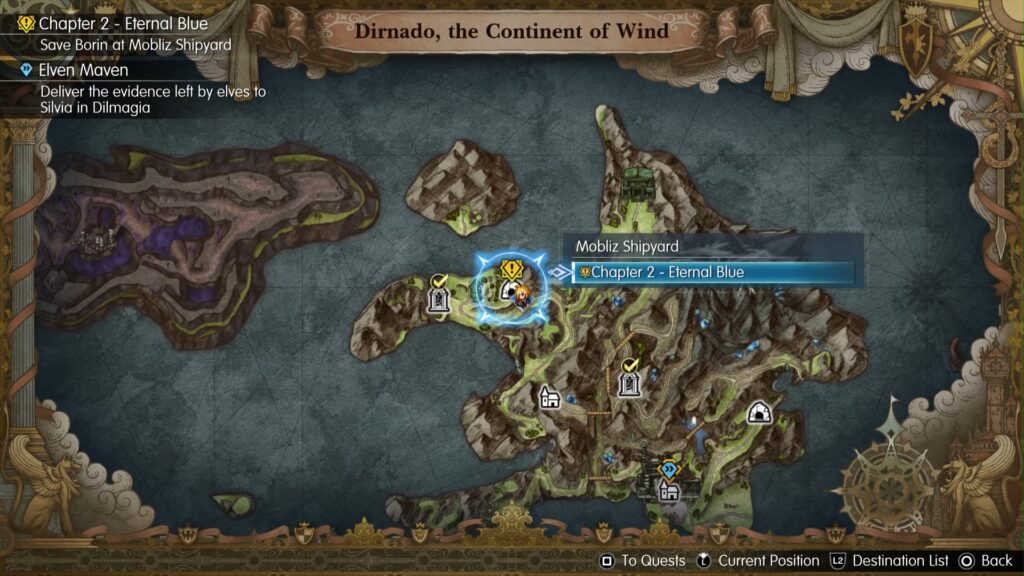
In the entrance area with all of the portraits, look in the bottom left corner with the large crate to find a shard.
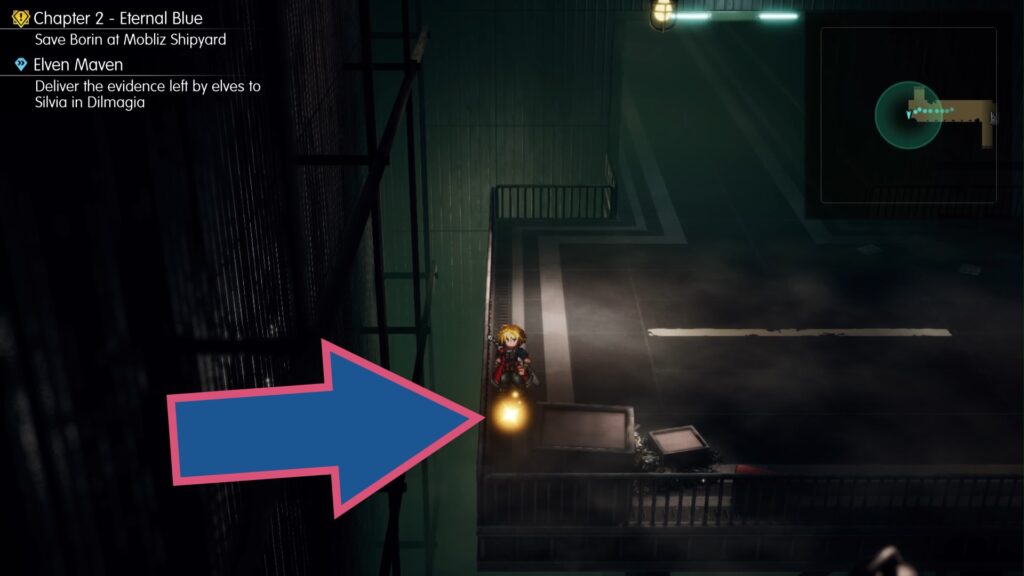
Take the elevator on the left up and run through the gap in the fence. A ladder down to a low gangway is in the bottom left corner of this enclosed area, and another shard is at the end of it.
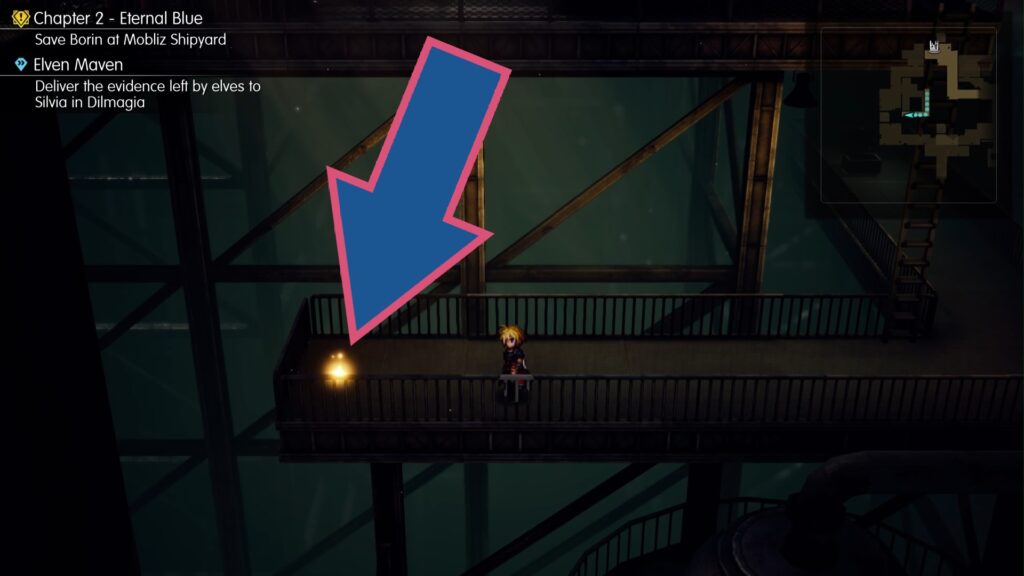
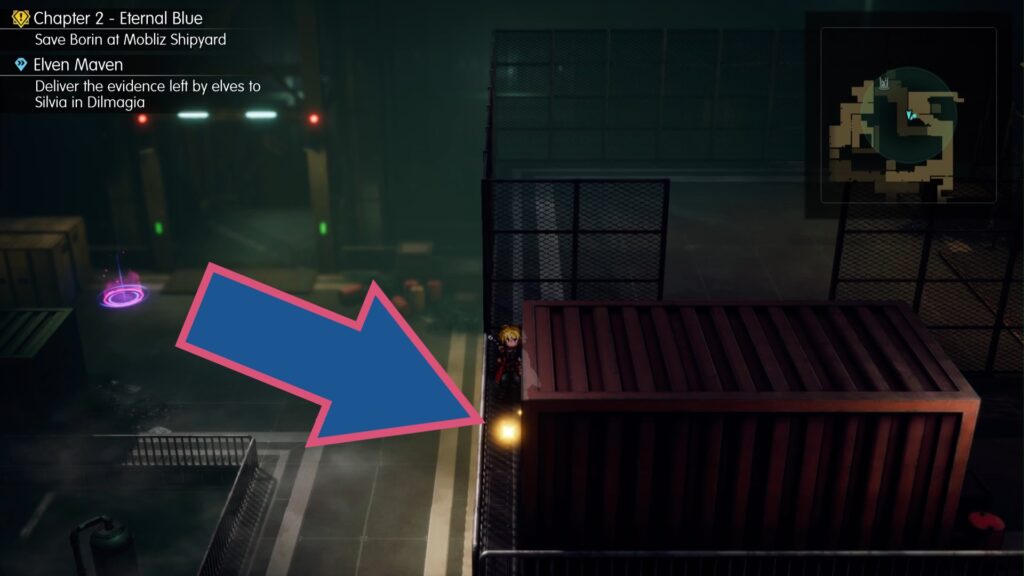
Go up the middle elevator and around to the stairs, but don’t go down them. Instead, look behind the red container next to them to find this shard sparkling by the rail.
Wind Shrine
– 3 Shards –
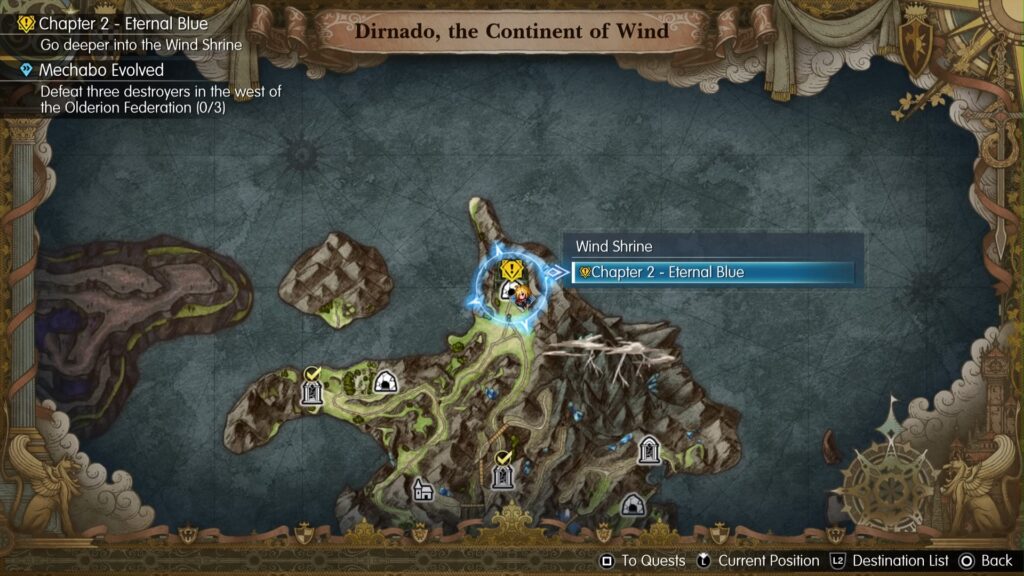
Look behind the right-hand pillar at the first lift to find the first shard in the Wind Shrine.
When you reach the lift at the top of the stairs, look to the right of them to find this shard.
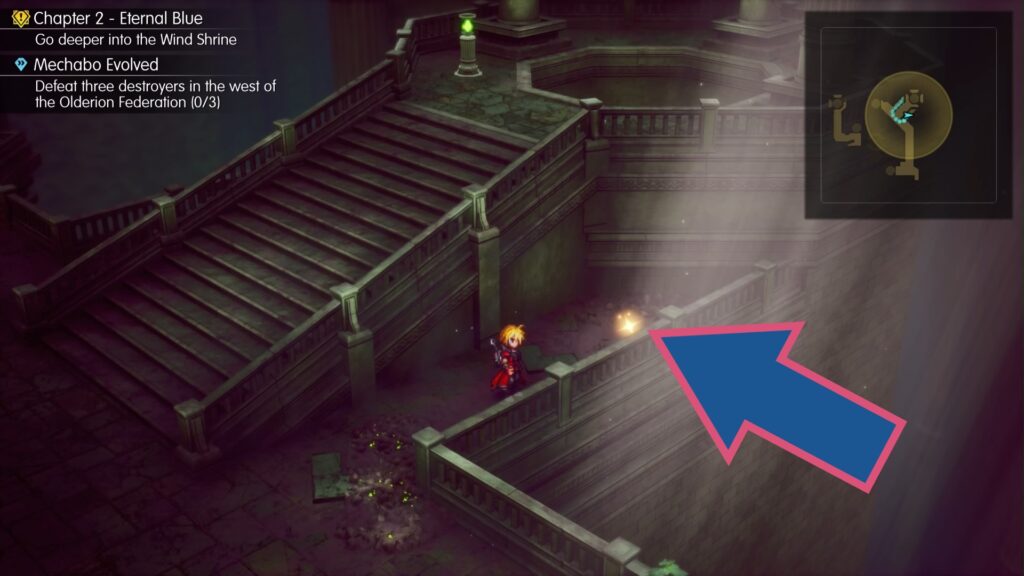
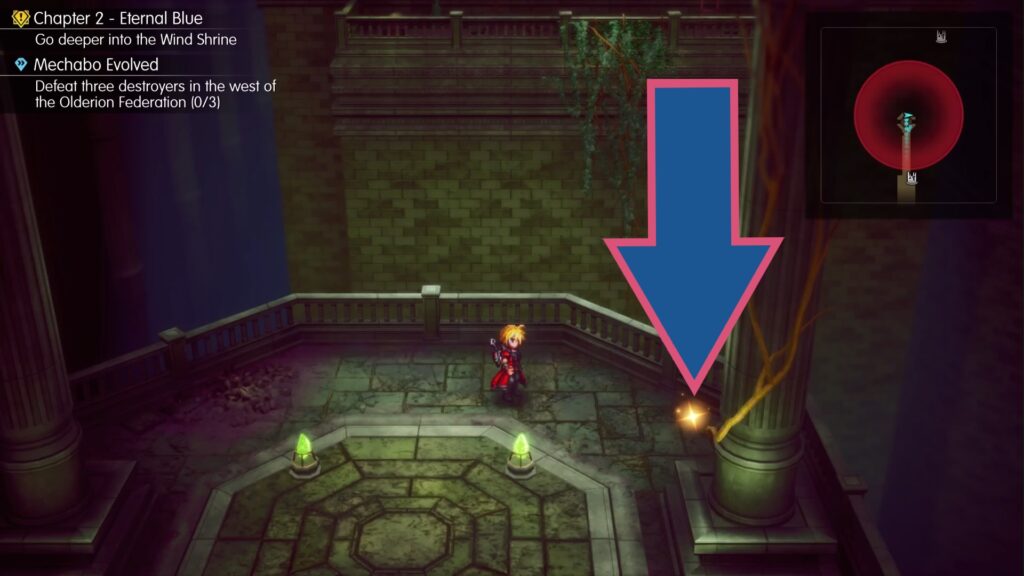
Run around to the other lift and ride it over to the platform with another lift at its centre. Behind the left-hand pillar is the shard.
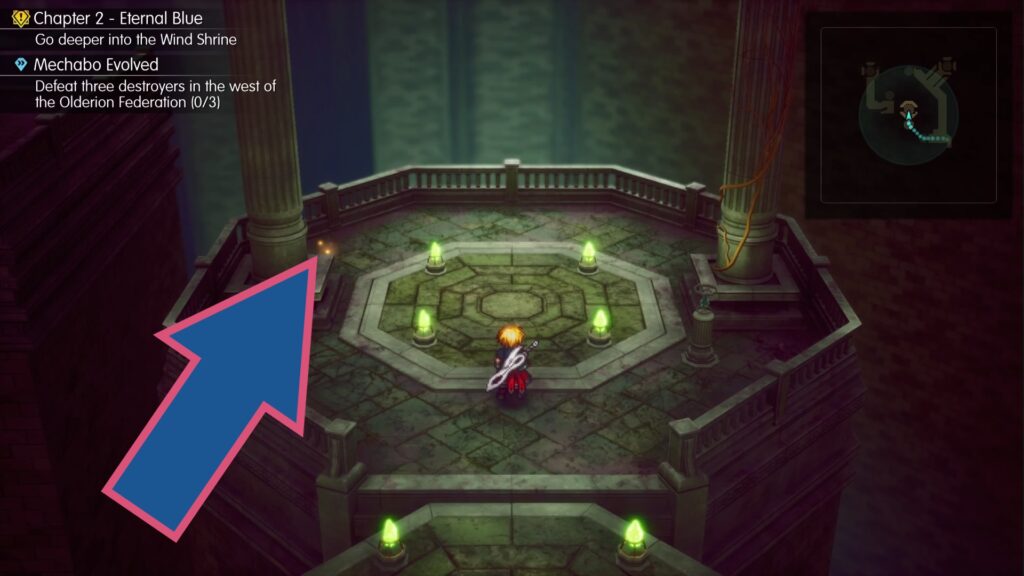
Olderion, The Aquapolis
– 4 Shards –
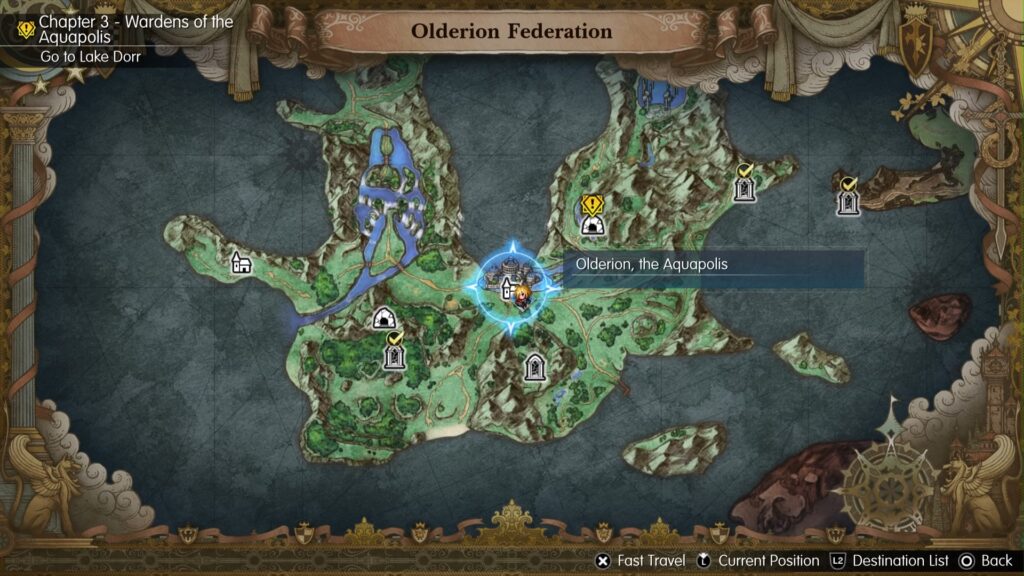
This shard is tucked behind the stairs near the Plaza taxi boat.
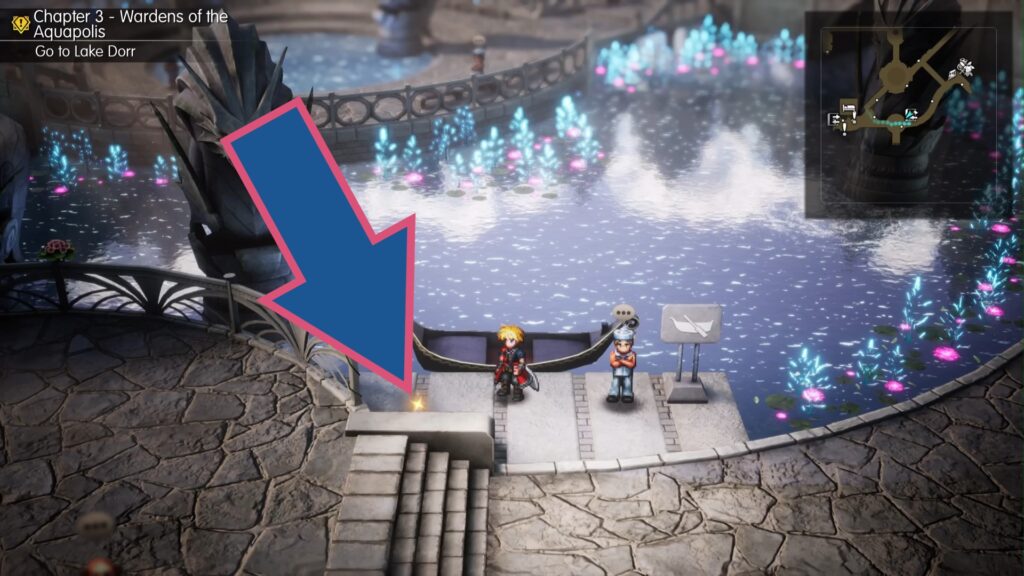
Between two benches on the left side of the central plaza with the Leviathan statues is the next shard.
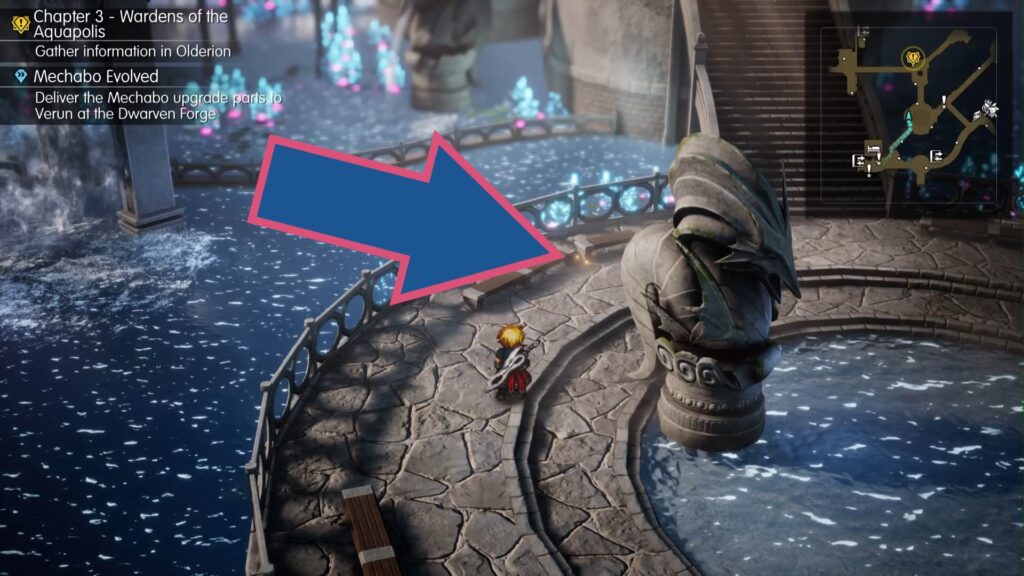
Another shard is next to a flower pot on the high walkway to the right of the central plaza.
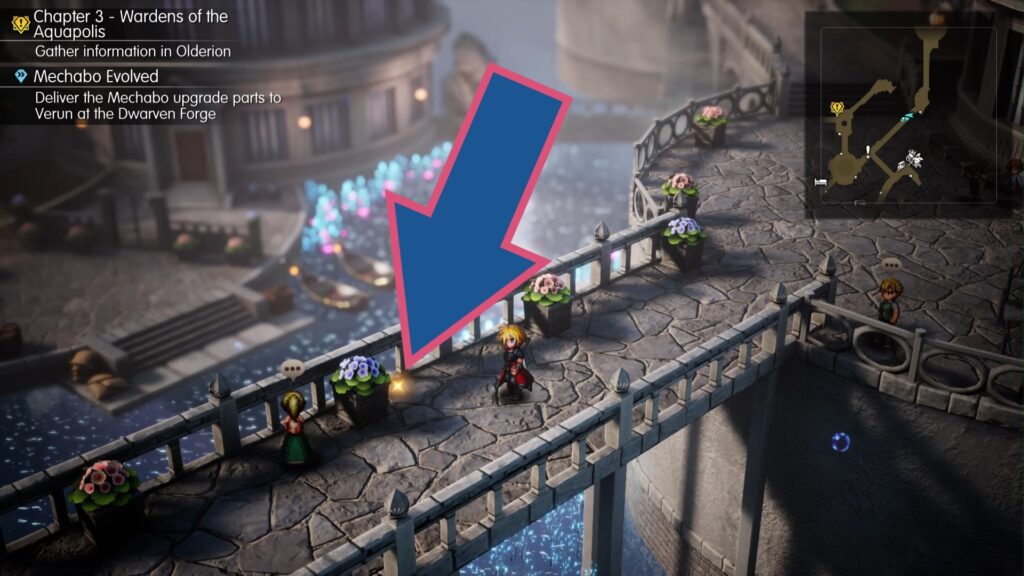
The fourth shard in Olderion is hiding behind the tree in the middle of the small plaza to the North.
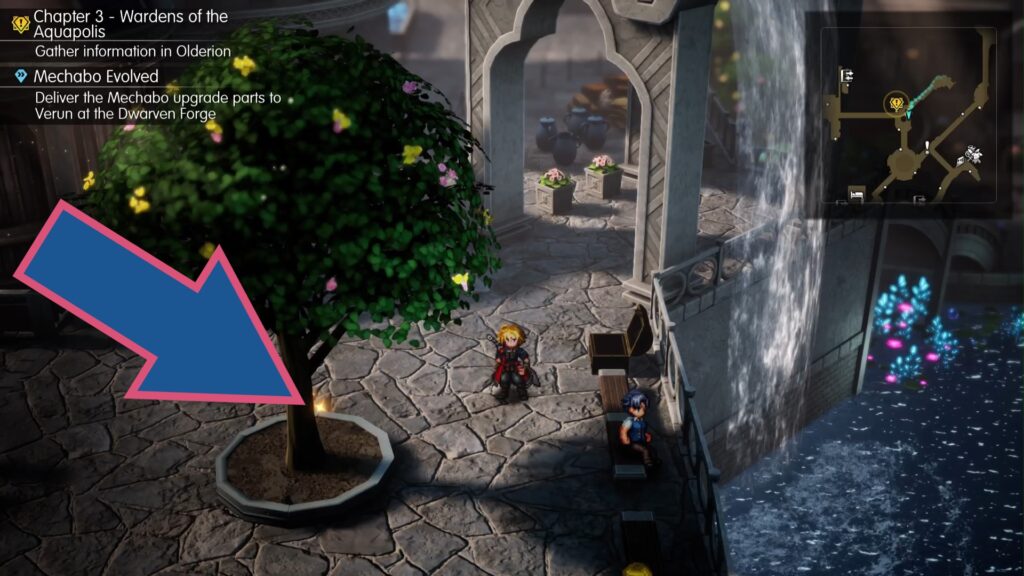
Cave of Waters
– 3 Shards –
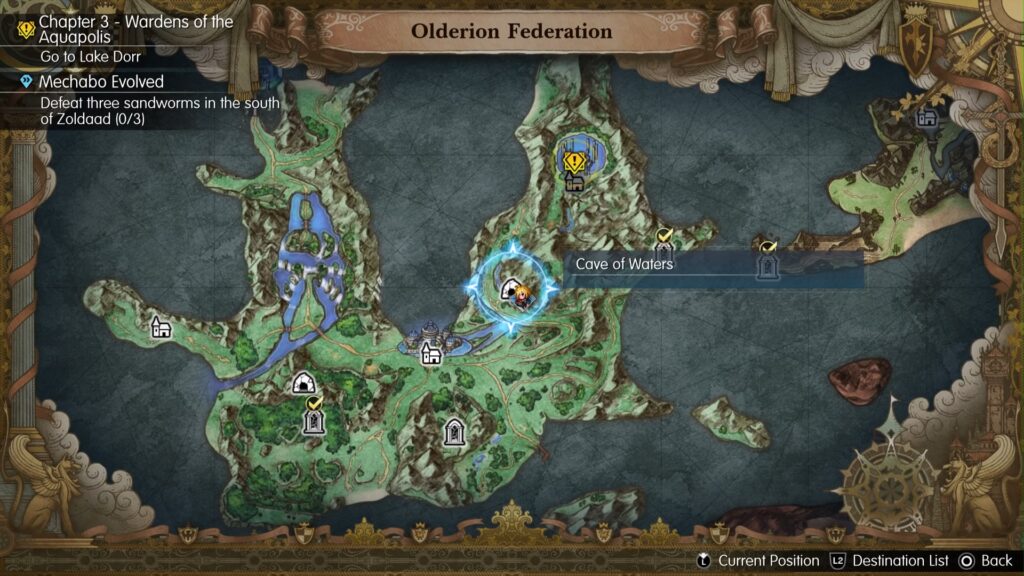
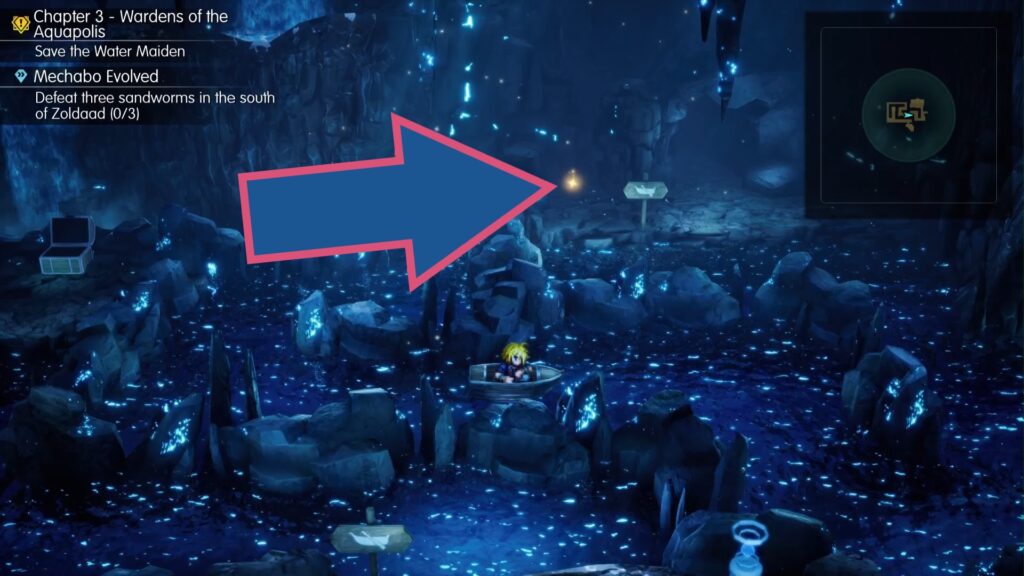
At the beginning, go through the door on the right and hop in the boat. Sail it around to the doorway at the top of the room and pick up the shard on dry land.
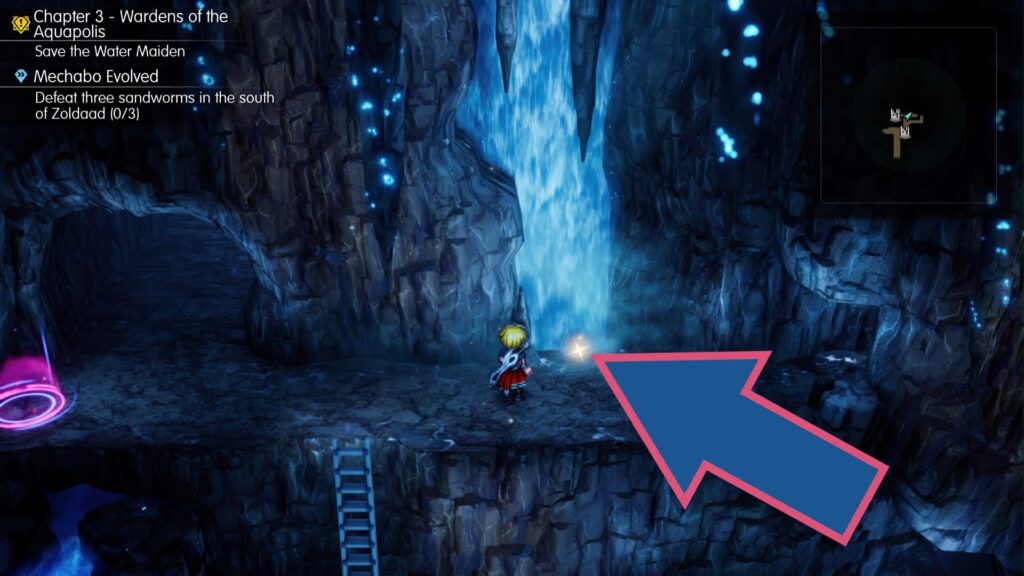
Make your way up to where the second save point/teleport is, and grab the shard in front of the waterfall.
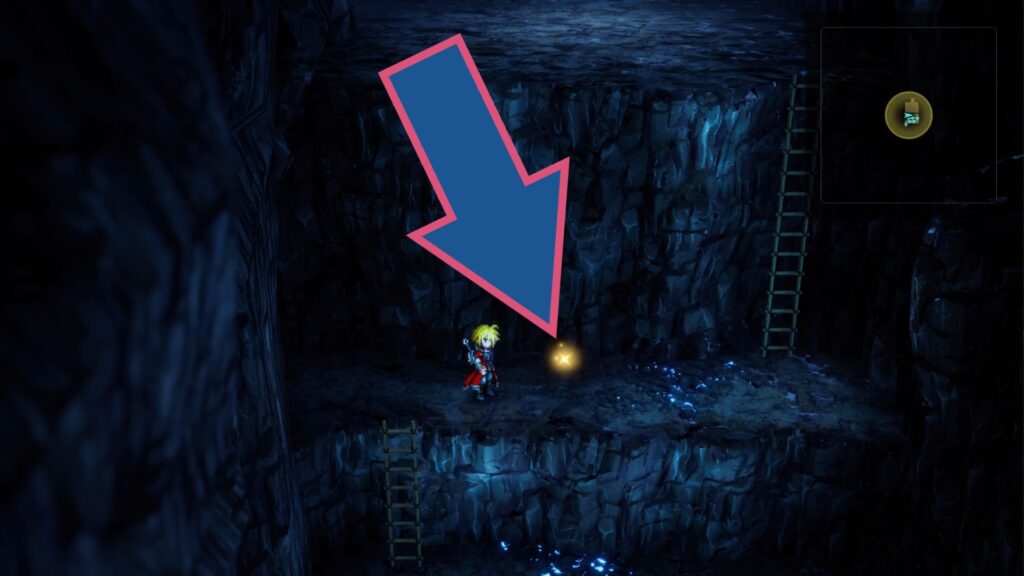
Return to the beginning and go through the doorway on the left. Continue through to the room with multiple ladders, and keep an eye out for the shard on the second ledge.
Waterfall Way
– 3 Shards –
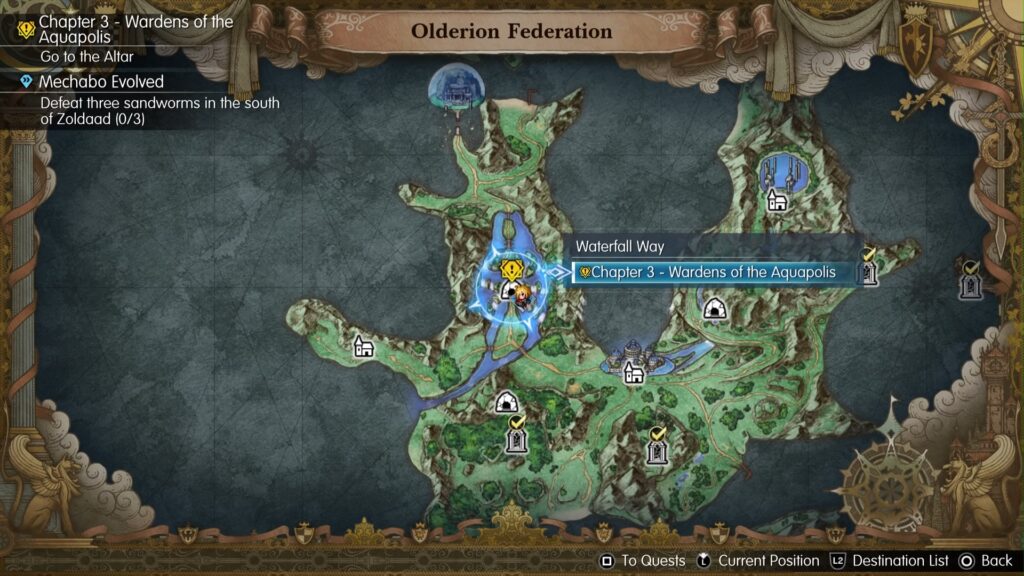
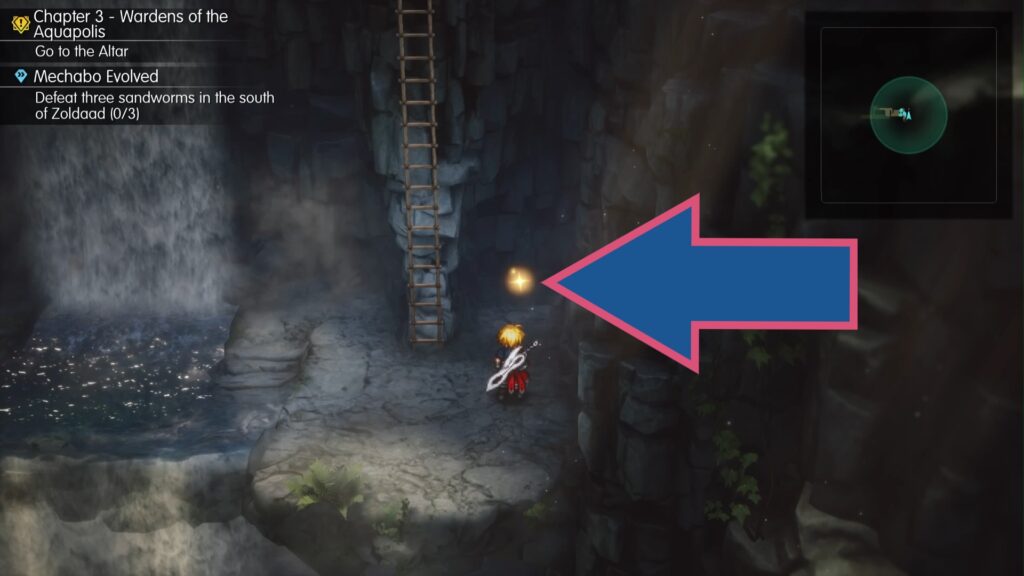
Tucked in an alcove to the right of the first ladder is a shard.
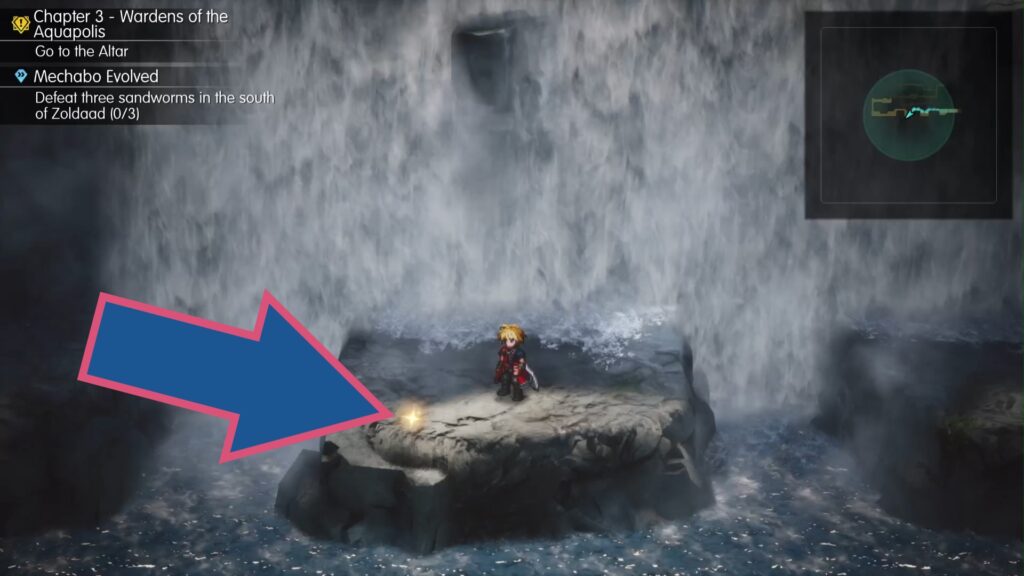
In the area where you run behind several waterfalls in a row, check the bottom left corner of the last rocky outcrop to find a shard.
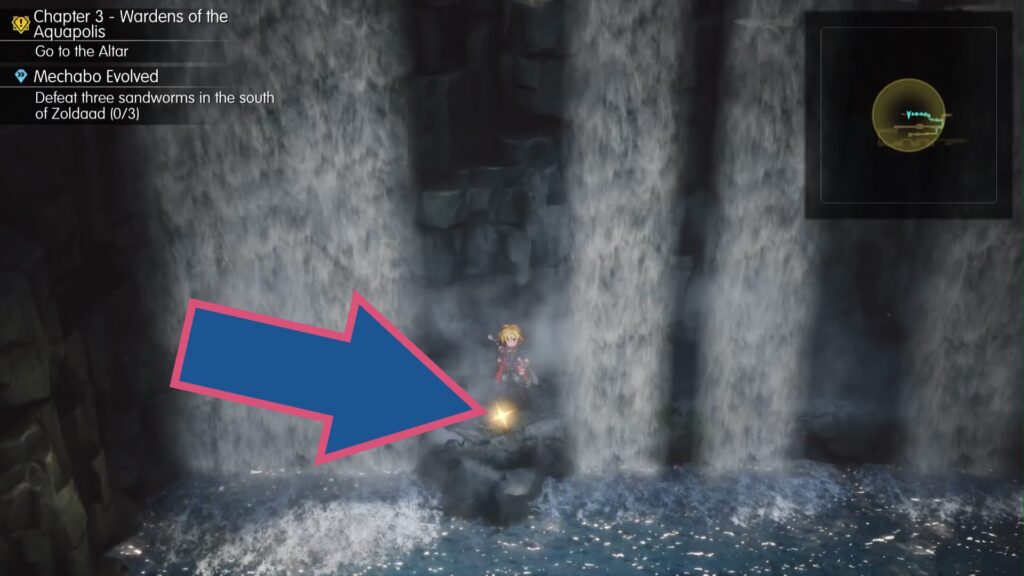
When you reach the area with lots of short wooden bridges, get to the back and head all the way to the left to find this shard between two waterfalls.
Town of Amore
– 2 Shards –
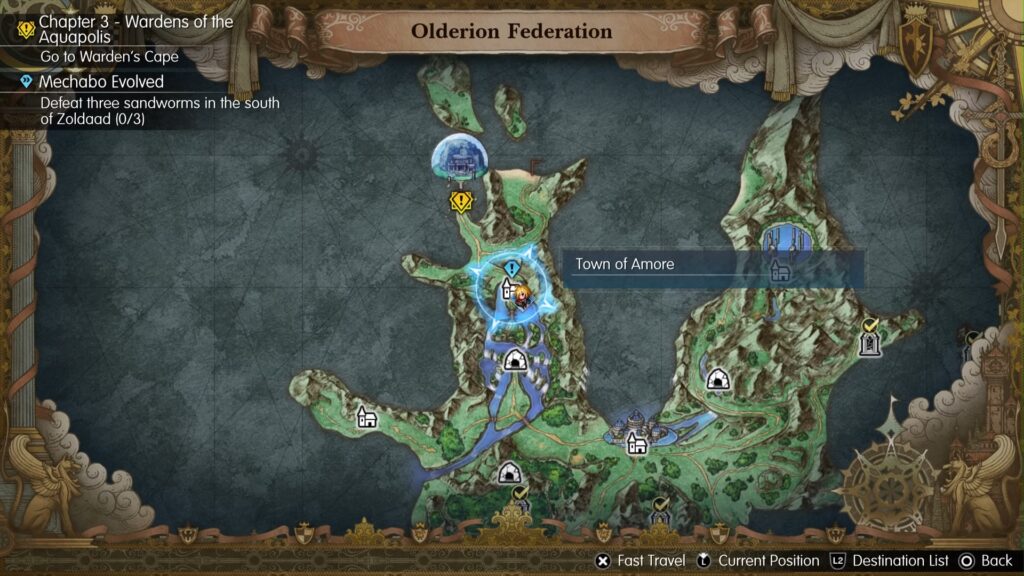
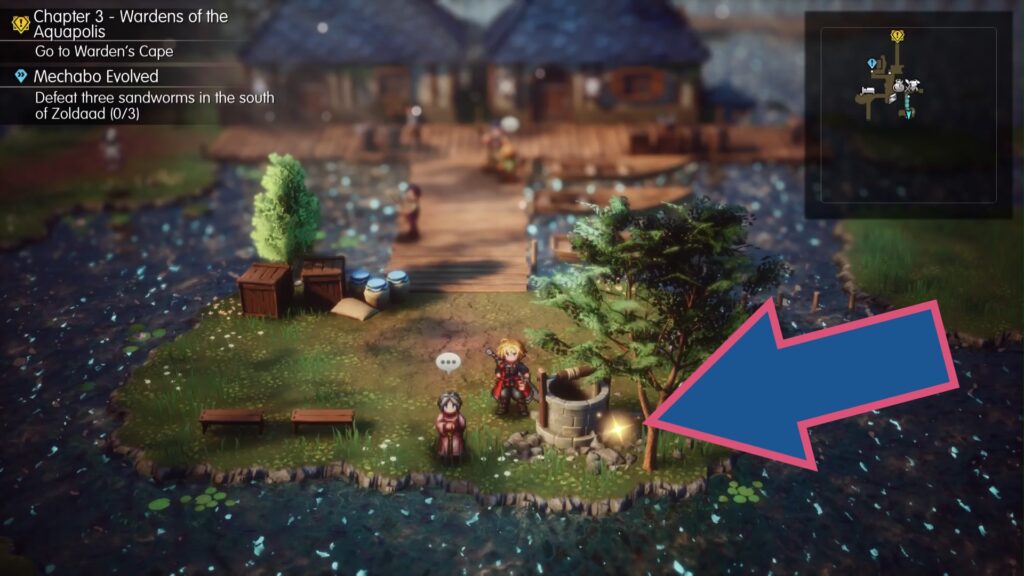
Cross the wooden walkways to reach the little islet and pick up the shard next to the well.
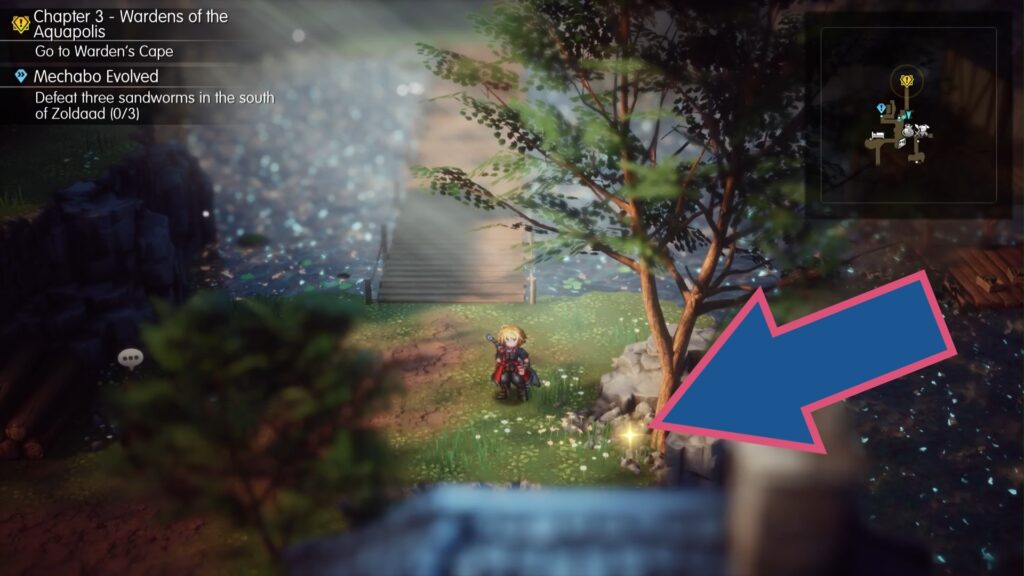
Another shard is at the foot of the tree before the wooden walkway at the back of Amore.
Water Shrine
– 3 Shards –
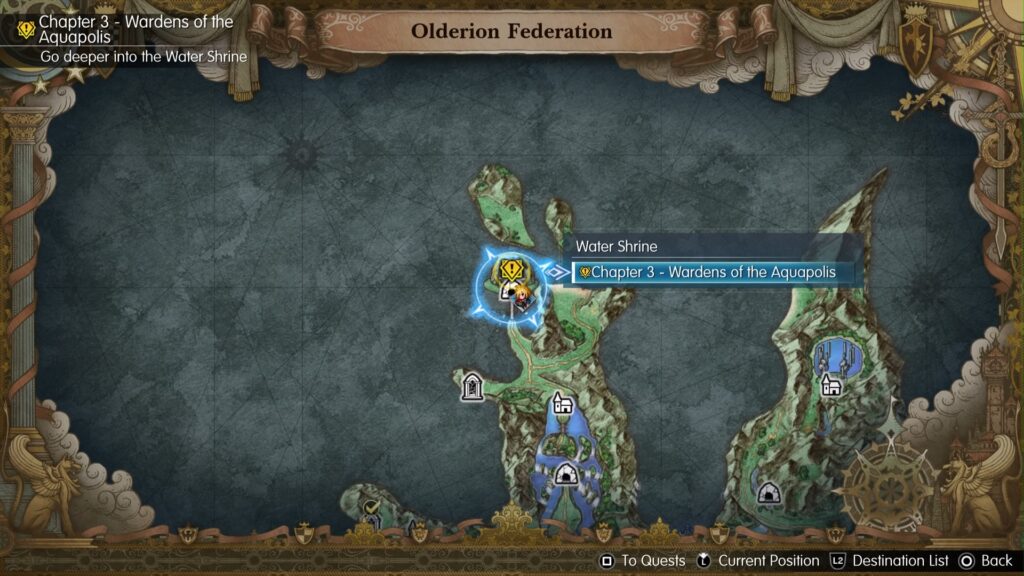
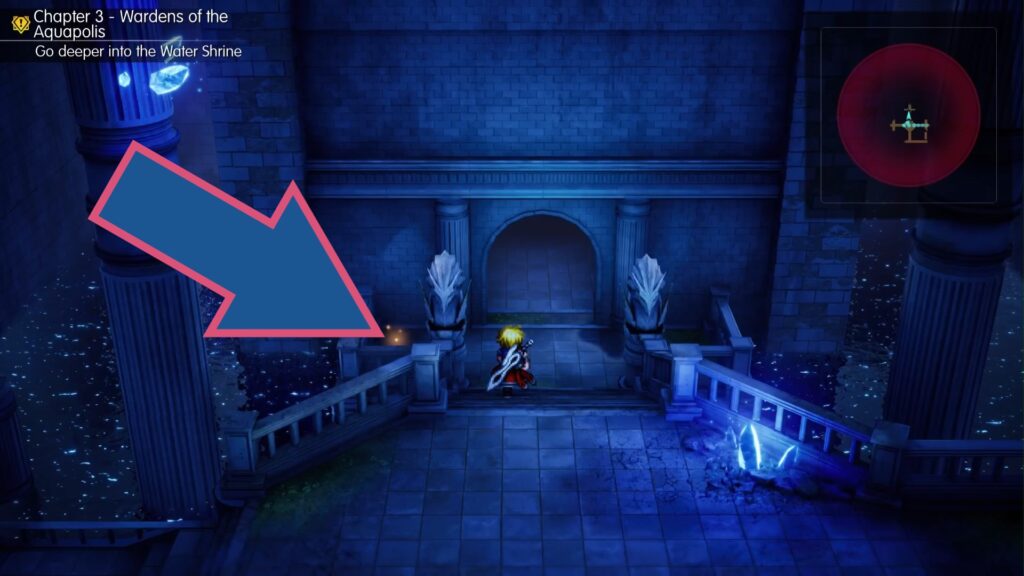
Go to the right, down two ladders, and look to the left of the doorway at the back to find this shard.
Go through the doorway and make your way across the next room until you get into a boat. Sail the boat up and disembark in front of the ladder, go to the right and pick up the twinkling shard.
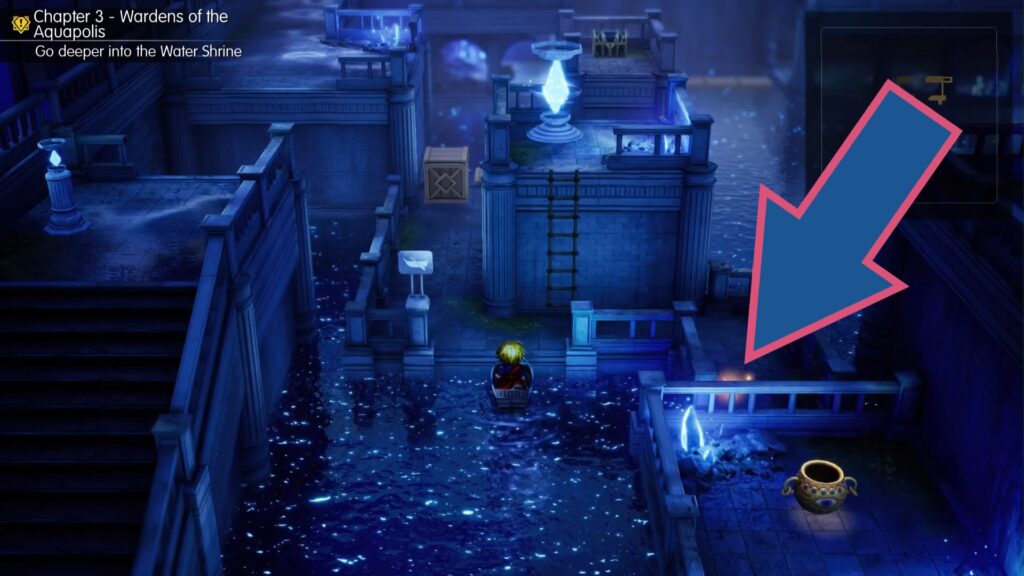
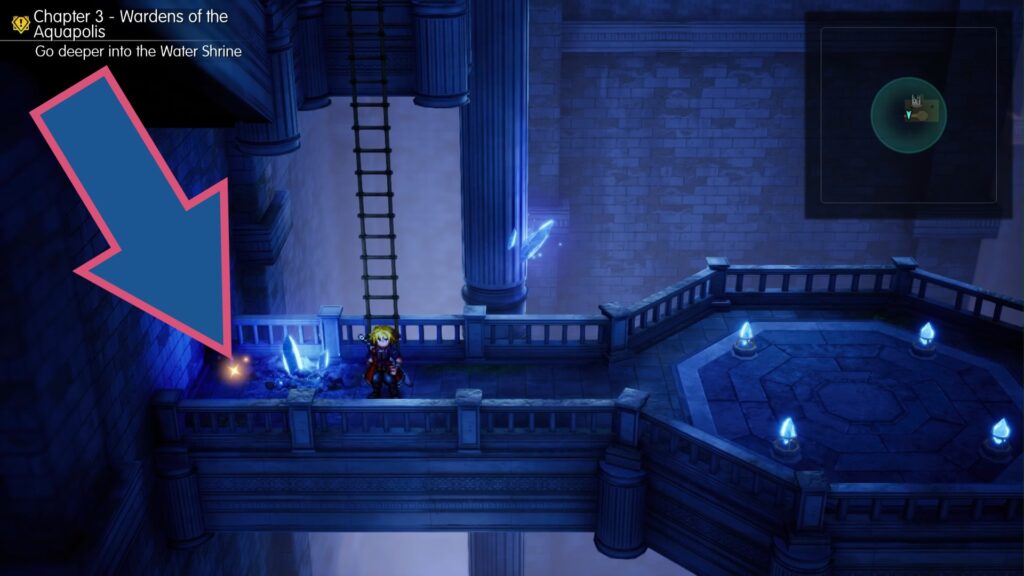
Head back to where the ladders were and go down the flight of stairs on the left to reach another ladder. At the bottom of it, to the left, is another shard.
Mozul Station
– 1 Shard –
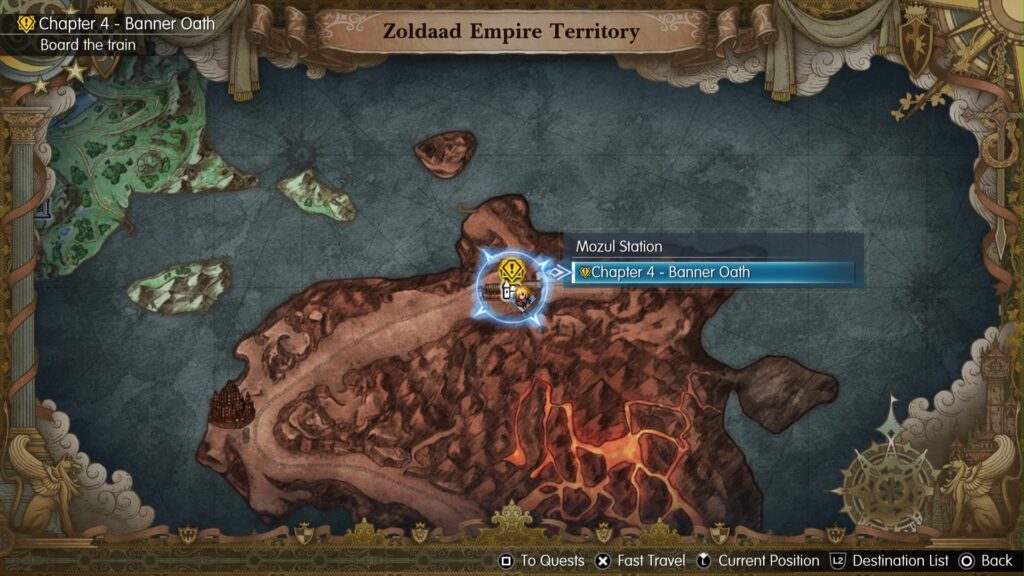
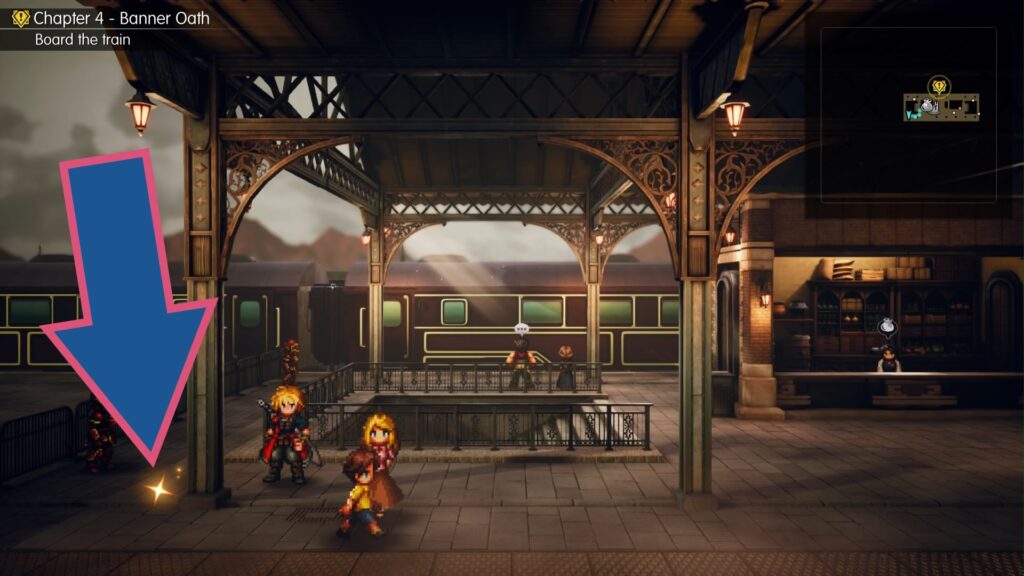
Go to the left end of the train platform, and at the base of the furthest left pillar in the foreground is a shard.
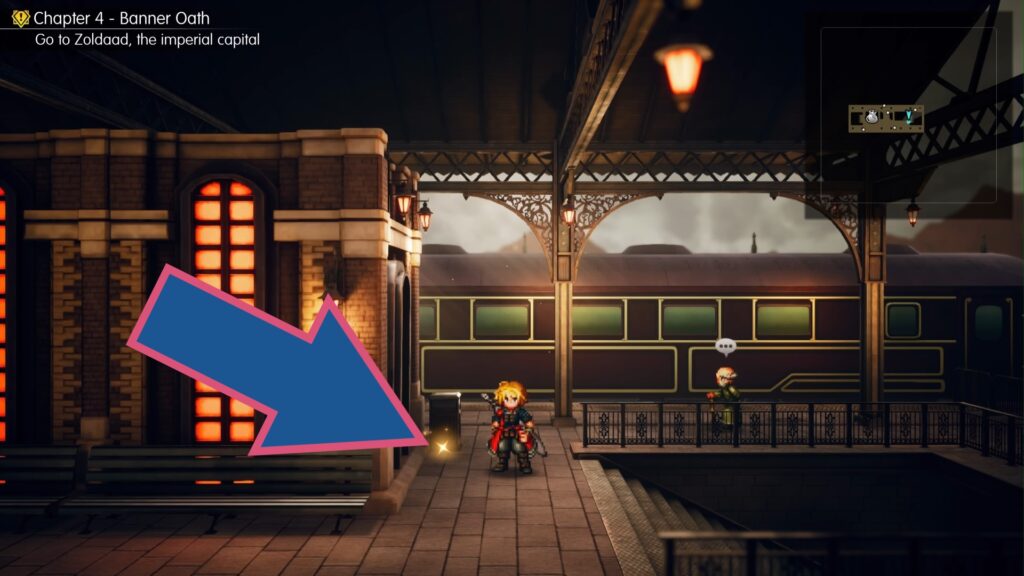
Capital Station
– 1 Shard –
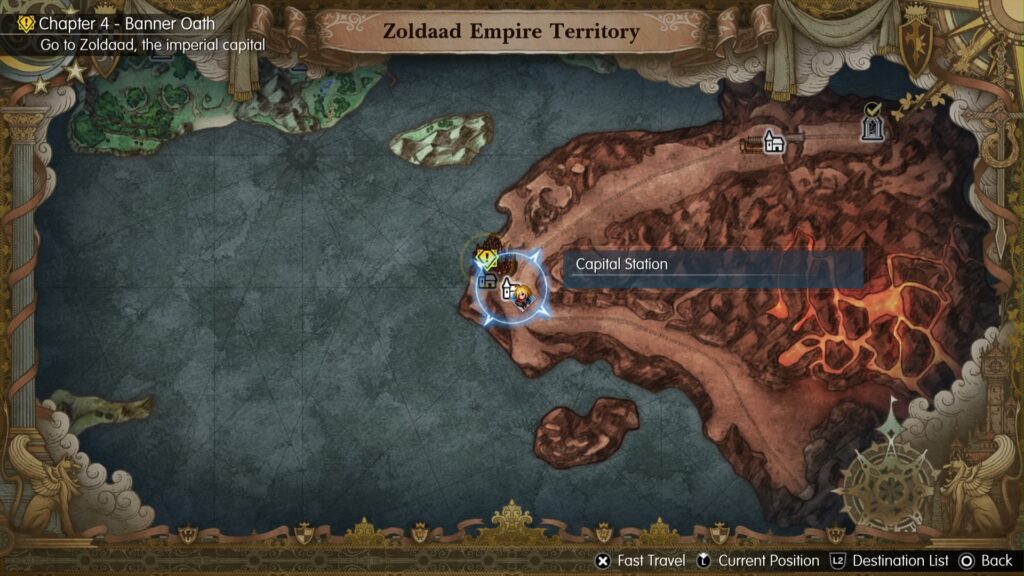
Opposite the flight of stairs on the right side of the platform is another shard.
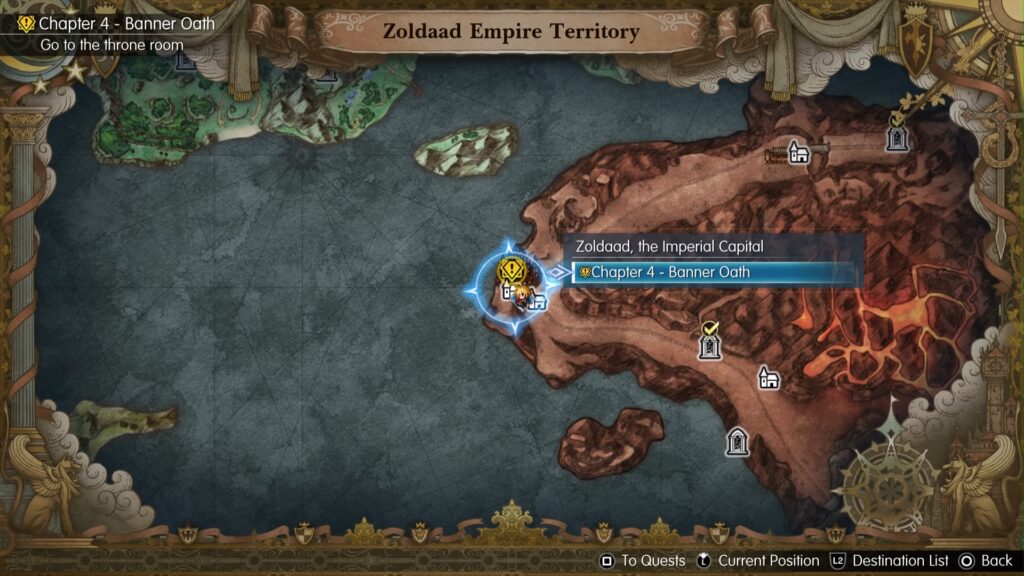
Zoldaad, the Imperial Capital
– 9 Shards –
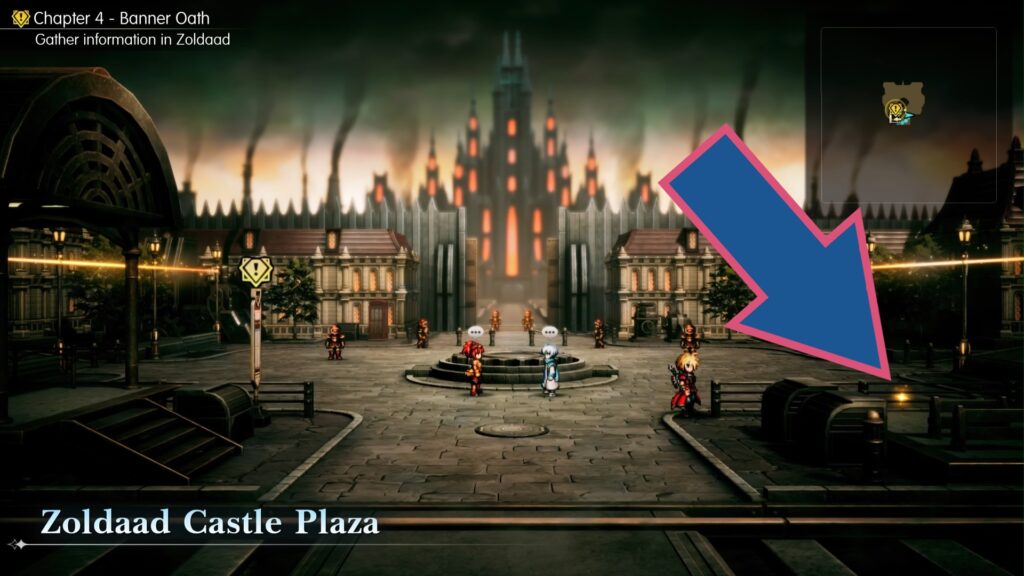
Go to the Zoldaad Castle Plaza, and in the near right corner of the plaza is a shimmering shard.
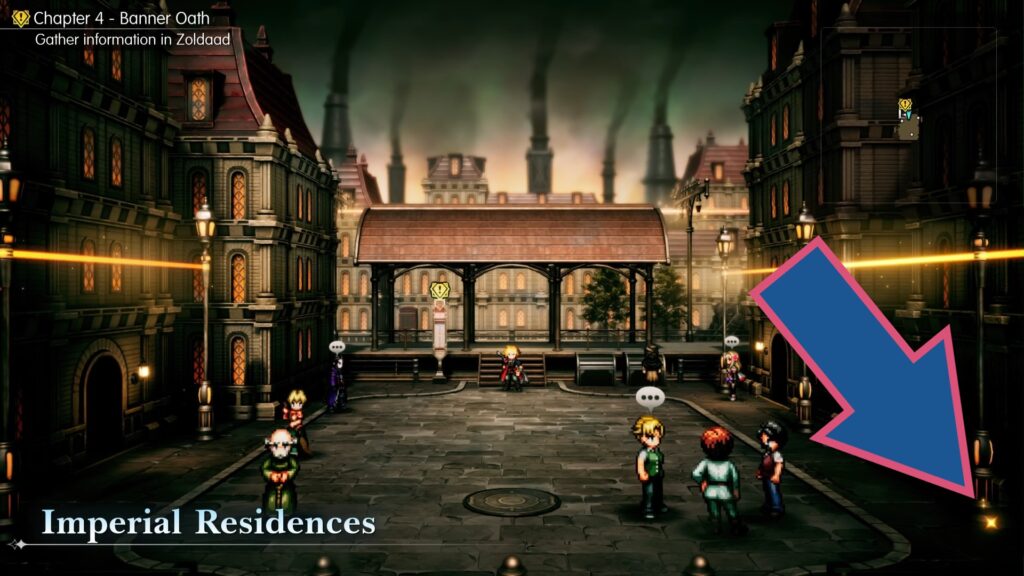
Visit the Imperial Residences and pick up the shard in the bottom right corner of the screen, near a lamppost.
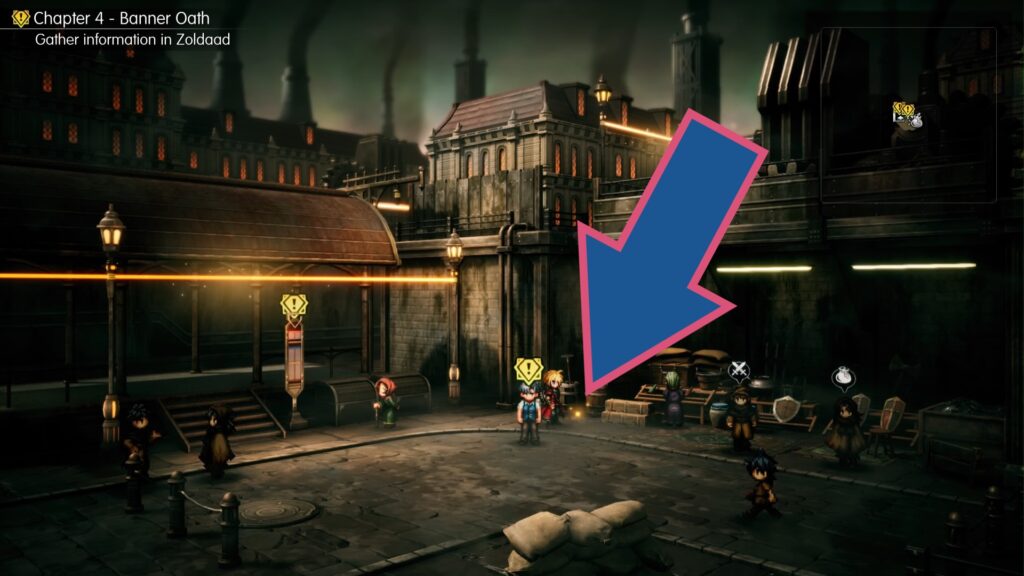
Stop by the Slums and grab the shard midway between the tram platform and the covered market area.
When heading through the Underground Tunnel, look for a doorway obscured by a walkway overhead. Go through it and up the stairs to find a shard in a little room.
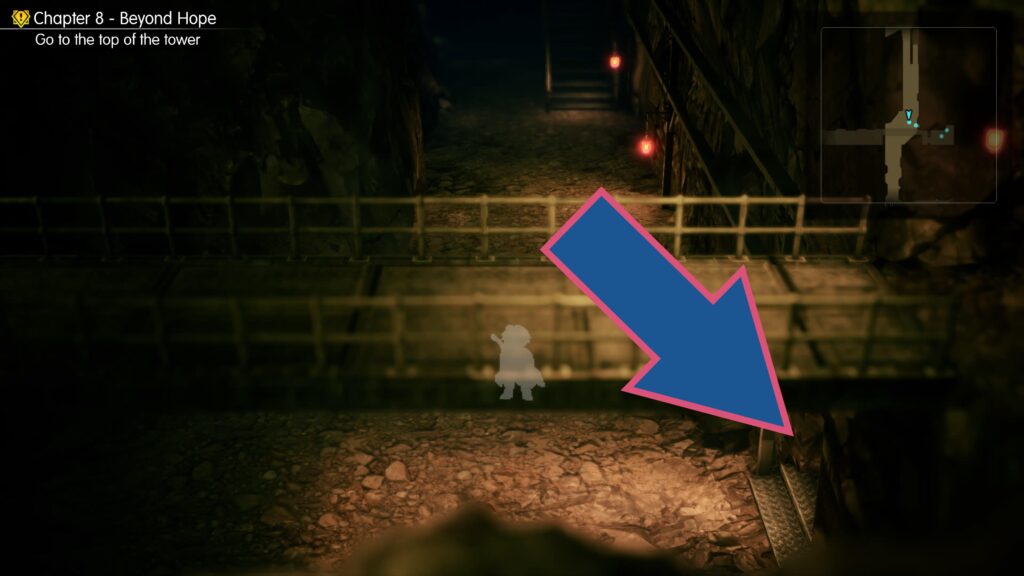
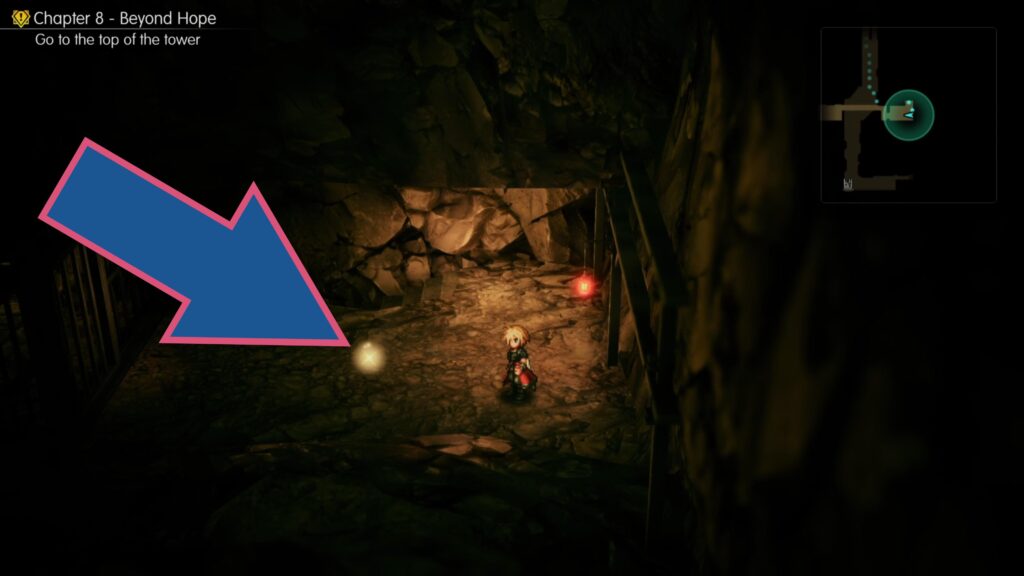
Go down the ramp below the flight of stairs and follow the path to its end to find a sparkling shard.
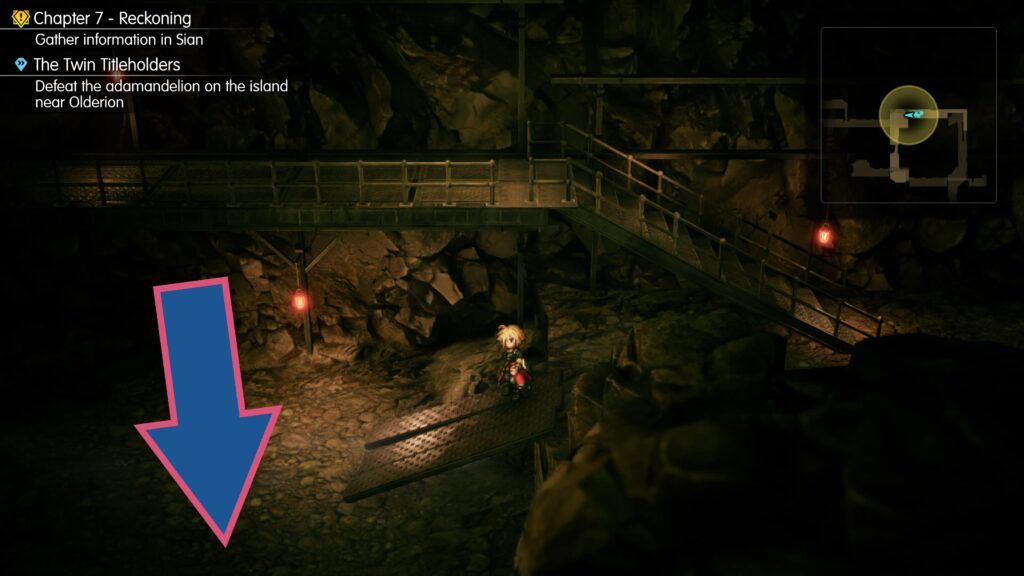
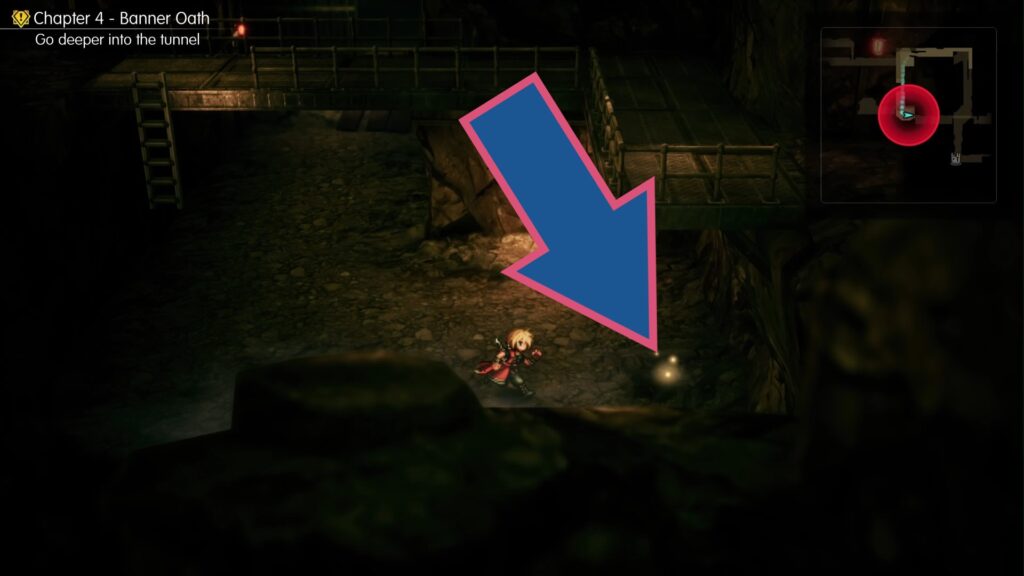
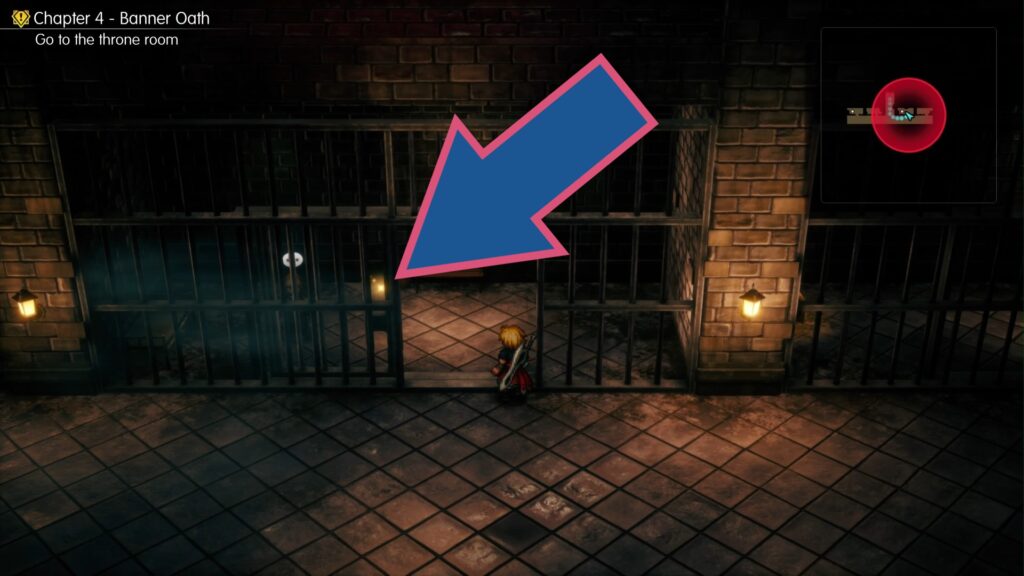
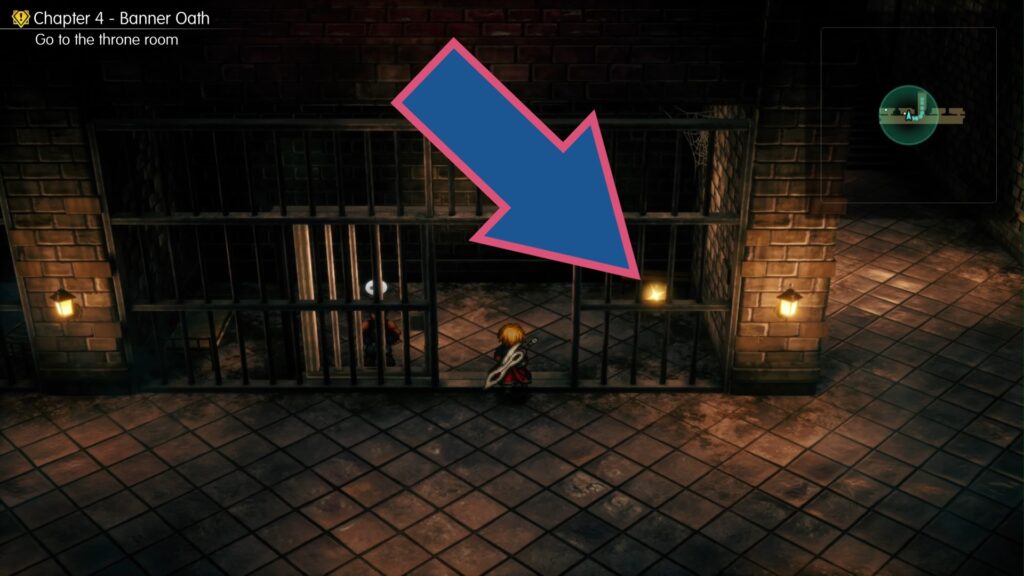
Once you have the Master Key for the prison cells, there are two cells you can unlock, with a shard in each.
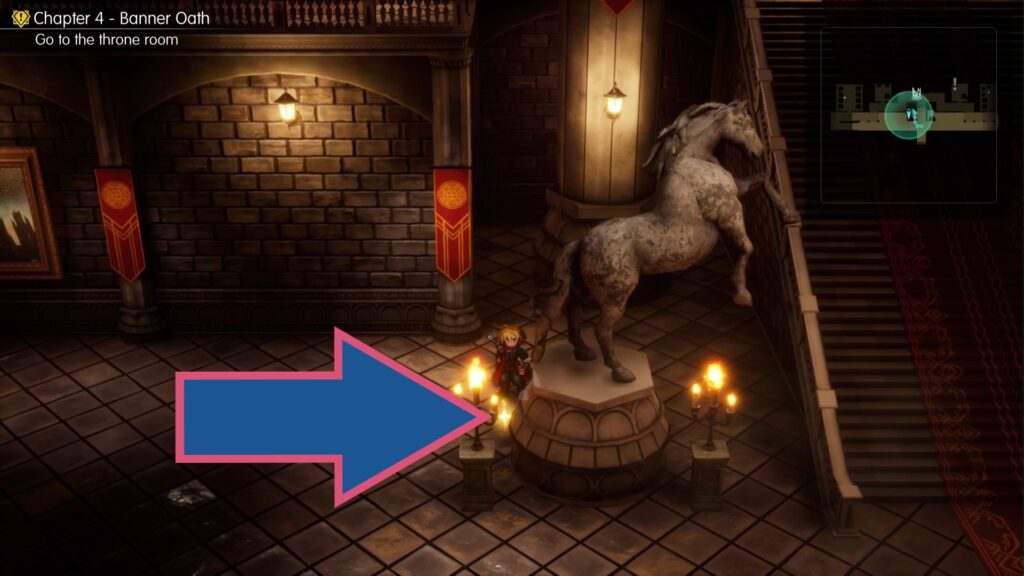
Look behind the left horse statue at the bottom of the stairs leading to the throne room to find another shard.
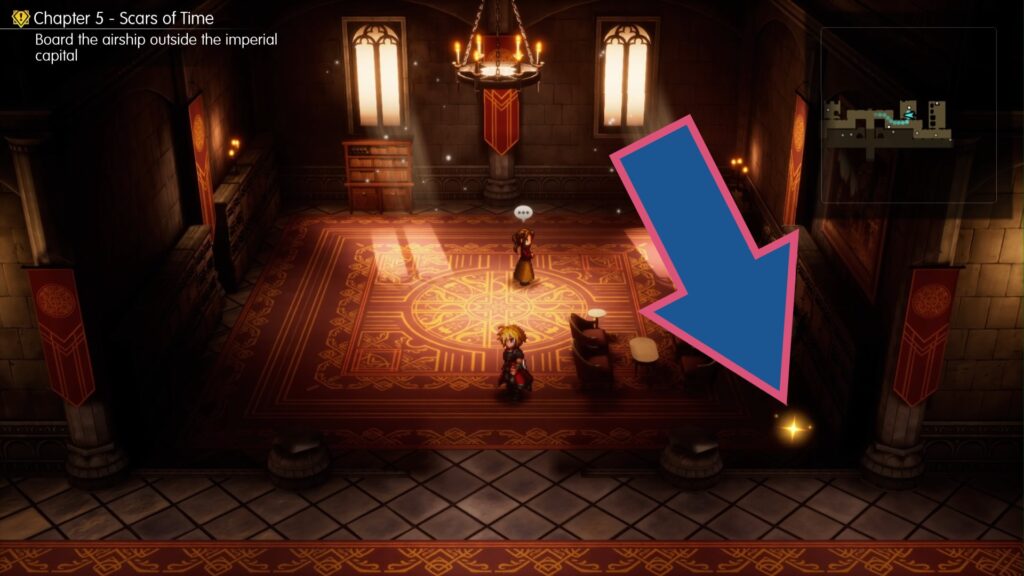
Go inside the room to the right of the central staircase on the upper floor and look in the bottom right corner to find a shard.
Rebel Hideout
– 2 Shards –
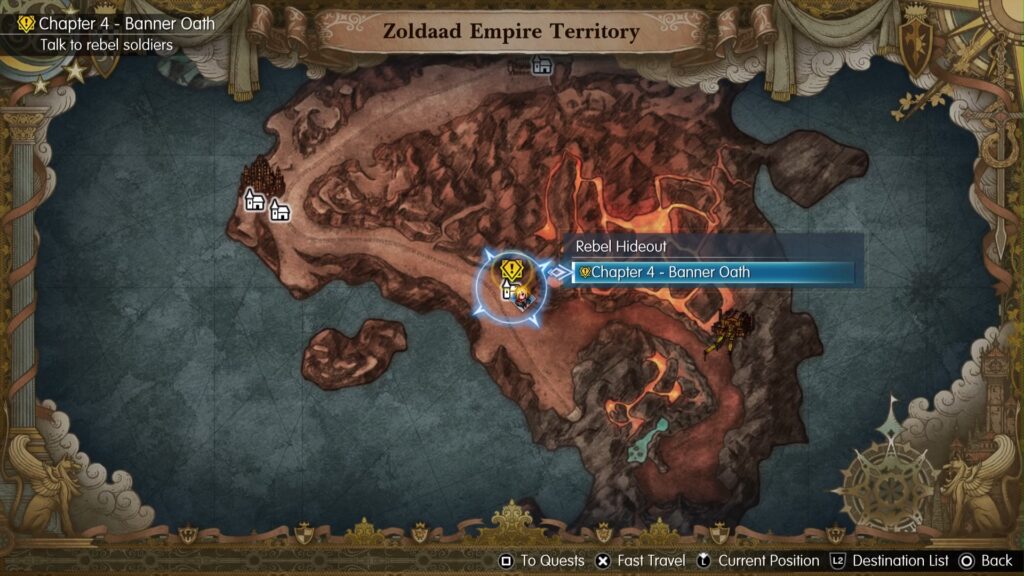
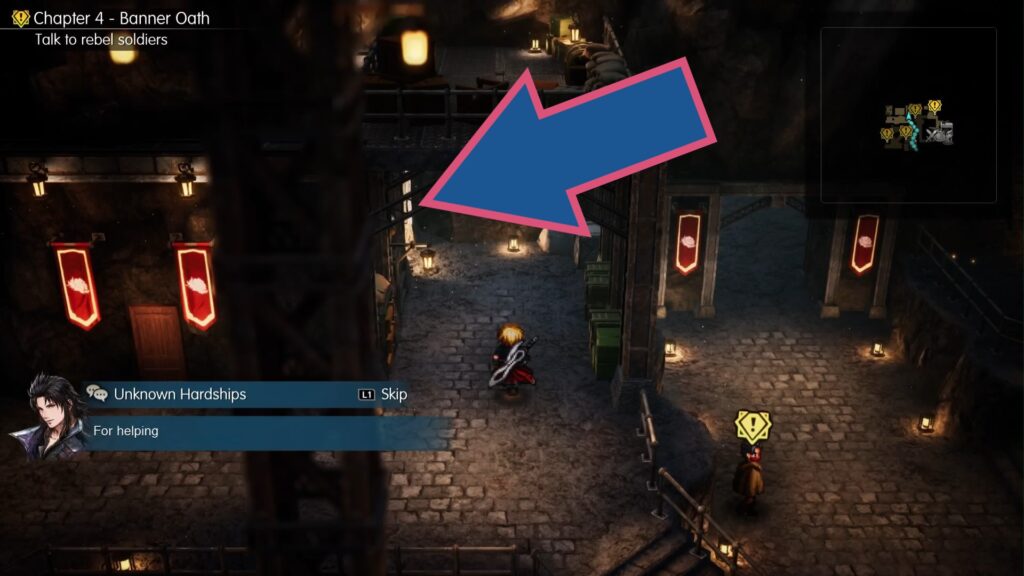
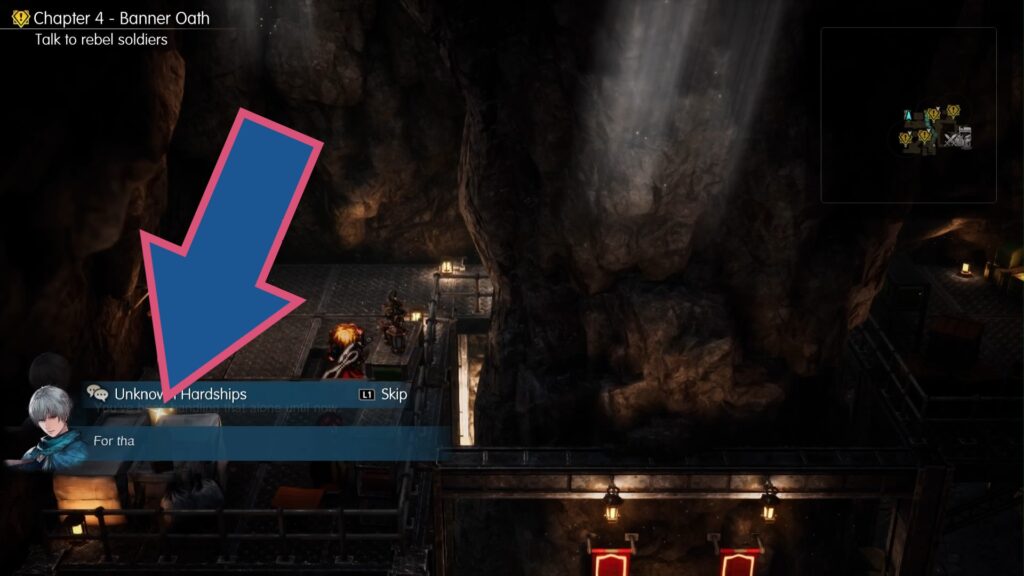
Go up the stairs on the right side of the Rebel Hideout near the large doorway and look behind the support pillar to find this shard.
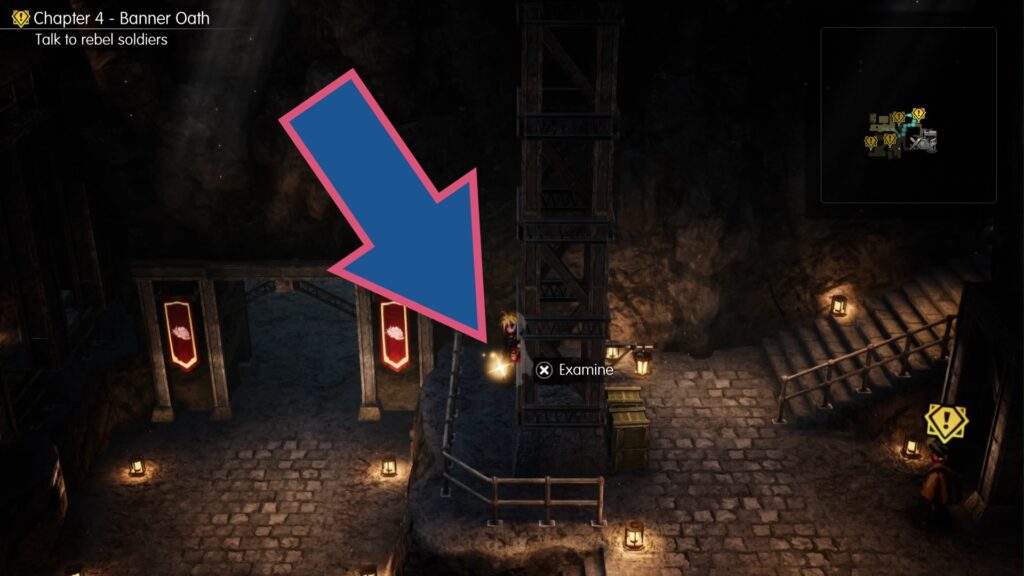
Go to the right side of Jake’s room and go down a concealed passage to reach a ladder. At the top, to the left of the ladder, is another shard.
Weapons Factory
– 2 Shards –
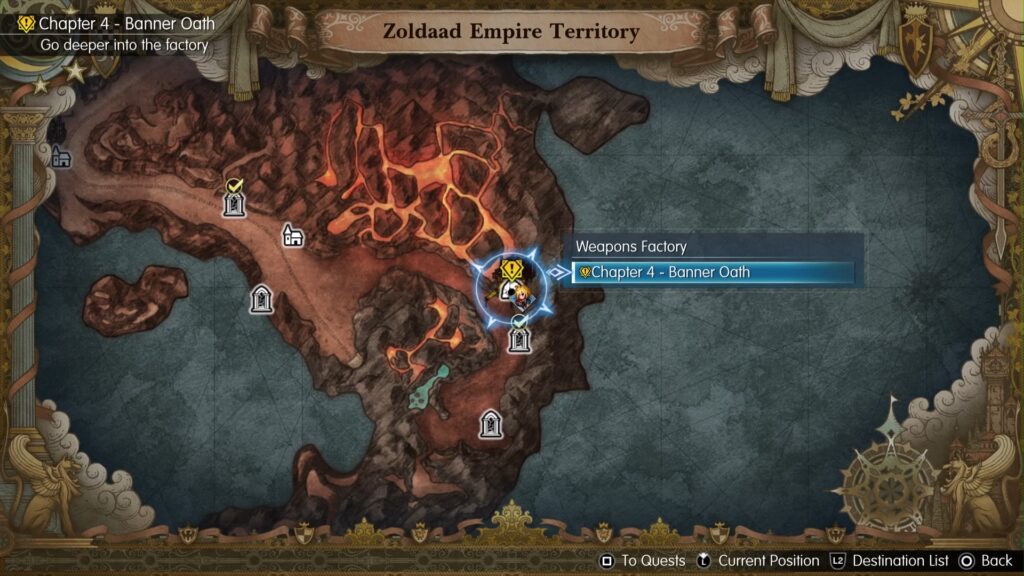
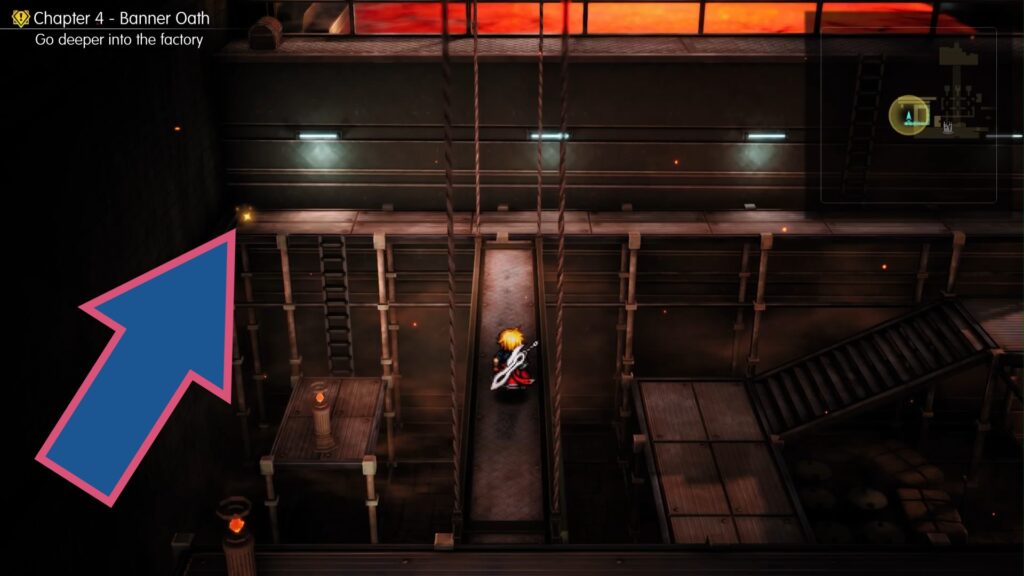
Go to the left, make your way up to the orange crystal, and interact with it to create a bridge. Cross it and pick up the shimmering shard to the left past the ladder.
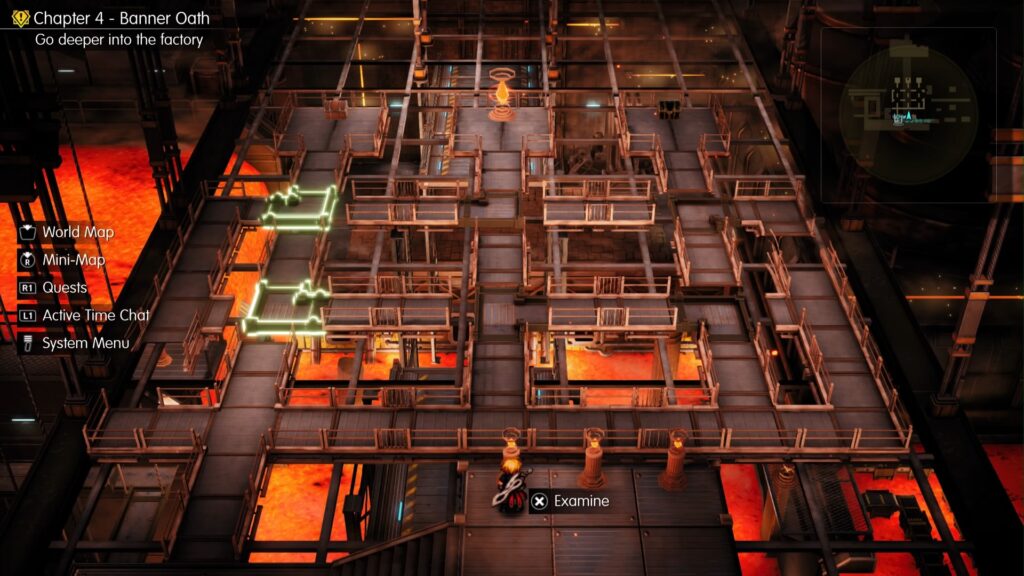
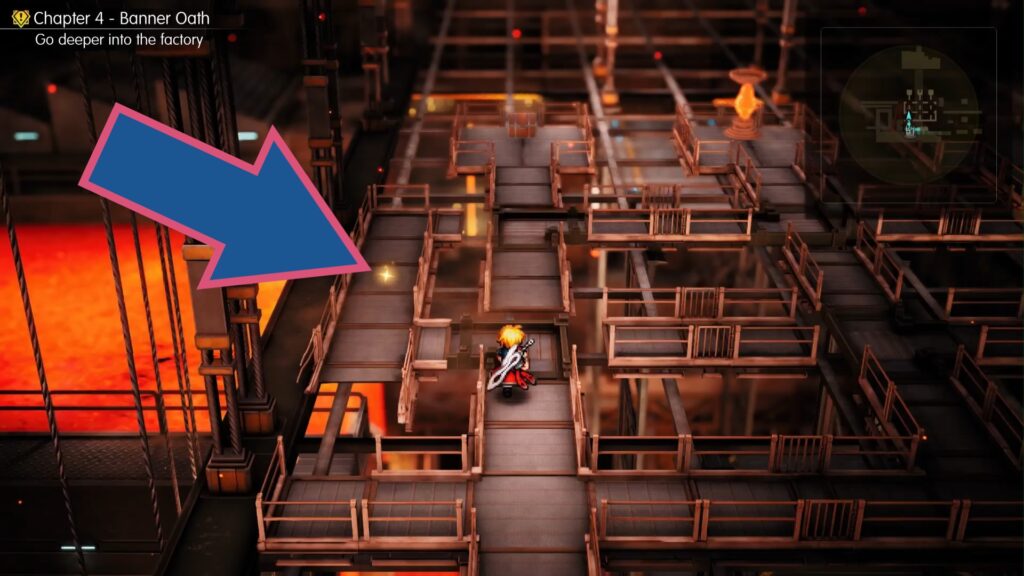
From the entrance, go to the right and make your way up to the area with multiple, crisscrossing walkways and three levers. Use the levers to turn portions of the walkways to make a path to the shard on the leftmost walkway.
Mysidia, the Magiapolis
– 5 Shards –
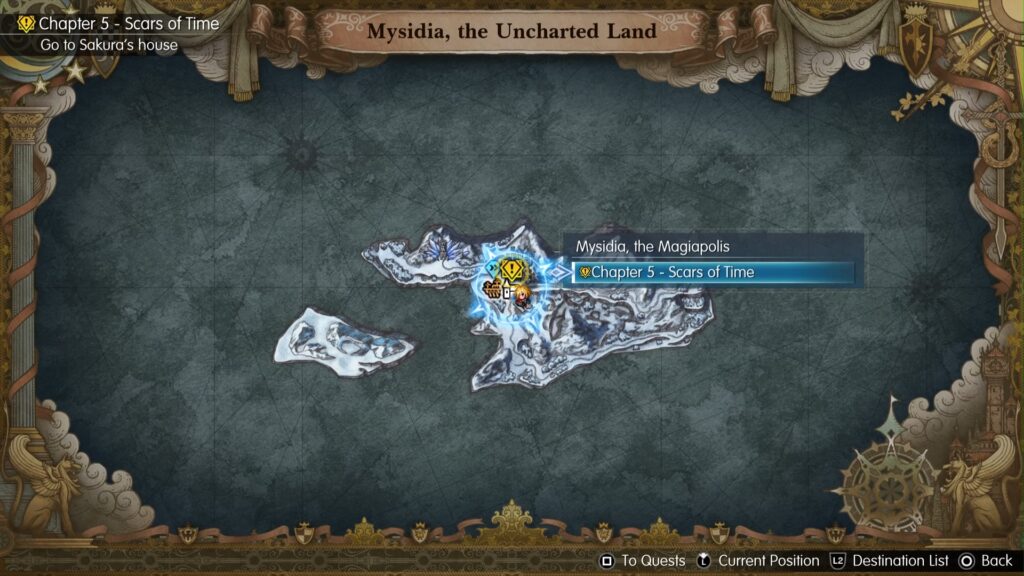
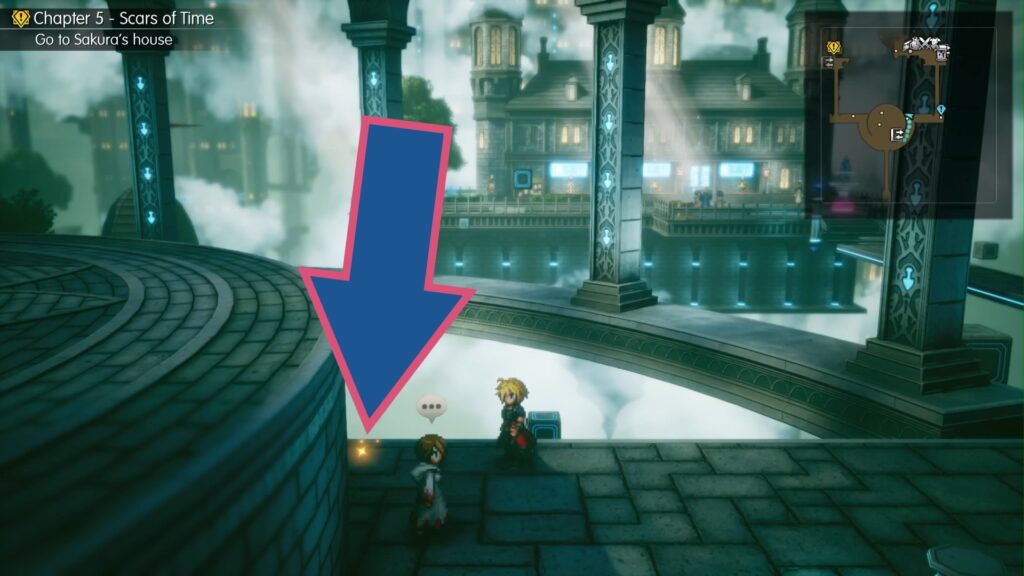
Go down the right-hand flight of stairs from the entrance and look for this shard tucked up against the wall to your left.
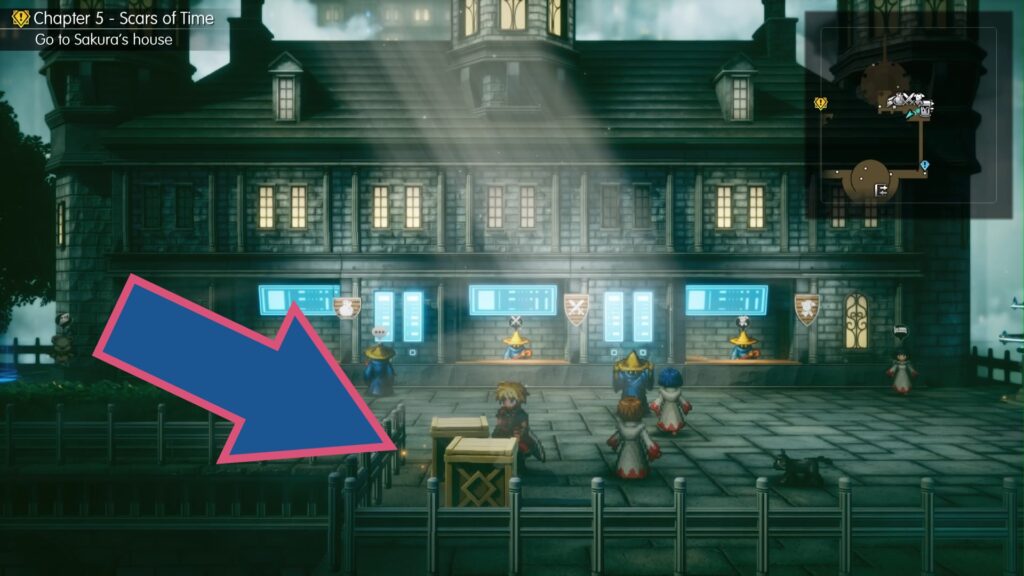
Head to the shopping area and check between the boxes and the railing to find another shard.
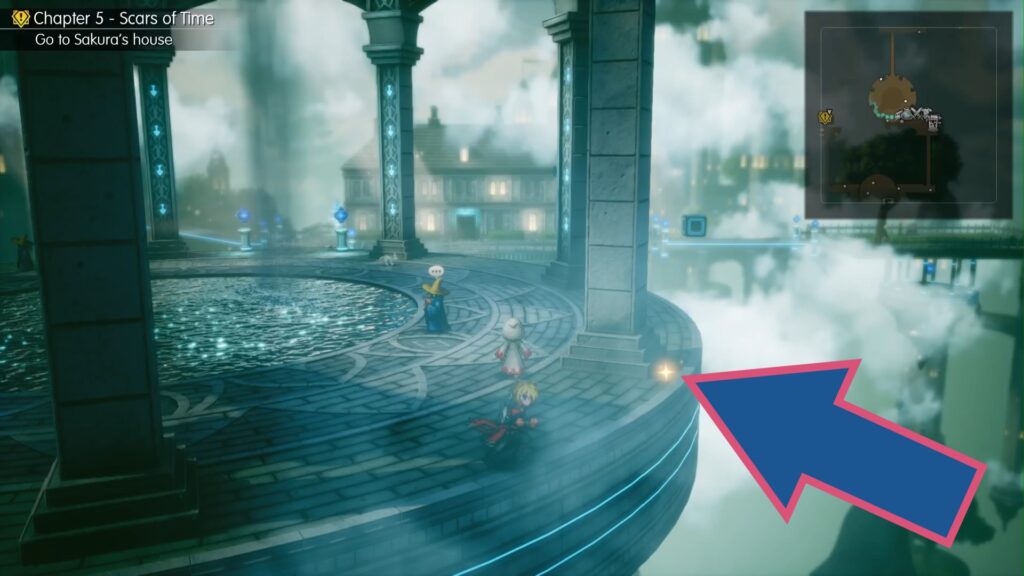
Use the teleportation platform to travel to the higher level and look for a sparkling shard behind a pillar on the right side.
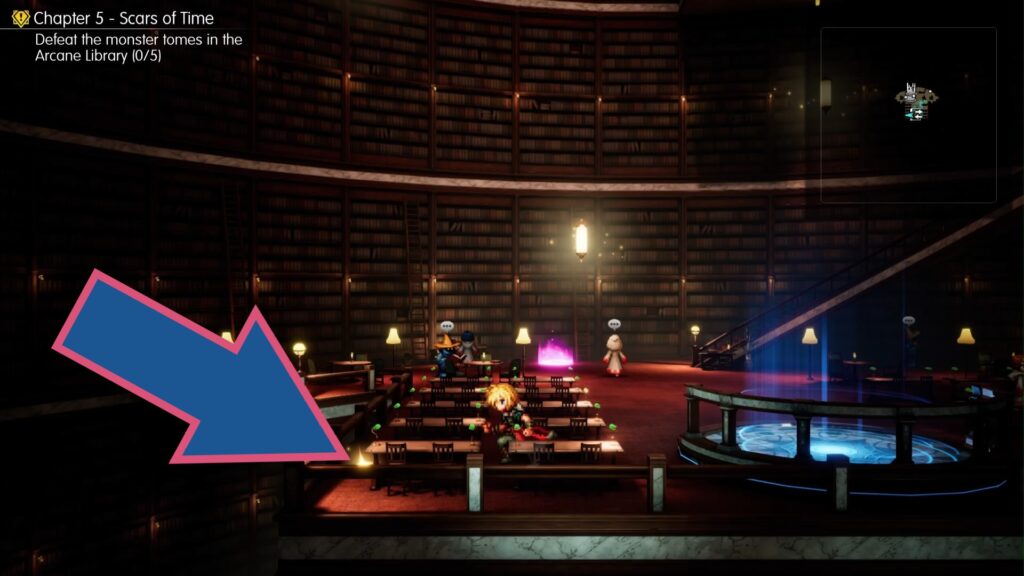
Walk between the long tables to the left of the entrance to the Arcane Library for a fourth shard.
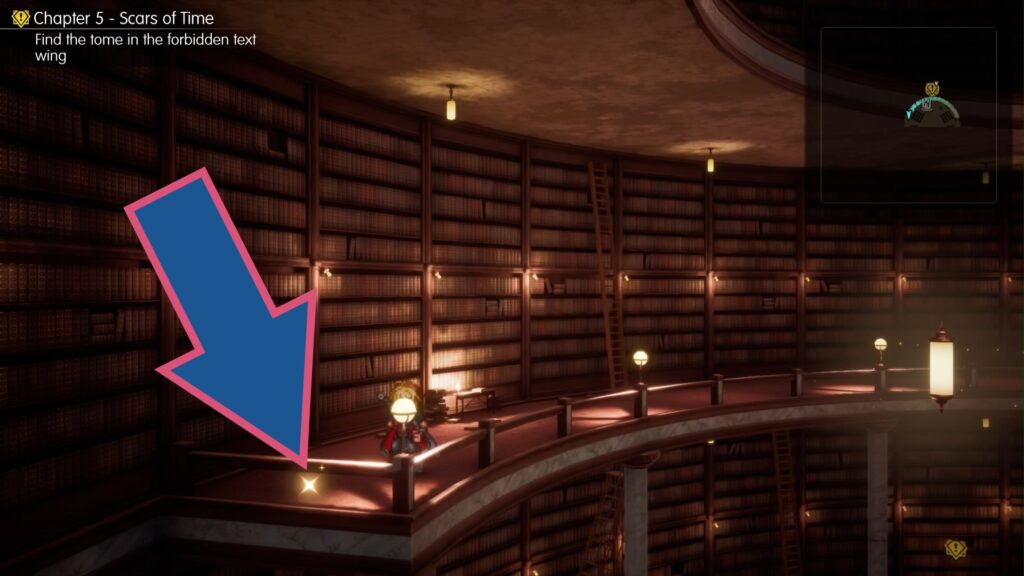
Go up the stairs and take the I elevator up. Go down the stairs on your left, take the VI elevator up next. Go up the stairs and use the teleport to reach the Forbidden Text Wing, then climb up the ladder to the balcony. At the far left end is a shard waiting to be collected.
Village of Sunioo
– 2 Shards –
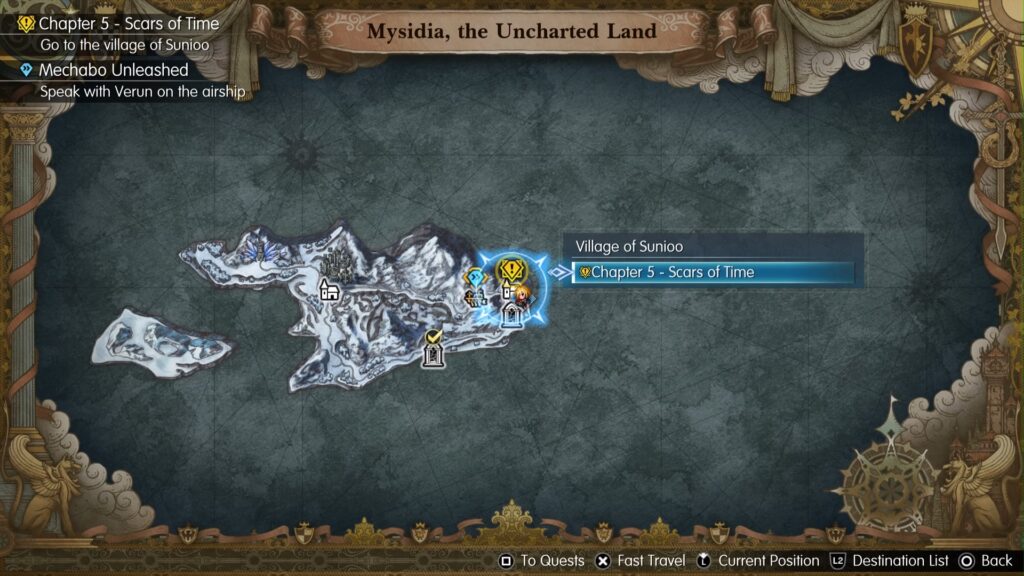
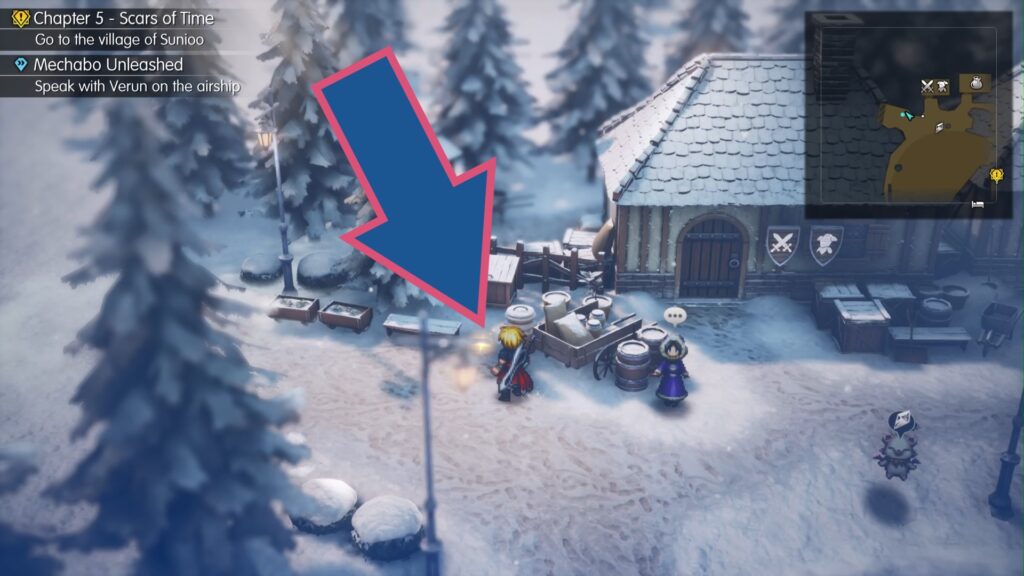
As soon as you enter the Village of Sunioo, you’ll find a shard on the ground between a wooden cart and a row of frozen water troughs.
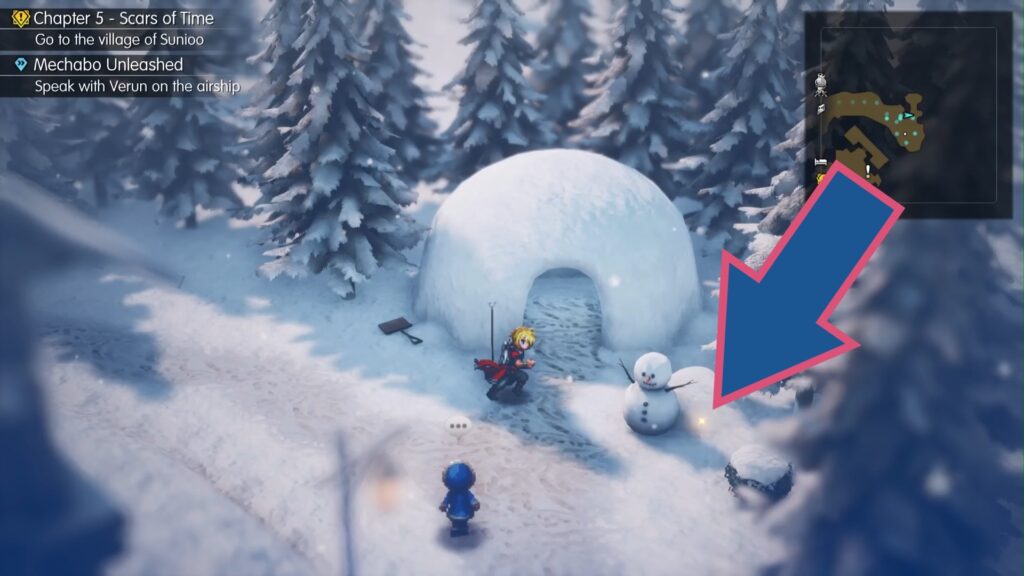
Head to the right-hand side of the village where an igloo and a snowman have been built. Between the snowman and a tree stump is another shard.
Nameless Ruins
– 2 Shards –
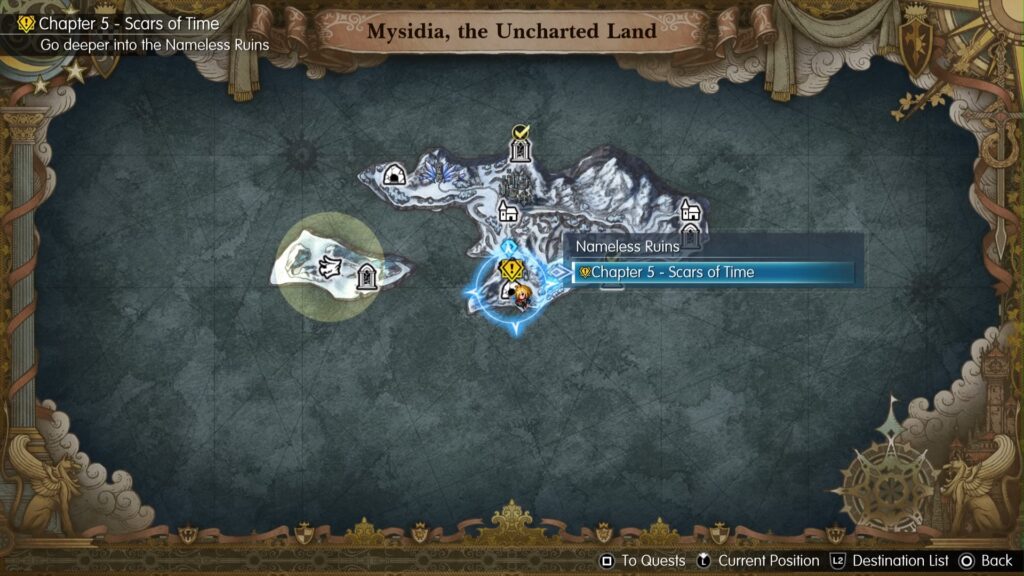
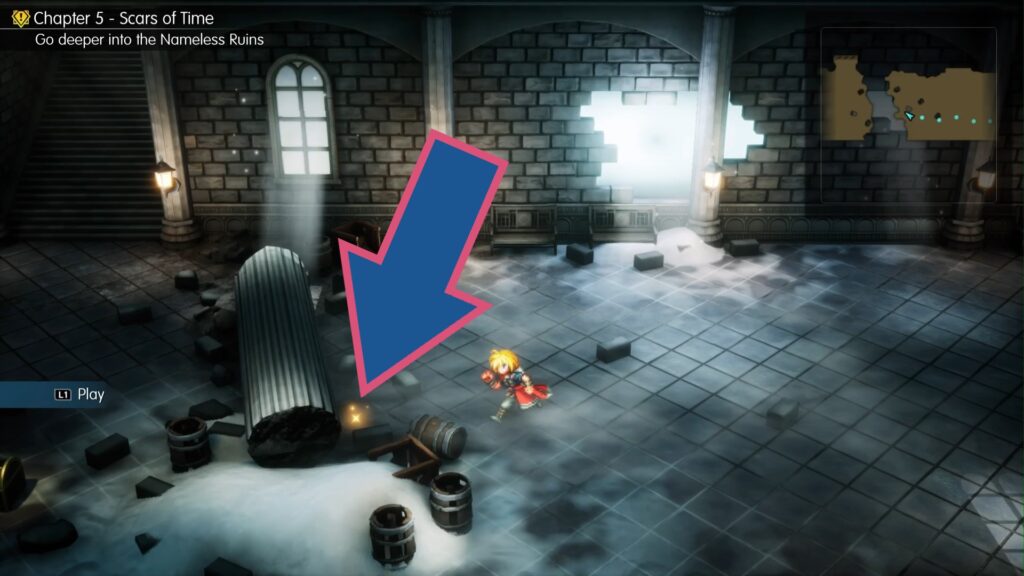
From the entrance to the Nameless Ruins, head left to find a collapsed pillar blocking your path. On the floor next to the pillar is a twinkling shard.
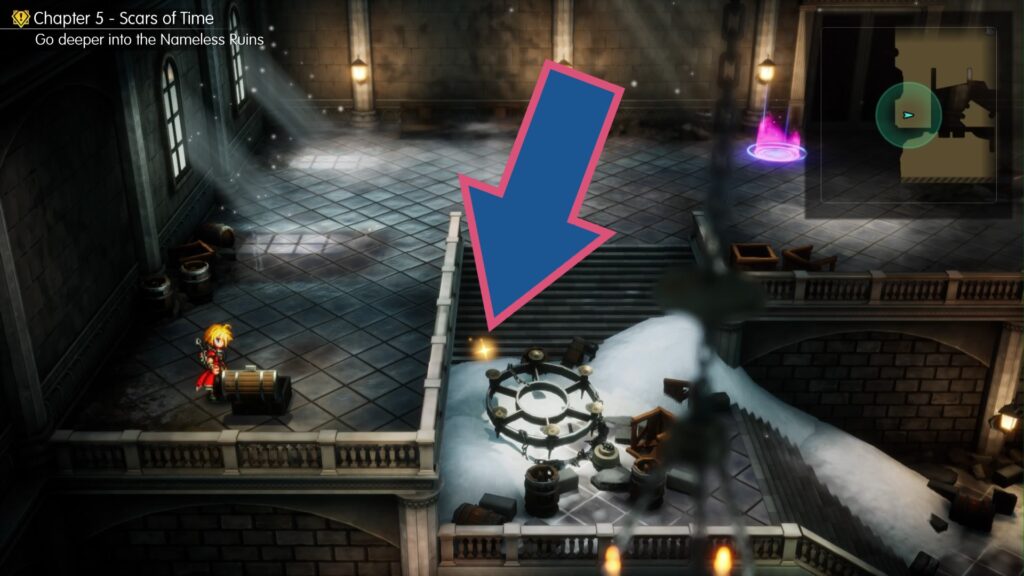
Go down the stairs to the left of the other save point/teleport to find a shard by the fallen candelabra.
Archwitch Fina’s Psyche
– 3 Shards –
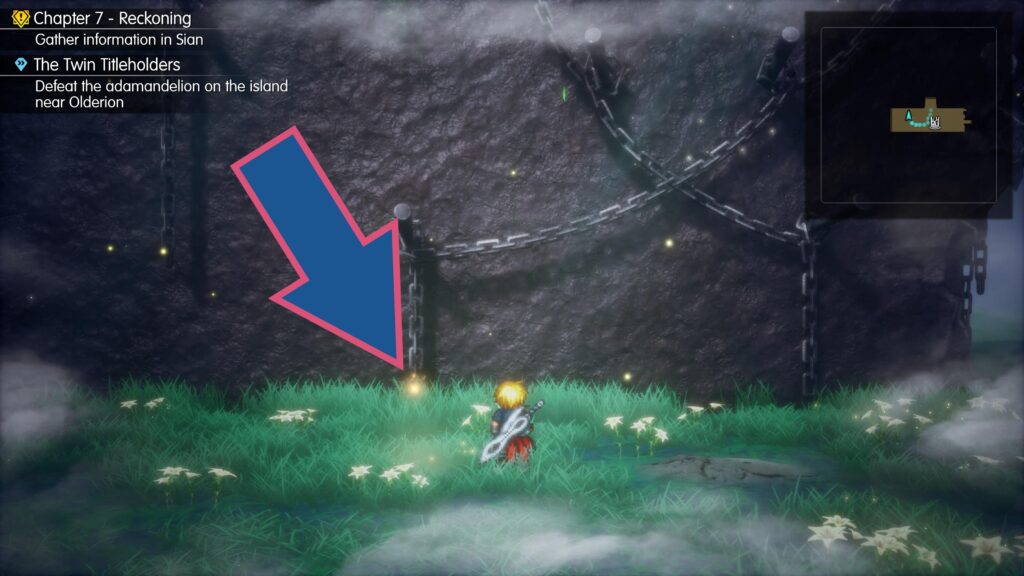
On the left side of the gate, where one of the chains meets the ground, is a sparkling shard.
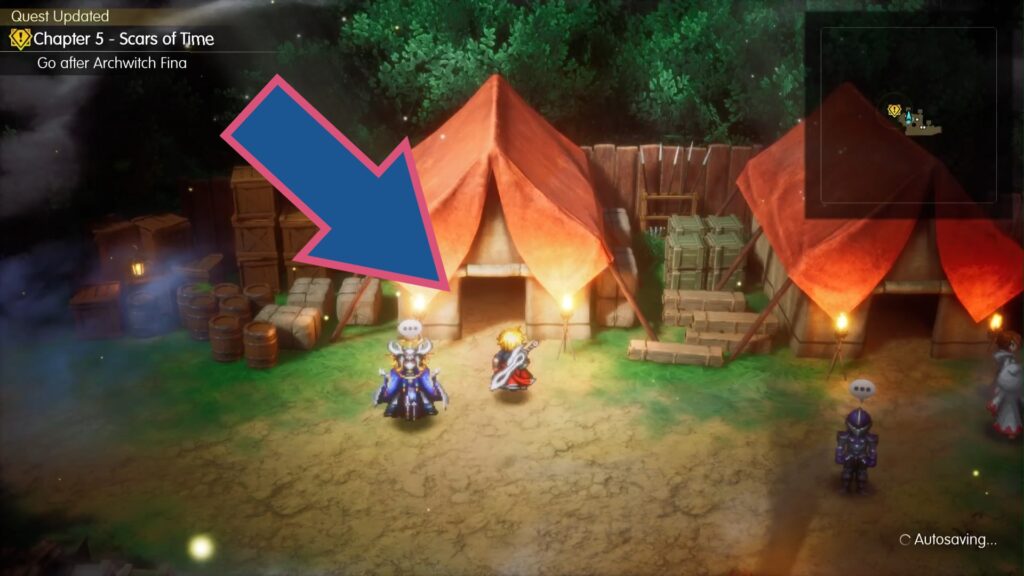
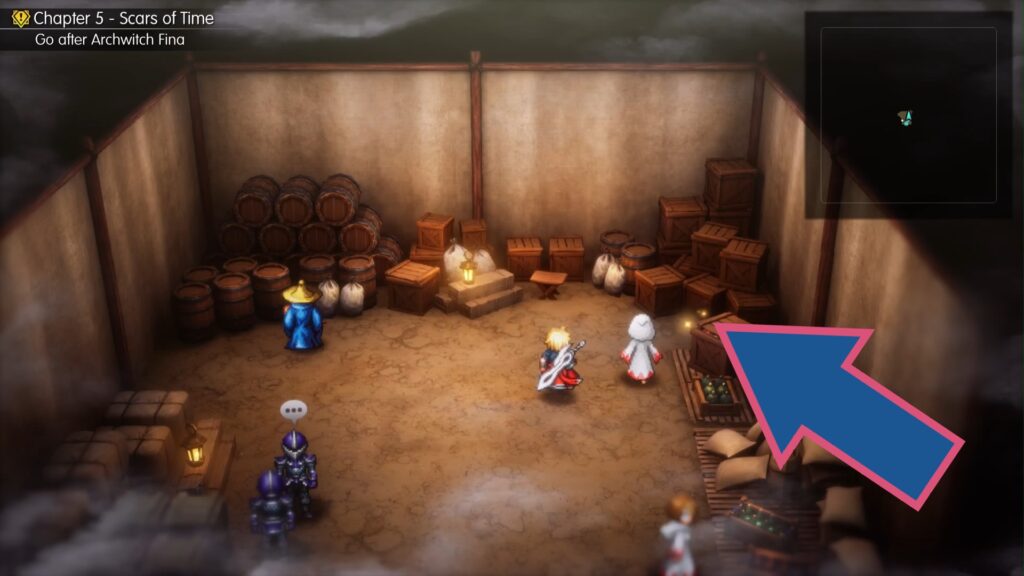
A shard can be found in the top left tent in the campsite, nestled amongst the wooden crates in the top right corner.
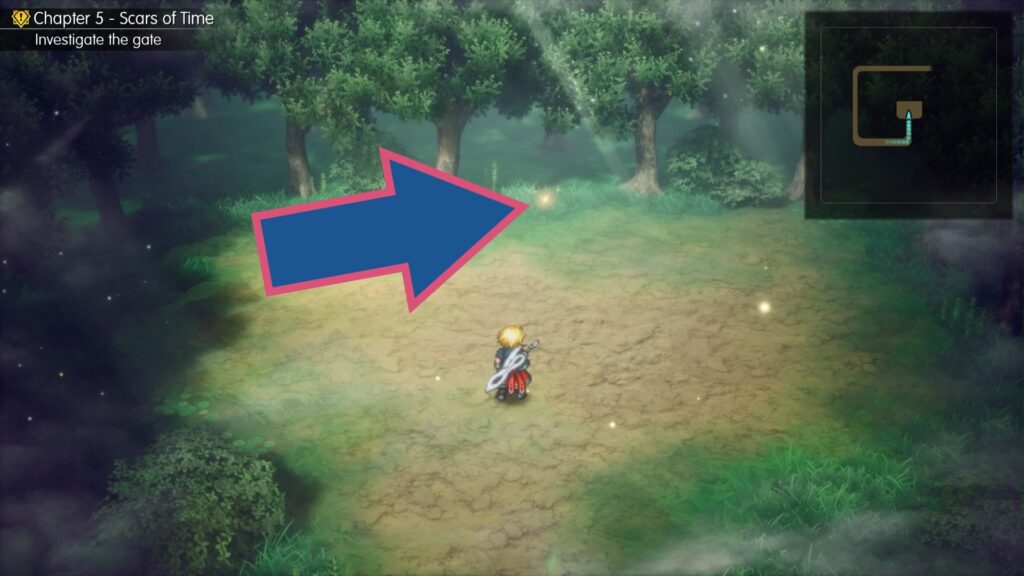
Another shard can be found at the back edge of the clearing at the end of the forest path.
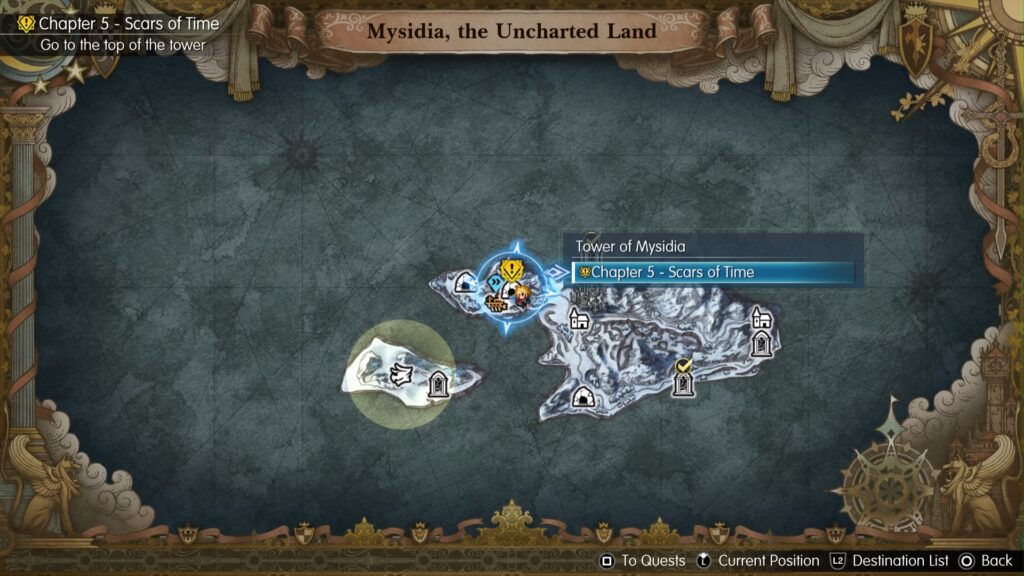
Tower of Mysidia
– 4 Shards –
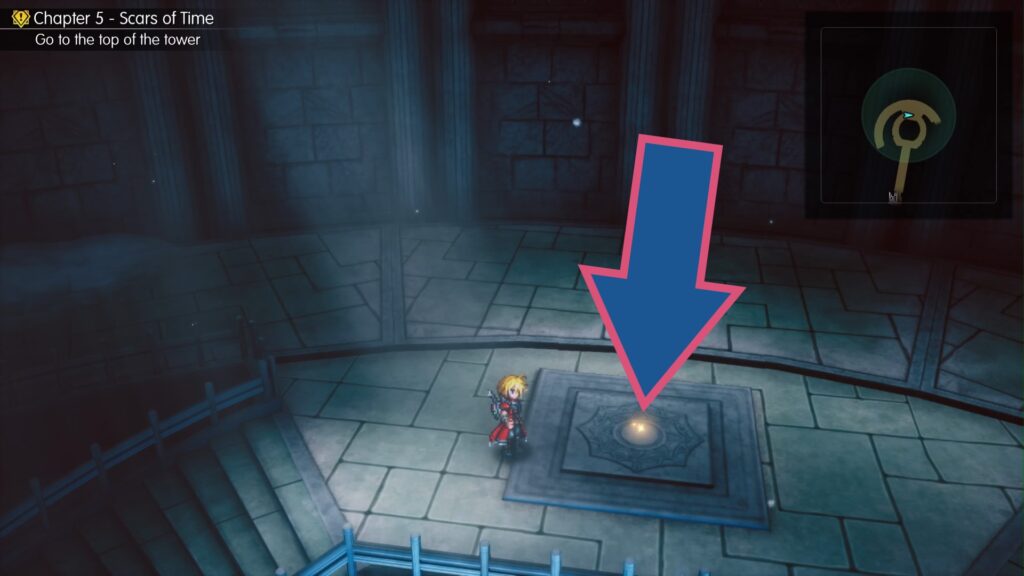
Directly behind the large icicle at the entrance to the Tower of Mysidia is a shard on top of a large, engraved flagstone.
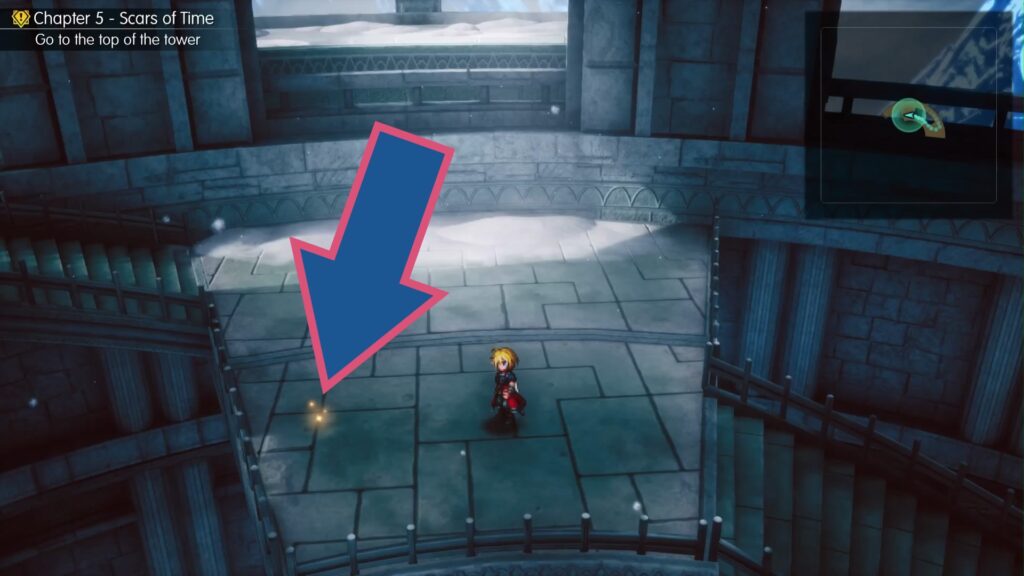
Head up the spiral staircase, and you’ll find a second shard on a landing between two smaller staircases going to the left.
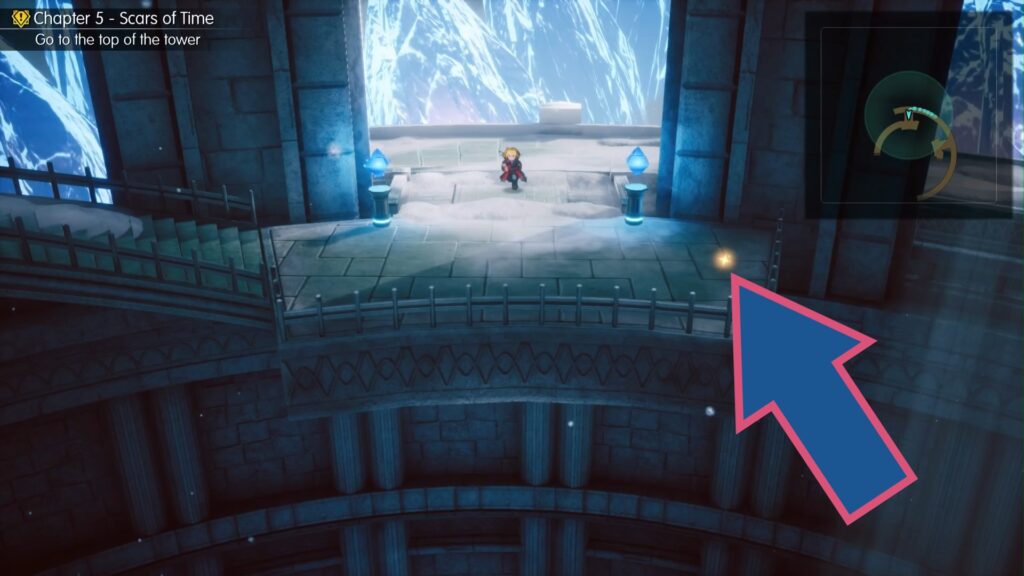
After running around the outside of the tower, you’ll spot the next shard opposite another spiral staircase.
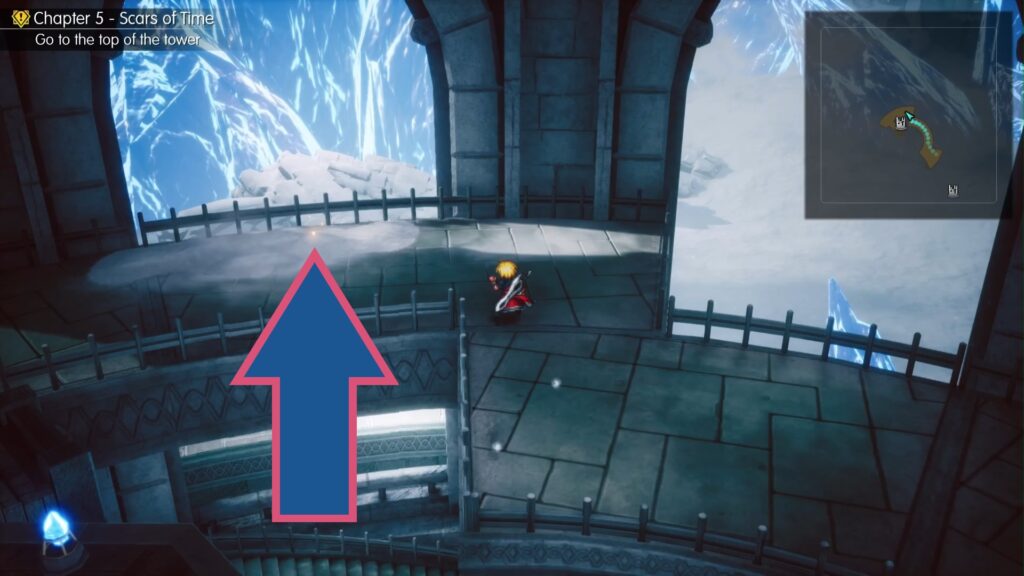
The last shard in the Tower of Mysidia is sitting on top of a pile of snow near the lift up to the top of the tower.
Archwitch Fina’s Psyche Part 2
– 1 Shard –
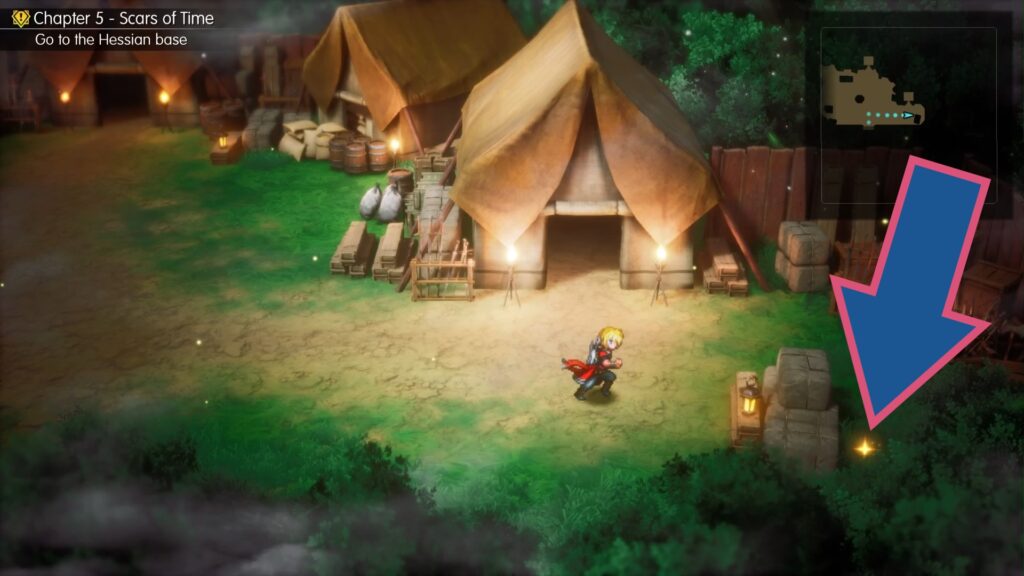
Once you reach the campsite of the Sworn Eight, go to the right and look behind the stacked boxes beneath the tent to find a shard.
Gaberada, the Undertown
– 1 Shard –
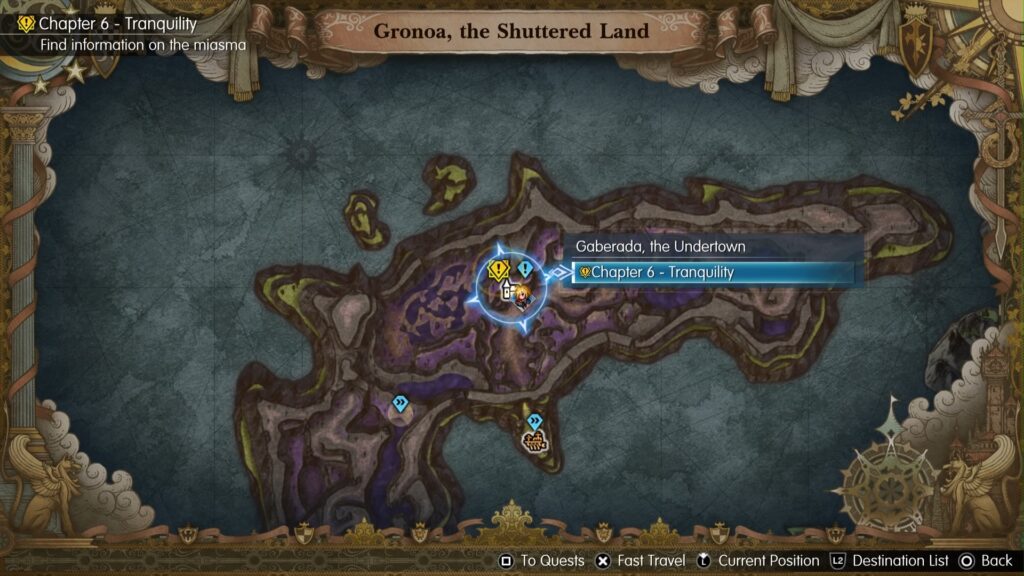
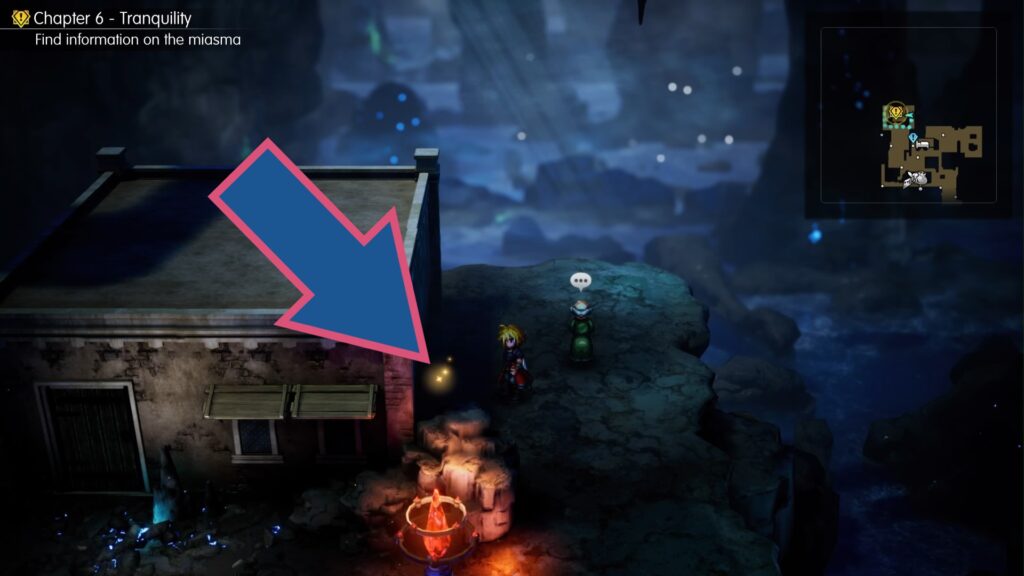
Head to the building at the back left of the town, where the old lady teaches Fina the spell Holy, and look against the right exterior wall to find this shard.
Research Centre Ruins
– 3 Shards –
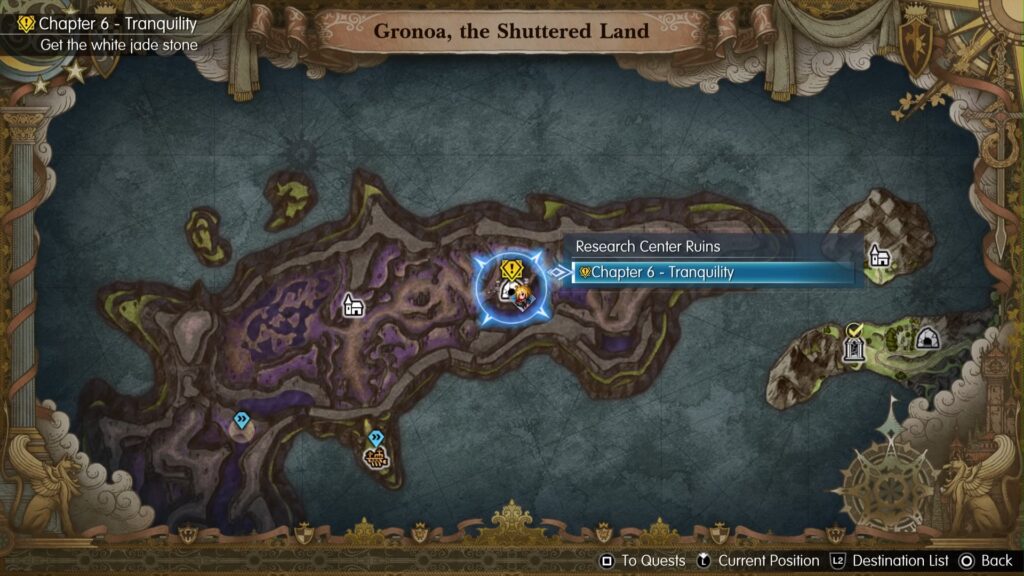
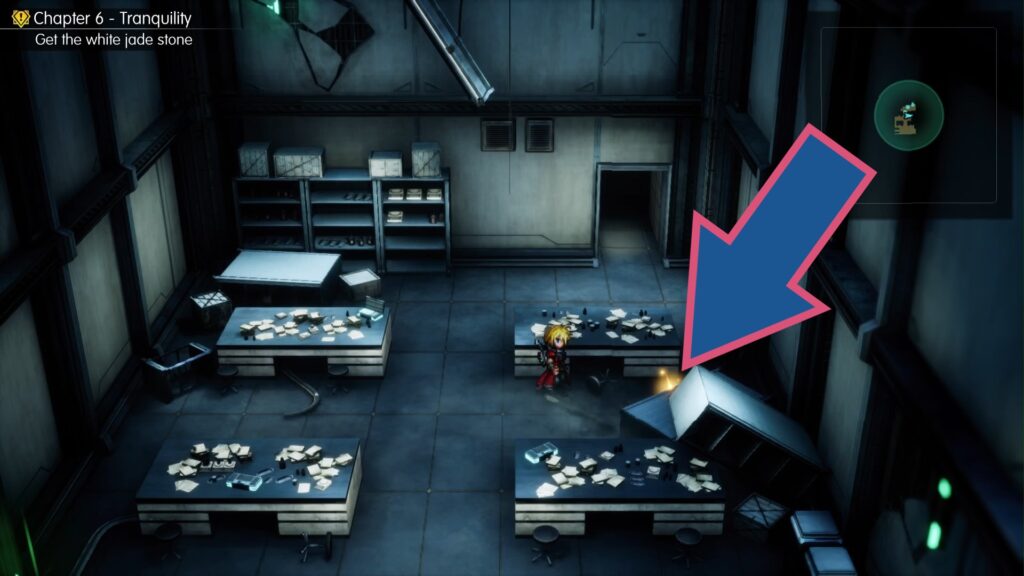
Look behind the collapsed filing cabinets between the two tables on the right side of the office room with the green teleport to find a shard.
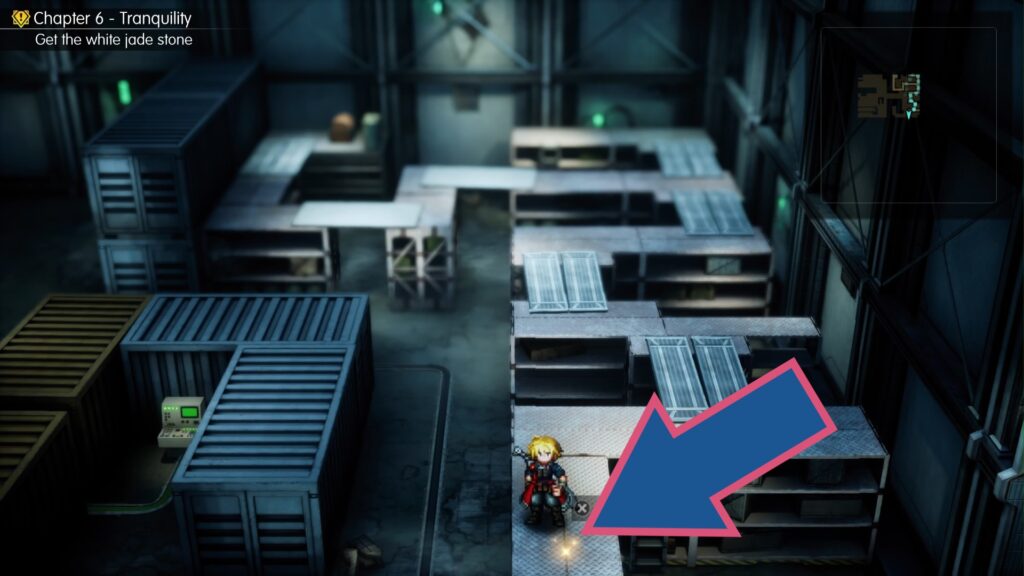
Once you have reached the room where you need to interact with three computers to turn on a green teleport, head to the right-hand side and climb up the ladder at the back to get onto the shelves, run down to the bottom near the screen to find this shard.
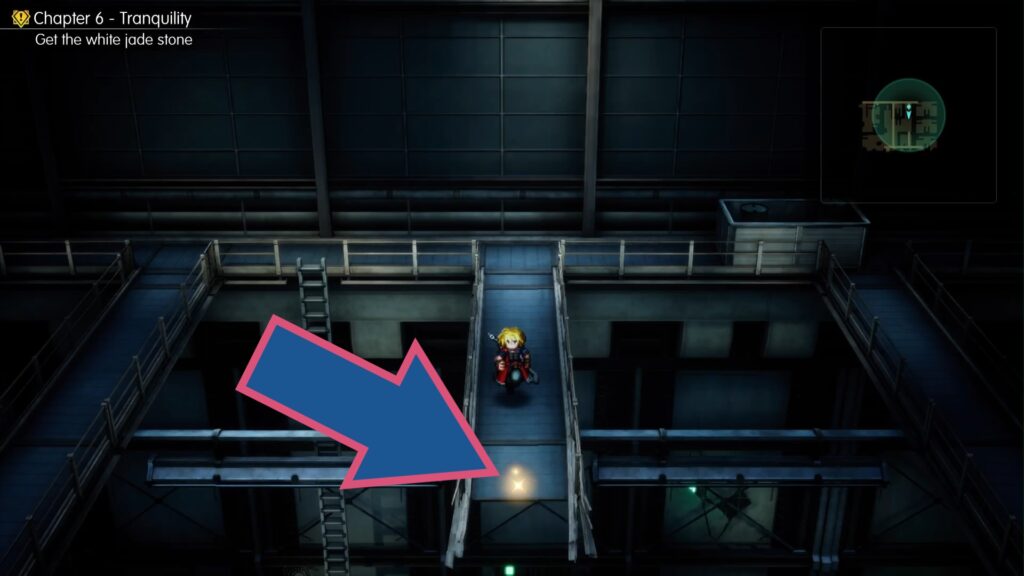
In the room with multiple green teleports, you want to pick Right, Left, Left to reach the ladder up to the gantries. Go down the broken gantry to the right of the ladder to find another shard.
Rugged Mountain Path
– 2 Shards –
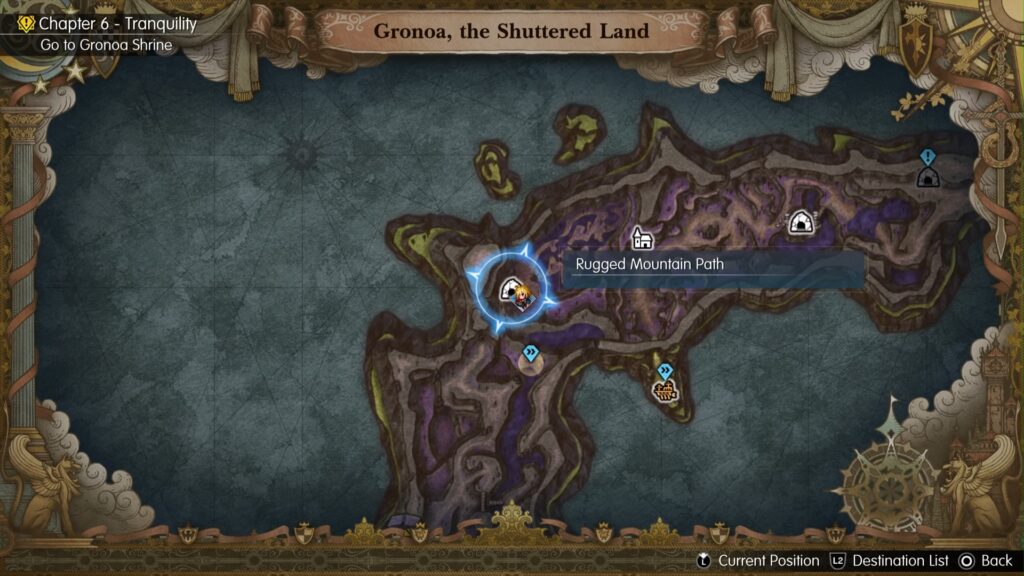
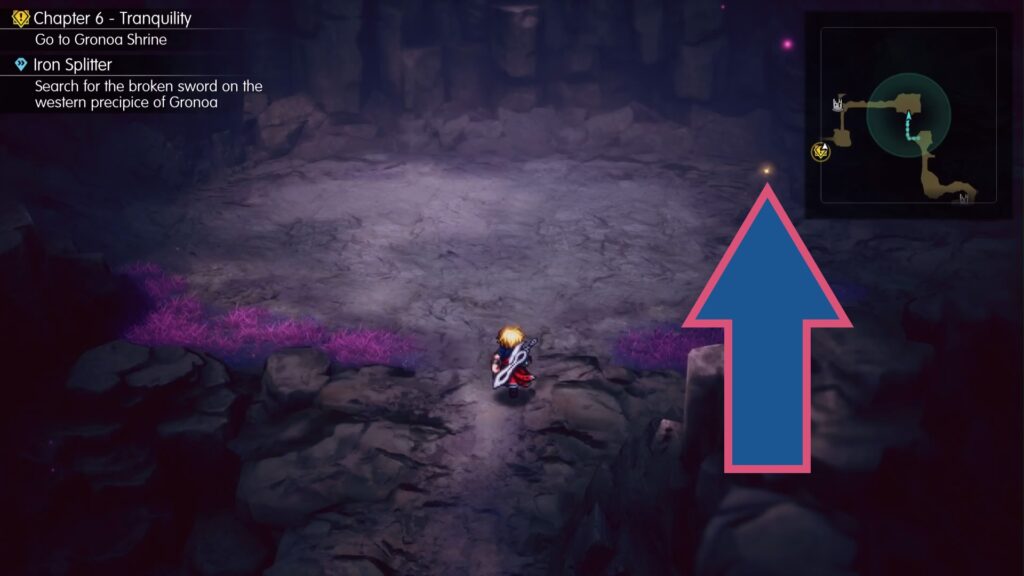
There is a shard just past the starting save point/teleport.
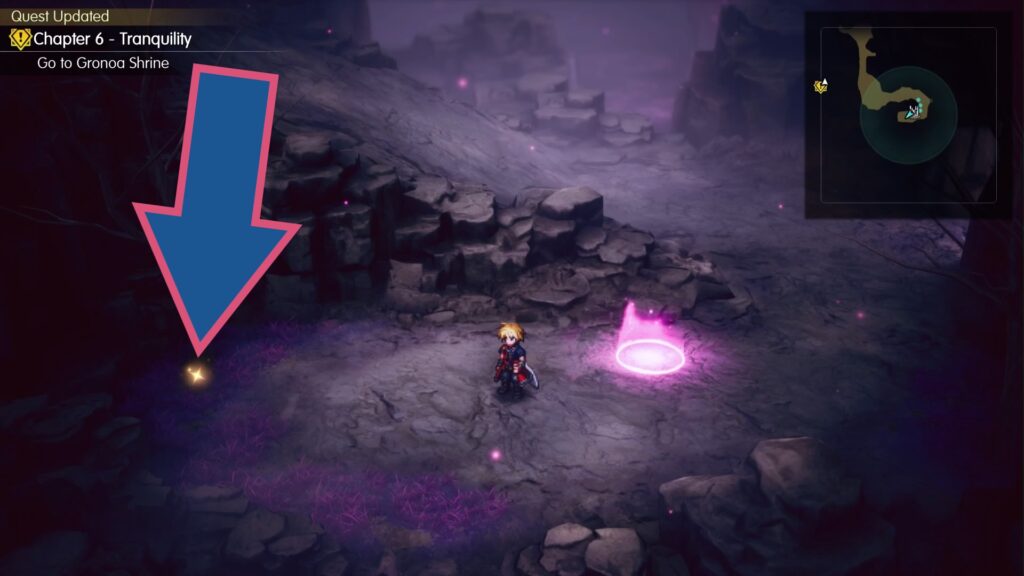
A second shard can be found in the back right corner of a large open square-shaped area along the path. The path going left from it takes you to the ending save point/teleport.
Town of Duggle
– 1 Shard –
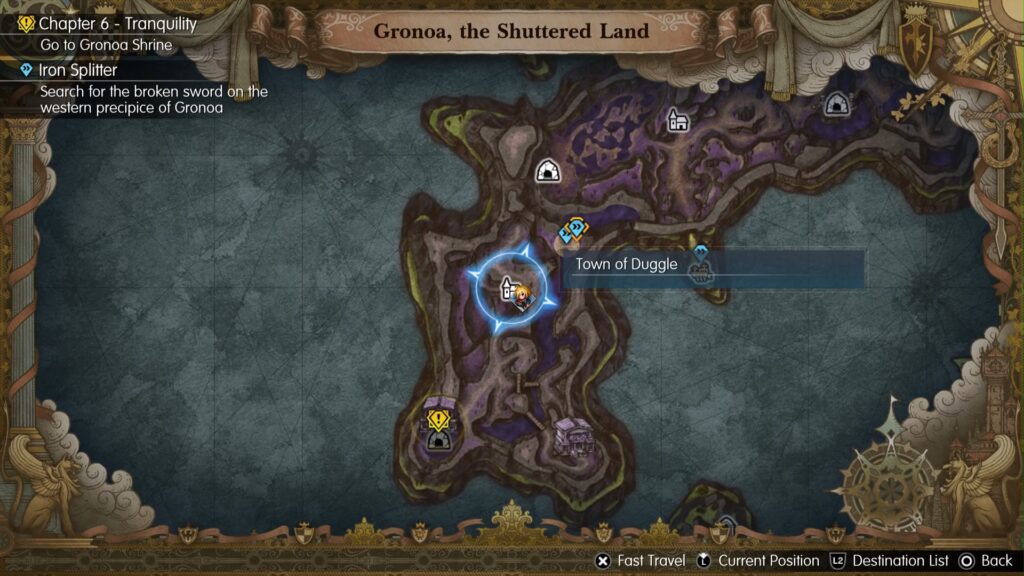
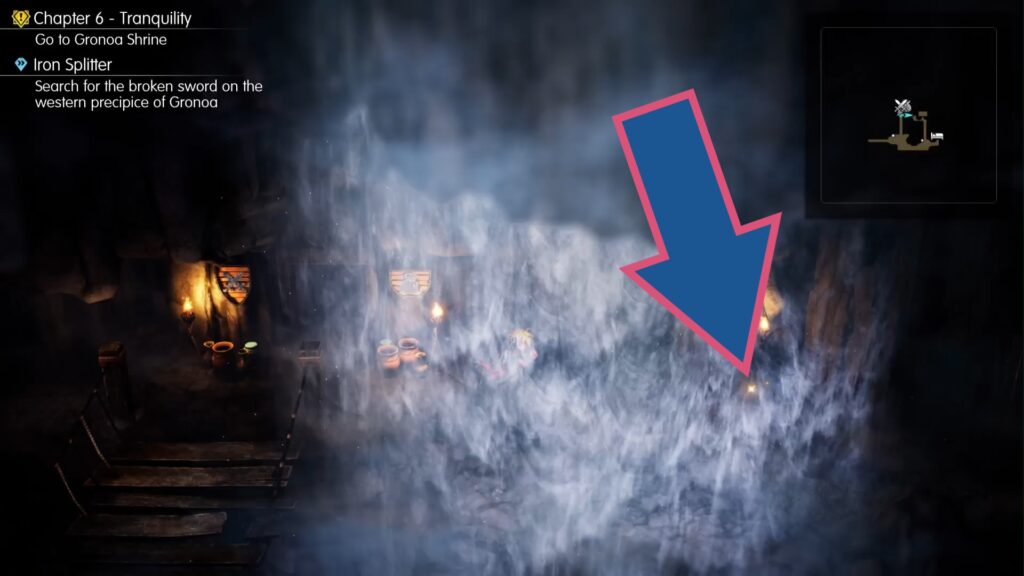
Head to the combined Weapons/Armor/Item Shop at the back of Duggle and go to the right behind the waterfall to find a shard on the far right.
Gronoa Shrine
– 3 Shards –
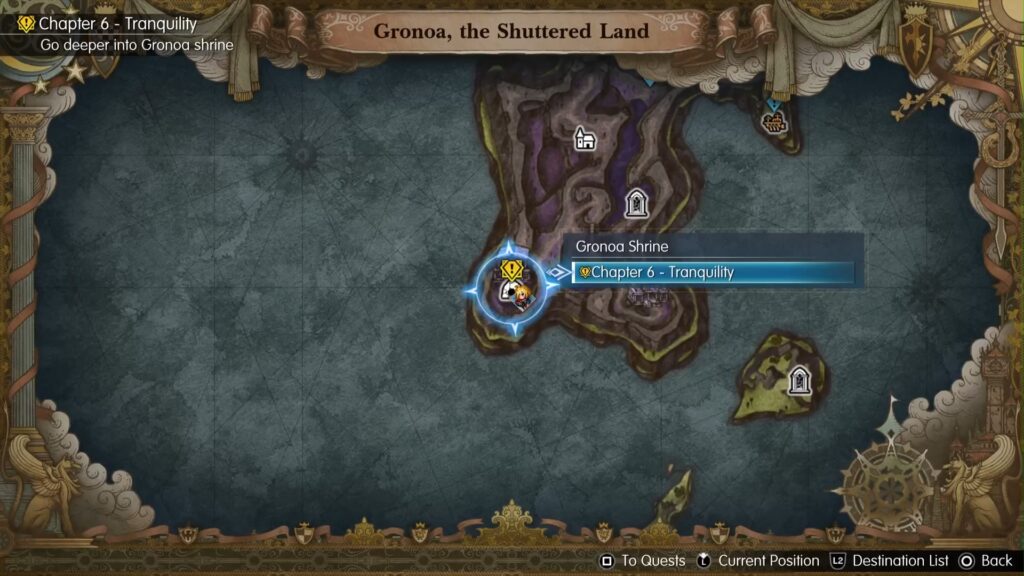
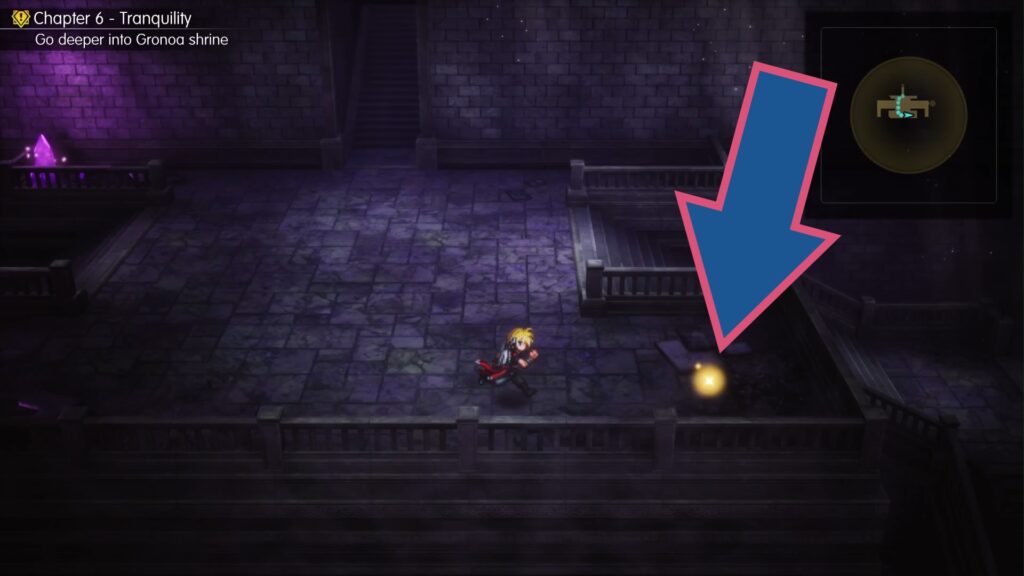
The first shard in Gronoa Shrine is found on the right side of the balcony at the beginning of the dungeon, before you go down either flight of stairs.
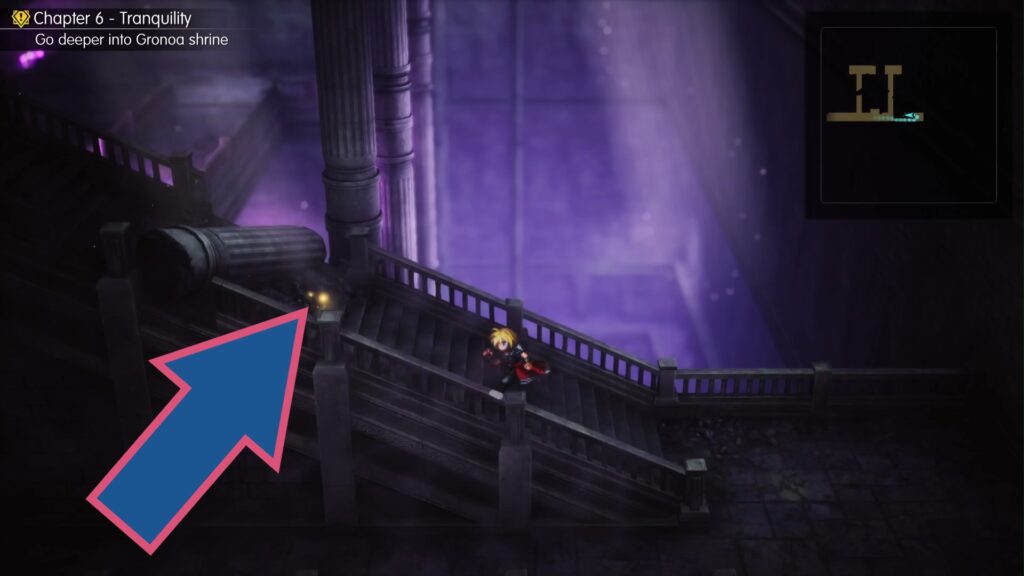
Once you’ve crossed over the gap, head to the right and go up the blocked flight of stairs to find a shard amongst the rubble.
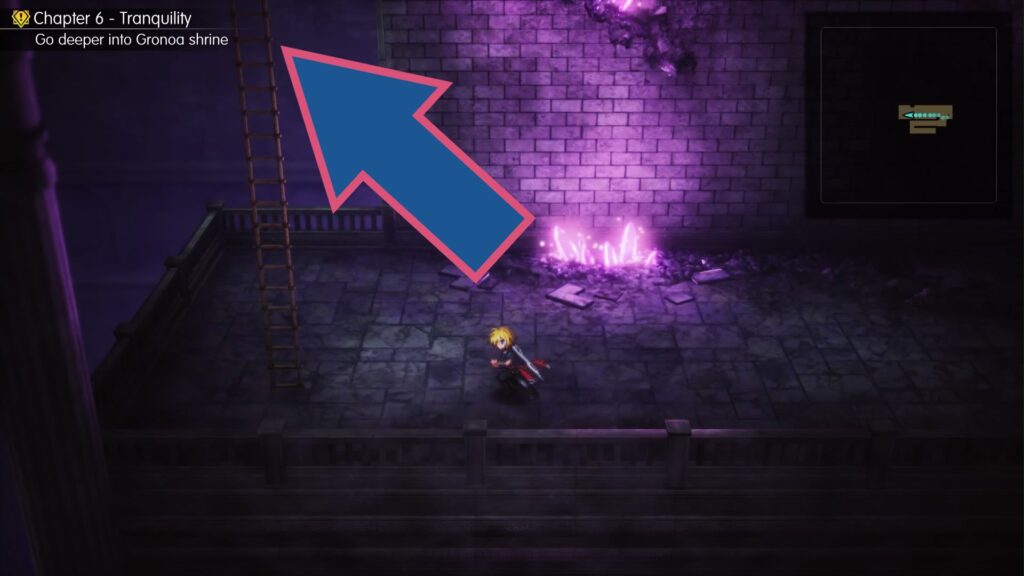
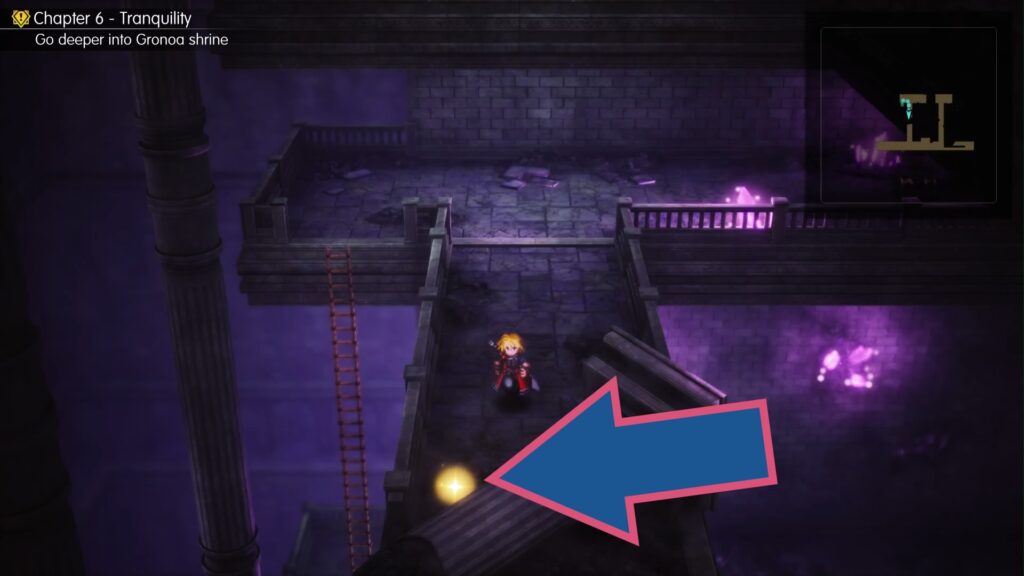
You’ll reach a wide area with a tall ladder at each end. Climb up the left one and run around to the collapsed pillar for the third shard in the shrine.
Sanctissimus Shrine
– 2 Shards –
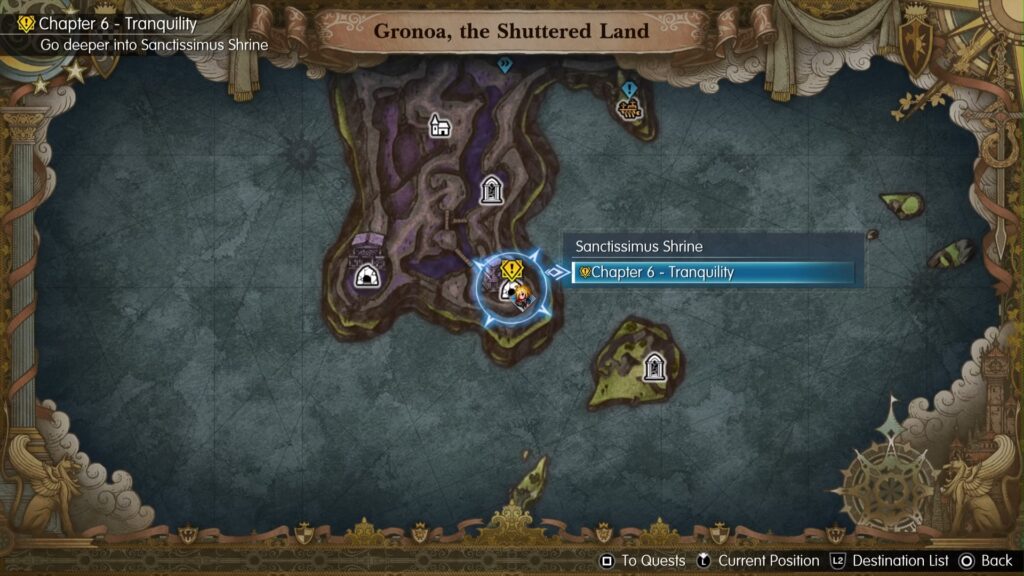
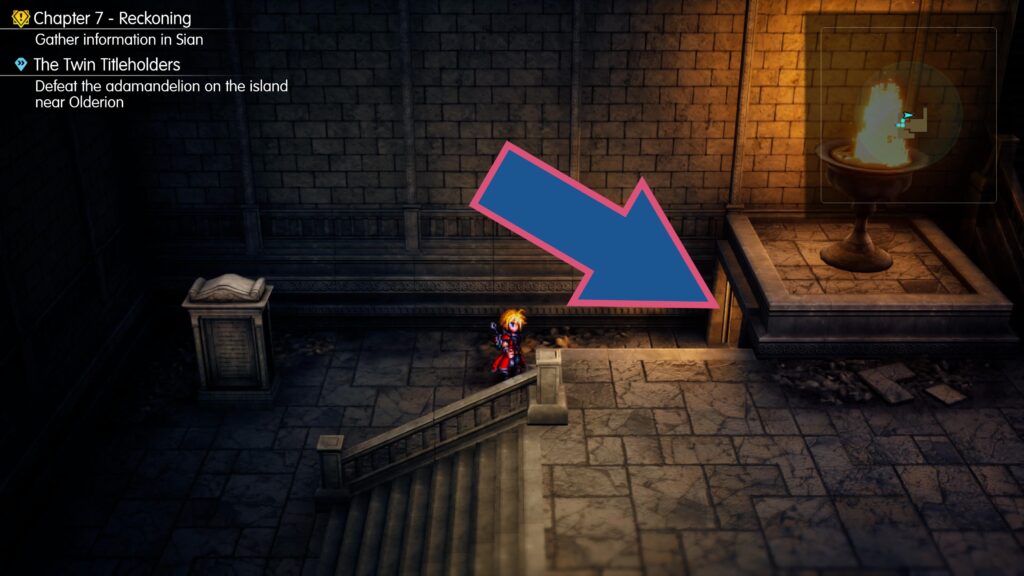
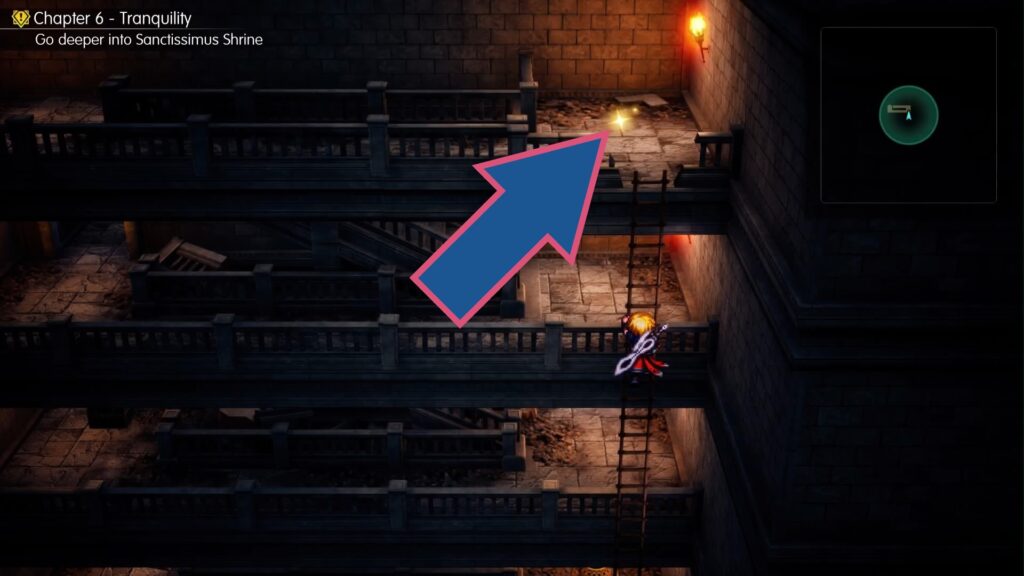
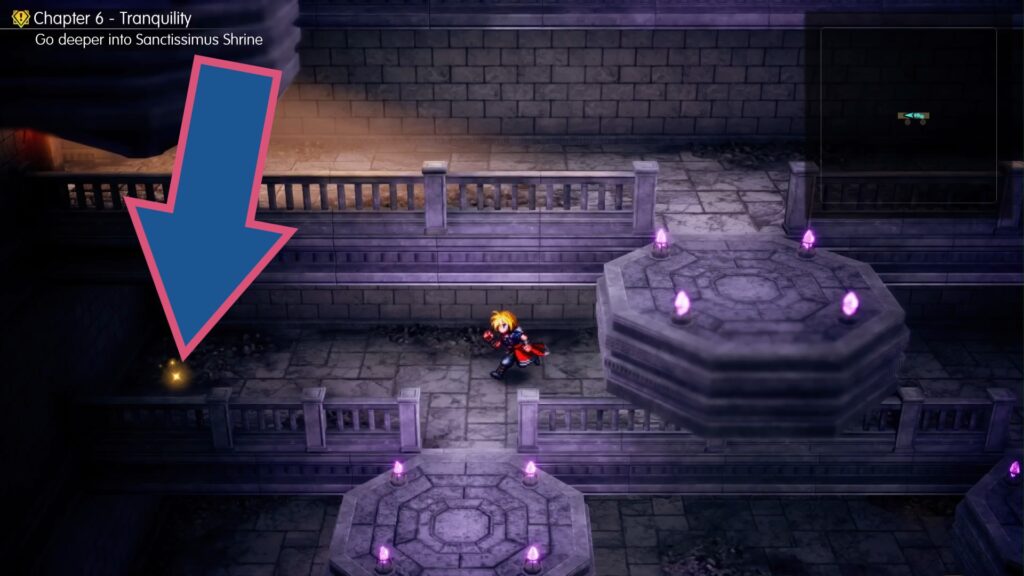
When you reach a monster encounter with the enemy on the right side of the room, go to the back wall and run behind the stairs to the right to go through a door. Go up the stairs as far as you can, then use the ladder. At the top is a shard.
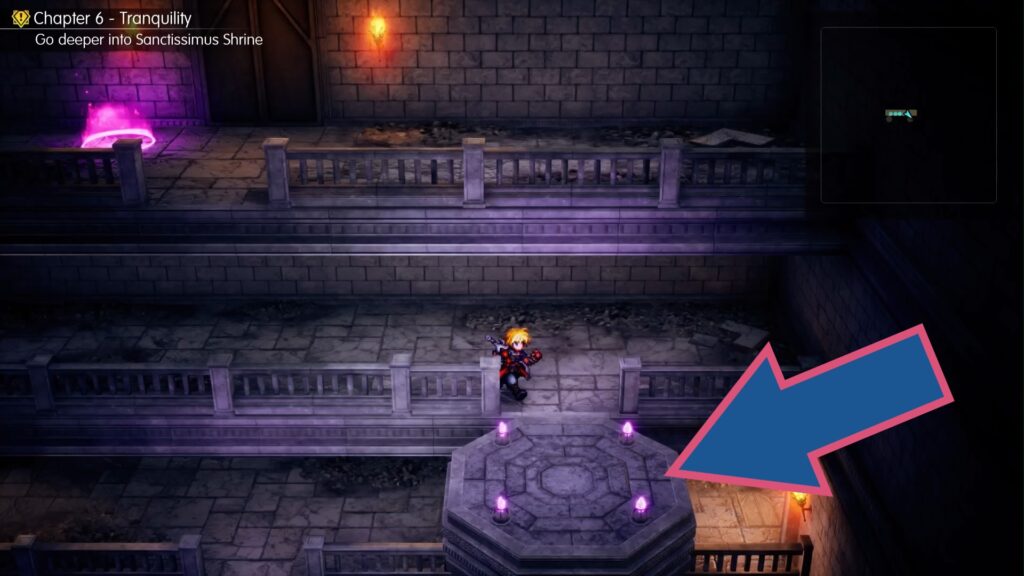
After the fight trials, you’ll reach a tall, purple-lit chamber with lots of lifts. Reach the lift on the level below the top, to the right of the save point/teleport, and run to the left end to find this shard.
Town of Sian
– 1 Shard –
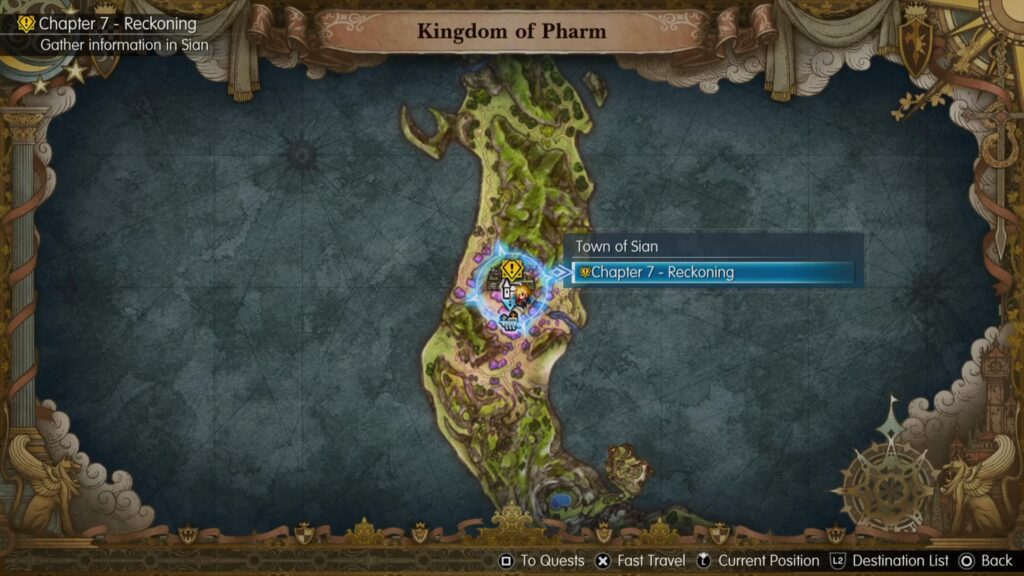
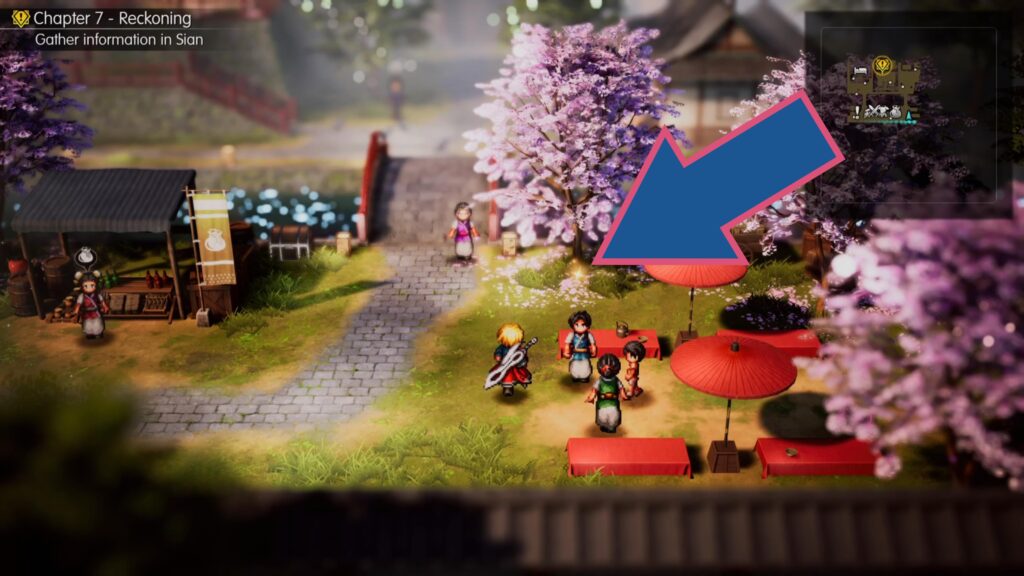
Go to the right of the Shops and look for this shard at the base of the blossom tree next to the bridge.
Mt. Reizan
– 2 Shards –
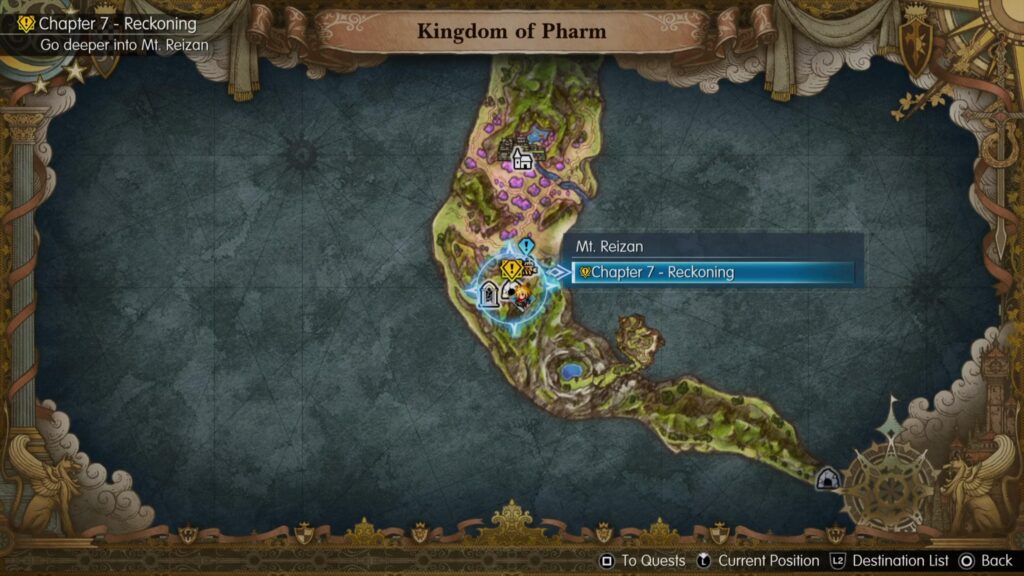
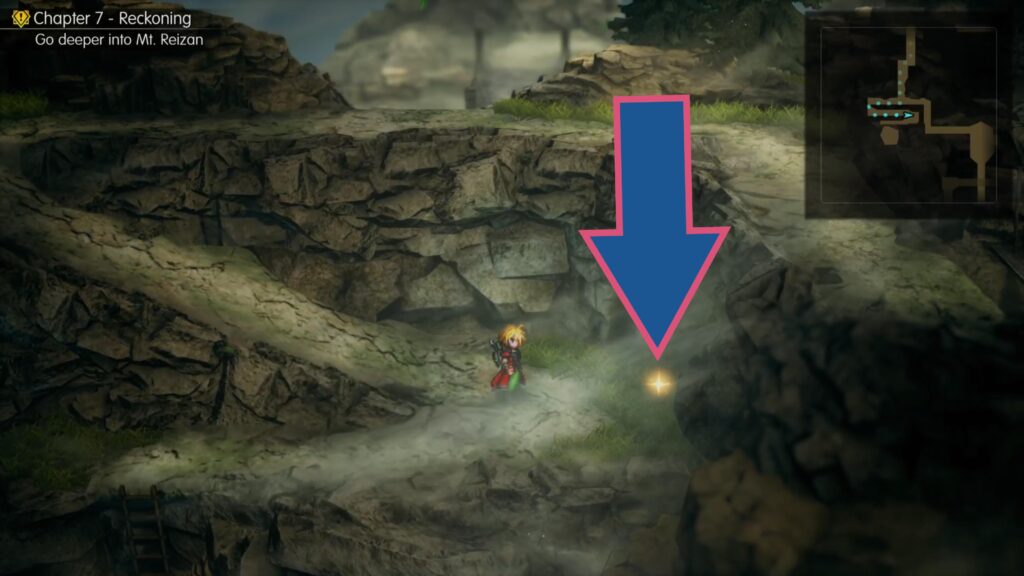
At the first fork in the road, go down the zig-zag path to find a shard halfway down.
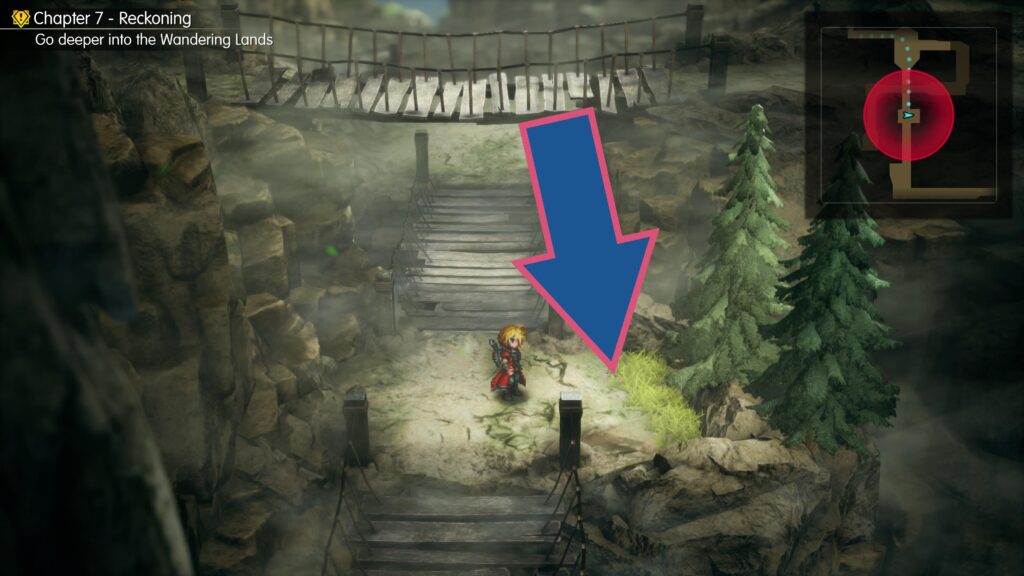
At the second fork in the road, go down and look for a shimmering shard by the trees between the two bridges.
Lake Ryusei
– 1 Shard –
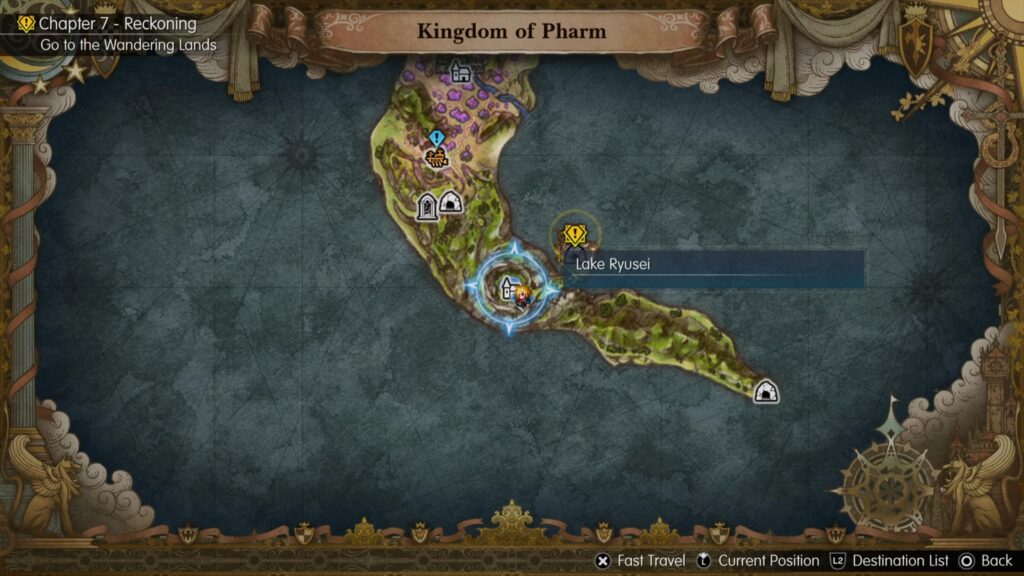
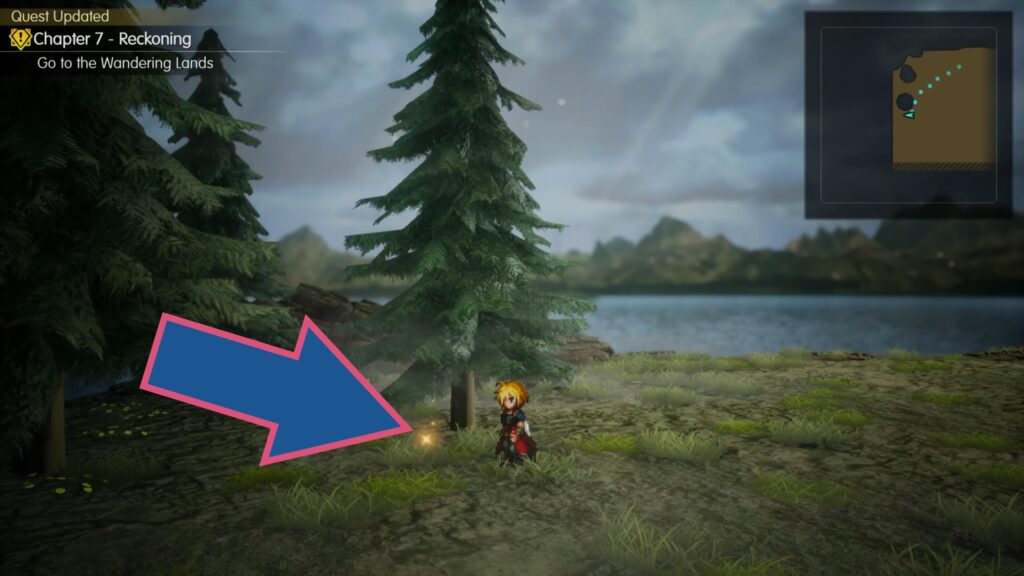
There is a shard under the first tree to the left of the cliff edge.
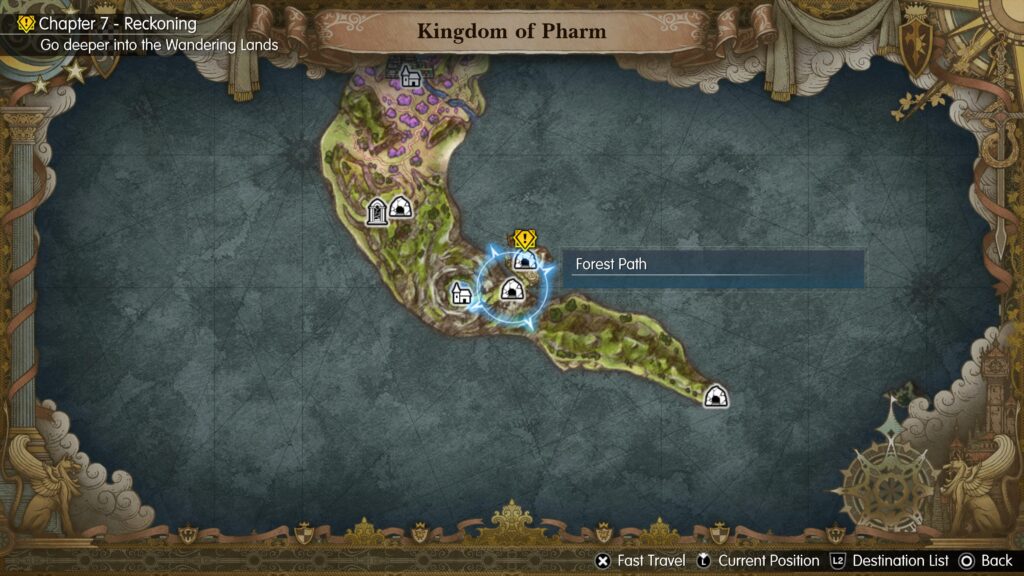
Forest Path
– 2 Shards –
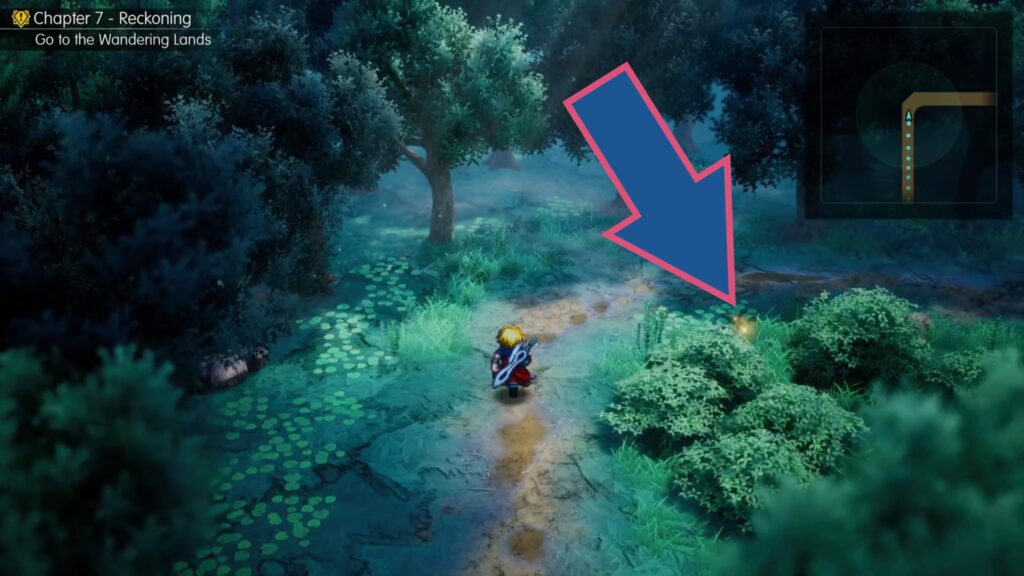
As you head up the path from the entrance to the Forest Path, look for a shard glittering in the bushes at the right turn.
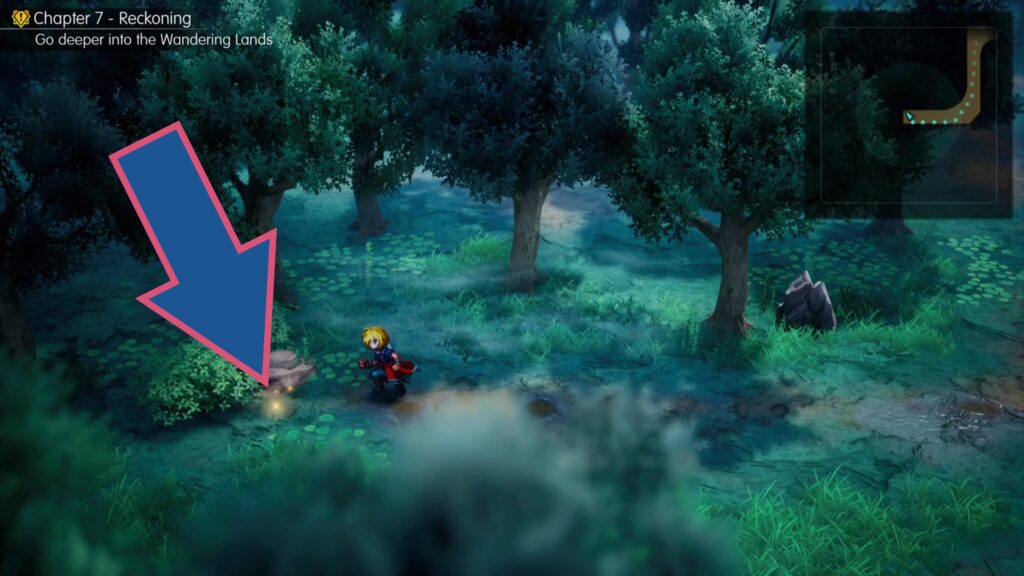
Return to where you fought Tellus and go down at the fork to find this shard at the end of the path.
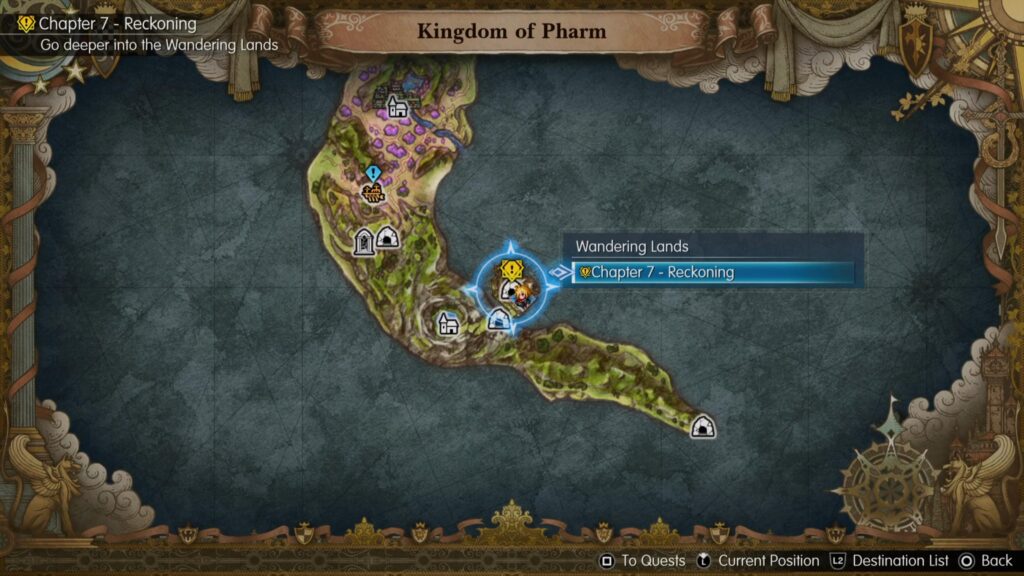
Wandering Lands
– 2 Shards –
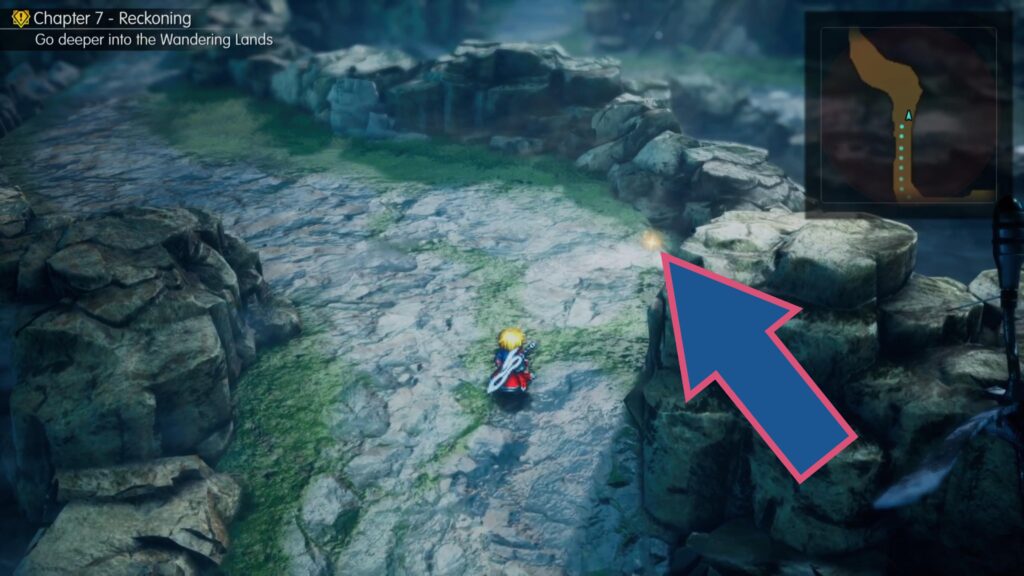
As you head up the main path, keep an eye out for a shard tucked against the rocks on the right-hand side.
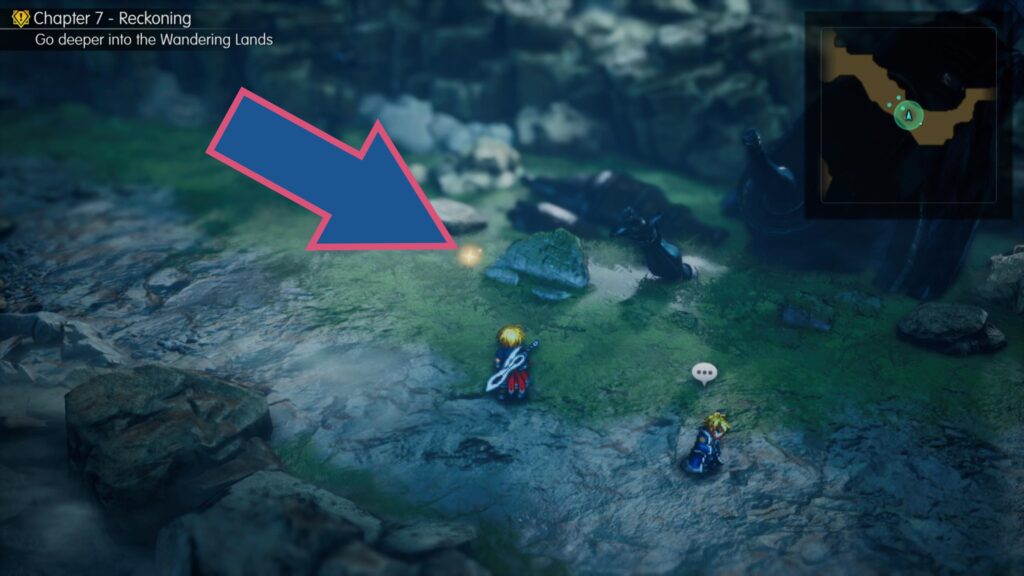
Look amongst the debris near Sir Reagan to find another shard.
Dragon’s Maw
– 1 Shard –
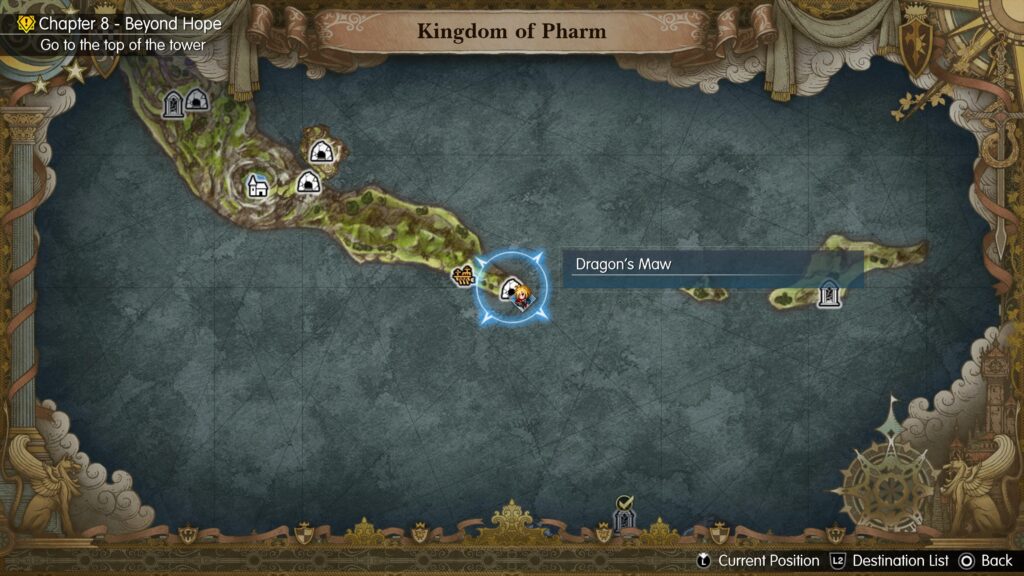
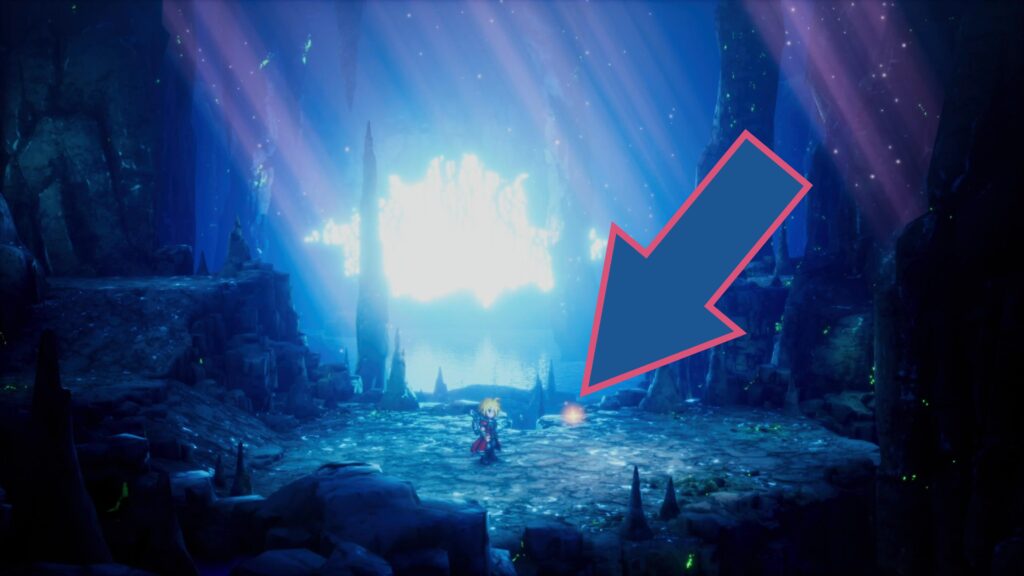
Halfway through the Dragon’s Maw dungeon, you’ll reach a small clearing with a mini boss waiting for you. Beat them to clear the path and find a shard they were standing in front of.
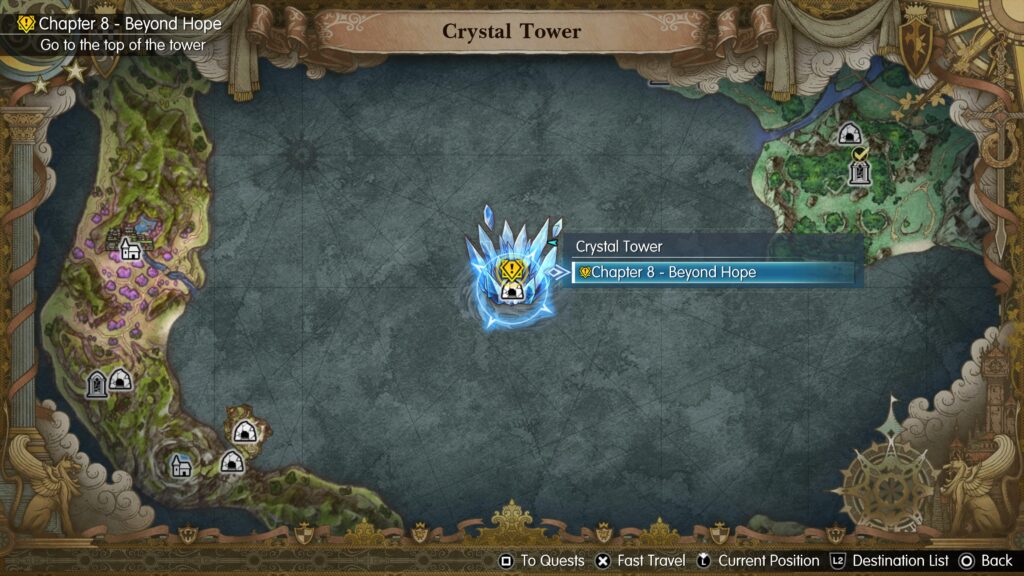
The Crystal Tower
– 3 Shards –
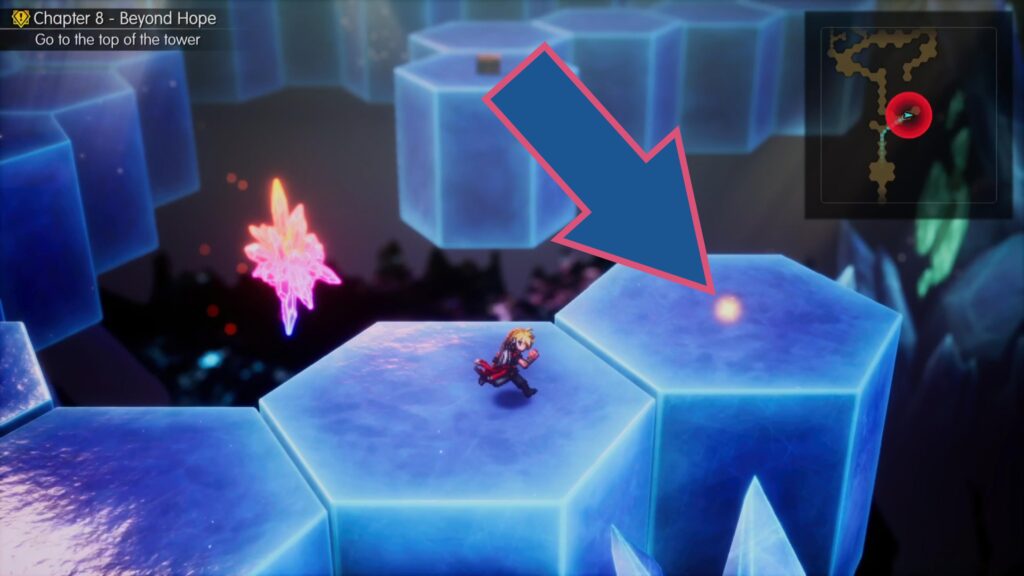
This shard is near the start of the Crystal Tower entrance level, at the end of a hexagonal path.
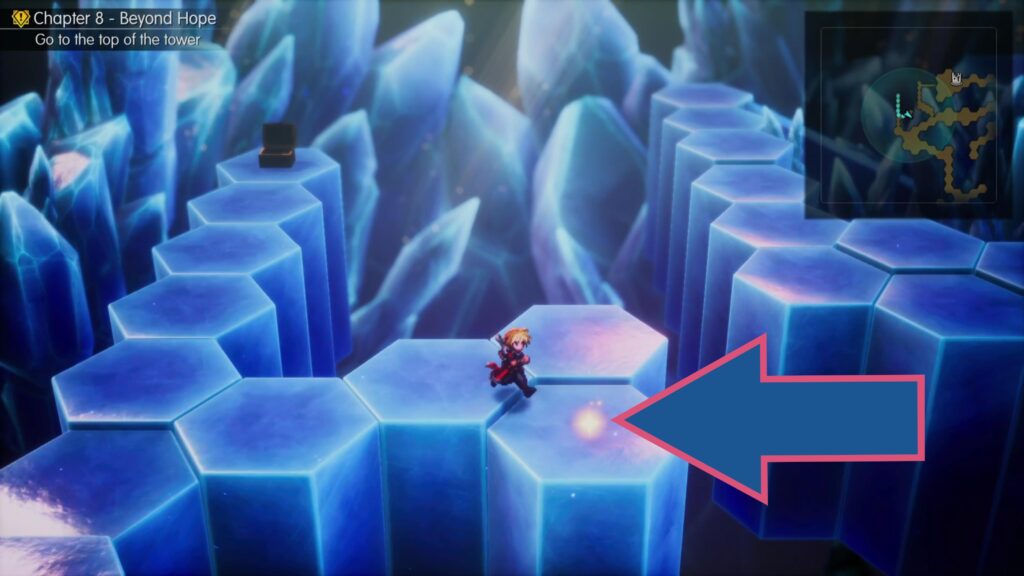
Further into the entrance level of the Crystal Tower, head to the left along some smaller hexagonal paths to find another shard.
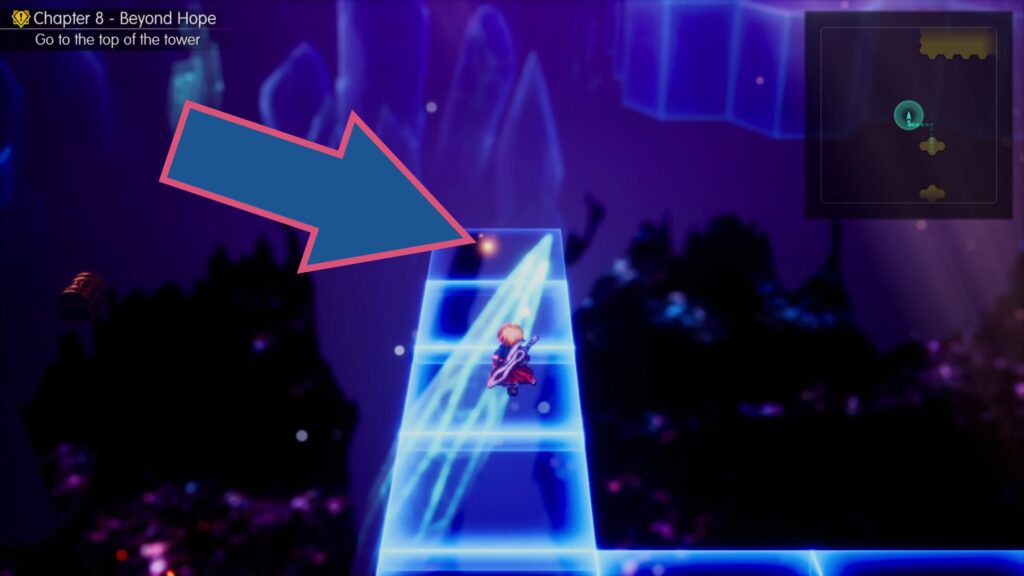
On the upper level of the Crystal Tower, you’ll reach a section where you walk on floor panels that appear out of thin air. Go left at the first fork you reach, and at the end you’ll find a shard.
With all 99 Tablet Shards collected and returned to the Princess, you’ll have access to all of her treasure chests and will have unlocked the Princess’s Reward and Memento achievements/trophies!
That was our Tablet Shards guide for Final Fantasy Resonance! We hope it was helpful, and you can find more guides below.
How are you finding Final Fantasy Resonance? Are you trying to get the Mythic achievement or the Platinum trophy? Let us know in the comments below, and join the Gamer Social Club Discord to chat about your favourite games, play in community game nights, take part in giveaways, and more!