

Don’t Nod is back once again with another narrative adventure game with Aphelion. As is typically the case with Don’t Nod games there are many miscellaneous achievements and collectibles to get and Aphelion is no different. This guide will help you find all the collectibles and help show you where the miscellaneous achievements are.
Aphelion has 4 different types of collectibles you need to find, although it feels weird calling Crew Members a collectible, the the purposes of this guide they are! You will need to find:
- 5 Crew Members
- 18 Audiofiles & Datapads
- 27 Secondary Markers
- 8 Glyphs
There is a chapter select for the game once you’ve beaten it so don’t sweat it too much if you miss something, but obviously following our guide you should be able to get everything done in one shot! The one big thing to note is there is no tracker for the Markers, so mopping those up might be a bit more difficult so definitely keep track of what one you missed if you somehow do. So without wasting anymore time lets jump into the Aphelion guide.
Miscellaneous Achievements
Just before we get into the actual collectibles we will highlight a few accumulative achievements that you can get throughout the game. They are:
- High-Wire Act – Cross 3 balancing sections without needing a button prompt to save yourself
- Cliffhanger – Perform 15 Perfect Grabs in a row. You can just do this somewhere on a wall and jump up 15 times in a row while hitting X to avoid the button prompt
- Augmented Reality – Open the pathfinder with LB and keep it open for 2 minutes
- Call of the Void – Die from a fall 20 times, self explanatory, just jump off a cliff if you need some deaths
- Killed by the Nemesis – Any sections where you come across the Nemesis you can just get caught and killed 10 times
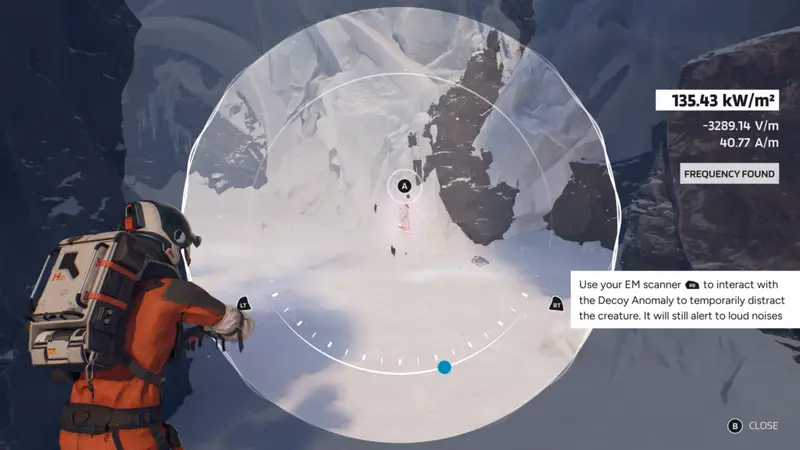
- Distraction Master – Distract the Nemesis 10 times using the red decoy anomalies. Will likely get this naturally by chapter 10 but if not load up any section with one and rinse/repeat.
All of these can be done after you complete the game with chapter select or you can do them while playing and just knock them out. Totally up to you and there’s plenty of spots to do them. Now onto the collectibles!
Chapter 2 – The Pulse
Secondary Marker 1/27 – Opening
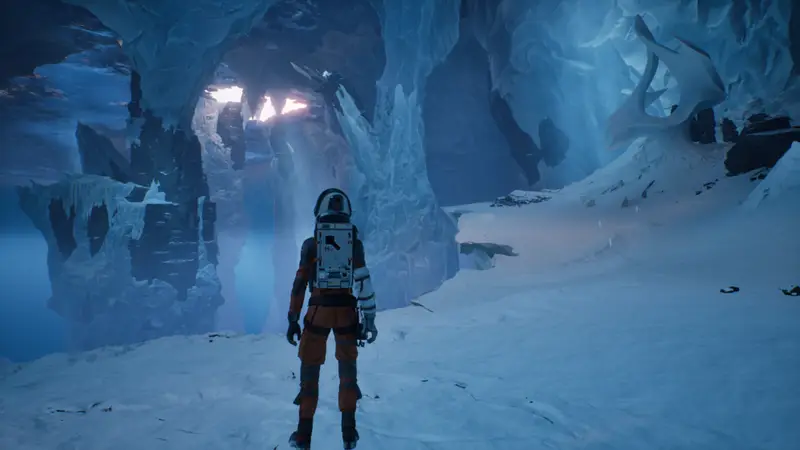
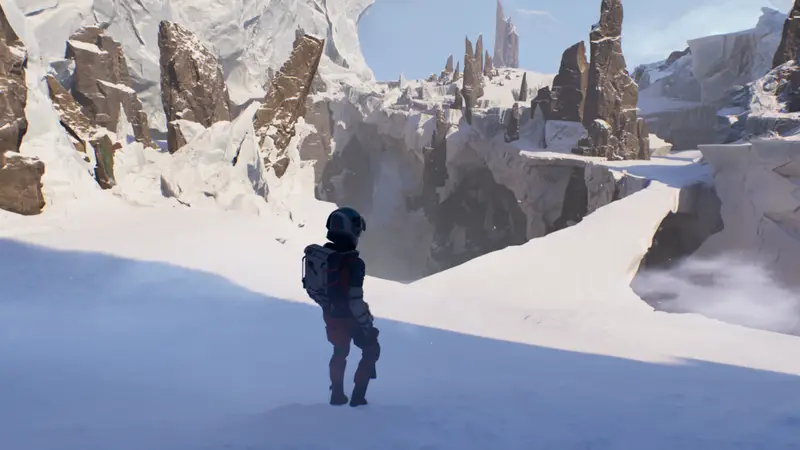
We’re starting in chapter 2 as there is nothing to collect in chapter 1. Proceed a lengthy ways into this chapter (like 20+ minutes in). You will be following a magnetic trail and eventually slide down a large hill and at the bottom you will have to jump to grab onto a rock climbing section.
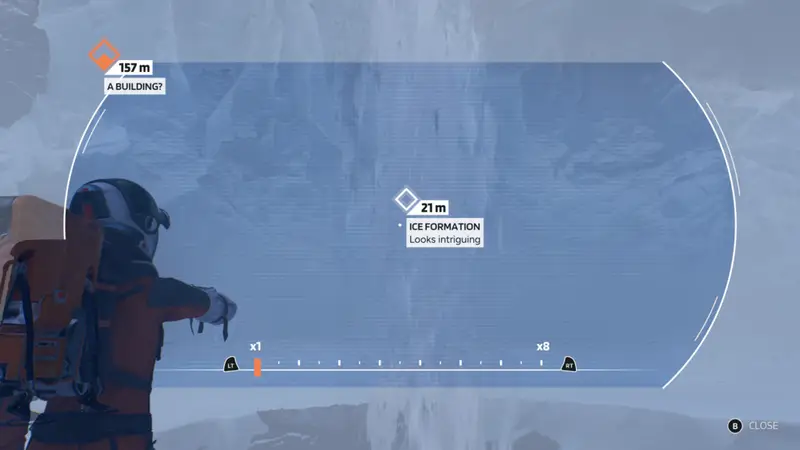
Once you climb to the top of the wall Ariane will make a comment about being the first person to ever see this view. Immediately open up your pathfinder and look out towards the main objective which will be “EM Junction”. Zoom in some and you should see a white marker above the area. Zoom in and look at it enough and you will unlock it.
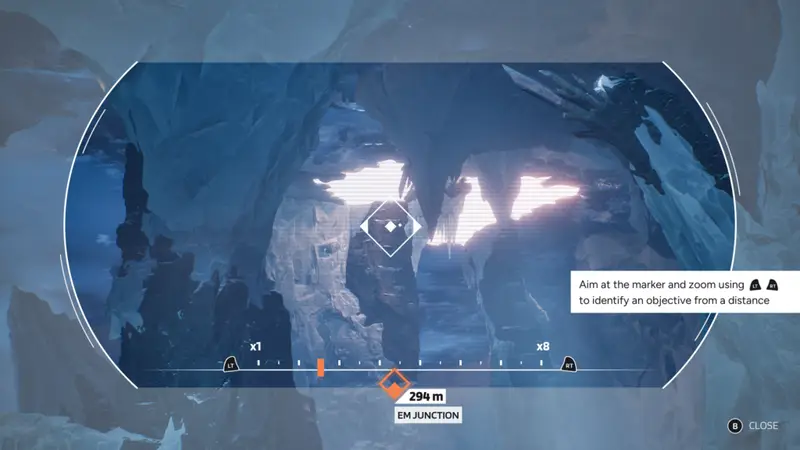
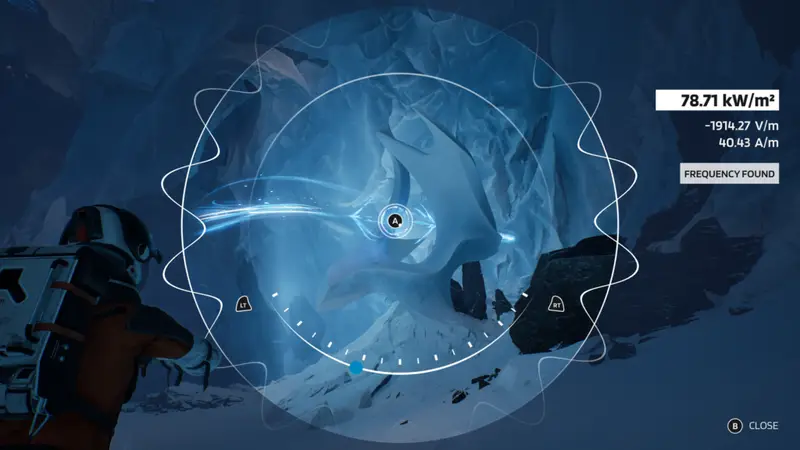
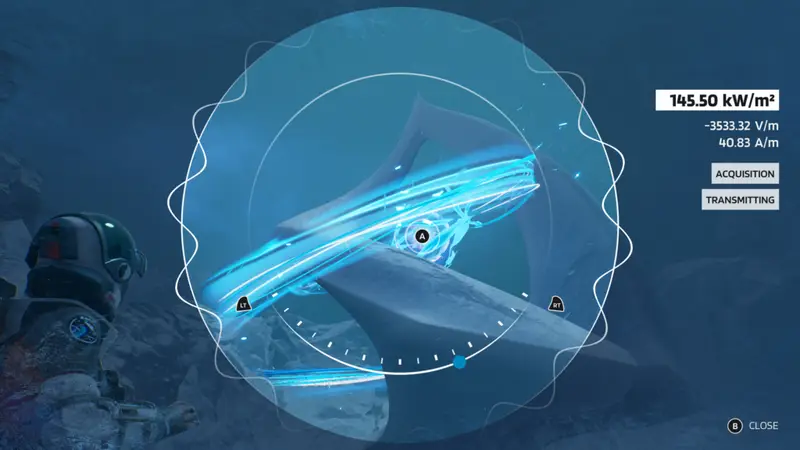
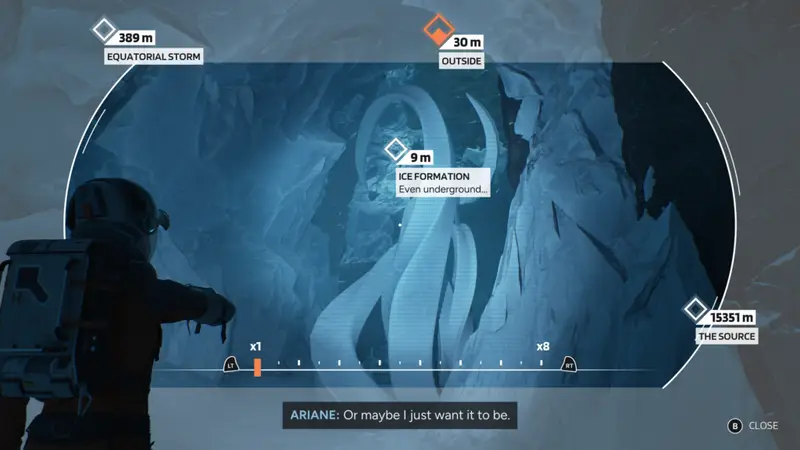
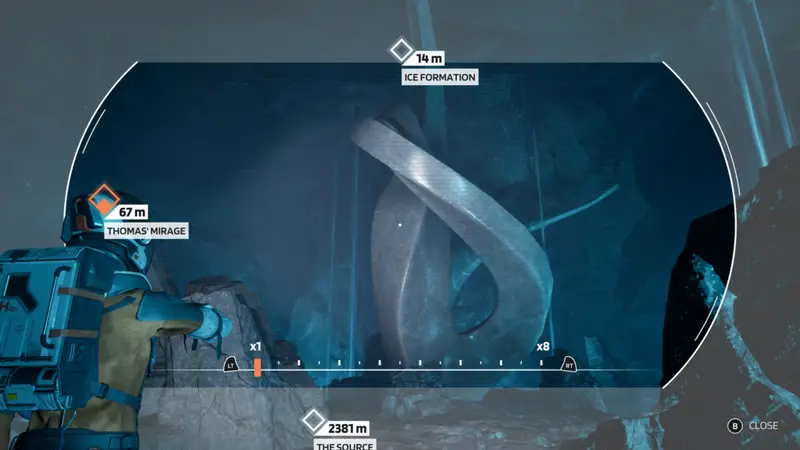
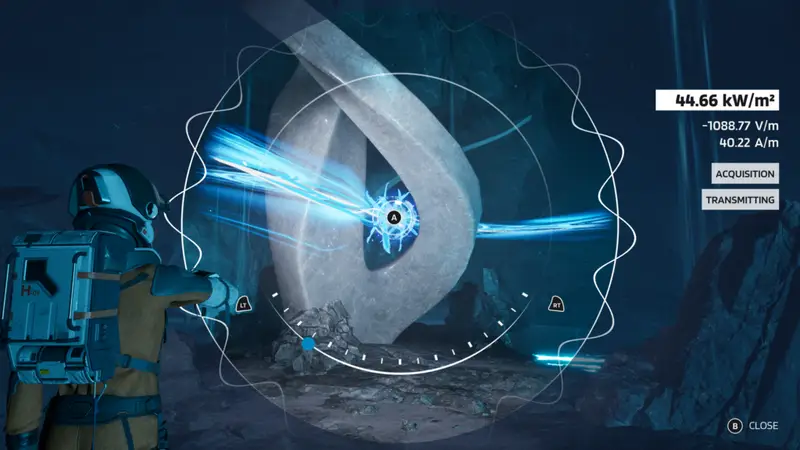
Secondary Marker 2/27 – Ice Formation & Glyph 1/8
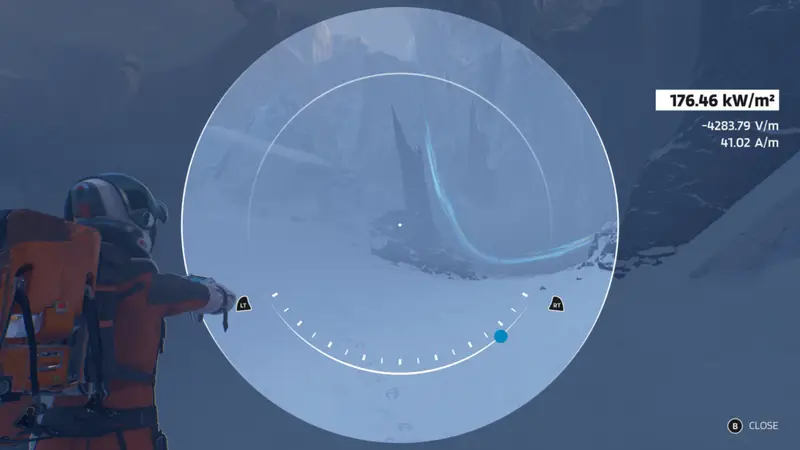
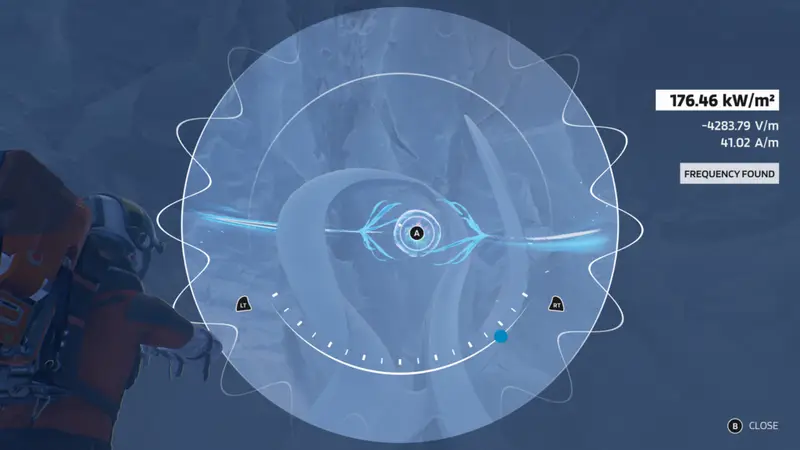
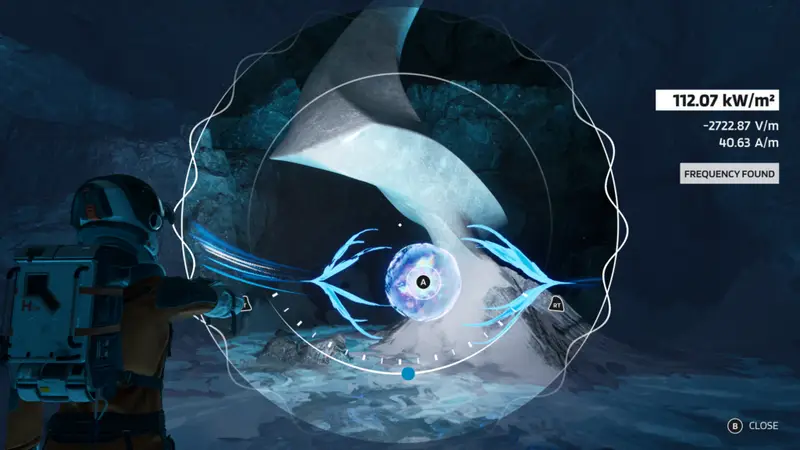
As soon as you are finished with the previous marker, look a little to your right and follow the path, but this time have your EM Scanner out (RB). You should see an ice formation here that when you get the right frequency on you can scan it. Scan it by holding down the button prompt to find your first glyph. This will unlock the Novice Glaciologist achievement/trophy as well.
That same ice formation is also the secondary marker. Scanning it with the EM Scanner should also unlock the marker, but just double check by taking out your pathfinder and looking at it. If its scanned and says “Ice Formation” you are good to go.
Chapter 3 – The Escape Pod
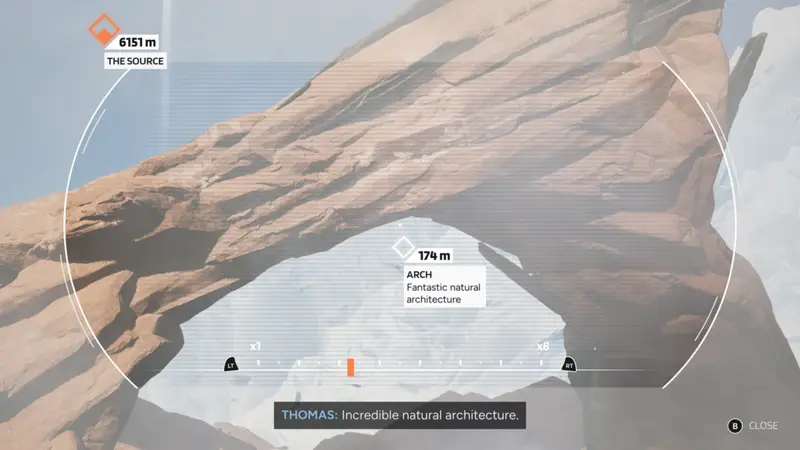
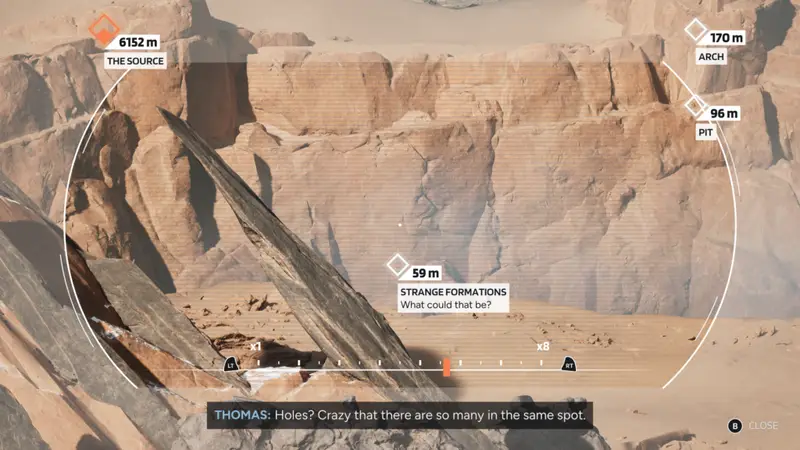
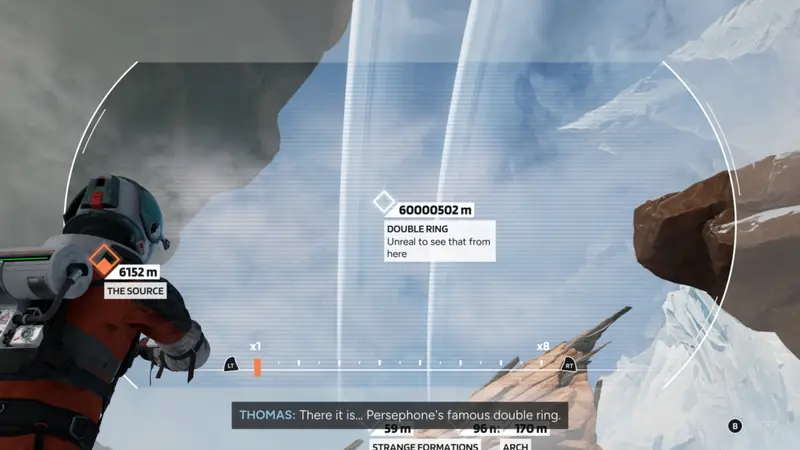
Secondary Marker 3-6/27 – Arch, Pit, Strange Formations & Double Ring
You will be in control of Thomas now. Walk through the level a bit until you go through a small gap between some rocks and come out on the other side with a large rock formation off in the distance which will start a cutscene. As soon as you can take control of Thomas again take out your pathfinder and zoom in on that large rock.
Starting at the top of the rock you can scan the “Arch”.
Then look down below to where the water is flowing to find the “Pit”.
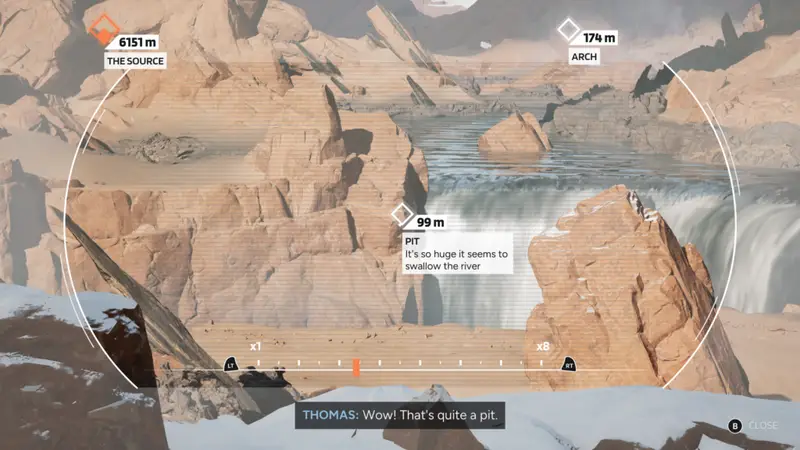
Next look slightly further down and to the left from the Pit to find “Strange Formations”. You may have to walk forward a little to get this one to pop up.
Lastly look all the way up into the sky where you should see “Double Ring” to scan.
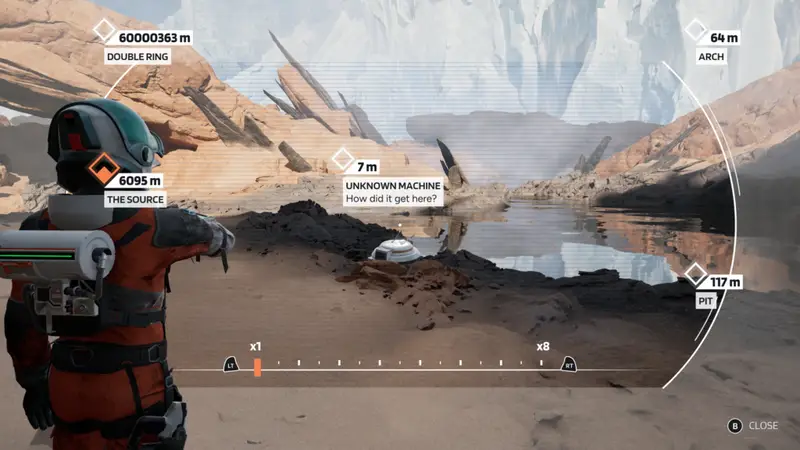
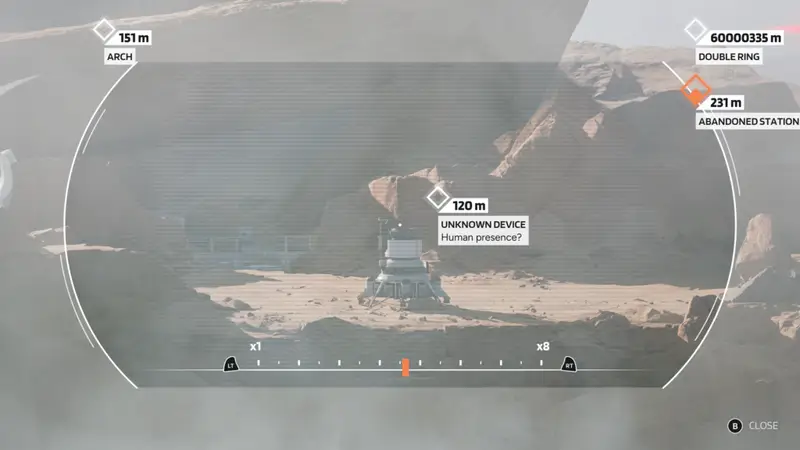
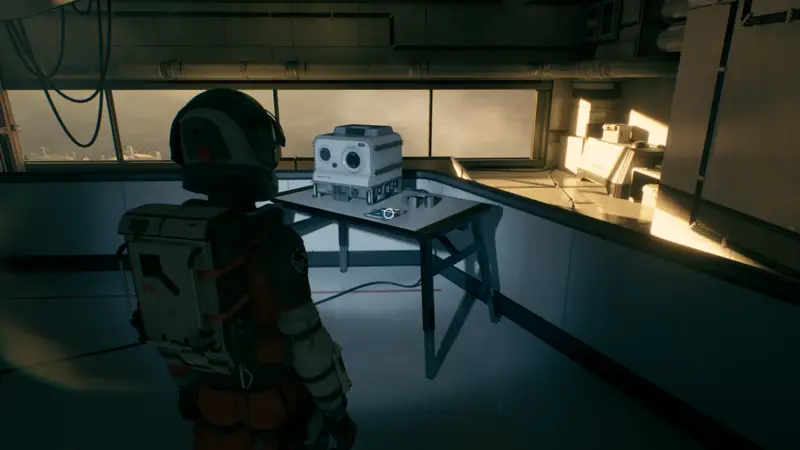
Secondary Marker 7/27 – Unknown Machine
Progress through the chapter until you get to a little white machine. It is impossible to miss as Thomas will make a comment about it and you have to interact with it. Before interacting with it make sure to take your scanner out and scan it.
Secondary Marker 8-11/27 – Unknown Device, Ice Formation, Deserted Gear & Abandoned Equipment
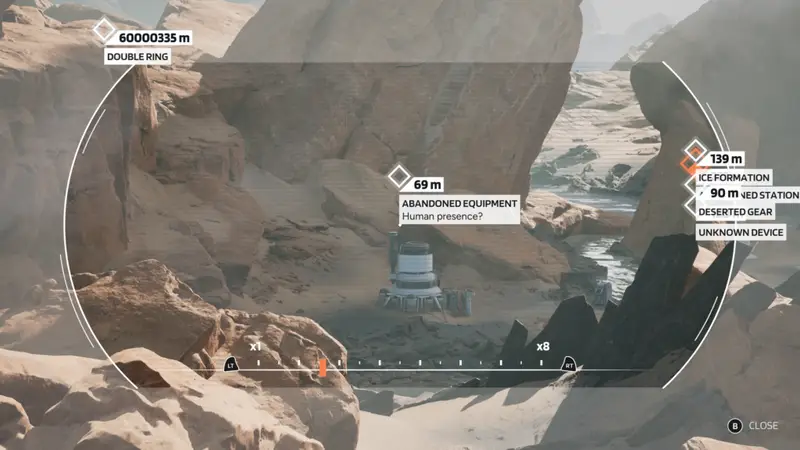
You will then continue until you get to a scene where you cross a gap with a ladder. Once the scene ends you will be looking out towards an Abandoned Station. A little to the left and down slightly will be the Unknown Device you can scan.
A little to the left of the Unknown Device you will see the Ice Formation.
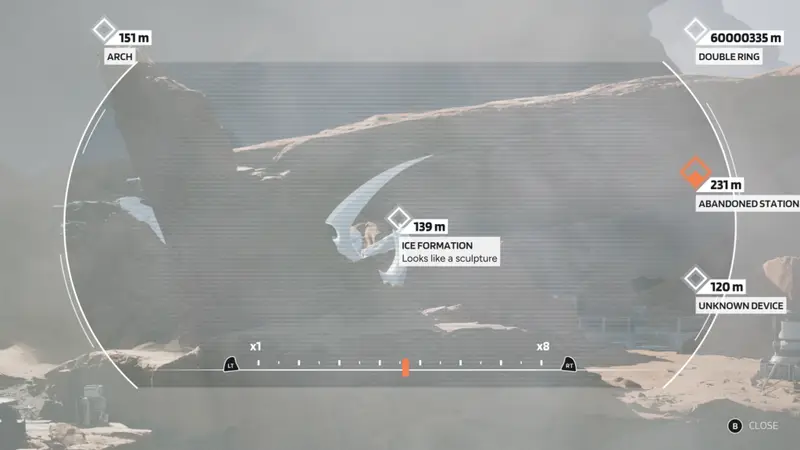
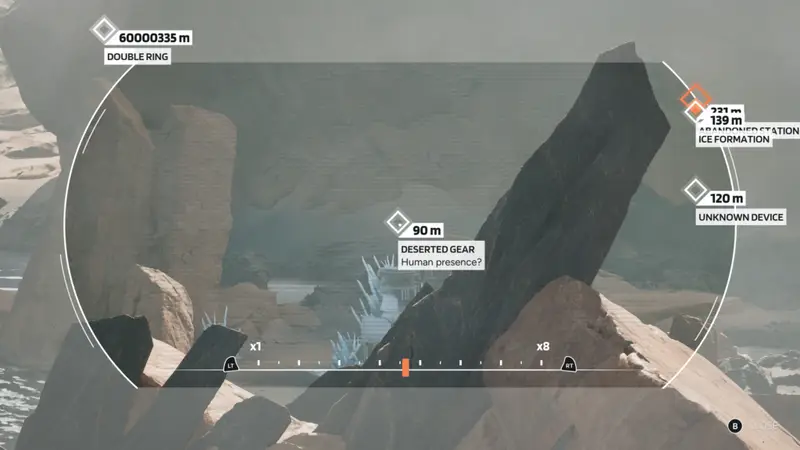
Look further to the left again to find the Deserted Gear and just to the left of that you can find the Abandoned Equipment. These secondary markers are coming quickly!
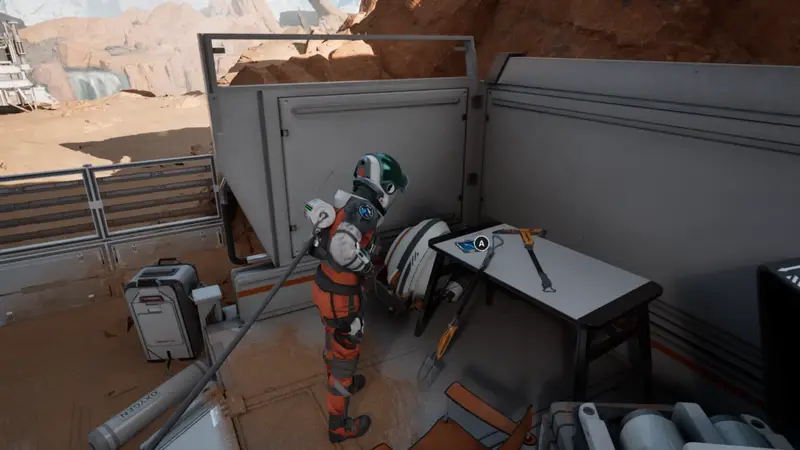
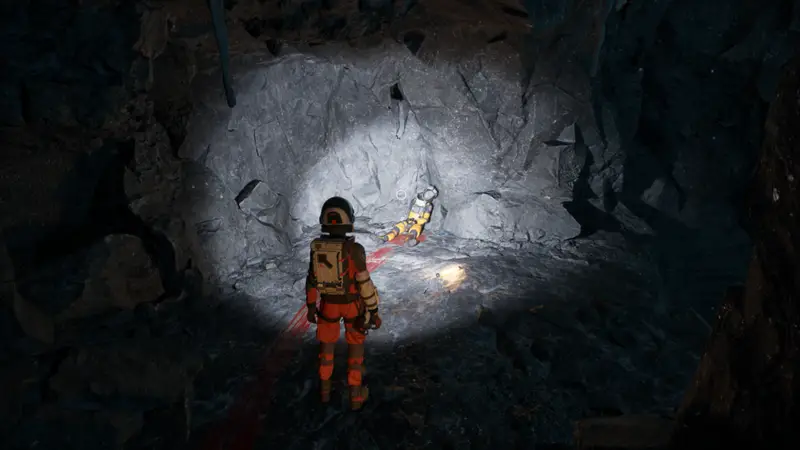
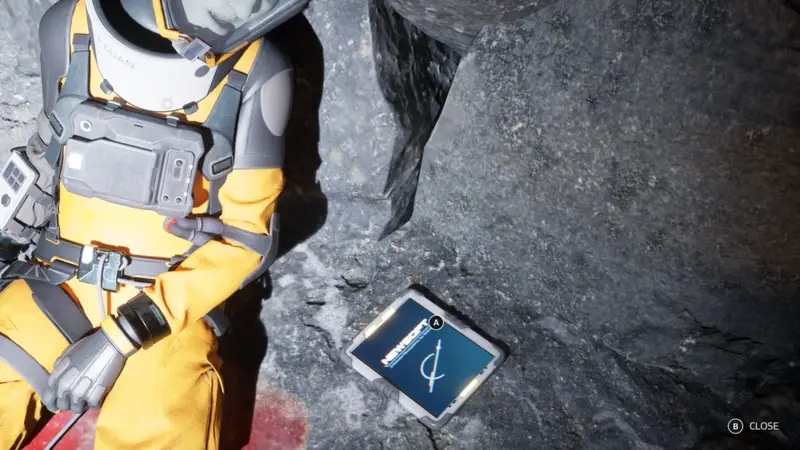
Audiofile & Datapad 1/18 – Station Operations
You will head through the chapter and move towards the Abandoned Station. Once you slide down a hill into the back of this area you will see an oxygen device you can hook up to and infront of you will be a little area with a desk. The audiiofile will be on top.
Chapter 4 – The Onyx Forest
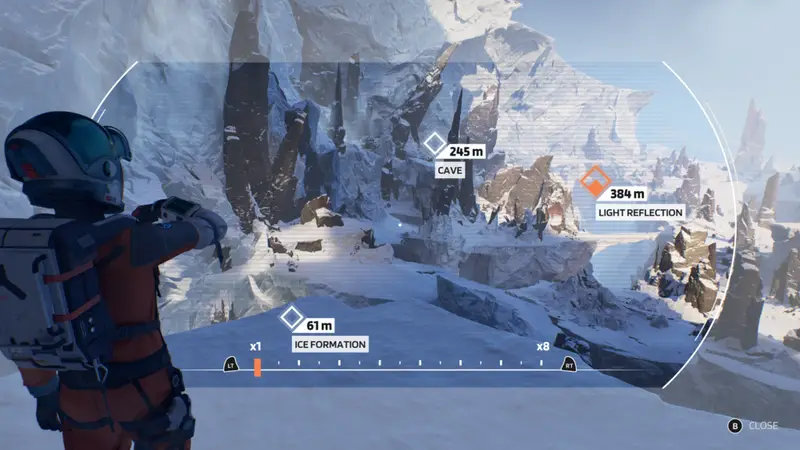
Secondary Markers 12-13/27 – Cave & Ice Formation
Progress through the chapter until you get to a cutscene an when you come out of it you are looking at a Light Reflection as your objective. Look to the left and slightly above the main objective to find the cave marker. Then look almost right down at your feet and further to the left for the Ice Formation marker.
Glyph 2/8
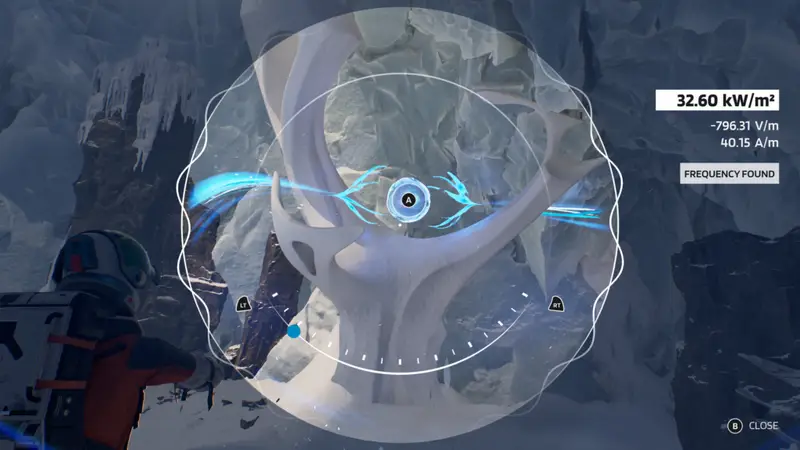
Continue down the path now and jump a gap. You should come to this point here where you can see some climbable rocks.
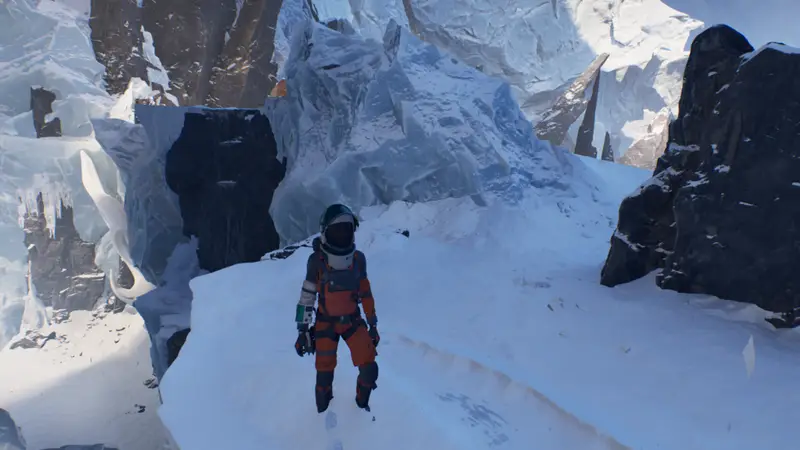
Take the path to the right and head up and go to where those climbable rocks are and drop down. Jump the gap to more climbable rocks and drop down again. From here just follow the path to the end and pull out your EM Scanner. Find the right frequency to make the magnetic lines show up and then look at the ice formation and interact with it to collect the glyph..
Echo Seeker Achievement/Trophy
There is an achievement/trophy for finding a specific echo in this chapter. When you open the frozen rock gate, on the other side you will see a large ice bridge to your right which is the path forward.
Before doing so head to the left where you will find another area Here you can climb up a couple rockfaces and and do a few grapples until you head inside a cave. Follow the path and at the end you will get a little scene and earn Echo Seeker. You may need to pull out your EM Scanner here to trigger the Echo.
Secondary Marker 14/27 – Ice Formation & Glyph 3/8
Continue through the chapter now until you get to a pretty foggy area. Your objective will be “A Building” and once you get to this section you will head to your right which is the main path. You will walk into a narrower gap that will have a geyser of water shooting out. Avoid the geyser and once on the other side look to the right.
Head towards this right side and you will eventually see a gap to jump with more geysers. You may want to turn your EM scanner on here to see the blue line to guide you. Jump the second gap and you will see another ice formation to scan for the marker and then pull out your EM Scanner to get the glyph.
Chapter 5 – The Outpost
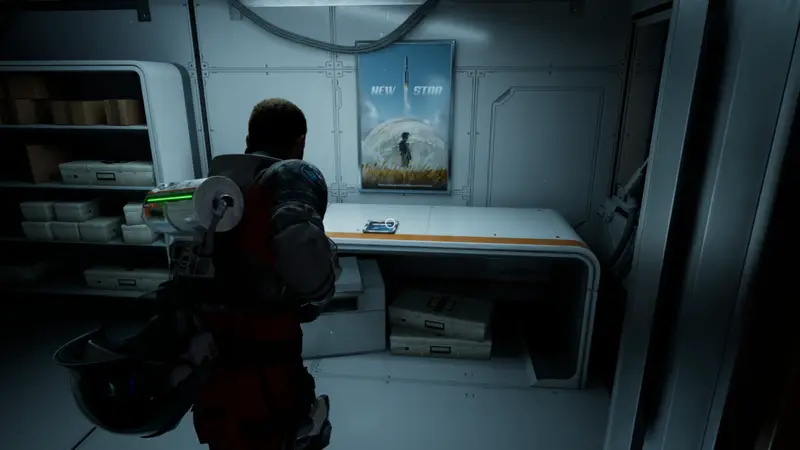
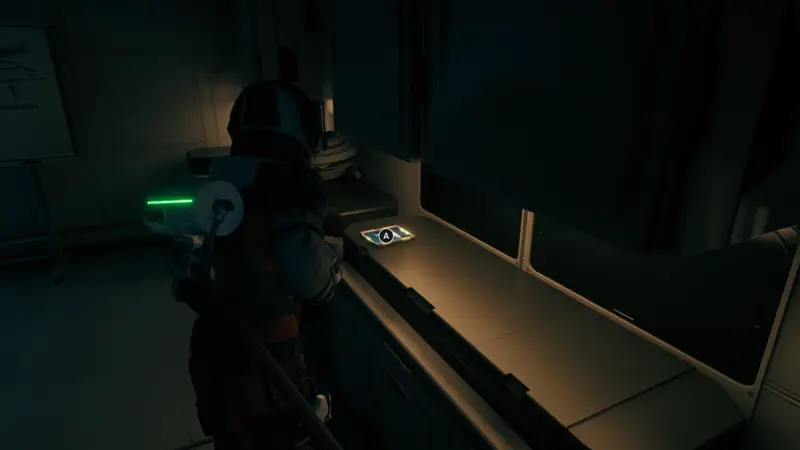
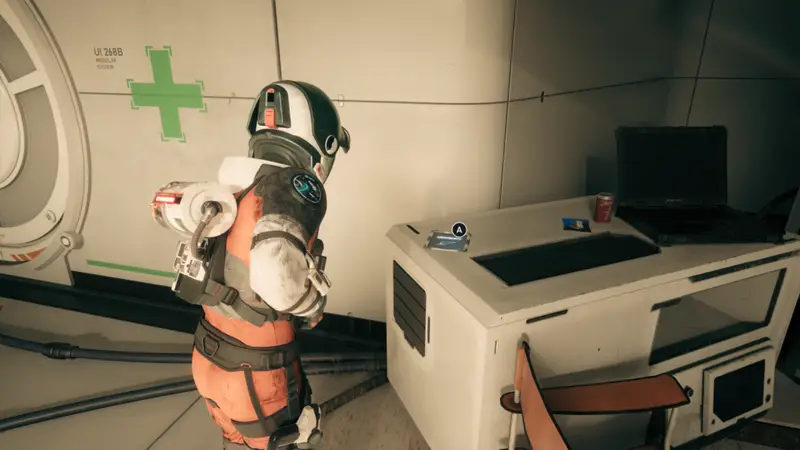
Audiofile & Datapad 2/18 – Project Aphelion Phase I Review
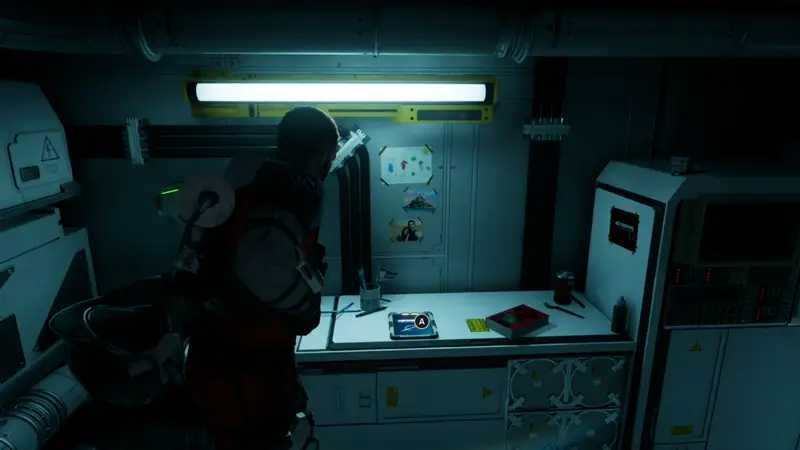
This will be near the very beginning of the level. We will start in a building as Ariane and have to interact with a few things. When ready, head down the ladder that you see in the main area. At the bottom of the ladder turn around and head into the kitchen that is here. On the table directly infront of you is the audiofile to collect.

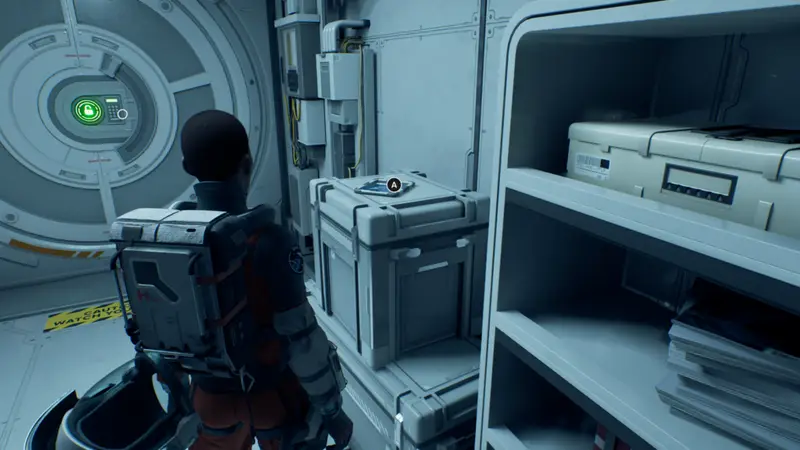
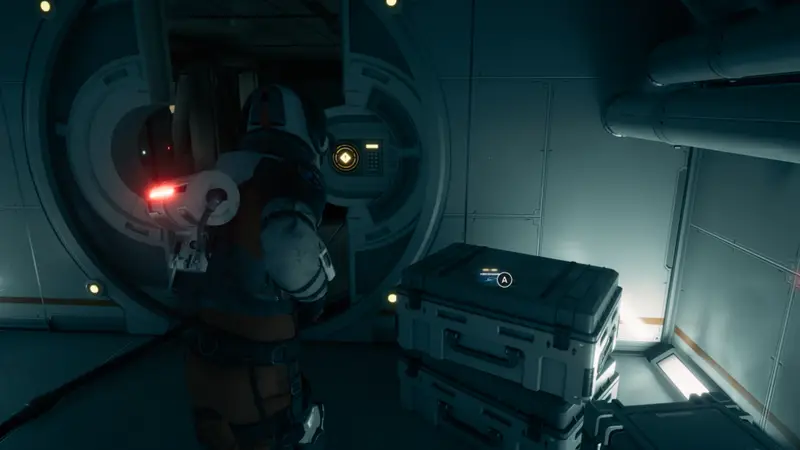
Audiofile & Datapad 3/18 – Nemesis Sighting
From the previous collectible turn around and head into the bigger room here and go across to the other side. Open the airlock door, take a few steps in and you will see the audiofile on your right on top of a box.
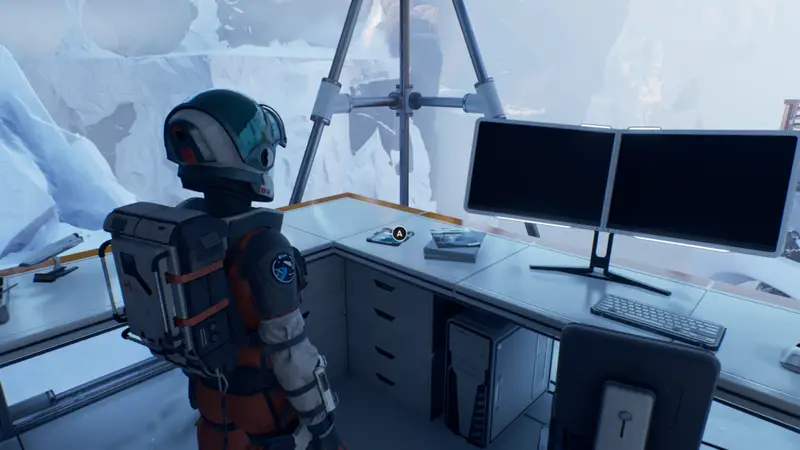
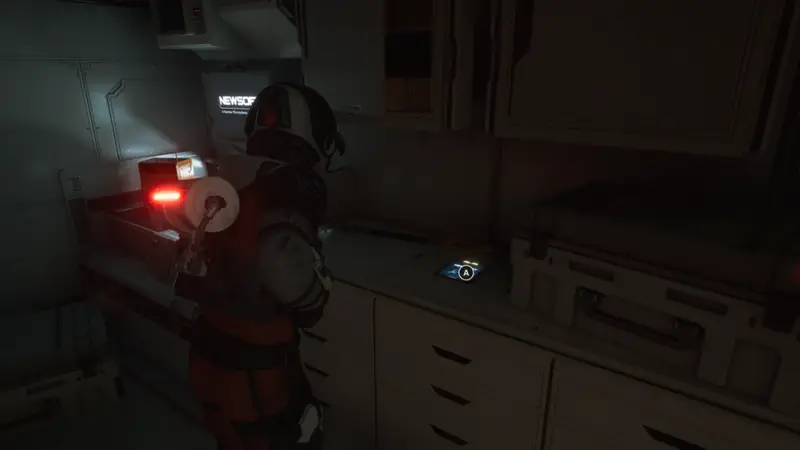
Audiofile & Datapad 4/18 – Status Report RE: EM Spectrum Amplifier
You will be outside now and be prompted to head inside a small building called the Annex. Enter the Annex and in the far left hand corner you will see the audiofile on the desk.
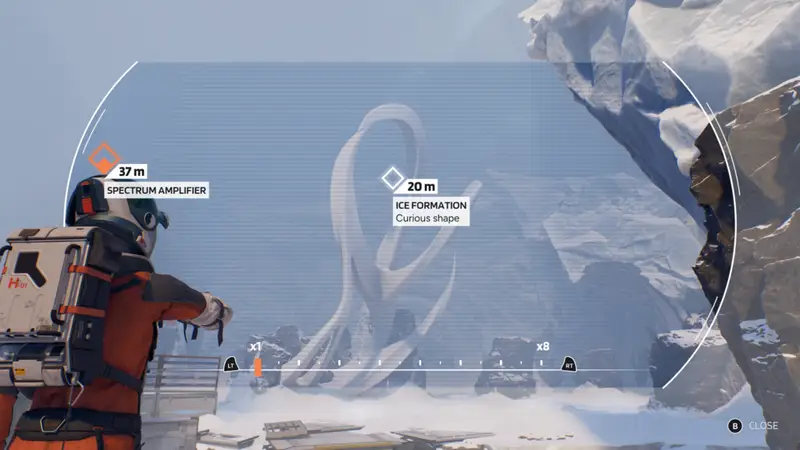
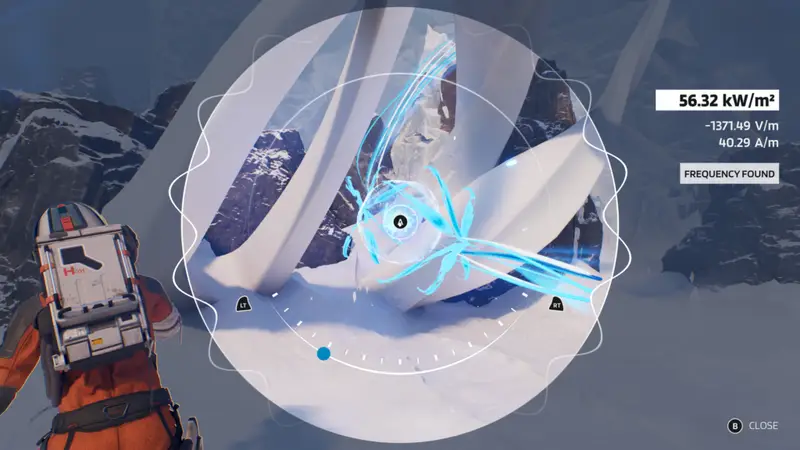
Secondary Marker 15/27 – Ice Formation & Glyph 4/8
When you are done in the Annex head back out and to the left and go around the Annex building. You should see the large ice formation right infront of you which you can go ahead and scan. Once done jump the gap, pull out your EM Scanner and scan the glyph.
Whisperstep Achievement/Trophy
You can earn this achievement elsewhere, but this is one of the easier spots. After scanning the glyph, begin using the stealth walking. If you are looking at the glyph head to the right and you will see a red anomaly you can scan. This will make a ton of noise and distract the Nemesis that is nearby.
As soon as you do that turn back around and head to the far left of the area as quickly as you can. You shouldn’t need to walk in stealth once you’ve hit the anomaly. You will see a spot where you can jump a gap to grab onto the rocks on the other side, quickly do so.
Climb these rocks and make sure to do a perfect jump each time. If you slip, you will alert the Nemesis and need to reload the checkpoint. About halfway up the second wall the achievement/trophy should unlock.
Chapter 6 – The Base
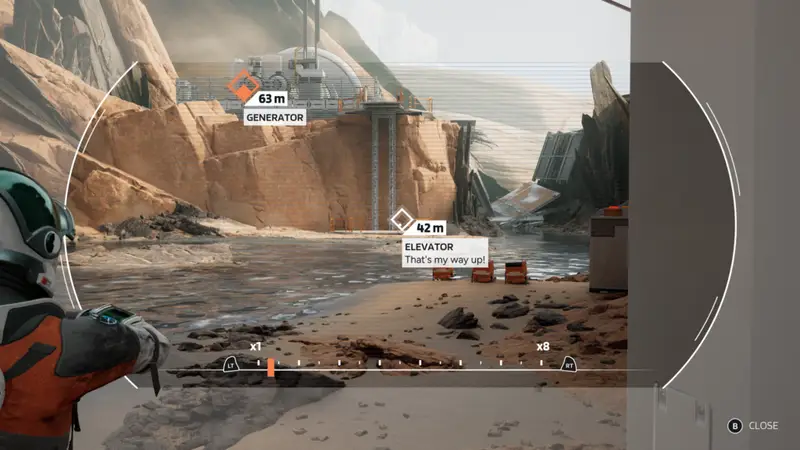
Secondary Marker 16/27 – Elevator
Pretty much right at the start of the chapter you will have to walk to a couple building and try to enter them, only to find out there’s no power. Your objective will switch to a Generator. Looking towards the generator there will be a broken elevator. Make sure to scan it before moving on.
Audiofile & Datapad 5/18 – Drilling Equipment
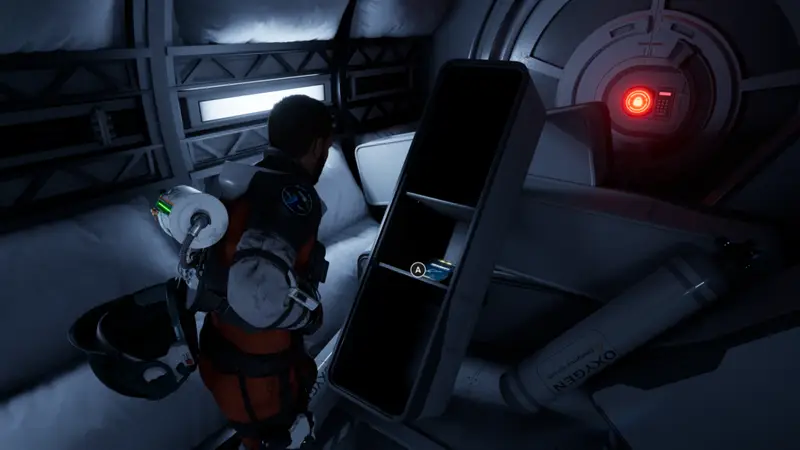
Once you have made your way into the main building you will walk through a few halls before coming to a main room with a semi open airlock door. To your immediate right is another airlock door which you can head inside. Its a dead end but at the end on a knocked over shelf is the audiofile.
Audiofile & Datapad 6/18 – Email Message
Head through the red hallways now and you will come out to what looks like the old crews main area. Head to the far back left of the room to find a datapad on a counter.
Audiofile & Datapad 7/18 – What’s Up?
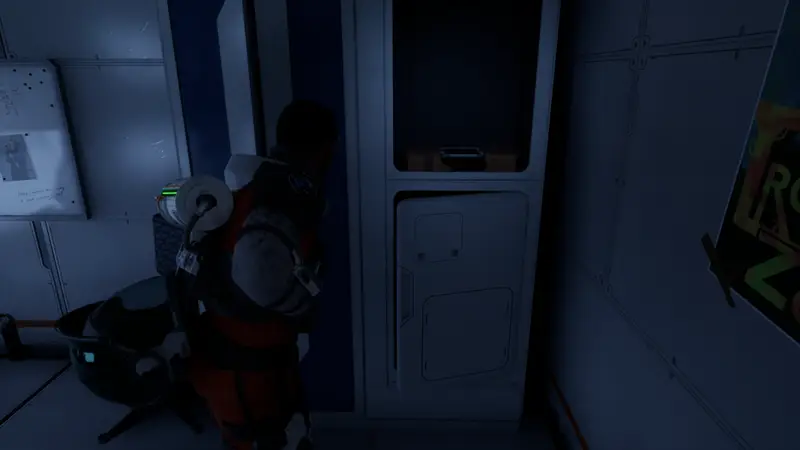
Turn around and head back towards the airlock door you just came through but make a right when you can and head through the next doorway. You should now see 3 doors infront of you and you want to go into the Dormitory. Once inside the dormitory look to your right to find an audiofile in a locker.
Audiofile & Datapad 8/18 -Marcus Macallan Incident
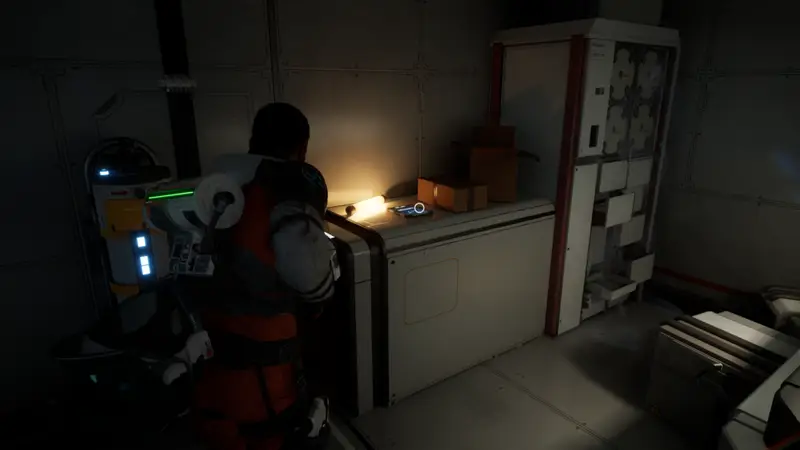
Head out of the Dormitory and now head all the way back and across to the other side of this area. Make a left at the commander door and head into the Machinery room. At the end of the long hallway on a desk will be another audiofile.
Nice Try Achievement/Trophy
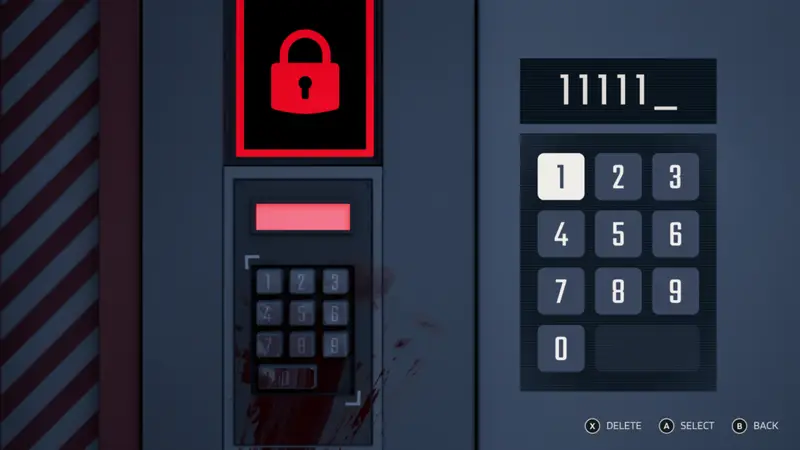
Now head back out to the hall and go to the commander door. You have to unlock it but first you will want to fail 3 times in a row. For simplicity sake I just punched in 111111 three times. This will unlock the achievement/trophy.When done you can use the correct code which is 020845.
Crew member 1/5 – Marcus Macmillan & Audiofile & Datapad 9/18 – Malcom’s Ineptitude
Head inside the commanders room and you will see the Commander dead on the bed. You need to interact with him for the story anyway but do so and it will get the first crew member. Interact with the device on his arm, again for the story, to collect the audiofile automatically.

Audiofile & Datapad 10/18 – Amazing News
You will continue through the chapter and deal with an escape sequence. At the very end of it you will open a door and head into what looks like part of the greenhouse. Make an immediate left in this room and head itno the little side room. At the end on a desk you will find the audiofile.
Audiofile 11/18 -New Form of Microial Life
Head to the next room now but do not go through the airlock door. Once in this room turn to the left and you will see another datapad sitting on a desk.
Crew Member 2/5 – Malcolm Spring
Now you can head through the airlock door and follow the path. When you get into the actual greenhouse and the path split, head to the left first. At the end of the path will be the crew member. This is the last collectible for chapter 6!

Chapter 7 – The Storm
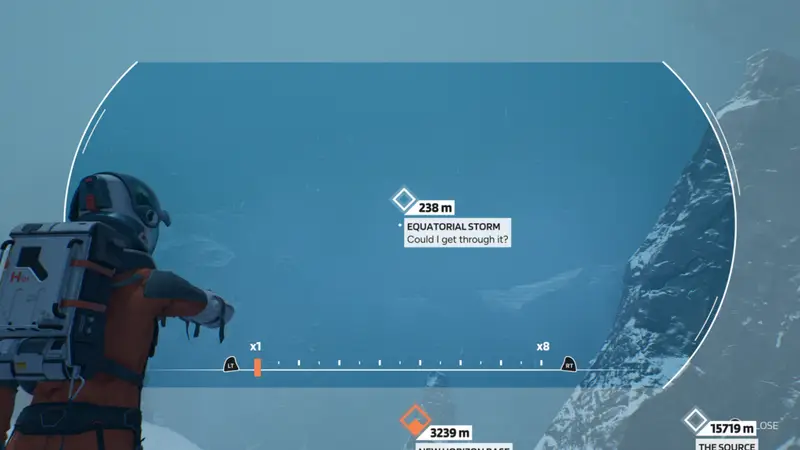
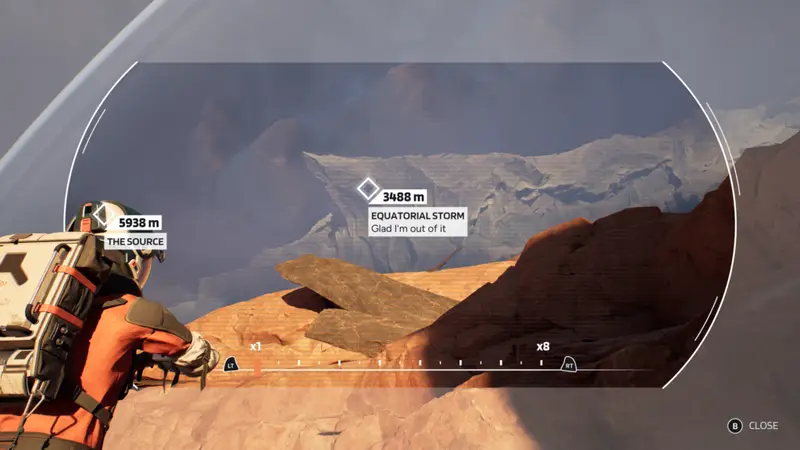
Secondary Marker 17/27 – Equatorial Storm
Near the beginning of the chapter you will slide down a hill. At the bottom you will notice a little bit of water running through the snow. Look pretty much directly up into the sky with your pathfinder to find the marker.
Absolute Freeze Achievement/Trophy
When you are in the storm and the game tells you to go seek shelter to get out of the cold, simply stand around and die 3 times. The achievement will unlock after the third death.
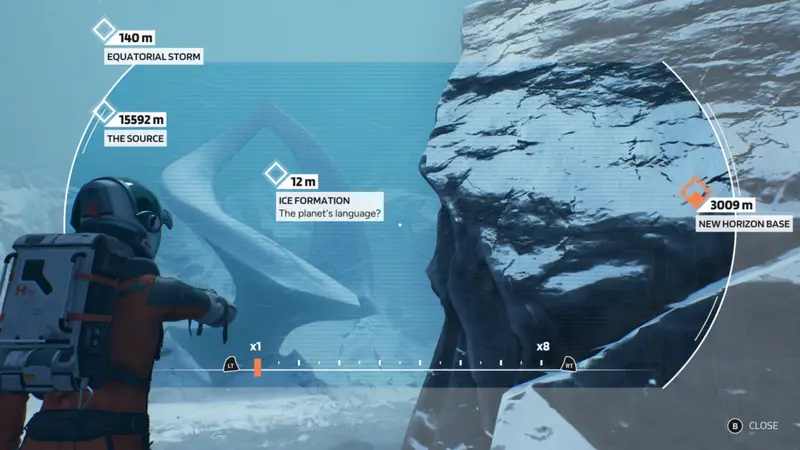
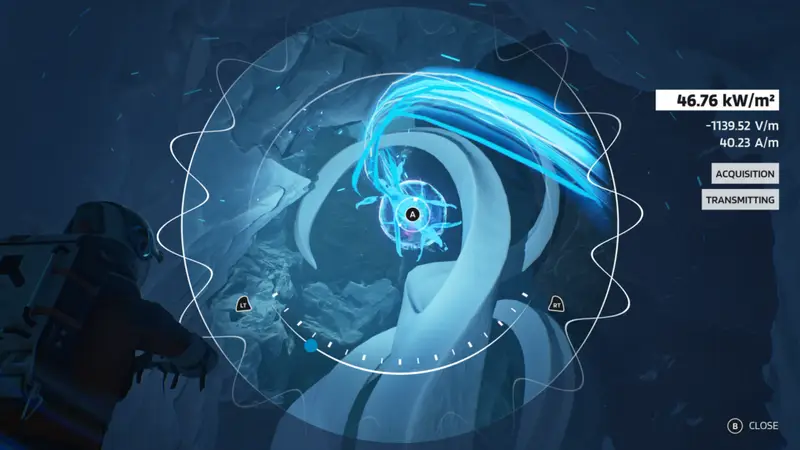
Secondary Marker 18/27 – Ice Formation & Glyph 5/8
When entering the storm, you will have to walk forward and hide behind the larger rocks to shield yourself from the elements. Making your way through the storm you will eventually see a hologram of Thomas and you will also see a small pond to the left of him.
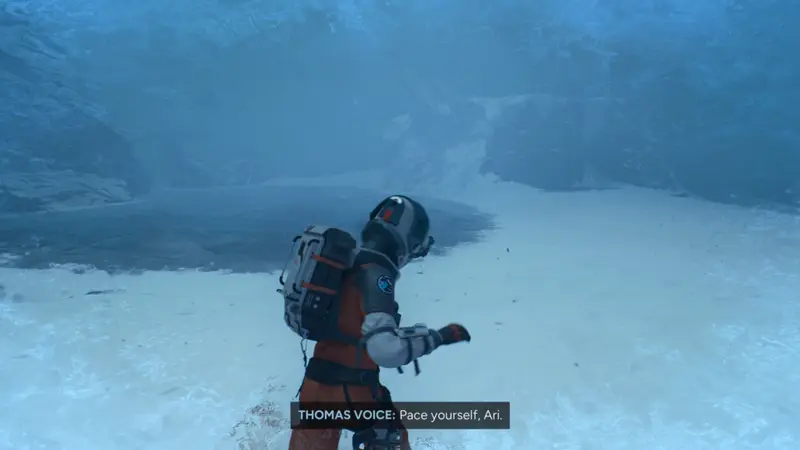
Go to where Thomas is to get shelter and then turn around and head back and across the pond. On the other side you will see the ice formation you can scan and then use your EM Scanner to unlock the glyph.
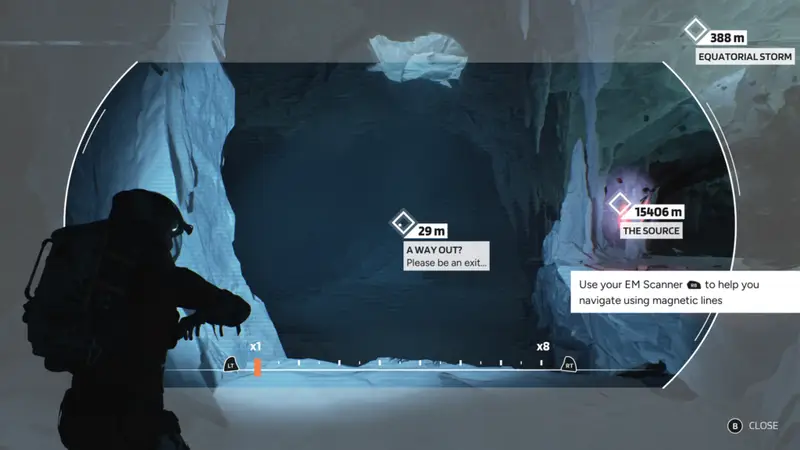
Secondary Marker 19/27 – A Way Out?
In the cave section you will get to a spot where there are a bunch of anomalies to distract the Nemesis. Use one to do so and then look immediately to your left to see a large rock wall to climb.
At the top move forward a little, use another anomaly to distract the Nemesis again and then you can pull out your pathfinder and look towards the exit of the cave to find the marker.
Secondary Marker 20/27 – Ice Formation & Glyph 6/8
Progress to nearly the end of the level where you will have to balance across a small ice bridge. On the other side the path will split, you want to take the right path by climbing the rocks infront of you.
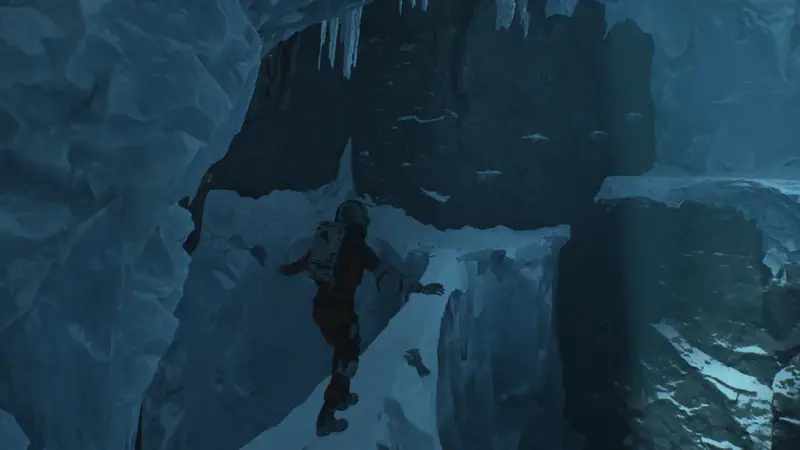
Cross the ice and about halfway up the slope on your right will be the ice formation to scan as well as the glyph.
Chapter 8 – The Nexus
Audiofile & Datapad 12/18 – It Exists!
You will take the elevator down and walk through an airlock into the room just before the Crew Quarters and Archives. Turn to your right and on the same wall as the airlock door you came through there will be an audiofile on the counter.
Audiofile & Datapad 13/18 – Expedition Journal
From the previous collectible head into the door where the red light is coming from (you may want some oxygen first). Crawl under the debris and on the other side you should see the datapad sitting on a crate just to the right of the next doorway.
Audiofile 14/18 – Hey, You There?
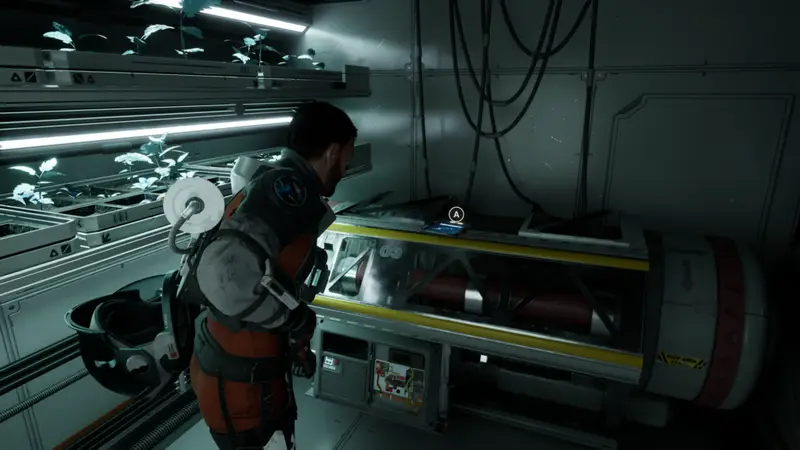
Head through that next doorway and go through the room, head past the oxygen (hook up if you need some) and in the next room on the counter to your right will be yet another audiofile.
Crew Member 3/5 – Frank Leary & Audiofile & Datapad 15/18 – Critical Info
Now turn back around from this collectible and make a right into the main room. You should pretty easily see the next crew member to interact with here. This is unmissable since you need to interact with him to progress the story. You should automatically get the audiofile here as well.

Audiofile & Datapad 16/18 – Personal Log
Head downstairs now that you have Frank’s credentials. Just to the right of the medical bay doors is the audiofile on a desk.
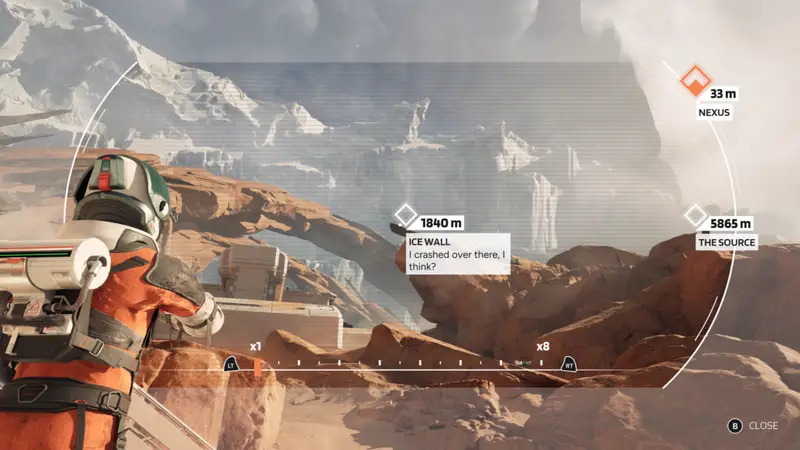
Secondary Marker 21/27 – Ice Wall
Once you head outside follow the path until you get to the first oxygen tank. Hook up to it then turn around and look up into the sky to find the marker.
Chapter 9 – Reunion
Secondary Marker 22/27 – Equatorial Storm
At the beginning of the chapter as you are overlooking the base look up and to the right into the sky with your pathfinder out to find the marker.
Audifile & Datapad 17/18 – Malcolm Spring and Frank Leary’s Last Exhange
While inside the base you will come to the room where you found the impaled crew member last chapter while playing as Thomas. On the table just behind the crew member will be the audiofile.
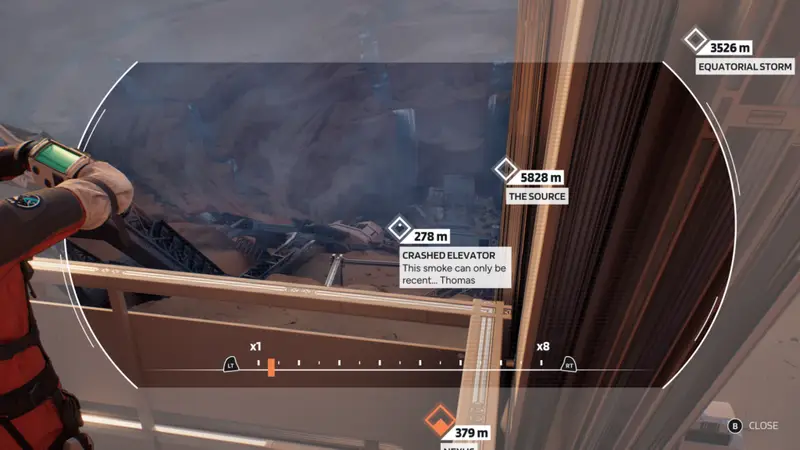
Secondary Marker 23/27 – Crashed Elevator
Back outside you will be heading down a bunch of stairs towards the crater where Nexus is. About halfway down the stairs look out into the crater with your pathfinder and you will find the marker center left in the crater.
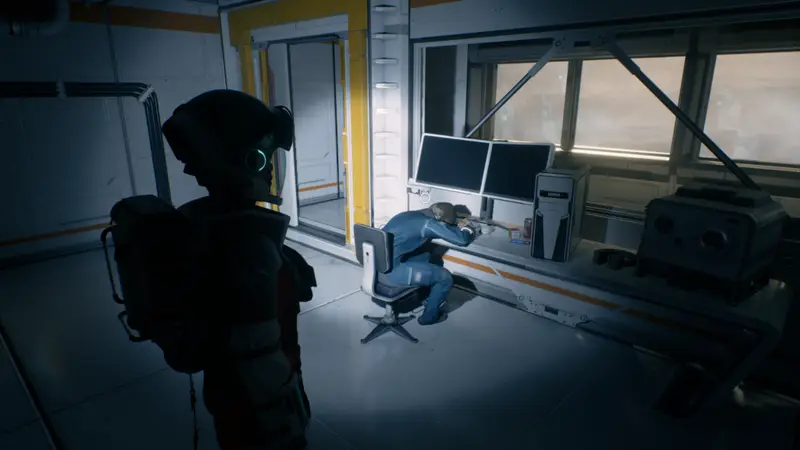
Crew Member 4/5 – Domenica Cano
Further into the chapter you will have to pull down a bridge with your grapple hook. Cross the bridge and you will see a building to go into on your left. Head in the door and you will see the crew member leaned over the desk infront of a computer. Make sure to interact with them for it to count.
Chapter 10 – The Styx
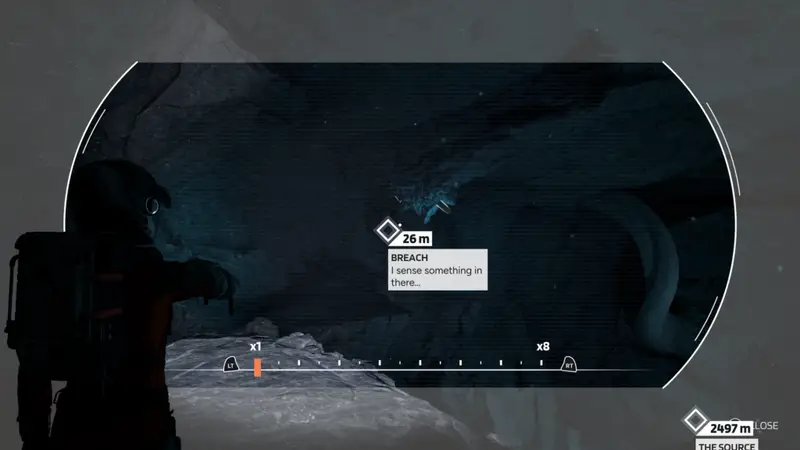
Secondary Marker 24/27 – Breach
Progress through the level until you come to a section where you cross a balancing section and climb up a wall using the grapple hook. You will get to a higher section and there will be a piece hanging from above you will have to use your grapple hook on to continue. Before doing that pull out your pathfinder and you will see the marker just to the left of it.
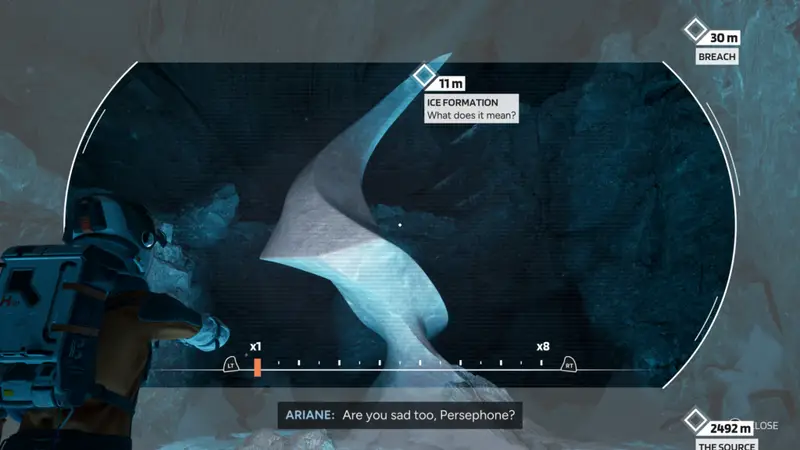
Secondary Marker 25/27 – Ice Formation & Glyph 7/8
Now use your EM Scanner to reveal the above grapple spot and cross the gap. As soon as you land hang a left and slip through the gap between the rock walls. On the other side you will see a wall to descend. Drop down and make your way to the bottom where you will find the ice formation. By now you know the drill, use your pathfinder to get the marker and then your EM Scanner to grab the glyph.
Crew Member 5/5 – Phaedra Duan and Audiofile & Datapad 18/18 – Phaedra Duan’s Last Words
You will get to a section where you have to rappel down a massive hole. About halfway down you will run out of rope and need to find a new place to clip to. Swing over to the left where you will find the final crew member and audiofile. Interact with the body and then look to the right of them to find the audiofile next to them.
If you have followed the guide and grabbed everything you will unlock Crew Expendable and Bookworm. If you don’t then you’ve missed something.
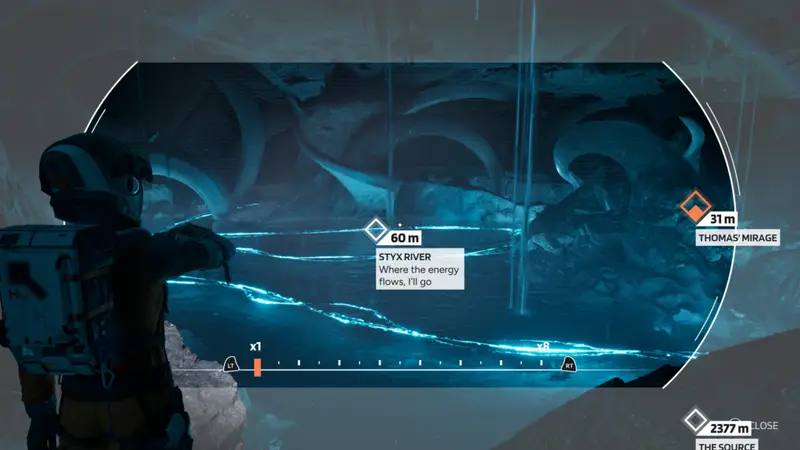
Secondary Marker 26/27 – Styx River
You will then progress and end up crawling through a hole. Once through walk to the edge here and look down and to the left to see the secondary marker with your pathfinder.
Secondary Marker 27/27 – Ice Formation & Glyph 8/8
Now from the previous marker turn around and continue on. Drop down at the little ledge and instead of continuing forward drop down the right hand side. Follow this path all the way around, climbing and walking to the end. At the very end will be the formation to scan and the glyph.
Assuming you have gotten everything here you should unlock Expert Glaciologist & Webb. This is the end of the collectibles.
Orpheus Achievement/Trophy
Lastly all you need to do is during the section where you slide down the water, you must survive the entire section without dying. If you do you will have to finish the game and select chapter 10 again and try again. Unfortunately no last checkpoint here. Frustrating.
And that is the end of our guide. We hope this has helped you gain the 1000GS or platinum trophy and that you enjoyed the game. Thanks for joining us!