There are a total of 48 trophies to unlock in Sword of the Sea, covering a bunch of activities and challenges. Here is our guide to help you unlock the Wisdom of the Ancients, Cleanse the Sacred River, Sacred River Shell Collector, Sperm Whale Rider, Whale Shark Rider, Blue Whale Rider, and Poison Dart Frog in Sword of the Sea.
Check out our Sword of the Sea Review to get our full thoughts on the game.
Cleansing
“Cleansing the Sacred River”
| COLLECTIBLE NAME | TIME STAMP | NOTES |
| 1 | 00:00 | Right after getting the quick tutorial on how to perform a water rail |
| 2 | 00:16 | In the room with a mural & a stele message, go to the overturned stone pillar turned into a ramp and water rail through the lanterns once again and onto the other side |
| 3 | 00:43 | Right after the newly opened gate, head through into a linear corridor for the next one |
| 4 | 01:00 | In the room with a mural & a stele message, go to the overturned stone pillar turned into a ramp and water rail through the lanterns once again, and onto the other side |
| 5 | 01:30 | Continue on the linear path until you reach a big dark room with a pedestal in the middle of two stairs. Water rail across to reach the pedestal. Don’t forget to ride the whale to nab your “Sperm Whale Rider” trophy as well! |
| 6 | 01:49 | Right after jumping down into the next area, these lanterns are right at the front of it |
| 7 | 02:02 | Again, right after, head up the bouncy jellyfish fish and you’ll see the Vendor. Past him is another set of jellyfish to bounce up on. You’ll encounter a dead end. Water rail across the other side, grab the water bubble, and use it to activate the switch |
| 8 | 02:19 | Continue down once again to the yellow brick road, but this time, to the left and in front of a small sunken boat. |
| 9 | 02:31 | Finally, at the end of the yellow brick road, you’ll reach a dead end. Hit that mandatory water source to open up the next area |
| 10 | 03:01 | Follow the yellow brick road into the next area, but before doing so, veer right when you see a small sunken boat |
| 11 | 03:27 | After the previous cleansing, follow this new yellow brick road to get to the next one |
| 12 | 03:57 | After water railing to the next area, you’ll see another stone pillar with some jellyfish. Basically, just do the same thing again, bounce up, water rail across, and grab the next water source |
| 13 | 04:57 | After revealing a huge ship underwater, look for two smaller boats with chains on the side. You’ll need to activate the lanterns underneath both, bounce up the jellyfish, and activate the switches above in order to get the ship to rise |
| 14 | 05:40 | After cleansing the area, head on top of the ship and use the chain all the way to the end, and up the newly solid set of stairs and onto the next area. Water rail from platform to platform until you see a bigger one on the right side, and activate the lanterns hidden behind some broken arches |
| 15 | 06:09 | Go all the way up using the trail of kelp that leads upwards |
| 16 | 06:33 | Go towards the other building by water railing across, ensuring the use of the lanterns in order to give you extra air time. Activate the lanterns to reveal kelp, and once again float upwards to claim the last water source. |
“Sperm Whale Rider”

Early in the Sacred River chapter, you’ll encounter a dark, large cylindrical room. In the middle of the room is the water source to cleanse it. As per the previous chapters, once you cleanse an area, flora and fauna will emerge. Once you do, a Sperm Whale will circulate the room. Hitch a ride and you’ve got yourself another trophy!
“Poison Dart Frog”
As you continue along the Sacred River chapter, you’ll encounter two small boats with chains on them leading underwater. Once you activate the lanterns on these boats, use the bouncy jellyfish to get on top and activate the switch on top, you’ll reveal the huge Sunken Ship as well as cleanse the general area.
As with previous chapters, once cleansed, flora and fauna will spawn, opening new areas to traverse. Behind the ship or the stern, you’ll see a wall with a tall kelp by it. Float up the kelp to get onto the boat on top of the rock and follow along to the left of the wall’s ledge. Follow along this ledge. Until you see the second boat, and on top of it, you’ll get to visit the lonely Poison Dart Frog and receive your trophy!
“Whale Shark Rider”
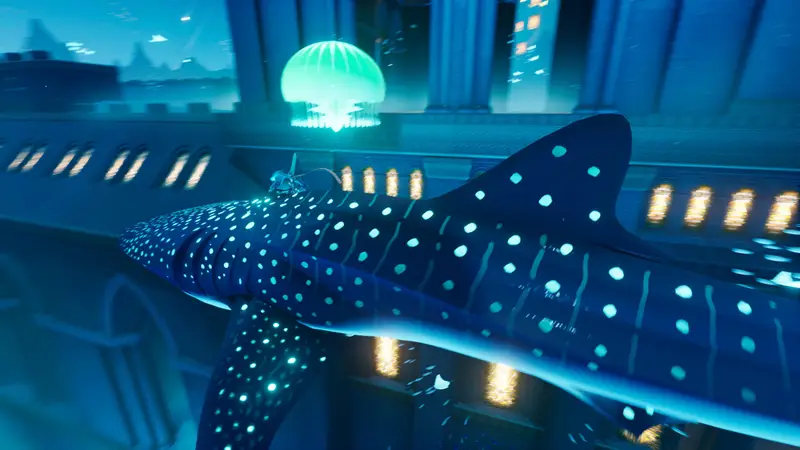
In the same area as the Poison Dart Frog, you’ll see the Whale Shark swim around the newly risen Sunken ship.
Hop on as always to get a good view of your surroundings, as well as getting another whale riding trophy!
Shells
“Sacred River Shell Collector”
| COLLECTIBLE NAME | TIME STAMP | NOTES |
| 1 | 00:00 | Right at the beginning, after activating the first set of lanterns through the water railing, hug the wall and jump on top of the shark statues to reach the other side. The Shell is on the right side of the statue |
| 2 | 00:30 | Right at the beginning after activating the first set of lanterns through the water railing, hug the wall and jump on top of the shark statues to reach the other side. The Shell is on the right side of the statue |
| 3 | 00:49 | After reaching the dark room with the pedestal in the middle, cleanse the area and ride the newly spawned whale to reach the top of the wall and drop down on a ledge for the secret shell |
| 4 | 01:22 | In the room with the huge mural and the Minder Wisdom’s Tale stele message, start up the ramp but turn around when you near halfway. Use that to get the elevation needed to water rail yourself and get through an opening on the wall along a ledge |
| 5 | 01:37 | In the next area, follow along the yellow brick road until you reach a stone pillar. Activate the lanterns around it, bounce up the jellyfish, and turn around. Use that height to water rail towards those boats stuck against the wall. |
| 6 | 02:33 | Once you reach the area with the 2 boats and a sunken ship, turn around again. This time, water rail yourself so that you are on top of that wall where there was boat. Follow along this narrow path above the wall until you reach the end. |
| 7 | 02:48 | After raising the Sunken Ship, make your way to the middle of the body of the ship. In there you’ll see a room with a the “Sacred River” stele message and on the other side, a room with a bunch of urns. In the left side is a tipped-over urn with a shell inside |
| 8 | 03:13 | Head out and make your way to the top of the Sunken Ship, and you’ll see another shell. This was probably visible to you a while ago when you first raised the ship |
| 9 | 03:35 | Jump off the ship. On the back side, there is a tall kelp near a wall. You can use that kelp to get some elevation in order to water rail yourself through those circular lanterns and boost yourself all the way across to a platform with a shell. This is also the best/first way to achieve the “Water Rider” Trophy |
| 10 | 03:59 | Upon reaching the next area with the floating boats and islands, look towards the left and look down. You’ll see an upside-down building with a boat beside it. Go further down until you see another building, and inside it is the secret shell |
| 11 | 04:38 | Once you’re done in this area, head back to the newly formed set of stairs using the chain from the huge Sunken Ship. Before heading all the way up the staircase, look to the right and use the elevation to water rail and reach that boat stuck on top of a tall thin rock |
“Blue Whale Rider”
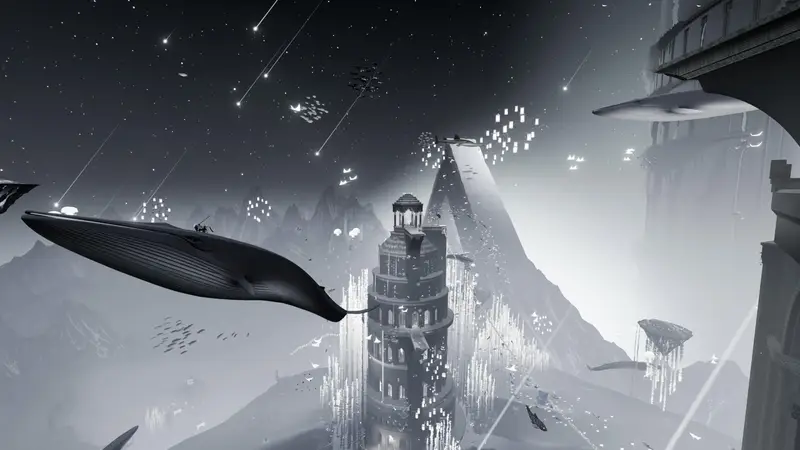
In the last area of this chapter, you’ll be at the top, amongst all the tall cylindrical buildings. Once you’ve cleansed the area, you’ll see the huge Blue Whale swimming around, making its way to all the floating islands in the area. Use the nearby kelp, bouncy jellyfish, or water rail to hitch a ride on the Blue Whale and grab the last Rider trophy, “Blue Whale Rider”.
Stele Messages
“Wisdom of the Ancients”
| COLLECTIBLE NAME | TIME STAMP | NOTES |
| The Minder’s Wisdom | 00:00 | Once you arrive in the room with the giant mural, you’ll see the stele message right below it |
| The Tower | 00:25 | After cleansing the final area of the chapter, you’ll see a bunch of floating islands. Look for one with two islands near each other and head towards the one closest to you. Use the jellyfish to bounce up to the next island and read the last message of the chapter. |
| The Sacred River | 00:47 | After the Sunken Ship has risen, make your way inside it. You’ll see a corridor. On one side is a room filled with urns, and on the other is your next stele message. |
| The Value of Legend | 01:02 | After cleansing the final area of the chapter, you’ll see a bunch of floating islands. Look for one with two islands near each other and head towards the one closest to you. Use the jellyfish to bounce up the next island and read the last message of the chapter. |
That’s our guide for All the Sacred River Collectibles. Look out for more guides for Sword of the Sea down below!