
This guide will show you where to capture all of the required images In the first zone of Lushfoil Photography Sim, Lago di Braies. There are two seasons to capture images in, the initial spring season and when unlocked, the snowy winter season. You will need to capture all of the spring images before being able to access the winter section and images, here is where to find all of the photo locations in both seasons.
When you take a photo of one of these correctly, you will hear a chime-like sound confirming you’ve captured the right content in your shot. You should also check your photo list (press start > photos) to ensure that the required image has disappeared from the top of your photo list, where all required images will be pinned.
Remember to take a picture of the photo boards before setting out to capture the actual required images. The photo board in Lago di Braies isn’t difficult to find. From where you start, head around the lake clockwise (with it on your right) and you’ll eventually find the board by some trees.
Section 1 _ Spring:
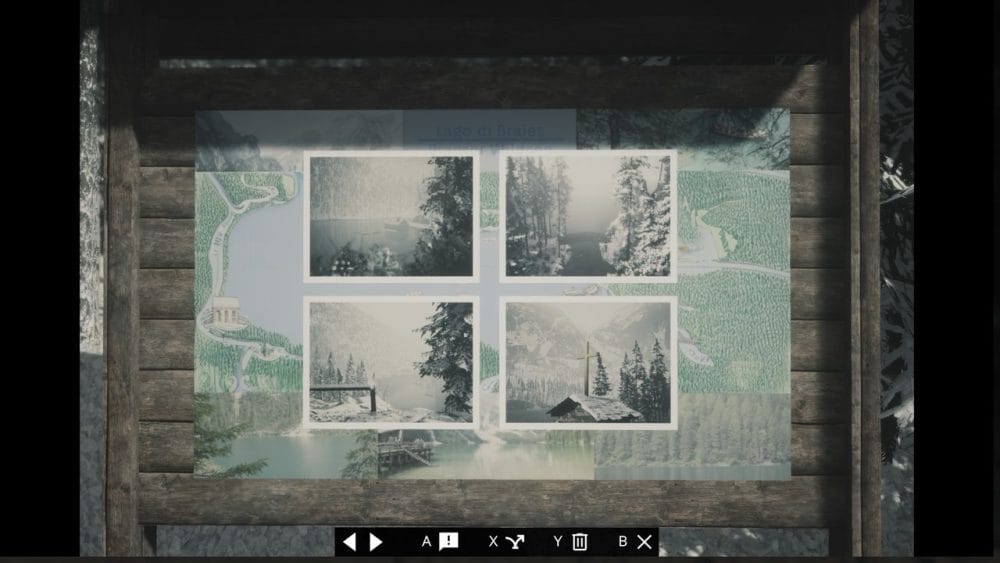
All of the images that you’re required to capture can be found on the board in this image:
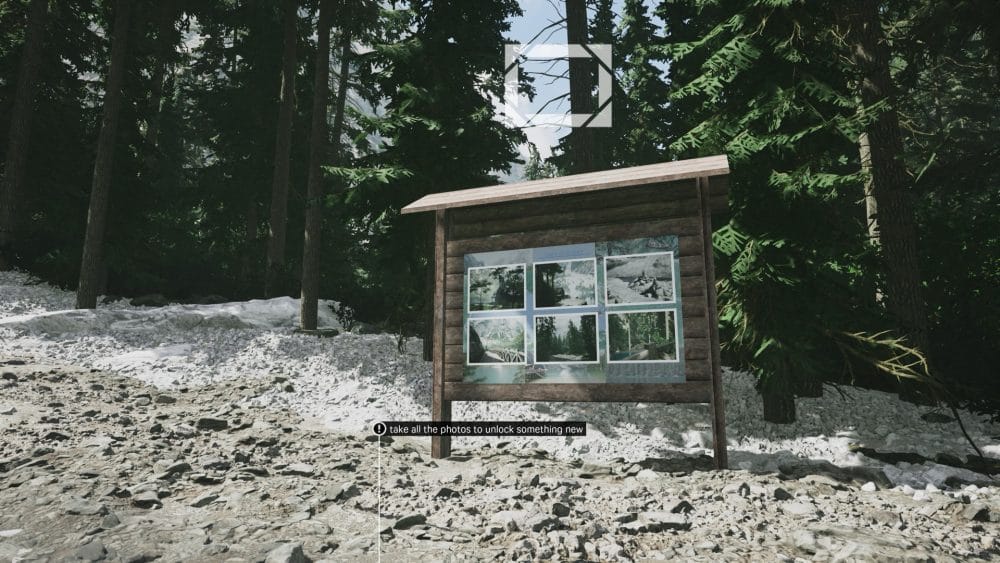
From top left, to bottom right, here is where to find all of the photo locations:
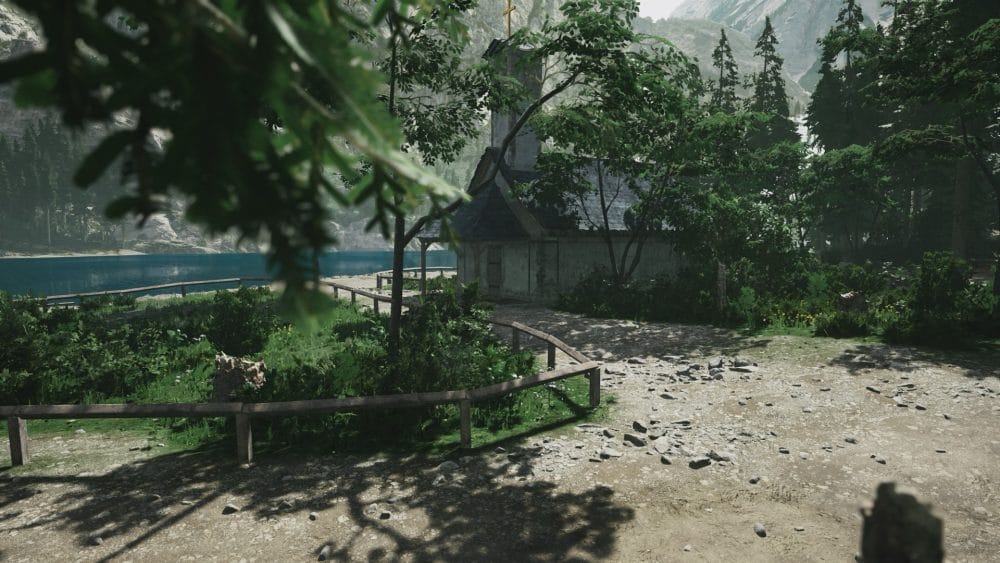
- Top left of picture board: The first image to capture is of the church; this one is easy to find. From the picture board, continue around the lake (with it being on your right hand side) until you find the church, its about a minute sprint walk away. From the spot below, move slightly closer to the church and find the angle to take your shot:
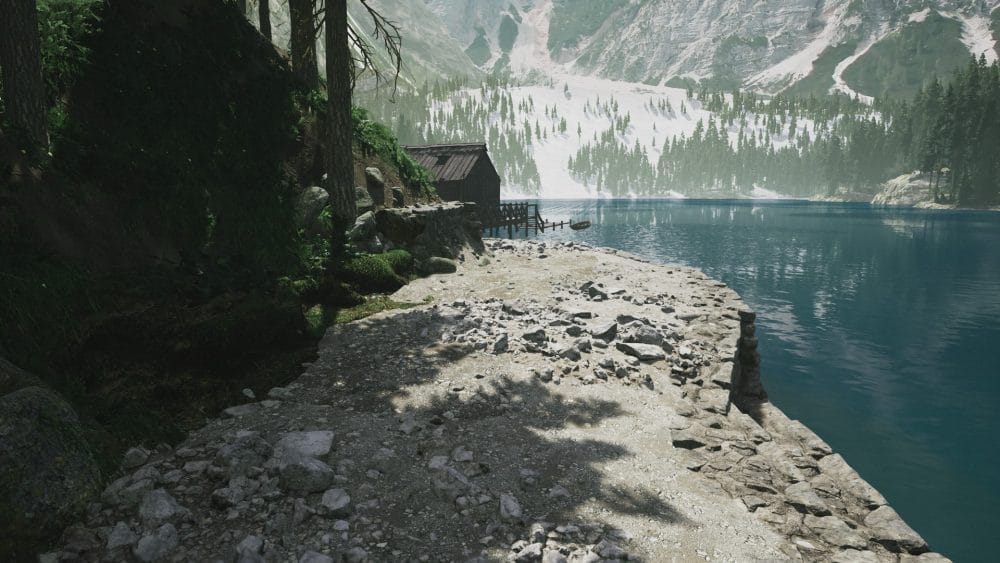
- Top middle from picture board: Another easy one to find. From the church, continue around the lake (again with the lake being on your right) until you find this spot just before the dock. Move in slightly closer from the spot in the image below to find the required angle:
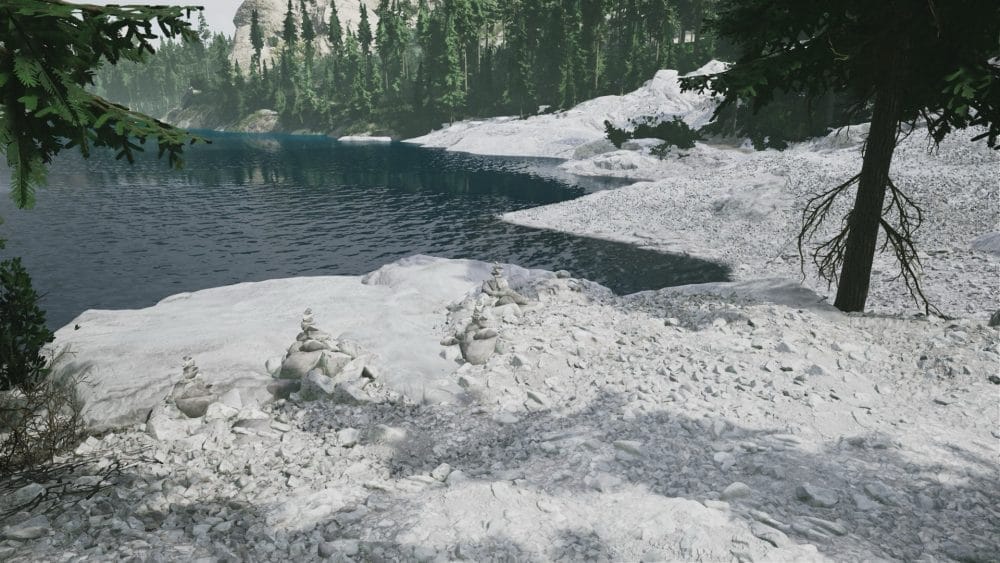
- Top right from the picture board: These stacks of rock cairns can be found on the edge of the lake near to the picture board. From the picture board, turn around towards the lake and continue around counter clockwise (with the lake on your left) and stay close to the shore, there you will see a group of cairns. From the below position, move in to frame your shot on the furthest right cairn.
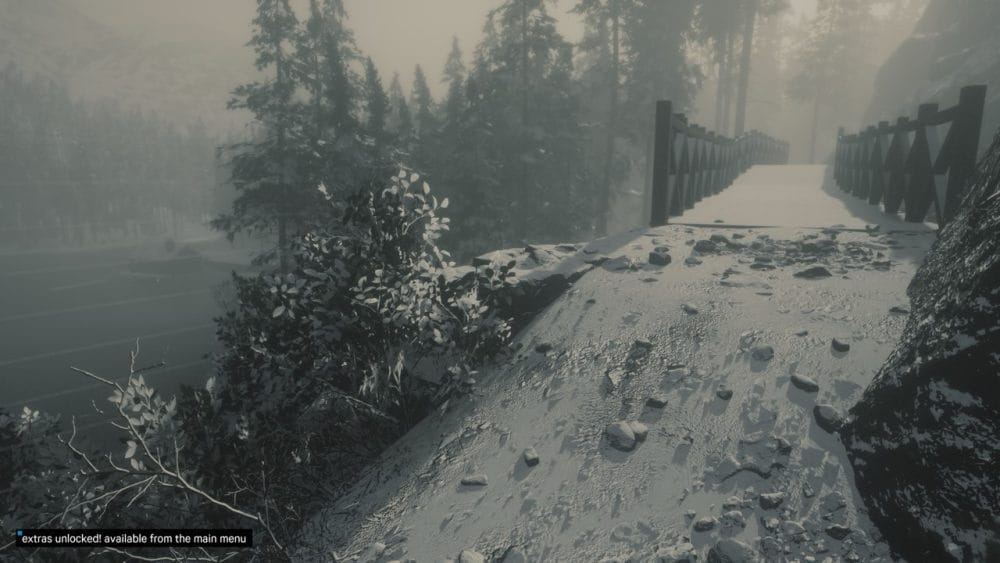
- Bottom left: From the starting location, this will be the farthest around the lake if you had been following it around clockwise, it isn’t far from where you first start. Naturally, you will reach this wooden bridge against the rock face. Approach the bridge below, after just stepping on the bridge itself, you should angle the required shot:
- Bottom middle: This will be the trickiest to find from the required spring images, however, it very easy to find. This location is simply beyond the trees, which are beyond the picture board. Facing the picture board, turn right and walk for about 10-15 seconds, then turn to face your seven o’clock. Follow the path and shortly after, you will spot this location for the required image:

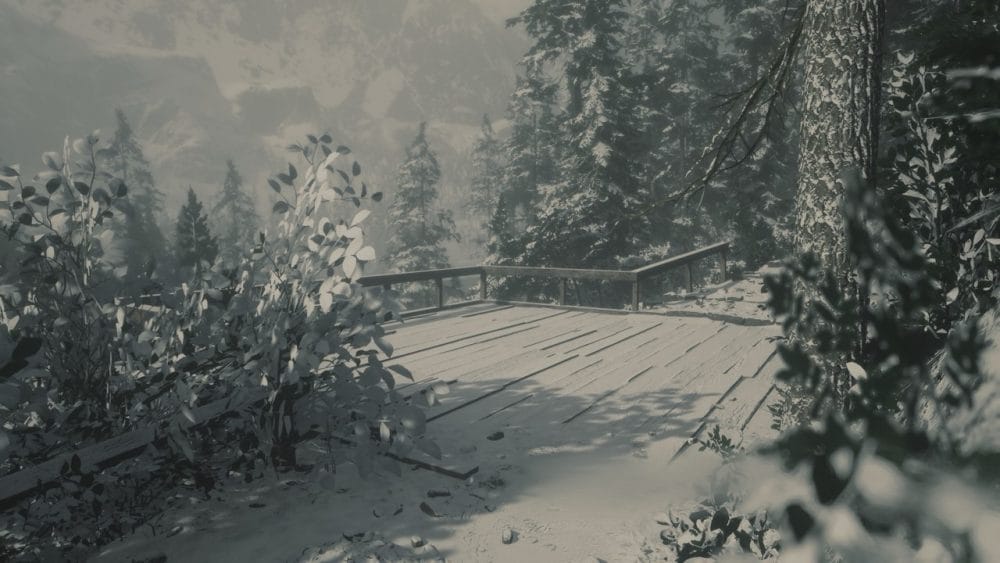
- Bottom right: Although this is last on the board, it’ll actually be the first image most players will get. From the picture board, continue clockwise around the lake (with it being on your right) until you reach this pretty spot where an optional tutorial is available. Step on to the bridge and face left to find the location for your required shot:
Section 2 – Winter:
After taking the first six shots, return to the board to obtain a key to use a boat on the lake. To access the winter season where the remaining images to capture are, set out on the boat and stick to your right side. You will need to go under the small wooden bridge to take the final spring picture. You will then see a boat dock, head towards that and you will automatically disembark.
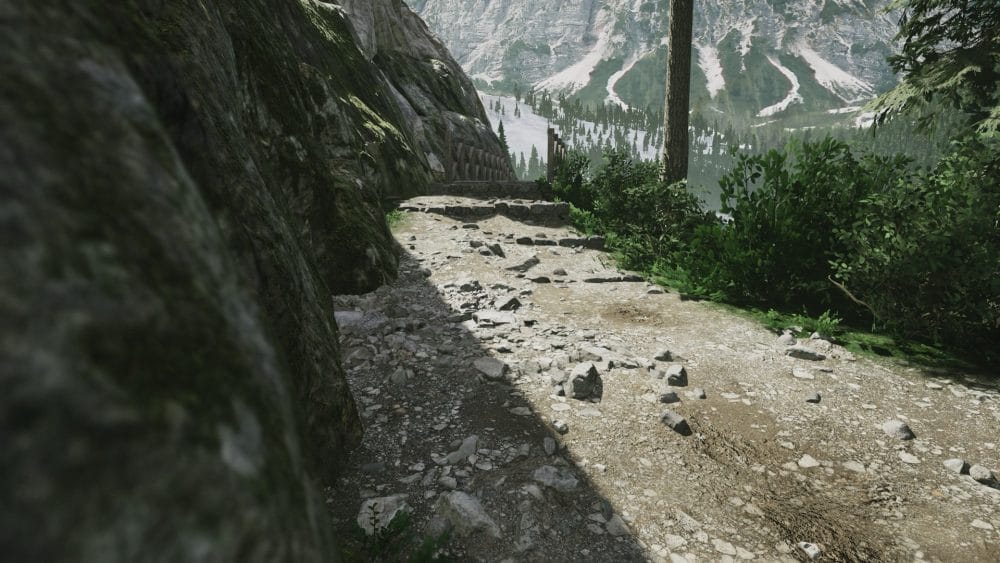
Head up the stairs and take a left and follow the path until you reach a short cutscene where the seasons will change to winter. When you resume control, go forward and left until you see the lake. The full area remains the same, so turn around to your 4 o’clock and you’ll see the same board with new images for you to find. Take a photo of the board to add these to your objectives:
Remember, you can use your spring season shots as fast travel points to make the winter section quicker and easier. From top left, to bottom right, here is where to find all of the locations:
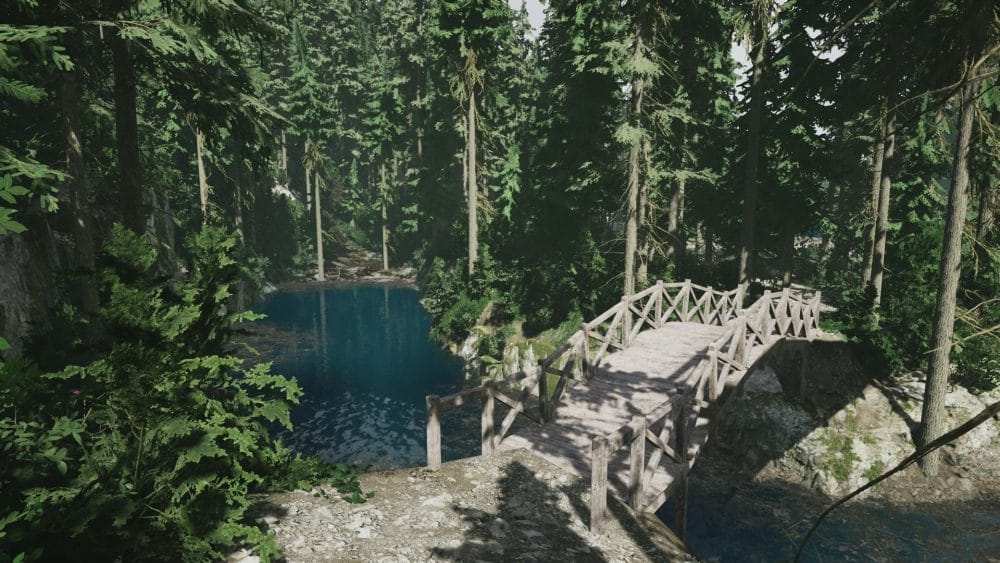
- Top left: Having completed the spring variant of Lago di Braies, you will now be familiar with the zone. To take this picture, you will need to be looking back towards the boat dock from the side of the lake you first start at. On this side of the lake, find the wooden foot bridge, stand just before the bridge, look towards the dock and take your picture:
- Top right: This shot is a simple one to find, you will recall the small bridge you went under in the boat. Head up the stairs you went up to unlock the winter zone, then look down at the bridge from this ledge:
- Bottom left: This is perhaps the trickiest to find from the winter zone in Lago di Braies. To find this location, you should head to where you first spawn in the spring zone. Continue with the lake on your right hand side, until you see small streams trickling down rocks on your left. You can walk up the rocks/stream and look for the platform you can see in the centre of the below image. Once on the platform, turn around and take the required shot:

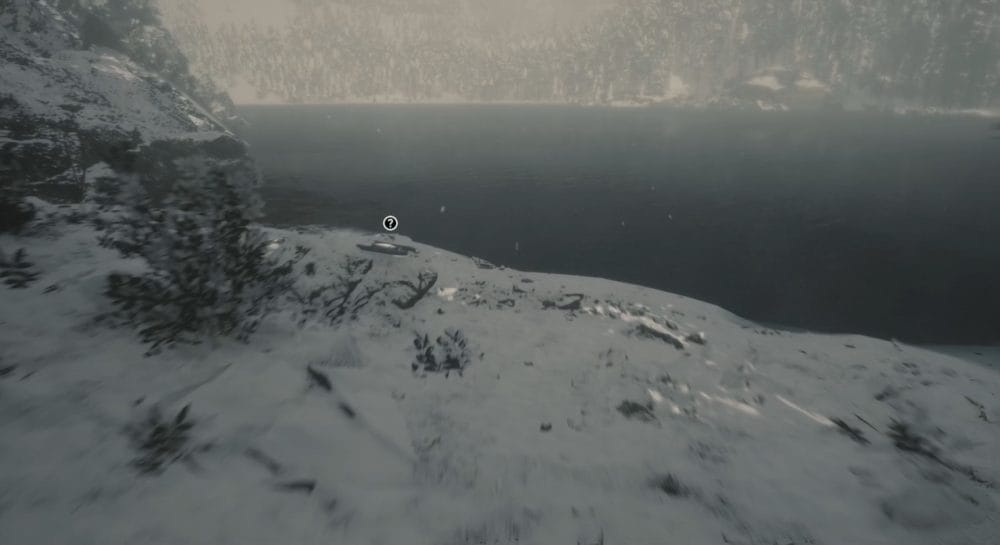
- Bottom right: For this image you are going to need the drone. To find the drone, you need to explore the shore on the adjacent side of the lake from where the church you’re required to take a picture of is. In the below image, you can see where the drone sits. Once you pickup the drone, fly across the lake and take the image of the cross atop the church from the closeup angle required:
After taking all of the winter images, you can head back to the winter season picture board and collect the ‘Tape’ camera.
Further Lushfoil Photography Sim guides and coverage
For further Lushfoil Photography Sim guides and coverage, please see the following from Gamer Social Club:
- Lushfoil Photography Sim _ ????? Trophy and Achievement guide
- Lushfoil Photography Sim _ See the Stars Achievement / Trophy Guide
- Lushfoil Photography Sim – All portal locations
- Lushfoil Photography Sim _ Le Prarion _ all picture locations guide
- Lushfoil Photography Sim _ Mardi Hamil Trail _ all picture locations guide
- Lushfoil Photography Sim – East Maddon Park – all picture locations
- Lushfoil Photography Sim – Shengshan Island – all picture locations
- Lushfoil Photography Sim _ Camera starter guide
- Lushfoil Photography Sim _ Unlock GPS tracker for totem collectibles
Are you having a good time with Lushfoil? What’s been your favourite location to take pictures so far? Please tag us in them on X / Twitter and Bluesky, and stick with Gamer Social Club for more Lushfoil Photography Sim guides and coverage.